

Schick CDR PanX Troubleshooting Manual
Schick CDR PanX
shielding.
Error 18 troubleshooting guide
Check normal operation. If error 18 appears then continue
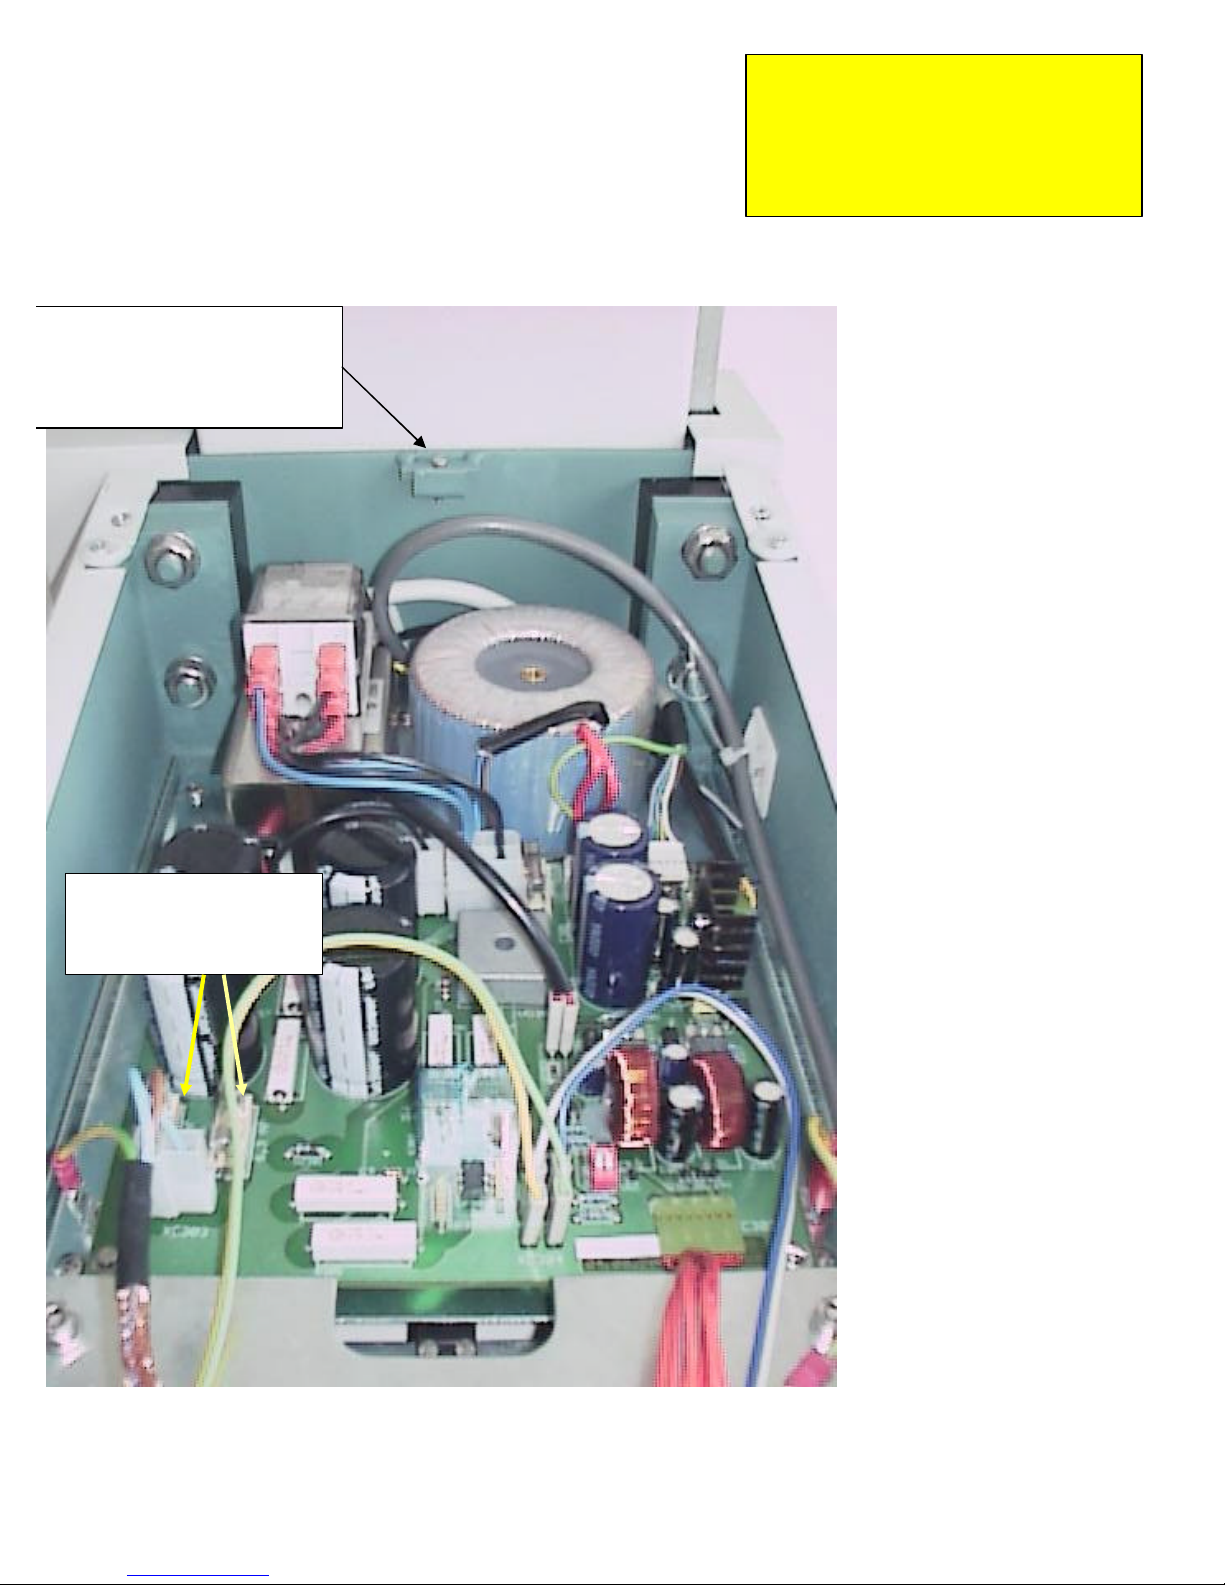
Loosen (do not remove) this screw
to unclamp to top cover.
Slide the cover toward the front
and lift to remove
Check and replace fuses
FU304 and FU305 as
necessary
Caution: Dangerous Voltages are present
during parts of this testing. Please observe all
applicable precautions for High Voltage
Systems. In addition parts of this test include
emission of ionizing radiation. Please use
Power Supply
Board
1) Switch
machine OFF.
2) Remove top
cover
3) Check fuses
FU304 and
FU305 on the
Main power
supply board
and replace as
necessary.
4) If fuses were
replaced then
turn machine
ON and retest
system. If the
error is not
present then
take a test
image to check
for X-ray
emission and
whether sensor
recalibration is
necessary.
5) If error still
appears or
FU304 and
FU305 are good
then check the
voltage at
connector
XC303.
1 of 4
Preliminary copy – for evaluation - not released

Remove this cover
Power Switching Unit
Check for 300 VDC at
XC303 during X-ray
6) To check the voltage at XC303.
a) Turn machine OFF
b) set DMM to DC Volts (ensure DMM is capable of measuring >300
VDC).
c) Connect probes to XC303.
d) Power machine ON.
e) Enter Service Mode and go to Service Test 10 (see Chapter 8 of the
CDR PanX Installation and Service Guide PN: B1051402).
f) Stand clear of X-ray path and energized components.
g) Press and hold the exposure switch momentarily.
h) Check DMM for proper reading of about 300 VDC.
If Fuses FU304 and FU305 are good and the proper voltage is not present
then replace the CDR PanX Power Supply Board (Schick PN: A4501200 for
115 V systems and Schick PN: A4501300 for 230 V systems).
7) If the proper voltage is present then continue below.
Power Switching Unit
2 of 4
Preliminary copy – for evaluation - not released
 Loading...