

Page 1

i
FCC Compliance Statement
This device complies with part 15 of the FCC Rules. Operation is subject
to the following two conditions:
1. This device may not cause harmful interference, and
2. This device must accept any interference received, including
interference that may cause undesired operation.
FCC WARNING
This equipment has been tested and found to comply with the limits for a
Class B digital device, pursuant to Part 15 of the FCC Rules. These limits
are designed to provide reasonable protection against harmful
interference in a residential installation.
This equipment generates, uses and can radiate radio frequency energy
and, if not installed and used in accordance with the instructions, may
cause harmful inerference to radio communications.
However, there is no guarantee that interference will not occur in a
particular installation. If this equipment does cause harmful interference to
radio or television reception, which can be determined by turning the
equipment off and on, the user is encouraged to try to correct the
interference by one or more of the following measures:
• Reorient or relocate the receiving antenna.
• Increase the separation between the equipment and the receiver.
• Connect the equipment into an outlet different from that to which
the receiver is connected.
• Consult the dealer or an experienced radio/TV technician for help.
Caution:
To comply with the limits for an FCC Class B computing device, always
use the shielded signal cord supplied with this unit.
Page 2

ii
The Federal Communications Commission warns that changes or
modifications of the unit not expressly approved by the party responsible
for compliance could void the user’s authority to operate the equipment.
CE mark for Class B ITE (Following European standard EN55022/1998; EN610003-2/1995; EN61000-3-3/1995, EN55024/1998, EN60950/1992+A1+A2+A3+A4+A11)
Radio Frequency Interference Statement
Warning:
This is a Class B product. In a domestic environment, this product may
cause radio interference in which case the user may be required to take
adequate measures.
Canadian Doc Notice
For Class B Computing Devices
This digital apparatus does not exceed the Class B limits for radio noise
emissions from digital apparatus as set out in the Radio Interference
Regulation of the Canadian Department of Communications.
“Le présent appareil numérique n’èmet pas de bruits radioélectriques
dépassant les limites applicables aux appareils numériques de la class B
prescrites dans le Règlement sur le brouillage radioélectrique édicté par le
ministère des Communications du Canada."
Page 3

iii
T
ABLE OF CONTENTS
TABLE OF CONTENTS...........................................................................................III
Your New LCD Monitor 1
Unpacking 1
Identifying Components 3
Adjusting the Tilting Angle 5
Connecting AC Power and Video Cable 6
Power Management System 6
How to install the VESA mount 7
The LCD Monitor's Control Panel 8
Adjusting the Monitor’s Display 9
TFT LCD Monitor Specifications 14
Supported Timing 16
Troubleshooting 17
Page 4

Page 5

1 Rev.1
The LCD Monitor
Your New LCD Monitor
Your LCD Monitor has been designed to be versatile, ergonomic and
user-friendly. The LCD Monitor is capable of displaying most
standards, from 640x400 VGA to 1280x1024 SXGA. The digital
controls located on the front panel allow the user to easily adjust the
Monitor’s display parameters, and the LCD Monitor’s small footprint
gives you more room in your workspace for other peripherals.
Lightweight and compact, the LCD Monitor is the perfect solution for
users on the go. You can use the LCD Monitor for everything from
making business presentations to playing computer games. The
Monitor also has a wall-mountable stand for added convenience.
The architecture of the LCD Monitor incorporates an LCD panel that produces a clear display
with low radiation emission. And with its low power consumption, the LCD Monitor helps you
reduce your power bill.
Unpacking
Before unpacking your LCD Monitor, prepare a suitable workspace for your LCD Monitor and
computer. Look for a stable, level and clean surface near a wall outlet. Even though the
LCD Monitor uses very little power, you should put it in a location which allows sufficient
airflow to ensure that the LCD Monitor and your computer do not overheat. Set up your LCD
Monitor so that the panel is not facing a window where sunlight often comes in. The glare
caused by sunlight reflecting off of the LCD Monitor’s screen will make it difficult to use the
Monitor for viewing.
Note: Using a computer for an extended period of time with a poor workstation
set-up and incorrect working habits can cause health problems. The science of
ergonomics studies the relationship between health and a suitable working
environment. There is a section on ergonomics at the end of this chapter. For
more information on ergonomics, contact your nearest computer bookstore, or
local library. The Internet also has information on this and other subjects.
Page 6

2 Rev.1
After unpacking your LCD monitor, make sure the following items are included
in the box and are in good condition:
• LCD monitor
• Power Cord
• Monitor-To-PC Analog signal cable 15pin
• 1.5M stereo Jack Audio Cable
• User’s manual
If you find that any item to be missing or appear to be damaged,
contact your dealer immediately. Do not throw away the packing
material or shipping carton in case you need to ship or store the LCD
monitor in the future.
Page 7
3 Rev.1
Identifying Components
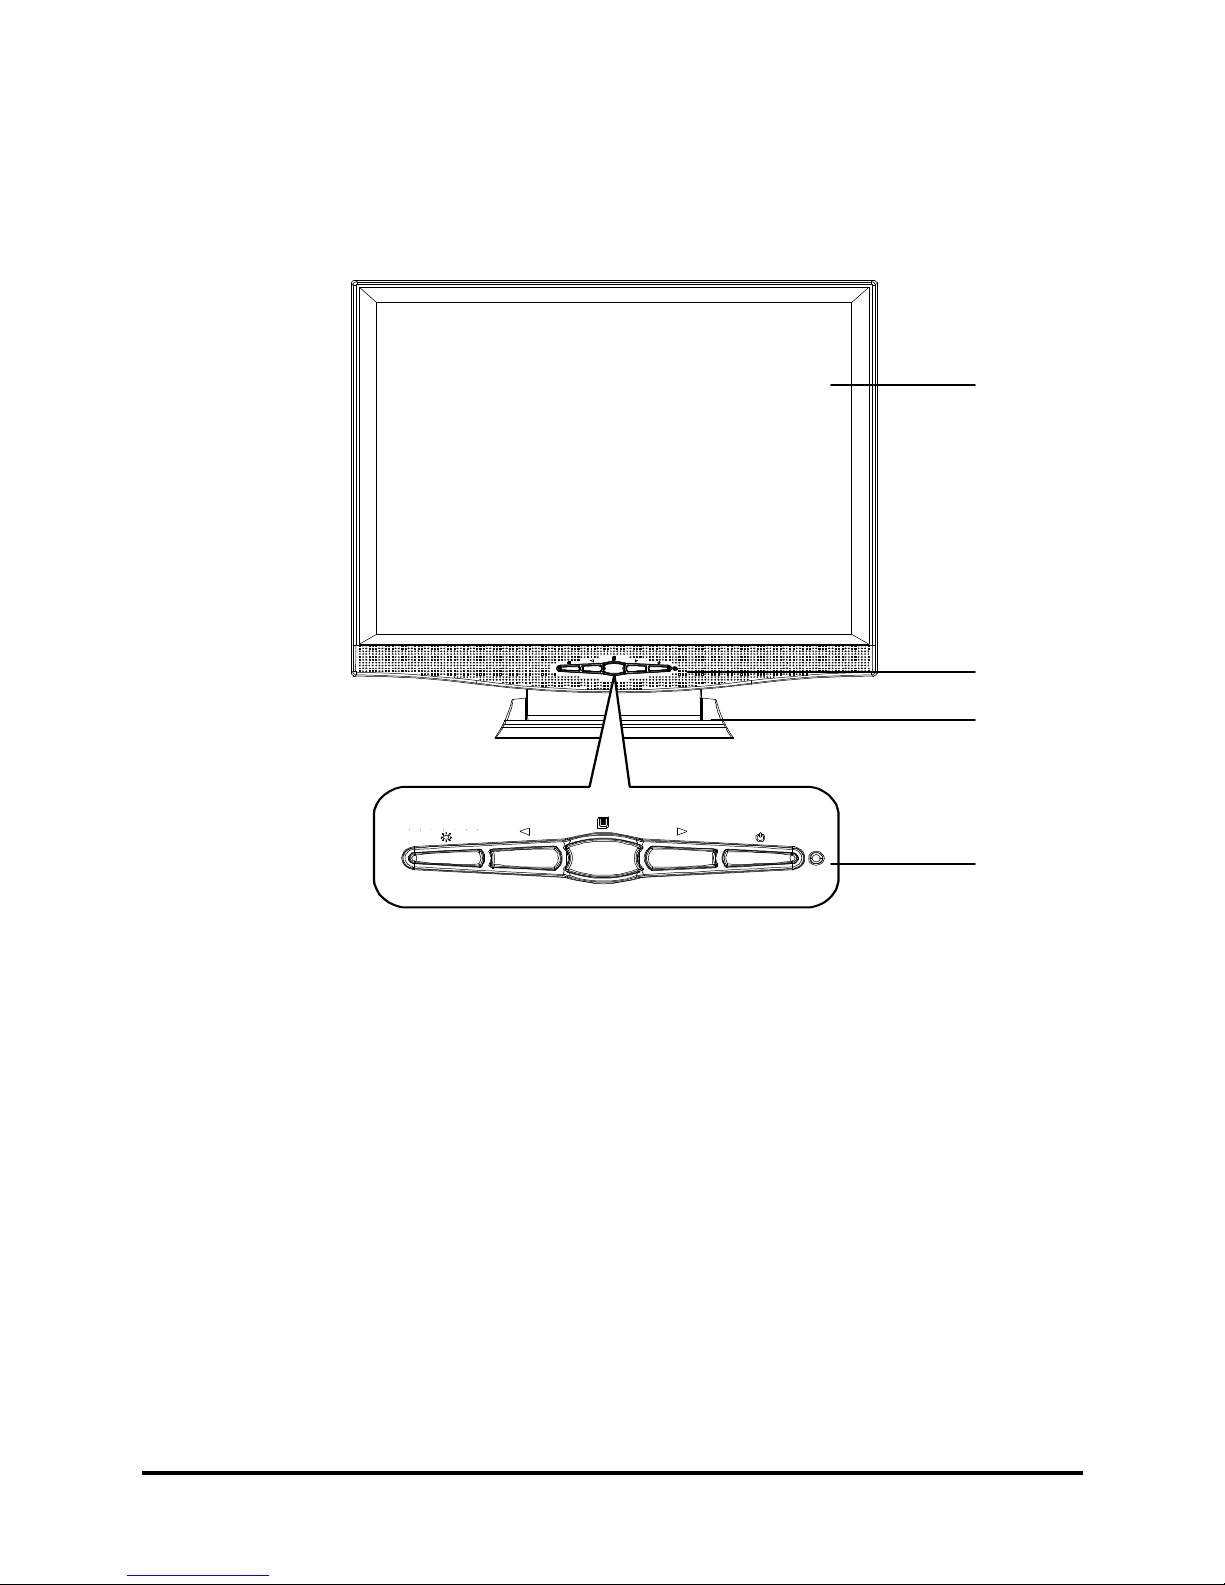
A. The LCD Monitor — Front View
Figure 1-1: The LCD Monitor Front View
1. Power-On Indicator
This Circular LED indicator green lit when the power is on and
orange lit when the LCD monitor is in power-saving mode.
2. Monitor Stand
3. LCD Screen
The LCD monitor screen is a 19-inch TFT 1280 x 1024 screen.
4.
LCD Monitor Control Panel
Refer to Chapter 2 for more details.
3
4
121
3
2
1
4
Page 8
4 Rev.1
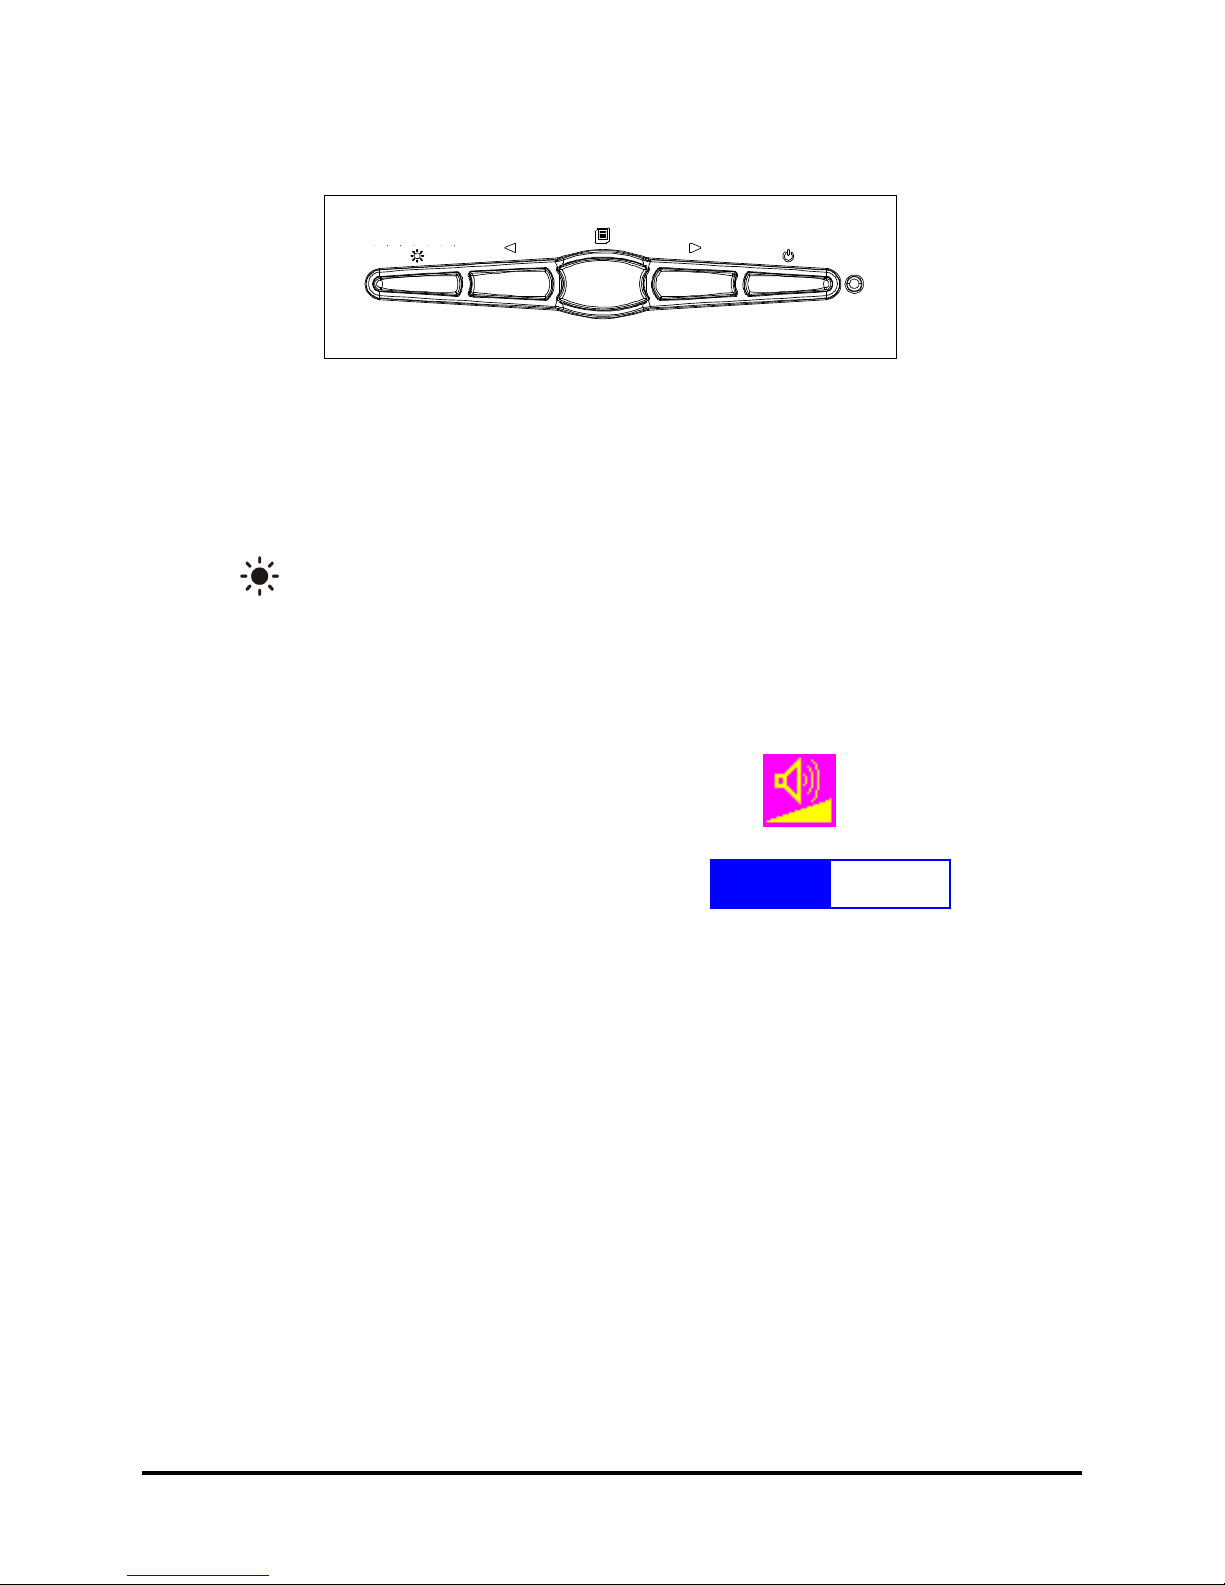
B. "Hot Keys" for Quick Adjustment of Monitor Settings
Figure 1-2: "Hot Keys"
1. Brightness adjustment "hot key":
Press
button to allow you to adjust
the brightness from high, Mid and low
brightness of the LCD Monitor directly.
A small “High Brightness” Charactes is
also displayed.
High Brightess
Mid Brightess
Low Brightness
2. Volume Adjustment “ Hot Key :
Press
&
two buttons to allow you
to adjust the speaker volume directly
without enabling OSD screen.
50
- +
Page 9
5 Rev.1
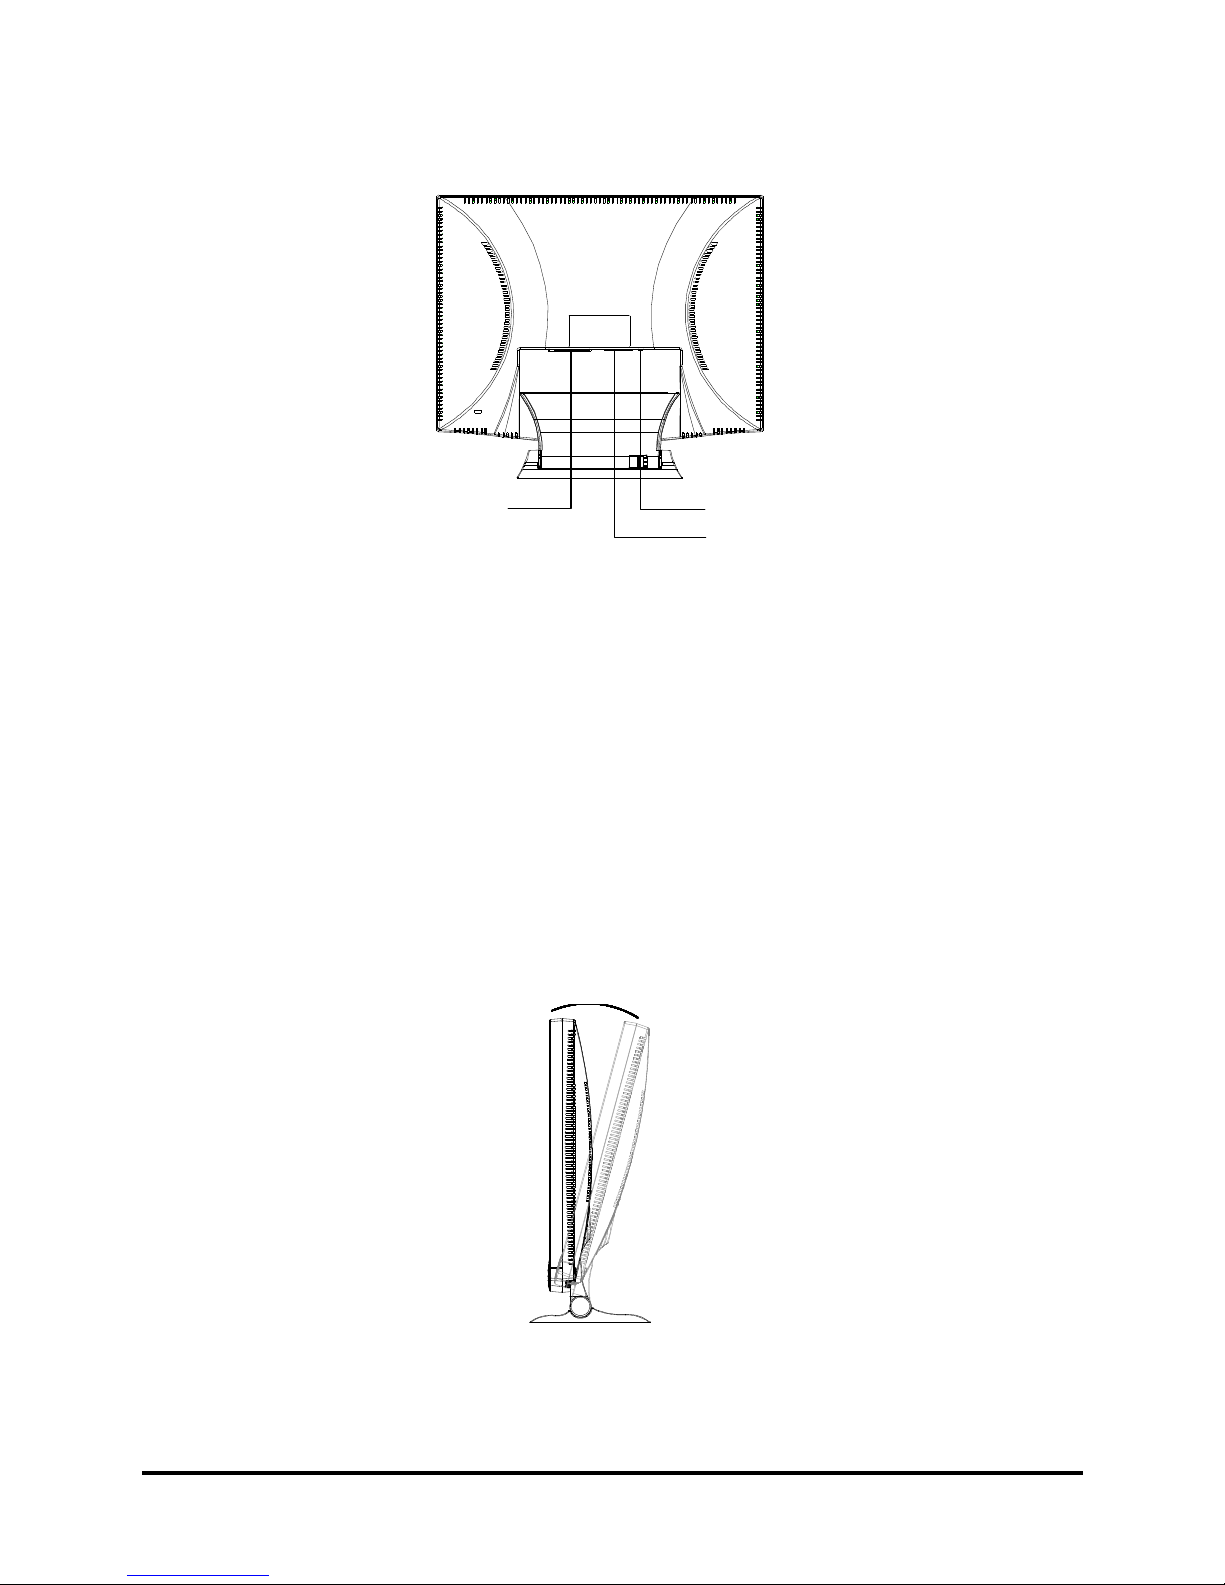
C. The LCD Monitor — Rear View
VGA
AC-IN AUDIO
Figure 1-3: LCD Monitor Rear View
1. AC Power Jack
2.
VGA Cable With 15-Pin D-Sub VGA Connector
3.
Stereo Audio Jack
Adjusting the Tilting Angle
The LCD Monitor’s angle settings range from 0° to 15°.
15
Figure 1-4: Tilting the Monitor
0 to 15
Page 10
6 Rev.1
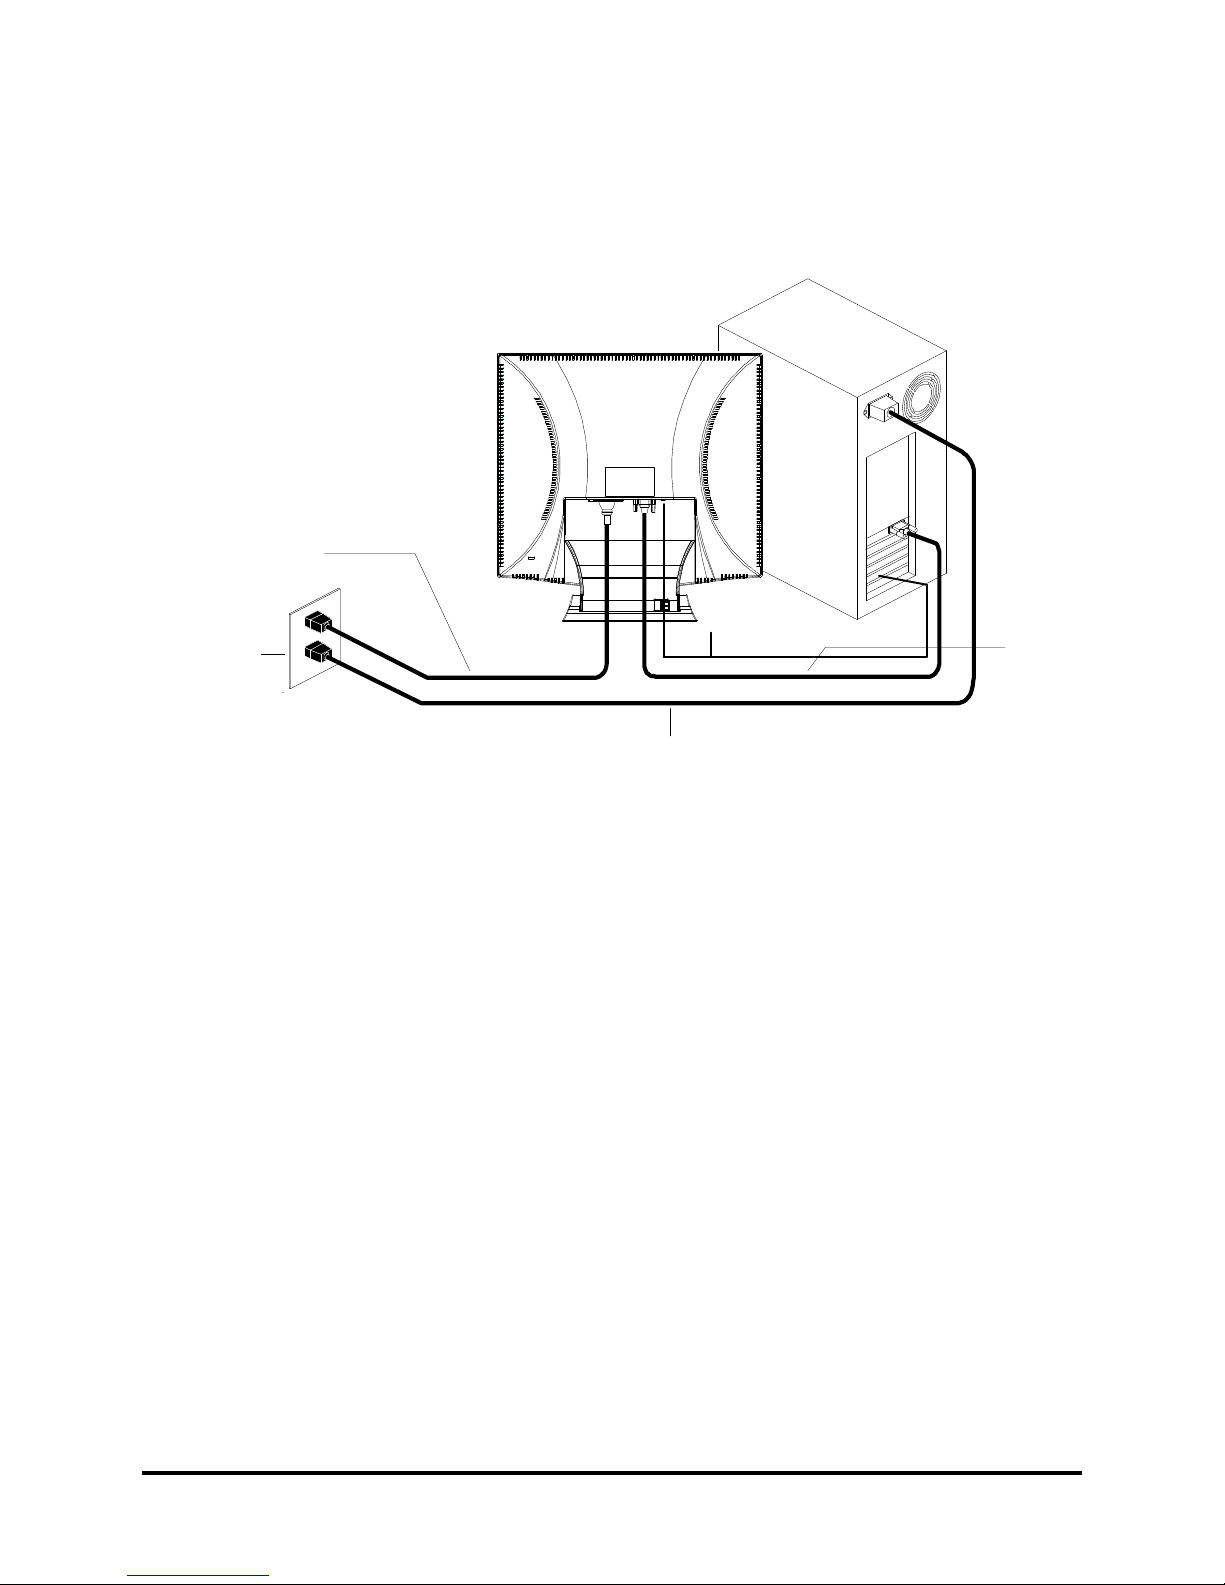
Connecting AC Power and Video Cable
Note: Turn off your PC and the LCD monitor before connecting your LCD monitor to the
computer.
D-SUB
AC-IN
AC Outlet
(Wall Socket)
Computer Power Cord
Figure 1-5: The AC Adapter
Power Management System
This LCD Monitor complies with the VESA DPMS power management proposal.
When the LCD Monitor is in power-saving mode or detects an incorrect timing, the monitor
screen will be blank and the power LED indicator starts blinking.
Audio cable
Page 11
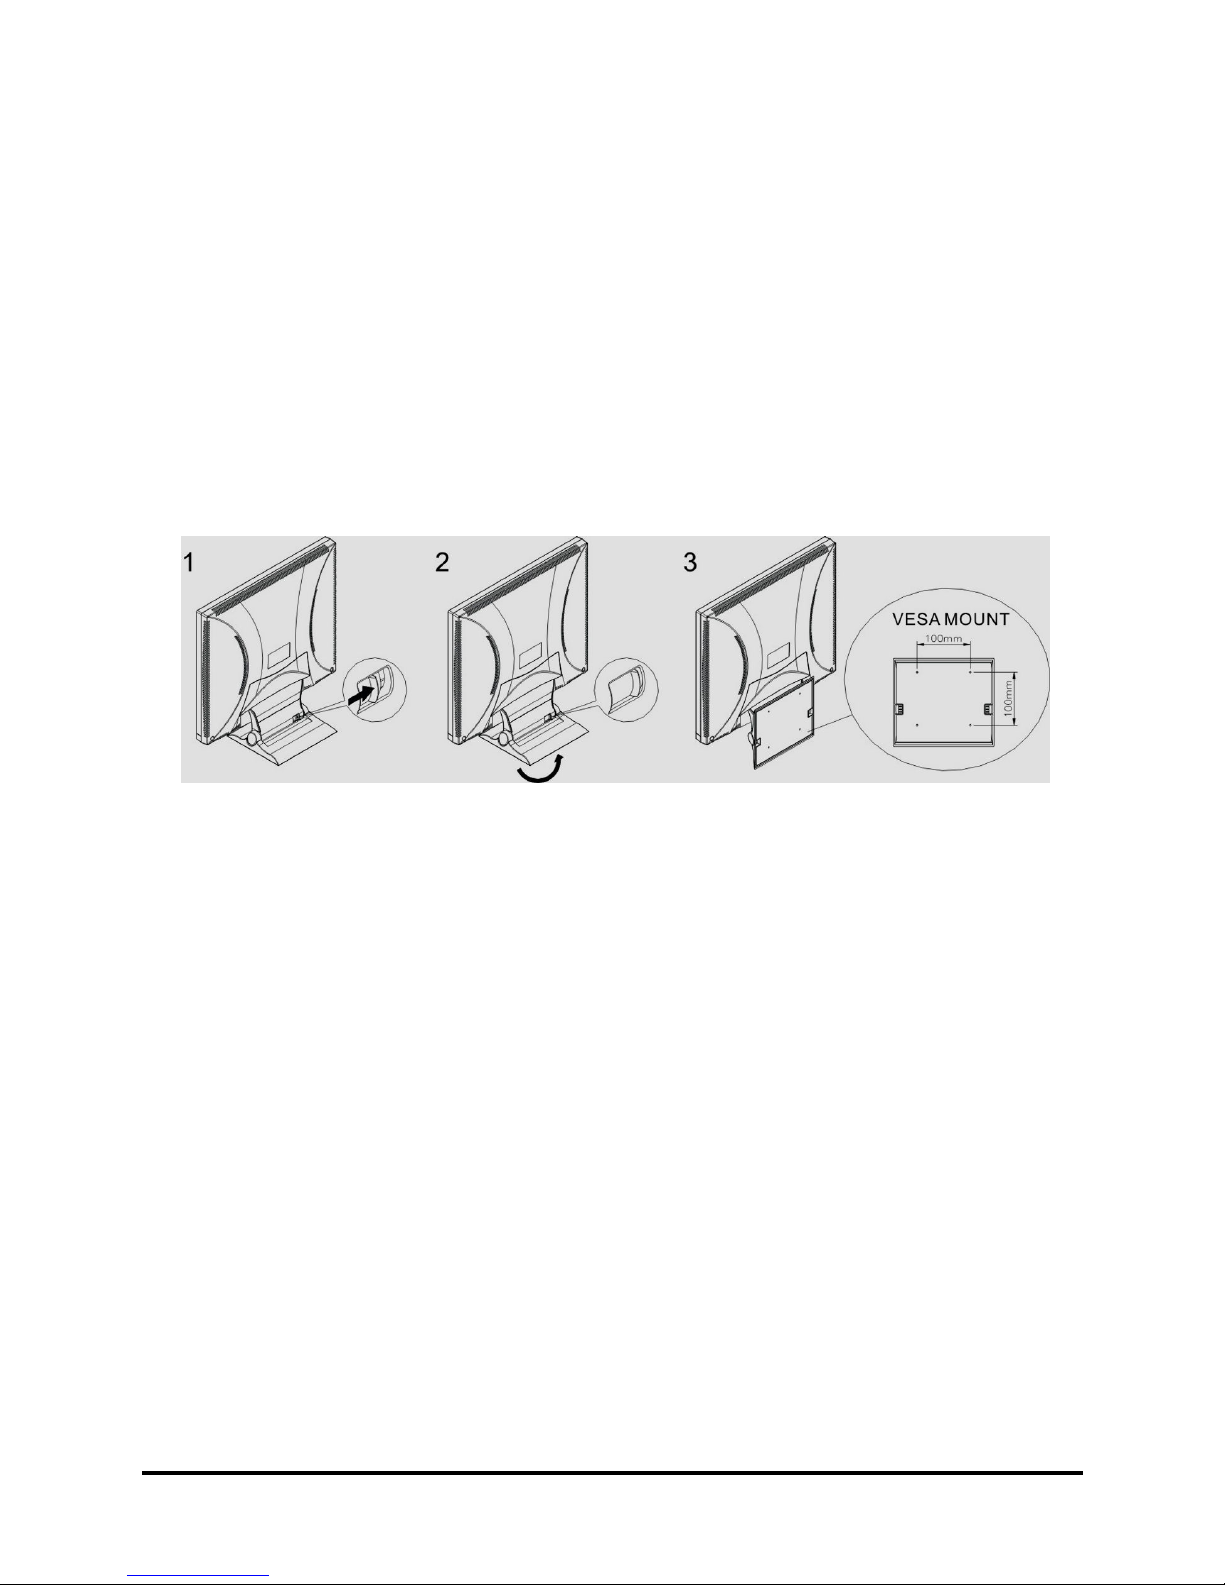
7 Rev.1
How to install the VESA mount:
Please see the below drawing.
First, find the slide on the stand.
Push the slide to the right side as step 2
Rotate the stand and let the stand horizontally as panel.
Now you will find the 4 holes to fix the VESA 100mm mount.
Page 12
8 Rev.1
The Display Controls
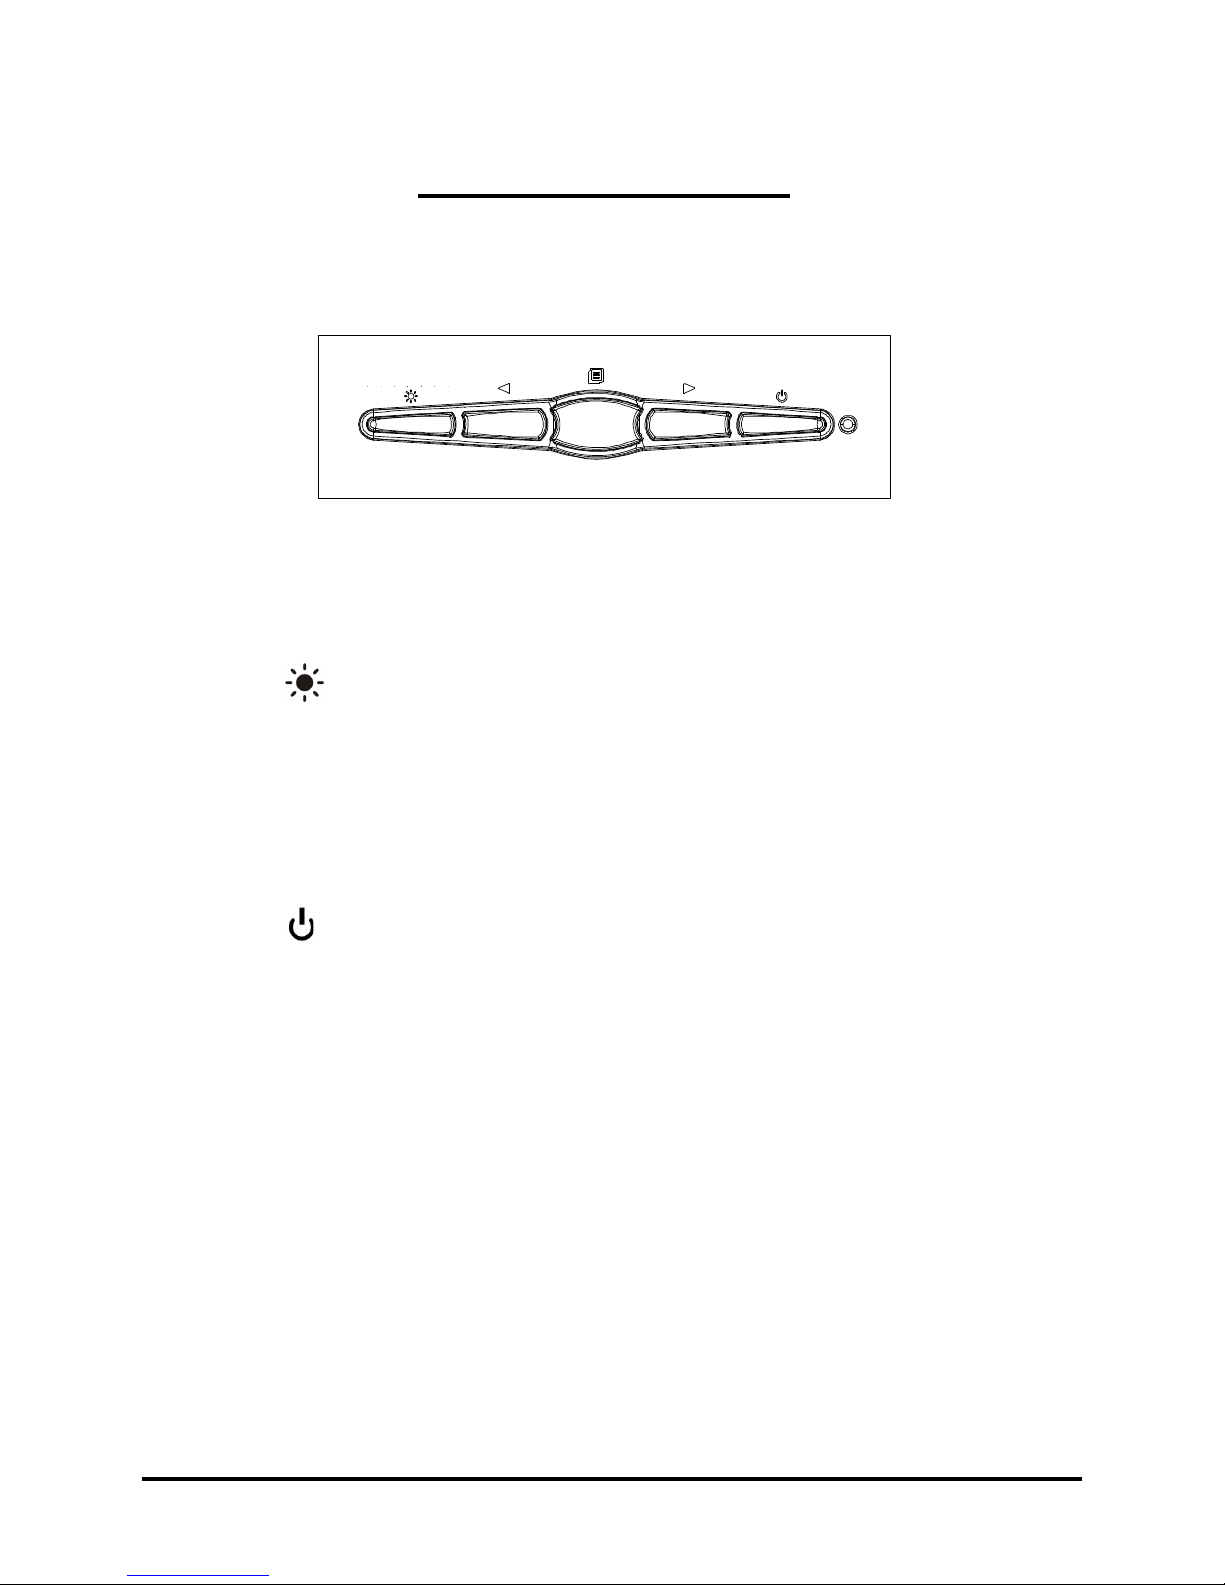
The LCD Monitor’s Control Panel
Figure 2-1: The Control Panel
1. Menu: OSD Menu button
Press this button to display the OSD (On-Screen Display) menu.
2.
: Brightness setting hot key
This button lets you set the LCD brightness to the preset value
from High, Mid to Low three level.
3. Adjustment button
&
These buttons let you move horizontally across your settings or
selections, or change the setting value..
4.
:
Power Switch
This button lets you turn power for the LCD monitor ON or OFF.
Page 13
9 Rev.1
Adjusting the Monitor’s Display
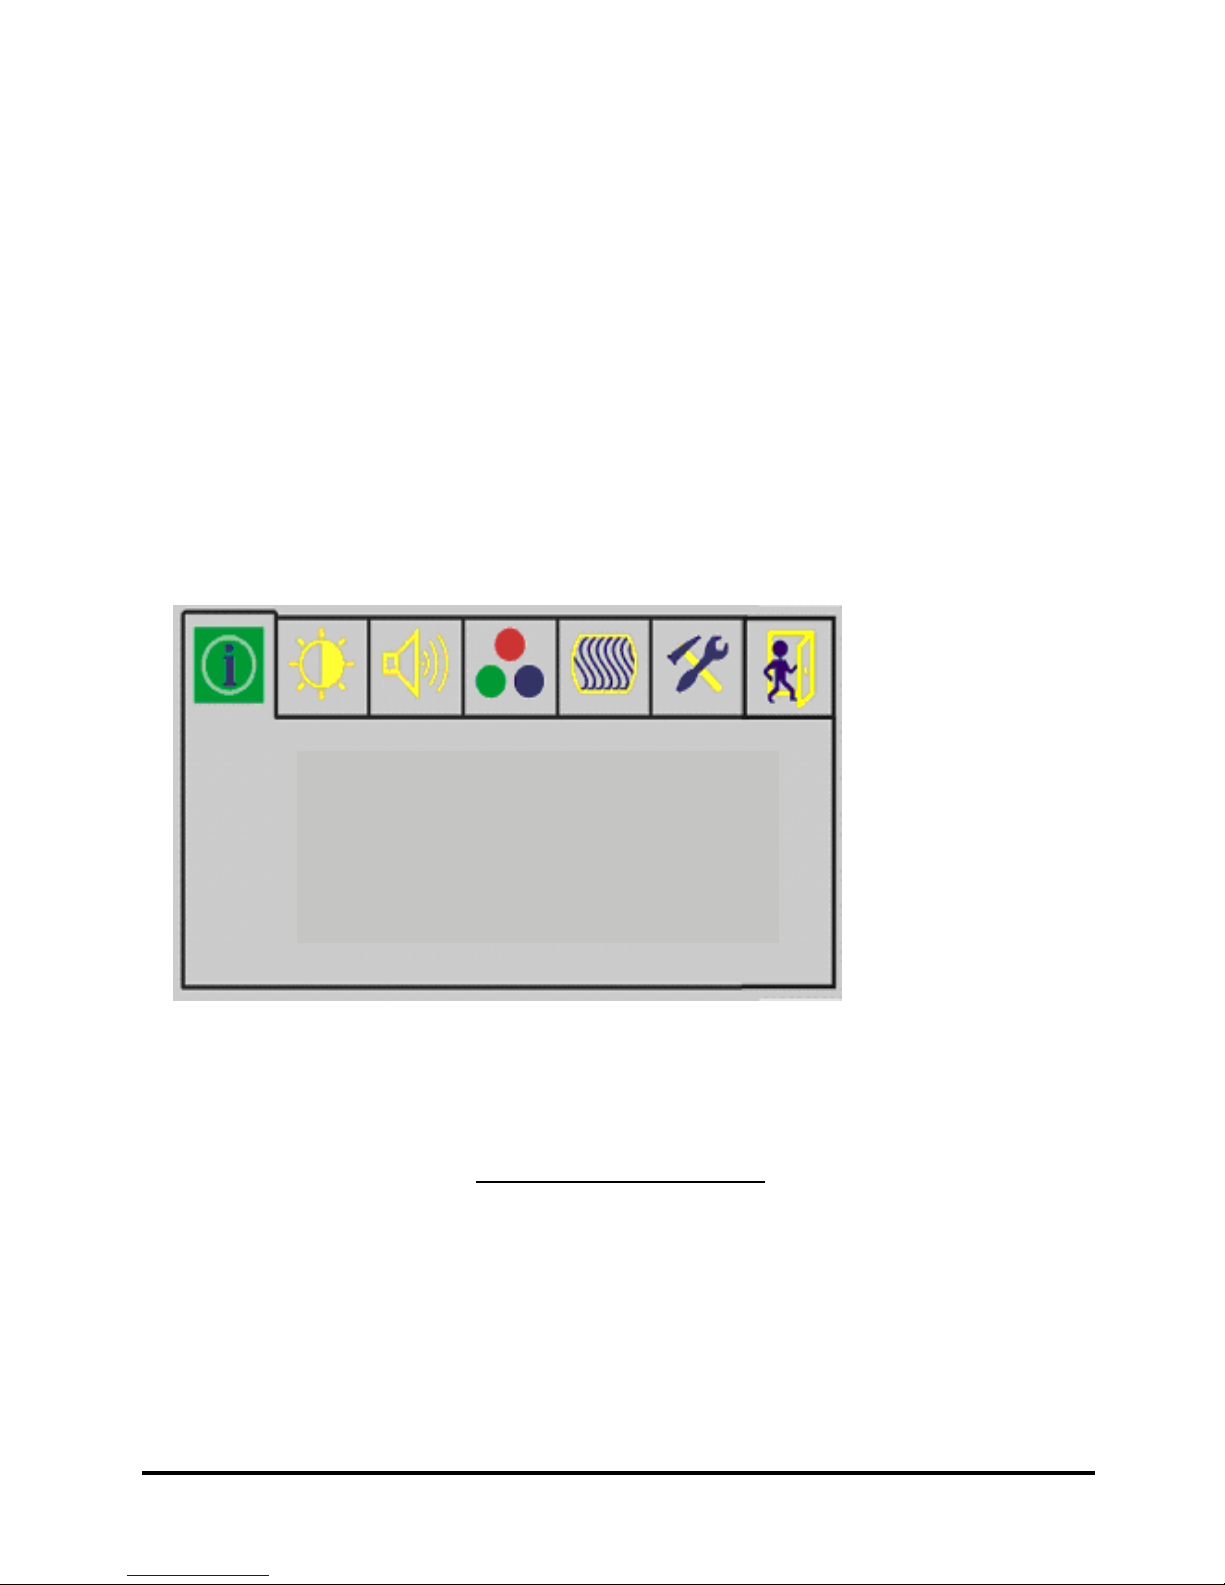
OSD Main Menu
1. Pressing the OSD Menu button causes the screen below to appear.
2. Use the & key to select the desired group, then press Menu key
to the sub-menu
3. Repeat step 2 to select the changed item, then press Menu to select the changed item.
4. Press the & key to change the value.
5. Press Menu key to retuen the item 3 screen to do another adjustment
The OSD Main Menu
OSD Main SCREEN
Timing : 1280 x 1024
V/H Freq : 74.6Hz 79KHz
DCLCD DCL9A+
Page 14
10 Rev.1
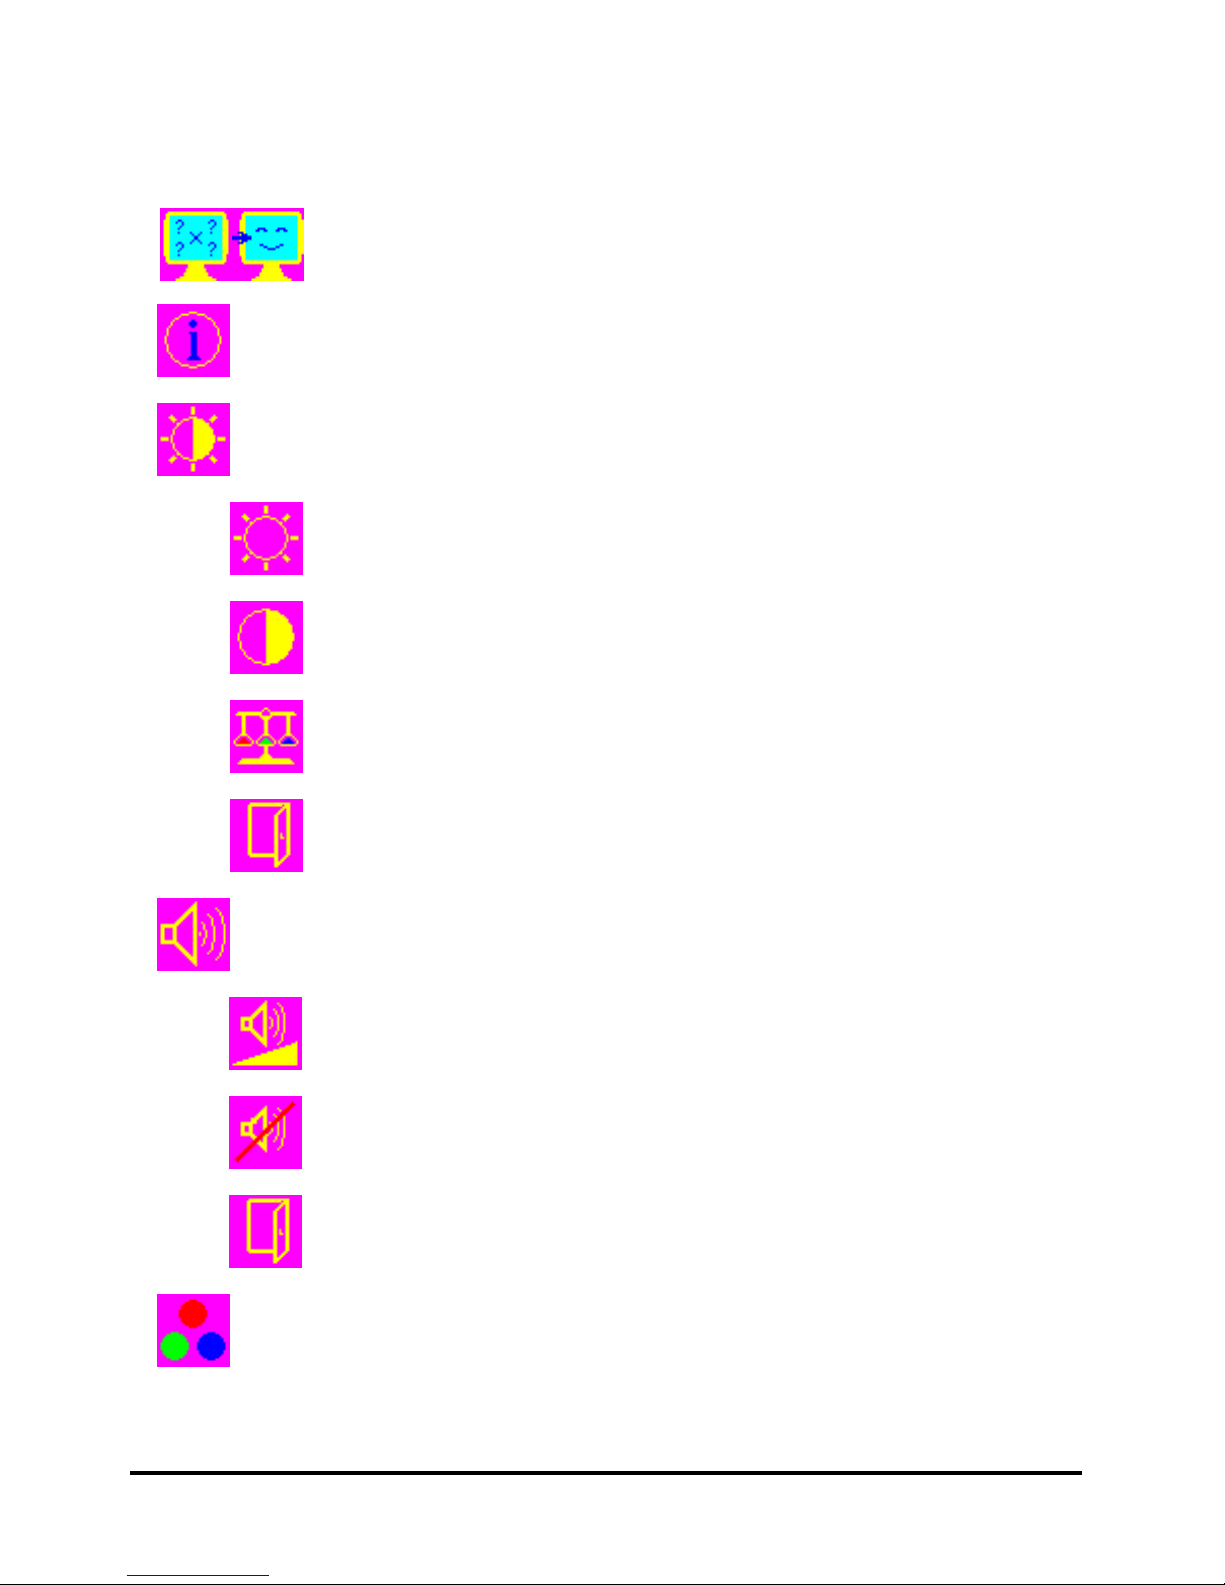
Auto Adjust Option
The Auto Adjust option lets the monitor determine and
select the settings that are most appropriate for your
system requirements.
Provides you with the current display timing information.
Brightness and Contrast Adjustment
Adjusts the Brightness value
Adjusts the Contrast value
Execute the white balance function
Return to the previous Menu
Audio Function
Volume : Adjust the speaker volume
Mute : Mute the speaker
Return
Color Temperature Adjustment
Page 15

11 Rev.1
Set up the color temperature value
User Mode
Sets the color temperature to 6500K
Sets the color temperature to 9300K
Red change Red gain for the color temperature
(only valid when color temperature set at user mode )
Green change Green gain for the color temperature
(only valid when color temperature set at user mode )
Blue change Blue gain for the color temperature
(only valid when color temperature set at user mode )
Return to the previous Menu
Display Quality Adjustment
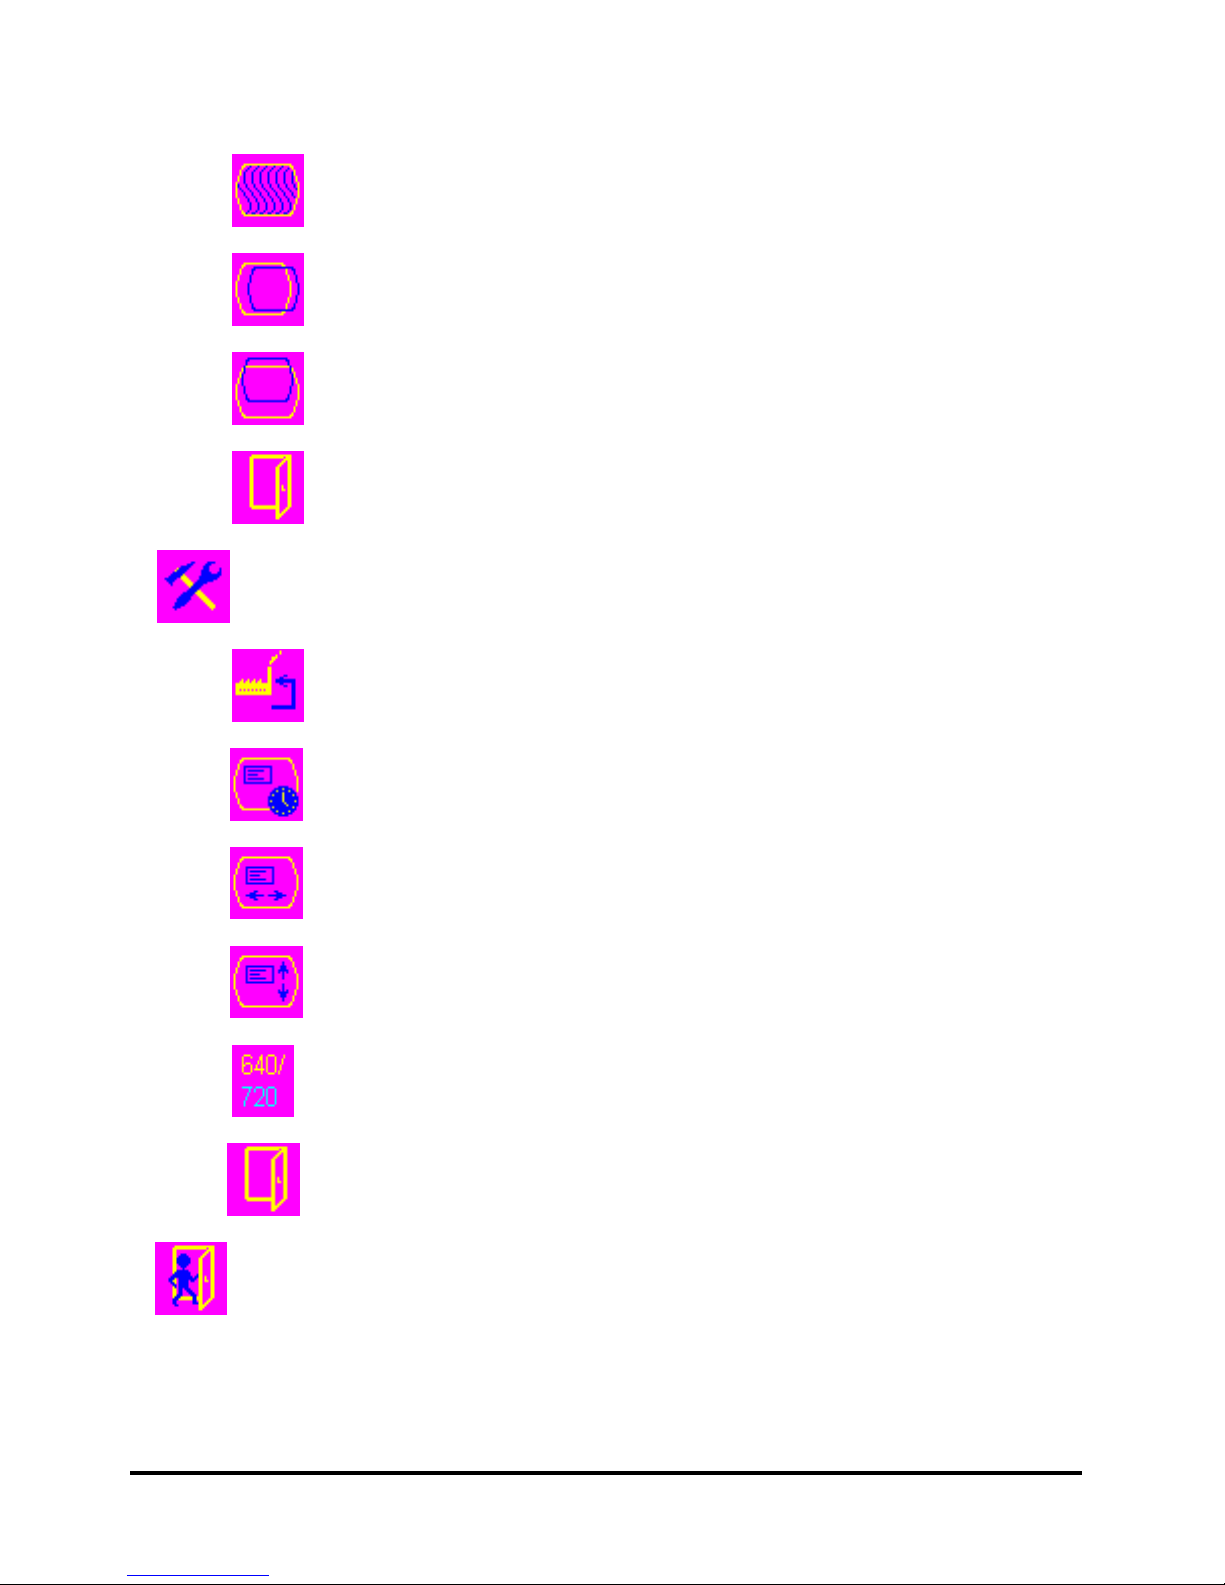
Auto Adjust: use this option to apply automatically setting
Changes the screen viewing size
Page 16
12 Rev.1
Adjusts phase tracking to reduce display flicker
Moves the whole screen right or left
Moves the whole screen up or down
Return to the previous Menu
OSD Adjustment
Restores settings to factory default values
Sets the OSD timer
Moves the OSD menu horizontally
Moves the OSD menu vertically
Set the graphic mode or text mode
Return to the previous Menu
Exit the OSD screen
Page 17
13 Rev.1
Note:
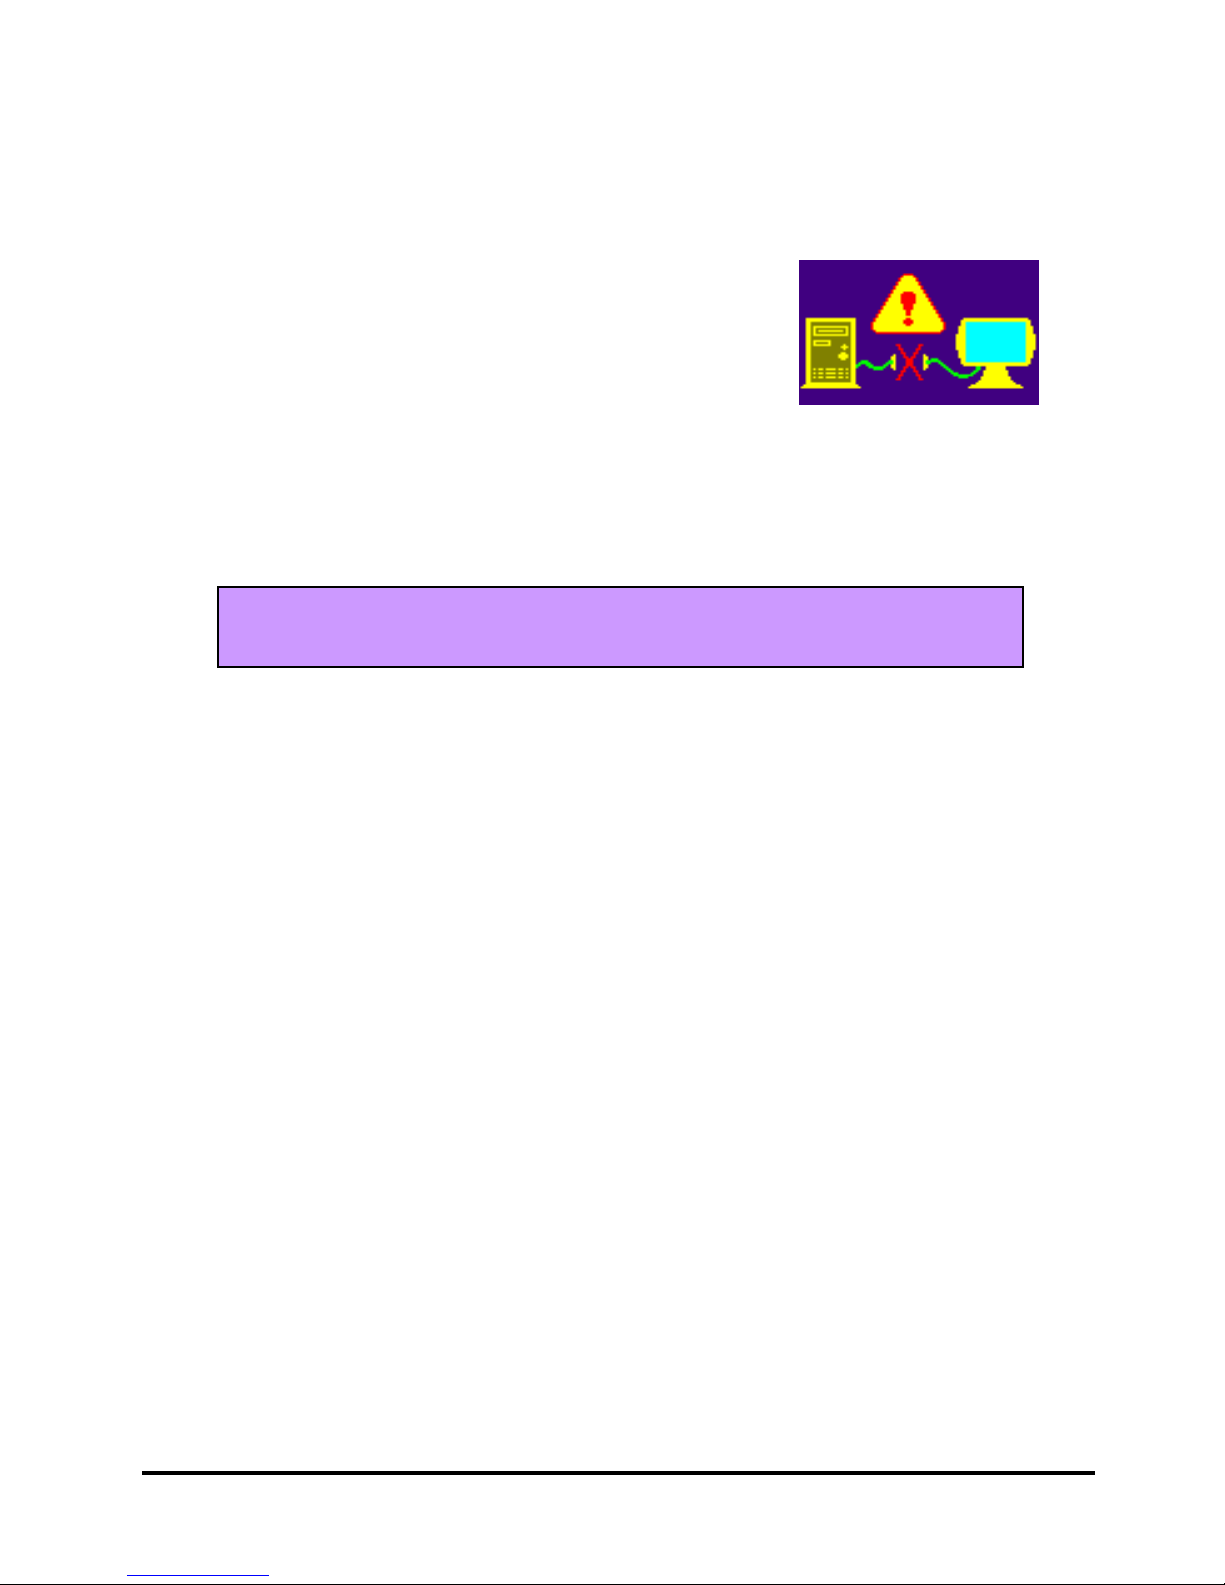
1) No video
When the monitor is ON and there is no video signal received,
the following message will be displayed
2) Signal out of range
When the frequency range of the signal is out of the Monitor’s specifications, (over 85HZ) the
display will show the following message
Out of Range
Page 18
14 Rev.1
Appendix A
TFT LCD Monitor Specifications
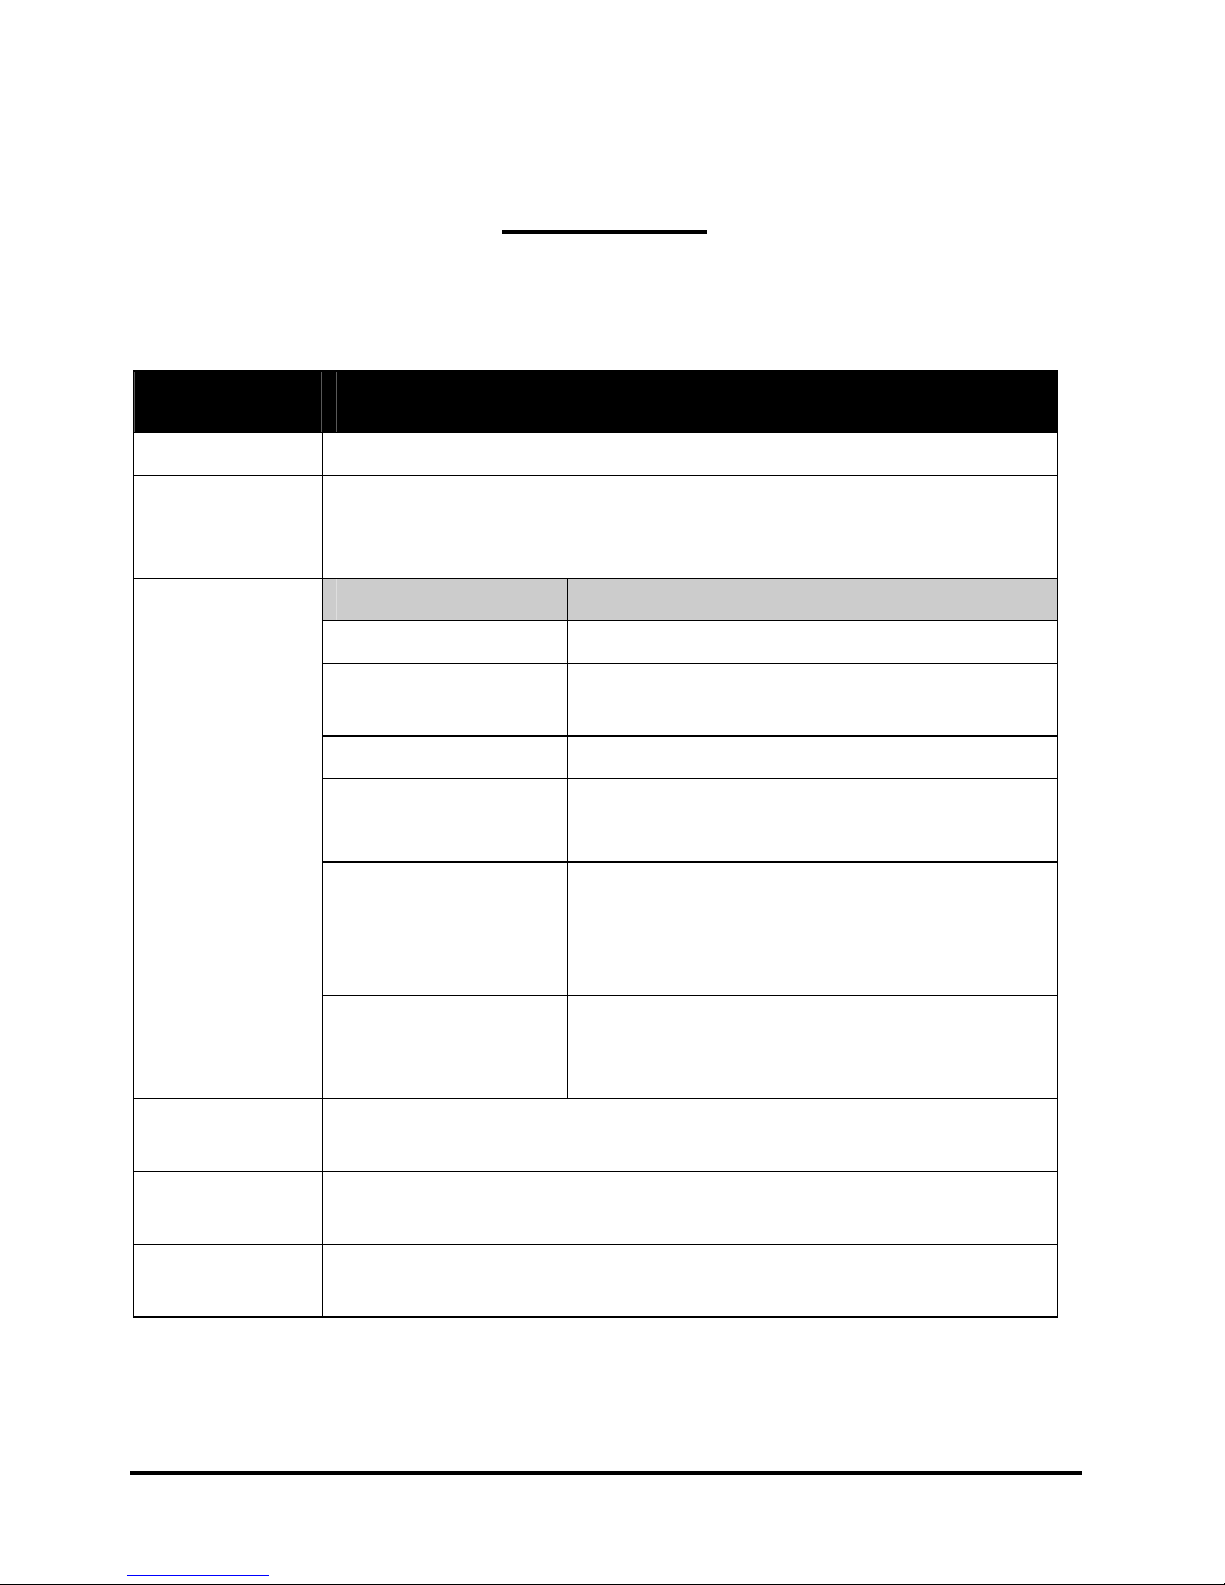
LCD Panel 19" SXGA
Control
Functions
Power
Software Power switch with LED indicator
(ON/OFF)
Main Menu Submenu
Information
Brightness
/Contrast Control
Brightness/Contrast/White balance/Exit
Audio Control Volume/Mute/Exit
Color temperature
Control
User mode, 9300K, 6500K
R,G,B, gain value
Display Quality Auto Adjustment/Phase
adjustment/Screen Size/ Screen
Horizontal position/Screen Vertical
position/Exit
On-Screen
Display
(OSD)
OSD adjsutment Restore to the default/OSD timer/OSD
Horizontal Position/OSD Vertical
Position/640&720/Exit
Display Area
(mm)
376.32 x 301.056
(19" diagonal)
Display
Colors
16 M
Video
Interface
VGA Compatible Analog RGB
Page 19
15 Rev.1
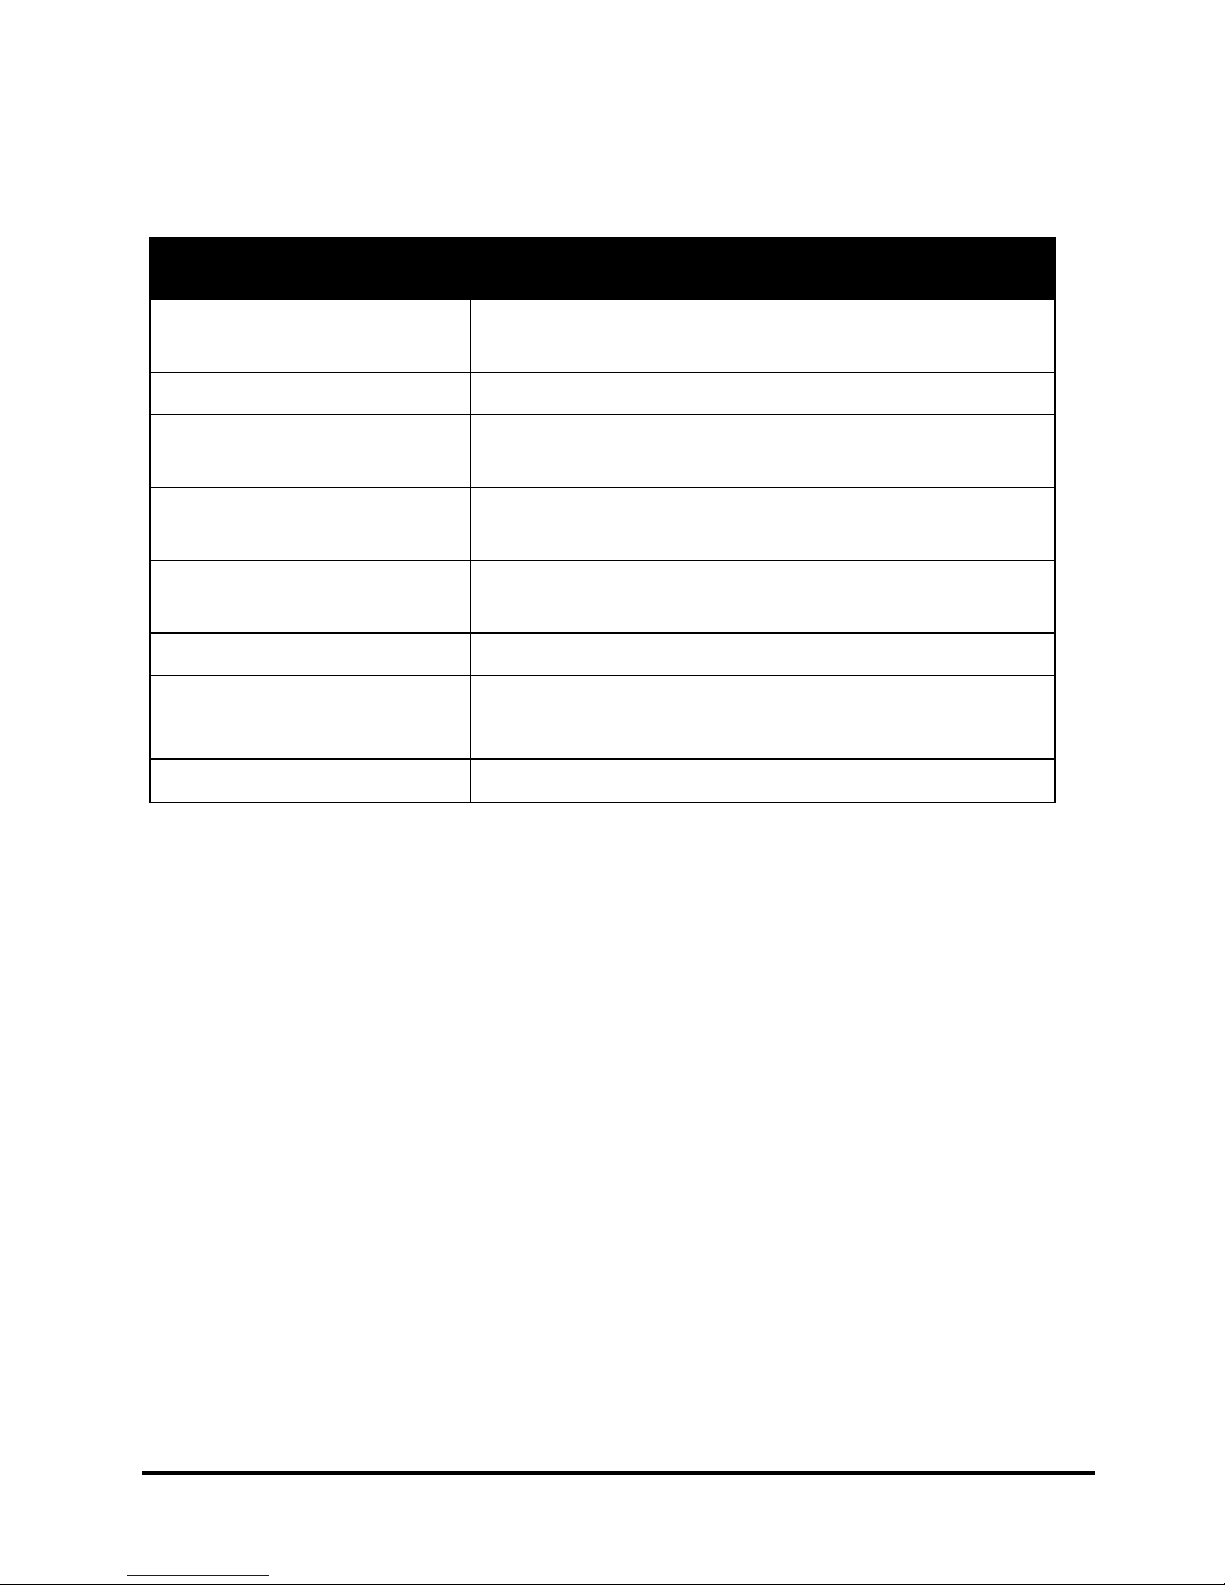
Scanning Frequency
H/V, Hz
24-80K
50-75
Power Management Meets VESA DPMS
Power Consumption
(ON/OFF, W)
37W/1W Max.
Dimensions
WxHxD
16.5 x 16.48 x 6.53
in.
(419 x 418.4 x 166mm)
Net Weight
(approx.)
12.7
lbs
(5.8 Kg)
Power Supply Universal Input AC Socket
Environment Operating Temperature: 32 to 104°F (0 to 40° C)
Relative Humidity: 10% to 90%
Regulatory
FCC B DoC,UL/cUL,Energy star
Page 20
16 Rev.1
Appendix B
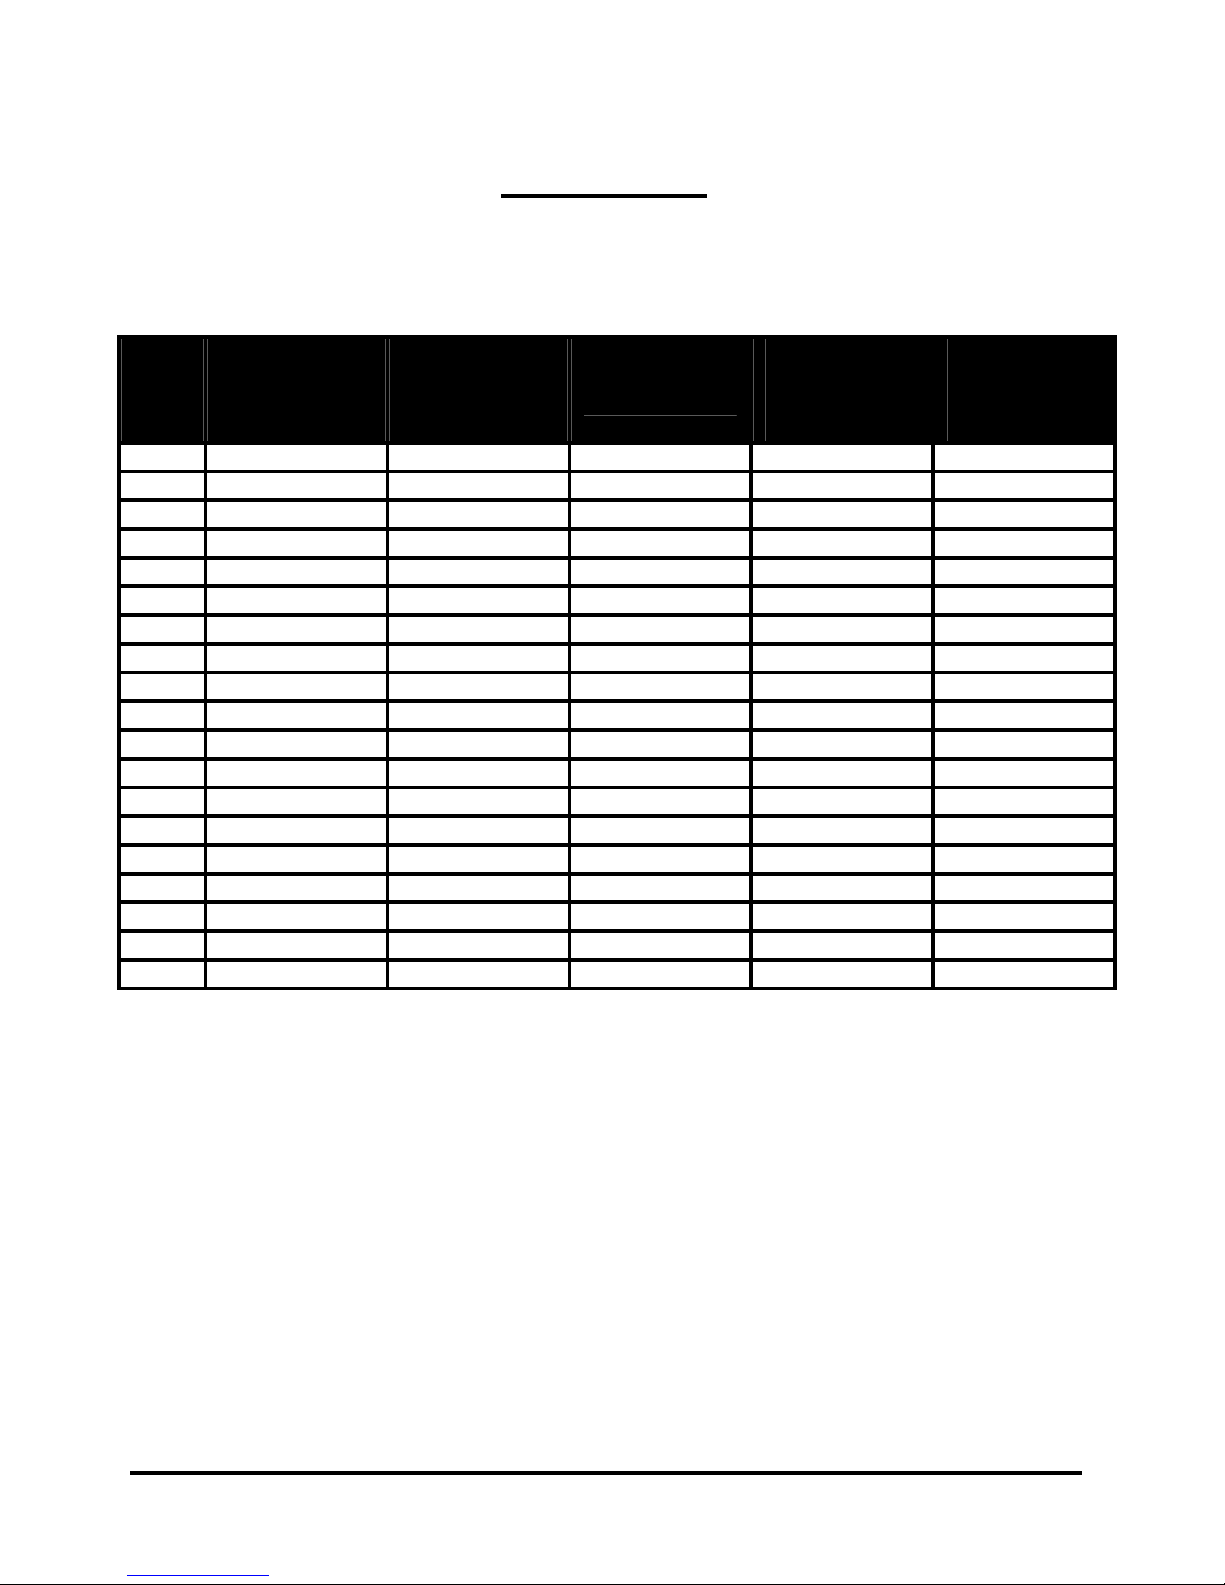
Supported Timing
Item
Standards
Resolution
Dot Clock
(MHz)
Vertical
Scanning
Frequency
(Hz)
Horizontal
Scanning
Frequency
(kHz)
1 NEC PC98 640x400 21.05 56.42 24.83
2 MAC 13" mode 640x480 30.24 66.67 35.00
3 MAC 16" mode 832x624 57.28 74.55 49.73
4 MAC 17" mode 1024x768 80.00 75.02 60.24
5 VGA 640x350 25.18 70.09 31.47
6 VGA 640x400 25.18 70.09 31.47
7 VGA 640x480 25.18 59.94 31.47
8 VESA 640x480 31.50 72.81 37.86
9 VESA 640x480 31.50 75.00 37.50
10 VESA 800x600 36.00 56.25 35.16
11 SVGA 800x600 40.00 60.32 37.88
12 VESA 800x600 50.00 72.19 48.08
13 VESA 800x600 49.50 75.00 46.88
14 VGA 720x400 28.32 70.09 31.47
15 XGA 1024x768 65.00 60.00 48.36
16 VESA 1024x768 75.00 70.07 56.48
17 VESA 1024x768 78.75 75.03 60.02
18 VESA 1280X1024 108 60 63.98
19 VESA 1280X1024 135 75 80
*Once a mode is optimized, there is no need to make any further adjustment
as long as the VGA card remains unchanged.
*Specifications are subject to change without notice.
Page 21

17 Rev.1
Appendix C
Troubleshooting
This LCD monitor comes pre-adjusted with standard VGA timing. Due to output timing
differences among various VGA cards, you may initially experience an unstable or unclear
display when a new display mode or new VGA card is selected.
Before applying any of the following troubleshooting procedures, you should first apply the Auto
Adjust option in the OSD menu.
PROBLEM: Display is unclear and unstable
To stabilize and clarify your display, open the OSD and adjust the clock and
phase to obtain a clear display
PROBLEM: There is no LCD display
If there is no display on the LCD, refer to the following:
1. Make sure that the power indicator on the LCD monitor is lit,
that all connections are secure, and that the system is running
on the correct timing. Refer to Appendix B for information on
timing.
2. Turn off the LCD monitor and then turn it back on again. Press
the OSD Menu button (refer to Chapter 2) once and then press
one of the Adjustment Control buttons several times. If there is
still no display, press the other Adjustment Control button
several times.
3. If step 2 does not work, connect your PC system to another
external CRT. If your PC system functions properly with a CRT
monitor but it does not function with the LCD monitor, and the
LCD monitor’s power LED is blinking, the output timing of the
PC’s VGA card may be out of the LCD’s synchronous range.
Change to one of the alternate modes listed in Appendix B, or
replace the VGA card and repeat steps 1 and 2.
Page 22

18 Rev.1
4.
If the power LED is not lit, check that the AC power connector
is securely connected, and verify that the AC adapter LED is lit.
If the AC adapter LED is not lit, please contact your dealer for
assistance.
 Loading...