

Page 1

INSTRUCTIONS FOR INSTALLATION
Including Directions for Use and Stoking
Contents:
General advice and instructions . . . . . . . .2-3
Warranty conditions
Approvals
Before the installation
Accessories
Mounting of tiles and soapstones
Quality control
Inspection
Connection to the chimney
Bearing foundation
Security distances
Requirements of flooring
Distribution of the heat
Self-closing doors
Adjustment screws
Number plate
Service bag
Mounting instructions . . . . . . . . . . . . . . . .4-7
Connection to an existing brick-built chimney
Top discharge with direct connection to steel .
chimney
External fresh-air supply
Directions for use and stoking . . . . . . . . .8-11
Maintenance of the stove
Handling of wood
Lighting and stoking
Trouble shooting . . . . . . . . . . . . . . . . . . . . 12
Edition 05.10.2010 - GB
We recommend that you read this manual as
well as the instructions for your specific model
before beginning the installation.
SCAN 38
BRUGSANVISNING
Til denne Brugsanvisning hø
rer
også en
generel M
on
teringsvejledning.
U
dg
ave 03.03 - D
K
M
O
N
T
E
R
I
N
G
S
V
E
J
L
E
D
N
I
N
G
m
e
d
b
r
u
g
s
-
o
g
f
y
r
i
n
g
s
a
n
v
i
s
n
in
g
I
n
d
h
o
l
d
:
G
e
n
e
r
e
lle
r
å
d
o
g
a
n
v
is
n
in
g
er
. .
.
. .
.
.
. .
.2
-
3
R
e
k
l
am
atio
n
s
re
t
T
y
p
e
-
o
g
m
ilj
ø
go
d
k
e
n
d
e
l
s
e
U
d
p
a
k
n
i
n
g
T
i
lb
e
h
ø
r
til d
in
p
e
js
M
o
n
t
e
r
in
g
a
f
k
a
k
le
r o
g
f
e
d
t
s
te
n
K
v
a
li
te
t
s
k
o
n
tr
o
l
A
n
m
e
ld
e
ls
e
s
p
li
g
t
S
k
o
r
s
te
n
s
t
je
k
S
k
o
r
s
te
n
s
lø
s
n
i
n
g
e
r
B
æ
r
e
n
d
e
u
n
d
e
r
la
g
B
r
æ
n
d
b
a
r
e
l
le
r
ik
k
e
b
r
æ
n
d
b
a
r
v
æ
g
G
u
lv
p
la
d
e
V
a
r
m
e
f
o
r
d
e
lin
g
J
u
s
t
e
r
s
k
r
u
e
T
y
p
e
s
kilt
P
ro
d
u
k
tio
n
s
n
r
.
S
e
r
v
ice
p
a
k
k
e
M
o
n
te
rin
g
s
v
e
j
le
d
n
in
g
.
.
. .
.
. .
. .
.
.
.
.
.
. .
.4
-
7
Tils
lu
tning
til
e
k
s
is
te
r
e
n
d
e
/m
u
r
e
t
s
k
o
r
s
te
n
Tils
lu
t
n
in
g
to
p
a
fg
a
n
g
ti
l
s
tå
ls
k
o
r
s
t
e
n
F
o
r
b
r
æ
n
di
n
g
s
lu
f
t
u
d
e
fr
a
B
r
u
g
s
-
o
g
fy
r
in
g
s
a
n
v
i
s
n
i
n
g
.
. .
.
. .
.
.
.
.
.
8
-
1
0
V
e
d
lig
e
ho
ld
e
ls
e
a
f
p
e
j
s
e
ov
n
e
n
H
å
n
d
te
r
i
n
g
a
f
b
r
æ
n
d
s
e
l
O
p
tæ
n
d
in
g
o
g
f
y
r
in
g
F
e
j
ls
ø
g
n
in
g .
.
. .
. .
. .
.
.
.
.
.
.
.
.
. .
.
.
. .
.
.
1
1
S
C
A
N
3
B
R
U
G
S
A
N
V
I
S
N
I
N
G
T
i
l
d
e
n
n
e
B
r
u
g
s
a
n
v
i
s
n
i
n
g
h
ø
r
e
r
o
g
s
å
e
n
g
e
n
e
r
e
l
M
o
n
t
e
r
i
n
g
s
v
e
j
l
e
d
n
i
n
g
.
U
d
g
a
v
e
0
3
.
0
3
-
D
K
M
O
N
T
E
R
I
N
G
S
V
E
J
L
E
D
N
I
N
G
m
e
d
b
r
u
g
s
-
o
g
f
y
r
i
n
g
s
a
n
v
i
s
n
i
n
g
I
n
d
h
o
l
d
:
G
e
n
e
r
e
l
l
e
r
å
d
o
g
a
n
v
i
s
n
i
n
g
e
r
.
.
.
.
.
.
.
.
.
.
2
-
3
R
e
kla
m
a
t
i
o
n
s
r
e
t
T
y
p
e
-
o
g
m
il
j
ø
g
o
d
k
e
n
de
l
s
e
U
d
p
a
k
n
i
n
g
T
i
l
b
e
h
ø
r
t
i
l
d
i
n
p
e
j
s
M
o
n
t
e
r
i
n
g
a
f
k
a
k
l
e
r
o
g
f
e
d
t
s
t
e
n
K
v
a
l
i
t
e
t
s
k
o
n
t
r
o
l
A
nm
e
l
d
e
l
s
e
s
p
l
i
g
t
S
k
o
r
s
t
e
n
s
t
j
e
k
S
k
o
r
s
t
e
n
s
l
ø
s
n
i
n
g
e
r
B
æ
r
e
n
d
e
u
n
d
e
r
l
a
g
Br
æ
n
d
b
a
r
e
l
l
e
r
i
k
k
e
b
r
æ
n
d
b
a
r
v
æ
g
G
u
l
v
p
la
d
e
V
a
r
m
e
f
o
r
d
e
l
i
n
g
S
e
l
v
l
u
k
k
e
n
d
e
l
å
g
e
J
u
s
t
e
r
s
k
r
u
e
T
y
p
e
s
k
i
l
t
P
r
o
d
u
k
t
i
o
n
s
n
r
.
S
er
v
i
c
e
p
a
k
k
e
M
o
n
t
e
r
i
n
g
s
v
e
j
l
e
d
n
i
n
g
.
.
.
.
.
.
.
.
.
.
.
.
.
.
.
.
.
4
-
7
T
i
l
s
l
u
t
n
i
n
g
t
i
l
e
k
s
i
s
t
e
r
e
n
d
e
/
m
u
r
e
t
s
k
o
r
s
t
e
n
T
i
l
s
l
u
t
n
i
n
g
t
o
p
a
f
g
a
n
g
ti
ls
t
å
l
s
ko
r
s
t
e
n
F
o
r
b
r
æ
n
d
i
n
g
s
l
u
f
t
u
d
e
f
r
a
B
r
u
g
s
-
o
g
f
y
r
i
n
g
s
a
n
v
i
s
n
i
n
g
.
.
.
.
.
.
.
.
.
.
.
8
-
1
0
V
e
d
l
i
g
e
h
ol
d
e
l
s
e
a
f
p
e
j
s
e
o
v
n
e
n
H
å
n
d
t
e
r
i
n
g
a
f
b
r
æ
n
d
s
e
l
O
p
t
æ
n
d
i
n
go
g
f
y
r
i
n
g
F
e
j
l
s
ø
g
n
i
n
g
.
.
.
.
.
.
.
.
.
.
.
.
.
.
.
.
.
.
.
.
.
.
.
.
1
1
T
i
l
d
e
n
n
e
m
o
n
t
e
r
i
n
g
s
v
e
j
l
e
dn
i
n
g
h
ø
r
e
r
o
g
s
å
e
n
s
e
p
a
r
a
t
b
r
u
g
s
a
n
v
i
s
n
in
g
f
o
r
d
e
n
e
n
k
e
l
t
e
p
e
j
s
.
U
d
g
a
v
e
0
2
/
0
3
-
D
K
Til
d
e
n
n
e
m
o
n
te
ri
n
g
s
v
e
jl
e
d
n
i
n
g
h
ø
re
r
o
g
s
å
e
n
s
e
p
a
ra
t
br
u
g
s
a
n
v
i
s
n
in
g
f
o
r
den
e
n
k
e
l
te p
e
j
s
.
U
d
g
a
v
e
0
2
/
0
3
-
D
K
Typegodkendelse
DS 887
Page 2

GENERAL ADVICE AND INSTRUCTIONS
We welcome you to the Scan family
You have chosen a product from one of Europe’s leading
manufacturers of wood-burning stoves. We are convinced that
your stove will be to your full satisfaction and give you many
hours of pleasure if you follow the advice and instructions of
this manual.
We ask you please to read this manual as well as the
instructions for your specific model before beginning the
installation.
Warranty conditions for Scan wood-burning products
All Scan wood-burning stoves and inserts are made of firstclass material and are subject to a strict quality control before
they leave the factory. However, if an error should occur, we
back all Scan wood-burning stoves and inserts with an extensive, five-year limited warranty.
The warranty covers all parts that may require replacement
from a failure that is considered, in the judgment of Scan A/S,
to be a defect in material or workmanship.
This warranty is given to the first retail purchaser only (other
than for the purposes of resale) and is not transferable. This
warranty does not cover damage resulting from other than
defects in material or workmanship.
Specifically this warranty does not cover:
• Wearing parts such as firebricks, ceramic smoke deflector, shaking grate, glass panes, tiles, and gaskets (other
than damages that are visible at the time of delivery).
• Defects caused by outer chemical and physical actions
during transport, in stock, during the installation, or
later.
• Sooting caused by a bad chimney draught, humid wood,
or wrong service.
• Costs caused by extra heating in connection with
repair.
• Transport costs.
• Costs in connection with dismounting and mounting of
the unit.
The warranty is invalid:
• If the installation or service is performed by someone
other than an authorised installer, or if the installation
is not in conformity with installation instructions and/or
local fire and building regulations.
• With the misuse of the stove and use of disallowed
fuel or non-original spare parts (see Instructions for
Installation).
• If the serial number has been removed or defaced.
• If service for defects covered under this warranty is
performed by other than an authorised Scan dealer or
contrary to Scan A/S instructions.
• At any change in the original condition of the Scan product or its accessories.
This warranty applies only to Scan stoves or inserts sold in
the country in which it was originally delivered and only on
presentation of the invoice from an authorised Scan dealer.
The date of delivery must appear on the invoice.
Settlement of the complaint
The settlement of the complaint is done by the responsible
dealer. You should only use original spare parts or parts recommended by the manufacturer.
Approvals
Most Scan stoves are tested and approved according to the
world's strictest standards concerning environment and combustion, among others DIN 18891 and EN 13240.
Before the installation
Before beginning the installation of your stove, contact your
local authorities to obtain the existing fire and building regulations regarding the installation of wood-burning stoves, or
ask your local experts in that field, e.g. the chimney sweep,
to install your stove.
We recommend that you do not remove the plastic bag until
the installation has been completed.
Please note that all stoves with counterweights must stand
100% vertically in order not to damage the door.
Accessories
A number of practical accessories are available for your
wood-burning stove. For instance, there are base plates
in steel or glass, shaped base plates made especially for
the individual stove models, glazed tiles of many different
colours, soap-stones, companion sets, baking doors, wood
carriers, etc. Contact your authorised dealer in order to know
the exact accessories available for your stove model.
Mounting of tiles and soapstones
If your stove is equipped with lateral tiles or soapstones,
the special mounting instructions for these are delivered to-
gether with the tiles/soapstones.
2
Page 3

Quality control
All products have undergone a thorough quality control
ensuring that they are in accordance with all specifications.
Inspection
We recommend that you have your chimney inspected by
the chimney sweep before you start installing the stove. He
can also advise you concerning a possible renovation of your
chimney.
Connection to the chimney
Sometimes it might be necessary to obtain permission to
connect your stove to the chimney if other stoves are already connected. The stove should not be connected to a
chimney of which the inside diameter is smaller than that of
the flue collar. The flue pipes must be at least 2 mm thick,
and we recommend the installation of a damper.
From the factory the stove is prepared for top-mounting of
the flue collar, but most Scan stoves have an optional smoke
outlet, wherefore the smoke collar can be fitted either on the
top or at the rear as required.
You will find a description of the connection on pages 4-6 in
this manual.
Bearing foundation
All of our stoves are considered as light fireplaces, and it is
normally not necessary to reinforce the foundation.
Security distances
The Scan stoves are double-skinned convection stoves
which means that the temperature at the rear of the stove
is reduced. This makes it possible to place your stove next
to non-combustible materials without any distance needed.
However, we recommend that you leave enough space in
order to facilitate cleaning at the rear of the stove.
If the stove is to be placed at a wall of combustible material, we recommend a minimum security distance of 20 cm.
However, you should always consult your local rules.
You can see the recommended security distances for your
stove model in the Specific Installation Instructions deliv-
ered with your stove.
Requirements of flooring
The stove is to be placed on a noncombustible surface, e.g.,
an original Scan base plate, floor tiles, or the like. We recommend that the base plate extends at least 150 mm from
the sides and at least 500 mm from the front of the stove
to prevent any sparks from ruining your carpet or floor. The
floor plate will also ease the daily cleaning and maintenance
of the stove.
For some models, there is a shaped floor plate specific to the
individual model that is placed in front of the stove. See the
Specific Installation Instructions.
Distribution of the heat
All Scan stoves (except Scan 4) are double-skinned convection stoves. This means that the air circulates around the
combustion chamber, where it is warmed up and then introduced into the room as comfortable heat.
Self-closing doors
Most Scan stoves are delivered with a self-closing device on
the doors. In order to activate this function, see the Specific
Installation Instructions delivered with the stove.
Adjustment screws
Most Scan stoves are equipped with two adjustment screws
on the bottom that can be used for levelling the stove. This is
particularly important for stoves with lifting doors and counter weights.
Number plate
All Scan stoves are equipped with a number plate. We ask
you please always to indicate this number in case of questions.
Service bag
In the Scan stove you will find the following:
• Flue collar with fittings
• Plastic coverings for the transport holes in the wood
compartment
• Various screws and hexagon spanners
• Fire lighters for the first lighting
• One oven mitten
• 2 manuals (general and specific)
3
Number plate
GENERAL ADVICE AND INSTRUCTIONS
Page 4
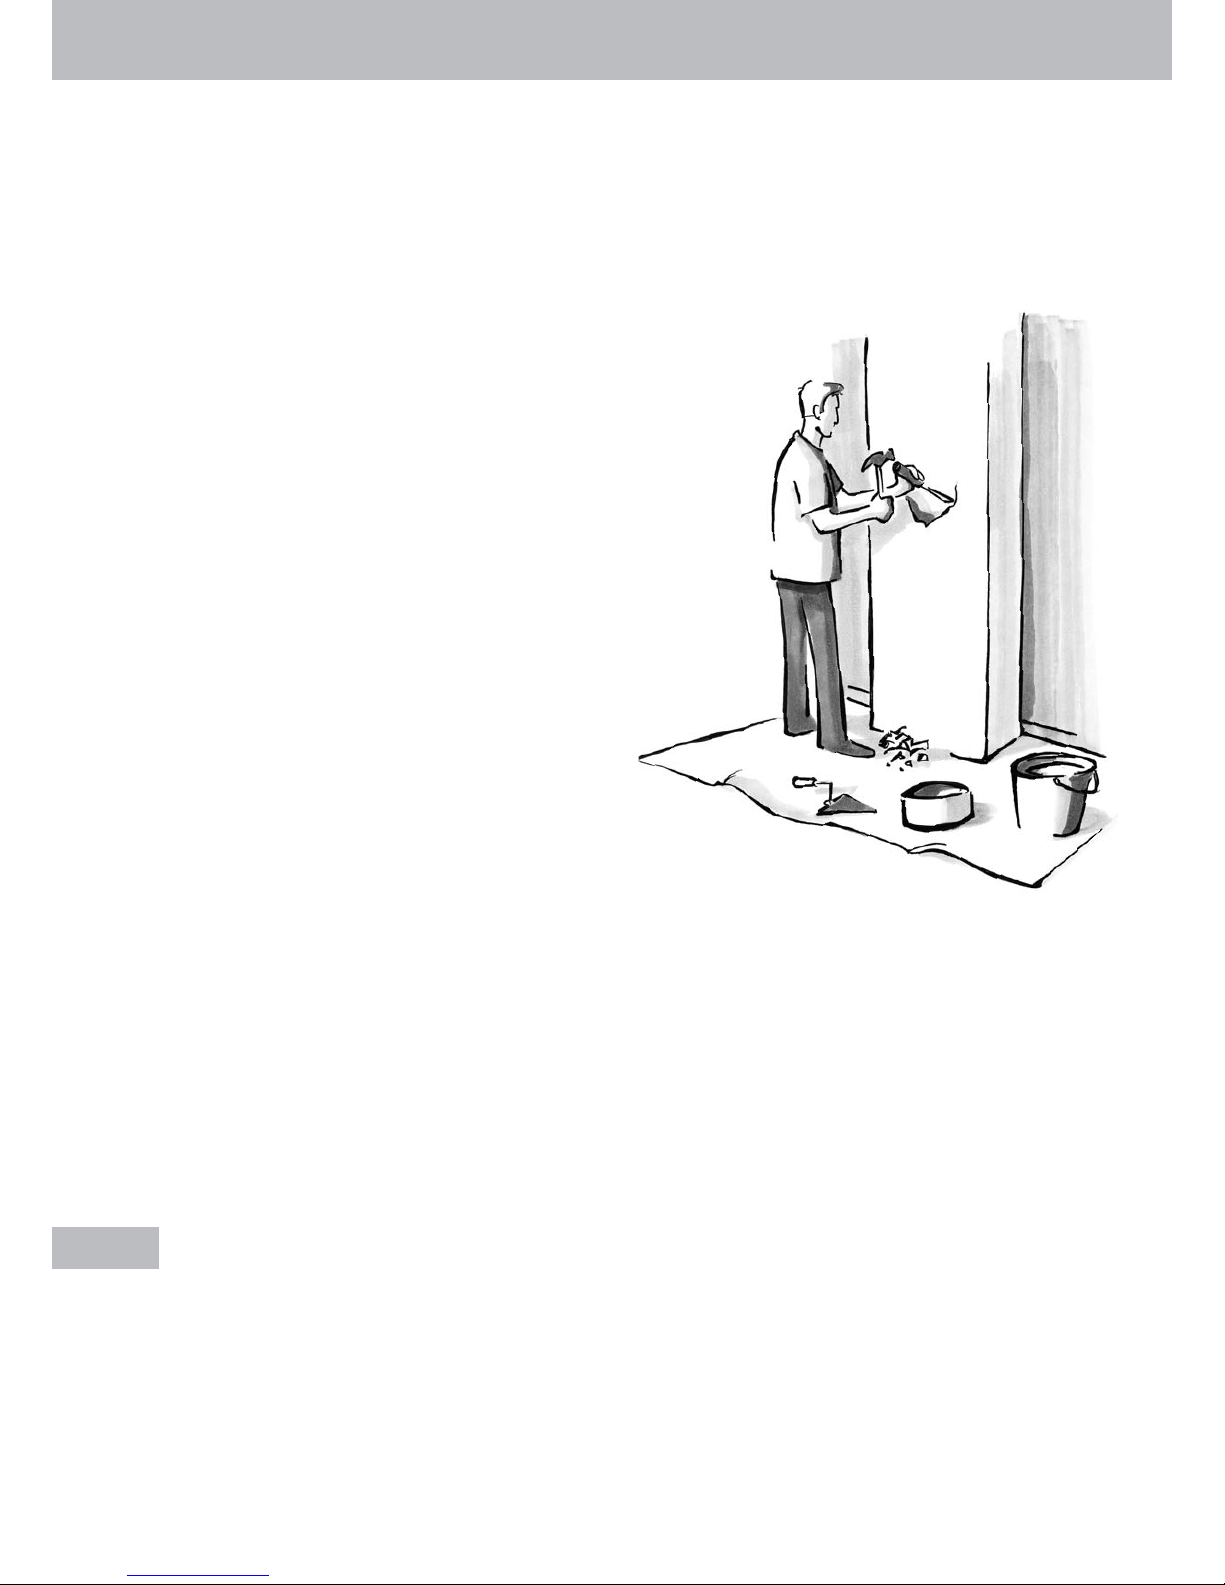
MOUNTING INSTRUCTIONS
4
Before starting the installation, it is important that you
have your chimney inspected by the chimney sweep. This
ensures that the chimney is dense and has the appropriate
diameter for your stove.
Proceed as follows:
1. Mark out the point where the centre of the pipe touches
the wall and cut out a hole of the same diameter as
the pipe. The distance from the floor to the centre of
the stove's flue outlet appears from the drawing in the
specific instructions for your stove. If the stove is to
be connected on the top with an elbow, please do not
forget to take the height of the elbow into account when
measuring out the position of the hole. You should also
remember to take the thickness of a possible base plate
into consideration.
2. We recommend that you build a wall sleeve into the wall.
The elbow is to be fitted onto the stove's collar, and the
clean-out door of the elbow is to be positioned on the
vertical section of the elbow. The elbow has to fit completely into the wall sleeve (but not into the chimney!).
We recommend that you check that the distance from
the floor to the wall sleeve is correct before the masonry
has dried completely.
3. When the masonry is dry, you can continue the installation. Important! If you wish to mount a cover ring
to cover the passage between the pipe and the wall,
you have to do this now, before you connect the stove.
Mount the pipe on the flue collar of the stove. Push the
stove with the pipe towards the wall so that the pipe
goes into the wall sleeve. The pipe must never penetrate
into the chimney. If the pipe is too long, you can shorten
it. If you want, you can put a thin, ceramic packing cord
around it at the wall sleeve.
4. Mount the cover ring - if any - on the wall.
5. The installation is ready for approval by the chimney
sweep.
Connection to an existing brick-built chimney
Page 5

5
Preparation of the stove for
rear discharge to a brick-built
chimney
Scan 60 and 61: we refer to the specific instructions for
these stoves.
1. Remove the cover
plate on the rear of the
stove.
3. Remove the inner cover
plate (cooking ring) with the
hexagon spanner. The cooking ring is to be put in the top
outlet (for models with a double-steel top plate, you must
first mount an intermediary
ring). Remove the ceramic
gasket from the cooking ring
and place it in the top outlet
without fixing it).
4. Fit the flue collar from
the outside into the discharge hole of the combustion chamber in such
a way that the bracket
is located on the inside.
Tighten the screws.
Scan 4 and Scan
ANDERSEN stoves are
equipped with a heat
shield at the rear (Fig.
2). The rear outlet is
punched in the plates.
Remove the two punched
plates and continue on
fig. 1, ill. 3-4.
You can also connect your stove with a top outlet and a 90degree elbow into the chimney.
The stove is prepared in the same way as a direct connection to a steel chimney (see page 6).
2. Cut free the inner
plate with a pair of nippers
Fig. 1 (1-4)
Fig. 2
Fig. 3
MOUNTING INSTRUCTIONS
Top outlet and elbow
Page 6

MOUNTING INSTRUCTIONS
6
If the steel chimney is installed directly on top of the stove,
we recommend the use of a connection piece/adaptor fitting
into the inside of the stove's flue collar to lead condensation
and rain into the stove, instead of on the top plate. A wrong
choice of length or dimension of the chimney can cause a
malfunctioning of the stove.
The diameter of the flue collar appears from the specific
instructions delivered with your stove.
Mounting of the flue collar with intermediate
ring (fig. 4).
Mount the flue collar with the intermediate ring in the flue
outlet of the stove using the special angle-fittings and long
screws in the service bag. At the same time, you can mount
the safety fitting in order to prevent the chimney sweep's
tools from destroying the ceramic smoke deflector.
Mounting of the flue collar without intermediate ring (fig. 5).
Mount the flue collar in the flue outlet of the stove using the
special angle-fittings and short screws in the service bag.
At the same time, you can mount the safety fitting in order
to prevent the chimney sweep's tools from destroying the
ceramic smoke deflector.
Mounting of the flue collar with safety fitting
(fig. 6).
Mount the flue collar in the flue outlet of the stove using the
special transversal fitting in the service bag. The safety fitting's function is to prevent the chimney sweep's tools from
destroying the ceramic smoke deflector.
Scan 60 and Scan 61:
We refer to the specific instructions for these stoves.
Read carefully the instructions from the chimney manufacturer before beginning the mounting.
Fig. 4 Fig. 5
Fig. 6
Top discharge with direct connection to steel chimney
Page 7

7
During the combustion, oxygen taken from the room air is
used. In order to get sufficient air supply for the combustion,
leave the windows half-open in well-insulated rooms or have
a fresh-air intake installed. It is very important that the air
is introduced in the room where the stove is installed. This
can be done in various ways. For instance, you can mount a
damper in the external wall as close to the stove as possible.
The damper must be so constructed that it can be closed
when not in use.
Most of the Scan stoves are prepared for an indirect external
air supply. The cover plate at the rear of the stove is to be
removed and replaced by the connection branch with damper
(Ø 100 mm - special accessory) that is mounted by means
of the self-tapping screws. Thereafter you can connect it with
a flexible tube.
Several Scan stoves are also available with a special air container (accessory) that takes the external air and introduces it
directly into the combustion chamber. On certain models, this
container can be mounted afterwards.
The air channel must have a diameter of at least Ø 100 mm
and must be insulated for condensation reasons.
Direct air supply from the
bottom of the stove through
a concrete floor. Only possible on certain models and
not to be mounted afterwards.
Direct air supply from the
rear of the stove through
an external wall. Can be
mounted afterwards on certain models.
The connecting piece/
damper for fresh-air intake
from the back of the stove is
mounted as shown above.
Indirect air supply from the
rear of the stove through an
external wall (by means of a
flexible tube).
Indirect air supply to the
room through a damper in
the external wall.
On certain models, this container can be mounted afterwards if you need a direct external air supply into the combustion chamber.
Direct air supply to the combustion chamber
Mounting of the connecting
piece/damper for fresh-air intake
Indirect air supply
Container for external air directly into the combustion chamber
Direct air supply from the
bottom of the stove through
a cellar. Only possible on
certain models and not to
be mounted afterwards.
Max. length ca. 3 m.
External fresh-air supply
MOUNTING INSTRUCTIONS
Page 8

DIRECTIONS FOR USE AND STOKING
8
Lacquered surfaces
The stove is cleaned with a moist cloth. Spray lacquer is
available for repair of possible damages/scratches. Your
dealer has the right spray in the right colour. As there may
be minor colour differences, it is recommended to repair
larger areas with natural borders. You will get the best result
if the stove is repaired while it is hand-warm (remember to
ensure good ventilation during repair). A possible change of
colour to grey is caused by over-firing, i.e. you have used
more wood than recommended (see specific instructions for
your model).
Glazed tiles
We recommend that you always use a dry cloth when cleaning the tiles as moistness worsens the existence of cracks.
Tiles are a natural material, and in time small cracks may
occur which is perfectly normal.
Soapstone
The soapstones are cleaned with fine sandpaper or a dry
sponge.
Firebricks
Little cracks may arise in the firebricks because of a minor
content of water, especially if the stove is overheated during
the first firing. These cracks do not influence the efficiency
of the stove and are not covered by the warranty. However,
if the bricks begin to crumble and fall out of the stove, they
must be changed. Firebricks are wearing parts and are not
included in the warranty conditions.
Gold or chrome doors
Always use a moist cloth or glass cleaner to clean your gold
or chrome door. Please note that you must NEVER use
metal cleaner. If you exceed the maximum amount of fuel
previously specified, the colour of the gold- or chromium
doors may change a little.
Cleaning of glass
Our stoves are constructed so that the glass is kept optimally
clean from soot. However, by burning wet wood or lighting
with closed dampers, the doors may become sooty. The
glass is easily cleaned by use of a special cleaning fluid
available at your dealer. Or you may wipe the glass as follows: Dip a moist cloth or old newspaper in the ashes and
use this to clean the glass. Important! The ashes should not
get into contact with your skin! Wipe with a dry cloth. The
ceramic door joint must not get wet.
For models with lifting door, please refer to the Specific
Instructions for your model.
Ceramic packing cord
All Scan stoves are equipped with ceramic packing cord to
ensure the tightness of the doors and the glasses. This packing cord is a wearing part and must be changed from time to
time. Please consult your authorised dealer in this case.
Ceramic smoke deflector
We recommend that you treat the ceramic smoke deflector
(Skamol) with caution as it is a delicate material (not included
in the warranty). It is extremely heat-resistant. See also the
specific instructions for your stove model.
Baking-compartment tiles
Never place pastry or the like directly on the baking compartment tiles. These are too hot, and the liquid/fat will be
absorbed by the tiles and thus cause nasty marks.
Some models are equipped with a valve in the baking compartment. This valve can be opened when you use the compartment as a baking oven in order to remove the steam.
Maintenance of the stove
Page 9

9
Preparation
You obtain the best fuel if you cut down, saw, and chop
the wood before the 1st May (Northern hemisphere). Do
not forget to adapt the length of the logs to the combustion
chamber of your stove. We recommend a diameter of 6 - 10
cm and a length that is approximately 6 cm shorter than the
combustion chamber in order to give space for the air circulation. If the diameter is larger, you should chop it. Chopped
wood dries better.
Storage
The correct storage of the wood is one of the main conditions
of an environment-conscious combustion. Only then are you
guaranteed optimal combustion values, and that the environment is not unnecessarily polluted.
* The wood should be stored in an airy, sunny, and dry
place (ideal: south side).
* There should be about a hand's breadth distance between
each layer.
* Poplar and spruce should be stored at least one year be-
fore being used as fuel.
* Lime, alder, and birch should be stored at least 1½ years
before being used as fuel.
* Beech, ash, and fruit tree should be stored at least two
years before being used as fuel.
It is a good idea to keep the wood at room temperature several days before use as the wood absorbs humidity from the
air in the autumn and in the winter.
Humidity
In order to avoid environmental problems and to obtain a
better heat economy, you should only use dry wood (max.
21% humidity). You will get the best efficiency at a humidity
of 15 to 18%. A simple way to determine the humidity of the
wood is to clack the ends of the logs against each other - if
the sound is dull, the wood is dry.
If you use wood that is too humid, a large part of the heat
is used for evaporating the water. As a consequence, the
temperature of the stove does not rise, and the room is not
heated sufficiently. This is, of course, inefficient and you
risk soot on the glass, in the stove, and in the chimney.
Furthermore, the environment is polluted.
It is absolutely prohibited to fire with
painted or chemically treated wood, or driftwood from the
sea. Nor should you fire with plastic or prepared paper, as
the content of this is bad for the environment, for your stove,
and for your chimney. In short - you should only fire with
wood.
Your stove is not constructed for the use of coal. However, it
is possible to use lignite briquettes if you use a special coal
insert of cast iron (accessory).
The thermal value of wood
The thermal value of wood differs from one type of wood
to another. This means that you must use more wood of
some types than of others in order to obtain the same heat
quantity. In our firing instructions we use beech, which has a
very high thermal value, as a starting point. If you use beech
or oak, you should keep in mind that they have a higher
thermal value than other types of wood, so you should use
a smaller quantity. Otherwise, you risk damaging your stove.
See table below.
Handling of wood
DIRECTIONS FOR USE AND STOKING
Type of wood
Dry wood, kg/m
3
Compared to beech
Hornbeam
640 110%
Beech/oak
580 100%
Ash
570 98%
Maple
570 93%
Birch
510 88%
Mountain pine
480
83%
Spruce
390 67%
Poplar
380 65%
Page 10

DIRECTIONS FOR USE AND STOKING
10
Please refer to the specific installation instructions concerning the recommended quantities of wood and the
position of the regulation handles on your stove.
First, some information about the different regulation possibilities of your stove.
Primary air
The primary air is used when lighting the stove and in order
to get the stove going when refuelling. The primary air should
always be closed when the stove is functioning continuously.
The handle is often placed on the ashtray, but it can also be
located on the stove itself.
Choke
Some models are equipped with an ashtray with a separate
choke. As long as the choke is kept open, you supply the
stove with supplementary air. When you let go of the choke,
the air is automatically closed.
Combustion air
The combustion air is preheated in canals around the combustion chamber, from where it is led in front of the glass
and then into the fire. Apart from providing oxygen to the
combustion, the combustion air contributes to keeping the
glass clean. If you close the combustion air too much, the
risk of getting sooty glass is increased. You can regulate the
desired heat quantity with the combustion air.
CB-technique (Clean-Burn)
Stoves equipped with a Clean-Burn technique have a separate canal that leads extra combustion air (tertiary air) into
the combustion chamber. This air is introduced in the combustion chamber through the small holes in the stainlesssteel rail right beneath the ceramic smoke deflector.
Ceramic smoke deflectors
There can be one or more ceramic smoke deflectors that are
placed in the upper part of the combustion chamber. Their
function is to lower the temperature of the smoke before it
goes up into the chimney, so the stove gives off more heat.
After the chimney has been swept, you should remove or
rock the ceramic smoke deflector(s) in order to remove the
resulting soot (see the specific instructions delivered with
your model). We recommend that you treat the ceramic
smoke deflector with caution. They are made of a porous
material (Skamol) and are not included in the warranty (they
are, however, extremely heat-resistant!).
The first lighting
For lighting use pieces of crumbled paper (newspaper) and/
or fire lighters, which are placed on the grate in the bottom
of the combustion chamber. Never use alcohol or other
flammable liquids!
Put 2-3 small bags of fire lighters in the bottom of the combustion chamber. Then place about two kgs wood (small
pieces) on top of the fire lighters. Open the primary and the
secondary air 100%. Light the fire lighters and leave the
door ajar the first 10-15 minutes. By doing this, the glass
is preheated and you avoid soot building on the glass. You
can also open the shaking grate or the ashtray 1-2 cm if you
need supplementary air. However, the primary air and the
shaking grate must always be closed when firing continuously. When the layer of embers is well developed, the stove
is ready for the first portion of wood.
Please note that the paint will harden the first time the stove
is used. This will result in a burned smell, which disappears
when the room is thoroughly aired.
Continuous firing
It is important to obtain a high temperature as fast as possible in the combustion chamber. Thereby the stove and
the fuel are exploited in the best possible way, and you will
get a clean combustion. You will also avoid a sooting of the
firebricks and the glass. When the stove is in use, the smoke
should only be faintly visible as a movement in the air.
After about 10-15 minutes, when you have a well-developed layer of embers, the stove is ready for the first portion
of wood. Use the amount of fuel specified in the specific
instructions delivered with your stove. Do not pack the wood
too closely - this is important in order to obtain an optimal
airflow in the combustion material.
Note! It is very important that the wood is lit quickly. Do
not close the door before this. You can use the primary
air or the choke in order to light the wood rapidly. If the
stove burns without flames, you may risk - in the worst
case - a lighting of the flue gases, which can ruin your
stove.
When you refuel, you should open the door cautiously in
order to avoid letting smoke out of the door. Never refuel
while the stove is burning well.
Lighting and stoking
Page 11

DIRECTIONS FOR USE AND STOKING
11
Cleaning
Be careful when you remove ash from the stove. There may
be embers left as long as 24 hours after the stove was last
used. The ash may, when it is cold, be placed in a garbage
bag
Chimney draught
The chimney draught depends on the weather conditions.
In stormy weather, you may reduce the chimney draught by
closing the damper in the smoke pipe (if a damper has been
installed). If the chimney draught is strong, the combustion
air supply must be reduced additionally.
Stoking during spring time and autumn
At outdoor temperatures of more than 15°C, the stove may
be under-fired, and a so-called "cold" combustion will take
place. The result will be an increasing formation of soot in the
smoke ducts of the stove, in the chimney connector, and in
the chimney. To avoid the soot buildup, we recommend that
you clean the smoke ducts more frequently and increase the
supply of combustion air. Small pieces of wood should be
used, and fuel should be added more frequently.
General advice for your safety
A wood-burning stove has an intermittent burning.
Please be careful! The stove and in particular the exterior surfaces get hot when in use!
Chimney fire
In case of a chimney fire, close the door, the ash tray, and all
air valves on the stove. If necessary, call the fire service.
Open fireplace
If the stove is used as an open fireplace with open doors, you
must use a spark guard of wire mesh or glass. If you leave
the room in which the stove is installed, remember to close
the doors of the stove.
Burning with open doors reduces the efficiency.
Page 12

Scan A/S - DK-5492 Vissenbjerg
Smoke
• Is the wood dry?
• Insufficient chimney draught.
• Check if the chimney has the right dimension.
• Check if the smoke pipe or chimney is blocked.
• Check if the chimney has the right height compared to the
surroundings.
• By rear outlet, check that the tube does not enter into the
chimney.
• Is there an under-pressure in the house?
The wood burns too fast
• Are the air valves adjusted correctly according to the
instructions?
• Is the smoke-deflector plate placed correctly?
• Bad fuel (see "Handling of wood").
Sooted glass
• Is the combustion air valve adjusted according to the
instructions?
• Is the wood dry?
• The door is closed too fast when refuelling.
• The logs are too large.
Polluted chimney
• Incorrect combustion (add more air).
• Is the wood dry?
The shaking grate is stuck
• Check if a piece of wood, a pin, or the like is stuck.
• Is the bar placed/mounted correctly?
The stove's surface turns grey
• Overheating - please refer to the firing instructions.
The stove does not heat
• Use of moist wood. The energy is used to dry the wood.
• Too small quantity of wood.
• Bad wood with a low thermal value.
• The smoke-deflector plate is placed incorrectly.
The stove smells
• The paint will harden the first time the stove is used. This
will result in a burned smell, which disappears when the
room is thoroughly aired.
TROUBLESHOOTING
 Loading...