


User Guide
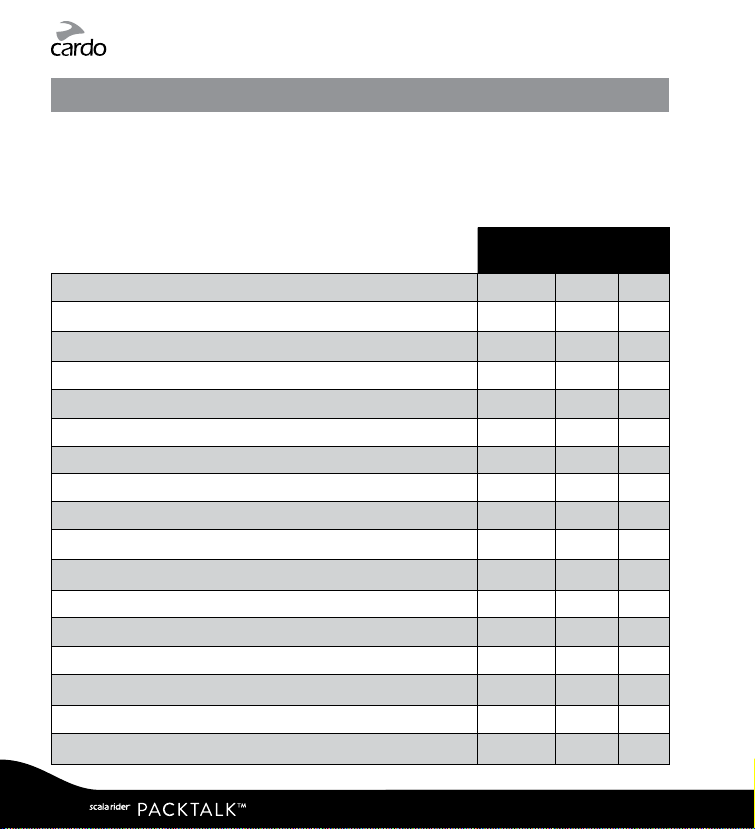
CONTENTS
1. INTRODUCTION. . . . . . . . . . . . . . . . . . . . . . . . . . . . . . . . . . . . . . . . . . . . . . . . . . . . . . . . . . . . . . . . . . . .3
2. CHARGING THE BATTERY ..........................................................5
3. CUSTOMIZATION AND SETTINGS .................................................6
3.1 CARDO COMMUNITY WEB PLATFORM .................................................. 7
3.2 CARDO SMARTSET APP* .................................................................7
3.3 MENU NAVIGATION ......................................................................7
4. GETTING STARTED ................................................................9
4.1 GENERAL FUNCTIONS ...................................................................9
4.2 S TATUS LI G HTS. . . . . . . . . . . . . . . . . . . . . . . . . . . . . . . . . . . . . . . . . . . . . . . . . . . . . . . . . . . . . . . . . . . . . . . . . . . 9
4.3 PARALLEL AUDIO STREAMING AND AUDIO SOURCE PRIORITIES .....................10
4.4 VOICE COMMANDS .....................................................................10
4.5 VOICE CONNECT VOX .................................................................12
5. INTERCOM ...................................................................... 13
5.1 DMC INTERCOM MODE .................................................................14
5.2 BLUETOOTH INTERCOM MODE .........................................................17
5.3 BUSY SIGNAL ...........................................................................24
5.4 RECEIVING INTERCOM CALLS ..........................................................24
6. USING A MOBILE PHONE, GPS OR MP3 PLAYER ................................. 25
6.1 PAIRING BLUE TOOTH CHANNELS 1 AND 2 .............................................25
6.2 MAKING AND RECEIVING PHONE CALLS ..............................................26
6.3 LISTENING TO MUSIC VIA A2DP ........................................................27
6.4 MUSIC SHARING ........................................................................27
7. FM RADIO ........................................................................ 28
7.1 RADIO TUNING ..........................................................................28
7.2 AUTOMATIC RADIO TUNING ............................................................29
8. TROUBLESHOOTING ............................................................ 29
9. SUPPOR T . . . . . . . . . . . . . . . . . . . . . . . . . . . . . . . . . . . . . . . . . . . . . . . . . . . . . . . . . . . . . . . . . . . . . . . . 29
IMPORTANT:
This is versi on 2.0 of the User Manual, for PACKTALK sof tware versio n 2.0 or later.
Please note, th at the manual is periodi cally updated on the C ardo website to include t he latest features
and func tions. Check if you r manual is the most updat ed at cardosystems.com/product-manuals .
|
1
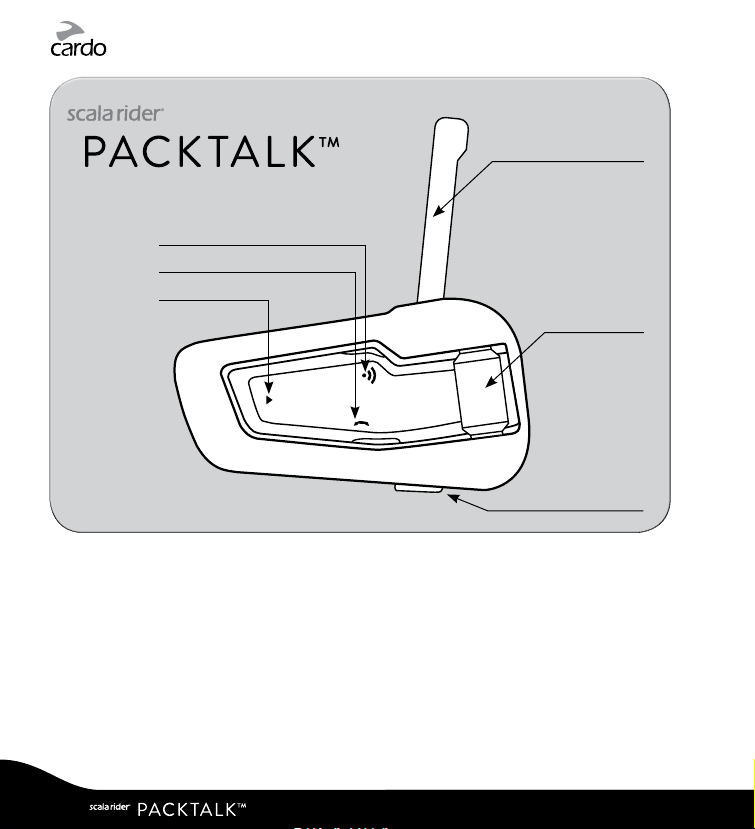
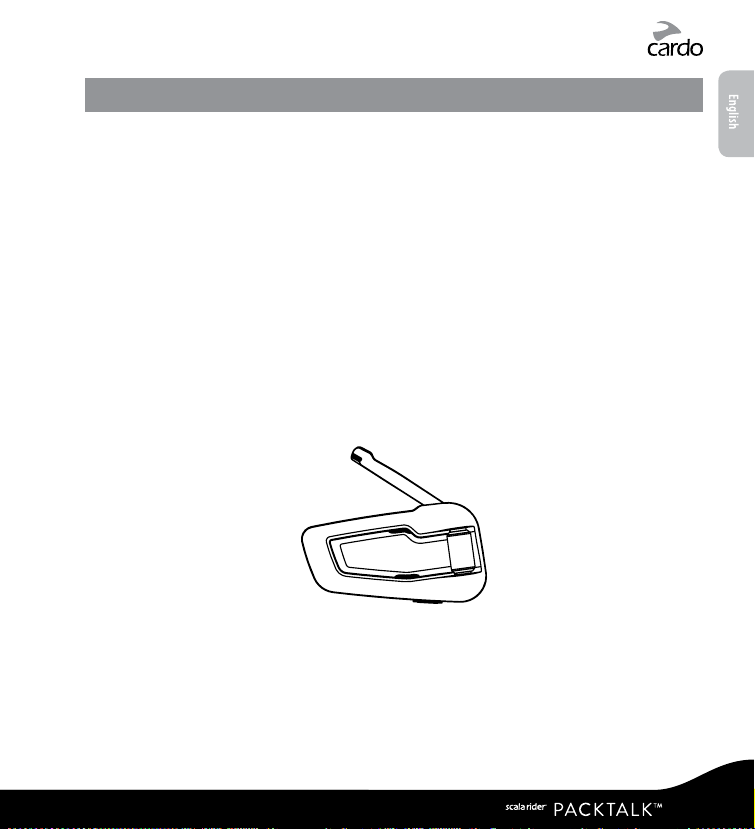
Intercom
Mobile
Audio
Flip-up Antenna
Roller-Wheel
Z
USB
scala rider PACKTALK button layout
2
|
1. INTRODUCTION
Thank you for choosing the scala rider PACKTALK™ communication and entertainment
system for motorcycle helmets.
If you have purchased the PACKTALK DUO, your retail box contains t wo factory-paired units.
The scala rider PACKTALK oers the following key features:
INTERCOM OPTIONS
Dual DMC™ (Dynamic Meshwork Communication) and Bluetooth® intercom technologies
on board – with a range of up to 1 mile / 1.6 km* bike-to-bike in full duplex.
DMC Intercom Mode:
• For groups of up to 15 riders over a dynamic auto-adaptive network
• Seamless group communication - each rider connects independently
• Up to 5 miles / 8 km extended intercom range with more than 4 riders
• DMC Bridge allows passenger with Bluetooth intercom device or outside mobile caller
to join a PACKTALK conversation
Bluetooth Intercom Mode:
•“1+8” Toggling with 8 additional buddies
• Conference - Between 2, 3 or 4 riders using Channels “A” and “B”
• Click-to-Link®: For spontaneous connection with other CTL-enabled riders nearby
MULTIPLE DEVICE CONNECTIVITY
Dual headset prole to connect 2 devices simultaneously for use with:
• Mobile phones (require Bluetooth connection)
• GPS navigation systems (require Bluetooth connection)
• MP3 players (wireless via A2DP / AVRCP)
ENTERTAINMENT OPTIONS
• Audio streaming via devices supporting Bluetooth Stereo A2DP and AVRCP proles
• Music Sharing: Rider and Passenger can enjoy the same stereo music (via A2DP)
• Built-in FM Radio with 6 station presets and automatic tuning
|
3

CARDO COMMUNITY®and CARDO SMARTSET APP
• Download the latest software upgrades and get new features
• Use your smartphone as a Remote Control on the handlebar
• Easily add and remove paired devices
• Customize your settings
ADVANCED TECHNOLOGY
➤ Voice Commands for safe and hands-free operation of key functions
➤ AGC and VOX technologies to automatically adjust speaker volume and microphone
sensitivity according to ambient noise and riding speed (Customizable and Pat.
Pending)
➤ Spoken status announcements (multi-lingual)
➤ Volume Per Mode: Volume is set and saved at dierent levels for each audio source
We wish you a great experience with your scala rider PACKTALK and encourage you
to write us at support@cardosystems.com with any questions, suggestions or
comments you may have.
* Under tough environmental conditions (dense forest, narrow buildings, heavy trac), intercom range
will be reduced. Once conditions improve, the range will increase again.
4
|
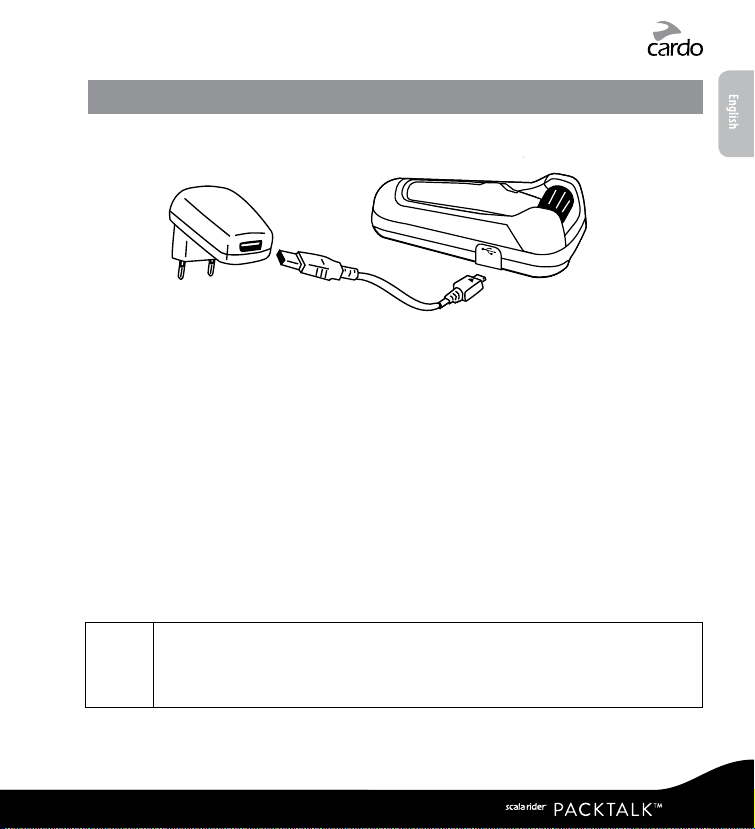
2. CHARGING THE BATTERY
Make sure that the battery is fully charged for at least 4 hours before initial use.
Charging with the wall charger is faster than via a computer USB port.
• RED LED ON – Charging
• RED LED OFF – Charging complete.
Cardo SmartSet App users can nd a battery indicator in the bottom right-hand corner of
the App.
The scala rider PACKTALK is waterproof and dustproof. However, when in use,
w
the USB silicone cover should be kept tightly closed to prevent moisture from
entering the unit.
|
5
3. CUSTOMIZATION AND SETTINGS
Get the most out of your scala rider by changing the settings and customizing your
unit according to your own personal preferences.
There are three ways to change the settings: via the Cardo Community on a PC / Mac*,
the Cardo SmartSet App or from the Menus on your device.
Create, join or leave a pack of riders
Set your Buddy name for 1+8 Intercom
Add friends to your Buddy list
Download the latest rmware upgrade
Set the 6 FM radio presets
Hot-Dial number
Intercom-to-Phone (Enable/Disable)
RDS (Enable/Disable)
Audio priority (A2DP/Intercom)
Parallel Audio Streaming settings (Enable/Disable)
Intercom Mode (DMC/Bluetooth)
Voice Recognition language
Spoken Status Announcements (Enable/Disable)
AGC sensitivity for the speakers (O/Low/Medium/High)
VOX Operation Mode (Voice Command/Call Intercom)
VOX sensitivity for the microphone (O/Low/Medium/High)
Click-to-Link settings (Enable/Disable)
Cardo
Community
SmartSet
App
Menu
6
|
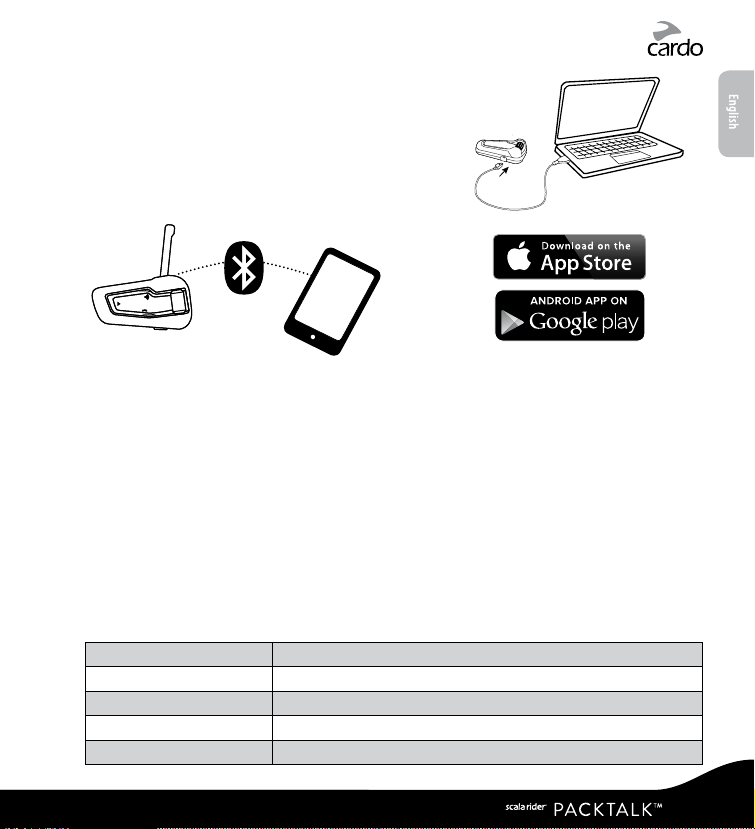
3.1 CARDO COMMUNITY WEB PLATFORM
Visit http://community.cardosystems.com
Minimum Requirements: Windows® XP™ / Mac OS X 10.7
3.2 CARDO SMARTSET APP*
Cardo
SmartSet
App
In the App, you can also:
• Add / Remove Intercom pairings
• Make Phone / Intercom calls
• Control your music
• Find / Change radio stations
• Set volume levels for each audio source
* App available only on iOS and Android
Minimum Requirements:
Android: 3.0, iOS: 8.0
devices
3.3 MENU NAVIGATION
Use the roller-wheel (
Â
The menu will vary according to which mode you are in (Standby/A2DP Music/FM).
The Settings menu and Advanced Settings menu can be accessed only in Standby Mode.
Menus are available in several languages.
and customize your scala rider PACKTALK.
Enter Menu
Enter Settings Menu
Select
Back / Up
Exit Menu
) to access and navigate the built-in me nus to easily operate
Z
Double-tap
In Standby, tap Z three times
Tap
Tap
Press
Z
or
Z
v
(only in Settings menu)
p
for 2 seconds
p
|
7
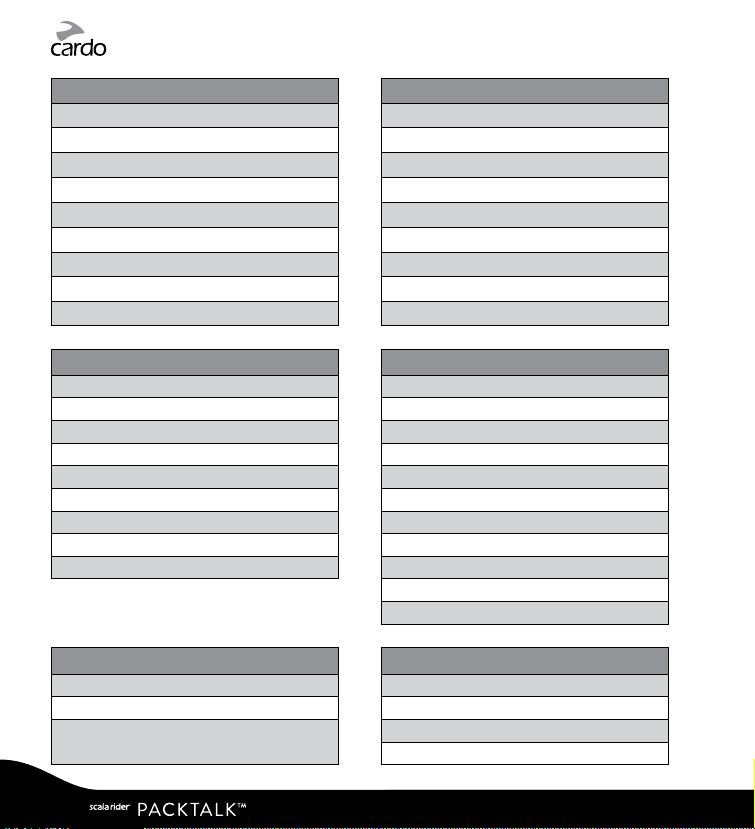
Settings
A2DP / Intercom audio priority Mute / Unmute the Pack (only in DMC mode)
VOX Operation Mode Play Music
Spoken Status Announcements Play Radio
Click-to-Link Start Intercom (only in Bluetooth mode)
AGC Voice Dial
RDS Redial
VOX Hotdial
Parallel Audio Streaming Switch Intercom mode (DMC/Bluetooth)
Language Advanced Features Menu
menu
(3 taps on Z )
Standby mode menu
Advanced Features
Create a Pack Pair Intercom Channel A
Join a Pack Pair Intercom Channel B
Leave the Pack Pair Mobile Phone to Channel 1
Pair Mobile Phone to Channel 1 Pair Mobile Phone to Channel 2
Pair Mobile Phone to Channel 2 Pair GPS to Channel 1
Pair GPS to Channel 1 Pair GPS to Channel 2
Pair GPS to Channel 2 Cardo Gateway on Intercom Channel B
Reset Mobiles and GPS pairing Reset Mobiles and GPS pairing
Reset to Factory settings Reset Channel A & B pairing
A2DP mode menu FM Radio mode menu
Scan tracks up Auto Scan 6 stations
Scan tracks down Seek stations up
Start / Stop Music Sharing
(only in BT Intercom mode)
8
|
menu
in DMC mode
Advance d Features men u in Bluetooth mode
Reset 1+8 Buddy pairings
Reset to Factory settings
Scan stations up
Scan stations down
4. GETTING STARTED
4.1 GENERAL FUNCTIONS
Power ON
Power OFF
Volume
Mute
π for 2 seconds
Press
3 BLUE ashes + ascending tone
In Standby, press
3 RED ashes + descending tone
Z forward or backward to adjust and set volume of
Roll the
current audio source
Z backward and then forward very fast
Roll the
π for 2 seconds
Enable / Disable VOX
(For Intercom /
Voice Commands only)
In Standby, tap
• Enabled: Blue ash for 2 seconds
• Disabled: Red ash for 2 seconds
v and Z simultaneously
4.2 STATUS LIGHTS
None OFF
1 BLUE ash every 3 seconds Standby in Bluetooth mode – No active audio
1 GREEN ash every 3 seconds Standby in DMC mode – No active audio
1 RED ash every 3 seconds Standby – Battery is low
2 BLUE ashes every 3 seconds
2 GREEN ashes every 3 seconds
2 RED ashes every 3 seconds Active audio – Battery is low
Solid RED Charging / USB connected
Solid YELLOW for 2 secs Pairing unsuccessful, pack is full
Active audio in Bluetooth mode
Call in progress / music or other audio source is ON
Active audio in DMC mode
Call in progress / music or other audio source is ON
|
9

4.3 PARALLEL AUDIO STREAMING AND AUDIO SOURCE PRIORITIES
The scala rider PACKTALK can stream audio from two connected sources
simultaneously, so that you can listen to your music or the radio while holding an
intercom conversation. Parallel Audio Streaming is automatically disabled during
mobile phone conversations.
By default, Parallel Audio Streaming is enabled. See section 3 to adjust the settings.
If disabled, the scala rider will automatically determine which audio source to play
based on the priority of the connected devices.
Higher Priority
Lower Priority
A2DP audio priorit y can be congured to be higher than Intercom. See section 3 to adjust
settings.
• Incoming mobile phone calls interrupt ongoing intercom calls
• Incoming intercom calls will interrupt FM radio
• Intercom modes all have the same priority - ongoing intercom calls will not be
interrupted by any other intercom call
1. Mobile Phone or GPS instructions
2. Intercom (DMC and Bluetooth modes)
3. A2DP (Stereo Bluetooth) audio
4. FM Radio (Built-in)
*GPS instruc tions from Smartphon e GPS Apps are prioritized
*
like A2DP audi o
4.4 VOICE COMMANDS
The Voice Commands allow you to perform certain actions by simply using your voice.
Using advanced Voice Recognition, you can control the PACKTALK completely handsfree.
The default Voice Command language is English. Other languages are also available see section 3 to adjust settings.
Throughout this manual, features which are available via Voice Command are marked
with the
1. With no call in progress, tap
2. Speak a Voice Command from the table:
10
icon.
ß
or speak any word loudly to activate VOX
Z
|

Current Mode Desired Action Say this:
Hear Voice Command List “Command List”
Standby
Start A2DP “Music ON”
Turn on FM “Radio ON”
Battery Status “Battery Status”
Standby /
FM / A2DP
“1+8” Intercom Call <<Say Buddy Name>> *
Intercom call with A and B “Call Intercom” *
Turn o FM “Radio OFF ”
FM Radio
Next Station Preset “Next Station”
Previous Station Preset “Previous Station”
Stop / Pause A2DP “Music OFF”
A2DP Music
Ne xt Trac k “Ne xt Trac k”
Previous Track “Previous Track”
Mute the Pack “Mute the Pack”
DMC Intercom
Unmute the Pack “Unmute the Pack”
*only in Blueto oth Intercom mode
Voice Recognition performance may vary based on environmental conditions including
driving speed, helmet type and ambient noise.
For improved performance of the Voice Command feature, minimize wind impac t on the
microphone by using the large microphone sponge and closing the visor.
|
11

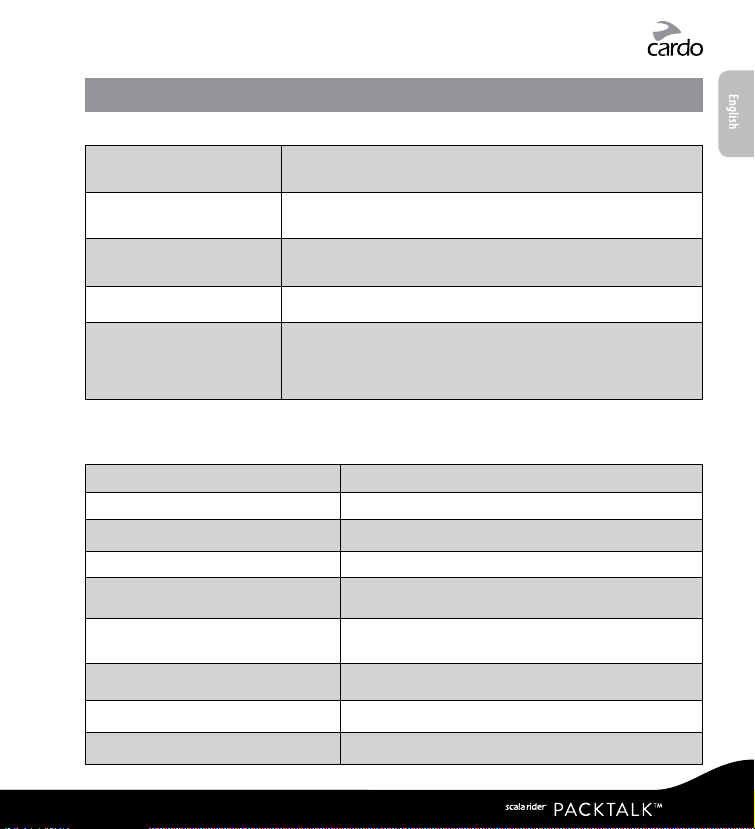
4.5 VOICE CONNECT VOX
The PACKTALK has VOX technology for safe and hands-free operation of some key
functions. See section 3 to adjust VOX settings.
VOX Activation Speak any word loudly into the microphone
Answer a call Speak any word loudly into the microphone
Reject a call Remain silent for about 15 seconds
VOX Sensitivity
(Default: Medium)
VOX Operation
Mode
Enable/Disable VOX
(For Intercom/ Voice
Commands only)
12
|
High: Use this setting if it is dicult to activate VOX
Low: Use this setting if it is too easy to activate VOX
Set VOX to either activate the Voice Command (default) or to
start an Intercom Call.
In Standby, tap
• Enable: Blue ash for 2 seconds
• Disable: Red ash for 2 seconds
v and
simultaneously
Z
5. INTERCOM
The scala rider PACKTALK is the world’s rst communication and entertainment system
to contain TWO intercom technologies that work to complement each other.
™
DMC
intercom mode enables groups of up to 15 riders to communicate via intercom
independently of each other, seamlessly and automatically adapting to rapid changes
of the group.
Bluetooth intercom mode is compatible with other scala rider intercom models, the
cardo SHO-1 and Schuberth’s SRC-System™. Non-Cardo devices can also connect via
the Cardo Gateway, allowing conversation between your PACKTALK and a non-Cardo
brand of Bluetooth intercom.
All intercom communication is full duplex with a range of up to 1 mile / 1.6 km
(subject to terrain and within line of sight). In DMC mode, intercom range can be
extended to up to 5 miles / 8 km with groups of more than 4 riders.
Intercom range with other models is limited to the distance of the device with the
shorter range.
For more info please visit www.cardosystems.com/PTcompatibility
Open the an tenna for maximu m range
To talk to someone via Intercom, rst pair your scala rider PACKTALK to the second unit.
Pairing is a one-time process. Once paired, the units should automatically recognize
each other whenever in range.
|
13

5.1 DMC INTERCOM MODE
The default intercom mode is Bluetooth Intercom. To switch to DMC intercom mode:
• Use the Cardo SmartSet App (see section 3.2)
• or enter the Standby menu and choose ‘Switch Intercom mode’
• or in Standby mode, tap
Introduction
The scala rider PACKTALK uses DMC technology to create a spontaneous and uid
virtual network of riders. DMC provides a more stable connection in a group of riders
than the Bluetooth intercom mode.
In DMC intercom mode, each rider acts as an autonomous hub that maintains
simultaneous and independent communication links with each of the other members
in the pack, operating in a mesh network.
Members may join, leave and rejoin the pack conversation without compromising the
integrity of the ongoing multi-point conference call among the other pack members.
Whenever a PACKTALK user cannot directly connect with pack members beyond
his intercom reach, it will re-adjust within split seconds and re-connect to the most
suitable other pack member in order to ‘leapfrog’ to the remote member.
Create a new Pack
The easiest way to create a new pack is via the Cardo SmartSet App, or from the
Advanced Features Menu in Standby mode.
Alternatively, in DMC mode, press
the LED is ashing, tap
proceed to search for pack members in DMC grouping mode and automatically add
them to your pack. If no units are found within 2 minutes, your unit will return to
Standby mode.
and p simultaneously
v
for 5 seconds to enter DMC grouping mode. While
v
to dene yourself as the “Pack Creator”. Your unit will then
v
Pairing with a SMARTPACK unit will limit the size of your group to 4 riders.
A pack can only have one “Pack Creator”. The pack can still continue to function even if the
Pack Creator is no longer available.
14
|

Join a Pack
The easiest way to join a pack is via the Cardo SmartSet App, while the “Pack Creator” is
nearby and in DMC grouping mode. The process can also be done from the Advanced
Features Menu in Standby mode.
Alternatively, make sure your unit is in DMC intercom mode and that you are within
3 m / 10 ft. from the Pack Creator. While the “Pack Creator” is in Grouping mode, press
for 5 seconds on your unit.
v
A Purple LED indicates that grouping with the “Pack Creator” has been successful.
A Yellow LED indicates that the pack is full and no additional members can join.
Using DMC intercom
Up to 15 riders can participate in a DMC conversation. To avoid confusion, only
6 members can be heard at the same time.
Once you are in a pack, you can start talking instantly.
Private Chat
⁄
Private Chat allows 1:1 conversation while no other members can listen in.
Choose any available pack member for a private chat using the Cardo SmartSet App.
To start a private chat, tap
If you have purchased a PACKTALK DUO, the two unit s are pre-paired as Private Chat partn ers
in DMC mode until a new Pri vate Chat partner is selected in the Cardo Sma rtSet App.
DMC Bridge
@
Add a passenger with a Bluetooth intercom device or an outside mobile caller to
your DMC conversation or to your Private Chat.
Bluetooth intercom device:
First, pair the device to your Bluetooth IC Channel B (see section 5.2b). Double-tap
add the device to your DMC conversation. Double-tap
Mobile Phone:
During an active phone call, double-tap
Double-tap
again to close the DMC Bridge.
v
. Tap v again to end the private chat.
v
again to close the DMC Bridge.
v
to add the caller to your DMC conversation.
v
v
to
|
15

Mute the pack
If for any reason you would like to mute the conversation but still remain a pack
member, press
for 2 seconds. Tap v to rejoin the conversation.
v
Leaving a pack
If your connection is lost for any reason, you will remain a member of the pack until
your unit can reconnect to any of the other members of the pack.
If you choose to leave the pack you can:
• Use the Cardo SmartSet App.
• Choose ‘Leave the Pack’ in the Advanced Features Menu in Standby mode
• Join a new pack
Rejoining a pack
If you have joined a dierent pack or chosen to leave a pack, and later wish to rejoin
the original pack, simply pair your unit with the “Pack Creator” again. If they are no
longer available, a new pack should be created and all members should pair again to
the new “Pack Creator”.
• Cardo SmartSet App
Create a pack
Join a pack
Private Chat
DMC Bridge
Mute / Unmu te
the pack
Leave a pack
Switch Intercom
mode
• Advanced Features Menu
• In DMC mode, press
While the LED is ashing, tap v to dene yourself as the Pack Creator.
• Cardo SmartSet App
• Advanced Features Menu
v for 5 seconds while the Pack Creator is in Grouping mode.
• Press
PURPLE LED: Success YELLOW LED: Pack is already full
To start/end a private chat, tap
Double-tap
ß
Press v for 2 seconds
• Cardo SmartSet App
• Advanced Features Menu
• Cardo SmartSet App
• Standby Menu
• In Standby, tap
Bluetooth mode: Blue LED • DMC mode: Green LED
for 5 seconds to enter DMC grouping mode.
v
.
v
to add/remove the person to your DMC conversation
v
v and
simultaneously
p
16
|

5.2 BLUETOOTH INTERCOM MODE
Bluetooth Intercom communication is possible using one of the three methods:
4
m
W
o
c
r
e
t
n
I
s
u
o
e
n
a
t
n
o
p
S
k
n
i
L
-
o
t
-
k
c
i
l
C
“
1
+
8
”
I
n
t
a
y
I
n
t
e
r
c
o
m
C
o
n
f
e
r
e
n
c
i
n
g
g
n
i
l
g
g
e
o
r
T
c
o
m
Section
5.2a
Section
5.2b
Section
5.2c
“1+8” Toggling
(between scala rider PACKTALK /
SMARTPACK, G9/G9x and cardo SHO-1 /
SRCS PRO models)
Conference via Channels A/B
(with any Cardo or other brand of
intercom model)
Click-to-Link
(with any CTL-compatible model)
2-way Intercom conversations within a
group of up to eight other “1+8” Buddies
Intercom Conferencing (2-way,
4-way) using Channels “A” and “B”
3-way and
1-on-1 spontaneous intercom conversations
with random riders near you who are not
already paired to your PACKTALK
|
17

5.2a “1+8” INTERCOM TOGGLING
with PACKTALK / SMARTPACK, G9 / G9X, cardo SHO1 and SRCS PRO
Pair with up to 8 other devices (“1+8” Buddies) and connect with them one at a time
by saying their name.
CONFIGURE YOUR BUDDY NAME
Before using “1+8” Intercom, you should assign yourself a Buddy name, so that other
paired Buddies can call you by this name. Visit the Cardo Community to congure your
Buddy Name (see Section 3).
Until you congure a Buddy name, your unit will be known as “PACKTALK”.
If you change your Buddy name, you must pair again with your “1+8” Buddies for their
devices to receive the new name.
Hear Your
Buddy Name
Check Your
Buddy List
PAIRING “1+8” BUDDIES
There are three ways to pair with “1+8” Buddies:
OPTION 1: Via the Cardo Community® (ALL models)
OPTION 2: Via the Cardo SmartSet App (PACKTALK/SMARTPACK models)
g
OPTION 3: Manual “1+8” Pairing (PACKTALK/SMARTPACK models)
☛
1. In Standby, press
2. Enter “1+8” Pairing mode on the second unit.
3. A purple LED for 2 seconds indicates pairing was successful.
If your scala rider already has a full list of 8 paired “1+8” Buddies, pairing another
buddy will replace the buddy that you have not spoken to for the longest time.
In Standby, press Z and v simultaneously for 2 seconds. You will hear your
Buddy name through the speakers.
Check via the Cardo SmartSet and Cardo Community. You can also hear your
Buddy List through the speakers: In Standby, press
for 5 seconds to enter “1+8” Pairing mode.
Z
for 2 seconds
Z
18
|

CALLING “1+8” BUDDIES
There are three ways to start an intercom call with “1+8” buddies.
OPTION 1: Voice Command VOX
Say any word loudly into the microphone. When you hear the Voice Command
tone, say the name of a ”1+8” Buddy i.e. “John Smith”. VOX Operation settings
must be set to “Voice Command” (see section 3).
OPTION 2: Manual Mode
☛
SAY THE NAME CHOOSE THE NAME (from your Buddy List):
In Standby, press
and say
Tap
Z
the Buddy name
OPTION 3: Via the Cardo SmartSet App
g
INTERCOMTOPHONE
In Bluetooth Intercom mode, if a “1+8” Buddy is not in range, or moves out of
range, you have the option to set up the “Intercom-to-Phone” feature via the Cardo
Community or Cardo SmartSet App, to remain in contact by diverting Intercom calls
automatically to your mobile phones.
When you hear the name of the Buddy you wish to call, tap
or say any word loudly into the microphone.
Z
To cancel Buddy List playback: Press
for 2 seconds to hear your Buddy List.
Z
for 2 seconds.
Z
|
19

5.2b INTERCOM WITH CHANNELS “A” AND “B”
Start multi-party conversations using Intercom Channels “A” and “B”. This mode is
suitable for 2, 3 or 4-way calls.
PAIRING INTERCOM CHANNELS “A” AND “B”
Pairing a channel will replace any existing paired device on that Channel with the
newly paired device.
If you have purchased the PACKTALK DUO, both units are factory-paired and congured
to communicate via Channel “A”. If for any reason you have to pair them again, OR if you
wish to pair a dierent unit to make Intercom calls, proceed as follows:
There are three ways to pair Intercom (IC) Channels “A” and “B”:
OPTION 1: Via the Cardo SmartSet App
g
OPTION 2: Advanced Features Menu
Â
1. Make sure your unit is in Bluetooth Intercom mode and in Standby.
2. Double-tap Z and choose the Advanced Features Menu (see 3.3).
3. Select either “Pair Intercom Channel A” or “Pair Interom Channel B”.
OPTION 3: Manual Pairing
☛
1. Check that all units are in Standby.
2. To pair IC Channel A – press
To pair IC Channel B – press
Then double-tap
3. Enter IC Pairing mode on the second unit following its user manual. Both units
will now be in Intercom Pairing mode.
4. After a few seconds, both units will show a solid LED for 2 seconds, indicating
that they are paired and ready to use.
5. If Pairing is not completed within 2 minutes, the units will return to Standby.
A ashing BLUE LED indicates Channel “B” pairing mode.
v.
for 5 sec. until the RED LED begins ashing rapidly.
v
for 5 sec. until the RED LED begins ashing rapidly.
v
20
|

CARDO GATEWAY
G
Non-Cardo devices can connect via the “Cardo Gateway”, allowing conversation
between your PACKTALK and a non-Cardo brand of Bluetooth intercom.
Cardo Gateway pairing is done on Intercom Channel “B”.
There are three ways to pair with a non-Cardo brand of Bluetooth intercom:
OPTION 1: Via the Cardo SmartSet App
g
OPTION 2: Advanced Features Menu
Â
Enter the Advanced Features Menu (see 3.3) and select “Cardo Gateway” to enter
pairing mode on the scala rider.
OPTION 3: Manual Pairing
☛
Enter Intercom Channel “B” pairing mode (see above) and tap p.
Next, enter Mobile Phone Pairing mode on the second unit following its user
manual. After a few seconds, a solid LED will appear for 2 seconds, indicating that
the two units are paired.
If Pairing is not completed within 2 minutes, the unit will return to Standby mode.
|
21

CALLING INTERCOM CHANNELS “A” AND “B”
OPTION 1: Voice Connect VOX
Say any word loudly into the microphone. When you hear the Voice Command
tone, say “Call Intercom” to start an intercom call with “A” and/or “B” (subject to
who is present).
VOX Intercom calls with only “A” or “B” will end automatically after 30 seconds of
silence.
OPTION 2: Via the Cardo SmartSet App
g
OPTION 3: Manual Mode
☛
Use this to start an Intercom call with either:
• Channel “A”: Tap
• Channel “B”: Double tap
To end a call with either Channel “A” or “B” - tap v
To end a conference call with both “A” and “B” - Press
If you are already in an Intercom call with “A” or “B”, you can add another rider
(“A” or “B”) by double-tapping
v
v
for 2 seconds.
v
.
v
22
|

THREE-WAY INTERCOM
FOUR-WAY INTERCOM
a
a
b
b
a
IMPORTANT: Conference Mode Considerations
During a 3 or 4-Way Intercom Conference call, riders using both intercom channels “A” and
“B” will not be able to receive phone calls or GPS instructions as long as the call is in progress.
|
23

5.2c CLICKTOLINK CTL INTERCOM MODE
Click-to-Link is a spontaneous way to instantly initiate 1-on-1 intercom calls
with other riders near you, without being paired. Think of it as a private channel
that you can set up on-the-go with other riders that you see along the way.
Click-to-Link can be dis abled eectively bl ocking any attempt by a third par ty to send a
CTL request to you.
Start a CTL call request
(search lasts up to 10 sec.)
End a CTL call /
Cancel a CTL call request
Accept a CTL call
Reject a CTL call
Enable / Disable CTL
(Enabled by default)
In Standby, press
Tap
v
When hearing the CTL ringtone: Tap
to answer by VOX
While hearing the CTL rin gtone, remain silent until the ring ton e
stops, or press
See section 3
for 2 seconds
v
for 2 seconds
v
or say any word loudly
v
If other riders are nearby, your next Click-to-Link call may randomly connect to any of them.
5.3 BUSY SIGNAL
When attempting to establish an Intercom call with another device that is already busy,
a “busy” signal will be heard. The scala rider is busy while on a phone call, intercom call
with Channels “A” and “B ”, “1+ 8” intercom call or CTL call.
5.4 RECEIVING INTERCOM CALLS
If a paired unit tries calling you via Intercom, the call will begin almost instantly.
24
|

6. USING A MOBILE PHONE, GPS OR MP3 PLAYER
To use a Bluetooth device with your scala rider PACKTALK you must rst pair them.
Once paired, they will automatically recognize each other whenever they are within
range (10m / 33ft).
Your scala rider has two Bluetooth channels to connect mobile phones, GPS devices
and music players with A2DP.
6.1 PAIRING BLUETOOTH CHANNELS 1 AND 2
1. Make sure Bluetooth is enabled on your phone/GPS/MP3 player.
2. To pair Bluetooth Channel 1 – In Standby, press
BLUE LEDs begin rapidly alternating.
To pair Bluetooth Channel 2 – In Standby, press
BLUE LEDs begin rapidly alternating.
To pair a GPS, when LEDs begin rapidly alternating, roll the Z either
3. Search for Bluetooth devices on your phone/GPS/MP3 player by following the
device’s instructions.
4. After a few seconds the device will list your name or “PACKTALK”. Select it.
5. If prompted for a PIN or Passkey, enter 0000 (four zeros).
6. The device will conrm that pairing has succeeded and your unit will return to
Standby mode, LED ashing once every 3 seconds.
7. If pairing is not completed within 2 minutes, the unit will return to Standby mode.
forward or back.
for 5 seconds until the RED and
p
for 5 seconds until the RED and
π
|
25

• If you have paired 2 dierent mob ile phones directly to your sca la rider, you will need to set one as
default for making calls.
• If your GPS supports it, you can p air the second mobile phone directly to the GPS and th en pair the
GPS to your scala rider, and so connect both mobil e phones and the GPS to your scala rider.
• Not all Bluetooth mobile phones broadcast Bluetooth Stereo music (A2DP), even if the phone has
an MP3 player function. Consult your mobile phone’s User Manual for more information.
• Not all Bluetooth GPS devices allow connection to Bluetooth audio devices. Consult you r GPS User
Manual for more information.
• After pairing, you may ne ed to tap
to connect.
p
6.2 MAKING AND RECEIVING PHONE CALLS
Tap
Answer a call
Reject a call
End a call
Voice Dial
mobile phone)
Redial
Hot Dial
Set default mobile
Change default mobile
INTERCOM CONFERENCE MODE
Add/Rem ove Channel “A”
to/from a call
Add/Rem ove Channel “B”
to / from a call
1 This feature is not available during intercom or mobile calls
1
(if supported by
1
2
3
2
Congure a Hot-Dial number via the Cardo Comm unity or Cardo SmartS et App
3
If 2 mobile phones are paired directly, you need to set one as default for outgoing calls
or speak any word l oudly to answer by VOX
p
Remain silent for 15 seconds, or press
Tap
p
or use the Feature Menu
Tap
p
Double-tap p or use the Standby Feature Menu
Tap p three times or use the Standby Feature Menu
While on a phone call, press p for 5 seconds
In Standby, press
while on a phone call
Tap
v
Double-tap
for 2 seconds
p
while on a phone call
v
for 2 seconds
p
26
|

6.3 LISTENING TO MUSIC VIA A2DP (on A2DP/AVRCP compatible Blu etooth audio devices)
Play
Pause/Stop
Next Track
Previous Track*
Music Scan
Stop Scan
*With some phones you may need to repeat this action
In standby, tap π or use the Voice Command / Feature Menu
ß
Press
ß
ß
ß
for 2 seconds or use Voice Command
π
With music ON, tap π or use Voice Command
With music ON, double-tap π or use Voice Command
With music ON, tap and roll
The rst few seconds of each audio track will be played.
To stop the scan on the current track , say any word loudly into the
microphone or tap
π
forward (scans up) or back (scans down).
Z
SWITCHING BETWEEN A2DP AUDIO SOURCES
If two A2DP audio sources are paired, the scala rider will use the default A2DP audio
source. To switch to the other audio source, stop the music playback from the current
device and start music playback on the other device. Your scala rider will automatically
remember your last played device.
6.4 MUSIC SHARING
Music Sharing allows rider and passenger to listen to the same music within
a range of 33 ft / 10m.
(Bluetooth stereo) enabled audio sources. To share your music with your riding partner,
your scala rider [SENDER] needs to be paired to the other unit [RECEIVER] on CHANNEL A
and the RECEIVER must be in Standby mode.
[SENDER]
Start/Stop sharing your music
[RECEIVER] Stop music sharing
Phone/Intercom calls and GPS audio navigation will override music playback.
Music Sharing does not transmit voice audio and cannot be used as an Intercom call.
Music Sharing works only in Bluetooth Intercom mode and with A2DP
During A2DP music playback, press
Press
for 2 seconds
v
for 2 seconds
v
|
27

7. FM RADIO
Your scala rider includes a built-in FM radio with a 6 Preset memory and
RDS (Radio Data System).
RDS allows the radio to automatically retune to the strongest frequency
available for the FM station you are listening to when the signal becomes too weak.
Radio On
Radio O
Next Station
Previous Station
RDS ON/OFF
(Default: O)
In standby, double-tap π or use Voice Command or the Standby
ß
Feature Menu
Press π for 2 seconds or use Voice Command
ß
With radio on, tap π or use Voice Command
ß
With radio on, double-tap π or use Voice Command
ß
See section 3 to adjust the settings
7.1 RADIO TUNING
Preset stations can easily be set via the Cardo Community and the Cardo Smartset App.
You can also save preset stations directly on your scala rider:
1. With the radio on, select a Preset number you wish to set (Preset 1 – 6) by tapping
until the desired preset is heard.
2. Find an FM station to save using Seek or Scan.
Seek a Sta tion
(Find the next
station)
Scan stations
(Automatically
scans for stations)
28
|
Choose a preset by tapping
π for 5 seconds to seek a radio station
Press
within 20 seconds to save to current preset
Tap
π
With radio on, tap
To stop scan, tap
within 20 seconds to save to current preset
Tap
π
To continue scan, wait for the next station to be found.
Z
π
π
and then roll either for ward or backward to start scan
π
7.2 AUTOMATIC RADIO TUNING
Find 6 temporary radio stations. These stations cannot be saved and do not replace
your saved FM Presets. Turning o your unit will clear the temporary stations and
restore the FM Presets.
1. With the radio on, tap
2. The radio will search upwards (higher frequency) from the current station and store
the next 6 FM stations it discovers.
3. If desired, repeat to store the next 6 FM stations.
three times.
π
8. TROUBLESHOOTING
Reboot
Reset to Factory Settings
(Deletes all paired devices)
If the unit stops responding, tap
for 2 seconds.
In Standby, press
Alternatively, use the Cardo Smar tSet App or in the Advanced
Features menu select “Reset to Factory Settings”.
π, v
and
and p. Then press
π
simultaneously for 5 seconds.
p
9. SUPPORT
For additional information:
www.cardosystems.com
support@cardosystems.com
USA and Canada: 1-800-488-0363
International: +49 89 450 36819
IMPORTANT
MULTINATIONAL COM MERCE COMPANIES AND O NLINE AUCTION WE BSITES ARE NOT AUTH ORIZED TO SELL CAR DO PRODUCTS
AND PURCHA SES FROM SUCH SITE S ARE AT YOUR OWN RISK. TO RECE IVE WARRANTY OR C USTOMER SERVICE , YOU MUST
SUBMIT ORIGINAL RECEIPTS FROM AUTHORIZED CARDO DEALERS.
PRODU CTS THAT WE RE IMPOR TED FROM N ORTH AME RICA MUS T BE SERVIC ED IN THE USA .
π
|
29
 Loading...