


Table of Contents
Getting Started
Identifying the parts of the recorder
Identifying the indicator on screen
Identifying HD camera
Identifying camera mounts
Basic Operations
Installing the battery pack
Installing the SD card
Installing the camera
Unplugging the camera
Start/Stop recording
Digital zoom
EV adjustment
Record with wired controller
Using enhanced wired controller
Taking photos
Playback operations
Movie playback
Viewi ng Photo s
How to connect
Power supply connection
Computer connection
Using HDMI to connect HDTV
Using AV out cable to connect TV
Connecting external microphone
1
2
2
2
3
3
3
3
4
4
4
4
5
5
6
7
7
8
8
8
8
9
9

Table of Contents
Applications
Motor sports
Sports shooting
As a Car DVR
Live Relay/ Recording
System Setup
Resolution setup
Recording quality setup
White balance setup
Recording mode setup
External/Internal microphone setup
Record overwrite setup
Motion detection setup
TV type setup
Beep sound setup
Language/Default setting setup
Time stamp/Time and date setup
Format SD Card
LCD Auto turn off
Split mode setup
Stop recording delay setup
Firmware
Specification
DVR specifications
Camera specifications
Accessories
Optional Accessories
10
10
11
11
12
13
13
14
14
15
15
15
16
16
16
17
17
17
18
18
19
20
21
22

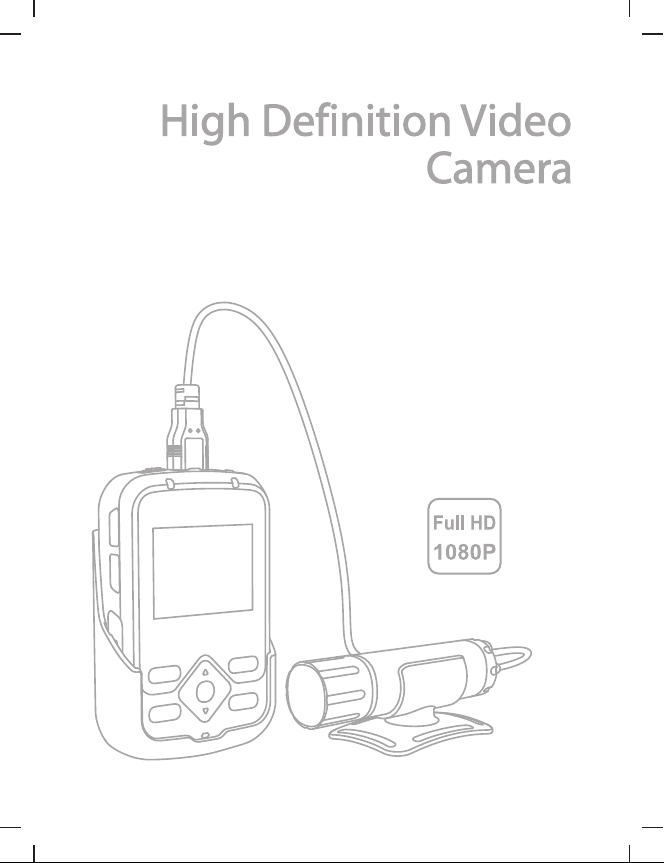
Identifying the parts of the recorder
1. Camera cable lock (to unplug the camera, switch left)
2. Menu
3. Reco rd /P ho togra ph m od e
4. SD car d sl ot
5. Wo rk in g indicat or
6. Powe r in di ca tor
7. Reco rd /p ho togra ph
8. Left
9. Up
10. Pla yb ac k
11. OK /S na pshot
12. Rig ht
13. Dow n
14. Bui lt -i n mi croph on e
15. HDM I- in f or H D camer a
16. Pow er /K ey board l oc k
(swit ch u p fo r 2 se c as powe r ON /O FF;
switc h do wn f or k eyboa rd l oc k)
17. USB port (2.0USB transfer/AV-Out/wired control/DC-IN)
18. HDM I ou tp ut
19. Spe ak er
20. Bat te ry c ov er
21. 2" 92 0× 24 0 TFT L CD s creen
22. 1/4 " tr ip od t hread
Getting star ted
1

Getting star ted
LCD screen indicators
1. Recording resol ution
2. Picture quality
3. Remaining time of memor y
4. Motion detectio n symbol
5. Cycle recording sym bol
6. Battery indicat or
7. Date indicator (yea r/month/date)
8. Time indicator (hour/ min/sec)
Other symbols
RecordingREC
5M Photograph/P ixels
Identifying the HD camera
1:Camera body
2:Lens
3:Camera cable
4:1/4" tripod thread
Identifying Camera mounts:
1: Vented helmet mount (with 1 velcro strap)
4: Bar mount (with 3 rubber bars)
*Rotates horizonta lly 360°
2
2: Elastic mount (with 2 velcro pads)
5: Rotatable surface mount (with 1 extra pad)
*Rotates horizonta lly 360° and vertically 180°
1
4
3
2
3: Surface mount (with 2 pads)
*Rotates horizonta lly 360°

Basic Operations
Basic Operations
A. Installin g the batter y pack:
1: Open the back cover (refer to pict ure 1).
2: Insert the battery pac k in the right direction (refer to pictur e 2).
3: Close the battery cove r (refer to picture 3).
Remarks: If the recor der will not be used for a long time, please remove the batte ry.
OPEN
SD CARD
MENU
QUIT/M
OPEN
pictu re 1 pictu re 2 pictu re 3
B. I nst al li ng th e SD c ard
1: Open the SD card slot cover.
2: Insert SD card with the “ ”mark facing toward the SD slot as illus trated
(refer to pictur e 1).
C. I nst al li ng th e ca mer a
1: Insert the camera into rec order (refer to picture 2).
D. Unp lu gin g th e camer a.
1: Switch the camera cabl e lock to left, and then unplug the camera (refer to pict ure 3).
CHARGE
WORK
MENU
QUIT/M
pictu re 1
M
I
C
pictu re 2 pictu re 3
C
I
M
3

Basic Operations
A: S ta r t/S to p Re co r di ng
[ ]
Press b ut to n (h old on fo r 2 se co nds) to swi tc h on r ecord er.
[ ]
Press b ut to n to s tart re co rd ing.
Press a ga in b ut ton to st op r ec ording an d re tu rn to pre vi ew m od e.
B: D ig ita l Zo om
In the preview/re cord mode, digital zoom funct ion will be available
as follows:
1920 x 1080: no digital zoom
1440 x 1080: 4x digital zoom
1280 x 720: 16x digital zoom
848 x 480: 16x digital zoom
Remarks: When HDMI/AV out cable is connected to the screen, the digital zoom function is not available.
C: E V Ad jus tm en t
EV can be adjusted in record/ preview mode
(as in the picture).
EV adjustment ran ge:-1.7~+1.7
D: Rec or d w it h a wi r ed c ont ro lle r
1: Connect wired remo te controller and device via DIGI TAL port (refer to pictu re 1).
2: Press REC button on the wired contro l (hold for 2 seconds) to power DVR on.
3: Press REC start recordi ng, indication light of recor ding bright (red) ,recording
(refer to pictur e 2).
4: In the process of recordin g, press REC on wired remote contr oller to stop recordi ng,
till indicati on light off, rec ording stop (refer to picture 3).
[ ]
[ ]
[ ]
to
[ ]
RE
C
pictu re 1 pictu re 2 pictu re 3
4
REC

Basic Operations
E: Using the Enhanced Wire d Contr ol (optiona l)
supports auto recor ding and stop recordi ng on power
1: DC input: DC 10V~42V
2: Connect Enhanced Wired Controller to the DVR via USB port (refer to picture 1).
3: Connect Enhanced Wired Controller and DC 10V~42V power cable (refer to picture 2).
R
E
RE
pictu re 1
Once device detects DC 10V~42V power supply, it will start recording automatically.
While recording, if the power supply stops, the device will stop recording automatically.
The stop recording delay time can be set in the system setup.
Note:
1: This function will depend on the system having a charged battery.
2: In stand by or recording mode, user can turn on LCD to preview.
3: In stand by or recording mode, user can connect device to another monitor to preview.
4: In recording mode, user can connect external MIC to device to enhance the audio quality.
Sound from internal MIC and external MIC will be recorded together.
C
pictu re 2
C
Taking Photos
[ ]
1: Press (hold on for 2 seconds)to power on DVR.
[ ]
2: Press QUI T/M to shift int o photogr aph mode.
[ ]
3: Press to take photo s.
*Photo Resolu tion: 5.0 Mega Pixe ls; Photo Dim ension: 2560x 1920
5

Basic Operations
How To Playback
Only in standby mode the vide os could be played back
[ ]
Press to go to the playback list.
Press once again to shift the vid eos and photos
(refer to picture 1).
pictu re 1
Press arrow keys to choose the file to be played.
Press to sta rt playing.[ ]
During the playin g back
Press Up and Down key to adjust volum e.
Press left and right keys to fast for ward or rewind.
To Delete a File
Choose the file you want to delet e. Press and hold the “OK” button for 2 seconds,
and then confirm to delet e the selected file.
To Protect a File
Choose the file you want to prote ct. Press and hold the “menu” button, and the n
confirm to protec t the selected file.
6

Basic Operations
Movie playback
Choose the movie and pres s OK[ ]
(Mo vi e pl ayb ac k-1)
Press OK to play/pause;
[ ]
Press Right / Left to fast forward
[ ] [ ]
/ fast backward;
(Mo vi e pl ayb ac k-2)
Photo Playback
Choose the photo and
press OK to show the selecte d picture.[ ]
(Ph ot o pl ayb ac k-1)
[ ]
Press OK to enter into a pictur e slide show;
[ ]
Press OK again to stop sli de show;
[ ] [ ]
Press Left / Rig ht to choose previous
/next picture.
(Ph ot o pl ayb ac k-2)
7

Basic Operations
HOW TO CONNECT
A. Power supply Connection
DC IN
Conne ct power supp ly to:DIGITAL jack on DVR
B. Connect to Computer via USB
USB
Conne ct USB cable to: DIGITAL jack on DVR
USB jack on Compu ter
C. Connect to HD Television via HDMI cable
HDMI
HDM I OUT
Conne ct HDMI cable to:HDMI jac k on DVR
HDMI
HDM I IN
HDMI jack on HD TV
8

D. Connect to TV via AV / OUT
Basic Operations
AV OUT
Conne ct AV / OUT cable to: AV / OUT jack on DVR
E:Exter nal MIC Connec tion (Optional)
MIC -IN
Conne ct extern al MIC to take more and bette r audios
AV / IN jack on TV
9

Applications
Motor sports
With the FullHD Mini DVR, it’s possibl e to capture powerful visuals in whic h the
ground comes towa rd you just as though you’re riding a motorcy cle or driving a
racing car! The Ful lH D Mini DVR prom ote your choice of where to mount it on a
car body.
Sp or ts sho otin g
Normally if you want to recor ding while taking part in extreme spo rt such as
mountain hiki ng, snow skiing, sky skating, it is hard to check the mos t vivid images
you’re record ing. But now with this FullHD Mini DVR, even if you can attac h the
camera to your helmet , and you can easily check the angles of view with the DVR.
You can also use our wired control to record and sto p. You can paste this wired
control anywh ere you want. Please put the control unit int o your backpack, on your
belt or fix on most of the handle bars and get going.
10

Applications
As a C ar DV R
Normal DVRs are quite big , while the camera of FullHD Mini DVR is quite small
and easy to hide. It can be easi ly installed on the winds hield. And with a DVR unit ,
you can check the vivid video s right away in your hand. You can activ ate
the “Record Overw rite”.
DVR
Came ra
REC
2010 /06/2 1
H 00:0 3:32
01:0 5:30
REC
2010 /06/2 1
H 00:0 3:32
01:0 5:30
Live Relay/ Recording
The control unit of the FullH D Mini DVR has connectors for both HDMI outpu t and
USB composite out put. By using a comm ercially avai labl e HDMI/HD-SDI con verter
or an A/D converte r, you can also make live relays or recordi ngs using HD-SDI signals.
HDMI or
compo ne nt
out put
HD-SDI
converter
HD-SD I
11

System Setup
System Setup
1: Press [Menu] to enter syst em setup menu;
2: Use [UP] / [Down] / [Left] / [Rig ht] to choose;
3: Press [OK] to confirm;
4: Press [Menu/Qu it] to quit.
Resolution Setup
Di sp lay
WVGA6 0P 50
WVGA6 0P 60
720P2 5
720P3 0
1080P 25
1080P 30
FULL HD 25
FULL HD 30
12
Di sc rip ti on
16:9
16:9
4:3
16:9
De fi nit io n
WVGA
848x4 80
720P
1280x 72 0
1080P
1440x 10 80
FULL HD
1920x 10 80
fp s
50
60
25
30
25
30
25
30

Recording Quality Setup
System Setup
Resoluti on
FULL HD
1920x 10 80
1080P
1440x 10 80
Display
H
M
L
H
M
L
Bitrate
12Mbp s
10Mbp s
8Mbps
12Mbp s
10Mbp s
8Mbps
Resoluti on
720P3 0
720P2 5
(1280x 72 0)
WVGA
848x4 80
Display
H
M
L
H
M
L
Bitrate
8Mbps
6Mbps
4Mbps
8Mbps
6Mbps
4Mbps
White Balance Setup
Choose different white bal ance value under different con diti ons. Default is AUTO.
AUTO
Sunny
WHITE BALANCE
Cloud y
Fluor es ce nt
Incan de sc en t
13

System Setup
Record Mode Setup
Default Setti ng is PAL
PAL
NTSC
External Microphone Volume Setup
Set the external micr ophone volume from 1 to 7; Default is 7.
When the external mic rophone is plugged in, audio from ext ernal
microphon e and internal microphone wil l be recorded togethe r.
Internal Microphone Volume Setup
Set the volume of interna l microphone from 1 to 7. Default is 7.
When the external mic rophone is plugged in, audio from ext ernal
microphon e and internal microphone wil l be recorded togethe r.
25 fps
50 fps
30 fps
60 fps
14

System Setup
Record Overwrite Setup
When Record Setup is acti ve, there will be C on the screen.
Recorder will sav e a new file every 5 minute; Whe n the SD card is nearly full,
system will delet e the oldest file and replace it with new file.
Recommend to use this opt ion together with the power adapt or.
Motion Detection Setup
When motion detec tion is active, there will be M on the screen.
If any motion is detected , the system will start recording in 2 second s.
Recommend to use this opt ion together with the power adapt or.
[ ]
[ ]
OFF
30 SEC.
1 MIN.
3 MIN.
5 MIN.
TV Type Setup (PAL/NTSC)
To choose PAL/NTSC based on different countries.
No Moti on D et ec tion
Stop recordin g after 30sec, if no motion
Stop recordin g after 1min, if no moti on
Stop recordin g after 3min, if no moti on
Stop recordin g after 5min, if no moti on
15

System Setup
Beep Sound Setup
Choose ON / OFF to turn on/off
[ ] [ ]
the beep sound
Language Setup
Choose Englis h/简体中文/繁體中文
Time and Date Setup
Press On to enter into time and date setup;
use UP / Down to increase or decrease
[ ] [ ]
the number and press OK to confirm.
[ ]
Default Setting Setup
Choose Yes, to resto re the factory settin gs
Time Stamp Setup
If you choose the time stamp, the n there will be a stamp showing the time on the video clip.
OFF
Date/Time
Date
Tim e
No time s ta mp
Date/Time format: 2011.01.01 21:21
Date fo rm at : 20 11.0 1. 01
Tim e fo rmat: 2 1: 21
16

System Setup
Format SD Card
To format the entire SD card
Please note: any file s will be deleted included the locked fil es.
LCD Auto Turn OFF Setup
The LCD will enter into power -save mode after the set time
OFF
30sec
1min
5min
LCD wil l ne ve r tu rn OFF
LCD wil l tu rn O FF i n 30sec
LCD wil l tu rn O FF i n 1min
LCD wil l tu rn O FF i n 5min
Split Mode Setup
System will save file s every set time.
Please note: if the SD card is full syste m will stop recording.
Default
Setting
15min
30min
System will save file only when stop
System will save file s every 2minutes
2min
System will save file s every 5minutes
5min
System will save file s every 15minutes
System will save file s every 30minutes
recording
17

System Setup
Stop Recording Delay Setup
System will stop reco rding after delay time
It will be triggered when you tur n off the car.
(With the optional enh anced wired control)
Fir mware
To check the firmwar e version
[ ].
18

DVR
Specifications
Digital Screen
Recording Format
Codec
Recording Resolution
Photo Resolution
Battery
Storage
AV Out pu t Ja ck
1/4"-20 thread
USB Jack
DC Input
External Microphone
Dimension
2.0" 960×240 TF T LCD
MOV
H.264
1920X1080(30/25 f ps )
1440X1080(30/25 f ps )
1280X720(30/25 fp s)
848X480(60/50 fps )
2592*1944
3.7V 1800mAH
(3hours recording )
Support Max: HCSD 64G (C la ss 4 )
(30mins for 4GB card @ Fu ll H D)
USB Port
HDMI Port
Yes
High-speed USB2.0
DC 5V 1.5A
3 rings with ø3.5mm
57×88×22mm
Camera Cable Lock
Keyboard Lock
19

Specifications
Camera
Camera Degree
Low light Sensitivity
Cable Length
Dimensions
Full HD/1080P:110°
720P/WVGA: 135°
3LUX
1.5m
ø22×88mm
with 1/4" tripod thre ad
20

Accessories
Back Cl ip
*It c an s wi vel 1 80 d egree
USB Cab le
Vented H el met M ou nt
*with 1 p ad
Rotat ab le Su rf ace Mou nt
* can rot at e hor iz ontal ly 3 60°
and ver ti cal ly 9 0°
* with 1 ex tr a pad
AC Wa ll Ch ar ge r
Wir ed C on tro l
*with 2 M ag ic pa ds
*cabl e le ngt h: 1.5m
Carry in g Bag
Bar Mou nt
*with 3 r ub ber b ar ;
It ca n ro ta te ho ri zonta ll y 360 °
Car Cha rg er wi th U SB port
AV Out C ab le
Magic M ou nt
*with 3 M ag ic pa ds
1800m AH B att er y
21

Optional Accessories
Ext er na l Mic
*Cabl e Le ngt h: 1 .5m
*wi th coll ar clip
Enhan ce d Wir ed C ontro l
*Supp or t aut o st art / sto p re cor di ng
*Cabl e le ngt h: 2 m
*Supp or t 10V- 42 V DC powe r
22
HDMI Ca bl e
Sucti on C up

 Loading...