

Page 1
INSTRUCTION MANUAL
Sherlock 3.0 Covert USB Voice Recorder
SB-VX0188
Revised: Jan 7th, 2016
ank you for purchasing from SafetyBasement.com! We appreciate your business.
We made this simple manual to help you enjoy your new product as quickly and easily as possible.
Be sure to check the TECH SUPPORT tab on your product page at SafetyBasement.com for the
latest available manual.
Page 2
PRODUCT MANUAL SHERLOCK RECORDER: VX0166
Headphone/USB
adapter
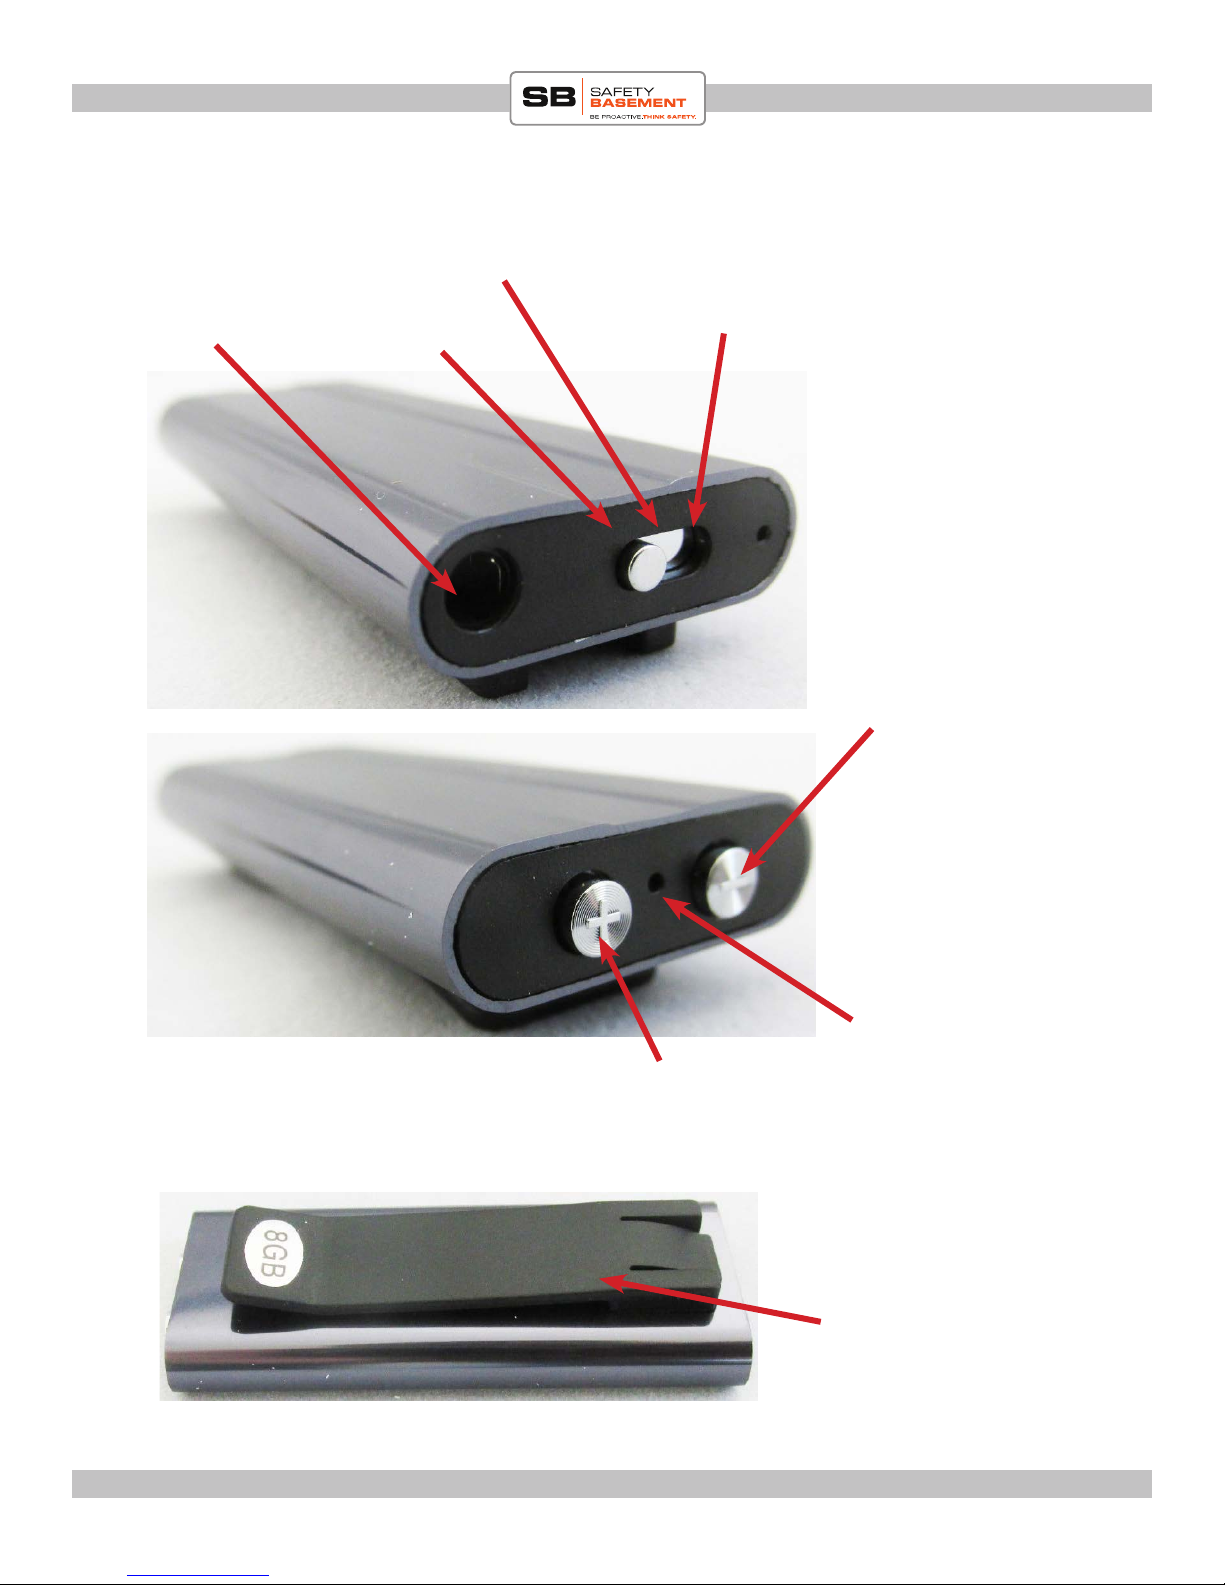
PRODUCT REFERENCE
PLAY BACK
RECORD
OFF
Volume UP/
NEXT FILE
Volume down/
NEXT FOLDER
Indicator light
www.SafetyBasement.com Phone: 877-345-2336 Fax: 888-236-2524
Pocket clip
Page 2
Page 3
PRODUCT MANUAL Jooney Bug Eye : SB-BUG100
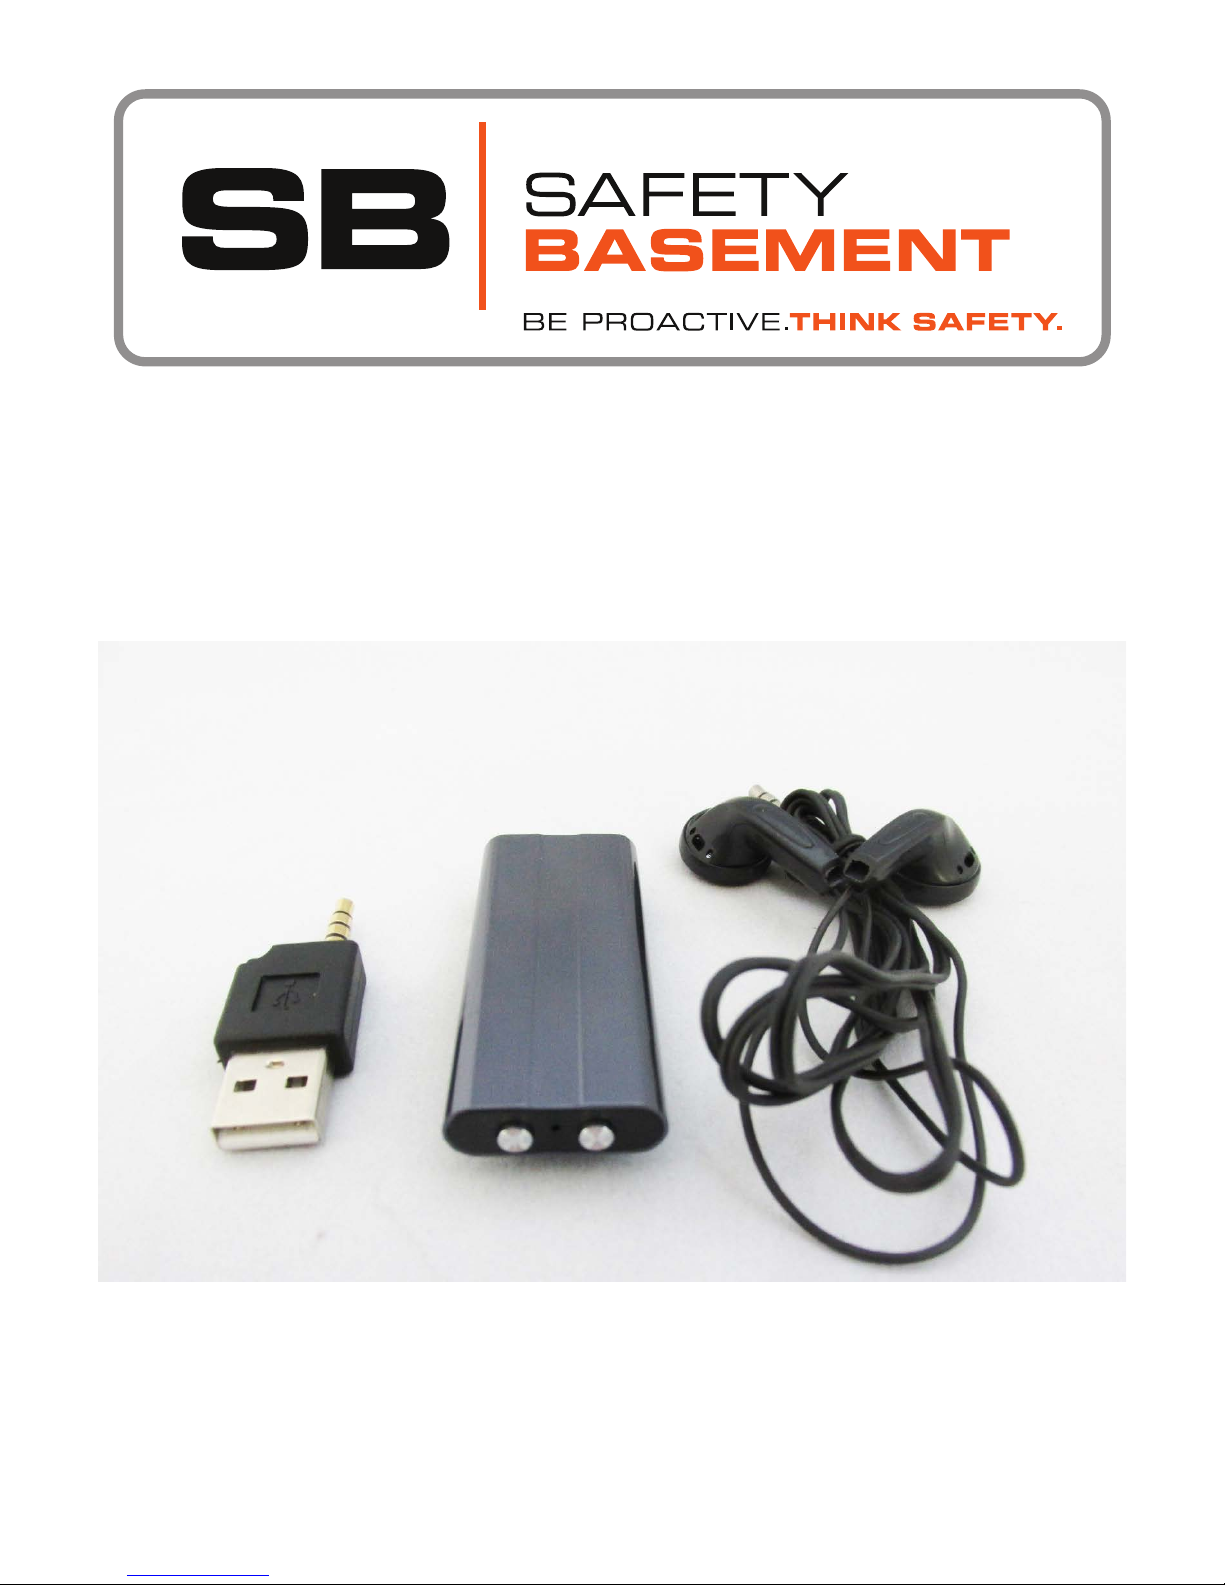
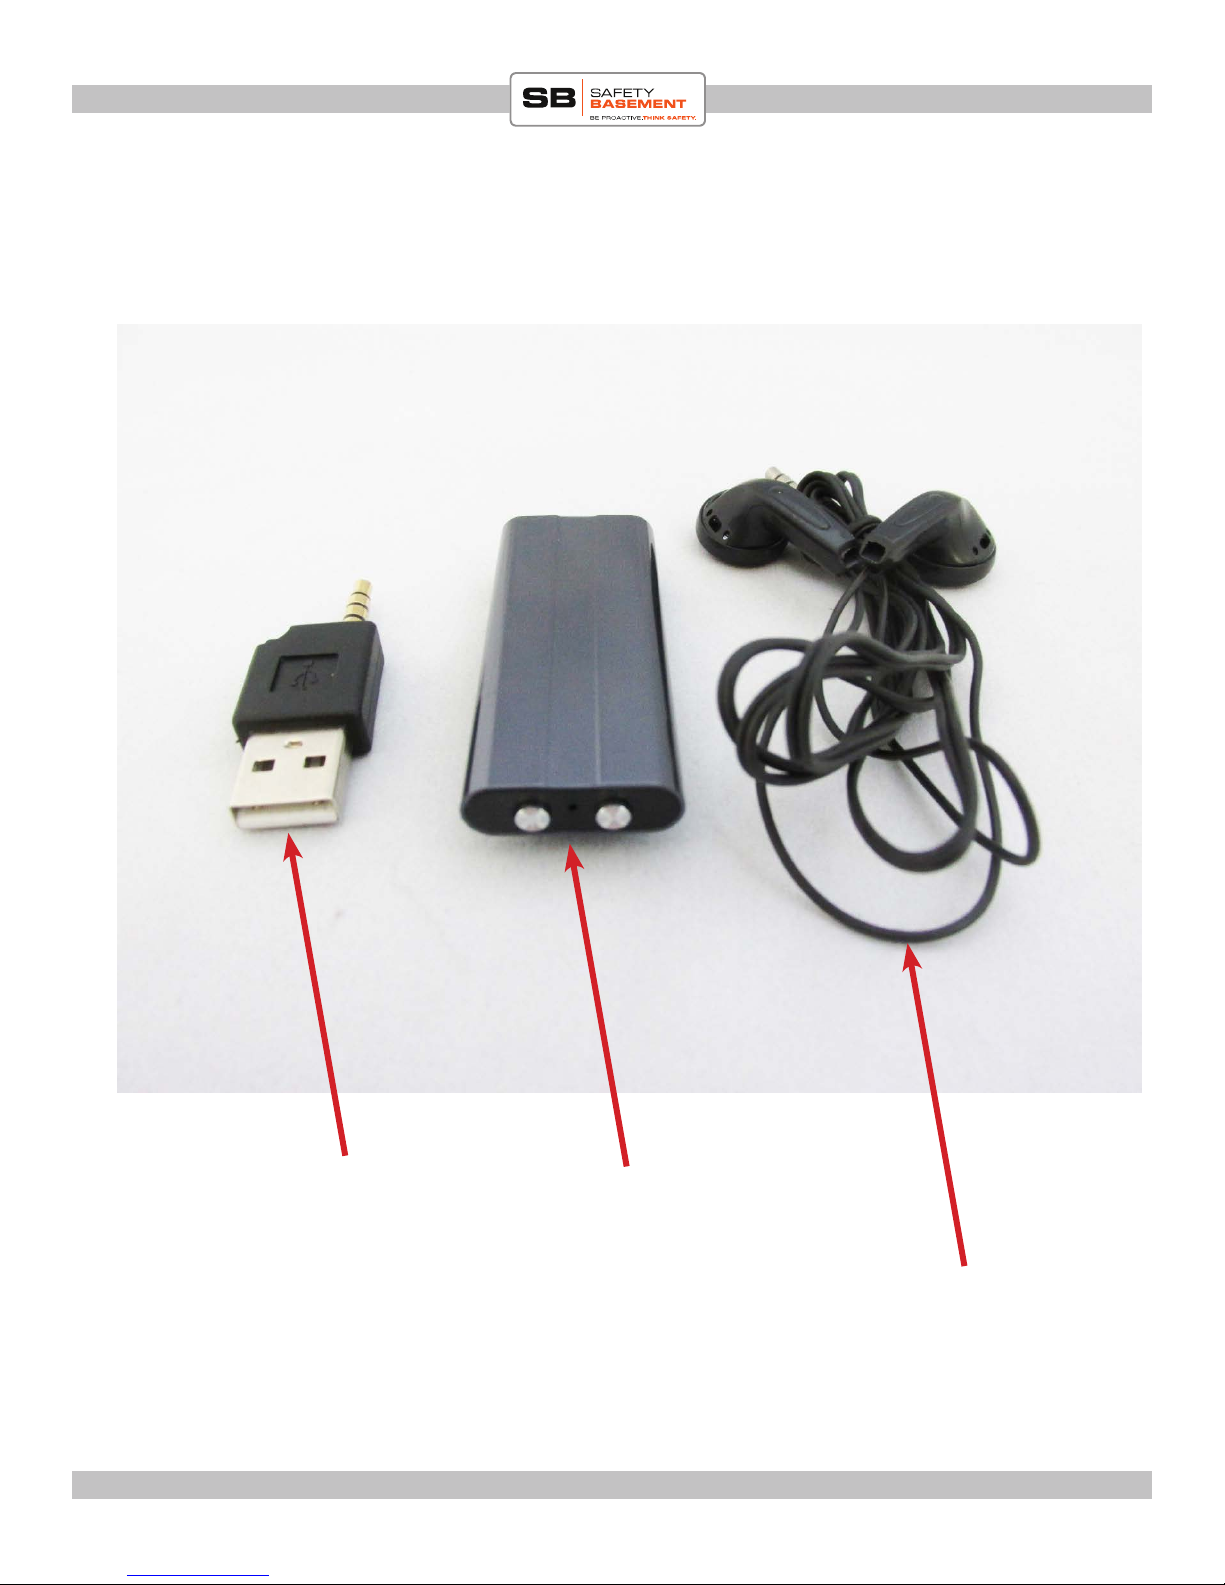
PACKAGE CONTENT
USB Adapter
www.SafetyBasement.com Phone: 877-345-2336 Fax: 888-236-2524
Sherlock 3.0 Recorder
Headphones
Page 3
Page 4
PRODUCT MANUAL Jooney Bug Eye : SB-BUG100
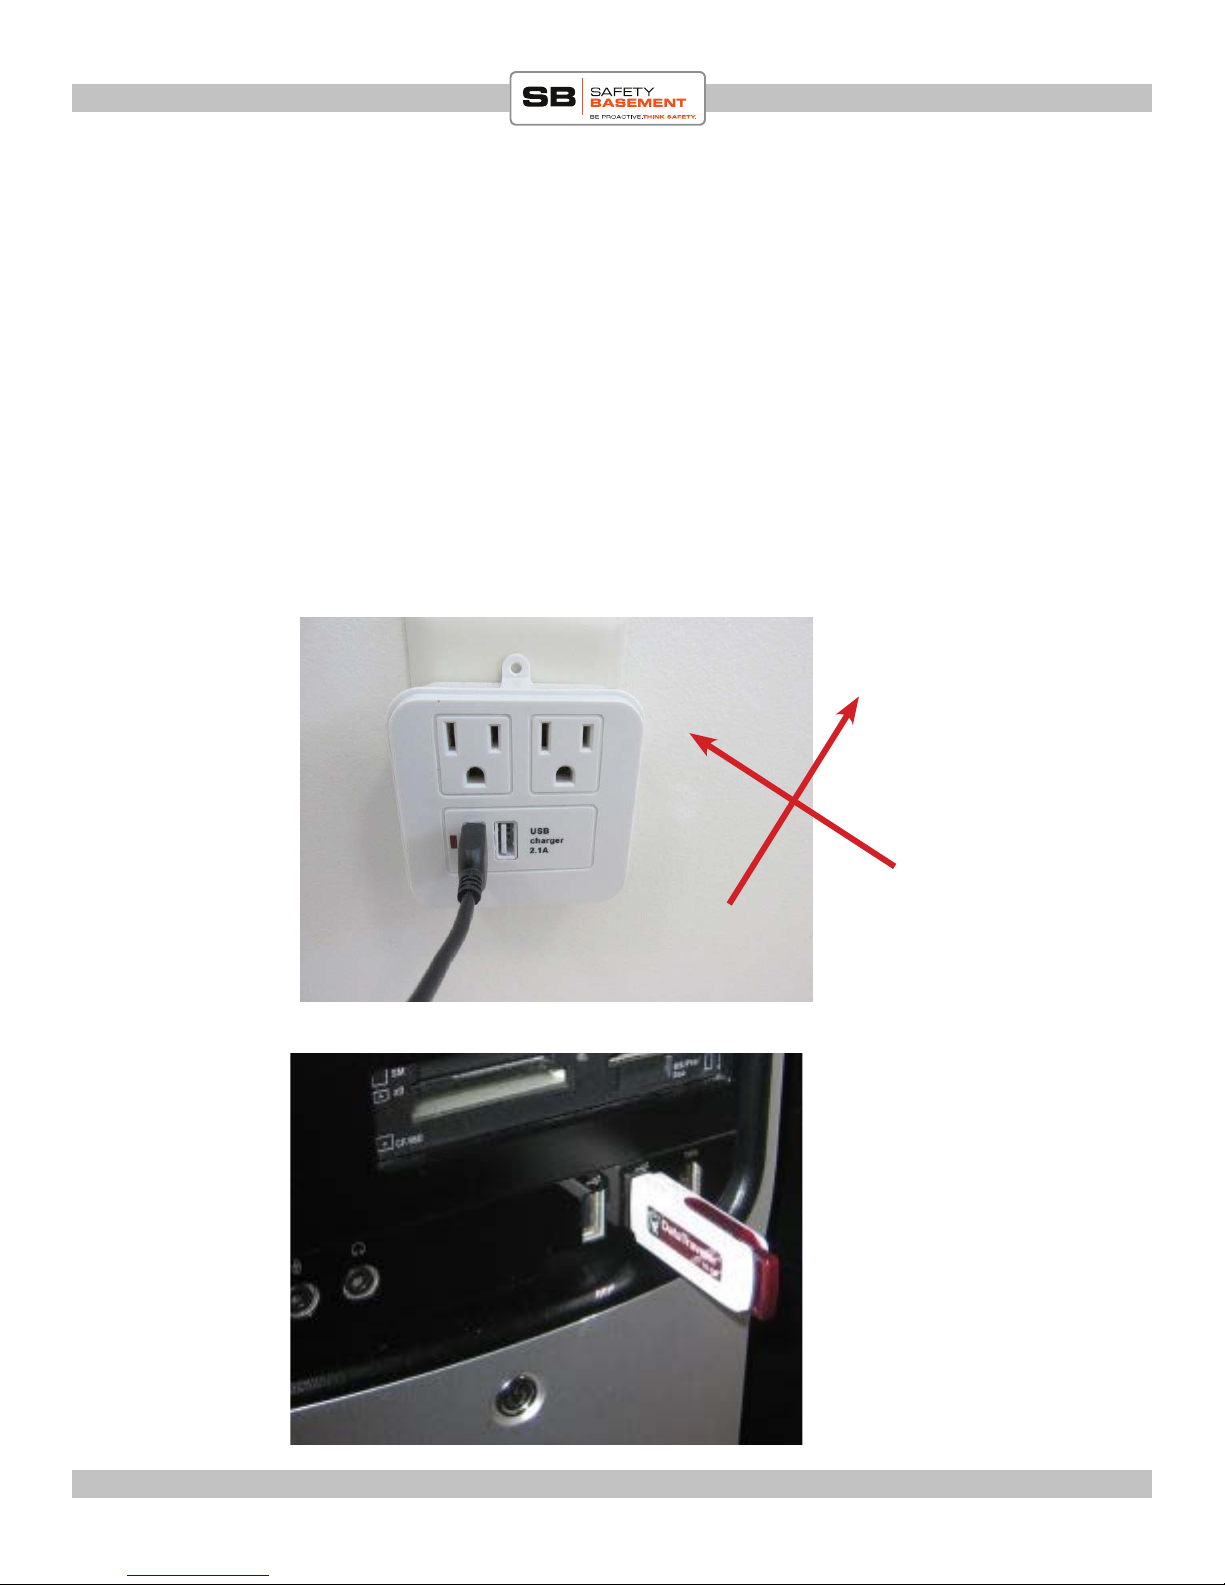
CHARGING:
CHARGING: Please fully charge unit before rst unse. CHARGE ONLY VIA COMPUTER USB PORT.
DO NOT CHARGE VIA PORT FROM WALL OUTLET. MAY DAMAGE UNIT DUE
TO POTENTIAL VARIABILITY OF POWER FROM WALL OUTLET. COMPUTER
NO
YES
www.SafetyBasement.com Phone: 877-345-2336 Fax: 888-236-2524
Page 4
Page 5
PRODUCT MANUAL SHERLOCK RECORDER: VX0166
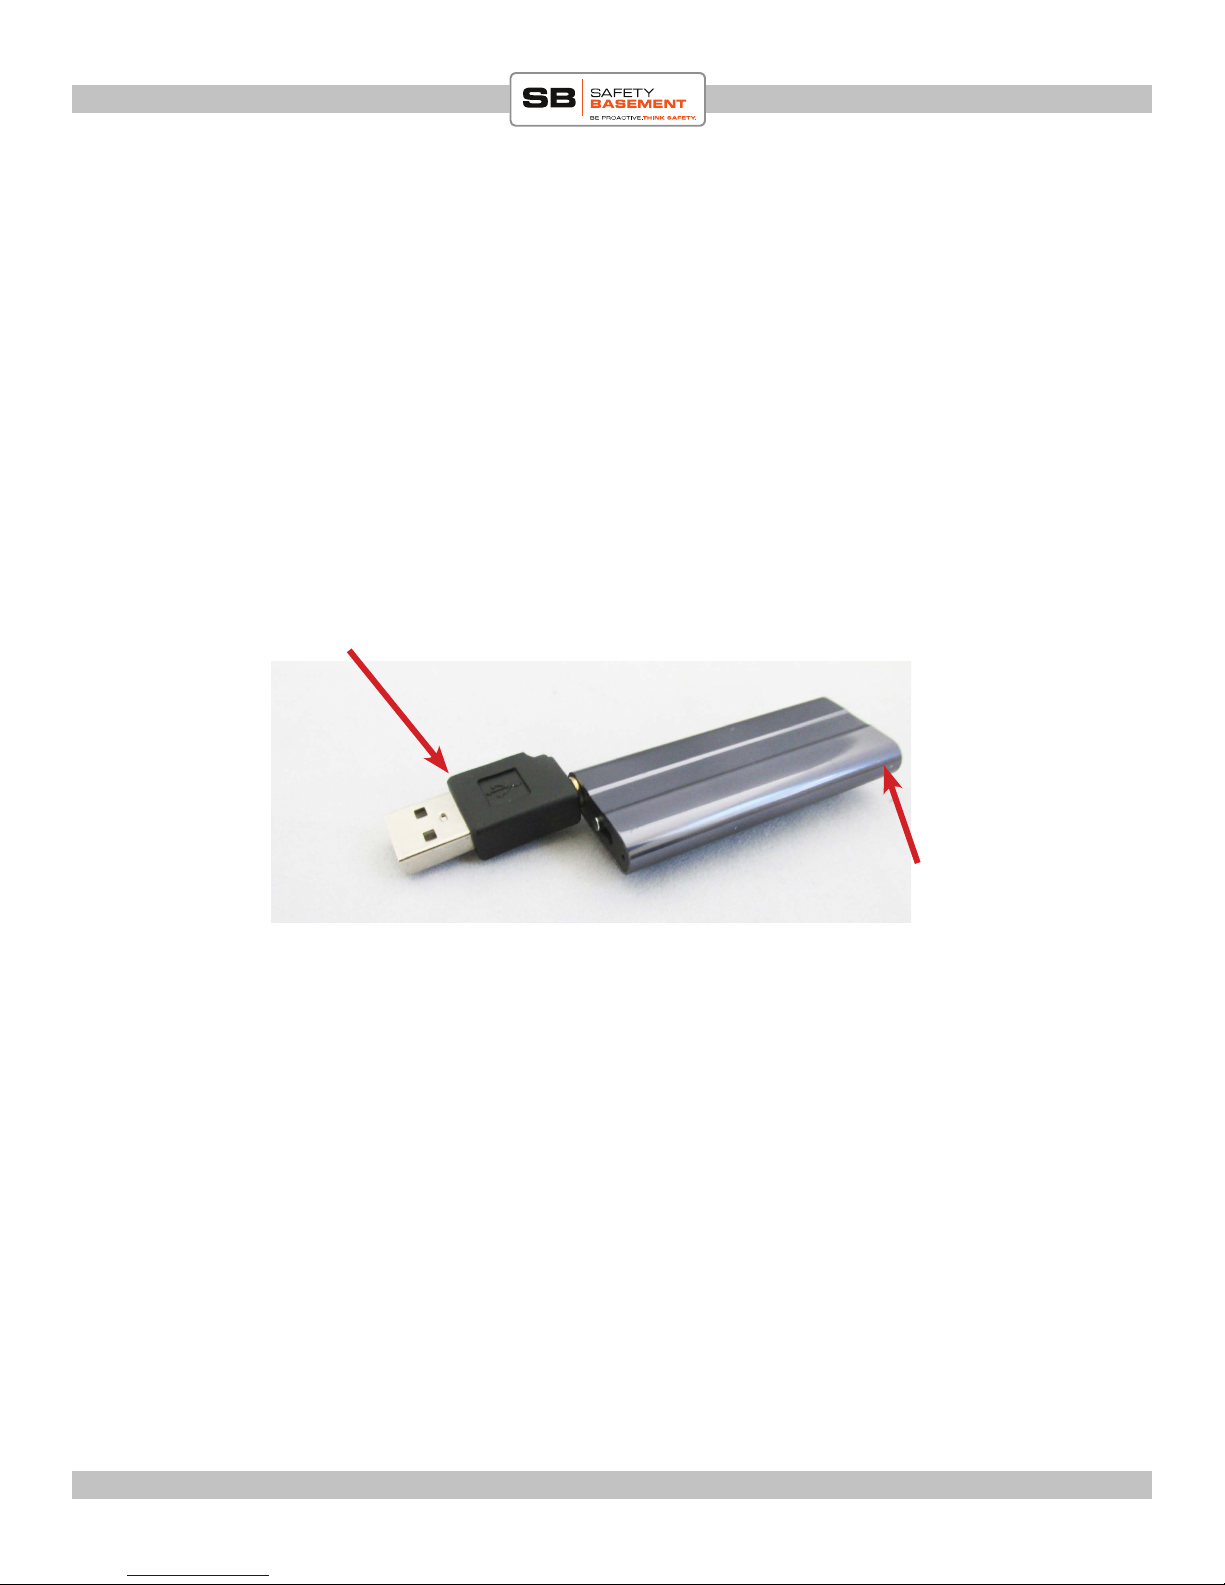
BEFORE FIRST USE - TIME STAMP
PLEASE NOTE: e time stamp has to be set each time you turn device OFF then ON.
Begin by connecting USB adapter to Sherlock recording device. en connect to your computer
USB port. See diagram below:
recorder.
1. Make sure your recorder is in OFF position then PLUG it into your USB port on your
computer. Please connect DIRECTLY to your computers USB port. (not via a hub)
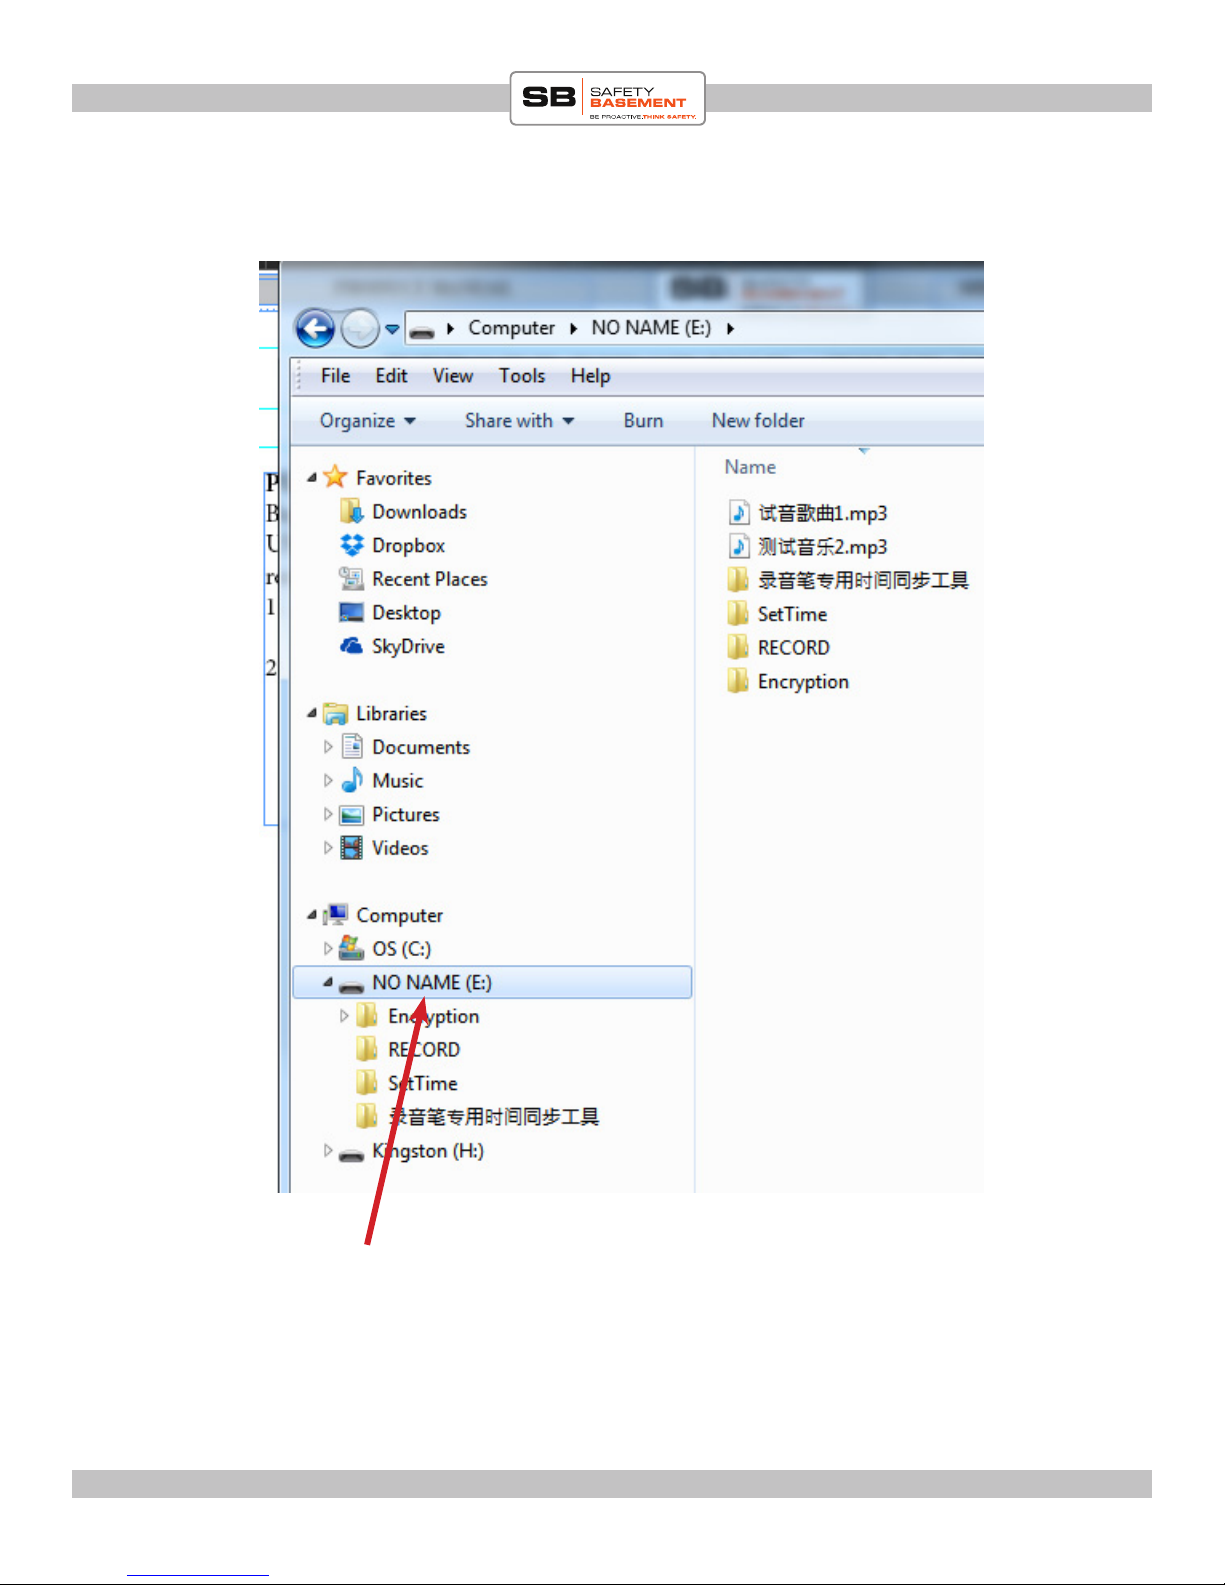
2. A window will pop up. Select OPEN FOLDER TO VIEW FILES, OR if a window does not
pop up, go to START menu>COMPUTER, then select the apropriate drivers that corresponds
to what you jsut plugged in 9Sherlock)
USB Adapter
Sherlock Voice Recorder
www.SafetyBasement.com Phone: 877-345-2336 Fax: 888-236-2524
Page 5
Page 6
PRODUCT MANUAL Jooney Bug Eye : SB-BUG100
If you are using WINDOWS operating system, le will
usually show up as ‘NO NAME’. In this case the driver
shows up as E but it may show up as a dierent letter on
your computer.
Click this le and the items on the right will show up.
www.SafetyBasement.com Phone: 877-345-2336 Fax: 888-236-2524
Page 6
Page 7

PRODUCT MANUAL Jooney Bug Eye : SB-BUG100
Double click this le.
Double click this le.
www.SafetyBasement.com Phone: 877-345-2336 Fax: 888-236-2524
Time successfully set.
Aer this point, please close
all windows BEFORE you
unplug device from computer
Page 7
Page 8

PRODUCT MANUAL Jooney Bug Eye : SB-BUG100
PRODUCT MANUAL SHERLOCK RECORDER: VX0166
VOICE RECORDING
e Sherlock 3.0 voice recorder can be set to record in continuous or voice-activated mode.
RECORD in CONTINUOUS MODE: is unit is defaulted to continuous recording. If you prefer
it in this mode, then simply turn switch to ON and you are all set. Place it where you need to
record.
RECORD in VOICE ACTIVATED MODE: To record in voice mode, hold the (volume down)button then turn unit ON. Continue holding the volume down button until the red indicator light
turns on, blinks three times and turns o. Release. Your unit is now engaged to work in voice
activated mode. Place unit where you need. (Please test feature to ensure it is engaged before
deploying)
RECORD while PLUGGED IN: Move Power Switch to “ON” position THEN connect USB
cable to charge the device, press and hold “ + ” “ – ” together until the Indicator Light goes o, the
device will start the recording when charging.
MONITOR RECORDING: Move Power Switch to “ON” position (make sure the headphone is
not plugged in), press and hold “ + ” “ – ” together until the Indicator Light goes o, then plug in
headphone, you can listen to the current recording
VOICE ACTIVATED MODE
Hold this button down, and
while it is still down turn this
button to ON position.
aer turning button to On
position, the indicator light
will turn on steady for a few
seconds. Continue holding ‘-’
button until steady red light
turns o. release both.
Red light will then blink 3
times and turn o. You are
now in Voice Activated mode.
www.SafetyBasement.com Phone: 877-345-2336 Fax: 888-236-2524
www.SafetyBasement.com Phone: 877-345-2336 Fax: 888-236-2524
Page 8
Page 8
Page 9

PRODUCT MANUAL Jooney Bug Eye : SB-BUG100
VOICE RECORDING ENCRYPTION
Encryption can only be achieved AFTER you have made a recording. If you want to password
protect/Encrypt your recordings, do the following:
To encrypt your recordings:
1. Create a new folder with a dierent name other than the default name of RECORD.
2. Copy the UHJJM.EXE le from the ‘Encryption’ folder and copy it into the new folder you just
created. (the example in our case is ‘Encrypted Folder’. See image on next page
3. Move all the les you wish to protect into this new folder (from the RECORD folder)
3. Now go to this ecryption folder and double click the UHJJM.EXE application
4. Enter password in space provided. Re-enter password in second text box.
5. Click the RIGHT button to SAVE or le to CANCEL. You MUST remember your password.
Forgotten passwords cannot be recovered and all les in the encrypted folder will be lost if you
forget password. You must remember your password to UNENCRYPTED an encrypted folder!
CONFIRM
www.SafetyBasement.com Phone: 877-345-2336 Fax: 888-236-2524
CANCEL
Page 9
Page 10

PRODUCT MANUAL Jooney Bug Eye : SB-BUG100
VOICE RECORDING ENCRYPTION..con-
Once you encrypt the folder, you will no longer see the les in the folder. You will only see
the encryption soware. You will need to double click the encryption soware, then enter the
password then the les will magically appear aer entering password.
www.SafetyBasement.com Phone: 877-345-2336 Fax: 888-236-2524
Page 10
Page 11

PRODUCT MANUAL Jooney Bug Eye : SB-BUG100
VOICE RECORDING DECRYPTION
Aer encrypting a folder, you can reverse the action.
1. Go the the encryptic folder and double click the encryption soware
2. Enter your password then before pressing conrm, check the last radio button
Enter password here
CONFIRM button
www.SafetyBasement.com Phone: 877-345-2336 Fax: 888-236-2524
Check this button before pressing the conrm button. is
will allow you to remove folder from ENCRYPTION state.
Please note: In order to delete an encrypted folder,
you have to decrypt it rst. Cannot be deleted while it is
encrypted.
Page 11
Page 12

PRODUCT MANUAL SHERLOCK RECORDER: VX0166
Optional Accessory:
If you bought the optional mini playback speaker, please read this page. If not proceed to next
page.
Ensure there is ‘AAA’ battery
Before plugging in to recorder, do the following:
1. Turn power on speaker to ON
2. Make sure Sherlock recorder is in OFF position
3. Plug in speaker to Sherlock recorder
4. Turn Sherlock recorder to ON positon
5. Files on your recorder should start plaing back in a few seconds
6. Adjust volume to your comfort level
7. When done TURN OFF VOICE RECORDER BEFORE unplugging speaker.
NOTE: While a headphone or speaker is plugged in, e Sherlock voice recorder will not
record!
www.SafetyBasement.com Phone: 877-345-2336 Fax: 888-236-2524
Page 12
Page 13

PRODUCT MANUAL SHERLOCK RECORDER: VX0166
PRODUCT MANUAL Jooney Bug Eye : SB-BUG100
PLAYING BACK RECORDINGS
IMPORTANT: MAKE SURE DEVICE IS IN OFF POSITION PRIOR TO PLUGGING TO
YOUR COMPUTER OR PLUGGING IN YOUR HEADPHONES.
ere are two ways to play back your recordings:
HEADPHONES (or the optional speaker mentioned on previous
page):
1. Make sure voice recorder is in OFF position
2. Plug in included headphones
3. Turn switch to PLAY BACK position
4. You will hear the mp3 les playing by default. To skip to the RECORD folder,
press the ‘-’ button. is will skip to your recordings. e ‘-’ button becomes a
‘Folder Skip’ command when headphones are plugged in. And if you press and
hold the same button it decreases volume.
4. You should start hearing the rst le play as soon you turn to ON
5. Please note that the les will be played sequentially. You will not be able to skip
to a dierent le or fast forward. is feature is possible if you listen via your
computer
Headphone/USB
adapter
www.SafetyBasement.com Phone: 877-345-2336 Fax: 888-236-2524
www.SafetyBasement.com Phone: 877-345-2336 Fax: 888-236-2524
PLAY BACK
OFF
RECORD
Page 13
Page 13
Page 14

PRODUCT MANUAL Jooney Bug Eye : SB-BUG100
PLAYING BACK RECORDINGS
Volume down/
NEXT FOLDER
Indicator light
Volume UP/
NEXT FILE
ese commands work while headphones are plugged in:
NEXT FOLDER: Press ‘-’ button
NEXT FILE: While you are in a given folder, press the ‘+’ button to skip to next le
VOLUME UP/DOWN: While listening to a le you can increase or decrease the volume by hold-
ing down the ‘+’ or ‘-’ buttons. release when required volume level is achieved.
COMPUTER:
1. Make sure device is in OFF position/
2. Plug to computer USB port
3. Open pop up folder and then open RECORD folder to view recorded les
4. Double click the le you wish to listen to
www.SafetyBasement.com Phone: 877-345-2336 Fax: 888-236-2524
Page 14
Page 15

PRODUCT MANUAL Jooney Bug Eye : SB-BUG100
DELETING RECORDINGS
NOTE: We recommend deleting les via your computer. You can use the method shown below
however it is easy to unintentionally delete les you did not intend. Please proceed with caution.
MAC USERS PLEASE NOTE: Please note carefully how to delete les. Read the entire section!!
DELETING RECORDINGS VIA RECORDER:
HOW TO DELETE FILE: when playing a le, press and hold “ + ” “ – ” buttons together to enter
Delete Mode, and the Indicator Light will turn purple.
Delete Single File: in Delete Mode, press “ + ” or “ – ” button will delete current le, the Indicator
Light will turn blue and blink fast.
Delete All Files: in Delete Mode, press and hold “ + ” “ – ” buttons together to delete all les, the
Indicator Light will turn red and blink fast
*Note: to prevent deletion mistake, we highly recommend you to conduct le deletion when con-
nected to PC.
DELETING RECORDINGS VIA COMPUTER (Very important for MAC users)
• On PC, highlight the les on your device you wish to remove, then DELETE normally. Now,
with the device still plugged in, go to your Recycle Bin and EMPTY it. is will remove
ALL les in your Recycle Bin, including les that were NOT on your Jooney Bug. Proceed
carefully! ese les will be gone forever.
• On Mac, highlight the les on your device you wish to remove, then DELETE normally.
THEN, with the device still plugged in, go to your Trash Can on our PC and EMPTY it. is
will remove ALL les in your Trash Can including trash les on your device. For some reason,
MAC computers create invisible trash les on the device you are deleting from. You will not
see the les but over time your memory will be full because the deleted les are still on the
device. By deleting your trash les on your computer right aer you delete the les from your
device will your device be truly rid of the deleted les. Proceed carefully! ese les will be
gone forever.
UNPLUGGING YOUR DEVICE from your computer
• For best operation of your device, be sure to remove or “eject” it properly from your PC or
Mac BEFORE you unplug it from the USB port. is will let your computer properly close its
connection to the device.
• On Windows, choose MY COMPUTER. Located your device, shown as a Removable Drive,
such as Drive E: or Drive F: RIGHT-CLICK on the drive, and choose EJECT. Wait until
Windows says it is safe to remove your device, then unplug.
www.SafetyBasement.com Phone: 877-345-2336 Fax: 888-236-2524
Page 15
Page 16

PRODUCT MANUAL Jooney Bug Eye : SB-BUG100
PRODUCT MANUAL SHERLOCK RECORDER: VX0166
DEVICE SPECIFICATIONS
Video Format N/A
Audio quality 192 kbps
Photo Format N/A
Photo Resolution N/A
Memory 8 GB
www.SafetyBasement.com Phone: 877-345-2336 Fax: 888-236-2524
www.SafetyBasement.com Phone: 877-345-2336 Fax: 888-236-2524
Page 16
Page 16
Page 17

PRODUCT MANUAL SHERLOCK RECORDER: VX0166
PRODUCT MANUAL Jooney Bug Eye : SB-BUG100
SUGGESTED SOFTWARE
Your Windows PC or Mac has built-in soware that will play most of the les created by devices
like yours. However, if you are having problems playing your les, or need more options, please
download and try these programs.
is soware is free and can be downloaded directly from the links below. You can nd support
and tutorials for these programs on their respective websites. SafetyBasement can not provide
soware support for these programs
As with ANY les you download from the internet, be sure to scan them for viruses using your
particular virus scanner. While most users report no issues using this soware, we can not be
responsible for any damage caused by this soware. Please proceed carefully. Back up your PC
before installing any new soware.
VIDEO PLAYBACK - VLC
(http://www.videolan.org/vlc/index.html)
e VLC Media Player can play almost any video or audio le type. ere is
a version for Windows and for Mac OS X.
VIDEO EDITING for WINDOWS - MOVIE MAKER 2012
(http://windows.microso.com/en-US/windows/get-movie-makerdownload)
Movie Maker is a simple video editing program from Microso. Please go
to this link, and choose the download for your version of Windows. Please
note: Movie Maker is part of the Windows Essentials package.
VIDEO EDITING for MAC OS X - iMOVIE
(Visit the Apple Mac App Store for latest version)
iMovie is a simple video editing program from Apple. It comes installed with
your new Mac. e latest version is also available at the Mac App Store at
additional cost.
AUDIO PLAYBACK and EDITING - AUDACITY
(http://audacity.sourceforge.net/)
Audacity is a popular audio editing program used by amateurs and
professionals to edit simple and complex audio projects. You can use
Audacity to convert your audio les to another format, such as MP3. ere
is a version for Windows and Mac OS X.
PHOTOS
Your Windows and Mac computers have the ability to do basic editing of
photos built in.
www.SafetyBasement.com Phone: 877-345-2336 Fax: 888-236-2524
www.SafetyBasement.com Phone: 877-345-2336 Fax: 888-236-2524
Page 17
Page 17
 Loading...