

Page 1

INSTRUCTION MANUAL
All-In-One GSM Home Alarm System
SB-SP7200-GSM
Revised: August 28, 2014
Page 2

All-In-One GSM Home Alarm & Video System Product Manual : SB-SP7200-GSM
PRODUCT REFERENCE
MOUNTING
ACCESSORIES
PIR / MOTION
DETECTION
UNIT
MAIN UNIT
POWER
ADAPTER
MOUNTING
ACCESSORIES
www.SafetyBasement.com Phone: 877-345-2336 Fax: 888-236-2524
(2) DOOR /
WINDOW
UNITS
REMOTE
CONROL
USB CABLE
Page 2
Page 3
All-In-One GSM Home Alarm & Video System Product Manual : SB-SP7200-GSM
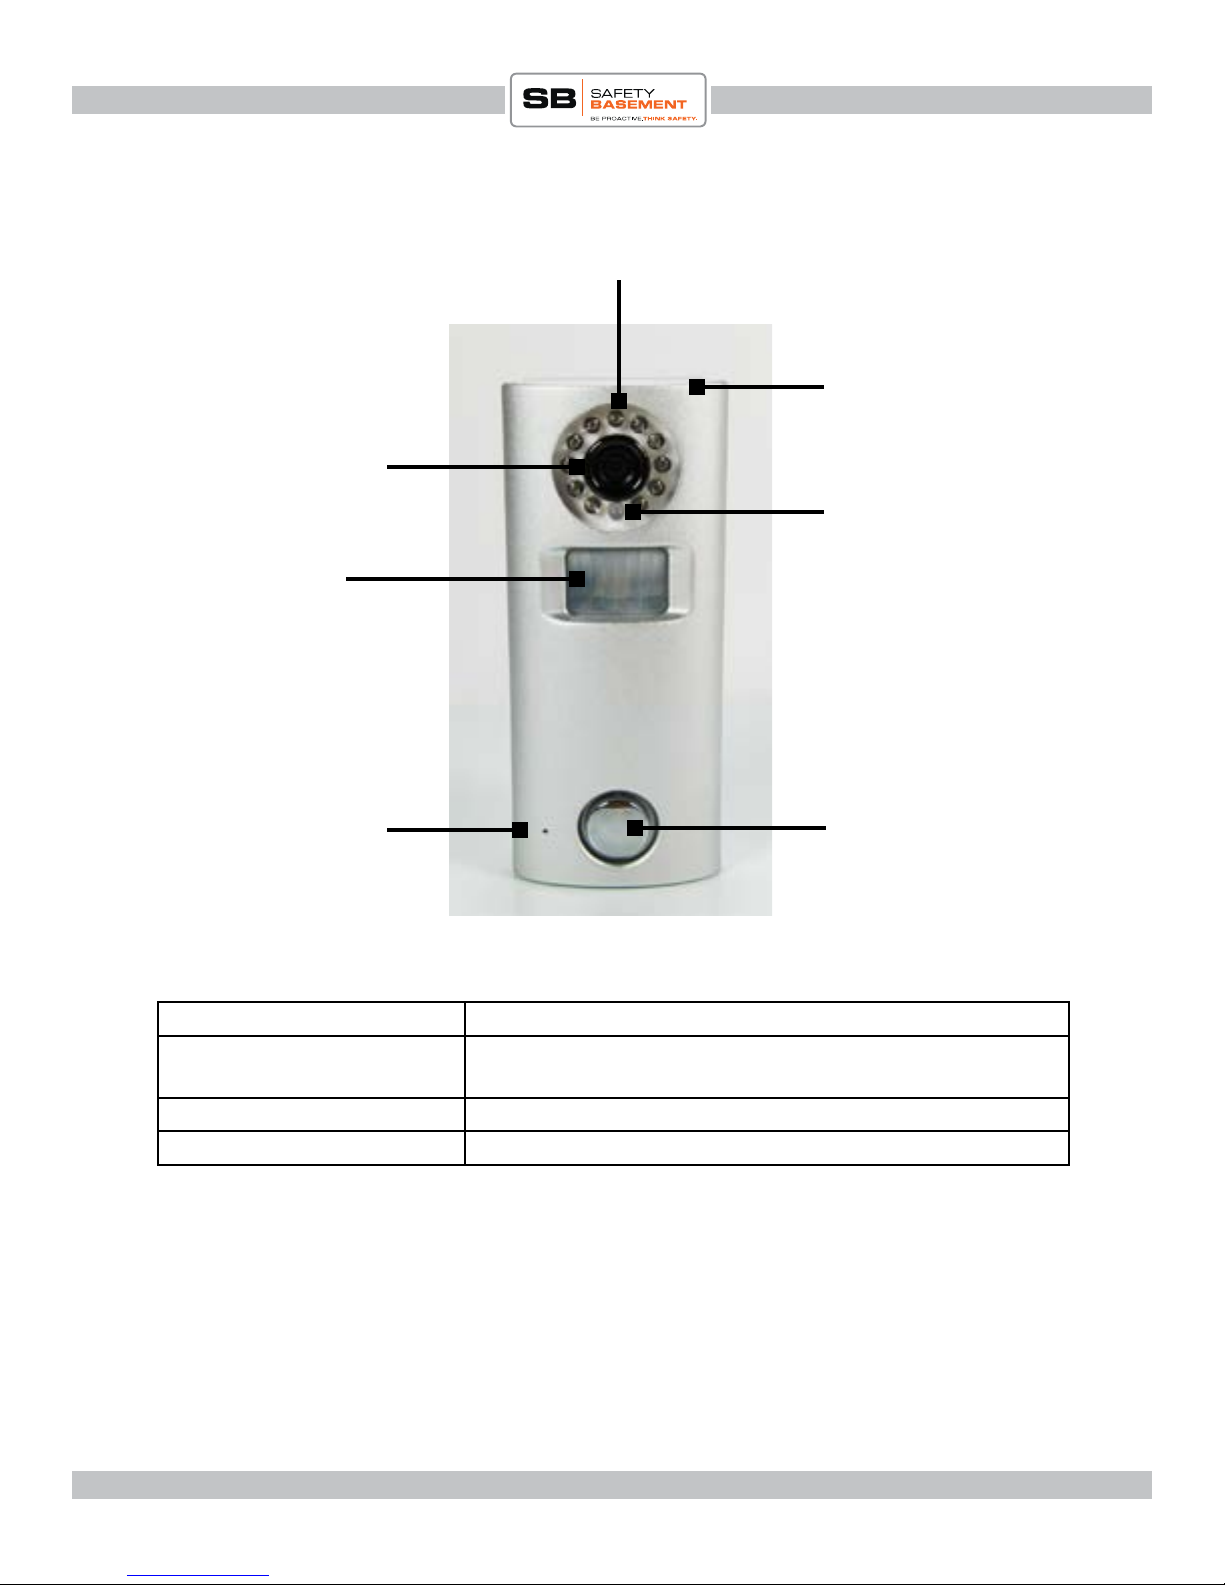
PRODUCT REFERENCE
IR LIGHTS
SOLAR PANEL
CAMERA LENS
STATUS LIGHT
MOTION
SENSOR
LIVE LISTENING
MICROPHONE
STATUS LIGHT
SLOW BLINK Device is searching for cellular signal
FLASHES 3 TIMES EVERY
2.5 SECONDS
LED FLASHES QUICKLY During setup of sensors, unit has connected successfully
e status light will also blink in other ways depending on the mode you are in. ese three
Your alarm system will automatically switch to IR “Night-Vision” when necessary.
Connected to cellular signal
status blinks are the most important.
SIREN SPEAKER
www.SafetyBasement.com Phone: 877-345-2336 Fax: 888-236-2524
Page 3
Page 4
All-In-One GSM Home Alarm & Video System Product Manual : SB-SP7200-GSM
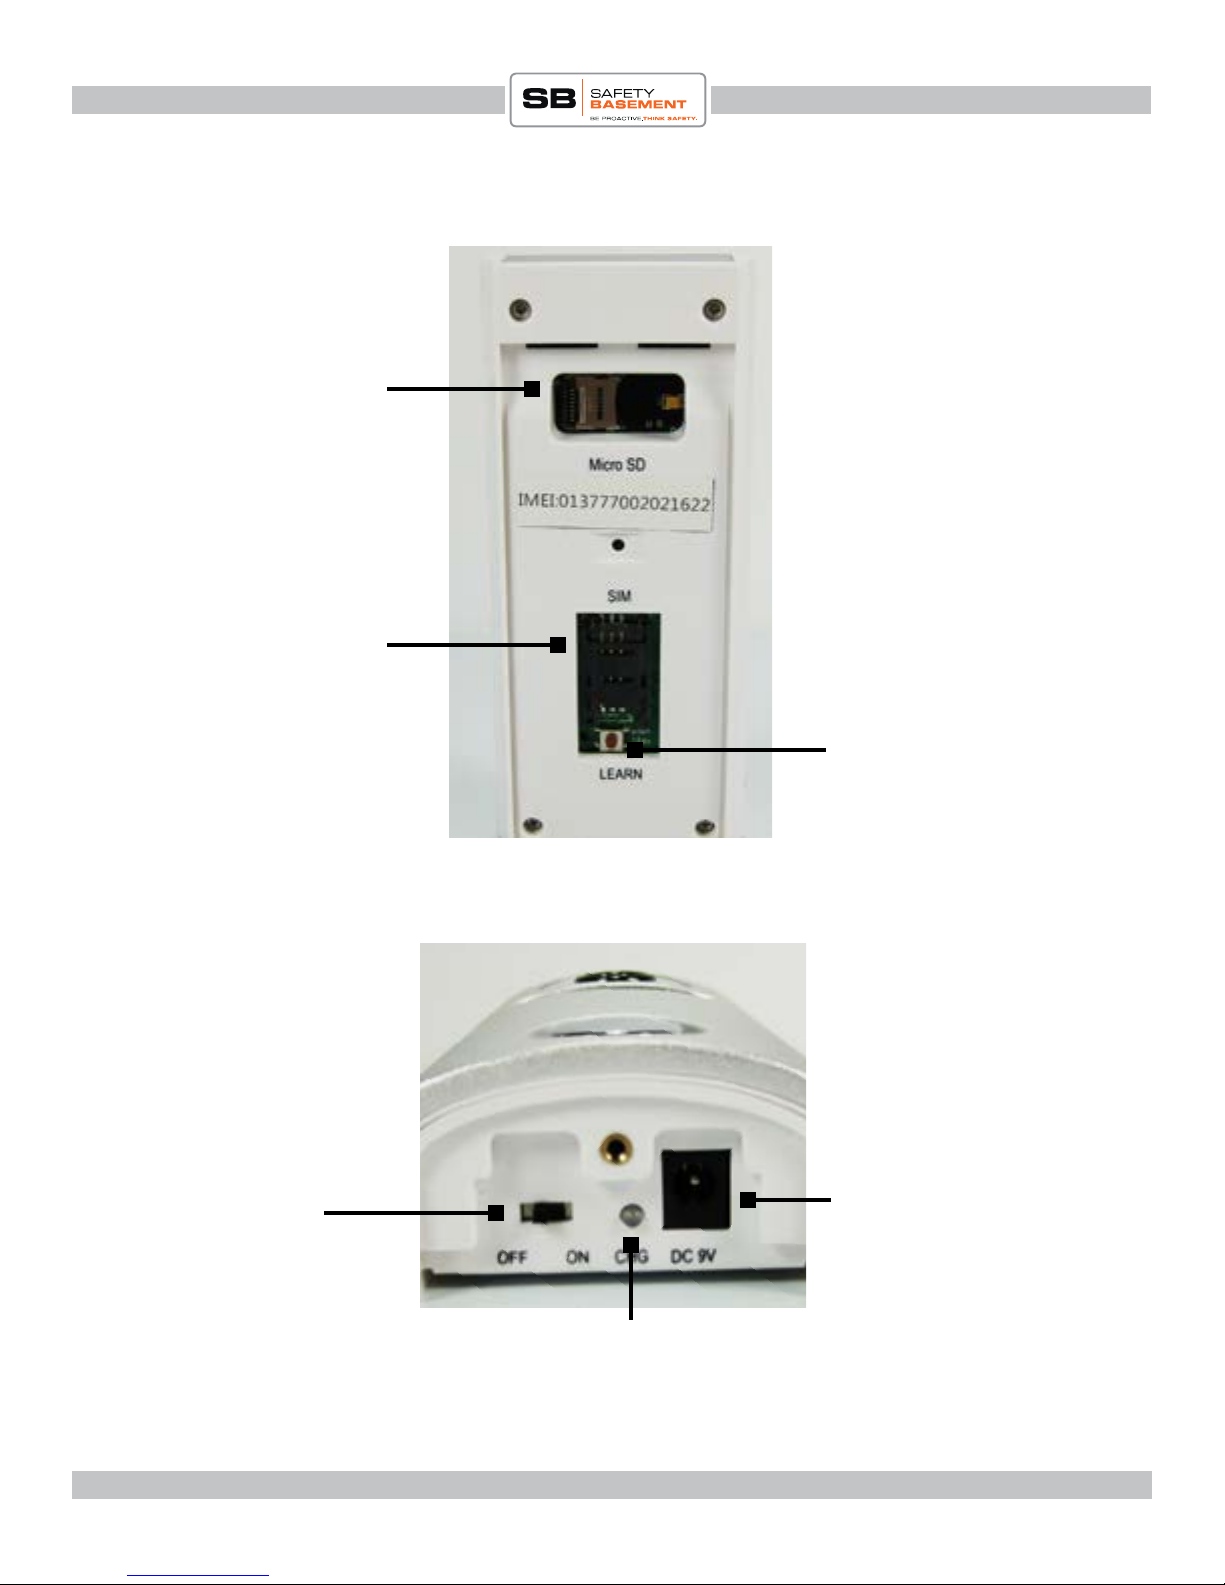
PRODUCT REFERENCE
BACK OF
MAIN UNIT
(BACK COVER
REMOVED)
MICRO SD CARD
SLOT
SIM CARD SLOT
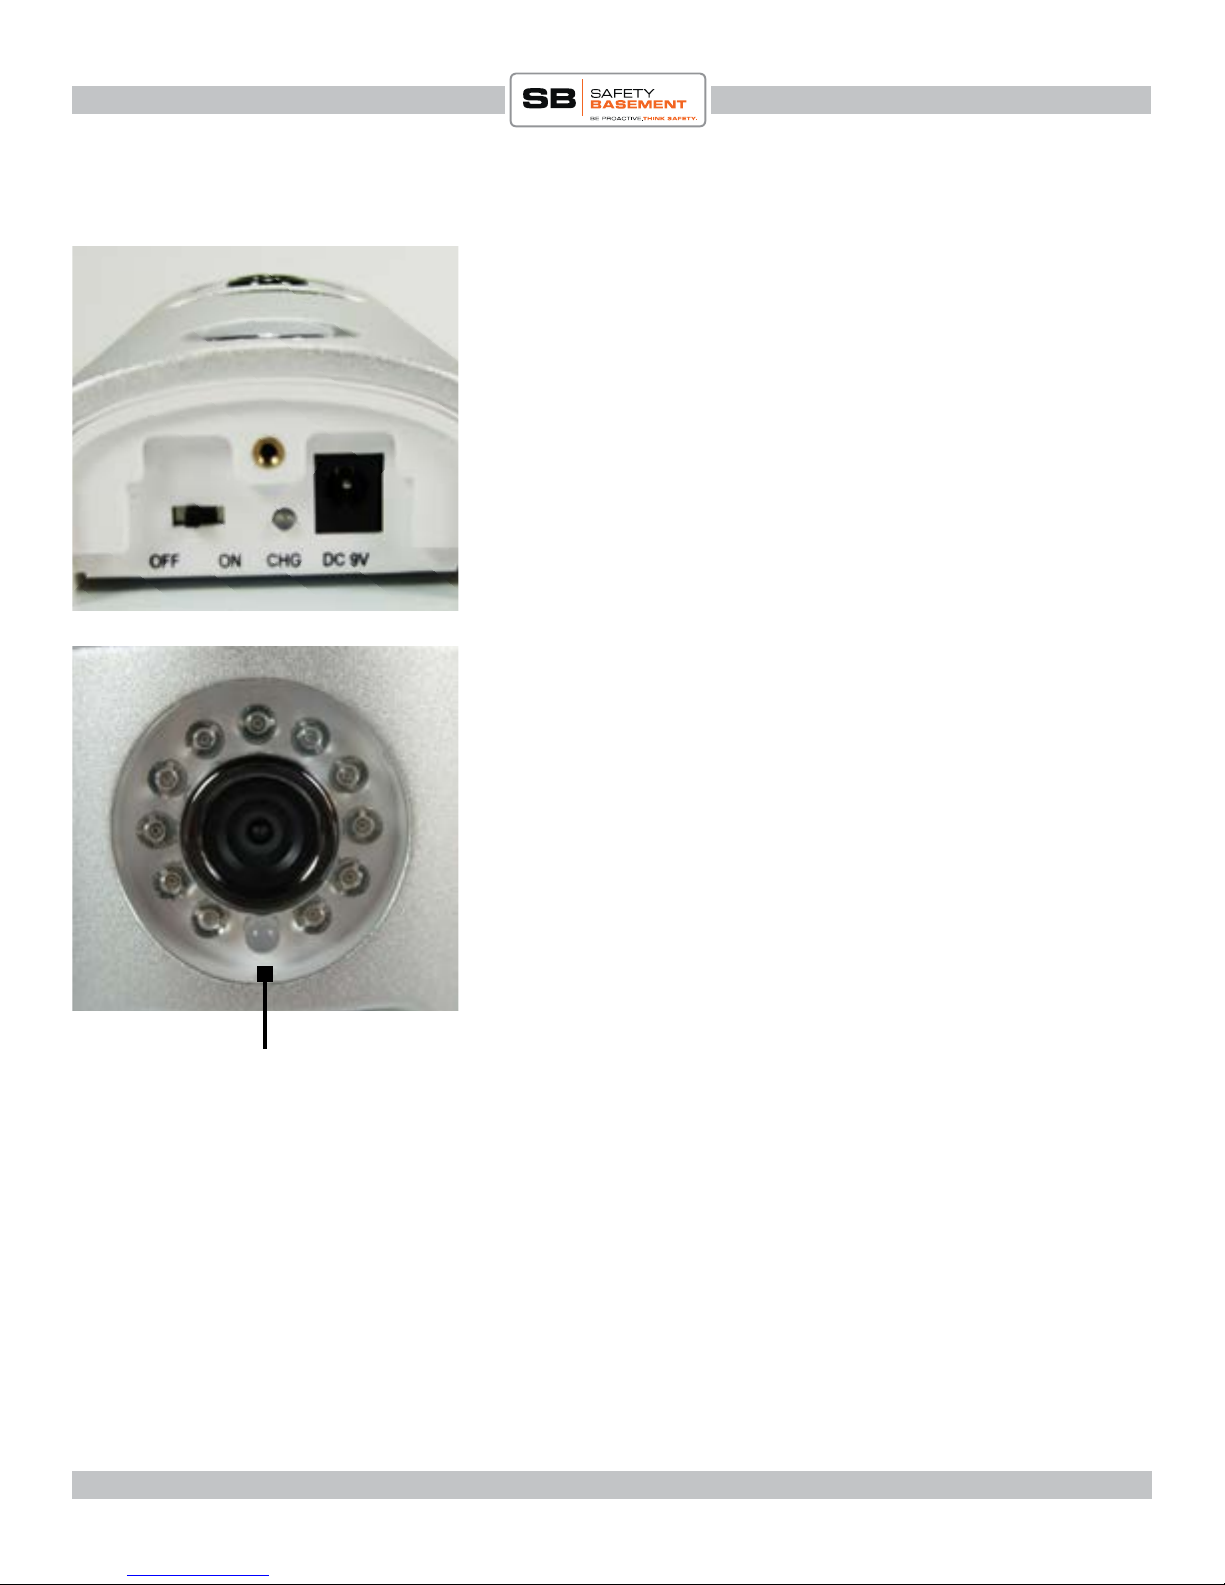
ON/OFF
SWITCH
LEARN BUTTON
BOTTOM OF
MAIN UNIT
(BACK COVER
REMOVED)
ADAPTER
CONNECTION
www.SafetyBasement.com Phone: 877-345-2336 Fax: 888-236-2524
CHARGING STATUS
RED - CHARGING
GREEN / OFF - CHARGED
Page 4
Page 5

All-In-One GSM Home Alarm & Video System Product Manual : SB-SP7200-GSM
INTRODUCTION
Your GSM Alarm System uses text messages to communicate with you. is requires sending
the unit particular codes. We have put together a list of codes at the end of this manual, but for
now, please follow the instructions in order so that you may best understand how the system
works.
REQUIREMENTS:
You should have the following for proper operation of your GSM Alarm System.
1) Your GSM Alarm System, with the Main Unit, Remote Control, Sensors, a Power Adapter,
USB Cable and mounting accessories.
2) A micro SD Card, up to 32GB. You can order a compatible card from SafetyBasement.com.
Should you already have an SD card, please be sure it has been erased.
3) A cellular SIM card. A compatible card is available from SafetyBasement.com. Please check
with SafetyBasement for SIM card requirement before using another card. ANY SIM card will
require a monthly fee.
4) A small Phillips head screwdriver.
5) 3 AAA batteries for wireless PIR unit.
www.SafetyBasement.com Phone: 877-345-2336 Fax: 888-236-2524
Page 5
Page 6
All-In-One GSM Home Alarm & Video System Product Manual : SB-SP7200-GSM
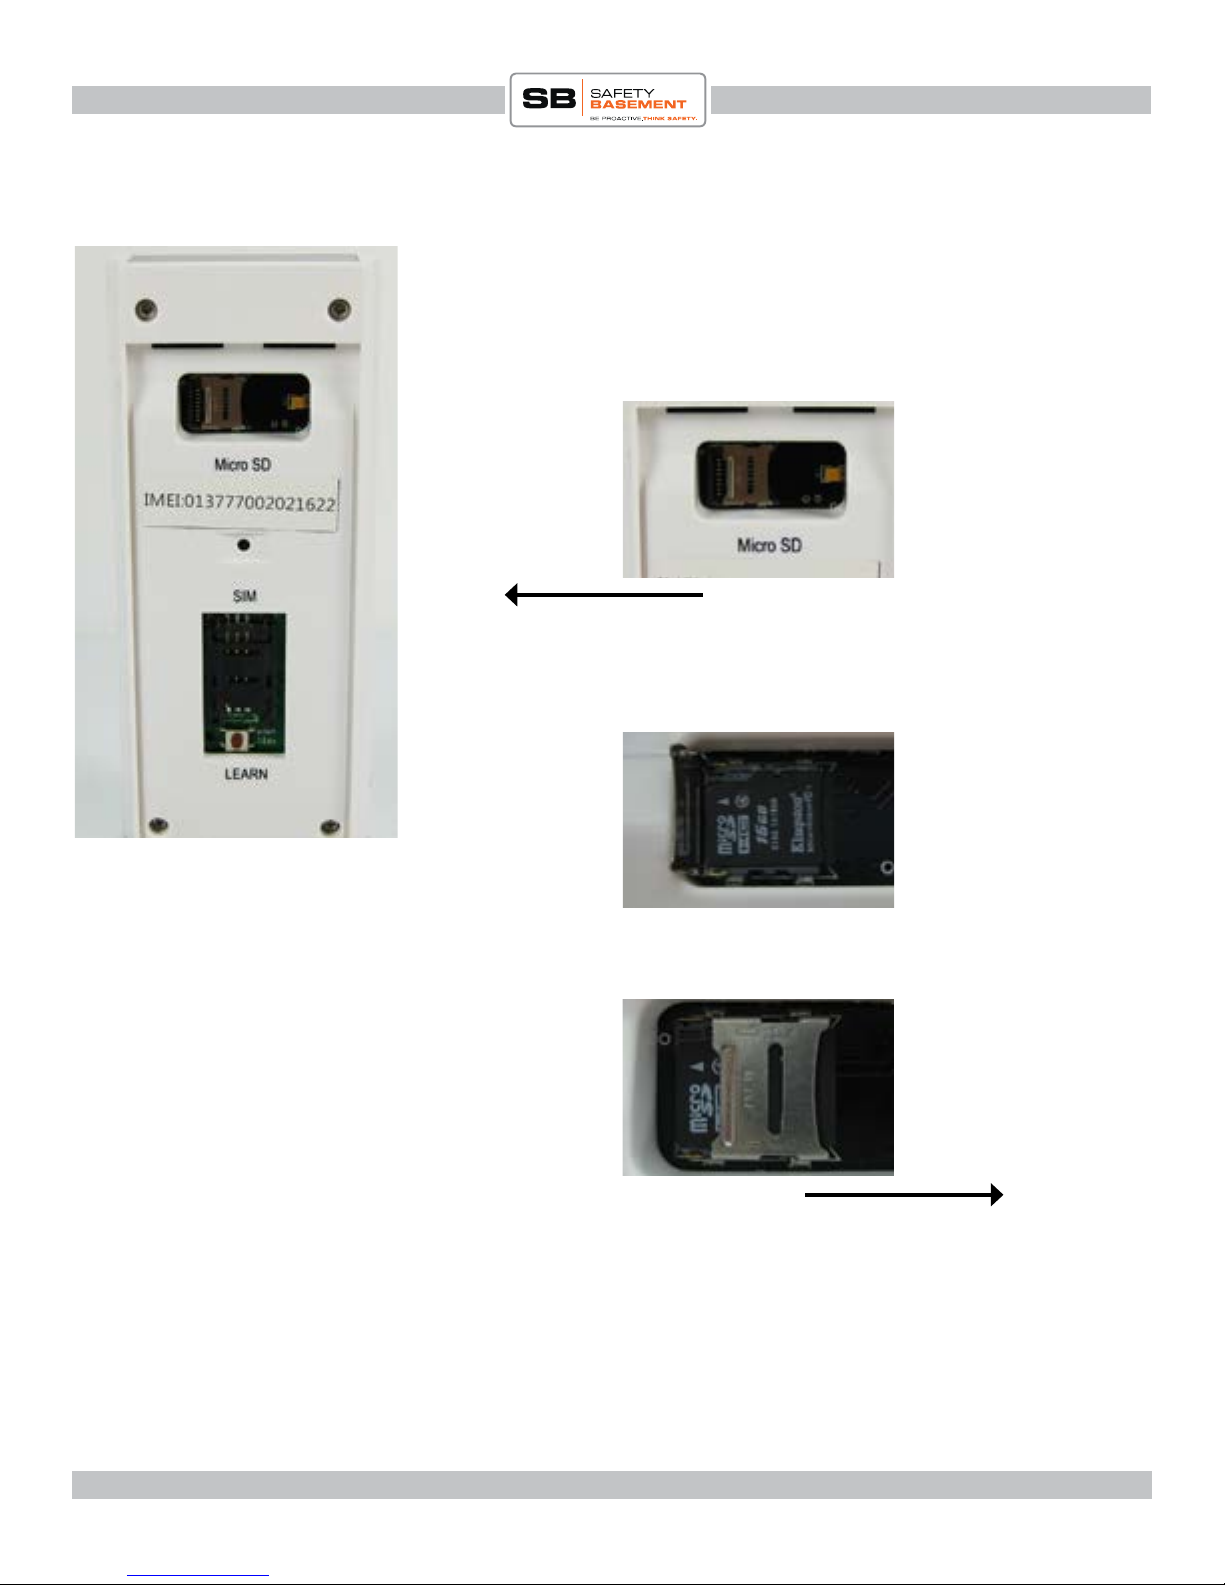
INSTALL THE SD CARD
1. Use your Phillips head screwdriver to remove the screw from the
bottom of the main unit.
2. Remove the back of the main unit.
3. With a ngernail, carefully push the silver SD Card slot lock to the
LEFT. It will click into the OPEN position.
Slide LEFT to UNLOCK
4. Raise the silver lock to expose the SD card connection.
5. Place the SD card in the slot as shown, with the gold connectors
down.
6. Lower the silver lock and slide to the RIGHT to lock the SD in
place. It will click into the LOCKED position.
Slide RIGHT to LOCK
www.SafetyBasement.com Phone: 877-345-2336 Fax: 888-236-2524
Page 6
Page 7
All-In-One GSM Home Alarm & Video System Product Manual : SB-SP7200-GSM
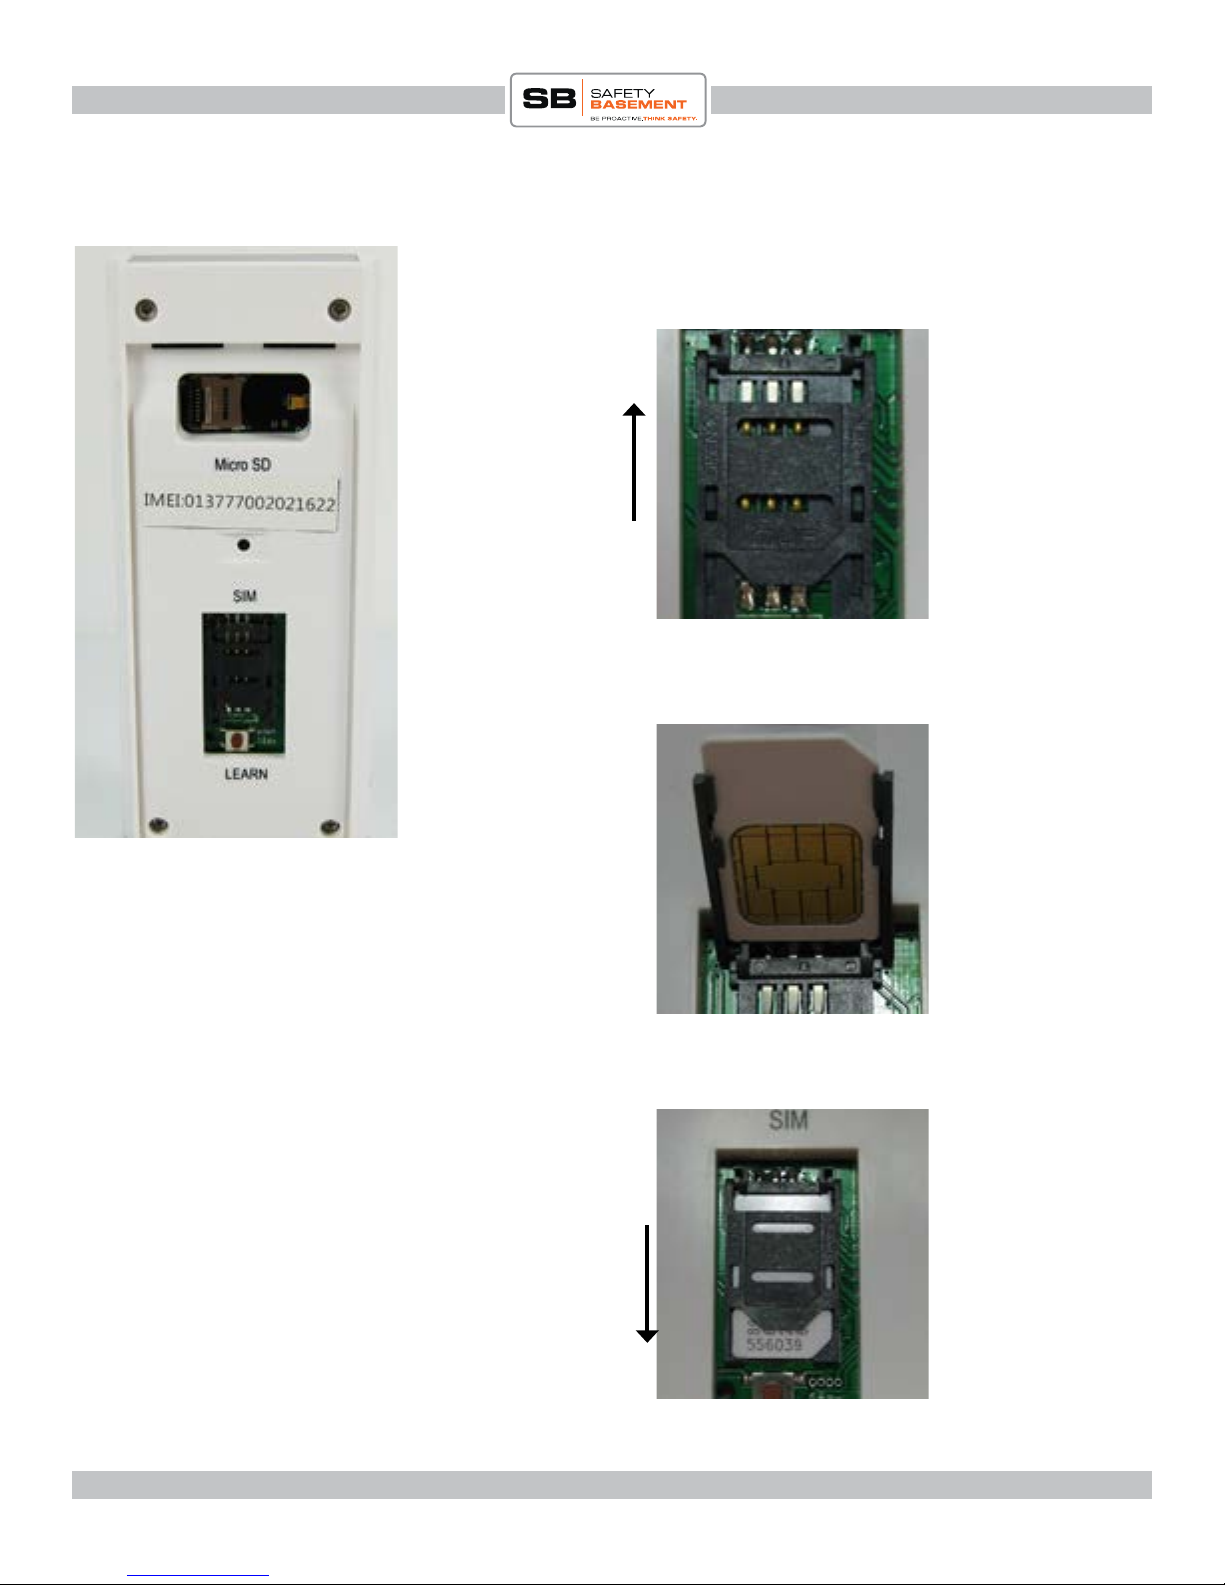
INSTALL THE SIM CARD
1. Use your ngernail to slide the lock gate UP. It will click into place
when UNLOCKED.
2. Raise the lock gate.
Slide UP to
UNLOCK
3. Insert your SIM Card into the lock gate as shown, with the gold
connector facing you, and towards the bottom. e slanted part of
the SIM Card will be on the UPPER RIGHT.
www.SafetyBasement.com Phone: 877-345-2336 Fax: 888-236-2524
4. Close the lock gate.
5. Slide the lock gate DOWN to lock your SIM Card in place.
Slide DOWN to
LOCK
6. Do not replace the back of the unit yet...
Page 7
Page 8
All-In-One GSM Home Alarm & Video System Product Manual : SB-SP7200-GSM
POWER & CELLULAR SIGNAL
Insert the power adapter plug into the Main Unit.
e Charging Light should be RED. It will remain red for some
time until the backup battery is fully charged.
Turn the Main Unit ON.
Look at the Status Light under the Camera Lense.
Shortly, the Status Light will blink 3 times, every 2.5 seconds.
is means that the Main Unit has found a cellular signal and is
working properly.
If the status light does not blink like this within 2 minutes,
turn o the unit and check the installation of your SD and SIM
Cards.
STATUS LIGHT
Try again. If the unit does not blink 3 times, every 2.5 seconds,
try moving the unit to an area where there may be a better
signal.
Try moving on to the next step of this setup to see if you are
connected.
If you are unable to connect, you should check to make
sure your SIM Card has been properly activated. Contact
SafetyBasement or your cellular provider.
www.SafetyBasement.com Phone: 877-345-2336 Fax: 888-236-2524
Page 8
Page 9
All-In-One GSM Home Alarm & Video System Product Manual : SB-SP7200-GSM
CHECK THE TIME
Your SIM Card has a phone number. You will need this phone number to text or call your GSM
Alarm System. Please write this number down. When using the phone number, you will enter
an 11 digit number, such as 12345551234. at’s 1, followed by your Area Code, then phone
number with NO spaces.
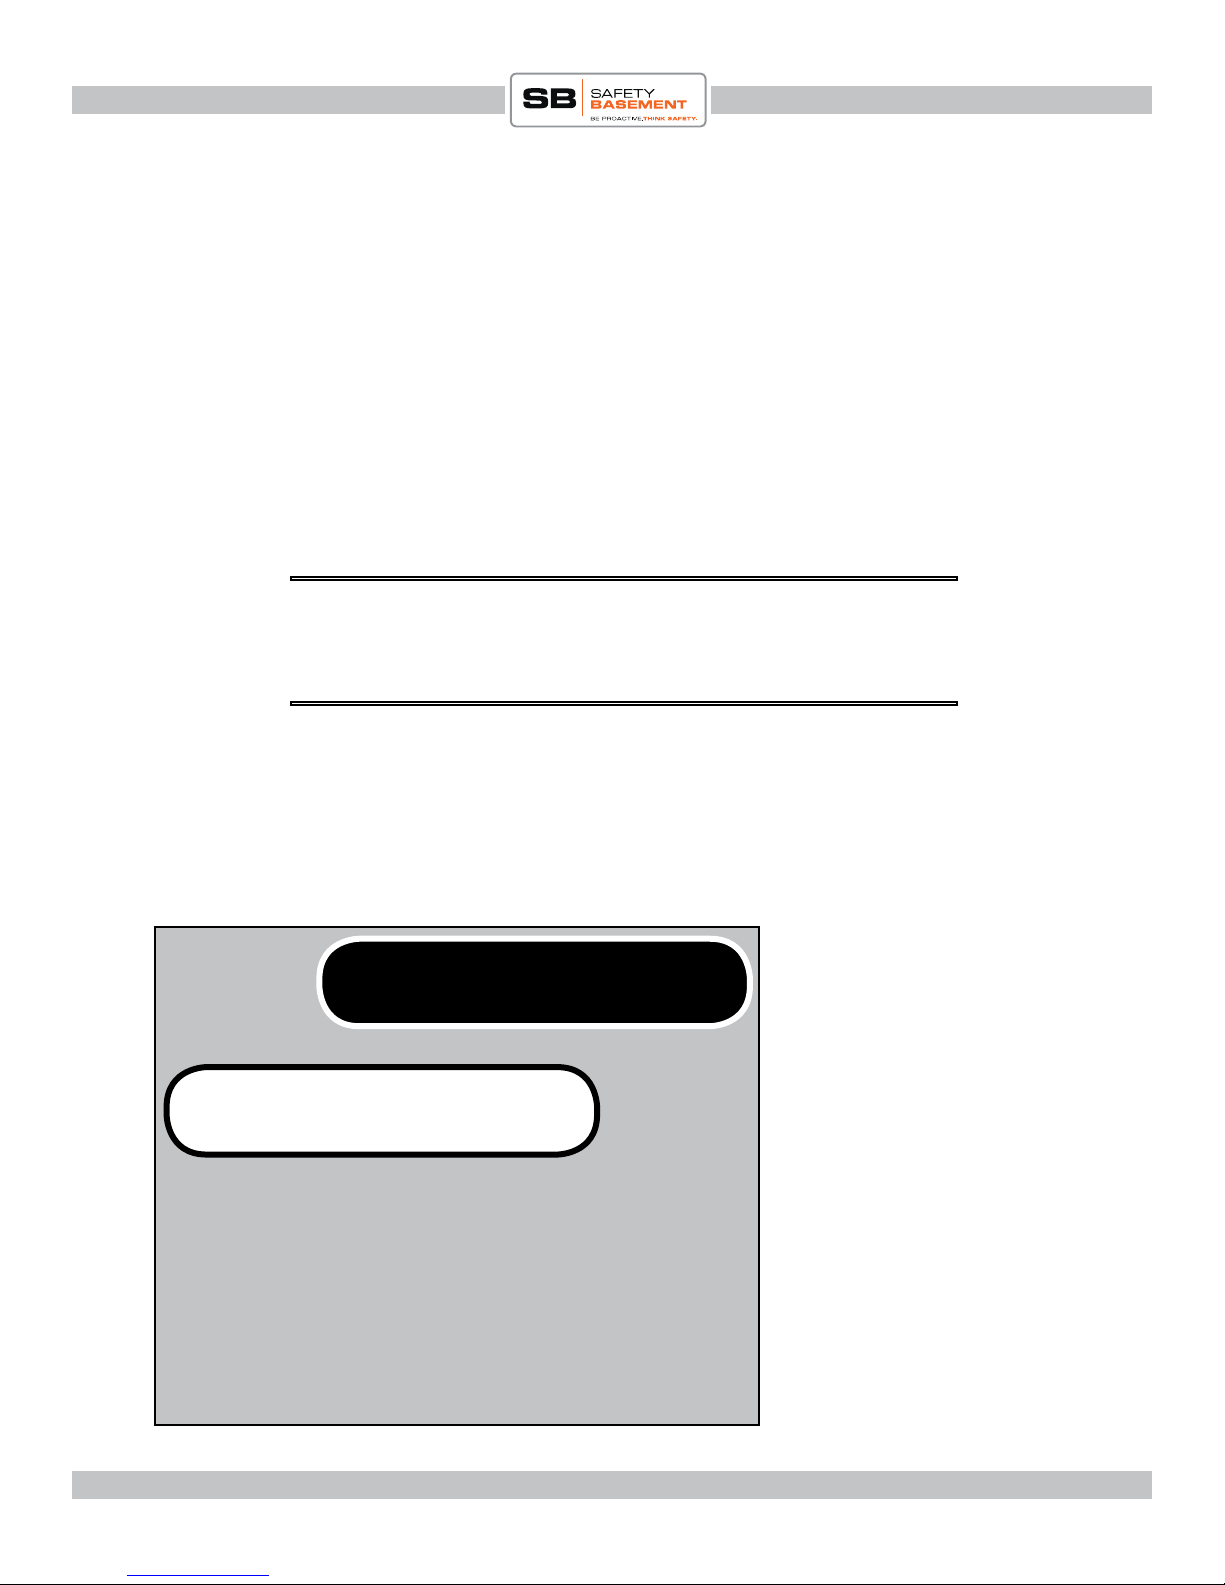
DEFAULT PASSWORD IS
258000
ALARM NUMBER IS
MY PASSWORD IS
We will be using standard text messages to communicate with the GSM Alarm system. Use your
standard text app as you would when texting anyone. TIP! Once you know how to work your
GSM Alarm System, use your text app and keyboard shortcuts to making talking to your system
as easy as possible. Refer to your phone and text app instructions for shortcuts.
A list of codes is at the end of this manual.
258000#200#
>>System time: 16:47
Send this text to the phone
number of your SIM card.
Your alarm should reply within
a few seconds with the system
time. e time is always on a
24 hour clock / military time.
If the system is not responding,
check the format of your text.
Make sure you are sending to
the complete phone number,
11 digits, no spaces.
Your text should also have NO
spaces.
www.SafetyBasement.com Phone: 877-345-2336 Fax: 888-236-2524
Page 9
Page 10
All-In-One GSM Home Alarm & Video System Product Manual : SB-SP7200-GSM
SET THE TIME
We may need to set the time of day. Remember, the alarm uses a 24 hour clock, military time.
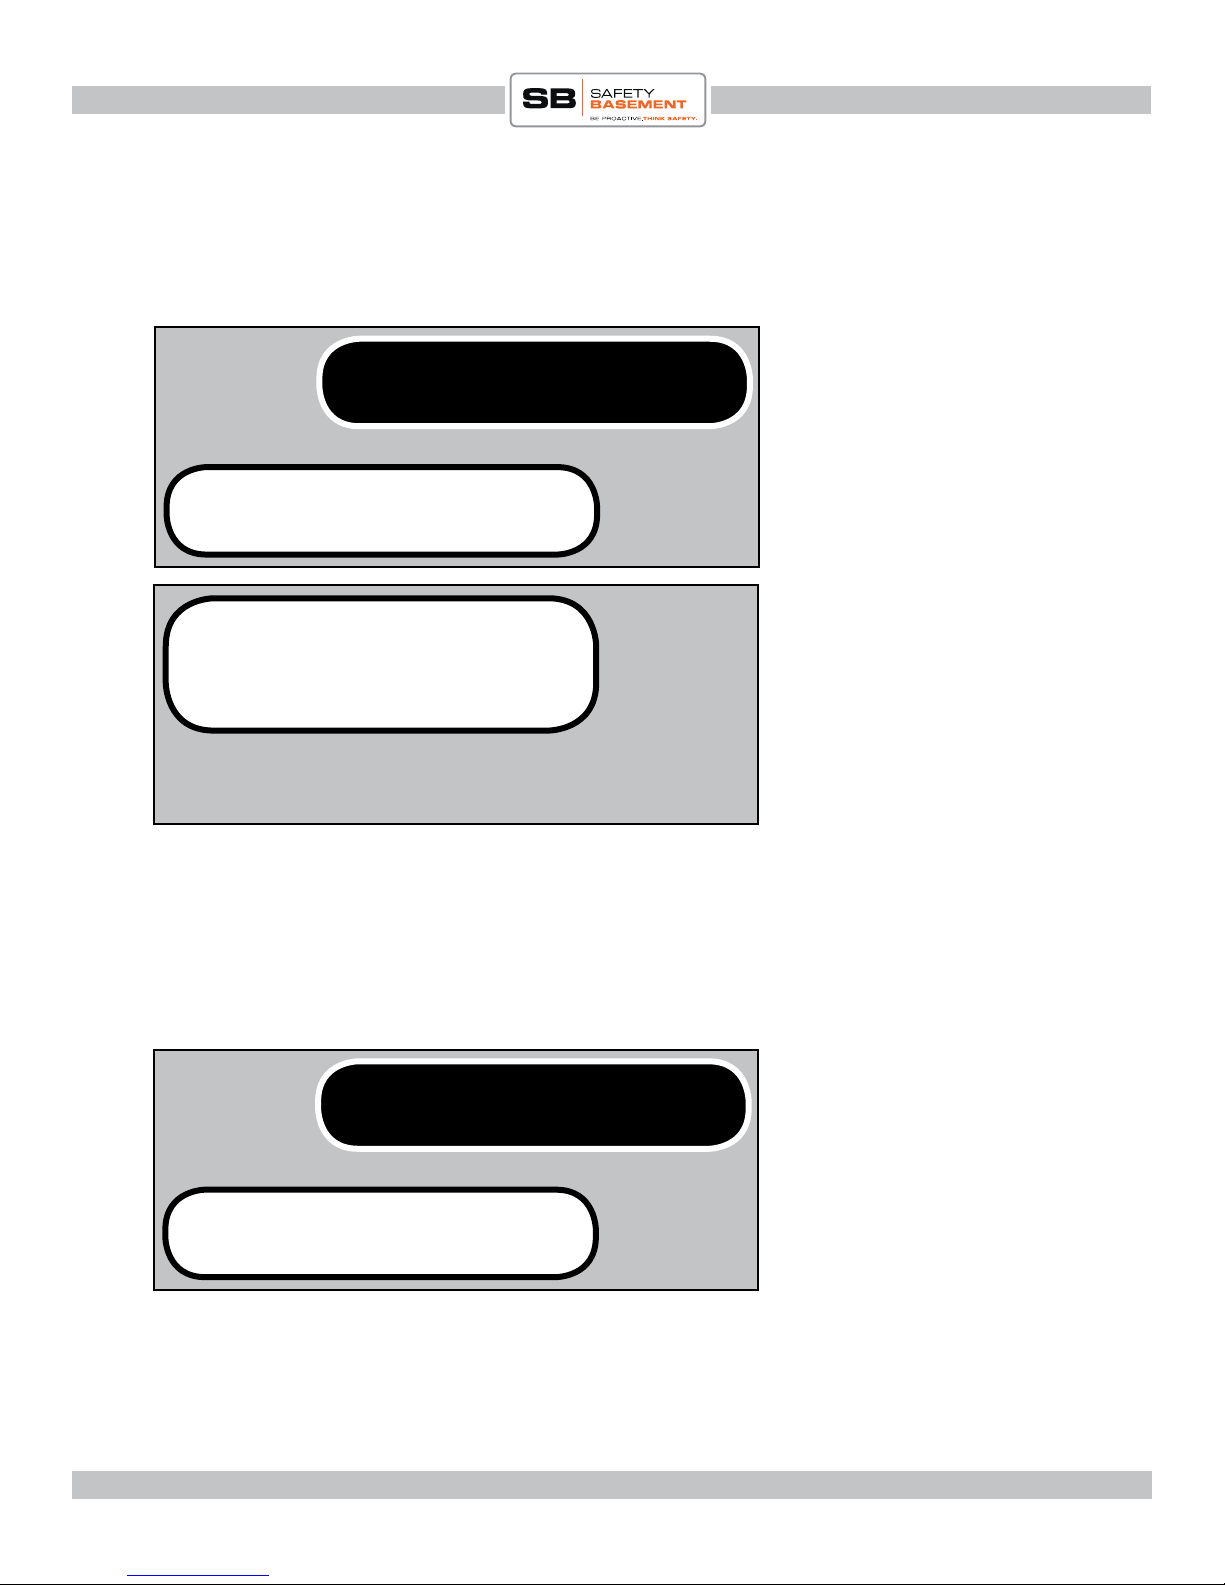
258000#03*1700#
>>Ok, setting successfully
>>Format error, please
input the right command!
SET THE LANGUAGE
Send this text to the phone
number of your SIM card. In
this example, we are setting the
clock to 5pm, 1700.
If you enter the wrong
password, the system will not
respond as a security feature.
If you enter the correct
password, but something is
wrong with the format of your
command, the system will tell
you.
is system can respond in English or Chinese. Choose 00*0 for English. 00*1 for Chinese.
258000#00*0#
Send this text to the phone
number of your SIM card. In
this example, we are setting the
language to English.
>>Ok, setting successfully
www.SafetyBasement.com Phone: 877-345-2336 Fax: 888-236-2524
Page 10
Page 11

All-In-One GSM Home Alarm & Video System Product Manual : SB-SP7200-GSM
WHO GETS THE ALERTS?
e system can send alert texts to 1-5 numbers. Let’s set up your rst number now. You can go
back later to set up additional numbers. Remember to enter your full 11 digit phone number.
Device # 1-5. In this example, we are setting the phone
number for Device #1.
Note the full 11 digit phone
258000#30*1*13215559987#
>>Ok, setting successfully
number. Remember, this must
be a number that accepts text
messages.
CHANGE THE PASSWORD
So far, so good. So it’s a good time to set the password that you’ll be using from now on. Choose
a password, enter it into the manual for reference later.
258000#01*123456#
>>Ok, setting successfully
PASS#200#
In this example, we are setting
the passcode to 123456.
NOTE! From now on, we’ll
be using “PASS” rather than a
number in the examples. Use
your new password here.
Test the new password. Request
the current time.
>>System time: 17:27
www.SafetyBasement.com Phone: 877-345-2336 Fax: 888-236-2524
Page 11
Page 12

All-In-One GSM Home Alarm & Video System Product Manual : SB-SP7200-GSM
CONNECT A WINDOW SENSOR
LEARN BUTTON PULL BATTERY TAB
We’re going to connect a sensor, then name it. You will follow this guide for each sensor device
you want to add. e system can accept up to 8 sensors. You can give each sensor a name, such
as “Garage” or “Kids Room.”
MAGNET
SENSOR
We’ll start with a Door / Window Sensor. ese work by detecting when the magnet has been
pulled out of range of the sensor.
1. Pull the battery tab from the bottom of the Window Sensor. e red status light should blink
briey.
2. Place the magnet next to the sensor.
3. On the Main Unit, press the LEARN BUTTON. e unit will beep.
4. Now, remove the magnet from the sensor.
5. e Main Unit will beep. e status lights on the Main Unit and Window Sensor will blink.
6. e Window Sensor is now connected wirelessly to the Main Unit.
www.SafetyBasement.com Phone: 877-345-2336 Fax: 888-236-2524
Page 12
Page 13

All-In-One GSM Home Alarm & Video System Product Manual : SB-SP7200-GSM
NAME A SENSOR
Each sensor can have a name. We are going to name this Window Sensor “Side Door.” It’s Sensor
#1 out of 8 possible sensors.
Device # 01-08. In this example, we are setting
the name for Device #01.
Your Sensor Name CAN
PASS#81*01*Side Door#
>>Ok, setting successfully
include spaces, but your total
text message should be less
than 48 characters.
Sensor #’s are determined by the order they are connected to the Main Unit. Keep track!
You can repeat this setup for the next Window Sensor at another time. Let’s connect the PIR /
Motion Detector Sensor.
www.SafetyBasement.com Phone: 877-345-2336 Fax: 888-236-2524
Page 13
Page 14

All-In-One GSM Home Alarm & Video System Product Manual : SB-SP7200-GSM
CONNECT THE PIR SENSOR
LEARN BUTTON ON / OFF SWITCH
1. Be sure the On/ O Switch is in the OFF position.
2. Remove the battery cover from the back of the PIR Sensor.
3. Insert 3 AAA batteries into the Sensor. Note the placement of the + and - ends of the
batteries.
4. Put the battery cover back on.
5. On the Main Unit, press the LEARN BUTTON. e Main Unit will beep.
6. Turn on the PIR sensor.
7. Press the LEARN BUTTON on the back of the PIR sensor. e Main Unit will beep.
8. Your PIR Sensor now connected.
www.SafetyBasement.com Phone: 877-345-2336 Fax: 888-236-2524
Page 14
Page 15

All-In-One GSM Home Alarm & Video System Product Manual : SB-SP7200-GSM
NAME THE PIR SENSOR
In the setup we’ve been following, the PIR Sensor was added as the 2nd device, #2. We are
going to name Device #2. We’re going to place this sensor in the garage, so let’s name the device
“Garage.”
Device # 01-08. In this example, we are setting the
name for Device #02.
Your Sensor Name CAN
PASS#81*02*Garage#
>>Ok, setting successfully
include spaces, but your total
text message should be less
than 48 characters.
Now, following the previous steps, continue to add up to 8 devices to your system, until
complete.
www.SafetyBasement.com Phone: 877-345-2336 Fax: 888-236-2524
Page 15
Page 16

All-In-One GSM Home Alarm & Video System Product Manual : SB-SP7200-GSM
MAIN UNIT MESSAGE
e main unit will send you a default message “N2 Emergency Alarm!” You can change this
message. Make sure the total number of characters in your text is under 48. Note that the Main
Unit is #80.
We are changing our alert
PASS#80*Alarm At Home!#
>>Ok, setting successfully
message to “Alarm At Home!”
Spaces are allowed in the
message.
POWER REMINDERS
You can receive texts about the power status of the System and the wireless sensors. You’ll want
to know when a unit is low on power.
Use 1 to turn on power
PASS#06*1#
>>Ok, setting successfully
messages. Use 0 to turn o
power messages.
www.SafetyBasement.com Phone: 877-345-2336 Fax: 888-236-2524
Page 16
Page 17

All-In-One GSM Home Alarm & Video System Product Manual : SB-SP7200-GSM
THE SIREN
e siren on the Main Unit can run for 1 to 30 minutes. It can also be set to Silent Alarm. You
will want to test your Siren at least once, so let’s set it for 1 minute.
We have set the siren to run for
PASS#07*01#
>>Ok, setting successfully
01 minute.
SILENT ALARM
Later, when you know the siren is working properly, you can set it to the length of time you
want. Or, set it for Silent Alarm. A Silent Alarm will NOT use the siren, but will send you text
alerts and record video.
Use 00 to set the Silent Alarm.
PASS#07*00#
>>Ok, setting successfully
www.SafetyBasement.com Phone: 877-345-2336 Fax: 888-236-2524
Page 17
Page 18

All-In-One GSM Home Alarm & Video System Product Manual : SB-SP7200-GSM
RESET - IF YOU NEED IT
If you need to start over, are moving the system to a new location, or any other reason you need
to reset all the settings in your system, use this command. It does NOT require the password.
You will lost ALL settings with
99113377#
>>System reset
this command.
DO NOT RESET NOW! Use
only if needed.
DELETE WIRESS SENSORS
You can quickly delete the Wireless Sensors from the Main Unit, should you need to reset their
locations, or start over.
You will lost ALL wireless
PASS#21*0#
>>OK, setting successfully
sensor settings with this
command.
DO NOT USE NOW! Use only
if needed.
www.SafetyBasement.com Phone: 877-345-2336 Fax: 888-236-2524
Page 18
Page 19

All-In-One GSM Home Alarm & Video System Product Manual : SB-SP7200-GSM
ARM BY REMOTE
e Remote Control activates your Alarm System (ARM) and turns it o (CLR). We are going
to turn the system on, and set o the alarm as a test.
e siren is quite loud! Protect your hearing during this test! Be prepared to press CLR on the
Remote Control to turn o the siren as quickly as possible.
Press ARM to Arm your alarm
system.
Press CLR to shut o the siren
and disarm the system.
Press the ARM button, and the system will arm itself in 30 seconds. Normally, you will have
30 seconds to leave the area. For this test, remain near the unit, protect your hearing and be
prepared to CLR the alarm.
1. Press ARM.
2. e Main Unit will beep. e status light will blink during the 30 second countdown.
3. e status light will be Steady aer 30 seconds. e system is now armed.
4. For your test, wave your hand across the sensor of the main unit, or your PIR wireless
sensor, or pull the maget away from the Window sensor.
5. e main unit will beep once, then a few seconds later, the alarm siren will sound.
6. Press CLR on the remote control to stop the siren and deactivate the alarm.
We received 2 messages from
Garage
our system during the test.
Note that the Garage alarm was
set o in this test.
Alarm at home!
www.SafetyBasement.com Phone: 877-345-2336 Fax: 888-236-2524
Page 19
Page 20

All-In-One GSM Home Alarm & Video System Product Manual : SB-SP7200-GSM
ARM VIA TEXT MESSAGE
A reminder, if you’re satised with the siren, you might want to turn on SILENT ALARM for
the remainder of testing and during your installation of your devices. en, set the siren length
for your desired time once the system is in place.
Send the 101 command to turn
PASS#101#
>>OK, system armed.
As with the remote control, the system will countdown 30 seconds, then arm.
the system ON.
DISMARM VIA TEXT MESSAGE
A reminder, if you’re satised with the siren, you might want to turn on SILENT ALARM for
the remainder of testing and during your installation of your devices. en, set the siren length
for your desired time once the system is in place.
Send the 102 command to turn
PASS#102#
>>OK, system disarmed.
the system OFF.
www.SafetyBasement.com Phone: 877-345-2336 Fax: 888-236-2524
Page 20
Page 21

All-In-One GSM Home Alarm & Video System Product Manual : SB-SP7200-GSM
ARM VIA TOUCH TONE PHONE
You can Arm and Disarm your system using a standard touchtone phone, rather than a text.
1. Using a touchtone telephone, CALL the SIM number. Use the full 11 digit number.
2. e system will answer with a beep.
3. Enter your PASSWORD, followed by a Pound Sign. (#) e system will automatically hang
up if you do not enter the password within 10 seconds.
4. e system will BEEP with every key you enter.
5. When you have enter the proper PASSWORD, it will beep twice.
6. Enter 101# to turn ON the Alarm.
7. e system will beep twice.
8. e alarm will have a 30 second countdown, then activate.
DISARM VIA TOUCH TONE PHONE
1. Using a touchtone telephone, CALL the SIM number. Use the full 11 digit number.
2. e system will answer with a beep.
3. Enter your PASSWORD, followed by a Pound Sign. (#) e system will automatically hang
up if you do not enter the password within 10 seconds.
4. e system will BEEP with every key you enter.
5. When you have enter the proper PASSWORD, it will beep twice.
6. Enter 102# to turn OFF the Alarm.
7. e system will beep twice.
If you enter the wrong code, the system will beep three times.
Remember, by using a text message, you will receive conrmation of your commands.
www.SafetyBasement.com Phone: 877-345-2336 Fax: 888-236-2524
Page 21
Page 22

All-In-One GSM Home Alarm & Video System Product Manual : SB-SP7200-GSM
USE AN ALARM SCHEDULE
You may wish to have the alarm automatically turn on at a certain time of day, and turn itself o.
You can do this by setting a schedule. Keep in mind, the system uses a 24 hour / military clock.
In this example, we have set up our Alarm System at our oce. e oce closes at 6pm, and
opens at 8am. We want to turn on the alarm from 6:30pm to 7:30am the next morning.
SET THE SCHEDULE
ARM Time DISARM Time
PASS#05*1830*0730#
>>OK, setting successfully
ARM THE SCHEDULE
PASS#04*1#
>>OK, setting successfully
DISARM THE SCHEDULE
PASS#04*0#
>>OK, setting successfully
Send the 1 command to turn
the schedule ON.
Send the 0 command to turn
the schedule OFF.
www.SafetyBasement.com Phone: 877-345-2336 Fax: 888-236-2524
Page 22
Page 23

All-In-One GSM Home Alarm & Video System Product Manual : SB-SP7200-GSM
MAIN UNIT MOTION DETECTION
ere may be times when you want to TURN OFF the motion detection on the Main Unit.
DEACTIVATE THE MOTION DETECTION
DISARM Code
PASS#08*0#
>>OK, setting successfully
RE-ACTIVATE MOTION DETECTION
PASS#08*1#
>>OK, setting successfully
ARM Code
www.SafetyBasement.com Phone: 877-345-2336 Fax: 888-236-2524
Page 23
Page 24

All-In-One GSM Home Alarm & Video System Product Manual : SB-SP7200-GSM
CHECK STATUS
You can check the system time, status of your alarm, the schedule, and the numbers to be texted
during an alarm.
SYSTEM TIME
PASS#200#
>>System time: 15:21
CHECK ARM / DISARM TIME
PASS#201#
>>Arm: 18:30 Disarm:
07:30 [o]
CHECK NUMBERS TO BE TEXTED
PASS#202#
>>SMS [1]13215551234
[2]--[3]---
e arm time is 6:30pm. e
disarm time is 7:30am the next
day. e alarm schedule is
currently OFF.
In our example, only 1 text
number has been set up.
You can have up to 5 numbers
to be texted during alerts.
[4]--[5]---
www.SafetyBasement.com Phone: 877-345-2336 Fax: 888-236-2524
Page 24
Page 25

All-In-One GSM Home Alarm & Video System Product Manual : SB-SP7200-GSM
CHECK STATUS
IS SYSTEM ARMED?
PASS#203#
>>System status: disarm
LISTEN IN - LIVE MICROPHONE
You can have the alarm system call you back, and you can listen live via the microphone on the
Main Unit. Send the command, and within a few seconds, the Main Unit will call you back.
PASS#100#
e system will only call back
the number you texted from.
It will NOT use the numbers
from the alert list.
www.SafetyBasement.com Phone: 877-345-2336 Fax: 888-236-2524
Page 25
Page 26

All-In-One GSM Home Alarm & Video System Product Manual : SB-SP7200-GSM
READY!
You are now ready to mount your system and use it. Your system included some basic mounting
pieces.
TIP! Remember, you will need to remove the Main Unit from the wall and plug it into your PC
when viewing videos. Use a hook to hang your Main Unit on the wall.
TIP! Use Painter’s Tape to test the location of your Windows / Door Units before sticking them
in place.
TIP! Aim the Motion Sensors in the general area you want to detect motion in. Avoid pointing
at areas that have frequent movement, such as aquariums.
TIP! Keep this manual handy, and write down your SIM #, PASSWORD and the order of your
wireless devices. is will make naming them easier later.
TIP! Remember, the system power switch must be OFF to connect via USB.
TIP! Remember, the system power switch must be ON for any of the functions to work.
www.SafetyBasement.com Phone: 877-345-2336 Fax: 888-236-2524
Page 26
Page 27

All-In-One GSM Home Alarm & Video System Product Manual : SB-SP7200-GSM
VIEWING THE VIDEO
e Alarm System records 640x480 video when the alarm is activated. e videos are saved as
les on the SD Card you installed earlier. You can play these les back on your Windows or Mac
PC.
USB PORT on
Main Unit
1. On the main unit, set the power switch to OFF. e Main Unit must be OFF to access the
video les.
2. Plug the small end of the included USB cable into the USB PORT on the Main Unit.
3. Plug the other, wide end, of the USB cable into a spare port on your Windows or Mac PC.
4. As with any external device, wait for the Main Unit drive to “mount” onto your system is
may take a moment. In some cases, your system may install standard drivers to access the
SD Card. is is normal.
5. Your computer will “mount” 2 drives; MainDVD.ISO and UNTITLED. IGNORE MainDVD.
ISO.
6. Click on UNTITLED. You may need to Double-Click.
7. Inside is another folder called RECORD. Your recorded video les are in this folder. Click or
Double-click to access.
8. COPY these les to your main PC for smoother playback, and for archiving.
9. You may DELETE the les from this RECORD folder.
10. If you DELETE, you must EMPTY YOUR TRASH before removing your Main Unit from
your PC.
11. UNMOUNT the 2 folders from your system BEFORE you disconnect the Main Unit from
your PC. You UNMOUNT by (PC) Right-Clicking on Drive, choose REMOVE.
PROBLEMS PLAYING VIDEO?
Your videos should play using the built-in video players that come with your Mac
or Windows PC. However, should you run into a problem, please try VLC. is
free program can play nearly any video le. If VLC is not able to play the le, the
le is most likely corrupt and unplayable.
VLC can be downloaded here: http://www.videolan.org
www.SafetyBasement.com Phone: 877-345-2336 Fax: 888-236-2524
Page 27
Page 28

All-In-One GSM Home Alarm & Video System Product Manual : SB-SP7200-GSM
SPECIFICATIONS
MAIN UNIT POWER
ADAPTER
WORKING TEMP -10 - 50 C
GSM FREQUENCY 850/900/1800/1900 MHZ Your GSM SIM Card may be
RF WIRELESS FREQUENCY 433 MHZ
DOOR SENSOR DISTANCE
SUPPORTED
BUILT-IN BATTERY,
RECHARGABLE BACK UP
PIR SENSOR 3 AAA BATTERIES
PIR FREQUENCY 433 MHZ
BATTERY LIFE UP TO 2 YEARS We recommend leaving
VIDEO FILES
RESOLUTION 640x480 pixels
FILE FORMAT .AVI
VIDEO CODEC JPEG
FRAME RATE 30 FPS
BIT RATE Approx. 5-6 Kbps
120 METERS DIRECT LINE-
9V, 1A OUTPUT
provided by SafetyBasement.
com
Your distance will vary with
OF-SITE
7.4V / 1000 mAh e back up battery will run
walls or other obstacles.
up to 24 hours.
Power Status Alerts ON.
www.SafetyBasement.com Phone: 877-345-2336 Fax: 888-236-2524
Page 28
Page 29

All-In-One GSM Home Alarm & Video System Product Manual : SB-SP7200-GSM
TEXT CODES
Remember, each code you send to your GSM Home Alarm System must start with your
PASSWORD, which is 6 digits. en POUND, the CODE, and end with POUND. Please wait
for the device to respond before sending your next code. You may try again if no response in 60
seconds.
PASSWORD#CODE#
ex: 123456#101# turns your alarm ON
TIP! You may want to use the Keyboard Shortcut feature on your smartphone to set up text
replacements, to make using codes daily as simple as possible. You should refer to your phone
instructions on how to use this feature.
ARM ALARM SYSTEM PASS#101# Activates your alarm system
DISARM ALARM SYSTEM PASS#102# Deactivates your alarm
system
SET NEW PASSWORD PASS#01*123456# Default password is 258000.
Start your text with 258000 to
change password to your new
6 digital code. is example
changes the code to 123456.
SET CURRENT TIME PASS#03*1345# Set the current time in a 24
hour clock. In this example,
the time has been set to
1:45pm.
ARM / DISARM TIMER PASS#05*2030*0830# Set the schedule you want
your system to be on using
a 24 hour clock. In this
example, the alarm is armed
from 8:30pm to 8:30am. You
must turn the timer ON for
the timer to activate at the
scheduled time.
ARM TIMER PASS#04*1# Activates your alarm using
the schedule set above.
DISARM TIMER PASS#04*0# Deactivates the timer.
www.SafetyBasement.com Phone: 877-345-2336 Fax: 888-236-2524
Page 29
Page 30

All-In-One GSM Home Alarm & Video System Product Manual : SB-SP7200-GSM
TEXT CODES
SET TEXT MESSAGE
RECEPIENT #1
SET TEXT MESSAGE
RECEPIENTS #2-5
CHANGE DEFAULT TEXT
ALARM MESSAGE FROM
MAIN UNIT
SIREN LENGTH PASS#07*TIME# Set the TIME to 01-30 for
SILENT ALARM PASS#07*00# Set the siren length to 00 for a
SET MESSAGE FROM
DOOR / WINDOW / PIR
SENSORS
PASS#30*1*PHONE# Set the phone number of your
phone to get text messages
from the alarm. e PHONE
number must be 11 digits,
including 1, then AREA
CODE, then NUMBER
without spaces. For example,
123456#30*1*12325551234#
PASS#30*X*PHONE# You can enter up to 5
numbers to receive texts.
Substitute the X with 2, 3, 4
or 5.
PASS#80*Your Desired Alert
Message#
PASS#81*01*Bedroom
Window#
Replace the default message
with your own. e total
number of characters in this
command must be less than
48.
your siren to run for 1 to 30
minutes when activated.
silent alarm. You will receive
texts, but siren will not sound.
In this example, we are
assigning sensor #01 as the
Bedroom Window. You can
assign up to 8 sensors. Text
message must be under 48
characters.
ACTIVATE PIR ON MAIN
UNIT
DEACTIVATE PIR ON
MAIN UNIT
DEACTIVATE ALL
WIRELESS SENSORS
www.SafetyBasement.com Phone: 877-345-2336 Fax: 888-236-2524
PASS#08*1# e motion detection is now
ON for the main unit.
PASS#08*0# Turn o the motion detection
on main unit.
PASS#21*0* Resets all wireless sensors.
Page 30
Page 31

All-In-One GSM Home Alarm & Video System Product Manual : SB-SP7200-GSM
TEXT CODES
POWER STATUS
REMINDERS - ON
POWER STATUS
REMINDERS - OFF
RESET EVERYTHING NO PASSCODE REQUIRED
CHECK CURRENT SYSTEM
TIME
CHECK ALARM
SCHEDULE / STATUS
CHECK ALERT NUMBERS PASS#202# See the numbers that will
CHECK ALARM STATUS PASS#203# See the current status of the
PASS#06*1# Turn on your power status
reminders. Recommended.
PASS#06*0# Turn o reminders.
is will set your system
99113377#
PASS#200# Receive the current system
PASS#201# See the current alarm
back to factory default. e
password will return to
258000. You will need to reenter all your settings.
time.
schedule and status.
receive text messages.
system.
www.SafetyBasement.com Phone: 877-345-2336 Fax: 888-236-2524
Page 31
 Loading...