

Page 1

INSTALLATION INSTRUCTIONS
75-2524
FORD
F-Series Super Duty V10-6.8L
Excursion V10-6.8L
1. With the engine turned off, disconnect the
vehicle’s negative battery cable.
2. Loosen hose clamps on intake tube at the air
cleaner and throttle body.
Qty Parts List Qty Parts List
1 Aluminum Adapter 2 5/16” Hex Head Screw s
1 3.5” - 4” x 3” Adapter 1 5/8” Hose Coupler
1 4.25” x 3” Hump Adapter 2 11/32” Washers
1 CARB Sticker 1 #8 Hose Clamp
1 Air Filter 1 #16 Hose Clamp
2 MAF Gaskets 1 #60 Hose Clamp
1 1/2” Grommet 2 #72 Hose Clamp
4 1/4”-20 x 1” Bolt 1 #64 Hose Clamp
1 5/8” x 2.25” Hose
7. Detach the cover for the throttle body.
This will not be used for your new system.
12. Remove the “J” nuts (threaded clips)
Tools Required
Flathead Screwdriver
Phillips Screwdriver
Ratchet
10mm Socket
13mm Socket
13mm Wrench
Drill
11/16” Drill Bit
5/16” Socket or Nut Driver
3. On vehicles equipped with external air temperature sensors, disconnect the air temperature sensor electrical connection.
4. Remove OEM intake tube.
5. Unhook the wiring harness for the mass air
sensor that is attached to the fender.
8. Remove the air cleaner housing from vehicle by pulling upwards firmly.
9. Remove the three bolts circled below.
10. Remove the bracket that was utilized to
mount the air cleaner.
13. Detach the 2 parts of the air cleaner assembly.
14. Detach the 4 clips that hold the retaining plate
for the mass air sensor by inserting a flat
head screwdriver.
15. Separate the rubber housing from the air
cleaner housing.
6. Disconnect the electrical connection for the
secondary mass air sensor.
1/23/2008
11. Remove the bolt shown below.
16. Disconnect the electrical connection for the
primary mass air sensor.
(909) 947-0015 Telephone (909) 947-0603 Fax
www.sbfilters.com
(Over)
Page 2
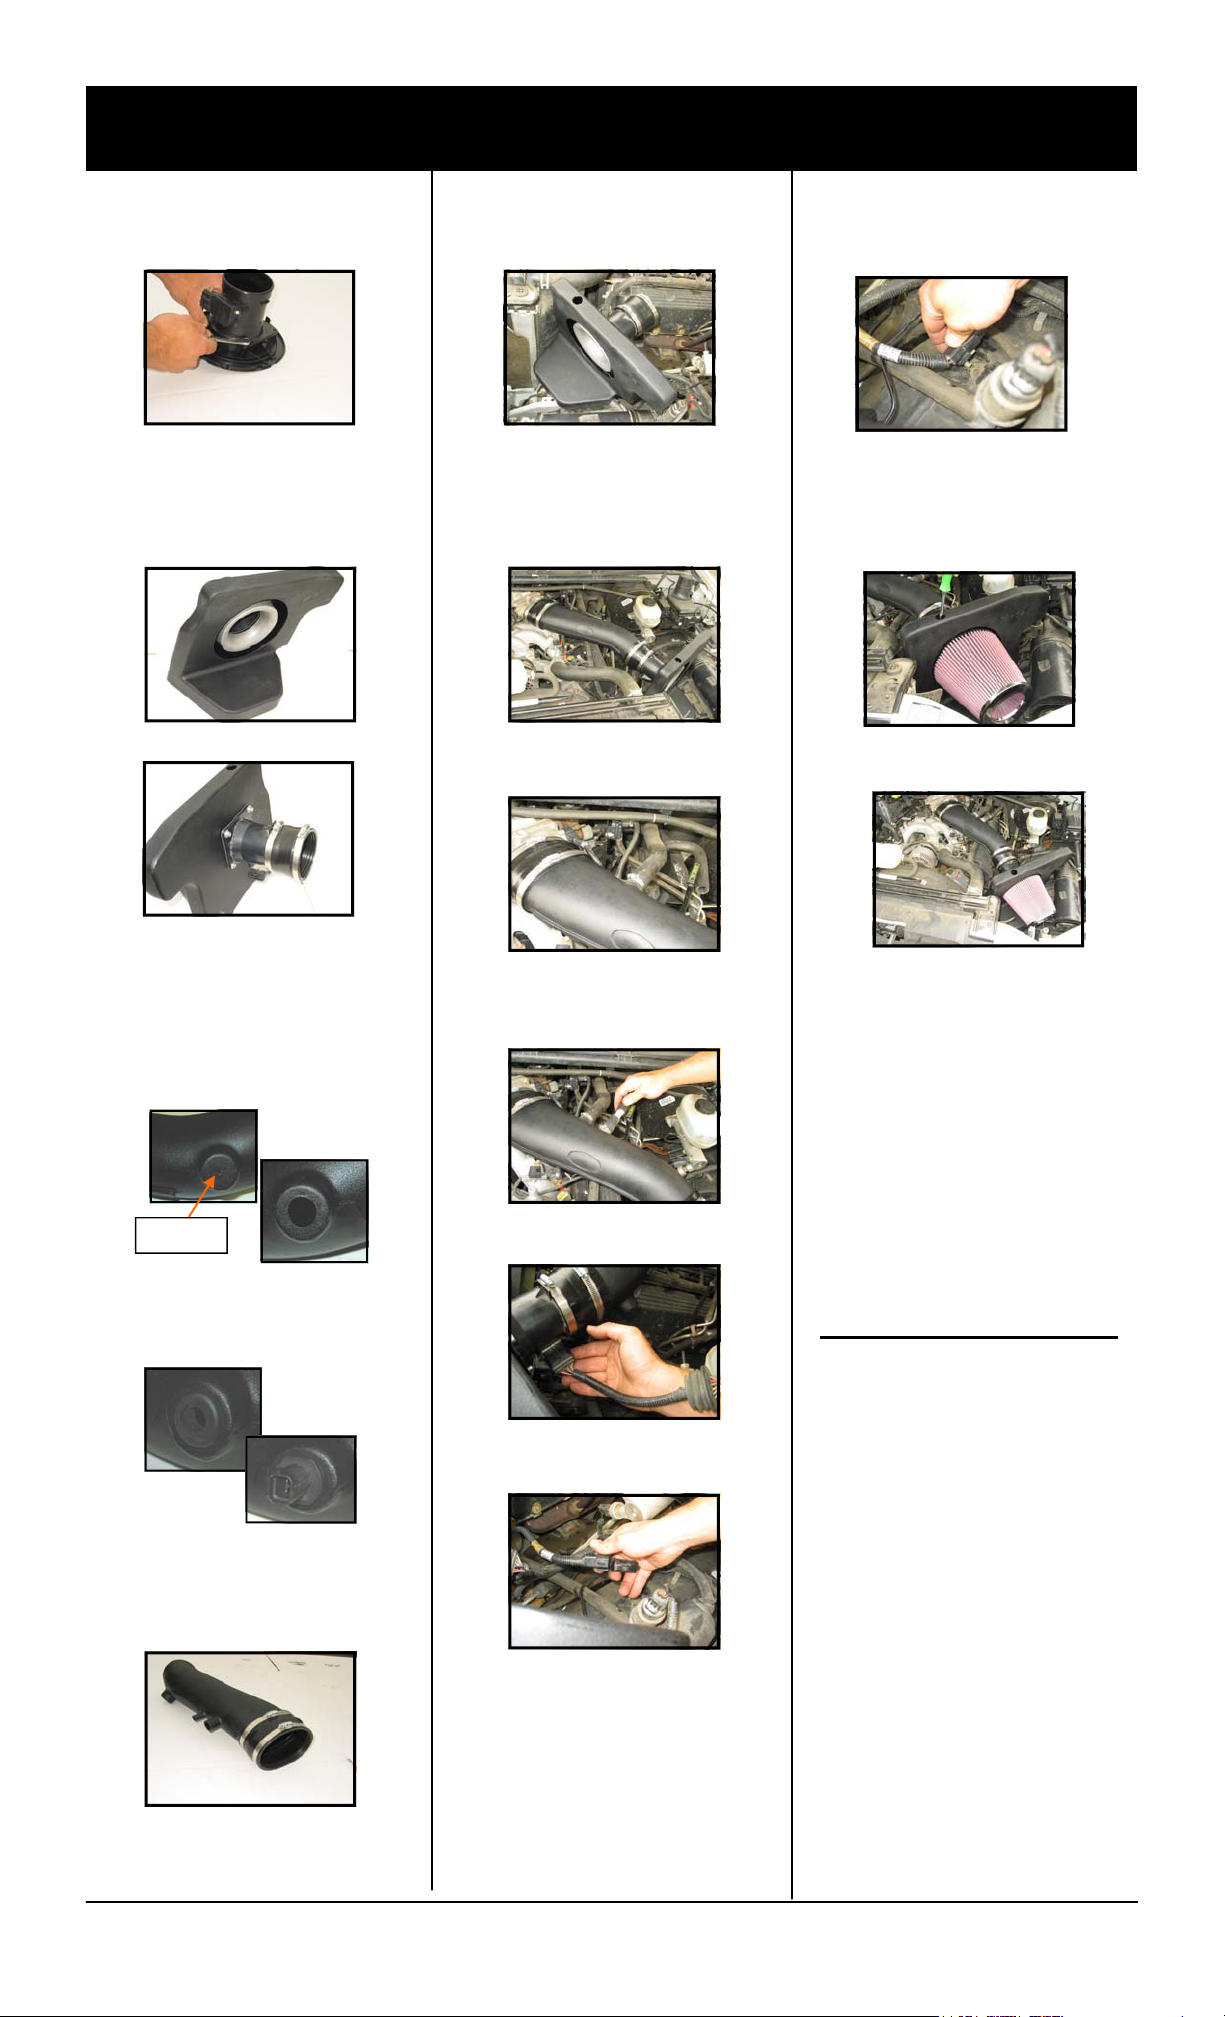
INSTALLATION INSTRUCTIONS (continued)
17. Remove the bolts that mount the mass
air sensor to the base plate.
18. Assemble filter adapter and mass air sensor using 1/4”-20 x 1” bolts and gaskets.
Also install connector hose to mass air
sensor and tighten clamp.
21. Install heat shield with 5/16-18 screws
and washers.
22. Attach intake tube to throttle body and
tighten clamps.
23. Connect the idle air line to the large connector port on the side of the S&B intake
tube. Tighten clamp.
27. Reattach the secondary electrical connection. Then reconnect the retaining clip
to the fender.
28. If your vehicle had an external temperature sensor and reconnect the electrical
connection now.
29. Install filter and align clamp so that it
can be tightened with a screwdriver as
shown in the picture below.
COMPLETED ASSEMBLY PICTURE
19. On vehicles that CONTAIN an external air
temperature sensor remove it from the
OEM tube and drill a 11/16” hole at the drill
point shown below. If your vehicle does not
contain an external air temperature sensor,
skip to step 20.
Drill Point
19.a. Insert grommet into hole and then
insert temperature sensor as shown
below.
20. Install the connector hose that has the
hump on air intake tube. Tighten hose
clamp around tube.
24. Connect the short provided hose to the
small connector port on tube. Connect
the line to the vent hose using the
hose connector provided.
25. Reattach the electrical connection for
the primary mass air sensor.
26. Reconnect wires to the vehicles base
connection.
PERFORMANCE TESTING
1. Engage parking brake and start your engine.
To ensure that the system was installed properly, listen for abnormal noises. If an air leak is
detected, re-inspect hoses and connections
as they may need to be tightened.
2. S&B FILTERS RECOMMENDS THAT YOU
KEEP YOUR OEM INTAKE SYSTEM IN THE
EVENT IT IS REQUIRED IN THE FUTURE.
3. In order to maintain proper warranty, all connections and components must be checked
periodically for realignment and to tighten all
connections. Failure to do so will void your
warranty.
4. Use only S&B Cleaning and Oil Products to
service your filter. Using other company’s oil
and cleaner products may void your warranty.
Please call (909) 947-0015
should you have any ques-
tions or comments.
1/23/2008
(909) 947-0015 Telephone (909) 947-0603 Fax
www.sbfilters.com
 Loading...