

operator manual
This document includes:
• Safety Notices
• Specifications
• Installation Instructions
• Operating Instructions
• Cleaning Instructions
• Warranty Statement
Revision: D
P/N: 15315
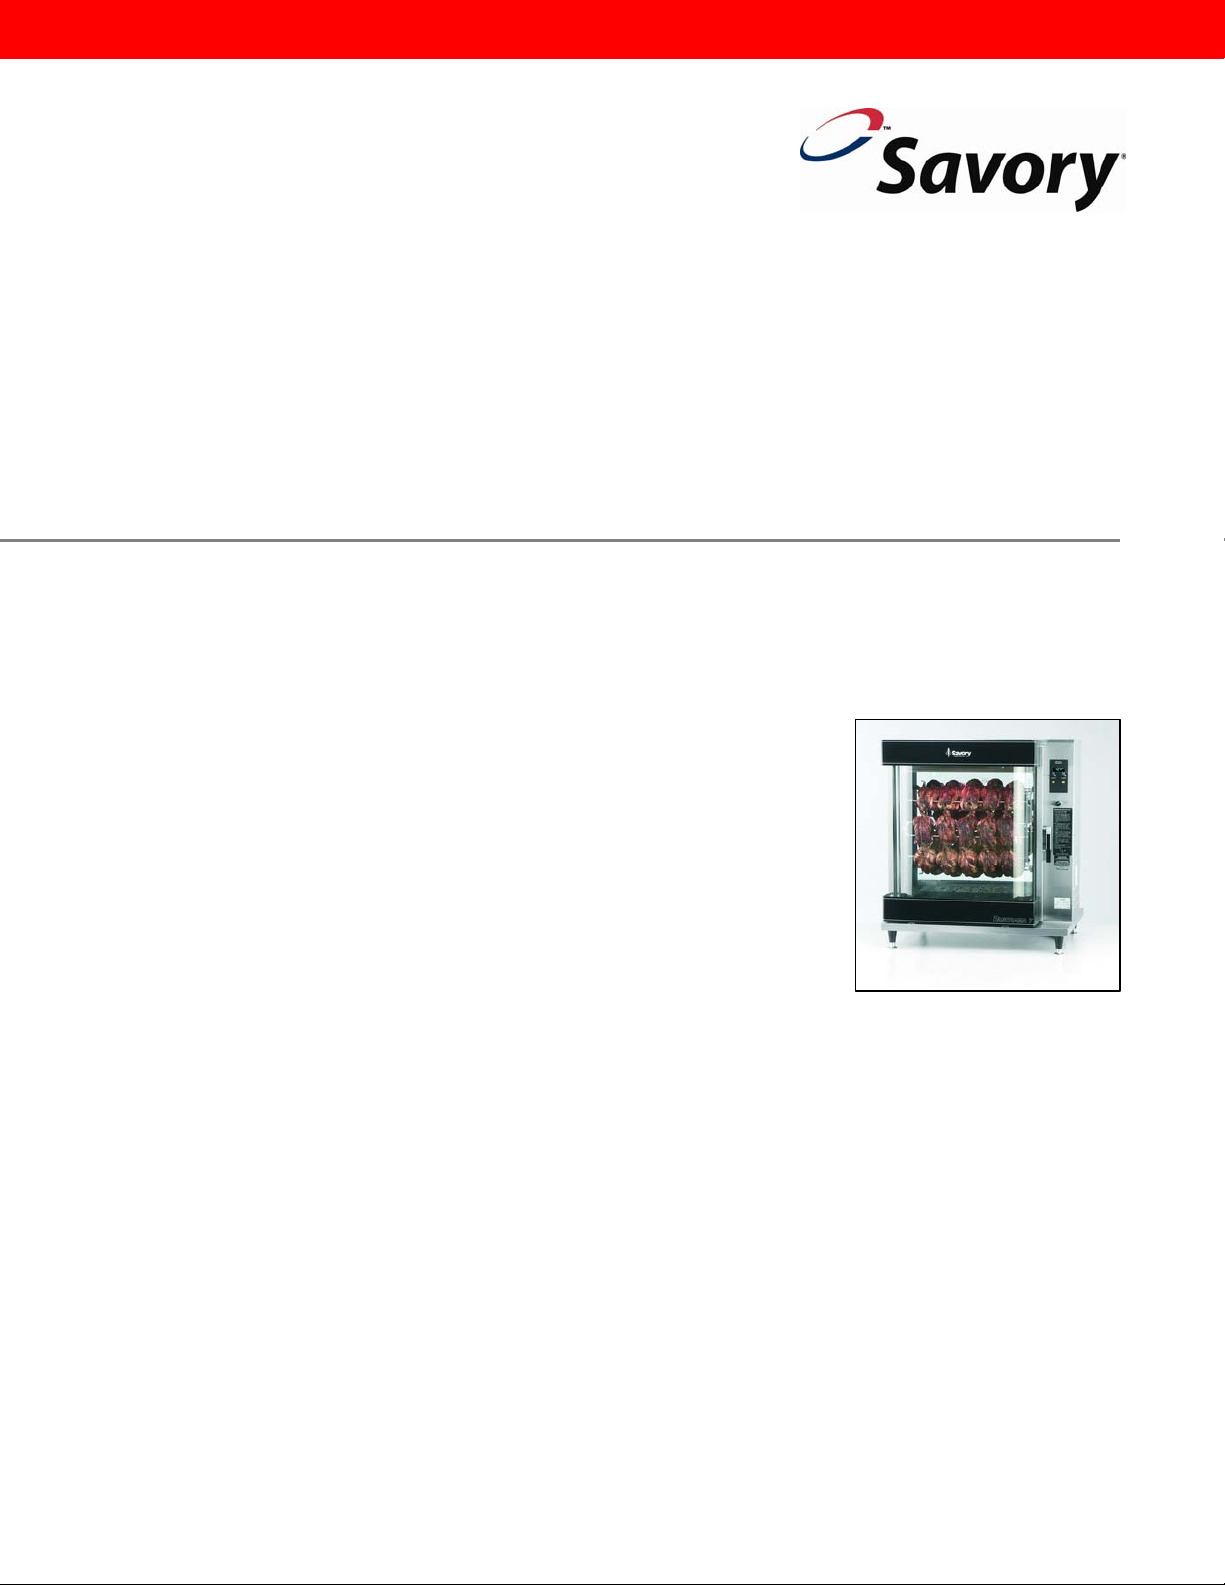
Panorama Rotisserie
Model SP-5
Lincoln Foodservice Products, LLC
1111 North Hadley Road
Fort Wayne, Indiana 46804
United States of America
Technical Support Hotline: (800) 678-9511
Telephone: (260) 459-8200
www.lincolnfp.com

g
quip
!
!
!
!
!
!
!
!
! !
NOTE:
NOTE:
WARNING:
DANGER!
DANGER!
DANGER!
DANGER!
IMPORTANT WARNING AND SAFETY INFORMATION
This manual contains important safety and installation-operation instructions.
Require all operators to read this manual thoroughly before installing, operating or
servicing this equipment. Improper installation, adjustment, alteration, service or
maintenance can cause property damage, injury or death.
Choose a well ventilated location that will allow for adequate cooling. Place
rotisserie on a suitable table or countertop capable of supporting the unit weight of
216 lbs. while insurin
Allow ample clearance for air circulation (minimum 6”) at the sides of the machine.
The rotisserie must be installed with adjustable legs to ensure proper clearance for
the underside air intakes.
The power supply must be in accordance with the specifications on the data plate
located on the lower control panel. It should be installed on a dedicated service line
with no other e
Do not work around unit with long hair, loose clothing, or dangling jewelry. Getting
caught in the rotisserie could result in serious injury.
For your safety, do not store or use gasoline or other flammable vapors or liquids in
the vicinity of this or any other appliance.
Do not spray aerosols in the vicinity of this appliance while it is in operation.
If the power supply cord appears to be damaged, do not attempt to operate the unit.
Contact a service agent or qualified electrician to repair!
that the unit is installed level.
ment on the circuit.
SP-5 Operator Manual
2
BEFORE INSTALLATION
NOTE: Upon receipt of this unit, immediately unpack and inspect for possible concealed shipping d amage. If unit is
found to be damaged, save all packing materials and contact your delivery carrier within 5 days. Refer to “Shipping
Damage Instructions” enclosed for detailed instructions. Failure to follow these instructions will negate Savory’s or
your ability to file claims and receive compensation for shipping damage.
This manual contains important safety and installation-operation instructions. Require all operators to read this manual
before using the unit. Failure to follow the instructions contained in this manual may cause injury, damage to the unit,
and will void the warranty.
INSTALLATION
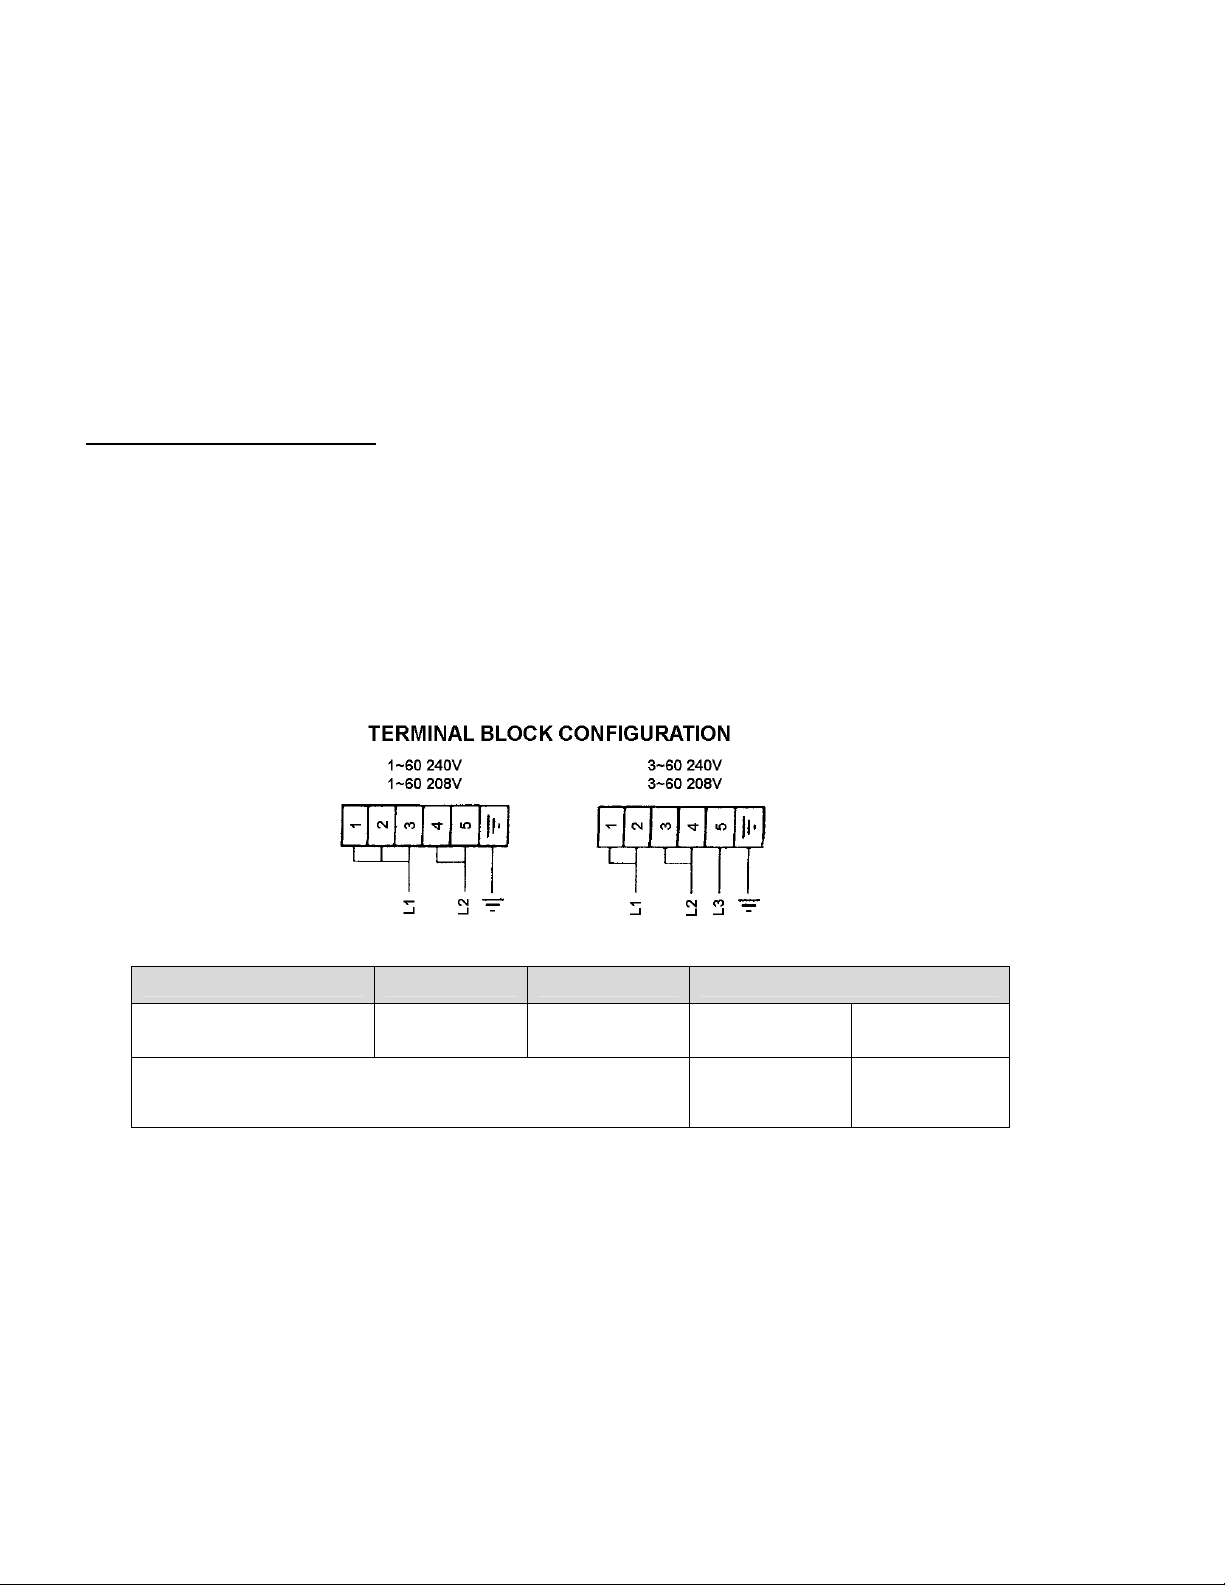
ELECTRICAL REQUIREMENTS
1. DEDICATED LINE – No other equipment may be connected to this line.
2. CORRECT VOLTAGE – The voltage is specified on the data plate. This is not a dual voltage unit. Check voltage
with a meter to ascertain actual voltage (i.e. 208V or 240V).
3. SUPPLY CONNECTION WIRE GUAGE: 1 Phase – No. 8 AWG
3 Phase – No. 10AWG
Wire to be suitable for at least 60° C
4. TERMINAL BLOCK CONFIGURATION:
SHIPPING WEIGHT CUBE MAXIMUM KW AMPERAGE (PER LEG)
242 lbs.
110 kg.
208V or 240V, single or three phase.
Equipped for field service connection.
SP-5 Operator Manual
Voltage
27 6 Single Phase
Three Phase
208V – 28.9
240V – 25.0
208V – 16.7
240V – 14.5
3
INSTALLATION (CONT’D)
ELECTRICAL REQUIREMENTS (CONT’D)
5. LEGS MUST BE LEFT ON THE ROTISSERIE WHEN IT IS INSTALLED. The legs are needed to allow adequate
airflow under the unit, which is necessary for proper cooling and operation. Once installed, adjust the legs to level
the rotisserie.
6. NO OBSTRUCTIONS under, on top, or around the unit to restrict airflow or cause unsafe conditions.
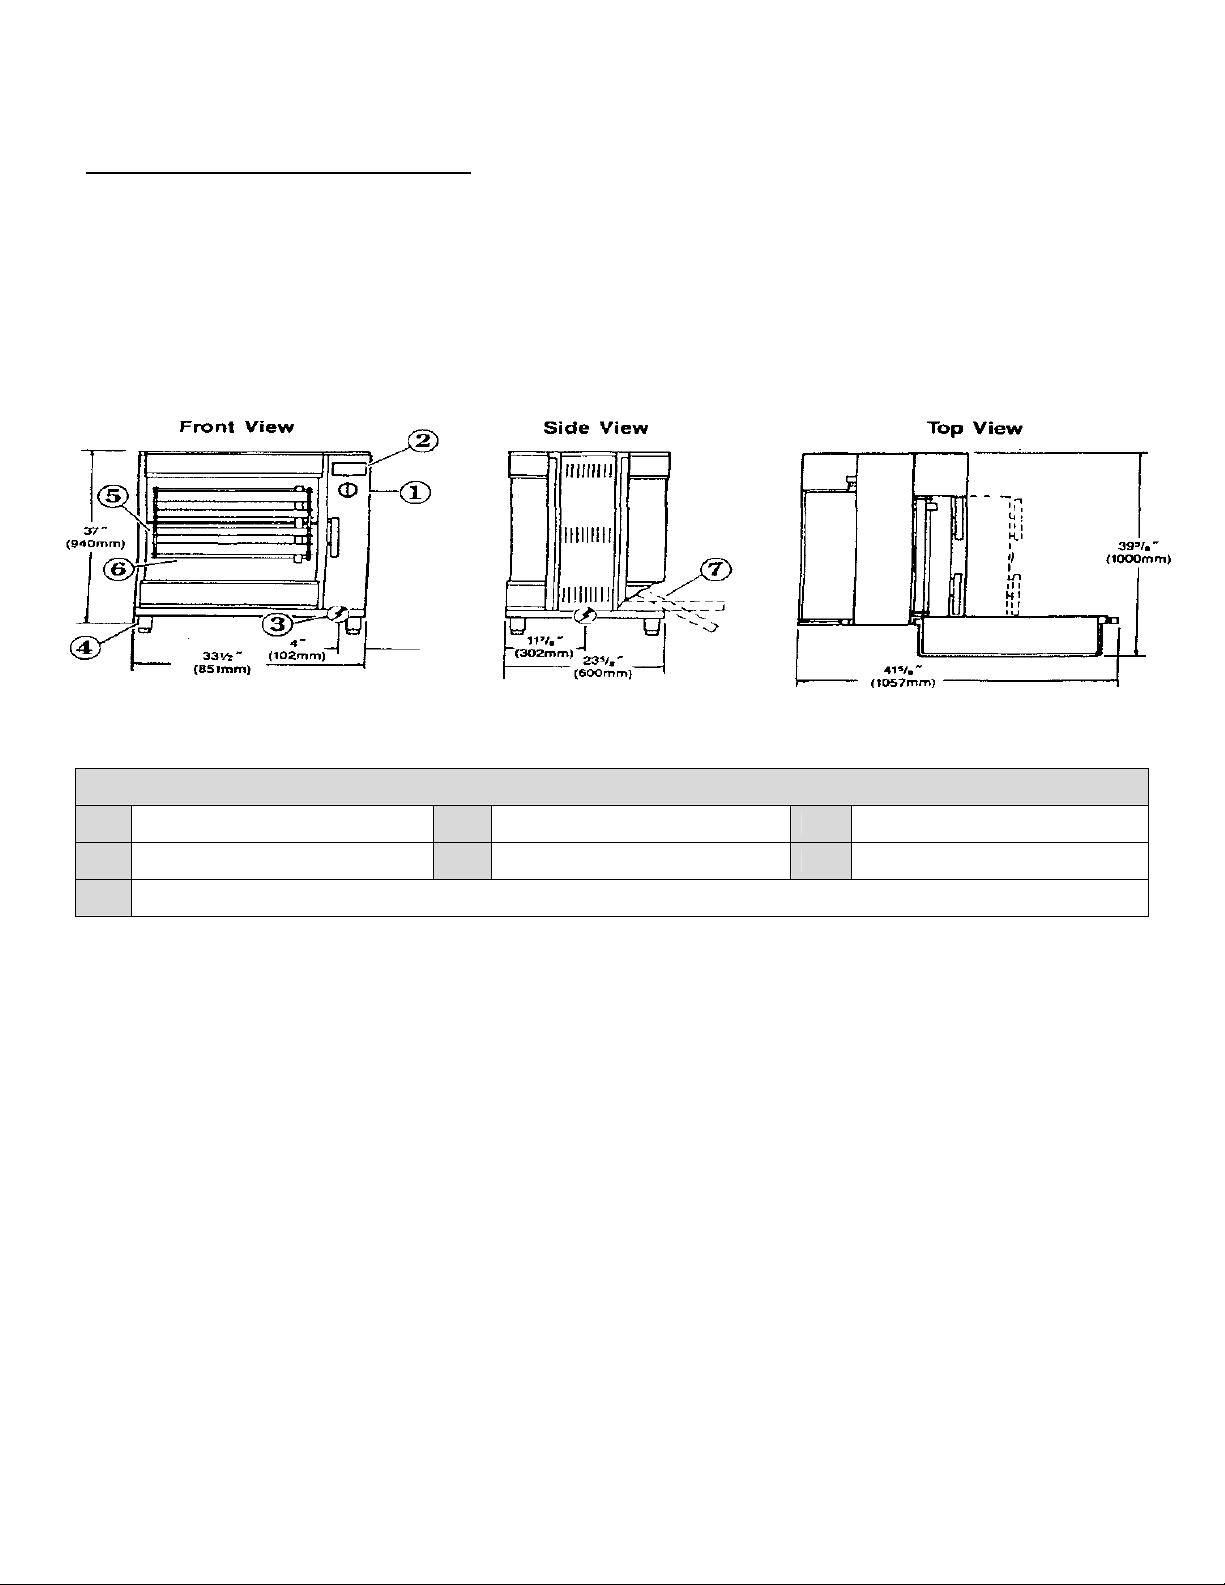
MECHANICAL DIMENSIONS
Unit Weight – 216 lbs. (98 kg.)
MECHANICAL DIMENSIONS ILLUSTRATION KEY
1 Switch with program selector 2 Display Window 3 Electrical Connection
4 Adjustable Feet 5 Rotor Unit 6 Double Spits, 5 pcs.
7 Fat Tray (Pull & tilt for emptying. The tray is removable.)
SP-5 Operator Manual
4

GENERAL PRODUCTIVITY INFORMATION
PRODUCT
Chicken:
Whole, 2-1/2 lbs. Each (avg.)
Parts (quartered)
COOKING TEMP / TIME
(All times include pre-heating)
350° - 1 hour, 30 minutes
350° - 1 hour
YIELD*
20 (50 lbs.)
18 lbs.
Ribs, Pork
Ribs, Beef
425° - 10 minutes, then
300° - 45 minutes
425° - 15 minutes, then
300° - 1 hour
10 lbs.
20 lbs.
Roasts, 4 to 7 lbs. Rolled 350° - 1 hour 20 lbs.
Fish Steaks 420° - 15 minutes 15-20 each
Pasta Dishes 375° - 40 minutes 5 pans
* These figures are approximate. Actual yield will depend on weight, size and quality of individual products.
NOTE: Some condensation at the base of the door is normal during use of this machine.
MENU ITEM REFERENCE CHART
MENU # PRODUCT WEIGHT COOK
TEMP.
1 30 Chickens
2 15 Chickens
3 10 Chickens
4
5 Pork Ribs 10 lbs.
6 Beef Ribs 20 lbs.
7
Chicken
Parts
Seafood
Filet
50 lbs. (2.5
lbs. Each)
37 lbs. (2.5
lbs. Each)
30 lbs. (3
lbs. Each)
18 lbs. 350°
420° 15 min. 175° 30 min.
350°
350°
350°
425° then
300°
425° then
300°
COOK
TIME
1 hour, 30
min.
1 hour, 25
min.
1 hour, 15
min.
1 hour, 5
min.
10 min. then
45 min.
20 min. then
75 min.
HOLD
TEMP.
175° 3 hr.
175° 3 hr.
175° 3 hr.
175° 2 hr.
175° 3 hr.
175° 3 hr.
HOLD
TIME
8 Casseroles 375° 40 min. 175° 30 min.
SP-5 Operator Manual
Manual
Hold
175° 5 hours
5

Set Cooking
Time Control
Starts Timer after
switching to Cook
Display Window
Set Temperature
Control
Resets Timer to
change cook time
OFF
HOLDING POSITION
AND JOG POSITION
(for wheel rotation to
load and unload)
Cook Position Program Selector
Switch
SP-5 Operator Manual
6

OPERATION INSTRUCTIONS
1. Set SELECTOR to ‘OFF.”
2. Load rotisserie with product. Set SELECTOR switch to “JOG” to jog wheel during loading.
3. Set required cooking temperature by turning the TEMP ADJUST knob to the right to raise temperature or left to
lower it. (The temperature setting will appear on the right side of the display window and will flash on and off until
the oven reaches the set point.) Check actual oven temperature by holding TIMER START for 5 seconds. NOTE:
Temperature should not be set above 425°.
4. Set required cooking time by turning the TIME ADJUST knob to the right to increase time or to the left to lower it.
Allow approximately 15-20 minutes preheat time. (The time setting will appear as minutes and hours on the
display.)
5. Start cooking by turning selector switch to “COOK” position and press TIMER START. (The two dots between
hours and minutes will flash on and off when timer is running.) When cooking time is completed an alarm will
sound.
6. After cooking is completed, turn the selector to “OFF” to stop the rotisserie, or to “JOG” for holding the product.
7. The buzzer can be turned off by pressing TIMER RESET.
8. To stop unit at any time, turn selector switch to “OFF.”
WEEKLY CLEANING
IMPORTANT: The Air Box must be
cleaned weekly.
1. Open the door and remove the 4
large hex head nuts located in
the upper cooking chamber. See
illustration.
2. Pull Air Box down and place it in
a sink or dishwasher.
3. Be certain that all grease residue
is removed from the interior of
the Air Box. Rinse and dry
thoroughly.
4. Wipe down the temperature
sensing probe which is shown in
the illustration. Gently wipe
clean the blower fan blades.
5. Replace the Air Box, carefully
fitting over the 4 studs. Secure
with hex head nuts.
IMPORTANT: The hex buts are
only to be hand tightened. DO
NOT use tools.
The Air Box should be removed weekly for cleaning.
WEEKLY AIR BOX CLEANING
SP-5 Operator Manual
7

Display Window
Door Open
Indicator Light
Menu Selection
Buttons 1-8
Adds 10 minutes to
Cook Time
Heat Indicator Lamp
Temperature Review
Program Review
Manual Hold Button
Rotates Wheel for
Loading or Unloading
Power Control
SP-5 Operator Manual
8

PRE-PROGRAMMABLE OPERATION INSTRUCTIONS
1. Press “ON/OFF” button.
2. Load rotisserie with product. Press “JOG” button to rotate wheel.
3. Touch appropriate “MENU ITEM” (refer to menu item reference chart on page 3).
4. Rotisserie will start cooking at indicated time and temperature for menu item. When cooking is completed alarm
will sound for 15 seconds. To stop alarm, press “MENU ITEM” button. It will now automatically switch to th e
HOLD mode.
5. To review program for any menu item, press “REVIEW” button.
6. If additional cooking time is needed, press “ADD COOK TIME” button, which adds 10 minutes at a time. Use the
following Internal Temperature Guide to determine if product is fully cooked.
INTERNAL TEMPERATURE GUIDE
PRODUCT INTERNAL TEMPERATURE °F / °C
Poultry 185° F / 85° C
Pork 170° F / 77° C
Beef (well) 170° F / 77° C
Beef (medium) 160° F / 70° C
Beef (rare) 140° F / 60° C
7. For additional hold time, press “MANUAL HOLD” button. It is recommended that internal temperatu re a nd product
condition be checked before more hold time is added.
PLEASE CALL SAVORY IF A MENU ITEM PROGRAM CHANGE IS NEEDED
CHANGING TEMPERATURE MODE
1. Turn Temperature Control Knob to 120°.
2. Hold both TIMER START & TIMER RESET buttons down simultaneously until display flashes either CCC or FFF.
3. Release buttons and use Temperature Control Knob to select desired display (CCC for Celsius, FFF for
Fahrenheit).
4. Press Timer Reset button once.
5. If Celsius is selected, a green indicator will show in the bottom right hand corner of the display next to red “bake”
indicator (max set temp of 221°C). If Fahrenheit is selected, there will be no display in the corner (max set temp of
430°F).
SP-5 Operator Manual
9

CLEANING & MAINTENANCE
IMPORTANT:
!
The following cleaning instructions must be carried out to insure satisfactory
performance from your Panorama Rotisserie. Neglecting to follow these procedures
may result in poorly cooked product, reduced reliability and may void the warranty.
GENERAL CLEANING
AFTER EVERY COOK CYCLE:
1. To avoid the build-up of splatter and grease baking onto the inside of the glass surface, it is important that they be
2. Check the grease level in the grease pan. If it needs to be emptied, lift out the drip tray closest to you and
DAILY CLEANING:
1. Upon completion of the last cook cycle of the day, soak the skewers or baskets in warm soapy water for
2. Lift out the wheel assembly. (Raise left end from the “cradle” bearing then lift and pull the right end from the drive
3. Carefully note how the two drip trays at the bottom of the cooking chamber are positioned. Each tray is held in
4. Slide out grease pan and pour off grease as described above. Place pan in the sink or dishwasher.
5. Wash the disassembled parts with warm soapy water. Rinse with clean water and dry. NOTE: A stainless steel
6. Use a soft cloth or sponge, dampened with warm soapy water to wash the non-stick coated side panels of the
7. Use a glass and surface cleaner to clean the inner and outer glass of both doors. Use a stainless steel cleaner on
8. Install pan, trays and rotating wheel.
WARNING:
!
cleaned with a liquid glass cleaner. This should be done after every cooking cycl e when these areas have been
allowed to cool slightly. NOTE: Keeping the glass area clean improves the customer’s view of the product being
cooked, adding to the appeal.
carefully slide out the pan by gently pulling on both handles. To remove grease, lift out the drip tray closest to you
and carefully slide out the pan by gently pulling on both handles. To remove grease, slide out the pan fully until it
locks in the stop position and tilt the tray, pouring off the grease into a suitable container.
approximately 5 minutes. This will make cleaning easier and faster.
coupling). Place in sink.
place by 2 sets of retaining pins. The trays are inserted under the two pins located innermo st, toward s the bottom
of the cooking chamber and resting on top of the pins (in the notches on the underside of the tray) located
outermost in the chamber. With the drip trays properly installed, the 4 innermost pins will be visible. Remove the
trays and place in the dishwasher or sink.
wool or plastic scouring pad and abrasive cleaner may be used to clean the skewers only
cooking chamber, the inside base of the machine, the underside of the Air Box Cover, and the inside of the door
frame including the door gasket. It is important that the area on the rotisserie where the door seals when closed
be thouroughly cleanes and free from grease. NOTE: Do not flood the rotisserie with cleaning fluid. Use
sparingly. Rinse using a cloth dampened with clear water then dry. Do not use water sprays directly on the
rotisserie.
the exterior metal surface to restore the original luster.
Allow the rotisserie to cool sufficiently (cool to touch) before attempting any cleaning
procedures.
.
SP-5 Operator Manual
10

LIMITED WARRANTY FOR COMMERCIAL PRODUCTS
LIMITED WARRANTY
Savory LLC, ("Savory”) warrants this pr od u c t to be f r e e f ro m defects in material and workmanship for a period of:
• One (1) year from the date the product is installed or eighteen (18) months from the date of shipment from our facility, whichever comes first.
• Heating elements only – two (2) year warranty against burnout (excluding breakage) from date of shipment from our facility.
• Hot Food Server products only – one (1) year labor, two (2) years parts from the date of shipment from our facility.
During the warranty period, Savory shall, at Savory’s option, repair, or replace parts determined by Savory to be defective in material or
workmanship, and with respect to services, shall re-perform any defective portion of said services. The foregoing shall be the sole obligation of
Savory under this Limited Warranty with respect to the equipment, products, and services. With respect to equipment, materials, parts and
accessories manufactured by others, Savory’s sole o bligation shall be to use reasonable efforts to obtain the full benefit of the manufacturer’s
warranties. Savory shall have no liability, whether in contract, tort, negligence, or otherwise, with respect to non-Savory manufactured products.
WHO IS COVERED
This Limited Warranty is available only to the original purchaser of the product and is not transferable.
EXCLUSIONS FROM COVERAGE
• Repair or replacement of parts required because of misuse, improper care or storage, negligence, alteration, accident, use of incompatible
supplies or lack of specified maintenance shall be excluded
• Normal maintenan ce ite m s, in clu d ing but no t lim it ed t o , lig ht bulbs, fuses, gaskets, O-rings, interior and exterior finishes, lubrication, de-liming,
broken glass, etc.
• Failures caused by improper or erratic voltages
• Improper or unauthorized repair
• Changes in adjustment and calibration after ninety (90) days from equipment installation date
• This Limited Warranty will not apply to any parts subject to damage beyond the control of Savory, or to equipment which has been subject to
alteration, misuse or improper installation, accidents, damage in shipment, fire, floods, power changes, other hazards or acts of God that are
beyond the control of Savory.
• This Limited Warranty does not apply, and shall not cover any products or equipment manufactured or sold by Savory when such products or
commercial equipment is installed or used in a residential or non-commercial application. Installations not within the applicable building or fire
codes render this Limited Warranty and any responsibility or obligations associated therein null and void. This includes any damage, costs, or
legal actions resulting from the installation of any Savory commercial cooking equipment in a non-commercial application or installation, where
the equipment is being used for applications other than those approved for by Savory.
LIMITATIONS OF LIABILITY
The preceding paragraphs set forth the exclusive remedy for all claims based on failure of, or defect in, products or services sold hereunder,
whether the failure or defect arises before or during the warranty period, and whether a claim, however instituted, is based on contract, indemnity,
warranty, tort (including negligence), strict liability, implied by statute, common-law or otherwise , and Savory its servants and agents shall not be
liable for any claims for personal injuries, incidental or consequential damages or loss, howsoever caused. Upon the expiration of the warranty
period, all such liability shall terminate. THE FOREGOING WARRANTIES ARE EXCLUSIVE AND IN LIEU OF ALL OTHER WARRANTIES,
WHETHER WRITTEN, ORAL, IMPLIED OR STATUTORY. NO IMPLIED WARRANTY OF MERCHANTABILITY OR FITNESS FOR PARTICULAR
PURPOSE SHALL APPLY. SAVORY DOES NOT WARRANT ANY PRODUCTS OR SERVICES OF OTHERS.
REMEDIES
The liability of Savory for breach of any warranty obligation he r e u nd er is limited to: (i) the repair or replacement of the equipment on which the
liability is based, or with respect to services, re-performance of the services; or (ii) at Savory’s option, the refund of the amount paid for said
equipment or services.
Any breach by Savory with respect to an y item or unit of e quipment or services shall be de emed a br each with respec t to t ha t it em o r unit or service
only
WARRANTY CLAIM PROCEDURE
Customer shall be responsible to:
• Immediately advise the Dealer or Savory’s Authorized Service Agent of the equipment serial number and the nature of the problem.
• Verify the problem is a factory responsibility. Improper installation or misuse of equipment, are not cove red under this Limited Warranty.
• Cooperate with the Service Agency so that warranty service may be completed during normal working hours.
• Travel Time not to exceed two hours and mileage not to exceed one hundred (100) miles.
• Portable equipment weighting less than ninety (90) pounds must be delivered to the Service Agent at Customer’s expense.
GOVERNING LAW
This Limited Warranty shall be governed by the laws of the state of Delaware, USA, exclud in g the i r con f lict s o f law principles. The United Nations
Convention on Contracts for the International Sale of Goods is hereby excluded in its entirety from application to this Limited Warranty
Lincoln Foodservice Products, LLC
1111 North Hadley Road
Fort Wayne, Indiana 46804
USA
www.lincolnfp.com
SP-5 Operator Manual
11

SP-5 Operator Manual
12
 Loading...