

Page 1

Manuals for This Machine
The following manuals describe the operational procedures of this machine. For
particular functions, see the relevant parts of the manual.
Note
❒ Manuals provided are specific to machine type.
❒ Adobe Acrobat Reader / Adobe Reader is necessary to view the manuals as
a PDF file
❒ Two CD-ROMs are provided:
• CD-ROM 1 “Operating Instructions”
• CD-ROM 2 “Scanner Driver and Utilities”
❖❖❖❖ General Settings Guide
Provides an overview of the machine and describes System Settings (such as
Tray Paper Settings), Document Server functions, and troubleshooting.
Refer to this manual for Address Book procedures such as registering e-mail
addresses and user codes.
❖❖❖❖ Security Reference (this manual)
This manual is for administrators of this machine. It describes security functions that the administrators can use to protect data from being tampered, or
prevent the machine from unauthorized use. Also refer to this manual for the
procedures for registering administrators, as well as setting user and administrator authentication.
❖❖❖❖ Network Guide (PDF file - CD-ROM1)
Provides information about configuring and operating the scanner (Type 480
) in a network environment.
For details about network settings of the scanner (RW480) and printer
(RW480), see the manual that comes with the related option.
❖❖❖❖ Copy Reference
Describes operations, functions, and troubleshooting for the machine's copier
function.
❖❖❖❖ Scanner Reference (Scanner Unite Type 480) (PDF file - CD-ROM1)
Describes operations, functions, and troubleshooting for the machine's scanner function.
i
Page 2

❖❖❖❖ Manuals for DeskTopBinder Lite
DeskTopBinder Lite is a utility included on the CD-ROM labeled “Scanner
Driver and Utilities”.
• DeskTopBinder Lite Setup Guide (PDF file - CD-ROM2)
Describes installation of, and the operating environment for DeskTopBinder Lite in detail. This guide can be displayed from the [Setup] display
when DeskTopBinder Lite is installed.
• DeskTopBinder Lite Introduction Guide (PDF file - CD-ROM2)
Describes operations of DeskTopBinder Lite and provides an overview of
its functions. This guide is added to the [Start] menu when DeskTopBinder
Lite is installed.
• Auto Document Link Guide (PDF file - CD-ROM2)
Describes operations and functions of Auto Document Link installed with
DeskTopBinder Lite. This guide is added to the [Start] menu when DeskTopBinder Lite is installed.
❖❖❖❖ Other manuals
• Manuals for Printer (RW480) function
• Manuals for Scanner (RW480) function
ii
Page 3

TABLE OF CONTENTS
Manuals for This Machine......................................................................................i
How to Read This Manual .....................................................................................1
1. Getting Started
Enhanced Security.................................................................................................3
Glossary .....................................................................................................................4
Security Measures Provided by this Machine.....................................................5
Preventing Information Leaks ....................................................................................5
Preventing Unauthorized Operation...........................................................................6
Enhanced Network Security.......................................................................................7
2. Preventing Information Leaks
Specifying Access Permission for Stored Files ................................................. 9
Assigning Users and Access Permission for Stored Files .......................................10
Assigning the User and the Access Permission for the User’s Stored Files............11
Specifying Passwords for the Stored Files...............................................................14
Unlocking Files.........................................................................................................15
Preventing Data Leaks Due to Unauthorized Transmission ............................ 16
Restrictions on Destinations.....................................................................................16
Protecting the Address Book ............................................................................. 18
Address Book Access Permission ...........................................................................18
Encrypting the Data in the Address Book ................................................................20
Overwriting the Data on the Hard Disk ..............................................................22
“Auto Erase Memory Setting”...................................................................................22
“Erase All Memory” ..................................................................................................25
3. Preventing Unauthorized Use of Functions and Settings
Preventing Modification of Machine Settings ...................................................27
Limiting Available Functions..............................................................................28
Specifying Which Functions are Available ...............................................................28
4. Enhanced Network Security
Preventing Unauthorized Access.......................................................................31
Enabling/Disabling Protocols ...................................................................................31
Access Control.........................................................................................................32
Encrypting Transmitted Passwords...................................................................34
Driver Encryption Key ..............................................................................................34
IPP Authentication Password...................................................................................36
Protection Using Encryption ..............................................................................37
SSL (Secure Sockets Layer) Encryption..................................................................38
User Settings for SSL (Secure Sockets Layer) ........................................................42
Setting the SSL / TLS Encryption Mode...................................................................42
SNMPv3 Encryption .................................................................................................44
iii
Page 4

5. Management Based on Authentication and Access Control
The Management Function .................................................................................47
Administrators and Users...................................................................................48
Administrator............................................................................................................48
User..........................................................................................................................49
Enabling Authentication......................................................................................50
Administrator Authentication ....................................................................................50
User Authentication..................................................................................................51
Authentication Information Stored in the Address Book................................. 59
Specifying Authentication Information to Log on......................................................59
If User Authentication Has Been Specified .......................................................61
User Code Authentication (Using the Control Panel)...............................................61
Login (Using the Control Panel)...............................................................................61
Log Off (Using the Control Panel)............................................................................62
Login (Using Web Image Monitor) ...........................................................................62
Log Off (Using Web Image Monitor) ........................................................................62
Auto Logout..............................................................................................................63
Menu Protect ........................................................................................................64
Menu Protect............................................................................................................64
6. Specifying the Administrator/Security Functions
The Roles of Administrators...............................................................................67
Administrator Authentication .............................................................................69
Administrator Authentication ....................................................................................70
Registering the Administrator...................................................................................72
Logging on Using Administrator Authentication ....................................................... 73
Logging off Using Administrator Authentication .......................................................74
Changing the Administrator......................................................................................75
Specifying the Extended Security Functions....................................................76
Changing the Extended Security Functions .............................................................76
Settings ....................................................................................................................77
Limiting Machine Operation to Customers Only ..............................................80
Settings ....................................................................................................................80
7. Troubleshooting
Authentication Does Not Work Properly ...........................................................83
A Message Appears.................................................................................................83
Machine Cannot Be Operated..................................................................................85
iv
Page 5

8. Appendix
Operations by the Supervisor.............................................................................87
Logging on as the Supervisor ..................................................................................87
Logging off as the Supervisor ..................................................................................88
Changing the Supervisor..........................................................................................88
Resetting an Administrator’s Password ...................................................................89
Machine Administrator Settings.........................................................................91
System Settings .......................................................................................................91
Copier/Document Server Features ..........................................................................93
Scanner Features.....................................................................................................93
Settings via Web Image Monitor ..............................................................................94
Settings via SmartDeviceMonitor for Admin.............................................................95
Network Administrator Settings.........................................................................96
System Settings .......................................................................................................96
Scanner Features.....................................................................................................97
Settings via Web Image Monitor ..............................................................................97
Settings via SmartDeviceMonitor for Admin.............................................................99
File Administrator Settings...............................................................................100
System Settings .....................................................................................................100
Settings via Web Image Monitor ............................................................................100
User Administrator Settings .............................................................................101
System Settings .....................................................................................................101
Settings via Web Image Monitor ............................................................................101
Settings via SmartDeviceMonitor for Admin...........................................................102
The Available Functions for Using the Files Stored in Document Server.... 103
Settings That Can Be Specified In the Address Book............................................104
User Settings......................................................................................................107
Copier/Document Server Features ........................................................................107
Scanner Features...................................................................................................109
System Settings .....................................................................................................110
Web Image Monitor Setting....................................................................................114
Functions That Require Options ......................................................................120
INDEX....................................................................................................... 121
v
Page 6

vi
Page 7

How to Read This Manual
R
R
Symbols
The following set of symbols is used in this manual.
WARNING:
This symbol indicates a potentially hazardous situation that might result in
death or serious injury when you misuse the machine without following the instructions under this symbol. Be sure to read the instructions, all of which are described in the Safety Information section.
CAUTION:
This symbol indicates a potentially hazardous situation that might result in minor or moderate injury or property damage that does not involve personal injury
when you misuse the machine without following the instructions under this
symbol. Be sure to read the instructions, all of which are described in the Safety
Information section.
* The statements above are notes for your safety.
Important
If this instruction is not followed, paper might be misfed, originals might be
damaged, or data might be lost. Be sure to read this.
Preparation
This symbol indicates information or preparations required prior to operating.
Note
This symbol indicates precautions for operation, or actions to take after abnormal operation.
Limitation
This symbol indicates numerical limits, functions that cannot be used together,
or conditions in which a particular function cannot be used.
Reference
This symbol indicates a reference.
[]
Keys that appear on the machine's display panel.
[]
Keys and buttons that appear on the computer's display.
{}
Keys built into the machine's control panel.
{}
Keys on the computer's keyboard.
1
Page 8

2
Page 9

1. Getting Started
Enhanced Security
This machine's security function can be enhanced through the management of
the machine and its users using the improved authentication functions.
By specifying access limits on the machine’s functions and the documents and
data stored in the machine, you can prevent information leaks and unauthorized
access.
Data encryption can prevent unauthorized data access and tampering via the
network.
❖❖❖❖ Authentication and Access Limits
Using authentication, administrators manage the machine and its users. To
enable authentication, information about both administrators and users must
be registered in order to authenticate users via their login user names and
passwords.
Four types of administrator manage specific areas of machine usage, such as
settings and user registration.
Access limits for each user are specified by the administrator responsible for
user access to machine functions and documents and data stored in the machine.
Reference
For details, see p.67 “The Roles of Administrators”.
❖❖❖❖ Encryption Technology
This machine can establish secure communication paths by encrypting transmitted data and passwords.
3
Page 10

Getting Started
Glossary
❖❖❖❖ Administrator
1
Administrators manage a specific area of machine usage, such as settings or
user registration.
There are four types of administrator: user administrator, network administrator, machine administrator, and file administrator. One person can act as
more than one type of administrator.
Basically, administrators make machine settings and manage the machine;
they cannot perform normal operations, such as copying.
❖❖❖❖ User
A user performs normal operations on the machine, such as copying.
❖❖❖❖ File Creator (Owner)
This is a user who can store files in the machine and authorize other users to
view, edit, or delete those files.
❖❖❖❖ Registered User
This is a user whose personal information is registered in the address book.
The registered user is the user who knows the login user name and password.
❖❖❖❖ Administrator Authentication
Administrators are authenticated by means of the login user name and login
password supplied by the administrator when specifying the machine’s settings or accessing the machine over the network.
❖❖❖❖ User Authentication
Users are authenticated by means of the login user name and login password
supplied by the user when specifying the machine’s settings or accessing the
machine over the network.
❖❖❖❖ Login
This action is required for administrator authentication and user authentication. Enter your login user name and login password on the machine’s control
panel.
A login user name and login password may also be supplied when accessing
the machine over the network or using such utilities as Web Image Monitor
and SmartDeviceMonitor for Admin.
❖❖❖❖ Logout
This action is required with administrator and user authentication. This action is required when you have finished using the machine or changing the
settings.
4
Page 11

Security Measures Provided by this Machine
Security Measures Provided by this
Machine
Preventing Information Leaks
❖❖❖❖ Protecting Stored Files from Unauthorized Access
You can specify who is allowed to use and access scanned files and the files
in Document Server. You can prevent activities such as the printing of stored
files by unauthorized users.
Reference
For details, see p.9 “Specifying Access Permission for Stored Files”.
❖❖❖❖ Protecting Stored Files from Theft
You can specify who is allowed to use and access scanned files and the files
in Document Server. You can prevent such activities as the sending and
downloading of stored files by unauthorized users.
Reference
For details, see p.9 “Specifying Access Permission for Stored Files”.
❖❖❖❖ Preventing Data Leaks Due to Unauthorized Transmission
You can specify in the address book which users are allowed to send files using the scanner function.
You can also limit the direct entry of destinations to prevent files from being
sent to destinations not registered in the address book.
1
Reference
For details, see p.16 “Preventing Data Leaks Due to Unauthorized Transmission”.
❖❖❖❖ Protecting Registered Information in the Address Book
You can specify who is allowed to access the data in the address book. You
can prevent the data in the address book being used by unregistered users.
To protect the data from unauthorized reading, you can also encrypt the data
in the address book.
Note
❒ To encrypt the data in the address book, the machine must have the scan-
ner function.
Reference
For details, see p.18 “Protecting the Address Book”.
5
Page 12

Getting Started
❖❖❖❖ Overwriting the Data on the Hard Disk
You can overwrite data on the hard disk.
Reference
For details, see p.22 “Overwriting the Data on the Hard Disk”.
1
Preventing Unauthorized Operation
❖❖❖❖ Preventing Modification or Deletion of Stored Data
You can specify who is allowed to access stored scan files and files stored in
Document Server.
You can permit selected users who are allowed to access stored files to modify
or delete the files.
Reference
For details, see p.9 “Specifying Access Permission for Stored Files”.
❖❖❖❖ Preventing Modification of Machine Settings
The machine settings that can be modified depend on the type of administrator account.
Register the administrators so that users cannot change the administrator settings.
Reference
For details, see p.27 “Preventing Modification of Machine Settings”.
❖❖❖❖ Limiting Available Functions
To prevent unauthorized operation, you can specify who is allowed to access
each of the machine’s functions.
Reference
For details, see p.28 “Limiting Available Functions”.
6
Page 13

Security Measures Provided by this Machine
Enhanced Network Security
❖❖❖❖ Preventing Unauthorized Access
You can limit IP addresses or disable ports to prevent unauthorized access
over the network and protect the address book, stored files, and default settings.
Reference
For details, see p.31 “Preventing Unauthorized Access”.
❖❖❖❖ Encrypting Transmitted Passwords
Prevent login passwords, group passwords for PDF files, and IPP authentication passwords being revealed by encrypting them for transmission.
Also, encrypt the login password for administrator authentication and user
authentication.
Note
❒ To encrypt transmitted passwords, the machine must have the scanner
function.
Reference
For details, see p.34 “Encrypting Transmitted Passwords”.
❖❖❖❖ Safer Communication Using SSL
When you access the machine using a Web browser or IPP, you can establish
encrypted communication using SSL. When you access the machine using an
application such as SmartDeviceMonitor for Admin, you can establish encrypted communication using SNMPv3 or SSL.
To protect data from interception, analysis, and tampering, you can install a
server certificate in the machine, negotiate a secure connection, and encrypt
transmitted data.
1
Note
❒ To establish encrypted communication using SSL, the machine must have
the scanner function.
Reference
For details, see p.37 “Protection Using Encryption”.
7
Page 14

Getting Started
1
8
Page 15

2.
Preventing Information Leaks
Specifying Access Permission for Stored
Files
You can specify who is allowed to access stored scan files and files stored in the
Document Server.
You can prevent activities such as the sending of stored files by unauthorized users.
❖❖❖❖ Access Permission
To limit the use of stored files, you can specify four types of access permission.
Read-only In addition to checking the content of and in-
Edit You can change the print settings for stored
Edit / Delete You can delete stored files.
Full Control You can specify the user and access permis-
formation about stored files, you can also
send the files.
files. This includes permission to view files.
This includes permission to view and edit
files.
sion.This includes permission to view, edit,
and edit / delete files.
Note
❒ Files can be stored by any user who is allowed to use the Document Server
or scanner function.
❒ Using Web Image Monitor, you can check the content of stored files. For
details, see the Web Image Monitor Help.
❒ The default access permission for the file creator (owner) is “Read-only”.
❖❖❖❖ Password for Stored Files
Passwords for stored files can be specified by the file creator (owner) or file
administrator.
You can obtain greater protection against the unauthorized use of files.
9
Page 16
Preventing Information Leaks
Assigning Users and Access Permission for Stored Files
This can be specified by the file creator (owner) or file administrator.
Specify the users and their access permissions for each stored file.
By making this setting, only users granted access permission can access stored
files.
2
Preparation
For details about logging on with administrator authentication, see p.73
“Logging on Using Administrator Authentication”.
For details about logging off with administrator authentication, see p.74
“Logging off Using Administrator Authentication”.
Important
❒ If files become inaccessible, reset their access permission as the file creator
(owner). This can also be done by the file administrator. If you want to access
a file but do not have access permission, ask the file creator (owner).
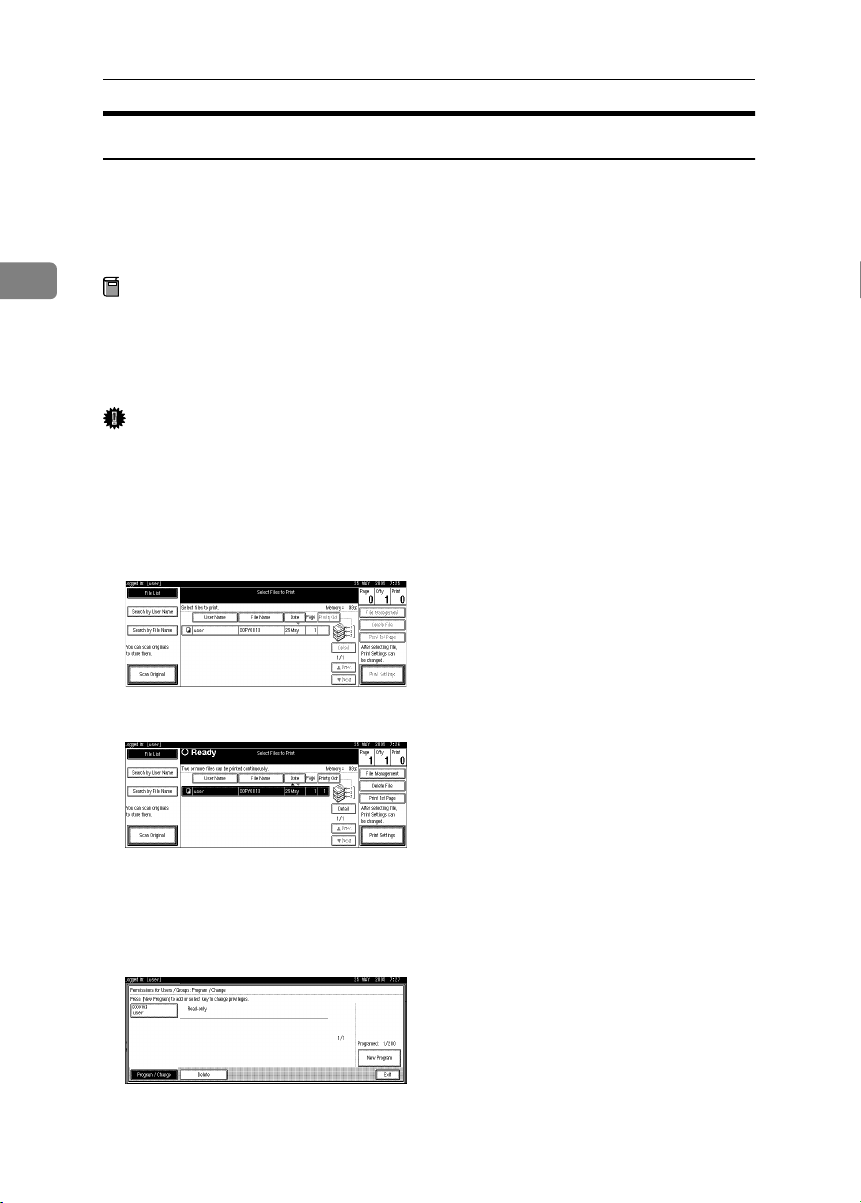
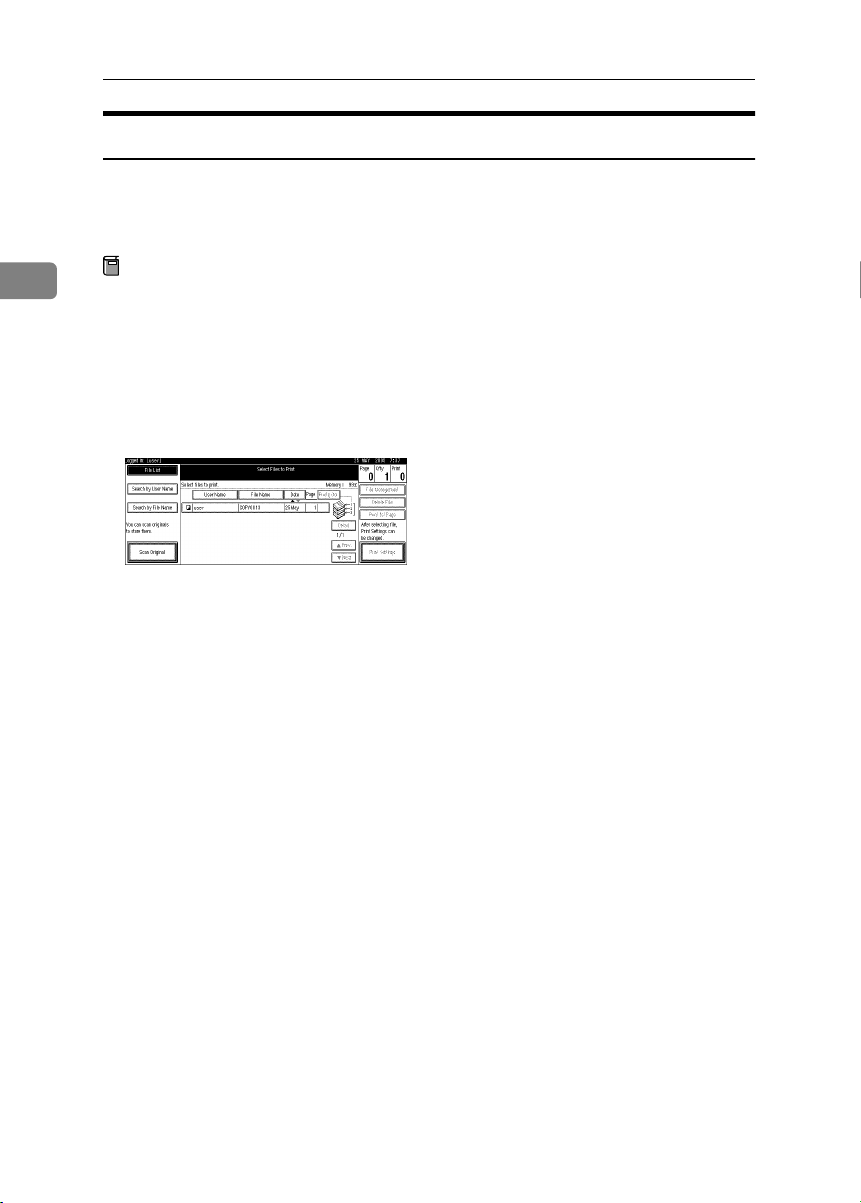
Press the {{{{Document Server}}}} key.
AAAA
Select the file.
BBBB
10
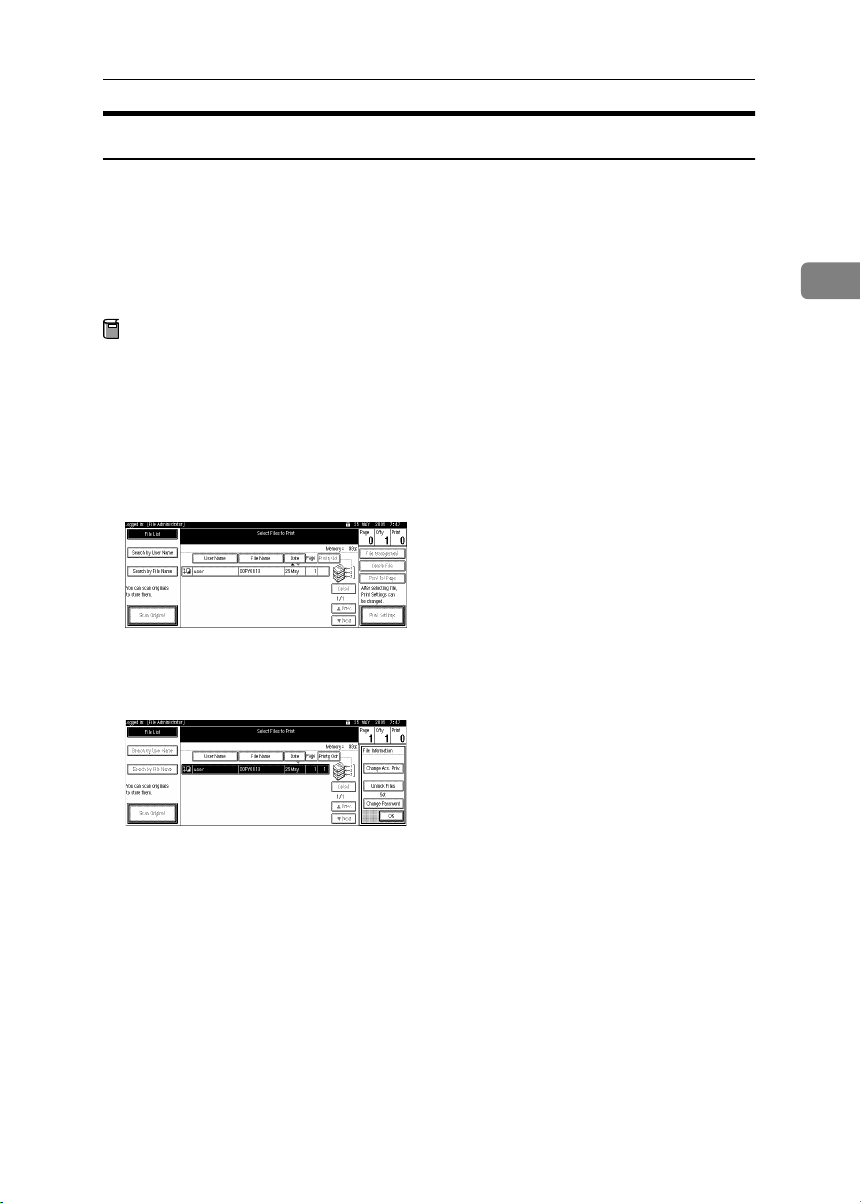
Press [File Management].
CCCC
Press [Change Acs. Priv.].
DDDD
Press [Program/Change/Delete].
EEEE
Press [New Program].
FFFF
Page 17
Specifying Access Permission for Stored Files
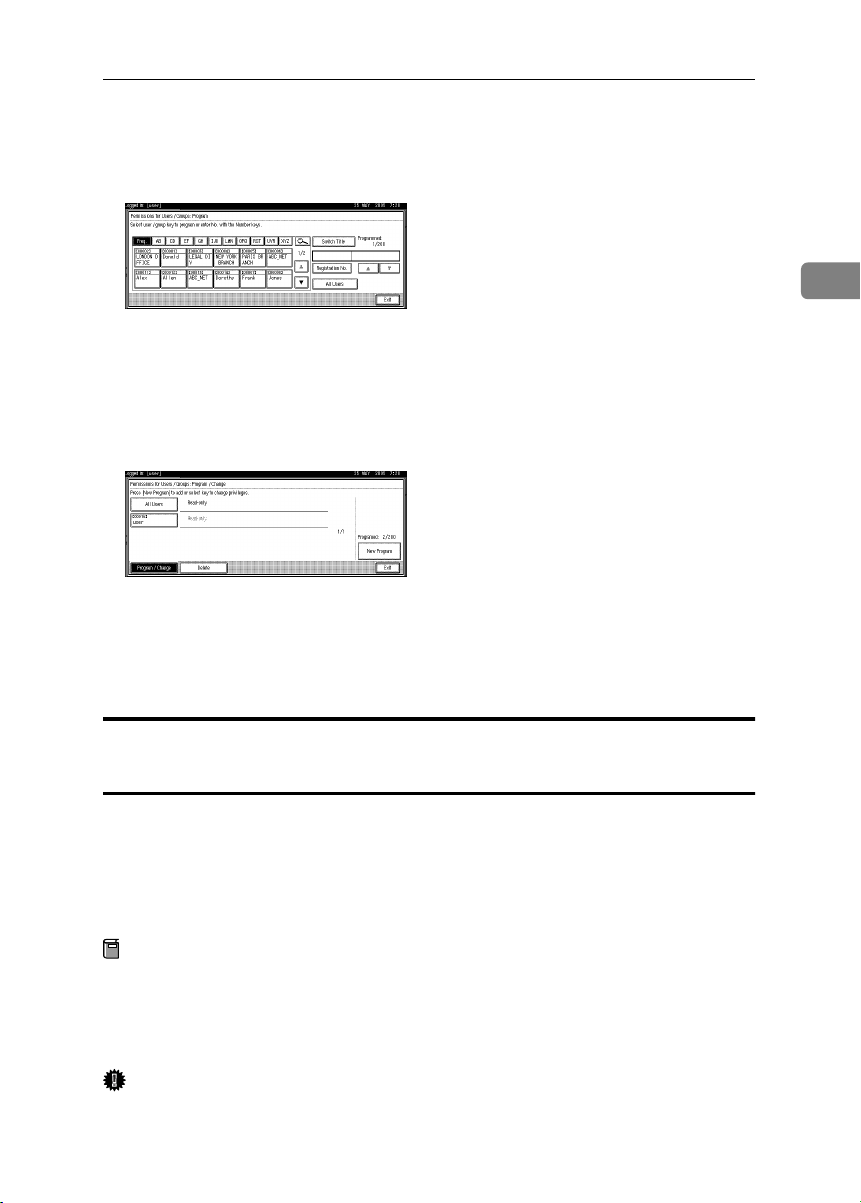
Select the users or groups you want to assign permission to.
GGGG
You can select more than one users.
By pressing [All Users], you can select all the users.
2
Press [
HHHH
Select the user who you want to assign an access permission to, and then
IIII
select the permission.
Select the access permission from [Read-only], [Edit], [Edit / Delete], or [Full Con-
trol].
Press [Exit].
JJJJ
Press [OK].
KKKK
Press [OK].
LLLL
Exit
].
Assigning the User and the Access Permission for the User’s
Stored Files
This can be specified by the file creator (owner) or user administrator.
Specify the users and their access permission to files stored by a particular user.
Only those users granted access permission can access stored files.
This makes the management of access permission easier than it is when permission is specified for each stored file.
Preparation
For details about logging on with administrator authentication, see p.73
“Logging on Using Administrator Authentication”.
For details about logging off with administrator authentication, see p.74
“Logging off Using Administrator Authentication”.
Important
❒ If files become inaccessible, be sure to enable the user administrator, and then
reset the access permission for the files in question.
11
Page 18
Preventing Information Leaks
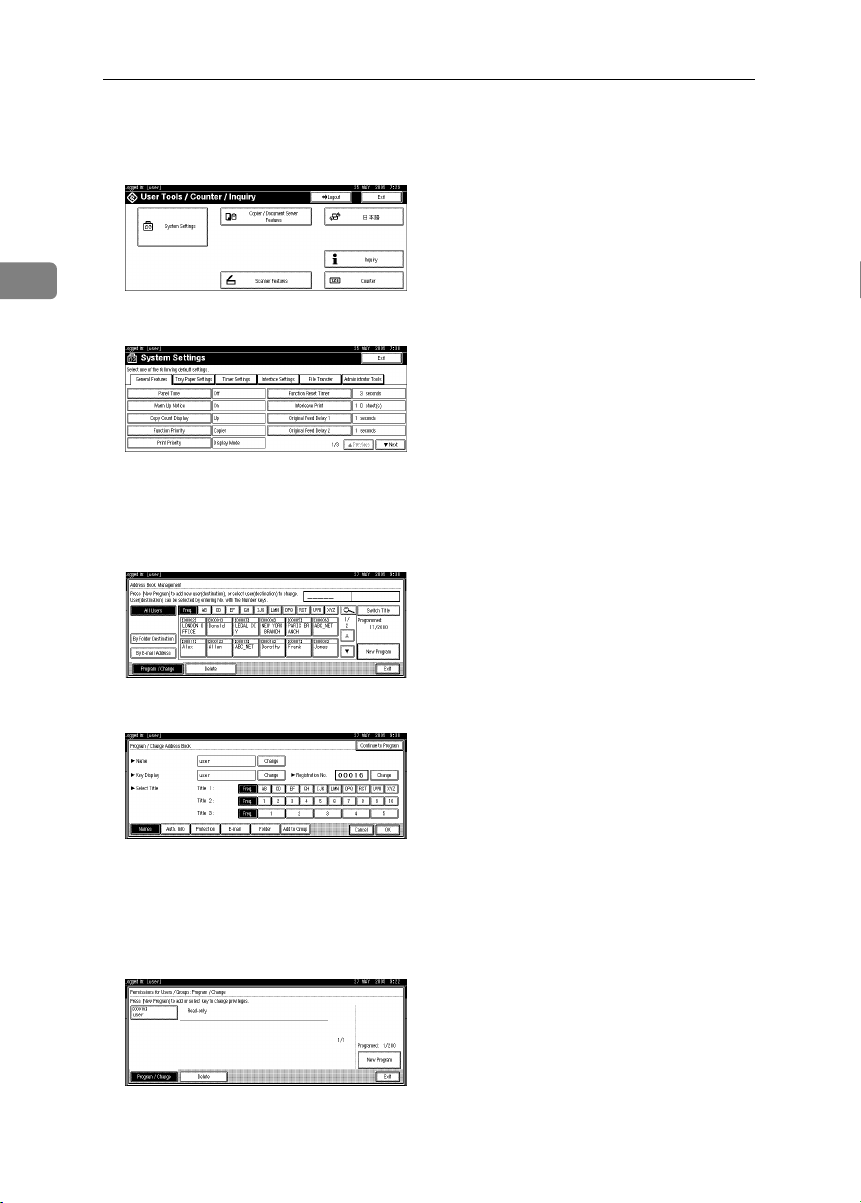
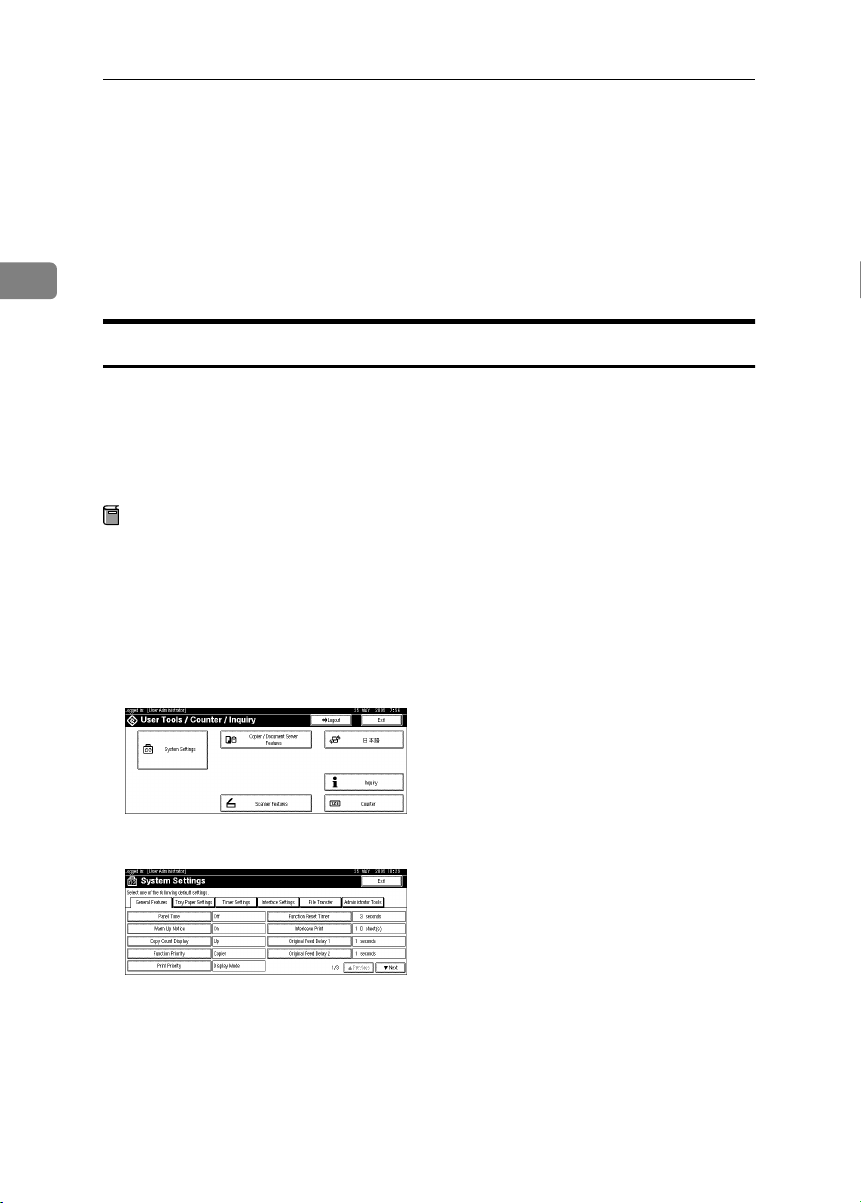
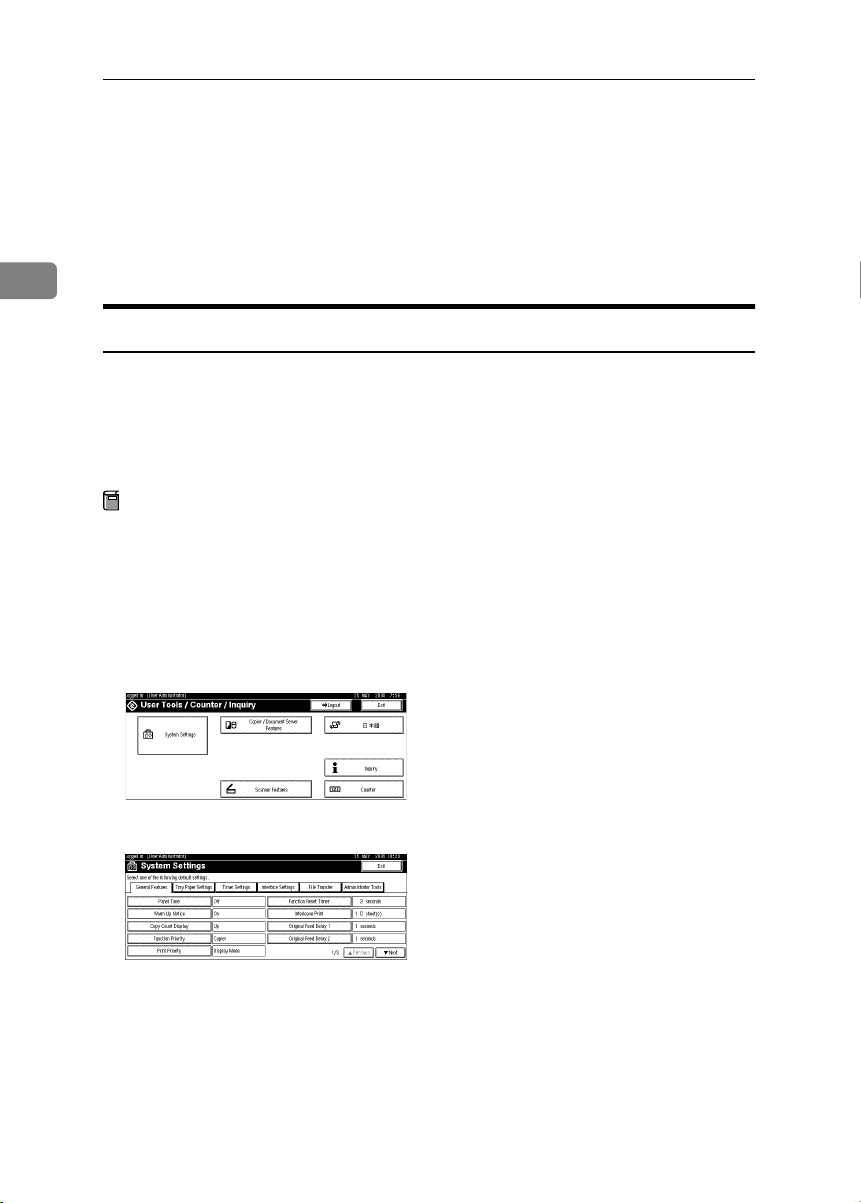
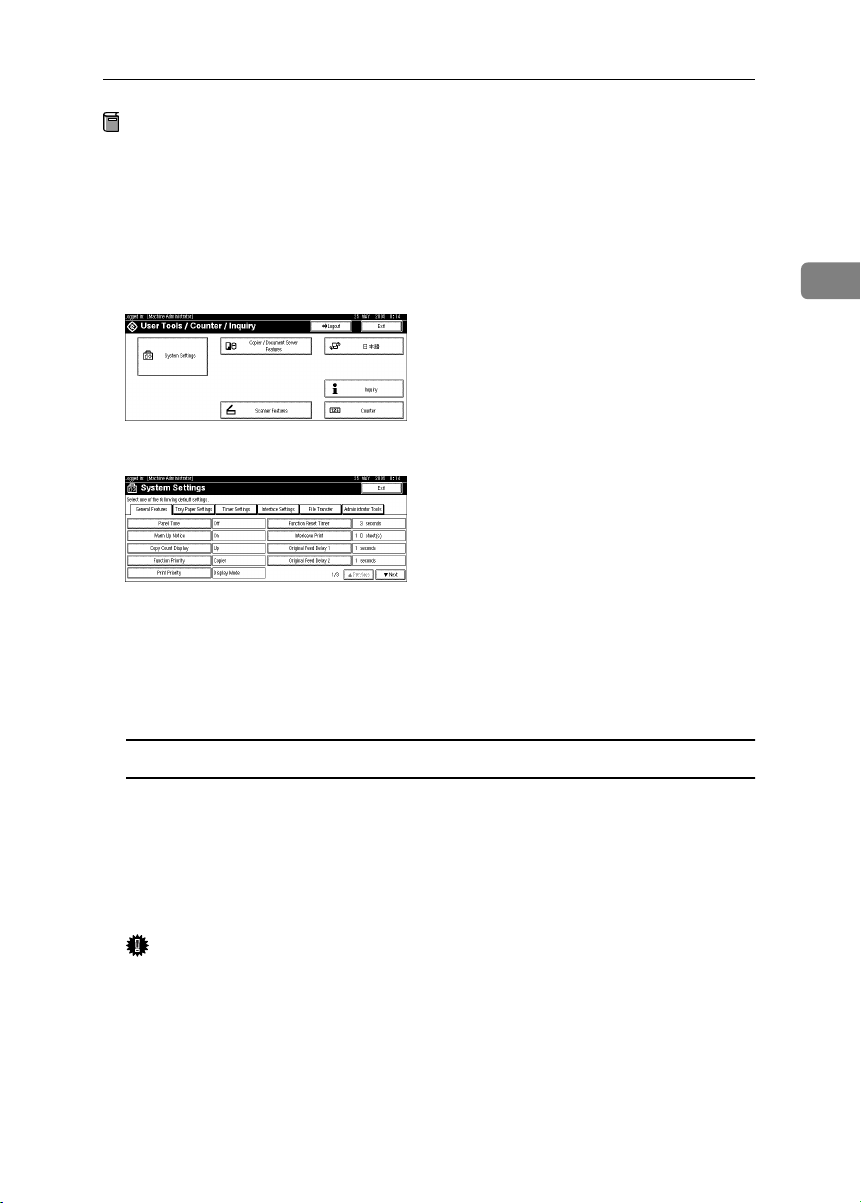
Press the {{{{User Tools/Counter}}}} key.
AAAA
Press [System Settings].
BBBB
2
Press [
CCCC
DDDD
EEEE
FFFF
GGGG
Administrator Tools
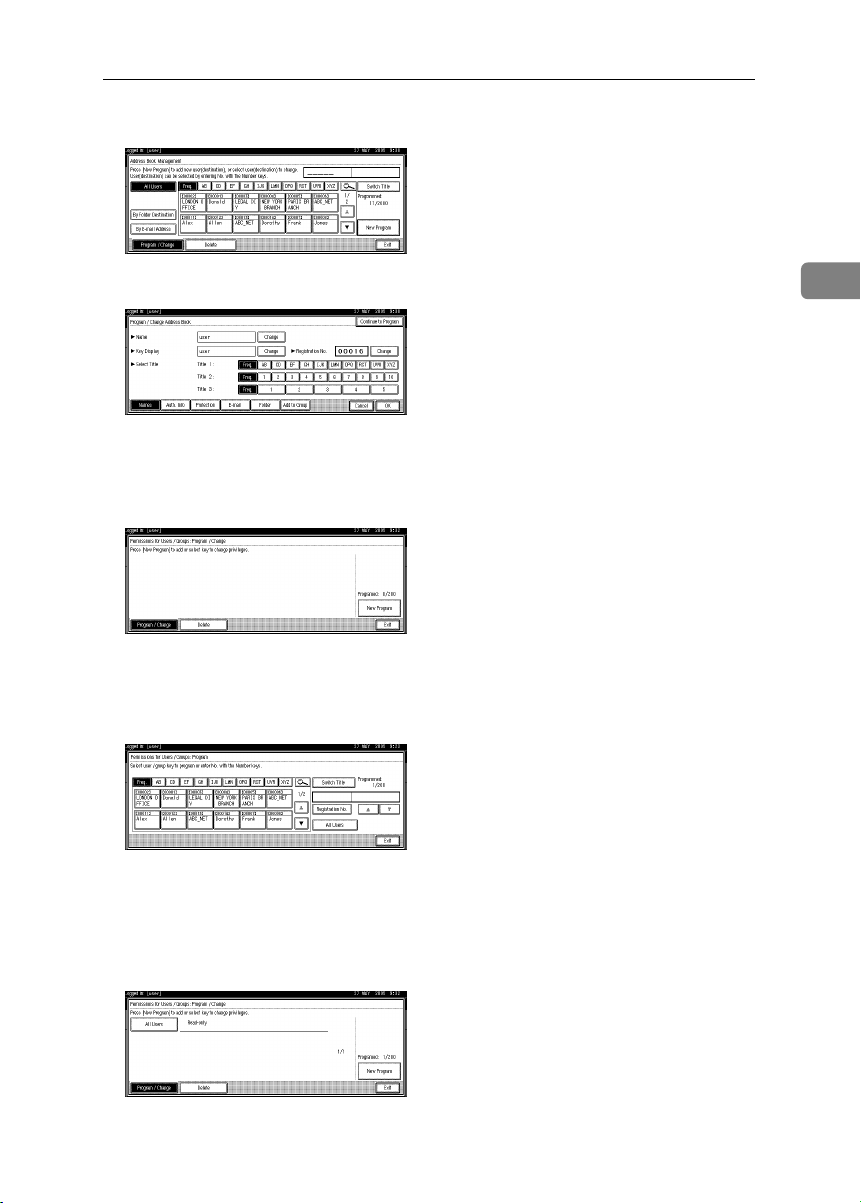
Press [Address Book Management].
If it does not appear, press [TTTTNext].
Select the user or group.
Press [Protection].
Under "Protect File(s)", press [Program/Change/Delete] for "Permissions for
Users/Groups".
If it does not appear, press [TTTTNext].
].
12
HHHH
Press [
New Program
].
Page 19
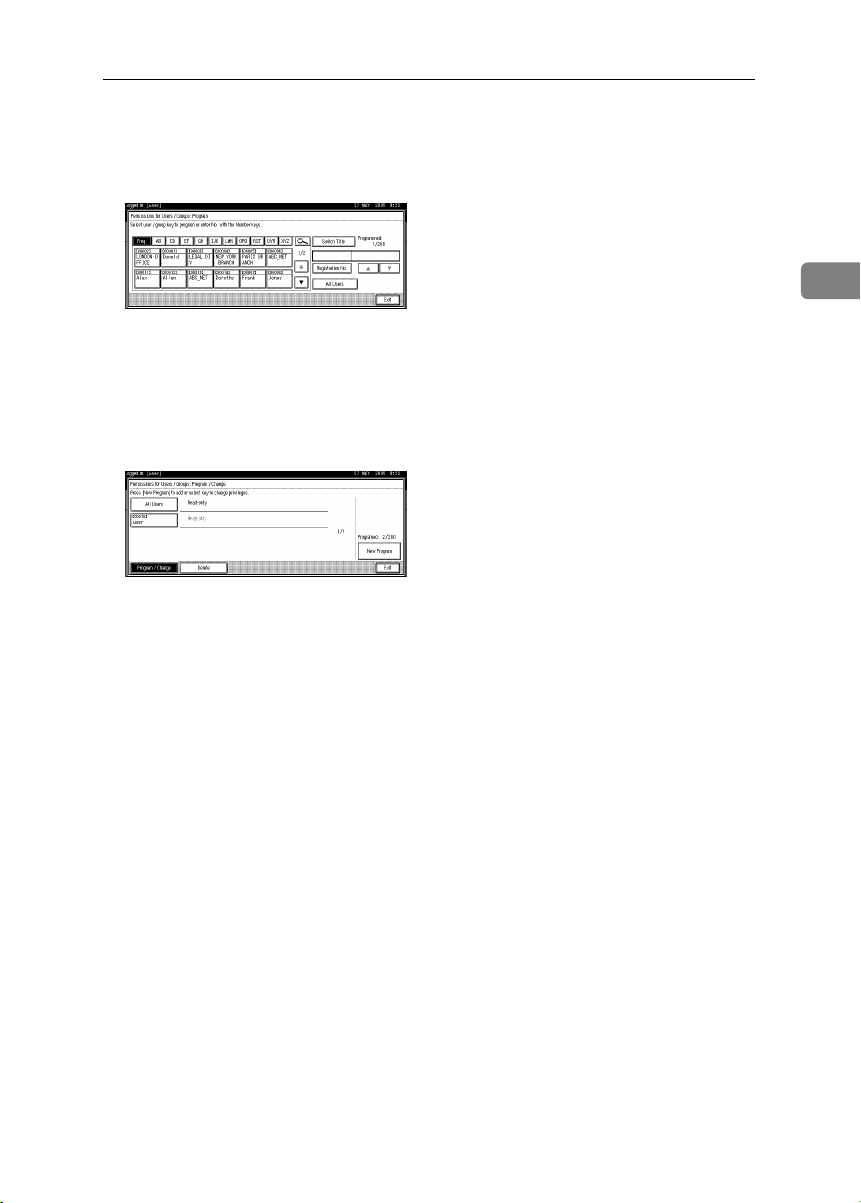
Select the users or groups to register.
IIII
You can select more than one users.
By pressing [All Users], you can select all the users.
Specifying Access Permission for Stored Files
2
Press [
JJJJ
Select the user who you want to assign an access permission to, and then
KKKK
select the permission.
Select the access permission from [Read-only], [Edit], [Edit / Delete], or [Full Con-
trol].
Press [Exit].
LLLL
Press [OK].
MMMM
Press [
NNNN
Press the {{{{User Tools/Counter}}}} key.
OOOO
Exit
Exit
].
].
13
Page 20
Preventing Information Leaks
Specifying Passwords for the Stored Files
This can be specified by the file creator (owner) or file administrator.
Specify passwords for the stored files.
Provides increased protection against unauthorized use of files.
2
Preparation
For details about logging on with administrator authentication, see p.73
“Logging on Using Administrator Authentication”.
For details about logging off with administrator authentication, see p.74
“Logging off Using Administrator Authentication”.
Press the {{{{Document Server}}}} key.
AAAA
Select the file.
BBBB
Press [File Management].
CCCC
Press [Change Password].
DDDD
Enter the password using the number keys.
EEEE
You can use 4 to 8 numbers as the password for the stored file.
Press [Change] at the bottom of the screen.
FFFF
Confirm the password by re-entering it using the number keys.
GGGG
Press [#].
HHHH
14
Press [OK].
IIII
Press [OK].
JJJJ
Page 21
Specifying Access Permission for Stored Files
Unlocking Files
If you specify “Enhance File Protection”, the file will be locked and become inaccessible if an invalid password is entered ten times. This section explains how
to unlock files.
Only the file administrator can unlock files.
For details about “Enhance File Protection”, see p.76 “Specifying the Extended
Security Functions”.
Preparation
For details about logging on with administrator authentication, see p.73
“Logging on Using Administrator Authentication”.
For details about logging off with administrator authentication, see p.74
“Logging off Using Administrator Authentication”.
Press the {{{{Document Server}}}} key.
AAAA
Select the file.
BBBB
2
Press [File Management].
CCCC
Press [Unlock Files].
DDDD
Press [Yes].
EEEE
Press [OK].
FFFF
15
Page 22
Preventing Information Leaks
Preventing Data Leaks Due to
Unauthorized Transmission
If user authentication is specified, the user who has logged on can be designated
as the sender to prevent unauthorized access.
2
You can also limit the direct entry of destinations to prevent files from being sent
to destinations not registered in the address book.
Restrictions on Destinations
This can be specified by the user administrator.
Make the setting to disable the direct entry of e-mail addresses under the scanner function.
By making this setting, the destinations can be restricted to addresses registered
in the address book.
Preparation
For details about logging on with administrator authentication, see p.73
“Logging on Using Administrator Authentication”.
For details about logging off with administrator authentication, see p.74
“Logging off Using Administrator Authentication”.
16
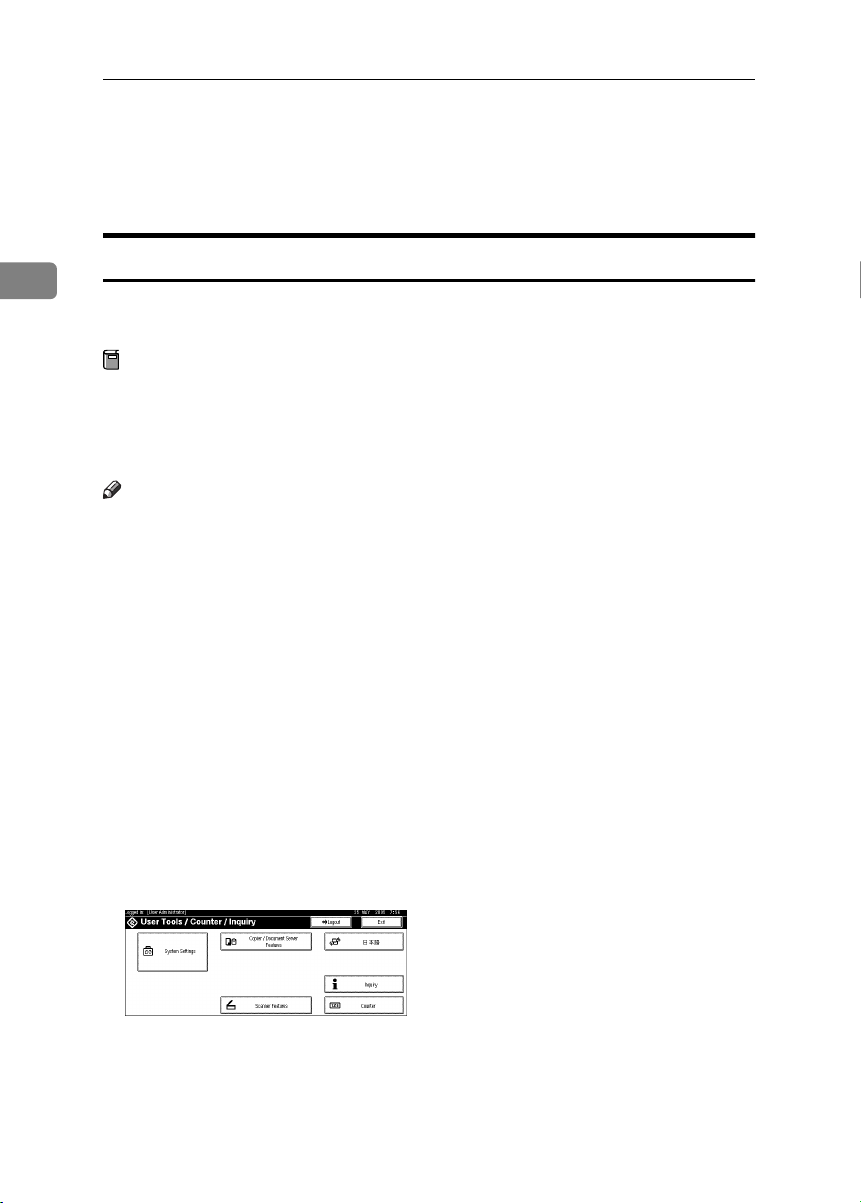
Press the {{{{User Tools/Counter}}}} key.
AAAA
Press [System Settings].
BBBB
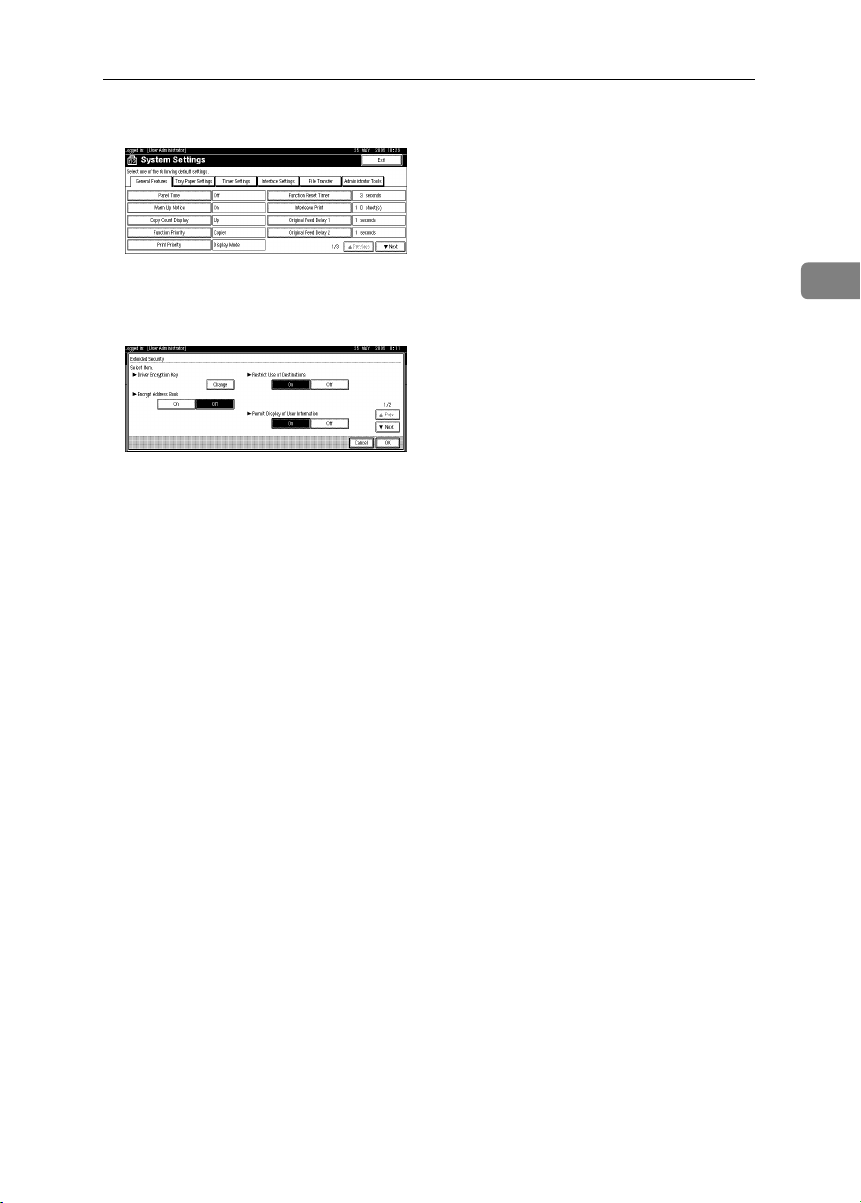
Press [Administrator Tools].
CCCC
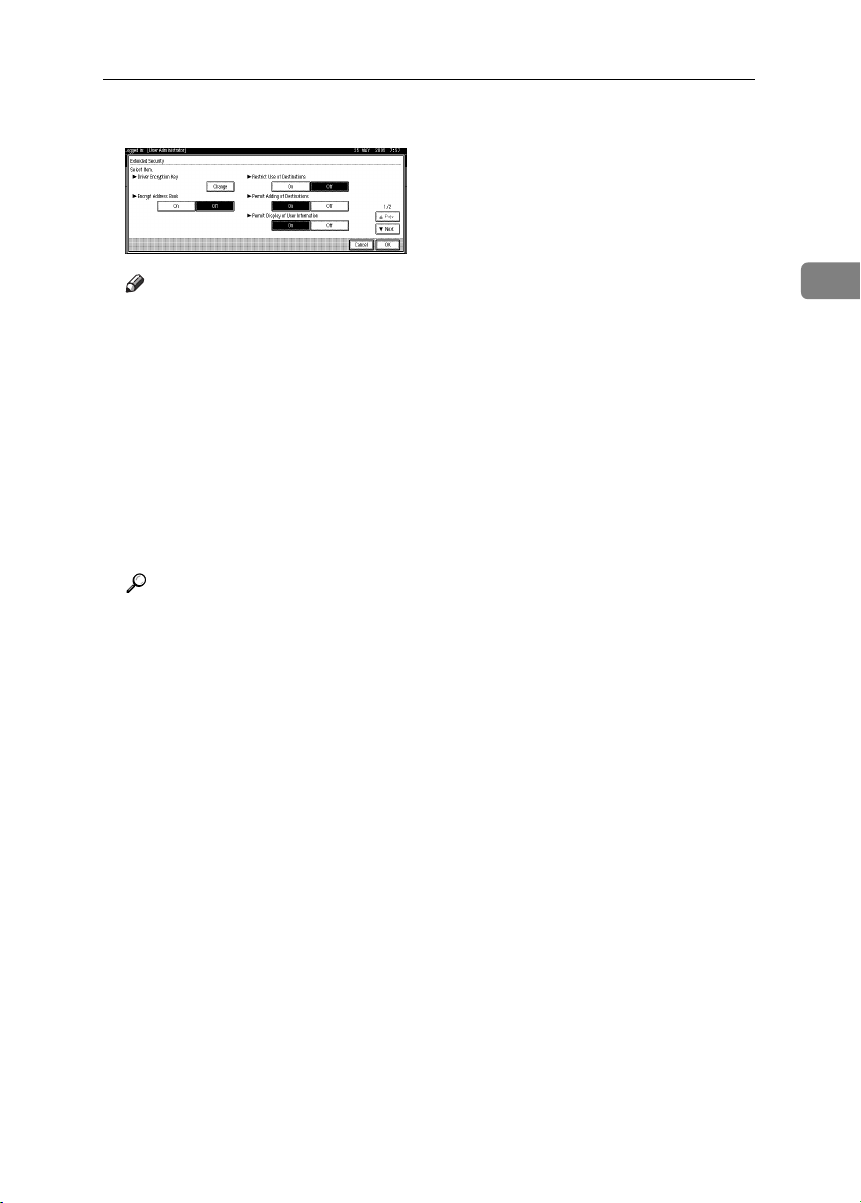
Press [Extended Security].
DDDD
Page 23
Preventing Data Leaks Due to Unauthorized Transmission
Press [On] for “Restrict Use of Destinations”.
EEEE
Note
❒ If you set “Restrict Use of Destinations” to [Off], “Permit Adding of Desti-
nations” appears.
❒ If you set “Permit Adding of Destinations” to [On], the user can register
destinations by entering them directly.
❒ If you set “Permit Adding of Destinations” to [Off], the user cannot register
destinations by entering them directly.
❒ If you set “Permit Adding of Destinations” to [Off], you cannot make
changes to the address book.
Press [OK].
FFFF
Press the {{{{User Tools/Counter}}}} key.
GGGG
Reference
This can also be specified using Web Image Monitor. For details, see the
Web Image Monitor Help.
2
17
Page 24
Preventing Information Leaks
Protecting the Address Book
You can specify who is allowed to access the data in the address book. By making this setting, you can prevent the data in the address book being used by unregistered users.
To protect the data from unauthorized reading, you can also encrypt the data in
2
the address book.
Address Book Access Permission
This can be specified by the registered user. The access permission can also be
specified by a user granted full control or the user administrator.
You can specify who is allowed to access the data in the address book.
By making this setting, you can prevent the data in the address book being used
by unregistered users.
Preparation
For details about logging on with administrator authentication, see p.73
“Logging on Using Administrator Authentication”.
For details about logging off with administrator authentication, see p.74
“Logging off Using Administrator Authentication”.
Press the {{{{User Tools/Counter}}}} key.
AAAA
18
Press [System Settings].
BBBB
Press [Administrator Tools].
CCCC
Press [Address Book Management].
DDDD
If it does not appear, press [TTTTNext].
Page 25
Select the user or group.
EEEE
Protecting the Address Book
Press [Protection].
FFFF
Under "Protect Destination", press [Program/Change/Delete] for "Permissions
GGGG
for Users/Groups".
Press [
HHHH
IIII
New Program
Select the users or groups to register.
You can select more than one users.
By pressing [All Users], you can select all the users.
].
2
Press [
JJJJ
Select the user who you want to assign an access permission to, and then
KKKK
select the permission.
Select the permission, from [Read-only], [Edit], [Edit / Delete], or [Full Control].
Press [Exit].
LLLL
Exit
].
19
Page 26
Preventing Information Leaks
Press [OK].
MMMM
Press [Exit].
NNNN
Press the {{{{User Tools/Counter}}}} key.
OOOO
Encrypting the Data in the Address Book
2
This can be specified by the user administrator.
Encrypt the data in the address book.
Preparation
For details about logging on with administrator authentication, see p.73
“Logging on Using Administrator Authentication”.
For details about logging off with administrator authentication, see p.74
“Logging off Using Administrator Authentication”.
Note
❒ To encrypt the data in the address book, the machine must have the scanner
function.
❒ Encrypting the data in the address book may take a long time. (Up to three
minutes)
❒ The time it takes to encrypt the data in the address book depends on the
number of registered users.
❒ The machine cannot be used during encryption.
❒ If you press [Stop] during encryption, the data is not encrypted.
❒ Normally, once encryption is complete, [Exit] appears. If three minutes have
passed and [Exit] has still not appeared, contact your service representative.
❒ If you press [Stop] during decryption, the data stays encrypted.
❒ Do not switch the main power off during encryption, as doing so may corrupt
the data.
20
Press the {{{{User Tools/Counter}}}} key.
AAAA
Press [System Settings].
BBBB
Page 27
Press [Administrator Tools].
CCCC
Protecting the Address Book
Press [Extended Security].
DDDD
Press [On] for “Encrypt Address Book”.
EEEE
Press [Change] for [Encryption Key].
FFFF
Enter the encryption key, and then press [OK].
GGGG
Enter the encryption key using up to 32 alphanumeric characters.
Press [
HHHH
IIII
JJJJ
KKKK
LLLL
Encrypt / Decrypt
Press [Yes].
Press [Exit].
Press [OK].
Press the {{{{User Tools/Counter}}}} key.
].
2
21
Page 28

Preventing Information Leaks
Overwriting the Data on the Hard Disk
To use this function, the optional DataOverwriteSecurity unit must be installed.
You can overwrite data on the hard disk.
Note
2
❒ Depending on the hard disk capacity and the method of erasing the data, this
action may take a few hours. The machine cannot be used during this time.
❖❖❖❖ Auto Erase Memory Setting
To erase selected data on the hard disk, specify [Auto Erase Memory Setting].
❖❖❖❖ Erase All Memory
To erase all the data on the hard disk, using [Erase All Memory].
❖❖❖❖ Methods of Erasing the Data
You can select the method of erasing the data from the following:
The default is “NSA”.
*1
NSA
*2
DoD
Random Numbers Overwrites the data with random numbers
*1
National Security Agency
*2
Department of Defense
Overwrites the data on the hard disk twice
with random numbers and once with zeros.
Overwrites the data with a number, its complement, and random numbers, and then
checks the result.
the specified number of times.
You can specify between 1 and 9 as the
number of times the data is overwritten with
random numbers. The default is 3 times.
Reference
For details, see the manual supplied with the DataOverwriteSecurity unit.
“Auto Erase Memory Setting”
This can be specified by the machine administrator.
A document scanned in Copier or Scanner mode is temporarily stored on the
machine's hard disk.
Even after the job is completed, it remains in the hard disk as temporary data.
Auto Erase Memory erases the temporary data on the hard disk by writing over
it.
Overwriting starts automatically once the job is completed.
The Copier functions take priority over the Auto Erase Memory function. If a
copy job is in progress, overwriting will only be done after the job is completed.
22
Page 29
Overwriting the Data on the Hard Disk
Preparation
For details about logging on with administrator authentication, see p.73
“Logging on Using Administrator Authentication”.
For details about logging off with administrator authentication, see p.74
“Logging off Using Administrator Authentication”.
Press the {{{{User Tools/Counter}}}} key.
AAAA
Press [System Settings].
BBBB
Press [Administrator Tools].
CCCC
Press [Auto Erase Memory Setting].
DDDD
If it does not appear, press [TTTTNext].
2
Press [On], and then select the method of erasing the data.
EEEE
Select the method of erasing the data from [NSA], [DoD], or [Random Numbers].
When you select “Random Numbers”
A Press [Change].
B Enter the number of times that you want to overwrite using the number
keys, and then press [#].
Press [OK].
FFFF
Auto Erase Memory is set.
Important
❒ When Auto Erase Memory is set to "On", temporary data that remained on
the hard disk when Auto Erase Memory was "Off" might not be overwritten.
23
Page 30

Preventing Information Leaks
Note
❒ Should the main power switch of the machine be turned off before over-
writing is completed, the temporary data will remain on the hard disk until the main power switch is next turned on and overwriting is resumed.
❒ If the overwriting method is changed while overwriting is in progress, the
remainder of the temporary data will be overwritten using the method set
originally.
2
Canceling Auto Erase Memory
Follow steps
AAAA
Press [Off].
BBBB
Press [OK].
CCCC
to
in “Auto Erase Memory Setting”.
AAAA
DDDD
Auto Erase Memory is disabled.
Note
❒ To set Auto Erase Memory to "On" again, repeat the procedure in “Auto Erase
Memory Setting”.
Types of Data that Can or Cannot Be Overwritten
The following table shows the types of data that can or cannot be overwritten by
Auto Erase Memory.
Data overwritten by Auto
Erase Memory
Data not overwritten by Aut o
Erase Memory
*1
Data scanned with network TWAIN scanner will not be overwritten by Auto Erase
Memory.
*2
A stored document can only be overwritten after it has been printed or deleted from
the Document Server.
*3
Data stored in the Address Book can be encrypted for security. For details, see p.20
“Encrypting the Data in the Address Book”.
Copier • Copy jobs
Scanner
Documents stored by the user in the Document Server using
the Copier or Scanner functions
Information registered in the Address Book
Counters stored under each user code
*1
•
Scanned files sent by e-mail
• Files sent by Scan to Folder
• Documents sent using
DeskTopBinder, the ScanRouter delivery software
or a Web browser
*2
*3
24
Page 31

Overwriting the Data on the Hard Disk
“Erase All Memory”
This can be specified by the machine administrator.
You can erase all the data on the hard disk by writing over it. This is useful if you
relocate or dispose of your machine.
Preparation
For details about logging on with administrator authentication, see p.73
“Logging on Using Administrator Authentication”.
For details about logging off with administrator authentication, see p.74
“Logging off Using Administrator Authentication”.
Important
❒ User codes and the counters under each user code, user stamps, data stored
in the Address Book, network settings, and the SSL Certificate will be overwritten.
Note
❒ Before erasing the hard disk, you can back up user codes, counters for each
user code, and Address Book data using SmartDeviceMonitor for Admin. For
details, see SmartDeviceMonitor for Admin Help.
Disconnect communication cables connected to the machine.
AAAA
Press the {{{{User Tools/Counter}}}} key.
BBBB
2
Press [System Settings].
CCCC
Press [Administrator Tools].
DDDD
Press [Erase All Memory].
EEEE
If it does not appear, press [TTTTNext].
25
Page 32

Preventing Information Leaks
Select the method of erasing the data.
FFFF
Select the method of erasing the data from [
When you select “Random Numbers”
NSA
], [
DoD
], or [
Random Numbers
].
A Press [
2
B Enter the number of times that you want to overwrite using the number
keys, and then press [#].
Press [OK].
GGGG
Press [
HHHH
IIII
Canceling Erase All Memory
AAAA
Yes
When overwriting is completed, press [Exit], and then turn off the power.
Reference
Before turning the power off, see "Turning On the Power", General Settings
Guide.
Important
❒ Should the main power switch of the machine be turned off before Erase
All Memory is completed, overwriting is canceled.
❒ Make sure the main power switch is not turned off during overwriting.
Note
❒ If the main power is turned off when Erase All Memory is in progress,
overwriting will start again when you next turn on the main power.
❒ If an error occurs before overwriting is completed, turn off the main pow-
er. Turn it on again, and then repeat from step
Press [
Cancel
].
Change
].
] while Erase All Memory is in progress.
.
B
Press [Yes].
BBBB
Erase All Memory is canceled.
Note
❒ If you stop this before completion, the data is not fully erased. Execute
[
Erase All Memory
Turn off the main power.
CCCC
Note
❒ To resume overwriting after power off, turn on the main power of the ma-
chine, and then repeat the procedure in “Erase All Memory”.
26
] again to erase the data.
Page 33

3. Preventing Unauthorized
Use of Functions and Settings
Preventing Modification of Machine
Settings
The machine settings that can be modified depend on the type of administrator.
Users cannot change the administrator settings.
Register the administrators before using the machine.
❖❖❖❖ Type of Administrator
Register the administrator on the machine, and then authenticate the administrator using the administrator’s login user name and login password. The
machine settings that can be modified depend on the type of administrator.
To manage the machine, the following types of administrator can be designated:
• User Administrator
• Network Administrator
• File Administrator
• Machine Administrator
Reference
For details, see p.67 “The Roles of Administrators”.
For details, see p.69 “Administrator Authentication”.
For details, see p.91 “Machine Administrator Settings”.
For details, see p.96 “Network Administrator Settings”.
For details, see p.100 “File Administrator Settings”.
For details, see p.101 “User Administrator Settings”.
❖❖❖❖ Menu Protect
Use this function to specify the permission level for users to change those settings accessible by non-administrators.
You can specify Menu Protect for the following settings:
• Copier / Document Server
• Scanner Features
Reference
For details, see p.101 “User Administrator Settings”.
27
Page 34

Preventing Unauthorized Use of Functions and Settings
Limiting Available Functions
To prevent unauthorized operation, you can specify who is allowed to access
each of the machine’s functions.
❖❖❖❖ Available Functions
Specify the available functions from the copier, Document Server, and scanner functions.
3
Specifying Which Functions are Available
This can be specified by the user administrator. Specify the functions available
to registered users. By making this setting, you can limit the functions available
to users.
Preparation
For details about logging on with administrator authentication, see p.73
“Logging on Using Administrator Authentication”.
For details about logging off with administrator authentication, see p.74
“Logging off Using Administrator Authentication”.
Press the {{{{User Tools/Counter}}}} key.
AAAA
Press [System Settings].
BBBB
Press [Administrator Tools].
CCCC
28
Press [Address Book Management].
DDDD
If it does not appear, press [TTTTNext].
Select the user.
EEEE
Page 35

Limiting Available Functions
Press [Auth. Info].
FFFF
In [Available Functions], select the functions you want to specify.
GGGG
If the setting to be specified does not appear, press [TTTTNext].
Press [OK].
HHHH
Press [Exit].
IIII
Press the {{{{User Tools/Counter}}}} key.
JJJJ
3
29
Page 36

Preventing Unauthorized Use of Functions and Settings
3
30
Page 37

4. Enhanced Network Security
Preventing Unauthorized Access
You can limit IP addresses or disable ports to prevent unauthorized access over
the network and protect the address book, stored files, and default settings.
Enabling/Disabling Protocols
This can be specified by the network administrator.
Specify whether to enable or disable the function for each protocol.
By making this setting, you can specify which protocols are available and so prevent unauthorized access over the network.
Preparation
For details about logging on with administrator authentication, see p.73
“Logging on Using Administrator Authentication”.
For details about logging off with administrator authentication, see p.74
“Logging off Using Administrator Authentication”.
Press the {{{{User Tools/Counter}}}} key.
AAAA
Press [System Settings].
BBBB
Press [Interface Settings].
CCCC
Press [Effective Protocol].
DDDD
If the setting to be specified does not appear, press [TTTTNext].
31
Page 38

Enhanced Network Security
Press [Invalid] for the protocol you want to disable.
EEEE
Press [OK].
FFFF
Press the {{{{User Tools/Counter}}}} key.
GGGG
Reference
Advanced network settings can be specified using Web Image Monitor.
For details, see the Web Image Monitor Help.
4
Access Control
This can be specified by the network administrator.
The machine can control TCP/IP access.
Limit the IP addresses from which access is possible by specifying the access
control range.
For example, if you specify the access control range as [192.168.15.16]-
[192.168.15.20], the client PC addresses from which access is possible will be from
192.168.15.16 to 192.168.15.20.
Limitation
❒ Using access control, you can limit access involving lpd, rcp/rsh, ftp, diprint,
ipp, Web Image Monitor, SmartDeviceMonitor for Client or DeskTopBinder.
You cannot limit the Monitoring of SmartDeviceMonitor for Client.
❒ You cannot limit access involving telnet, or SmartDeviceMonitor for Admin.
Open a Web browser.
AAAA
Enter “http://(machine's-address)/” in the address bar to access the ma-
BBBB
chine.
Log onto the machine.
CCCC
The network administrator can log on using the appropriate login user name
and login password.
Click [Configuration], click [Security], and then click [Access Control].
DDDD
32
The [
Access Control
In [
EEEE
Access Control Range
chine is permitted.
] page appears.
], enter the IP addresses from which access to the ma-
Page 39

Click [Apply].
FFFF
Access control is set.
Log off from the machine.
GGGG
Reference
For details, see the Web Image Monitor Help.
Preventing Unauthorized Access
4
33
Page 40

Enhanced Network Security
Encrypting Transmitted Passwords
Prevent login passwords, group passwords for PDF files, and IPP authentication
passwords being revealed by encrypting them for transmission.
Also, encrypt the login password for administrator authentication and user authentication.
❖❖❖❖ Driver Encryption Key
To encrypt the login password, specify the driver encryption key for the driver used for the machine and the user’s computer.
Limitation
❒ The driver encryption key cannot be used under Windows 95/98 SE/Me.
4
❖❖❖❖ Password for IPP Authentication
Using Web Image Monitor, you can encrypt the password for IPP authentication.
Note
❒ You can use Telnet or FTP to manage passwords for IPP authentication, al-
though it is not recommended.
Note
❒ To encrypt transmitted passwords, the machine must have the scanner func-
tion.
Driver Encryption Key
This can be specified by the network administrator.
Specify the driver encryption key on the machine.
By making this setting, you can encrypt login passwords for transmission to prevent them from being analyzed.
Preparation
For details about logging on with administrator authentication, see p.73
“Logging on Using Administrator Authentication”.
For details about logging off with administrator authentication, see p.74
“Logging off Using Administrator Authentication”.
Press the {{{{User Tools/Counter}}}} key.
AAAA
Press [System Settings].
BBBB
34
Page 41

Press [Administrator Tools].
CCCC
Press [Extended Security].
DDDD
Encrypting Transmitted Passwords
For [
EEEE
FFFF
GGGG
HHHH
Driver Encryption Key
Enter the driver encryption key, and then press [OK].
Enter the driver encryption key using up to 32 alphanumeric characters.
Note
❒ The network administrator must give users the driver encryption key
specified on the machine so they can register it on their computers. Make
sure to enter the same driver encryption key as that specified on the machine.
Press [OK].
Press the {{{{User Tools/Counter}}}} key.
Reference
See the TWAIN driver Help.
], press [
Change
].
4
35
Page 42

Enhanced Network Security
IPP Authentication Password
This can be specified by the network administrator.
Specify the IPP authentication passwords for the machine using Web Image
Monitor.
By making this setting, you can encrypt IPP authentication passwords for transmission to prevent them from being analyzed.
Open a Web browser.
AAAA
Enter “http://(machine's-address)/” in the address bar to access the ma-
BBBB
chine.
Log onto the machine.
4
CCCC
The network administrator can log on. Enter the login user name and login
password.
Click [Configuration], click [Security], and then click [IPP Authentication].
DDDD
The [IPP Authentication] page appears.
Select [DIGEST] from the [Authentication] list.
EEEE
Note
❒ When using the IPP port under Windows XP or Windows Server 2003, you
can use the operating system’s standard IPP port.
36
Enter the user name in the [User Name] box.
FFFF
Enter the password in the [Password] box.
GGGG
Click [Apply].
HHHH
IPP authentication is specified.
Log off from the machine.
IIII
Page 43

Protection Using Encryption
Protection Using Encryption
When you access the machine using a Web browser or IPP, you can establish encrypted communication using SSL. When you access the machine using an application such as SmartDeviceMonitor for Admin, you can establish encrypted
communication using SNMPv3 or SSL.
To protect data from interception, analysis, and tampering, you can install a
server certificate in the machine, negotiate a secure connection, and encrypt
transmitted data.
❖❖❖❖ SSL (Secure Sockets Layer)
4
AFN001S
A To access the machine from a user’s computer, request for the SSL server
certificate and public key.
B The server certificate and public key are sent from the machine to the us-
er’s computer.
C Using the public key, encrypt the data for transmission.
D The encrypted data is sent to the machine.
E The encrypted data is decrypted using the private key.
Note
❒ To establish encrypted communication using SSL, the machine must have
the scanner function.
37
Page 44

Enhanced Network Security
SSL (Secure Sockets Layer) Encryption
This can be specified by the network administrator.
To protect the communication path and establish encrypted communication,
create and install the server certificate.
There are two ways of installing a server certificate: create and install a self-certificate using the machine, or request a certificate from a certificate authority and
install it.
❖❖❖❖ Configuration flow (self-signed certificate)
A Creating and installing the server certificate
Install the server certificate using Web Image Monitor.
4
B Enabling SSL
Enable the [SSL/TLS] setting using Web Image Monitor.
❖❖❖❖ Configuration flow (certificate issued by a certificate authority)
A Creating the server certificate
Create the server certificate using Web Image Monitor.
The application procedure after creating the certificate depends on the certificate authority. Follow the procedure specified by the certificate authority.
B Installing the server certificate
Install the server certificate using Web Image Monitor.
Enabling SSL
C
Enable the [SSL/TLS] setting using Web Image Monitor.
Creating and Installing the Server Certificate (Self-Signed Certificate)
Create and install the server certificate using Web Image Monitor.
Note
❒ To confirm whether SSL configuration is enabled, enter https://(ma-
chine’s-address) in your Web browser’s address bar to access this machine.
If the “The page cannot be displayed” message appears, check the configuration as the SSL configuration is invalid.
Creating and Installing the Self-Signed Certificate
Create and install the server certificate using Web Image Monitor.
This section explains the use of a self-certificate as the server certificate.
Open a Web browser.
AAAA
Enter “http://(machine's-address)/” in the address bar to access the ma-
BBBB
chine.
Log onto the machine.
CCCC
The network administrator can log on.
Enter the login user name and login password.
38
Page 45

Protection Using Encryption
Click [Configuration], click [Security], and then click [Certificates].
DDDD
Click [Create].
EEEE
Make the necessary settings.
FFFF
Reference
For details about the displayed items and selectable items, see Web Image
Monitor Help.
Click [OK].
GGGG
The setting is changed.
Click [OK].
HHHH
A security warning dialog box appears.
Check the details, and then click [OK].
IIII
[Installed] appears under [Certificate Status] to show that a server certificate for
the machine has been installed.
Log off from the machine.
JJJJ
Note
❒ Click [Delete] to delete the server certificate from the machine.
Creating the Server Certificate (Certificate Issued by a Certificate Authority)
4
Create the server certificate using Web Image Monitor.
This section explains the use of a certificate issued by a certificate authority as
the server certificate.
Open a Web browser.
AAAA
Enter “http://(machine's-address)/” in the address bar to access the ma-
BBBB
chine.
Log onto the machine.
CCCC
The network administrator can log on.
Enter the login user name and login password.
Click [Configuration], click [Security], and then click [Certificates].
DDDD
The [Certificates] page appears.
Click [
EEEE
FFFF
Request
Make the necessary settings.
Reference
For details about the displayed items and selectable items, see Web Image
Monitor Help.
].
39
Page 46

Enhanced Network Security
Click [OK].
GGGG
[
Requesting
Use the data in the [Certificate Request Contents:] dialog box to apply to the cer-
tificate authority.
Log off from the machine.
HHHH
Apply to the certificate authority for the server certificate.
IIII
The application procedure depends on the certificate authority. For details,
contact the certificate authority.
When applying, use the data created with Web Image Monitor.
Note
4
❒ Using Web Image Monitor, you can create the contents of the server certif-
icate but you cannot send the application.
❒ Click [Cancel Request] to cancel the request for the server certificate.
Installing the Server Certificate (Certificate Issued by a Certificate Authority)
Install the server certificate using Web Image Monitor.
This section explains the use of a certificate issued by a certificate authority as
the server certificate.
Enter the server certificate contents issued by the certificate authority.
] appears for [
Certificate Status
] in the [
Certificates
] area.
40
Open a Web browser.
AAAA
Enter “http://(machine's-address)/” in the address bar to access the ma-
BBBB
chine.
Log onto the machine.
CCCC
The network administrator can log on.
Enter the login user name and login password.
Click [
DDDD
EEEE
FFFF
Configuration
The [
Certificates
Click [Install].
Enter the contents of the server certificate.
In the [
ceived from the certificate authority.
Certificate Request
Reference
For details about the displayed items and selectable items, see Web Image
Monitor Help.
], click [
] page appears.
Security
] box, enter the contents of the server certificate re-
], and then click [
Certificates
].
Page 47

Protection Using Encryption
Click [OK].
GGGG
[
Installed
the machine has been installed.
Log off from the machine.
HHHH
Enabling SSL
After installing the server certificate in the machine, enable the SSL setting.
This procedure is used for a self-signed certificate or a certificate issued by a certificate authority.
Open a Web browser.
AAAA
Enter “http://(machine's-address)/” in the address bar to access the ma-
BBBB
chine.
Log onto the machine.
CCCC
The network administrator can log on.
Enter the login user name and login password.
Click [Configuration], click [Security], and then click [SSL/TLS].
DDDD
The [SSL/TLS] page appears.
Click [Enable] for [SSL/TLS].
EEEE
] appears under [
Certificate Status
] to show that a server certificate for
4
Click [Apply].
FFFF
The SSL setting is enabled.
Log off from the machine.
GGGG
Note
❒ If you set [Permit SSL / TLS Communication] to [Ciphertext Only], enter “ht-
tps://(machine's address)/” to access the machine.
41
Page 48

Enhanced Network Security
User Settings for SSL (Secure Sockets Layer)
If you have installed a server certificate and enabled SSL (Secure Sockets Layer),
you need to install the certificate on the user’s computer.
The network administrator must explain the procedure for installing the certificate to users.
If a warning dialog box appears while accessing the machine using the Web
browser or IPP, start the Certificate Import Wizard and install a certificate.
When the [
AAAA
The [
To be able to respond to inquiries from users about such problems as expiry
4
of the certificate, check the contents of the certificate.
On the [
BBBB
Certificate Import Wizard starts.
Install the certificate by following the Certificate Import Wizard instruc-
CCCC
tions.
Note
❒ For details about how to install the certificate, see the Web browser Help.
❒ If a certificate issued by a certificate authority is installed in the machine,
confirm the certificate store location with the certificate authority.
Reference
For details about where to store the certificate when accessing the machine
using IPP, see the SmartDeviceMonitor for Client Help.
Security Alert
Certificate
General
] dialog box appears.
] tab, click [
] dialog box appears, click [
Install Certificate...
].
View Certificate
].
Setting the SSL / TLS Encryption Mode
By specifying the SSL/TLS encrypted communication mode, you can change the
security level.
❖❖❖❖ Encrypted Communication Mode
Using the encrypted communication mode, you can specify encrypted communication.
Ciphertext Only Allows encrypted communication only.
If encryption is not possible, the machine
does not communicate.
Ciphertext Priority Performs encrypted communication if en-
Ciphertext / Clear Text Communicates with or without encryption,
42
cryption is possible.
If encryption is not possible, the machine
communicates without it.
according to the setting.
Page 49

Protection Using Encryption
Setting the SSL / TLS Encryption Mode
This can be specified by the network administrator or machine administrator.
After installing the server certificate, specify the SSL/TLS encrypted communication mode. By making this setting, you can change the security level.
Preparation
For details about logging on with administrator authentication, see p.73
“Logging on Using Administrator Authentication”.
For details about logging off with administrator authentication, see p.74
“Logging off Using Administrator Authentication”.
Press the {{{{User Tools/Counter}}}} key.
AAAA
Press [System Settings].
BBBB
Press [Interface Settings].
CCCC
Press [Permit SSL / TLS Communication]
DDDD
If it does not appear, press [TTTTNext].
Select the encrypted communication mode.
EEEE
Select [Ciphertext Only], [Ciphertext Priority], or [Ciphertext / Clear Text] as the encrypted communication mode.
4
Press [OK].
FFFF
Press the {{{{User Tools/Counter}}}} key.
GGGG
Note
❒ The SSL/TLS encrypted communication mode can also be specified using
Web Image Monitor. For details, see the Web Image Monitor Help.
43
Page 50

Enhanced Network Security
SNMPv3 Encryption
This can be specified by the network administrator.
When using SmartDeviceMonitor for Admin or another application to make
various settings, you can encrypt the data transmitted.
By making this setting, you can protect data from being tampered with.
Preparation
For details about logging on with administrator authentication, see p.73
“Logging on Using Administrator Authentication”.
For details about logging off with administrator authentication, see p.74
“Logging off Using Administrator Authentication”.
Press the {{{{User Tools/Counter}}}} key.
4
AAAA
Press [System Settings].
BBBB
Press [Interface Settings].
CCCC
44
Press [Permit SNMP V3 Communication].
DDDD
If it does not appear, press [TTTTNext].
Press [Encryption Only].
EEEE
Press [OK].
FFFF
Press the {{{{User Tools/Counter}}}} key.
GGGG
Page 51

Protection Using Encryption
Note
❒ To use SmartDeviceMonitor for Admin for encrypting the data for speci-
fying settings, you need to specify the network administrator’s [Encryption
Password] setting and [Encryption Key] in [SNMP Authentication Information] in
SmartDeviceMonitor for Admin, in addition to specifying [Permit SNMP V3
Communication] on the machine.
❒ If the machine does not have the scanner function, or if network adminis-
trator’s [Encryption Password] setting is not specified, the data for transmission may not be encrypted or sent.
Reference
For details about specifying the network administrator’s [Encryption Pass-
word] setting, see p.72 “Registering the Administrator”.
For details about specifying [Encryption Key] in SmartDeviceMonitor for
Admin, see the SmartDeviceMonitor for Admin Help.
4
45
Page 52

Enhanced Network Security
4
46
Page 53

5.
Management Based on
Authentication and Access Control
The Management Function
The machine has an authentication function requiring a login user name and
login password. By using the authentication function, you can specify access
limits for individual users and groups of users. Using access limits, you can not
only limit the machine’s available functions but also protect the machine settings
and files and data stored in the machine.
Important
❒ If you have enabled [Administrator Authentication Management], make sure not to
forget the administrator login user name and login password. If an administrator login user name or login password is forgotten, a new password must
be specified using the supervisor’s authority.
❒ Be sure not to forget the supervisor login user name and login password. If
you do forget them, a service representative will to have to return the machine to its default state. This will result in all data in the machine being lost
and the service call may not be free of charge.
Reference
For details, see p.87 “Operations by the Supervisor”.
47
Page 54

Management Based on Authentication and Access Control
Administrators and Users
When controlling access using the authentication specified by an administrator,
select the machine’s administrator, enable the authentication function, and then
use the machine.
The administrators manage access to the allocated functions, and users can use
only the functions they are permitted to access. To enable the authentication
function, the login user name and login password are required in order to use
the machine.
When specifying user authentication, specify administrator authentication as
well.
Important
❒ If user authentication is not possible because of a problem with the hard disk
or network, you can use the machine by accessing it using administrator authentication and disabling user authentication. Do this if, for instance, you
5
need to use the machine urgently. For details, see the Web Image Monitor
Help.
Administrator
There are four types of administrator according to the administered function:
machine administrator, network administrator, file administrator, and user administrator.
By sharing the administrative work among different administrators, you can
spread the workload and limit unauthorized operation by a single administrator.
Administrators are limited to managing the machine’s settings and access limits,
so user authentication is required to use such function as copying.
Note
❒ One person can act as more than one type of administrator.
Reference
For details, see p.67 “The Roles of Administrators”.
For details, see p.72 “Registering the Administrator”.
48
Page 55

Administrators and Users
User
Users are managed using the personal information registered in the machine’s
address book.
By enabling user authentication, you can allow only people registered in the address book to use the machine. Users can be registered in the address book by
the user administrator or registered user. In addition to registering users with
the machine’s control panel, you can register them using SmartDeviceMonitor
for Admin or Web Image Monitor.
Note
❒ Users can be registered only by a user administrator, using SmartDeviceMon-
itor for Admin or Web Image Monitor.
Reference
For details about registering users in the address book, see General Settings
Guide, the SmartDeviceMonitor for Admin Help, or the Web Image Monitor
Help.
5
49
Page 56

Management Based on Authentication and Access Control
Enabling Authentication
To control administrators’ and users’ access to the machine, perform administrator authentication and user authentication using login user names and login
passwords. To perform authentication, the authentication function must be enabled.
Note
❒ To specify authentication, the administrator must be registered.
Reference
For details, see p.72 “Registering the Administrator”.
Administrator Authentication
To use administrator authentication, enable [Administrator Authentication Manage-
5
ment] on the control panel.
Important
❒ If you have enabled [Administrator Authentication Management], make sure not to
forget the administrator login user name and login password. If an administrator login user name or login password is forgotten, a new password must
be specified using the supervisor’s authority.
Reference
For details, see p.87 “Operations by the Supervisor”.
Specifying Administrator Authentication Management
Press the {{{{User Tools/Counter}}}} key.
AAAA
Press [System Settings].
BBBB
Press [Administrator Tools].
CCCC
Press [Administrator Authentication Management].
DDDD
Press the [User Management], [Machine Management], [Network Management], or
EEEE
[File Management] key to select which settings to manage.
50
Page 57

Enabling Authentication
Set "Admin. Authentication" to [On].
FFFF
[Available Settings] appears.
Select the settings to manage from "Available Settings".
GGGG
Note
❒ To specify administrator authentication for more than one category, repeat
steps
Press [OK].
HHHH
Press the {{{{User Tools/Counter}}}} key.
IIII
E
to G.
User Authentication
There are four types of user authentication method: user code authentication,
basic authentication, Windows authentication, and LDAP authentication. To use
user authentication, select an authentication method on the control panel, and
then make the required settings for the authentication. The settings depend on
the authentication method.
5
Important
❒ When using Windows authentication or LDAP authentication, keep in mind
that if you edit an authenticated user’s e-mail address or any of the other data
that is automatically stored after successful authentication, the edited data
may be overwritten when it is reacquired at the next authentication.
Note
❒ User code authentication is used for authenticating on the basis of the user
code, and basic authentication, Windows authentication, and LDAP authentication are used for authenticating individual users.
❒ You cannot use more than one authentication method at the same time.
❒ User authentication can also be specified via Web Image Monitor. For details
see the Web Image Monitor Help.
51
Page 58

Management Based on Authentication and Access Control
User Code Authentication
This is an authentication method for limiting access to functions according to the
user code. The same user code can be used by more than one user. For details
about specifying user codes, see General Settings Guide.
Limitation
❒ If user code authentication is specified, files stored in the machine cannot be
delivered using DeskTopBinder. To deliver stored files using DeskTopBinder, use basic authentication, Windows authentication, or LDAP authentication.
Reference
For details about specifying the TWAIN driver user code, see the TWAIN
driver Help.
Specifying User Code Authentication
5
Press the {{{{User Tools/Counter}}}} key.
AAAA
Press [System Settings].
BBBB
52
Press [Administrator Tools].
CCCC
Press [User Authentication Management].
DDDD
Select [User Code Authentication].
EEEE
Note
❒ If you do not want to use user authentication management, select [Off]
Select which of the machine’s functions you want to limit.
FFFF
Page 59

Enabling Authentication
Press [OK].
GGGG
Press the {{{{User Tools/Counter}}}} key.
HHHH
Basic Authentication
Specify this authentication when using the machine’s address book to authenticate for each user. Using basic authentication, you can not only manage the machine’s available functions but also limit access to stored files and to the personal
data in the address book.
Specifying Basic Authentication
Press the {{{{User Tools/Counter}}}} key.
AAAA
Press [
BBBB
CCCC
DDDD
EEEE
FFFF
GGGG
System Settings
Press [Administrator Tools].
Press [
User Authentication Management
Select [
❒ If you do not want to use user authentication management, select [Off].
Press [OK].
Press the {{{{User Tools/Counter}}}} key.
Basic Authentication
Note
].
].
].
5
53
Page 60

Management Based on Authentication and Access Control
Windows Authentication
Specify this authentication when using the Windows domain controller to authenticate users who have their accounts on the directory server. Users cannot
be authenticated if they do not have their accounts in the directory server. Under
Windows authentication, you can specify the access limit for each group registered in the directory server.
❖❖❖❖ Operational Requirements for Windows Authentication
• To specify Windows authentication, the following requirements must be
met:
• The machine has the scanner function.
• A domain controller has been set up in a designated domain.
• This function is supported by the operating systems listed below. NTLM
authentication is used for Windows authentication. To obtain user information when running Active Directory, use LDAP. For this to be possible,
5
the version of Windows being used must support TLSv1.
• Windows NT 4.0 Server
• Windows 2000 Server
• Windows Server 2003
Limitation
❒ Users managed outside the domain are subject to user authentication, but
they cannot obtain items such as e-mail addresses.
❒ With Active Directory, you can authenticate users and obtain user informa-
tion. Under Windows NT 4.0 domain controller, you can only authenticate
users.
❒ If you can obtain user information, the sender’s address (From:) is fixed to
prevent unauthorized access when sending e-mails under the scanner function.
Note
❒ Enter the login password correctly, keeping in mind that it is case-sensitive.
❒ In a network environment with a WINS server, where other networks can be
accessed via a router, you must specify WINS.
❒ If you want to use Windows Authentication, you need to register the user
name that is registered in the Windows server.
❒ Users who are not registered in groups and whose available functions are not
limited in the machine’s address book can use the available functions specified in [Default Group].
❒ Users who are registered in multiple groups can use all the functions availa-
ble to those groups.
54
Page 61

Enabling Authentication
Specifying Windows Authentication
Note
❒ Under Windows authentication, the machine and domain controller commu-
nicate using SSL, so you need to create a server certificate for the domain controller. For details about creating the certificate, see p.56 “Creating the Server
Certificate”.
Press the {{{{User Tools/Counter}}}} key.
AAAA
Press [System Settings].
BBBB
Press [Administrator Tools].
CCCC
Press [User Authentication Management].
DDDD
Select [Windows Authentication].
EEEE
Note
❒ If you do not want to use user authentication management, select [Off].
Press [Change] for “Domain Name”, enter the name of the domain controller
FFFF
to be authenticated, and then press [OK].
If global groups have been registered:
If global groups have been registered, you can limit the use of functions for
each global group.
You need to create global groups in the Windows server in advance and register in each group the users to be authenticated.
5
55
Page 62

Management Based on Authentication and Access Control
You also need to register in the machine the functions available to the global
group members.
If global groups are not specified, users can use the available functions specified in [Default Group]. If global groups are specified, users not registered in
global groups can use the available functions specified in [Default Group]. By
default, all functions are available to [Default Group] members. Specify the lim-
itation on available functions according to user needs.
A
Under “Group”, press
If the setting to be specified does not appear, press [TTTTNext].
B Press [Change], and then enter the group name.
C Select which of the machine’s functions you want to limit.
D Press [OK].
Press [OK].
GGGG
Press the {{{{User Tools/Counter}}}} key.
HHHH
[Program / Change]
, and then press
[*Not Programmed]
.
5
----Creating the Server Certificate
This section explains how to create a Windows certificate for authentication. The
procedure given uses Windows 2000 as an example.
Note
❒ Before you can create a certificate, you need to install Internet Information
Service (IIS).
A In [Control Panel], click [Add/Remove Programs].
Click [
B
C On the [Start] menu, point to [Programs], [Administrative tools], and then click
D
E Click the [
F Click [Server Certificate...] in [Secure Communication] at the bottom of the dialog
G Follow Web Server Certificates Wizards to create and install the server certif-
Add/Remove Windows Components
[Internet Information Service].
Right-click [Default Web Site] and click [Properties].
Directory Security
box.
icate.
] tab.
] and install [
Certificates Service
].
56
Page 63

Enabling Authentication
LDAP Authentication
Specify this authentication when using the LDAP server to authenticate users
who have their accounts on the LDAP server. Users cannot be authenticated if
they do not have their accounts on the LDAP server. The address book stored in
the LDAP server can be downloaded to the machine, enabling user authentication without first using the machine to register individual settings in the address
book.
Limitation
❒ To use LDAP authentication, the network configuration must allow the ma-
chine to detect the presence of the LDAP server.
❒ SSL communication is used for LDAP authentication, so the machine must
have the scanner function.
❒ To use LDAP authentication you need to register the LDAP server in the ma-
chine. For details about registration, see Network Guide.
❒ Enter the user’s login user name using up to 32 characters and login password
using up to 128 characters.
❒ Enter the administrator’s login user name and login password using up to 32
characters for each.
Note
❒ If the LDAP server is Active Directory, the login user name is specified as
“username@domainname”. However, you can omit the domain name by do-
ing the following: On the Windows server’s [Start] menu, select [Programs],
[Administrative tools], [Active Directory Domains and Trusts]; then, on the [Action]
menu, select [Properties]; and then, in [Active Directory Domains and Trusts Prop-
erties], add the UPN suffix.
❒ If you want to use LDAP authentication, you need to register the user name
that is registered in the LDAP server.
5
Specifying LDAP Authentication
Press the {{{{User Tools/Counter}}}} key.
AAAA
Press [System Settings].
BBBB
Press [Administrator Tools].
CCCC
Press [User Authentication Management].
DDDD
57
Page 64

Management Based on Authentication and Access Control
Select [LDAP Authentication].
EEEE
Note
❒ If you do not want to use user authentication management, select [Off].
Select the LDAP server to be used for LDAP authentication.
FFFF
5
Enter the login name attribute in the [Login Name Attribute] box.
GGGG
If it does not appear, press [TTTTNext].
Note
❒ The default login name attribute for Active Directory is “userPrincipal-
Name”.
Enter the unique attribute in the [Unique Attribute] box.
HHHH
Note
❒ The default unique attribute for Active Directory is “objectGUID”.
Press [OK].
IIII
Press the {{{{User Tools/Counter}}}} key
JJJJ
58
Page 65

Authentication Information Stored in the Address Book
Authentication Information Stored in the
Address Book
In [User Authentication Management], specify the login user name and password.
The login user name and password specified in [
can be used as the login information for “SMTP Authentication”, “Folder Authentication”, and “LDAP Authentication”.
If you do not want to use the login user name and password specified in [User
Authentication Management] for “SMTP Authentication”, “Folder Authentication”,
or “LDAP Authentication”, see General Settings Guide.
Preparation
For details about logging on using administrator authentication, see p.73
“Logging on Using Administrator Authentication”.
For details about logging off with administrator authentication, see p.74
“Logging off Using Administrator Authentication”.
You need to register a user in the address book. For details about the address
book, see General Settings Guide.
Specifying Authentication Information to Log on
If you want to use [Windows Authentication] or [LDAP Authentication] in [User Authen-
tication Management], take the user name registered in the server and register it in
the machine’s address book.
User Authentication Management
]
5
Press the {{{{User Tools/Counter}}}} key.
AAAA
Press [System Settings].
BBBB
Press [
CCCC
DDDD
EEEE
Administrator Tools
Press [
Address Book Management
If the setting to be specified does not appear, press [TTTTNext].
Select the user or group.
].
].
59
Page 66

Management Based on Authentication and Access Control
Press [Auth. Info].
FFFF
Specify the login user name and password.
GGGG
In “Available Functions”, select the functions available to the user.
HHHH
Reference
For details about limiting available functions, see p.28 “Limiting Available
Functions”.
Select [Use Auth. Info at Login] in “SMTP Authentication”.
IIII
If the setting to be specified does not appear, press [TTTTNext
Limitation
❒ When using [Use Auth. Info at Login] for “SMTP Authentication”, “Folder
Authentication”, or “LDAP Authentication”, a user name other than “other” or “HIDE***” must be specified. The symbol “***” represents any character.
5
❒ To use [Use Auth. Info at Login] for SMTP authentication, a login password
up to 64 characters in length must be specified.
Note
❒ For folder authentication, select [Use Auth. Info at Login] in “Folder Authen-
tication”.
❒ For LDAP authentication, select [Use Auth. Info at Login] in “LDAP Authen-
tication”.
].
60
Press [OK].
JJJJ
Press [Exit].
KKKK
Press the {{{{User Tools/Counter}}}} key.
LLLL
Page 67

If User Authentication Has Been Specified
If User Authentication Has Been Specified
When user authentication (User Code Authentication, Basic Authentication,
Windows Authentication, or LDAP Authentication) is set, the authentication
screen is displayed. Unless a valid user name and password are entered, operations are not possible with the machine. Log on to operate the machine, and log
off when you are finished operations. Be sure to log off to prevent unauthorized
users from using the machine.
Note
❒ Consult the User Administrator about your login user name, password, and
user code.
❒ For user code authentication, enter a number registered in the address book
as [User Code].
User Code Authentication (Using the Control Panel)
When user authentication is set, the following screen appears.
Enter a user code (eight digit), and then press [#].
Login (Using the Control Panel)
Follow the procedure below to log on when Basic Authentication, Windows Authentication, or LDAP Authentication is set. Follow the procedure below to log
on when basic authentication, Windows authentication, or LDAP authentication
is set.
Press [Enter] for [Login User Name].
AAAA
Enter a login user name, and then press [OK].
BBBB
5
Press [Enter] for [Login Password].
CCCC
Enter a login password, and then press [OK].
DDDD
61
Page 68

Management Based on Authentication and Access Control
Press [Login].
EEEE
When the user is authenticated, the screen for the function you are using appears.
Log Off (Using the Control Panel)
Follow the procedure below to log off when Basic Authentication, Windows Authentication, or LDAP Authentication is set.
Press {{{{User Tools / Counter}}}}.
AAAA
BBBB
Press [
Logout
].
5
Press [Yes].
CCCC
Press {{{{User Tools / Counter}}}}.
DDDD
Login (Using Web Image Monitor)
Follow the procedure below to log on when user authentication is set.
Click [Login].
AAAA
Enter a login user name and password, and then click [OK].
BBBB
Note
❒ For user code authentication, enter a user code in [User Name], and then
click [OK].
❒ The procedure may differ depending on the Web browser used.
Log Off (Using Web Image Monitor)
62
Click [Logout] to log off.
AAAA
Note
❒ Delete the cache memory in the Web browser after logging off.
Page 69

If User Authentication Has Been Specified
Auto Logout
When using user authentication management, the machine automatically logs
you off if you do not use the control panel within a given time. This feature is
called “Auto Logout”. Specify how long the machine is to wait before performing Auto Logout.
Press the {{{{User Tools/Counter}}}} key.
AAAA
Press [
BBBB
CCCC
DDDD
EEEE
FFFF
GGGG
System Settings
Press [Timer Settings].
Press [Auto Logout Timer].
If the setting to be specified does not appear, press [TTTTNext].
Select [On], and then enter “10” to “999” (seconds) using the number keys.
Note
❒ If you do not want to specify [Auto Logout Timer], select [Off].
Press [OK].
Press the {{{{User Tools/Counter}}}} key.
].
5
63
Page 70

Management Based on Authentication and Access Control
Menu Protect
The administrator can also limit users’ access permission to the machine’s settings. The machine’s System Settings menu can be locked so they cannot be
changed. This function is also effective when management is not based on user
authentication.
Note
❒ To change the menu protect setting, you must first enable administrator au-
thentication.
Reference
For details about the menu protect level for each function, see p.101 “User
Administrator Settings”.
Menu Protect
5
You can set menu protect to [Off], [Level 1], or [Level 2]. If you set it to [Off], no
menu protect limitation is applied. To limit access to the fullest extent, select
[Level 2].
Copying Functions
Note
❒ To specify [Menu Protect] in [Copier / Document Server Features], set [Machine Man-
agement] to [On] in [Administrator Authentication Management] in [Administrator
Tools] in [System Settings].
64
Press the {{{{User Tools/Counter}}}} key.
AAAA
Press [Copier / Document Server Features].
BBBB
Press [Administrator Tools].
CCCC
Press [Menu Protect].
DDDD
Select the menu protect level, and then press [OK].
EEEE
Page 71

Menu Protect
Press the {{{{User Tools/Counter}}}} key.
FFFF
Scanner Functions
Note
❒ To specify [Menu Protect] in [Scanner Features], set [Machine Management] to [On]
in [Administrator Authentication Management] in [Administrator Tools] in [System
Settings].
Press the {{{{User Tools/Counter}}}} key.
AAAA
Press [Scanner Features].
BBBB
Press [Administrator Tools].
CCCC
Press [Menu Protect].
DDDD
Select the menu protect level, and then press [OK].
EEEE
5
Press the {{{{User Tools/Counter}}}} key.
FFFF
65
Page 72

Management Based on Authentication and Access Control
5
66
Page 73

6.
Specifying the
Administrator/Security Functions
The Roles of Administrators
By limiting the functions available to each user, you can protect the data in the
machine from leaks and from being tampered with or deleted. The administrators each manage the access limits to the functions they are responsible for.
There are four types of administrator, as shown below. You can also specify a supervisor who can change each administrator’s password.
• Machine Administrator
• Network Administrator
• File Administrator
• User Administrator
• Supervisor
Register the administrators and supervisor separately from the users registered
in the address book. Users registered in the address book cannot be specified as
administrators.
Reference
For details, see p.72 “Registering the Administrator”.
❖❖❖❖ Machine Administrator
This is the administrator who mainly manages the machine’s default settings.
You can set the machine so that the default for each function can only be specified by the machine administrator. By making this setting, you can prevent
unauthorized people from changing the settings and allow the machine to be
used securely by its many users.
❖❖❖❖ Network Administrator
This is the administrator who manages the network settings. You can set the
machine so that network settings such as the IP address and settings for sending and receiving e-mail can only be specified by the network administrator.
By making this setting, you can prevent unauthorized users from changing
the settings and disabling the machine, and thus ensure correct network operation.
❖❖❖❖ File Administrator
This is the administrator who manages permission to access stored files. You
can specify passwords to allow only registered and permitted users to view
and edit files stored in Document Server. By making this setting, you can prevent data leaks and tampering due to unauthorized users viewing and using
the registered data.
67
Page 74

Specifying the Administrator/Security Functions
❖❖❖❖ User Administrator
This is the administrator who manages personal information in the address
book.
A user administrator can register/delete users in the address book or change
users’ personal information.
Users registered in the address book can also change and delete their own information. If any of the users forget their password, the user administrator
can delete it and create a new one, allowing the user to access the machine
again.
❖❖❖❖ Supervisor
The supervisor can delete an administrator’s password and specify a new
one. The supervisor cannot specify defaults or use normal functions. However, if any of the administrators forget their password and cannot access the
machine, the supervisor can provide support.
Reference
See p.87 “Operations by the Supervisor”.
6
68
Page 75

Administrator Authentication
Administrator Authentication
Administrators are handled differently from the users registered in the address
book. When registering an administrator, you cannot use a login user name and
login password already registered in the address book. Windows Authentication and LDAP Authentication are not performed for an administrator, so an administrator can log on even if the server is unreachable because of a network
problem.
Each administrator is identified by a login user name and login password. One
person can act as more than one type of administrator if multiple administrator
authority is granted to a single login user name and login password.
You can specify the login user name, login password, and encryption password
for each administrator.
The encryption password is a password for performing encryption when specifying settings using Web Image Monitor or SmartDeviceMonitor for Admin.
The password registered in the machine must be entered when using applications such as SmartDeviceMonitor for Admin.
Note
❒ You can use up to 32 alphanumeric characters and symbols when registering
login user names and login passwords. Keep in mind that passwords are
case-sensitive.
❒ You should use at least eight characters for the login password so that other
people will not be able to guess it easily.
❒ You cannot include spaces, semicolons (;) or quotes (“”) in the user name, or
leave the user name blank.
❒ You can register up to four sets of login user names and login passwords to
which you can grant administrator authority.
❒ Administrator authentication can also be specified via Web Image Monitor.
For details see the Web Image Monitor Help.
6
69
Page 76

Specifying the Administrator/Security Functions
Administrator Authentication
To specify administrator authentication, set Administrator Authentication Management to [On]. You can also specify whether or not to manage the items in System Settings as an administrator.
If you have not registered any administrator, you can obtain each administrator’s authority with the “Administrator 1” setting. To log on as an administrator,
use the default login user name and login password.
Preparation
For details about logging on with administrator authentication, see p.73
“Logging on Using Administrator Authentication”.
For details about logging off with administrator authentication, see p.74
“Logging off Using Administrator Authentication”.
The “Administrator 1” defaults are “admin” for the login name and blank for
the password. If user authentication has been specified, a screen for authentication appears. To specify administrator authentication, log on as an administrator by entering “admin” as the login user name and leaving the login
password blank.
6
Press the {{{{User Tools/Counter}}}} key.
AAAA
Press [System Settings].
BBBB
70
Press [Administrator Tools].
CCCC
Press [
DDDD
EEEE
Administrator Authentication Management
Specify each administrator authentication.
Specifying User Management Authentication
A Press [
B To specify address book management, press [
User Management
], and then press [On].
].
Administrator Tools
].
Page 77

Administrator Authentication
Specifying Machine Management Authentication
A Press [Machine Management], and then press [On].
B Press the item for which you want to specify management.
Specifying Network Management Authentication
A Press [Network Management], and then press [On].
6
B Press the item for which you want to specify management.
Specifying File Management Authentication
A Press [
B To specify file management, press [
Press [OK].
FFFF
Press the {{{{User Tools/Counter}}}} key.
GGGG
File Management
], and then press [On].
Administrator Tools
].
71
Page 78

Specifying the Administrator/Security Functions
Registering the Administrator
To specify the administrators separately when only “Administrator 1” has been
specified, log on using the “Administrator 1” login user name and login password. To register an administrator, you need to specify the authority of one of
the administrators. The data for each administrator can be changed using administrator authority.
Administrator authentication can also be specified via Web Image Monitor. For
details see the Web Image Monitor Help.
Preparation
If administrator authentication has already been specified, log on using a registered administrator name and password. For details about logging on using
administrator authentication, see p.73 “Logging on Using Administrator Au-
thentication”.
For details about logging off with administrator authentication, see p.74
“Logging off Using Administrator Authentication”.
Press the {{{{User Tools/Counter}}}} key.
AAAA
Press [System Settings].
6
BBBB
72
Press [Administrator Tools].
CCCC
Press [Program / Change Administrator].
DDDD
In the line for the administrator whose authority you want to specify, press
EEEE
[Administrator 1], [Administrator 2], [Administrator 3] or [Administrator 4], and then
press [Change].
Press [Change] for the login user name.
FFFF
Page 79

Administrator Authentication
Enter the login user name, and then press [OK].
GGGG
Press [Change] for the login password.
HHHH
Enter the login password, and then press [OK].
IIII
If a password reentry screen appears, enter the login password, and then
JJJJ
press [OK].
Press [Change] for the encryption password.
KKKK
Enter the encryption password, and then press [OK].
LLLL
If a password reentry screen appears, enter the encryption password, and
MMMM
then press [OK].
6
Press [OK].
NNNN
Press [OK].
OOOO
Press the {{{{User Tools/Counter}}}} key.
PPPP
Logging on Using Administrator Authentication
If administrator authentication has been specified, log on using an administrator’s user name and password.This section describes how to log on.
Note
❒
If user authentication has already been specified, a screen for authentication appears.
❒ To log on as an administrator, enter the administrator’s login user name and
login password.
❒ If you log on using administrator authority, the name of the administrator
logging on appears.
❒ If you log on using a login user name with the authority of more than one ad-
ministrator, “Administrator” appears.
❒ If you try to log on from an operating screen, “Selected function cannot be
used.” appears. Press the {{{{User Tools/Counter}}}} key to change the default.
73
Page 80

Specifying the Administrator/Security Functions
Press the {{{{User Tools/Counter}}}} key.
AAAA
Press [Login].
BBBB
Press [
CCCC
Enter the login user name, and then press [OK].
DDDD
Note
6
❒ If assigning the administrator for the first time, enter “admin”.
Press [Enter] next to “Login Password”.
EEEE
Note
❒ If assigning the administrator for the first time, proceed to step
pressing [
Enter the login password, and then press [OK].
FFFF
Enter [Login].
GGGG
Authenticating... Please wait.
“
specifying the default.
] next to “Login User Name”.
Enter
].
Enter
without
G
” appears, followed by the screen for
Logging off Using Administrator Authentication
If administrator authentication has been specified, be sure to log off after completing settings. This section explains how to log off after completing settings.
Press [Logout].
AAAA
Press [Yes].
BBBB
Press the {{{{User Tools/Counter}}}} key.
CCCC
74
Page 81

Administrator Authentication
Changing the Administrator
Change the administrator’s login user name and login password. You can also
assign each administrator’s authority to the login user names “Administrator 1”
to “Administrator 4” To combine the authorities of multiple administrators, assign multiple administrators to a single administrator.
For example, to assign machine administrator authority and user administrator
authority to [Administrator 1], press [Administrator 1] in the lines for the machine
administrator and the user administrator.
Preparation
For details about logging on with administrator authentication, see p.73
“Logging on Using Administrator Authentication”.
For details about logging off with administrator authentication, see p.74
“Logging off Using Administrator Authentication”.
Press the {{{{User Tools/Counter}}}} key.
AAAA
Press [System Settings].
BBBB
6
Press [Administrator Tools].
CCCC
Press [Program / Change Administrator].
DDDD
In the line for the administrator you want to change, press [Administrator 1],
EEEE
[Administrator 2], [Administrator 3] or [Administrator 4], and then press [Change].
Press [Change] for the setting you want to change, and re-enter the setting.
FFFF
Press [OK].
GGGG
Press [OK].
HHHH
Press the {{{{User Tools/Counter}}}} key.
IIII
75
Page 82

Specifying the Administrator/Security Functions
Specifying the Extended Security
Functions
As well as providing basic security through user authentication and the machine
access limits specified by the administrators, you can increase security by, for instance, encrypting transmitted data and data in the address book. If you need extended security, specify the machine’s extended security functions before using
the machine.
This section outlines the extended security functions and how to specify them.
For details about when to use each function, see the corresponding chapters.
Changing the Extended Security Functions
To change the extended security functions, display the extended security screen
as follows:
Preparation
For details about logging on with administrator authentication, see p.73
6
“Logging on Using Administrator Authentication”.
For details about logging off with administrator authentication, see p.74
“Logging off Using Administrator Authentication”.
Procedure for Changing the Extended Security Functions
Press the {{{{User Tools/Counter}}}} key.
AAAA
Press [System Settings].
BBBB
Press [Administrator Tools].
CCCC
Press [Extended Security].
DDDD
Press the setting you want to change, and change the setting.
EEEE
76
Page 83

Specifying the Extended Security Functions
Press [OK].
FFFF
Press the {{{{User Tools/Counter}}}} key.
GGGG
Settings
❖❖❖❖ Driver Encryption Key
This can be specified by the network administrator. Encrypt the password
transmitted when specifying user authentication. If you register the encryption key specified with the machine in the driver, passwords are encrypted.
• Driver Encryption Key
Reference
See the TWAIN driver Help.
❖❖❖❖ Encrypt Address Book
This can be specified by the user administrator. Encrypt the data in the machine’s address book.
Even if one of the machine’s internal parts is removed, the data in the address
book is protected by encryption and cannot be read.
• On
• Off
Note
❒ Default: Off
6
❖❖❖❖ Restrict Use of Destinations
This can be specified by the user administrator.
The available scanner destinations are limited to the destinations registered
in the address book.
A user cannot directly enter the destinations for transmission.
Note
❒ The destinations searched by “Search LDAP” can be used.
• On
• Off
Note
❒ Default: On
77
Page 84

Specifying the Administrator/Security Functions
❖❖❖❖ Permit Adding of Destinations
This can be specified by the user administrator.
When “Restrict Use of Destinations” is set to [
scanner destination, you can register it in the address book by pressing
[
ProgDest
vents the registration of destinations not managed by the administrator.
• On
• Off
❒ Default: On
]. If this setting is set to [
Note
Off
], [
ProgDest
]. After directly entering a
Off
] does not appear. This pre-
❖❖❖❖ Permit Display of User Information
This can be specified if user authentication is specified. When the job history
is checked using a network connection for which authentication is not available, all personal information can be displayed as “********”. For example,
when someone not authenticated as an administrator checks the job history
using SNMP in SmartDeviceMonitor for Admin, personal information can be
displayed as “********” so users cannot be identified. Because no information
identifying registered users can be viewed, unauthorized users can be pre-
6
vented from obtaining information about the registered files.
• On
• Off
Note
❒ Default: On
❖❖❖❖ Enhance File Protection
This can be specified by the file administrator. By specifying a password, you
can limit operations such as deleting, and sending files, and can prevent unauthorized people from accessing the files. However, it is still possible for the
password to be cracked.
By specifying “Enhance File Protection”, files are locked and so become inaccessible if an invalid password is entered ten times. This can protect the files
from unauthorized access attempts in which a password is repeatedly
guessed.
The locked files can only be unlocked by the file administrator. When “En-
hance File Protection” is specified, ( ) appears at the top right of the screen.
Note
❒ If files are locked, you cannot select them even if the correct password is
entered.
• On
• Off
Note
❒ Default: Off
78
Page 85

Specifying the Extended Security Functions
❖❖❖❖ Permit Settings by SNMP V1 and V2
This can be specified by the network administrator. When the machine is accessed using the SNMPv1, v2 protocol, authentication cannot be performed,
allowing machine administrator settings such as the paper setting to be
changed. If you select [
SNMPv1, v2.
• On
• Off
Note
❒ Default: On
], the setting can be viewed but not specified with
Off
❖❖❖❖ Permit Simple Encryption
This can be specified by the machine administrator.
Under Windows95/98/Me, advanced encryption is not possible with the
printer driver, so simple encryption is used. If you select [Off], printing with
simple encryption is not allowed and you cannot connect using the printer
driver under Windows95/98/Me. Specify this setting when using a driver
that does not support advanced encryption.
Limitation
❒ When this setting is set to [Off] and you want to edit the address book in
[
User Management Tool
for Admin, or you want to access the machine using DeskTopBinder or the
ScanRouter software, enable SSL/TLS for encrypted communication. For
details about specifying SSL/TLS, see p.42 “Setting the SSL / TLS Encryption Mode”.
• On
• Off
] or [
Address Management Tool
] in SmartDeviceMonitor
6
Note
❒ Default: Off
79
Page 86

Specifying the Administrator/Security Functions
Limiting Machine Operation to Customers
Only
The machine can be set so that operation is impossible without administrator authentication.
The machine can be set to prohibit operation without administrator authentication and also prohibit remote registration in the address book by a service representative.
We maintain strict security when handling customers’ data. Also, by being authenticated by an administrator to use the machine, we operate the machine under the customer’s control.
Use the following settings.
• Service Mode Lock
Settings
❖❖❖❖ Service Mode Lock
6
This can be specified by the machine administrator. Service mode is used by
a customer engineer for inspection or repair. If you set the service mode lock
to [On], service mode cannot be used unless the machine administrator logs
onto the machine and cancels the service mode lock to allow the customer engineer to operate the machine for inspection and repair. This ensures that the
inspection and repair are done under the supervision of the machine administrator.
Specifying Service Mode Lock
Preparation
For details about logging on with administrator authentication, see p.73
“Logging on Using Administrator Authentication”.
For details about logging off with administrator authentication, see p.74
“Logging off Using Administrator Authentication”.
Press the {{{{User Tools/Counter}}}} key.
AAAA
Press [
BBBB
CCCC
80
System Settings
Press [Administrator Tools].
].
Page 87

Press [Service Mode Lock].
DDDD
Press [On] and then [OK].
EEEE
A confirmation message appears.
Limiting Machine Operation to Customers Only
Press [
FFFF
Press the {{{{User Tools/Counter}}}} key.
GGGG
Canceling Service Mode Lock
For a customer engineer to carry out inspection or repair in service mode, the machine administrator must log onto the machine and cancel the service mode lock.
Preparation
For details about logging on with administrator authentication, see p.73
“Logging on Using Administrator Authentication”.
For details about logging off with administrator authentication, see p.74
“Logging off Using Administrator Authentication”.
Press the {{{{User Tools/Counter}}}} key.
AAAA
Press [
BBBB
Press [Administrator Tools].
CCCC
Press [Service Mode Lock].
DDDD
].
Yes
System Settings
].
6
Press [Off] and then press [OK].
EEEE
Press the {{{{User Tools/Counter}}}} key.
FFFF
The customer engineer can switch to service mode.
81
Page 88

Specifying the Administrator/Security Functions
6
82
Page 89

7. Troubleshooting
Authentication Does Not Work Properly
This section explains what to do if a user cannot operate the machine because of
a problem related to user authentication. Refer to this section if a user comes to
you with such a problem.
A Message Appears
This section explains how to deal with problems if a message appears on the
screen during user authentication.
The most common messages are explained. If some other message appears, deal
with the problem according to the information contained in the message.
Messages Causes Solutions
You do not have the
privileges to use
this function.
The authority to use the function is not specified.
• If this appears when trying
to use a function:
The function is not specified in the address book
management setting as being available. The user administrator must decide
whether to authorize use
of the function and then
assign the authority.
• If this appears when trying
to specify a default setting:
The administrator differs
depending on the default
settings you wish to specify. Using the list of settings, the administrator
responsible must decide
whether to authorize use
of the function.
83
Page 90

Troubleshooting
Messages Causes Solutions
Authentication has
failed.
Selected files contain file(s) that
the user does not
have access privileges to. Please
note that only the
The entered login user name
or login password is not correct
The number of users registered in the address book has
reached the maximum limit
allowed by Windows Authentication or LDAP Authentication, so you cannot register
additional users.
Cannot access the authentication server when using Windows authentication or LDAP
authentication.
You have tried to delete files
without the authority to do so.
Inquire the user administrator
for the correct login user name
and login password.
Delete unnecessary user addresses.
A network or server error may
have occurred. Contact to the
network administrator.
Files can be deleted by the file
creator (owner) or file administrator. To delete a file which
you are not authorized to delete, contact the file creator
(owner).
files with access
privileges will be
deleted.
7
84
Page 91

Authentication Does Not Work Properly
Machine Cannot Be Operated
If the following conditions arise while users are operating the machine, provide
instructions on how to deal with them.
Condition Cause Solution
Cannot connect using the
TWAIN driver.
Cannot authenticate using the
TWAIN driver.
Cannot log on to the machine
[Document Server: Authen-
using
tication/Encryption:]
TopBinder.
Cannot access the machine using ScanRouter EX Professional V3 / ScanRouter EX
Enterprise V2.
Cannot connect to the ScanRouter delivery software.
Cannot log off when using the
copying or scanner functions.
in Desk-
The encryption key specified
in the driver does not match
the machine’s driver encryption key.
If “Permit Simple Encryption”
[Off]
is set to
driver uses simple encryption.
Another user is logging on to
the machine.
Authentication is taking time
because of operating conditions.
Authentication is not possible
while the machine is editing
the address book data.
“Permit Simple Encryption” is
not set correctly. Alternative-
[SSL/TLS]
ly,
although the required certificate is not installed in the
computer.
The ScanRouter delivery software may not be supported by
the machine.
The original has not been
scanned completely.
, data sent by the
has been enabled
Specify the driver encryption
key registered in the machine.
See p.34 “Driver Encryption
Key”.
Under Windows NT 4.0, Windows 2000/XP, and Windows
server 2003, enable driver encryption.
Under Windows 95/98/Me,
you can use only simple encryption, so you cannot print.
Under Windows 95/98/Me,
set “Permit Simple Encryp-
[On]
tion” to
[System Settings]
Wait for the user to log off.
Make sure the LDAP server
setting is correct. Make sure
the network settings are correct.
Wait until editing of the address book data is complete.
Set “Permit Simple Encryption” to
enable
server certificate in the machine, and then install the certificate in the computer.
in the machine’s
.
[On]
. Alternatively,
[SSL/TLS]
, install the
Reference
See p.79 “Permit Simple
Encryption”.
See p.42 “Setting the SSL /
TLS Encryption Mode”.
Update to the latest version of
the ScanRouter delivery software.
When the original has been
scanned completely, press
remove the original, and then
log off.
[#]
7
,
85
Page 92

Troubleshooting
Condition Cause Solution
Cannot access the machine using ScanRouter EX Professional V2.
[ProgDest] does not appear on
the scanner’s screen for specifying destinations.
Stored files do not appear. User authentication may have
Destinations specified using
the machine do not appear.
7
If you try to interrupt a job
while copying or scanning, an
authentication screen appears.
Cannot register entries in [Pro-
gram No.10] for program regis-
tration in the copier function.
ScanRouter EX Professional V2 does not support user authentication.
[Permit Adding of Destinations] is
set to [Off] in [Restrict Use of
Destinations] in [Extended Security], so only the user adminis-
trator can register
destinations in the address
book.
been disabled while [All Users]
is not specified.
User authentication may have
been disabled while [All Users]
is not specified.
With this machine, you can
log off while copying or scanning. If you try to interrupt
copying or scanning after logging off, an authentication
screen appears.
If “Change Initial Mode” is set
to [Program No.10] in [General
Features] in [Copier / Document
Server Features], entries can be
registered in [Program No.10]
only by the machine administrator.
Registration must be done by
the user administrator.
Re-enable user authentication,
and then enable [All Users] for
the files that did not appear.
For details about enabling [All
Users], see p.9 “Specifying Ac-
cess Permission for Stored
Files”.
Re-enable user authentication,
and then enable [All Users] for
the destinations that did not
appear.
For details about enabling [All
Users], see p.18 “Protecting the
Address Book”.
Only the user who executed a
copying or scanning job can
interrupt it.Wait until the job
has completed or consult an
administrator or the user who
executed the job.
The machine administrator
must carry out the registration.
86
Page 93

8. Appendix
Operations by the Supervisor
The supervisor can delete an administrator’s password and specify a new one.
If any of the administrators forget their passwords or if any of the administrators
change, the supervisor can assign a new password. If logged on using the supervisor’s user name and password, you cannot use normal functions or specify defaults. Log on as the supervisor only to change an administrator’s password.
Important
❒ The default login user name is “supervisor” and the login password is blank.
We recommend changing the login user name and login password.
❒ When registering login user names and login passwords, you can specify up
to 32 alphanumeric characters and symbols. Keep in mind that user names
and passwords are case-sensitive.
❒ Be sure not to forget the supervisor login user name and login password. If
you do forget them, a service representative will to have to return the machine to its default state. This will result in all data in the machine being lost
and the service call may not be free of charge.
Note
❒ You cannot specify the same login user name for the supervisor and the ad-
ministrators.
❒ Using Web Image Monitor, you can log on as the supervisor and delete an ad-
ministrator’s password.
Logging on as the Supervisor
If administrator authentication has been specified, log on using the supervisor
login user name and login password. This section describes how to log on.
Press the {{{{User Tools/Counter}}}} key.
AAAA
Press [Login].
BBBB
Press [Enter] for [Login User Name].
CCCC
87
Page 94

Appendix
Enter a login user name, and then press [OK].
DDDD
Note
❒ When you assign the administrator for the first time, enter “supervisor”.
Press [Enter] for [Login Password].
EEEE
Enter a login password, and then press [OK].
FFFF
Note
❒ When you assign the administrator for the first time, proceed to step
without pressing [Enter].
Press [Login].
GGGG
Logging off as the Supervisor
If administrator authentication has been specified, be sure to log off after completing settings. This section explains how to log off after completing settings.
Press [Logout].
AAAA
G
Press [Yes].
8
BBBB
Press the {{{{User Tools/Counter}}}} key.
CCCC
Changing the Supervisor
Press the {{{{User Tools/Counter}}}} key.
AAAA
Press [System Settings].
BBBB
Press [Administrator Tools].
CCCC
Press [Program / Change Administrator].
DDDD
88
Page 95

Operations by the Supervisor
Under “Supervisor”, click [Change].
EEEE
Press [Change] for the login user name.
FFFF
Enter the login user name, and then press [OK].
GGGG
Press [Change] for the login password.
HHHH
Enter the login password, and then press [OK].
IIII
If a password reentry screen appears, enter the login password, and then
JJJJ
press [OK].
Press [OK].
KKKK
Press [OK].
LLLL
Press the {{{{User Tools/Counter}}}} key.
MMMM
Resetting an Administrator’s Password
Press the {{{{User Tools/Counter}}}} key.
AAAA
Press [Login].
BBBB
Log on as the supervisor.
CCCC
You can log on in the same way as an administrator.
Press [
DDDD
EEEE
FFFF
System Settings
Press [Administrator Tools].
Press [
Program / Change Administrator
].
].
8
89
Page 96

Appendix
Press [Change] for the administrator you wish to reset.
GGGG
Press [Change] for the login password.
HHHH
Enter the login password, and then press [OK].
IIII
If a password reentry screen appears, enter the login password, and then
JJJJ
press [OK].
Press [OK].
KKKK
Press [OK].
LLLL
Press the {{{{User Tools/Counter}}}} key.
MMMM
8
90
Page 97

Machine Administrator Settings
Machine Administrator Settings
The machine administrator settings that can be specified are as follows:
System Settings
The following settings can be specified.
❖❖❖❖ General Features
All the settings can be specified.
❖❖❖❖ Tray Paper Settings
All the settings can be specified.
❖❖❖❖ Timer Settings
All the settings can be specified.
❖❖❖❖ Interface Settings
• Machine Name
• Panel Off Timer
❖❖❖❖ File Transfer
The following settings can be specified.
• Delivery Option
• SMTP Authentication
SMTP Authentication
User Name
E-mail Address
Encryption
Reception Protocol
• POP before SMTP
• POP3 Setting
Server Name
Encryption
• Administrator's E-mail Address
• Default User Name / Password (Send)
SMB User Name
FTP User Name
• Program / Change / Delete E-mail Message
• Program / Change / Delete Subject
8
91
Page 98

Appendix
❖❖❖❖ Administrator Tools
• User Authentication Management
You can specify which authentication to use.
You can also edit the settings for each function.
• Administrator Authentication Management
Machine Management
• Program / Change Administrator
Machine Administrator
You can change the user name and the full-control user’s authority.
• Key Counter Management
• External Charge Unit Management
• Enhanced External Charge Unit Management
• Extended Security
Permit Display of User Information
• Display / Print Counter
Display / Print Counter
• Display / Clear / Print Counter per User
Display / Print Counter
• AOF (Always On)
• Program / Change / Delete LDAP Server
Server Name
Search Base
Port No.
Authentication
8
User Name
Password
Japanese Chara. Code
Search Conditions
Search Options
• Use LDAP Server
• Service Mode Lock
• Auto Erase Memory Setting
• Erase All Memory
*1
The DataOverwriteSecurity unit option must be installed.
*1
*1
92
Page 99

Copier/Document Server Features
The following settings can be specified.
❖❖❖❖ General Features
All the settings can be specified.
❖❖❖❖ Reproduction Ratio
All the settings can be specified.
❖❖❖❖ Edit
All the settings can be specified.
❖❖❖❖ Stamp
All the settings can be specified.
❖❖❖❖ Input / Output
All the settings can be specified.
❖❖❖❖ Administrator Tools
All the settings can be specified.
Scanner Features
The following settings can be specified.
Machine Administrator Settings
❖❖❖❖ Scan Settings
All the settings can be specified.
❖❖❖❖ Destination List Settings
All the settings can be specified.
❖❖❖❖ Send Settings
The following settings can be specified.
• TWAIN Standby Time
• File Type Priority
• Compression (Black & White)
• Print & Delete Scanner Journal
• E-mail Information Language
• Store File Priority
• Delete Scanner Journal
• Print Scanner Journal
❖❖❖❖ Administrator Tools
All the settings can be specified.
8
93
Page 100

Appendix
Settings via Web Image Monitor
The following settings can be specified.
❖❖❖❖ Top Page
• Reset Device
❖❖❖❖ Device Settings
• System
Device Name
Output Tray
Paper Tray Priority
• Paper
All the settings can be specified.
• Timer Settings
All the settings can be specified.
• E-mail
All the settings can be specified.
• File Transfer
All the settings can be specified.
• User Authentication Management
All the settings can be specified.
• Program/Change Administrator
You can specify the following administrator settings as the machine ad-
8
ministrator.
Login User Name
Login Password
Change Encryption Password
• Administrator Authentication Management
Machine Administrator Authentication
Available Settings for Machine Administrator
94
❖❖❖❖ Network
• SNMPv3
• Access Type (Machine Administrator)
 Loading...