

Page 1

Operating Instructions
For safety, please read this manual carefully before you use this product and keep it
handy for future reference.
Page 2

Note to users in the United States of America
Notice:
This equipment has been tested and found to comply with the limits for a Class B digital device, pursuant to Part 15 of the FCC Rules. These limits are designed to provide reasonable protection against
harmful interference in a residential installation. This equipment generates, uses and can radiate radio
frequency energy and, if not installed and used in accordance with the instructions, may cause harmful
interference to radio communications. However, there is no guarantee that interference will not occur
in a particular installation. If this equipment does cause harmful interference to radio or television reception, which can be determined by turning the equipment off and on, the user is encouraged to try to
correct the interference by one more of the following measures:
Reorient or relocate the receiving antenna.
Increase the separation between the equipment and receiver.
Connect the equipment into an outlet on a circuit different from that to which the receiver is
connected.
Consult the dealer or an experienced radio /TV technician for help.
Warning
Changes or modifications not expressly approved by the party responsible for compliance could void
the user's authority to operate the equipment.
Note to users in Canada
Note:
This Class B digital apparatus complies with Canadian ICES-003.
Remarque concernant les utilisateurs au Canada
Avertissement:
Cet appareil numérique de la classe B est conforme à la norme NMB-003 du Canada.
In accordance with IEC 60417, this machine uses the following symbols for the main switch:
aaaa means POWER ON.
bbbb means POWER OFF.
Page 3

Introduction
This manual describes detailed instructions on the operation and notes about the use of this machine.
To get maximum versatility from this machine all operators are requested to read this manual carefully
and follow the instructions. Please keep this manual in a handy place near the machine.
Notes:
Some illustrations in this manual might be slightly different from the machine.
Certain options might not be available in some countries. For details, please contact your local dealer.
Two kinds of size notation are employed in this manual. With this machine refer to the inch version.
For good print quality, Standard recommends that you use genuine Standard masters and inks.
Standard shall not be responsible for any damage or expense that might result from the use of parts
other than genuine Standard parts in your Standard office product.
Power Source
120V, 60Hz, 2.4A or more
Please be sure to connect the power cord to a power source as above. For details about power source,
⇒ p.200 “Power Connection”.
Page 4
Safety Information
R
R
When using this machine, the following safety precautions should always be followed.
Safety During Operation
In this manual, the following important symbols are used:
WARNING:
CAUTION:
Indicates a potentially hazardous situation which, if instructions
are not followed, could result in death or serious injury.
Indicates a potentially hazardous situation which, if instructions are not
followed, may result in minor or moderate injury or damage to property.
R WARNING:
• Connect the power cord directly into a wall outlet and never use an extension cord.
• Disconnect the power plug (by pulling the plug, not the cable) if the
power cable or plug becomes frayed or otherwise damaged.
• To avoid hazardous electric shock, do not remove any covers or
screws other than those specified in this manual.
• Turn off the power and disconnect the power plug (by pulling the plug,
not the cable) if any of the following occurs:
• You spill something into the machine.
• You suspect that your machine needs service or repair.
• The external housing of your machine has been damaged.
i
Page 5

R CAUTION:
• Protect the machine from dampness or wet weather, such as rain, snow.
• Unplug the power cord from the wall outlet before you move the machine.
While moving the machine, you should take care that the power cord will not
be damaged under the machine.
• When you disconnect the power plug from the wall outlet, always pull the
plug (not the cable).
• Do not allow paper clips, staples, or other small metallic objects to fall inside
the machine.
• For environmental reasons, do not dispose of the machine or expended
supply waste at household waste collection points. Disposal can take place
at an authorized dealer.
• Be careful not to cut yourself on any sharp edges when you reach inside the
machine to remove misfed sheets of paper or masters.
• Our products are engineered to meet high standards of quality and functionality, and we recommend that you use only the expendable supplies available at an authorized dealer.
ii
Page 6
How to Read This Manual
R
R
Symbols
In this manual, the following symbols are used:
WARNING:
This symbol indicates a potentially hazardous situation that might result in
death or serious injury when you misuse the machine without following the instructions under this symbol. Be sure to read the instructions, all of which are described in the Safety Information section.
CAUTION:
This symbol indicates a potentially hazardous situation that might result in minor or moderate injury or property damage that does not involve personal injury
when you misuse the machine without following the instructions under this
symbol. Be sure to read the instructions, all of which are described in the Safety
Information section.
* The statements above are notes for your safety.
Important
If this instruction is not followed, paper might be misfed, originals might be
damaged, or data might be lost. Be sure to read this.
Preparation
This symbol indicates the prior knowledge or preparations required before operating the machine.
Note
This symbol indicates precautions for operation, or actions to take after misoperation.
Limitation
This symbol indicates numerical limits, functions that cannot be used together,
or conditions in which a particular function cannot be used.
Reference
This symbol indicates a reference.
[]
Keys that appear on the machine's display panel.
{}
Keys built into the machine's operation panel.
iii
Page 7
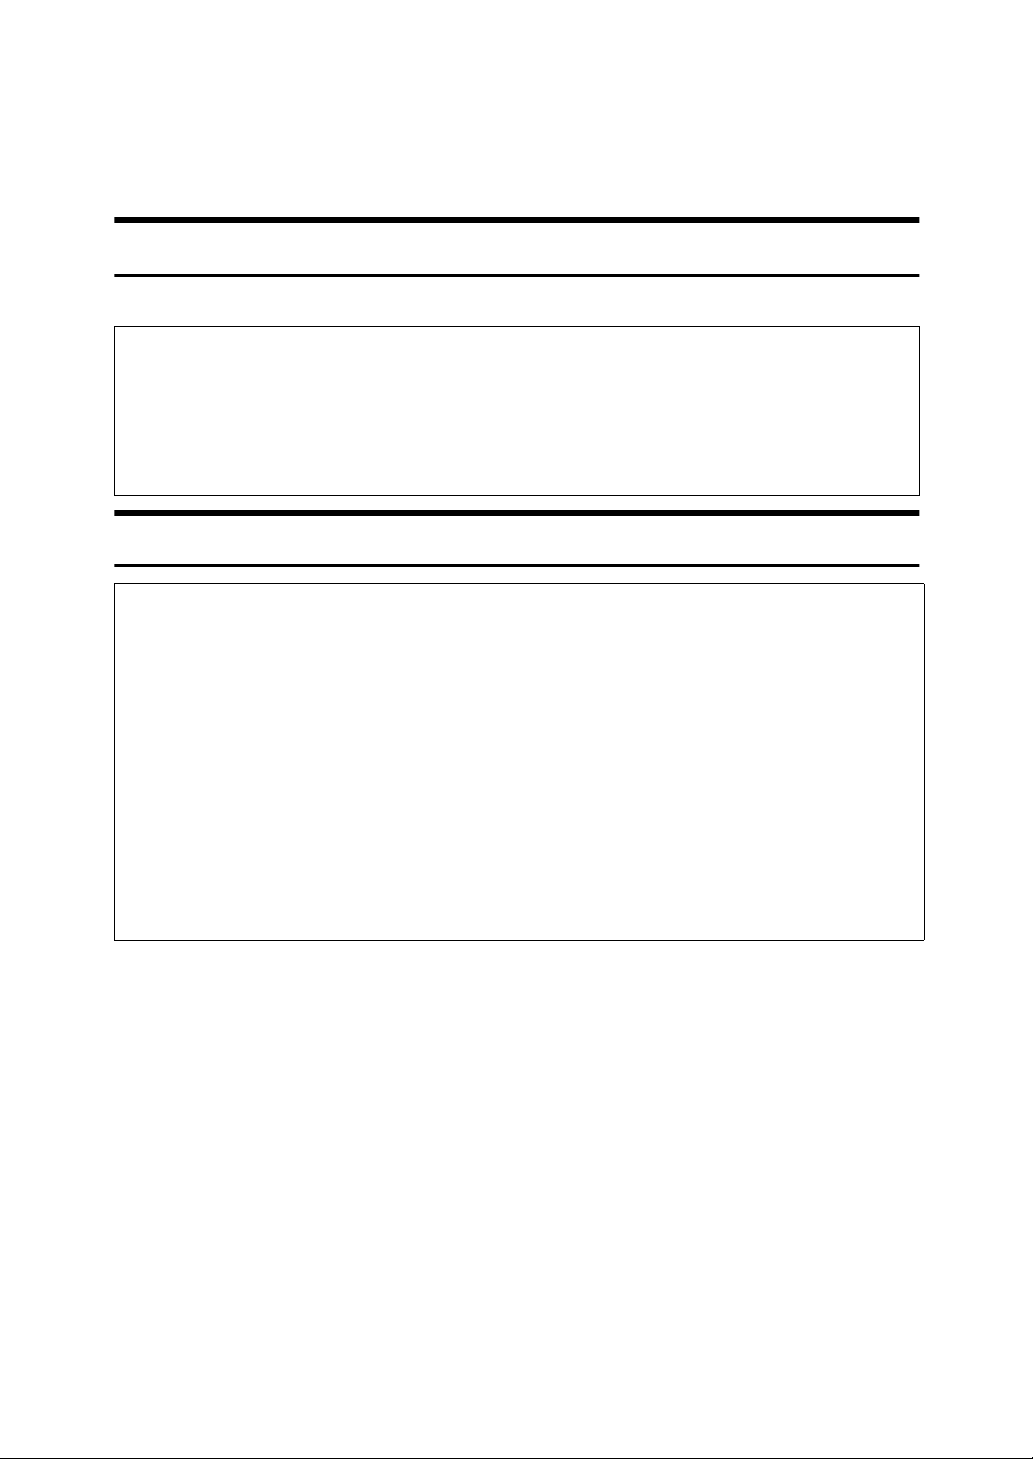
Making Prints
Before making prints using this machine, you have to make a master by
pressing the {{{{Start}}}} key. When you
press the {{{{Start}}}} key, the machine
scans the original image and makes a
master. This procedure describes
how to make basic prints.
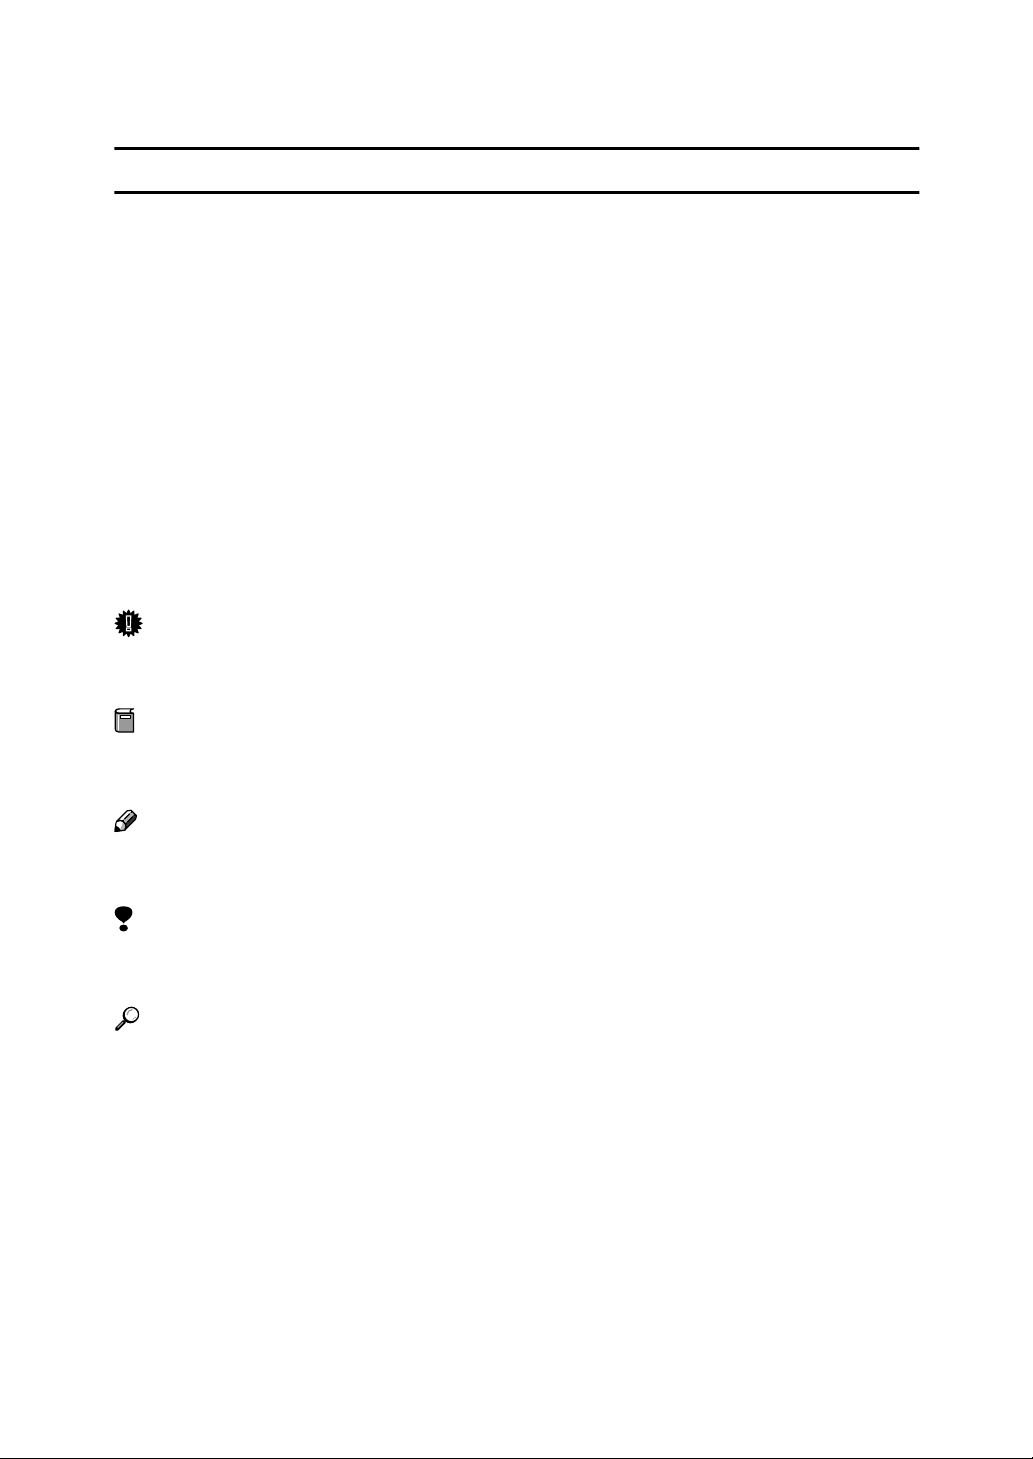
Place your originals in one of the
AAAA
following two ways:
Placing originals on the exposure
glass
A Place a single page face down.
Press the {{{{Start}}}} key.
BBBB
Press the {{{{Proof}}}} key.
CCCC
ZDCH110E
Inserting originals in the optional
document feeder
A Insert a stack of originals face
up.
ZDCH120E
Note
❒ To avoid jamming, fan the
originals before placing them
in the document feeder.
Check the print image.
Reference
For changing the image position, see p.24 “Adjusting the Position of Printed Images”.
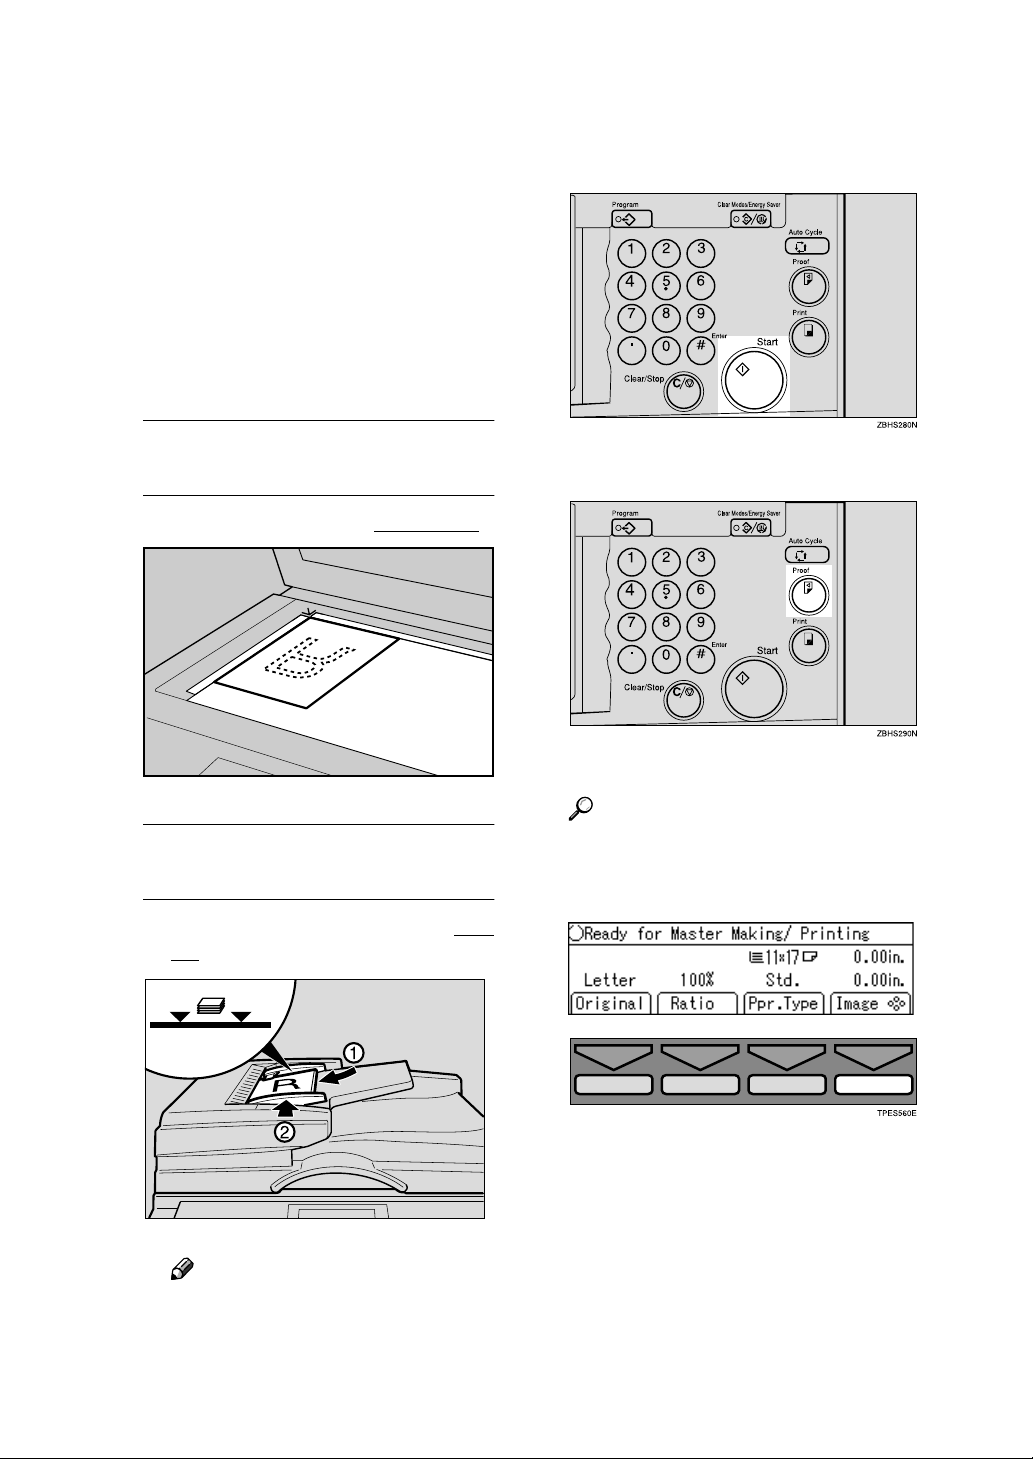
To increase the image density,
press the {{{{WWWW}}}} key. See p.25 “Adjusting the Image Density of
Prints”.
iv
Page 8
To decrease the image density,
press the {{{{VVVV}}}} key. See p.25 “Ad-
justing the Image Density of
Prints”.
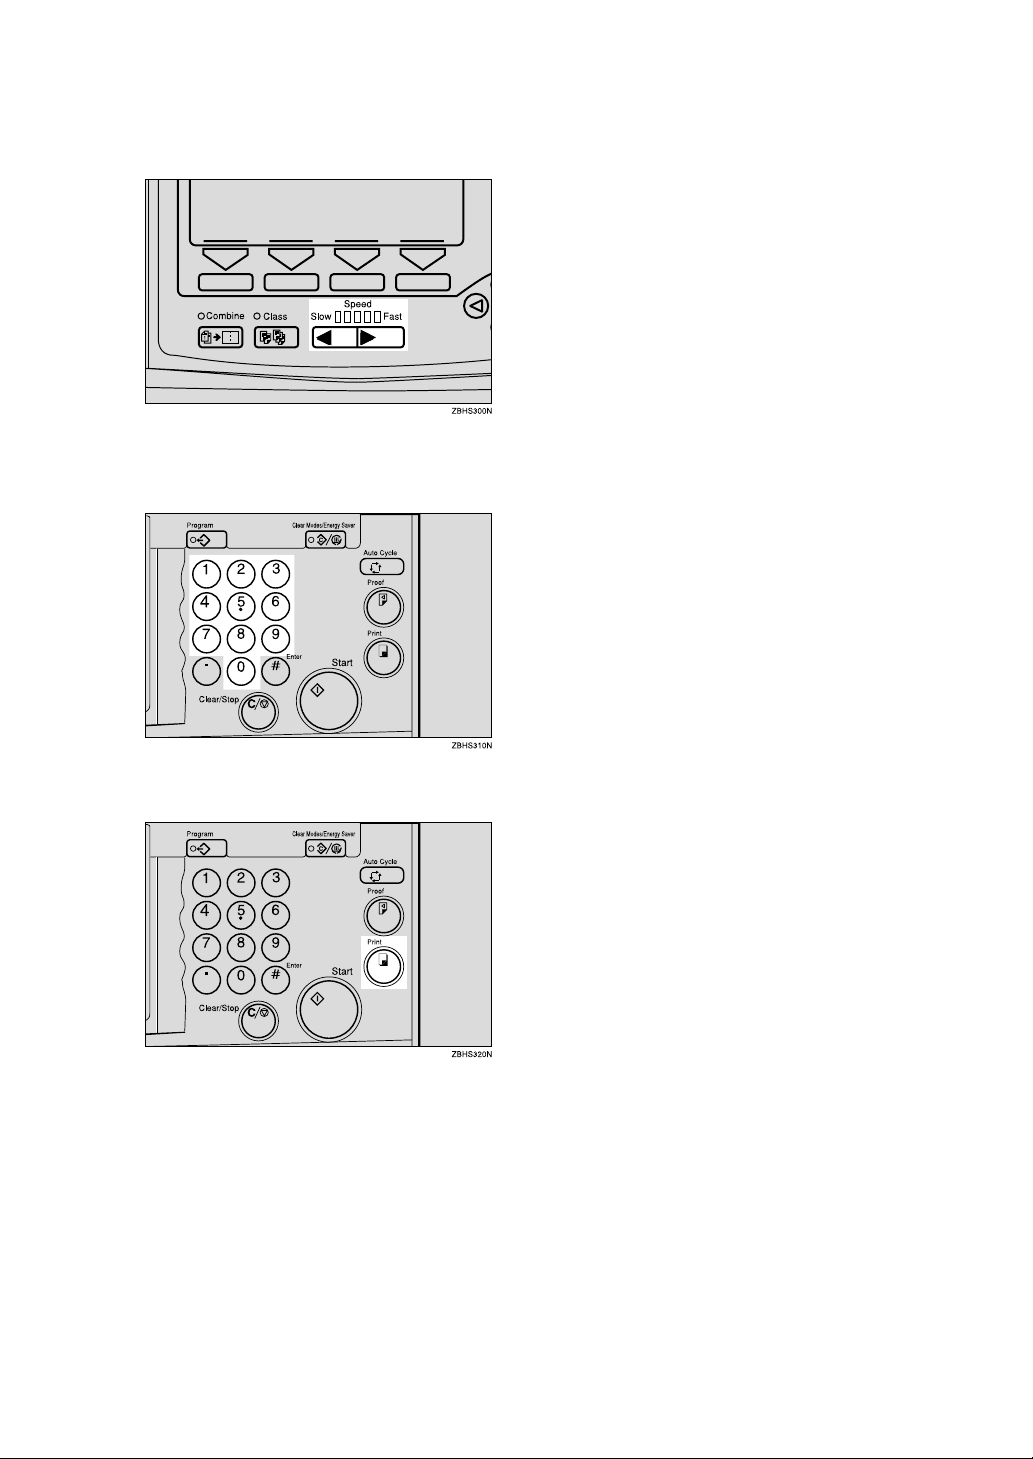
Enter the desired number of
DDDD
prints with the number keys.
Press the {{{{Print}}}} key.
EEEE
When the print job has finished,
press the {{{{Clear Modes/Energy Sav-
er}}}} key. Previously entered job settings will be cleared.
v
Page 9

What You Can do with this Machine
Below is a quick summary of this machine's features and where to look in
this manual for more information.
❖❖❖❖ Standard Printing
See p.19 “Standard Printing”.
❖❖❖❖ Energy Saver Mode
See p.22 “Energy Saver Mode”
❖❖❖❖ Adjusting the Print Image Position
See p.24 “Adjusting the Position of
Printed Images”.
GRPOSI0E
❖❖❖❖ Reducing and Enlarging Using Preset
Ratios
See p.29 “Reducing and Enlarging
Using Preset Ratios”.
GRRATI0E
❖❖❖❖ Auto Magnification
See p.31 “Auto Magnification”.
* Paper feed direction
❖❖❖❖ Adjusting the Print Image Density
See p.25 “Adjusting the Image
Density of Prints”.
❖❖❖❖ Tint Mode
See p.26 “Tint Mode”.
❖❖❖❖ Changing the Printing Speed
See p.27 “Changing the Printing
Speed”.
GRAUTO0E
❖❖❖❖ Zoom
See p.34 “Zoom”.
GRZOOM0E
GRTINT0E
vi
Page 10
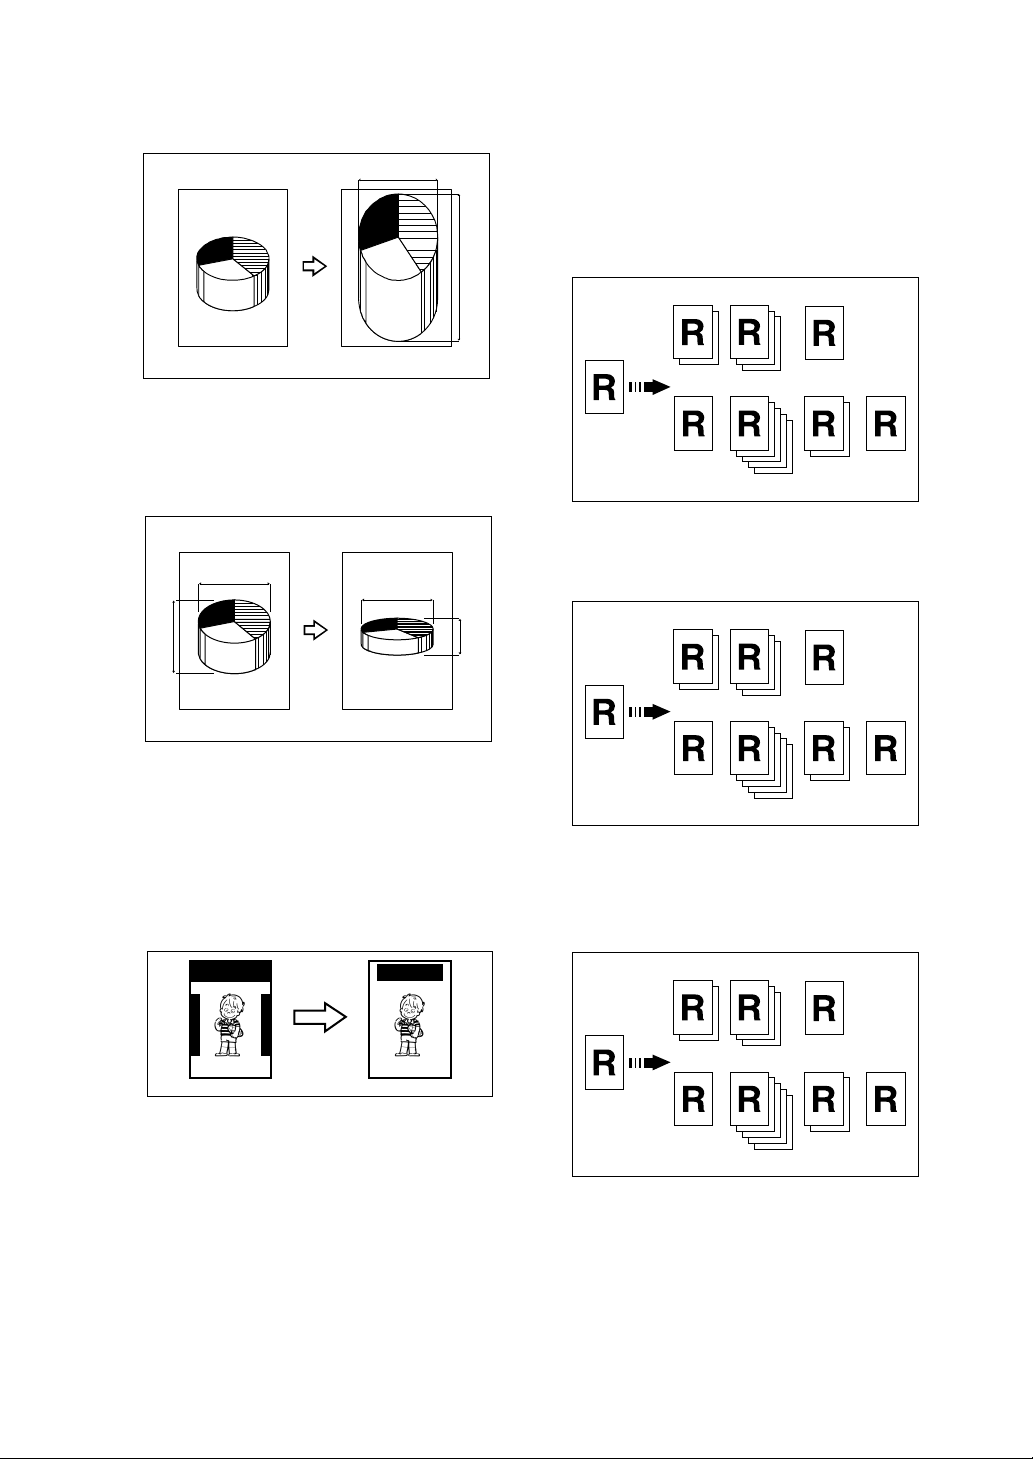
❖❖❖❖ Directional Magnification (%)
See p.36 “Directional Magnifica-
❖❖❖❖ Economy Mode
See p.50 “Economy Mode”.
tion (%)”.
❖❖❖❖ Auto Cycle
a%
See p.51 “Auto Cycle”.
❖❖❖❖ All Class Mode
b%
CP2P01EE
See p.52 “All Class Mode”.
❖❖❖❖ Directional Magnification (Size)
See p.38 “Directional Magnification (Size)”.
❖❖❖❖ Auto Class Mode
1
24
3
See p.54 “Auto Class Mode”.
GRCLAS2E
CP2M01EE
❖❖❖❖ Erasing Center and Edge Margins
See p.40 “Erasing Center and Edge
Margins”.
❖❖❖❖ Edge Erase
See p.41 “Edge Erase”.
AB AB
GRERAS0E
❖❖❖❖ Printing on Various Kinds of Paper
See p.43 “Printing onto Various
Kinds of Paper”.
❖❖❖❖ Selecting Original Modes
See p.46 “Selecting Original
Modes”.
GRCLAS2E
❖❖❖❖ Manual Class Mode
See p.57 “Manual Class Mode with
One Original”.
GRCLAS2E
vii
Page 11

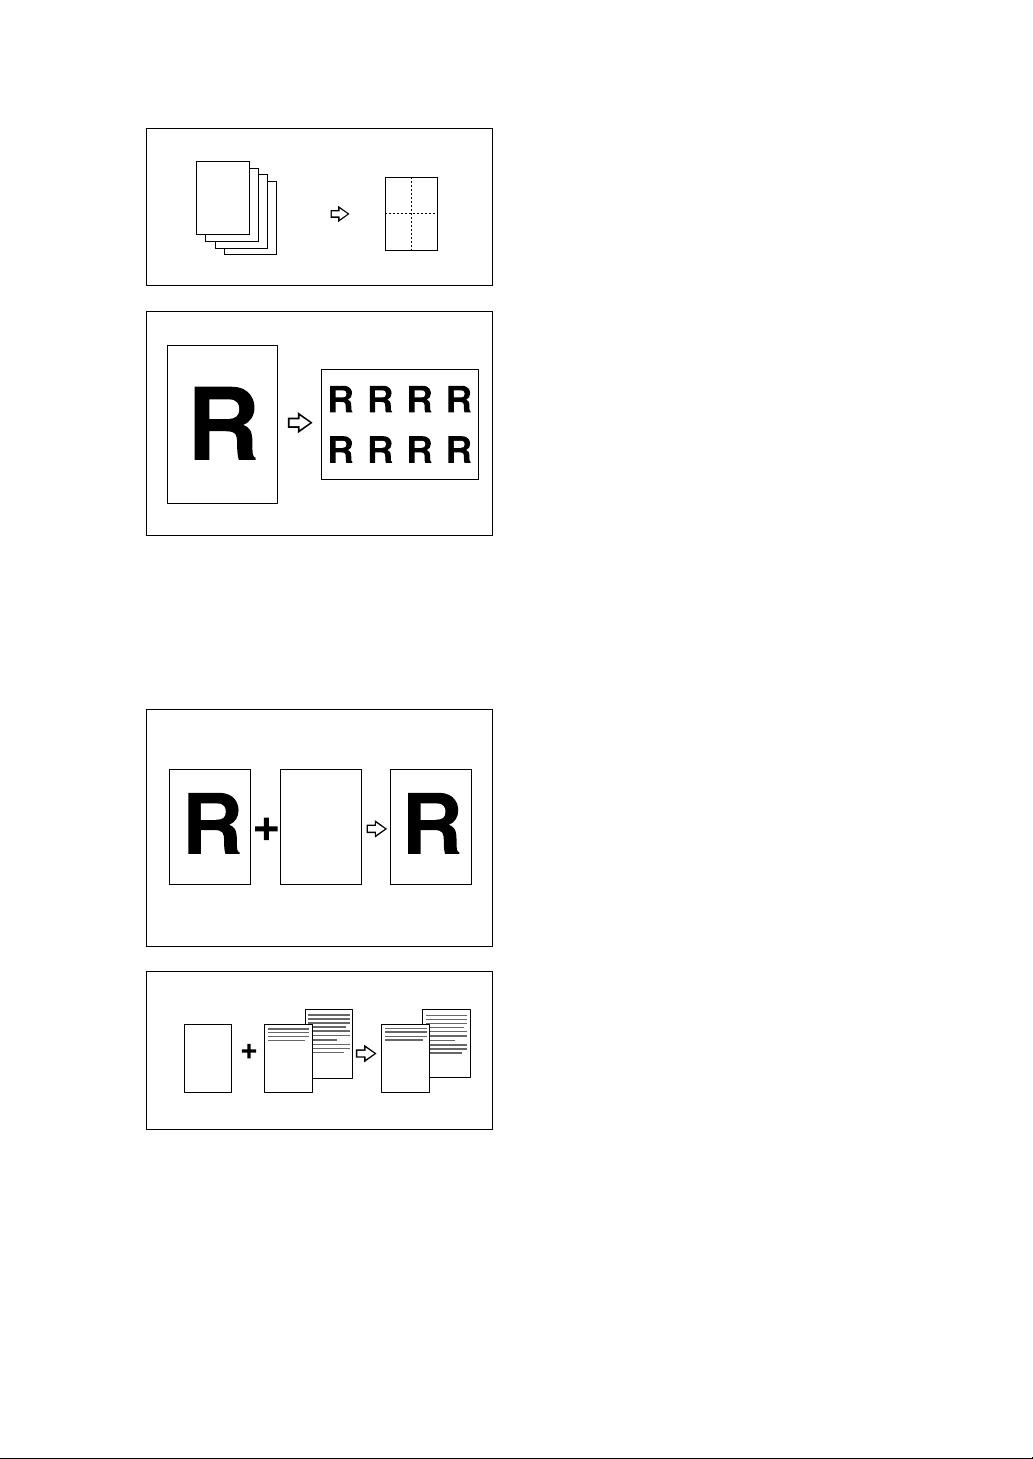
❖❖❖❖ Manual Class Mode with two or More
Originals
See p.59 “Manual Class Mode with
two or More Originals”.
❖❖❖❖ Auto Combine Mode
See p.69 “Auto Combine Mode”.
1 11
A
A
B
C
D
❖❖❖❖ Class Mode
See p.62 “Class Mode”.
R
C D
R R
R
R R R
❖❖❖❖ Combining Originals
See p.64 “Combine Originals”.
B
GRCLAS1E
GRCLAS0E
1
❖❖❖❖ Skip Feed Printing
See p.71 “Skip Feed Printing”.
❖❖❖❖ Programs
See p.73 “Programs”.
❖❖❖❖ Security Mode
See p.76 “Security Mode”.
❖❖❖❖ Quality Start Mode
See p.77 “Quality Start Mode”.
❖❖❖❖ Job Separation
See p.79 “Job Separation”.
11
11
GRACOM0E
viii
11
1
22
22
11
2
GRCOMB2E
❖❖❖❖ Conserving the Master
See p.81 “Conserving the Master”.
❖❖❖❖ On Line Printing
See p.83 “On Line Printing”.
❖❖❖❖ Making Color Prints
See p.132 “Making Color Prints”.
GRJOBS0E
Page 12

❖❖❖❖ Printing in Two Colors
See p.134 “Printing in Two Colors”.
❖❖❖❖ Date Stamp
See p.111 “Date Stamp”.
R
P
❖❖❖❖ Image Rotation
See p.85 “Image Rotation”.
❖❖❖❖ Make-up Printing
See p.97 “Make-up Printing”.
❖❖❖❖ Merging Images
See p.108 “Image Overlay”.
ABCDE ABCDE ABCDE ABCDE ABCDE
ABCDE ABCDE ABCDE ABCDE ABCDE
ABCDE ABCDE ABCDE ABCDE ABCDE
ABCDE ABCDE ABCDE ABCDE ABCDE
ABCDE ABCDE ABCDE ABCDE ABCDE
ABCDE ABCDE ABCDE ABCDE ABCDE
ABCDE ABCDE ABCDE ABCDE ABCDE
ABCDE ABCDE ABCDE ABCDE ABCDE
ABCDE ABCDE ABCDE ABCDE ABCDE
ABCDE ABCDE ABCDE ABCDE ABCDE
ABCDE ABCDE ABCDE ABCDE ABCDE
ABCDE ABCDE ABCDE ABCDE ABCDE
ABCDE ABCDE ABCDE ABCDE ABCDE
ABCDE ABCDE ABCDE ABCDE ABCDE
ABCDE ABCDE ABCDE ABCDE ABCDE
ABCDE ABCDE ABCDE ABCDE ABCDE
ABCDE ABCDE ABCDE ABCDE ABCDE
ABCDE ABCDE ABCDE ABCDE ABCDE
ABCDE ABCDE ABCDE ABCDE ABCDE
ABCDE ABCDE ABCDE ABCDE ABCDE
ABCDE ABCDE ABCDE ABCDE ABCDE
ABCDE ABCDE ABCDE ABCDE ABCDE
R
P
GRCOLO0E
ABCDE ABCDE ABCDE ABCDE ABCDE
ABCDE ABCDE ABCDE ABCDE ABCDE
ABCDE ABCDE ABCDE ABCDE ABCDE
ABCDE ABCDE ABCDE ABCDE ABCDE
ABCDE ABCDE ABCDE ABCDE ABCDE
ABCDE ABCDE ABCDE ABCDE ABCDE
ABCDE ABCDE ABCDE ABCDE ABCDE
ABCDE ABCDE ABCDE ABCDE ABCDE
ABCDE ABCDE ABCDE ABCDE ABCDE
ABCDE ABCDE ABCDE ABCDE ABCDE
ABCDE ABCDE ABCDE ABCDE ABCDE
ABCDE ABCDE ABCDE ABCDE ABCDE
ABCDE ABCDE ABCDE ABCDE ABCDE
ABCDE ABCDE ABCDE ABCDE ABCDE
ABCDE ABCDE ABCDE ABCDE ABCDE
ABCDE ABCDE ABCDE ABCDE ABCDE
ABCDE ABCDE ABCDE ABCDE ABCDE
ABCDE ABCDE ABCDE ABCDE ABCDE
ABCDE ABCDE ABCDE ABCDE ABCDE
ABCDE ABCDE ABCDE ABCDE ABCDE
ABCDE ABCDE ABCDE ABCDE ABCDE
ABCDE ABCDE ABCDE ABCDE ABCDE
GROVER0E
❖❖❖❖ Page Stamp
See p.113 “Page Stamp”.
❖❖❖❖ Stamp
See p.116 “Stamp”.
Priority
1
– 1 –
5
GRPAGE0E
RR
R
GROVER1E
R
R
Preliminary
Confidential
GRSTAM0E
ix
Page 13
❖❖❖❖ Memory Combine
See p.118 “Memory Combine”.
1
2
3
4
❖❖❖❖ Original Storage
See p.103 “Original Storage”.
12
43
GRMCOM0E
GRREPE0E
❖❖❖❖ Storage Overlay
See p.108 “Image Overlay”.
ABCDE ABCDE ABCDE ABCDE ABCDE
ABCDE ABCDE ABCDE ABCDE ABCDE
ABCDE ABCDE ABCDE ABCDE ABCDE
ABCDE ABCDE ABCDE ABCDE ABCDE
ABCDE ABCDE ABCDE ABCDE ABCDE
ABCDE ABCDE ABCDE ABCDE ABCDE
ABCDE ABCDE ABCDE ABCDE ABCDE
ABCDE ABCDE ABCDE ABCDE ABCDE
ABCDE ABCDE ABCDE ABCDE ABCDE
ABCDE ABCDE ABCDE ABCDE ABCDE
ABCDE ABCDE ABCDE ABCDE ABCDE
ABCDE ABCDE ABCDE ABCDE ABCDE
ABCDE ABCDE ABCDE ABCDE ABCDE
ABCDE ABCDE ABCDE ABCDE ABCDE
ABCDE ABCDE ABCDE ABCDE ABCDE
ABCDE ABCDE ABCDE ABCDE ABCDE
ABCDE ABCDE ABCDE ABCDE ABCDE
ABCDE ABCDE ABCDE ABCDE ABCDE
ABCDE ABCDE ABCDE ABCDE ABCDE
ABCDE ABCDE ABCDE ABCDE ABCDE
ABCDE ABCDE ABCDE ABCDE ABCDE
ABCDE ABCDE ABCDE ABCDE ABCDE
RR
ABCDE ABCDE ABCDE ABCDE ABCDE
ABCDE ABCDE ABCDE ABCDE ABCDE
ABCDE ABCDE ABCDE ABCDE ABCDE
ABCDE ABCDE ABCDE ABCDE ABCDE
ABCDE ABCDE ABCDE ABCDE ABCDE
ABCDE ABCDE ABCDE ABCDE ABCDE
ABCDE ABCDE ABCDE ABCDE ABCDE
ABCDE ABCDE ABCDE ABCDE ABCDE
ABCDE ABCDE ABCDE ABCDE ABCDE
ABCDE ABCDE ABCDE ABCDE ABCDE
ABCDE ABCDE ABCDE ABCDE ABCDE
ABCDE ABCDE ABCDE ABCDE ABCDE
ABCDE ABCDE ABCDE ABCDE ABCDE
ABCDE ABCDE ABCDE ABCDE ABCDE
ABCDE ABCDE ABCDE ABCDE ABCDE
ABCDE ABCDE ABCDE ABCDE ABCDE
ABCDE ABCDE ABCDE ABCDE ABCDE
ABCDE ABCDE ABCDE ABCDE ABCDE
ABCDE ABCDE ABCDE ABCDE ABCDE
ABCDE ABCDE ABCDE ABCDE ABCDE
ABCDE ABCDE ABCDE ABCDE ABCDE
ABCDE ABCDE ABCDE ABCDE ABCDE
GROVER0E
R
GROVER1E
x
Page 14

TABLE OF CONTENTS
Machine Exterior......................................................................................... 1
Machine Interior.......................................................................................... 2
Options........................................................................................................ 4
Operation Panel.......................................................................................... 5
Keys ............................................................................................................... 5
Indicators........................................................................................................ 7
Panel Display .............................................................................................. 8
Panel Display Layout ..................................................................................... 9
1.Operation
Print Paper ................................................................................................ 11
Originals.................................................................................................... 13
Printing Preparations............................................................................... 15
Loading Paper.............................................................................................. 15
Setting Up The Paper Delivery Tray ............................................................ 16
Entering a User Code to Use the Machine ............................................. 18
Standard Printing ..................................................................................... 19
Removing Prints........................................................................................... 20
Energy Saver Mode .................................................................................. 22
Auto Reset................................................................................................. 23
Adjusting the Position of Printed Images .............................................. 24
Adjusting the Image Density of Prints.................................................... 25
Before Making a Master ............................................................................... 25
After Making a Master .................................................................................. 25
Tint Mode................................................................................................... 26
Changing the Printing Speed .................................................................. 27
Stopping a Multi-print Run ...................................................................... 28
Stopping a Multi-print Run to Print Another Original .................................... 28
Changing the Number of Prints Entered and Checking Completed Prints... 28
Reducing and Enlarging Using Preset Ratios ....................................... 29
Auto Magnification ................................................................................... 31
Zoom.......................................................................................................... 34
Directional Magnification (%).................................................................. 36
Directional Magnification (Size) .............................................................. 38
Erasing Center and Edge Margins.......................................................... 40
Edge Erase................................................................................................ 41
xi
Page 15

Printing onto Various Kinds of Paper..................................................... 43
Printing onto Thick Paper............................................................................. 43
Printing onto Standard Paper....................................................................... 43
Printing onto Envelopes ............................................................................... 44
Printing onto Special Kinds of Paper............................................................ 44
Selecting Original Modes......................................................................... 46
Letter/Photo Mode Printing .......................................................................... 46
Photo Mode Printing..................................................................................... 47
Pencil Mode Printing .................................................................................... 48
Economy Mode......................................................................................... 50
Auto Cycle................................................................................................. 51
All Class Mode.......................................................................................... 52
Auto Class Mode ...................................................................................... 54
Manual Class Mode with One Original ................................................... 57
Manual Class Mode with two or More Originals.................................... 59
Class Mode................................................................................................ 62
Combine Originals.................................................................................... 64
Auto Combine Mode................................................................................. 69
Skip Feed Printing.................................................................................... 71
Programs................................................................................................... 73
Storing a Program ........................................................................................ 73
Protecting a Program ................................................................................... 74
Removing Program Protection ..................................................................... 74
Recalling a Program..................................................................................... 75
Security Mode........................................................................................... 76
Quality Start Mode.................................................................................... 77
Using Quality Start Manually........................................................................ 77
Job Separation.......................................................................................... 79
Conserving the Master............................................................................. 81
Double Feed.............................................................................................. 82
When a Double Feed is Detected ................................................................ 82
On Line Printing........................................................................................ 83
Auto On Line ................................................................................................ 84
Image Rotation.......................................................................................... 85
Make-up Printing Features ...................................................................... 86
Main Features .............................................................................................. 86
Make-up Modes for Designated Areas......................................................... 86
Make-up Modes for Outside Designated Areas ........................................... 88
Background Patterns.................................................................................... 89
xii
Page 16

Command Sheets for Make-Up Printing................................................. 90
Command Sheets ........................................................................................ 90
Making a Command Sheet........................................................................... 90
Command Sheets and Finished Prints......................................................... 95
Make-up Printing ...................................................................................... 97
Make-up Samples ................................................................................... 100
Original Storage...................................................................................... 103
Storing Originals......................................................................................... 103
Selecting Stored Originals.......................................................................... 105
Protecting Stored Originals ........................................................................ 105
Deleting Stored Originals ........................................................................... 106
Image Overlay......................................................................................... 108
Storage Overlay ......................................................................................... 108
On Line Overlay ......................................................................................... 109
Overlay Format .......................................................................................... 109
Date Stamp.............................................................................................. 111
Page Stamp............................................................................................. 113
Stamp....................................................................................................... 116
Memory Combine ................................................................................... 118
Combining onto a Single–sided Print ......................................................... 118
Repeat........................................................................................................ 123
2.Optional Functions
Optional Document Feeder.................................................................... 127
Originals ..................................................................................................... 127
Placing Originals ........................................................................................ 128
Combine Printing........................................................................................ 129
Manual Class Mode with Two or More Originals........................................ 130
Color Printing Using the Optional Color Drum.................................... 132
Making Color Prints.................................................................................... 132
Changing the Color Drum Unit ................................................................... 132
Printing in Two Colors................................................................................ 134
Changing the Drum Size........................................................................ 136
Printing Area (At 23°C/73°F, 65% RH)....................................................... 136
Master Cut Length...................................................................................... 136
3.Combination Chart
Combination Chart ................................................................................. 137
xiii
Page 17

4.User Tools
Accessing the User Tools...................................................................... 141
User Tools Menu..................................................................................... 143
1. System ................................................................................................... 143
2. Set Operat'n Mode ................................................................................. 144
3. Initial Setting........................................................................................... 145
4. Mode Setting .......................................................................................... 146
5. Stamp..................................................................................................... 151
6. Administrator Mode ................................................................................ 153
7. On Line Mode......................................................................................... 154
User Tool Menus in Detail...................................................................... 156
1-6 Time Setting......................................................................................... 156
3-4 Reproduction Ratio .............................................................................. 156
3-5 Class Enter No..................................................................................... 157
3-11 Margin Erase Area ............................................................................. 158
4-11 No. of Skip Feed ................................................................................ 159
4-14 No. of Q.start...................................................................................... 160
4-19 Type of Paper .................................................................................... 161
5-4 Stamp Position..................................................................................... 162
5-7 Position (Date) ..................................................................................... 163
5-10 Position (Page) .................................................................................. 164
5-11 Make/Chg. Pattern ............................................................................. 165
6-1 Check Counter ..................................................................................... 166
6-2 Reset Counters .................................................................................... 167
6-5 Chg. User Code ................................................................................... 168
6-6 Del. User Code .................................................................................... 168
5.Troubleshooting
If Your Machine Does Not Operate as You Want................................. 171
If You Cannot Make Prints as You Want .............................................. 173
Combine Originals Mode............................................................................ 173
Loading Paper......................................................................................... 174
xxxx Clearing Misfeeds.............................................................................. 175
”x + A” Paper Misfeeds in the Paper Feed Section.................................. 175
”x + A + B” Paper Misfeeds in the Paper Feed Section ........................... 176
”x + B” Paper or Master Wrapped Around the Drum................................ 177
”x + C” Paper Misfeeds in the Paper Exit Section.................................... 179
”x + D” Master Misfeeds in the Master Feed Section............................... 179
”x + D + B” Master Misfeeds in the Master Feed Section ........................ 180
”x + B + E” Master Misfeeds in the Master Eject Section......................... 181
”x + E” Master Misfeeds in the Master Eject Section ............................... 182
”x + P” Original Misfeeds Occur When Using the Optional Document Feeder
xiv
... 183
Page 18

When the Open Cover/Unit Indicator (MMMM) Lights................................. 185
When the Add Ink Indicator (jjjj) Lights................................................ 186
When the Master End Indicator (CCCC) Lights.......................................... 188
When the Master Eject Indicator (kkkk) Lights........................................ 190
When Other Indicators Are Lit............................................................... 191
When Prints Are Not Delivered in a Neat Stack................................... 192
When Printing on Small Size Paper ........................................................... 192
When the Machine Cannot Detect the Paper Size..................................... 192
Poor Printing........................................................................................... 193
Dirty Background........................................................................................ 193
Black Lines/Stained Prints ......................................................................... 196
Faint Prints ................................................................................................. 196
6.Remarks
Do's and Don'ts ...................................................................................... 197
Where to Put Your Machine................................................................... 199
Environment ............................................................................................... 199
Power Connection...................................................................................... 200
Machine Clearance .................................................................................... 200
Maintaining Your Machine..................................................................... 201
Cleaning the Main Frame........................................................................... 201
Cleaning the Optional Document Feeder ................................................... 202
7.Specifications
Main Frame.............................................................................................. 203
Document Feeder (Option) .................................................................... 207
Color Drum Type 80(L) A3, 11" ×××× 17" (Option)..................................... 207
Color Drum Type 80(S) A4, 81/2" ×××× 11" (Option) .................................. 207
Exposure Glass Cover (Option) ............................................................ 207
Printer Unit Type 80 RCP80 (Option).................................................... 207
Interface Cable Type 85 (Option) .......................................................... 207
Editing Function Type 85 (Option)........................................................ 208
PC Controller (Option) ........................................................................... 208
Key Counter (Option) ............................................................................. 208
Twin Color Press Roller Printing System TC-II (Option)..................... 209
Consumables.......................................................................................... 210
INDEX....................................................................................................... 211
xv
Page 19

xvi
Page 20
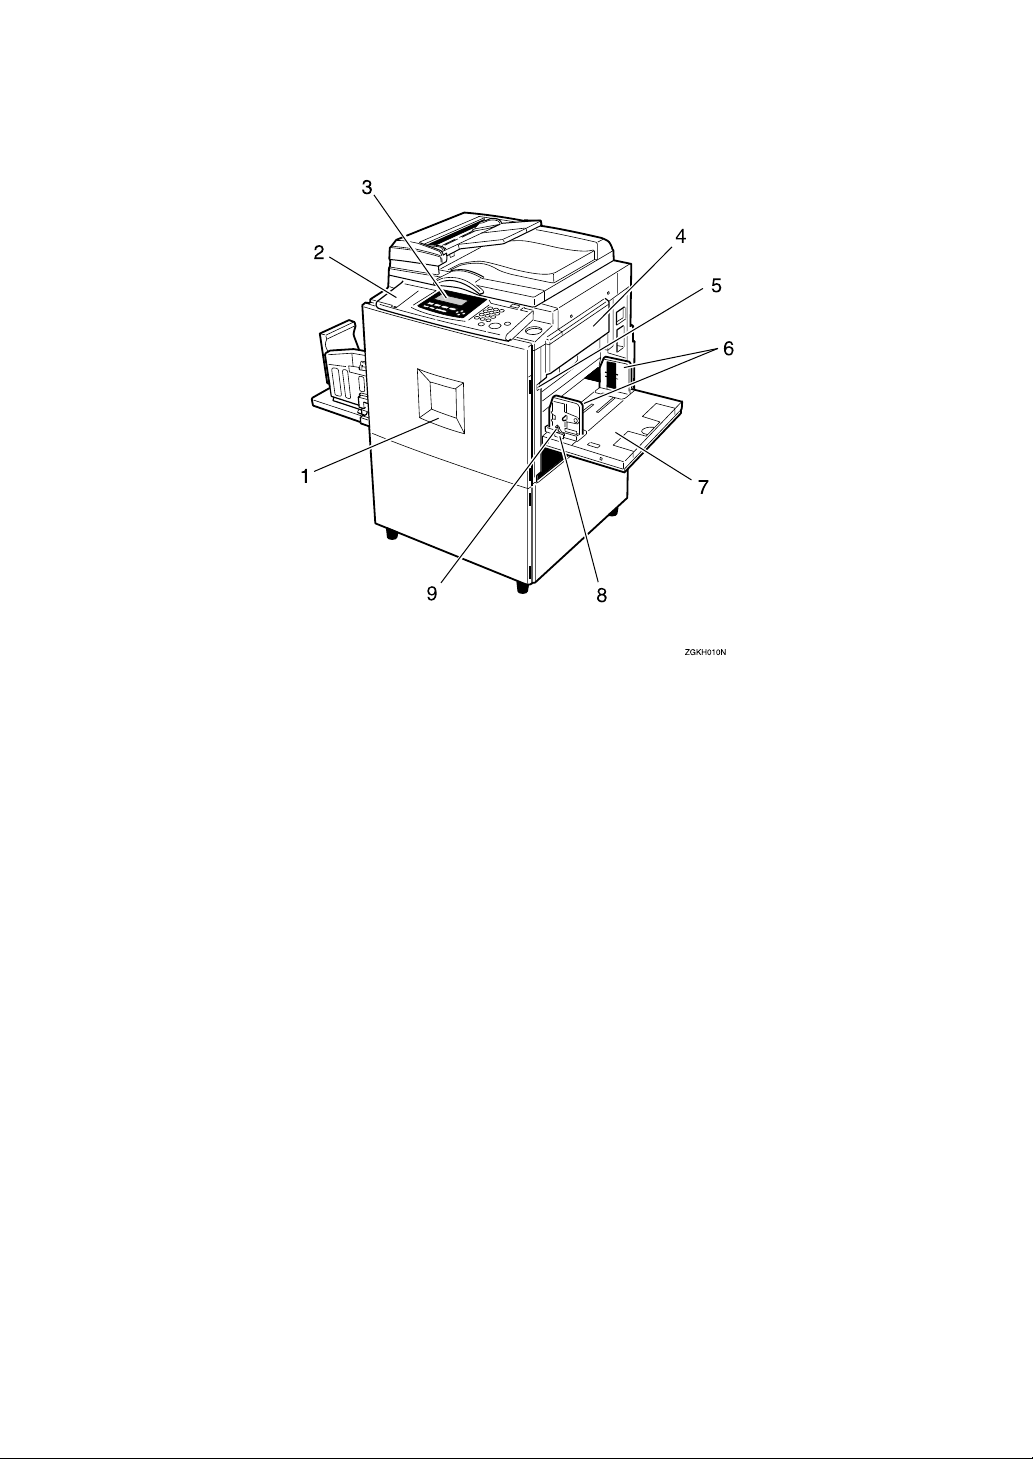
Machine Exterior
1. Front door
Open to access the inside of the machine.
2. Flip up cover
Flip up to access the keys underneath.
3. Operation panel
See p.5 “Operation Panel”.
4. Master tray
Open this unit when installing the master.
5. Paper feed tray down key
Press to lower the paper feed tray.
6. Paper feed side plates
Prevent paper skewing.
7. Paper feed tray
Load paper here.
8. Paper feed side plates knob
Use to move the side plates.
9. Paper feed side plates knob lock
lever
Locks the paper feed side plates.
1
Page 21
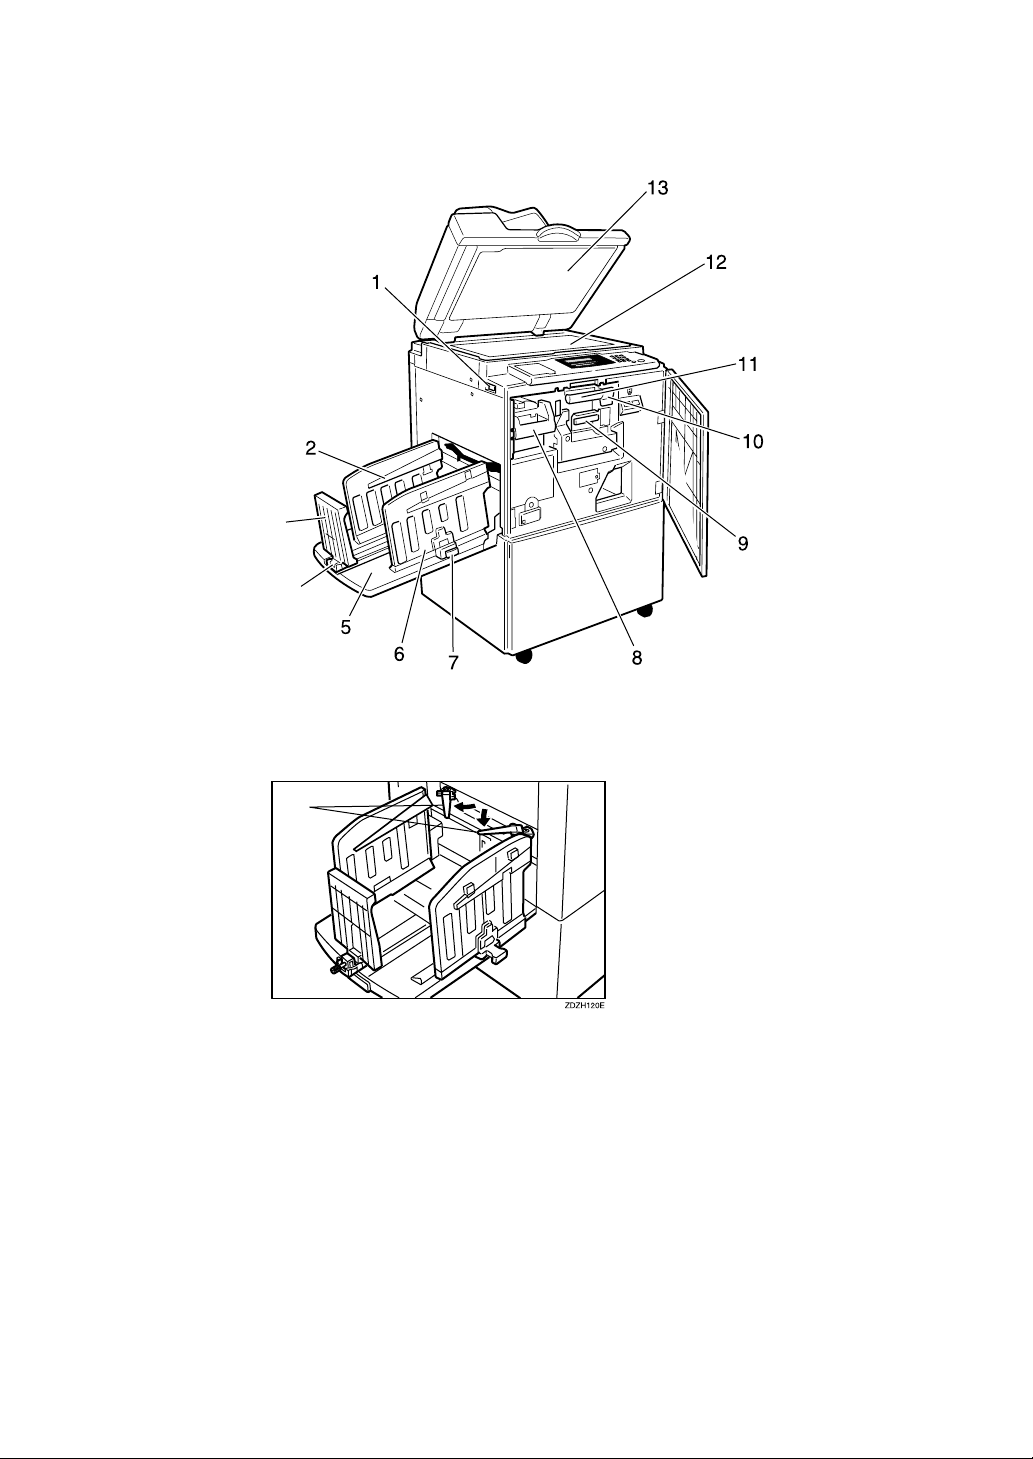
Machine Interior
3
4
14
1. Main switch
Use to turn the power on or off.
2. Paper alignment wings
Lift or lower the wings depending on the
type of paper being used.
3. Paper delivery end plate
This plate aligns the leading edge of
prints.
4. Paper delivery end plate knob
Use to move the end plate.
ZBHH180E
5. Paper delivery tray
Completed prints are delivered here.
6. Paper delivery side plates
These plates align the prints on the paper
delivery tray.
7. Paper delivery side plate knobs
Use to move the side plates.
8. Handle E1
Use to pull out the master eject unit.
2
Page 22

9. Ink holder
Set the ink cartridge in this holder.
10. Drum unit lock lever B1
Lower to unlock and pull out the drum
unit.
11. Drum unit
The master is wrapped around this unit.
12. Exposure glass
Position originals here face down for
printing.
13. Exposure glass cover or docu-
ment feeder (option)
Lower this cover over an original on the
exposure glass.
14. Trailing edge guides
Swing out these guides when you use A4,
1
/2" × 11"KL paper.
8
3
Page 23
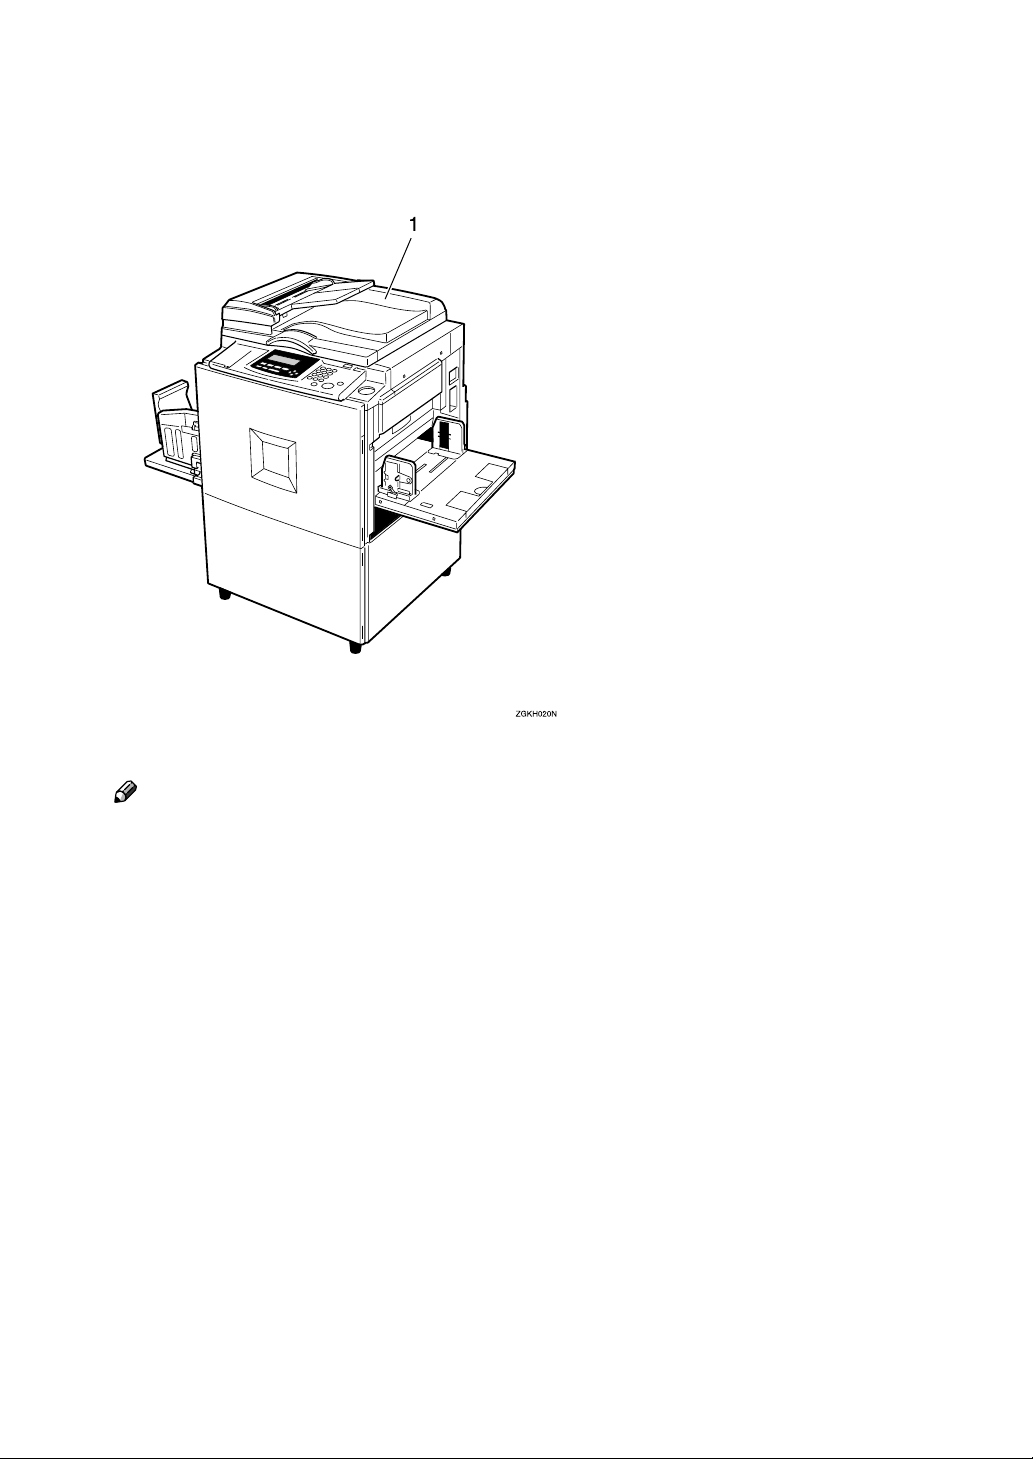
Options
❖❖❖❖ Document feeder
1. Document Feeder
Note
❒ Other options:
• Color Drum Type 80(L) A3, 11" × 17"
• Color Drum Type 80(S) A4, 8
• Exposure Glass Cover
• Printer Unit Type 80 RCP80
• Interface Cable Type 85
• Editing Function Type 85
• Key Counter
• PC Controller
• Twin color press roller printing system TC-II
1
/2" × 11"
4
Page 24

Operation Panel
Keys
Auto On Line
lay
Original Storage
1. {
{Quality Start}}}} key
{{
See p.77 “Quality Start Mode”.
2. {
{Security}}}} key
{{
See p.76 “Security Mode”.
3. {
{Skip Feed}}}} key
{{
Press to select skip feed printing. See p.71
“Skip Feed Printing”.
4. {
{User Tools}}}} key
{{
Press to change the default settings to
meet your requirements.
5. {
{Stamp}}}} key
{{
Press to select the Stamp mode. See p.111
“Date Stamp”, see p.113 “Page Stamp”,
see p.116 “Stamp”.
ZDZS200N
9. {
{Image Density}}}} key
{{
Press to make prints darker or lighter. See
p.25 “Adjusting the Image Density of
Prints”.
10. {
{Economy Mode}}}} key
{{
Press to save ink. See p.50 “Economy
Mode”.
11. {
{Original Storage}}}} key
{{
Press to select the Original Storage function. See p.103 “Original Storage”.
12. {
{On Line}}}} key
{{
See p.83 “On Line Printing”.
13. {
{Auto On Line}}}} key
{{
See p.83 “On Line Printing”.
6. {
{Make-Up}}}} key
{{
Press to select the Make-up mode. See
p.97 “Make-up Printing”.
7. {
{Overlay}}}} key
{{
Press to select the Image Overlay mode.
See p.108 “Image Overlay”.
8. {
{Edge Erase}}}} key
{{
Press to select Edge Erase mode. See p.41
“Edge Erase”.
14. {
{Job Separator}}}} key
{{
See p.79 “Job Separation”.
15. {
{Combine}}}} key
{{
Press to combine originals onto one print.
See p.64 “Combine Originals”, see p.118
“Memory Combine”, see p.69 “Auto
Combine Mode”.
5
Page 25

{{{{Class}}}} key
16.
Press to select All Class, Auto Class,
Manual Class, or Class mode. See p.52
“All Class Mode”, see p.54 “Auto Class
Mode”, see p.57 “Manual Class Mode
with One Original”, see p.59 “Manual
Class Mode with two or More Originals”,
see p.62 “Class Mode”.
17. {
Press to adjust the printing speed. See
p.25 “Adjusting the Image Density of
Prints”, see p.27 “Changing the Printing
Speed”.
18.
Press to shift the image forward, backward, right, or left. See p.24 “Adjusting
the Position of Printed Images”.
Also use to highlight items you wish to
select on the panel display.
19. {
Press to enter or recall programs. See p.73
“Programs”.
} {{{{VVVV}}}} keys (Speed keys)
{{{WWWW}}}
{{{{~~~~}}}}{{{{}}}}}}}}{{{{||||}}}}{{{{{{{{}}}} keys
{Program}}}} key
{{
20. Number keys
Press to enter the desired number of
prints and data for selected modes.
21. {
{Clear/Stop}}}} key
{{
Press to stop printing.
22. {
Use to enter data in selected modes.
{{{qqqq}}}
} key
23. {
{Clear Modes/Energy Saver}}}} key
{{
Press to clear any previously entered job
settings.
24. {
{Start}}}} key
{{
Press to make a master.
25. {
{Auto Cycle}}}} key
{{
Use to process the master and make
prints in one operation. See p.51 “Auto
Cycle”.
26. {
{Proof}}}} key
{{
Press to make proof prints.
27. {
{Print}}}} key
{{
Press to start printing.
6
Page 26

Indicators
1. Special feature indicator
Lights to indicate that special features
have been selected. To access the special
features, lift up the cover on the left side
of the operation panel.
2. Monitor indicators
These indicators light to inform you of
the status of the machine. See p.171 “If
Your Machine Does Not Operate as You
Want”.
3. A3/11" ×
Lights when the A3, 11" × 17" drum unit
is installed. See p.136 “Changing the
Drum Size”.
4. A4, 8
Lights when the A4, 81/2" × 11" drum unit
is installed. See p.136 “Changing the
Drum Size”.
× 17" drum indicator
××
1
/2" ×××× 11" drum indicator
5. Color drum indicator
Lights when the color drum unit is installed. See p.132 “Color Printing Using
the Optional Color Drum”.
6. Counter
Displays the number of prints entered.
While printing, it shows the number of
prints remaining.
7. Panel display
See p.8 “Panel Display”.
8. Data In indicator (Green)
Indicates the status of this machine:
• On: Data waiting for Master Making
and printing is in the mchine.
• Blinking: Data is being received, or
Master Making or printing is in
progress.
• Off: Master Making and printing are
completed.
9. Error indicator (Red)
Indicates the status of this machine:
• On: An error has occurred. Master
Making and printing stops.
• Off: Normal status
7
Page 27

Panel Display
The panel display shows the machine status, error messages, and function
menus.
ZBZX170N
1. Items for the selected function
2. These keys correspond to the se-
3. Machine status or messages
4. Items which can be selected
lectable items shown above them on
the panel display. To select an item
shown on the panel display, press
the key directly below it.
Important
❒ Strong impact or pressure exceeding 30N will damage the panel display.
Note
❒ When you select an item on the panel display, it is highlighted (e.g. ).
Items shown grayed-out (e.g. ) cannot be selected.
OK
Auto
❒ Common panel display items
[OK] Confirms a function selection or enters a value.
[Cancel] Cancels a function selection or entered value and returns to
the previous display.
[Prev.][Next] When there are too many items to fit on the panel display, use
these keys to move between pages.
{{{{~~~~}}}}{{{{}}}}}}}}{{{{||||}}}}{{{{{{{{}}}}[←
←][→→→→] Press to highlight items you wish to select on the panel dis-
←←
play.
[Select] Selects a value.
[Exit] Returns to the previous display.
8
Page 28

Panel Display Layout
The basic elements used on the panel display are shown below. Understanding
their meaning helps you use this machine's features quickly and easily.
❖❖❖❖ Sample display when selecting the [Original] key
ZBZX180N
1. Machine status or message
2. Available functions
When the [Original] key is pressed, the following display is shown.
3. Illustrations of displays in this
manual show the next key to be
pressed whitened
1. Available functions
2. Confirms the settings
9
Page 29

10
Page 30

1. Operation
Print Paper
The following limitations apply
Paper Size Paper
Metric Inch
Paper feed tray A3 L, B4 L, A4 L K, B5 L K,
A5 L, B6 L, A6 L, Others (Vertical: 70 - 297mm, Horizontal: 148
- 432mm)
Non-recommended paper:
• Roughly cut paper
• Paper of different thickness in the same stack
• Envelopes heavier than 85g/m
2
, 22 lb.
• Folded, curled, creased, or damaged paper
11" × 17" L, 8
1
8
/2" × 11" L K, 51/2" ×
1
8
/2" L K, Others (Vertical: 2.76" - 11.7", Horizontal: 5.83" - 17")
1
/2" × 14" L,
Weight
47.1 -
209.3g/m
12.5 - 55.6 lb
2
,
• Torn paper
• Slippery paper
• Rough paper
• Paper with any kind of coating (such as carbon)
• Short grain paper
• Thin paper that has low stiffness
• Paper that may create a lot of dust
• Grained paper with the direction of the grain running opposite to the feed di-
rection
• Certain types of long thin envelopes.
E.g. international mail envelopes
11
Page 31

1
Operation
• The following types of envelopes
Note
❒ If you print on rough grained paper, the copy image might be blurred.
❒ You can use A3 (297 × 420mm) or 11" × 17" originals or printing paper. When
you want to print the entire image of an A3, 11" × 17" original, select Reduce
mode because the maximum print areas are as follows:
• Metric version: 290 × 409mm, 11.4" × 16.1"
• Inch version: 290 × 419mm, 11.4" × 16.4"
❒ When you use A3, 11" × 17" and 209.3g/m
speed down to setting 1, 2, or 3.
2
, 55.6 lb paper, slow the printing
Important
❒ Correct curls in the paper before placing it in the machine. When you cannot
correct the paper curl, stack the paper with the curl face down or face up as
shown in the illustration. If the paper is curled, it might wrap around the
drum or stains might appear.
12
Page 32

Originals
R
R
Originals
The machine can detect the following original sizes placed on the exposure glass.
Metric version A3L, B4L, A4KL, B5KL
Inch version
If the machine cannot detect the original sizes properly, select the area to copy
with the {{{{Edge Erase}}}} key. See p.41 “Edge Erase”. The machine may not detect
the original size properly when:
• Originals contain index tabs.
• Originals are OHP transparencies or are translucent.
• Originals are dark.
• Originals contain solid images.
• Originals are of sizes other than those listed above.
If you do not lift the exposure glass cover more than 30cm, 12" when you place
another original, the machine might not detect the next original size correctly.
The maximum original size you can place on the exposure glass is 304.8 ×
432mm, 12" × 17".
If you use originals that have bold letters or solid images at the leading edges,
you might get prints with dirty edges. In this case, place the original face down
with the widest margin toward the paper delivery tray or raise the printing
speed.
Make sure any correction fluid or ink is completely dry before placing originals
on the exposure glass. Not taking this precaution could mark the exposure glass
and cause marks to be printed.
11" × 17"L, 8
1
/2" × 14"L, 81/2" × 11"KL
1
In most situations, place originals as shown below.
R
R
ZDZX030E
When the original is placed in a direction that differs from the print paper, the
machine automatically rotates the original image by 90° to match the print paper
direction.
The first 8mm, 0.32", of the leading edge and the last 2mm, 0.08", of the trailing
edge cannot be printed. Make sure the leading edge margin is at least 8mm,
0.32", and the trailing edge margin is at least 2mm, 0.08".
13
Page 33

1
Operation
Original Print
a
a = 8mm, 0.32"
14
Page 34

Printing Preparations
Loading Paper
Carefully open the paper feed
AAAA
tray.
ZDCY130E
Lift the paper feed side plates.
BBBB
Printing Preparations
Make sure that the paper feed side
CCCC
plates knob lock lever is raised
(lock is released), and then grasp
the paper feed side plates knob
and adjust the paper feed side
plates to match the paper size.
1
ZDCY01
ZDCH050E
Note
❒ When loading larger paper,
slide out the extender.
Important
❒ Always adjust the position with
the lock lever for the paper feed
side plates in the raised position
(lock released).
Place the paper on the paper feed
DDDD
tray.
Note
❒ Correct the paper curl before
loading the paper. If you cannot
do so, stack the paper with the
curl face down.
TPEY040E
Reference
See p.11 “Print Paper”.
15
Page 35

1
1
Operation
Make sure that the paper feed
EEEE
side plates are touching both
sides of the paper, and then push
the lock lever for the side plates
down to lock the side plates into
position.
Important
❒ Always make sure that you
push the lock lever for the side
plates down to lock the side
plates into position.
ZDCY04
Setting Up The Paper Delivery
Tray
Raise the paper delivery tray
AAAA
slightly, and then gently lower it
with your hand.
ZBHH050E
Raise each paper delivery side
BBBB
plate, and then grasp the side
plate knobs and move the paper
delivery side plates to match the
print paper size.
Note
❒ Make sure that the paper size
and direction in the panel display correspond with the actual
paper size and direction set on
the paper feed tray.
ZDZH180E
Note
❒ The inside of the plates should
correspond to the paper size.
When you use thick paper (128 g/m2
to 209.3 g/m2, 34 lb to 55.6 lb)
A Adjust the side plates to match
the paper size scale on the
main frame side.
16
Page 36

Printing Preparations
When you use standard paper
(47.1 g/m2 to 105 g/m2, 12.5 lb to
28 lb)
A Adjust the side plates to match
the paper size scale on the end
plate side.
Lower or lift the paper alignment
CCCC
wings by turning the left and
right knobs.
Note
❒ When the guides are up, you
might not be able to load the
unit to full capacity (1,000
sheets) depending on the paper
you are using.
When you use 81.4 g/m2, 21.6 lb
or thinner and A4, 81/2 × 11" or
larger paper
A
Lift the paper alignment wings.
When you use A4, 8 1/2" × 11"KL
paper
A Swing out the guides as shown
in the illustration.
Turn on the main switch.
DDDD
1
ZDZY020E
❒ Lift the paper alignment wings
if B5L prints are curled.
When you use 81.4 g/m2, 21.6 lb
or thicker paper
A Lower the paper alignment
wings.
When you use 81.4 g/m2, 21.6 lb
or thinner and B5 or smaller
paper
A Lower the paper alignment
wings.
TPEH021E
Note
❒ You can have the machine dis-
play how much ink and master
are left when you switch it on.
See “User Tools—Ink/Master
Left” on p.146 “4. Mode Setting”.
17
Page 37

Operation
Entering a User Code to Use the Machine
1
If user codes are turned on, operators
must enter their user code before they
can use the machine. The machine
keeps count of the number of copies
made under each user code.
Note
❒ If you want to use this feature, you
must turn it on and register the
user codes with the user tools. You
can register up to 20 user codes.
See “Set User Code” and “Reg.
User Code” on p.153 “6. Adminis-
trator Mode”.
❒ When user codes are turned on,
the machine will prompt you for
your user code when you turn on
the main switch or after the machine has been reset.
Enter your 4–digit user code with
AAAA
the number keys.
Press the {{{{qqqq}}}} key.
BBBB
Make your prints.
CCCC
To prevent others from making
DDDD
prints with your user code, hold
down the {{{{Clear Modes/Energy Sav-
er}}}} key, and then press the
{{{{Clear/Stop}}}} key.
18
Note
❒ User codes are not displayed on
the panel display.
❒ To change the number entered,
press the {{{{Clear/Stop}}}} key and
enter the new number.
Page 38

Standard Printing
Standard Printing
Make sure that the machine is
AAAA
ready for printing.
If user codes are turned on, enter
BBBB
your user code with the number
keys, and then press the {{{{qqqq}}}} key.
Reference
See p.18 “Entering a User Code
to Use the Machine”.
Make sure that there are no previ-
CCCC
ous settings remaining.
Note
❒ To clear any previous settings,
press the {{{{Clear Modes/Energy
Saver}}}} key.
Lift the exposure glass cover.
DDDD
Place the original face down on
EEEE
the exposure glass. The original
should be aligned with the reference mark and the left corner
scale.
1. Left corner scale
2. Reference mark
Lower the exposure glass cover.
FFFF
Make your desired settings.
GGGG
Press the {{{{Start}}}} key.
HHHH
1
TPEH010E
Note
❒ Be sure to lift the exposure glass
cover more than 30cm, 12".
A trial print is delivered to the paper delivery tray.
19
Page 39

Operation
1
Press the {{{{Proof}}}} key and check
IIII
the image density and the image
position on the proof print.
Note
❒ If the image position is not cor-
rect, adjust it using the [Image
====] key. See p.24 “Adjusting the
Position of Printed Images”.
❒ If the image density is slightly
dark or light, adjust the image
density using the {{{{WWWW}}}}{{{{VVVV}}}} keys.
See p.25 “Adjusting the Image
Density of Prints”.
Enter the number of prints re-
JJJJ
quired with the number keys.
Press the {{{{Print}}}} key.
KKKK
Note
❒ To stop the machine during a
multi-print run, press the
{{{{Clear/Stop}}}} key.
❒ To return the machine to the ini-
tial condition after printing,
press the {{{{Clear Modes/Energy
Saver}}}} key.
Removing Prints
Pull the front paper delivery side
AAAA
plate down towards you to open.
20
Note
❒ To change the number entered,
press the {{{{Clear/Stop}}}} key and
enter the new number.
Note
❒ You cannot open the rear paper
delivery side plate.
Page 40

Remove the prints from the paper
BBBB
delivery tray and close the paper
delivery side plate.
Standard Printing
1
21
Page 41

1
Operation
Energy Saver Mode
If you do not operate the machine for a certain period the machine can enter
Idling for pre-printing function to remove ink from inside the ink drum, and
then the machine can enter Energy Saver mode to save energy consumption.
You can press the {{{{Clear Modes/Energy Saver}}}} key to cancel Energy Saver mode
and return the machine to the ready condition.
Idling for pre-printing function helps to reduce excess ink when printing. It reduces recovery time from Energy Saver mode.
Energy Saver mode uses less electricity.
Note
❒ If you press the {{{{Clear Modes/Energy Saver}}}} key for more than three seconds,
the machine will enter Idling for pre-printing function, and then it will enter
Energy Saver mode.
❒ You can change the setting so that the machine does not enter Idling for pre-
printing function. See “Setting Q.start” on p.146 “4. Mode Setting”.
❒ Idling for pre-printing function lasts for a few seconds.
❒ You can change the time the machine waits before Energy Saver mode starts.
See “Energy Saving” on p.143 “1. System”.
❒ The machine will not automatically enter Energy Saver mode in the following
cases:
• If there is no ink
• If originals or paper are jammed
• If the machine is making master or printing
• If the machine is printing the second page of a combined print job
• If the machine is loading original images in memory
• If there is no paper
• If there is no master
• If the paper delivery box is full
• If originals are left on the document feeder
• If there are originals still on the machine
• If the “cover open” message is displayed
• If the settings have been reset to their defaults
• If there are prints in the sorter's paper delivery tray
• If the User Code entry screen is displayed
22
Page 42

Auto Reset
Auto Reset
If you do not operate the machine for a certain period after printing, the machine
will return to the initial condition. This function is called “Auto Reset”.
Note
❒ You can change the time the machine waits before Auto Reset starts. See “Au-
to Reset” on p.143 “1. System”.
❒ The machine will not enter Auto Reset in the following cases:
• If there is no ink
• If originals or paper are jammed
• If the machine is making master or printing
• If the machine is printing the second page of a combined print job
• If the machine is loading original images in memory
• If there is no paper
• If there is no master
• If the paper delivery box is full
1
• If originals are left on the document feeder
• If the “cover open” message is displayed
• If the settings have been reset to their defaults
• If you select “Off” for “Auto Reset” with the user tools
23
Page 43

Operation
Adjusting the Position of Printed Images
1
Use the following procedure to adjust
the position of print images as required.
GRPOSI0E
* Paper feed direction
Limitation
❒ For 308 mm, 12.2"-width paper,
you can only adjust the position of
the print image 5 mm, 0.2" up or
down.
Note
❒ When the main switch is turned
off, the position returns to the default.
Press the [Image ====] key.
AAAA
Adjust image position using the
BBBB
{{{{~~~~}}}}, {{{{}}}}}}}}, {{{{||||}}}}, and {{{{{{{{}}}} keys.
Note
❒ When you shift the image for-
ward, leave a 10mm, 0.4" margin at the leading edge. If there
is no margin, paper might wrap
around the drum and cause a
misfeed.
❒ The {{{{~~~~}}}} and {{{{}}}}}}}} keys shift the
image up to 15mm, 0.6" each
way in 0.5mm, 0.02" steps.
❒ The {{{{||||}}}} and {{{{{{{{}}}} keys shift the
image up to 10mm, 0.4" each
way in 0.5mm, 0.02" steps.
Press the [OK] key.
CCCC
24
Note
❒ You can skip step A and adjust
the image position directly by
pressing the {{{{~~~~}}}}, {{{{}}}}}}}}, {{{{||||}}}},
and {{{{{{{{}}}} keys.
Press the {{{{Proof}}}} key to check the
DDDD
image position.
Page 44

Adjusting the Image Density of Prints
Adjusting the Image Density of Prints
There are two ways to adjust the image density of prints:
❖❖❖❖ Before making a master
Use the {{{{Image Density}}}} key.
❖❖❖❖ After making a master
Use the {{{{WWWW}}}}{{{{VVVV}}}} (Speed) keys.
Before Making a Master
Press the {{{{Image Density}}}} key to
AAAA
adjust the image density.
Image Density
Skip Feed
Stamp
Make-Up
Over lay
Edge Erase
Lighter
Normal
Darker 1
Darker 2
Economy Mode
Original Storage
On Line
Auto On Line
Job Separator
ZDZS010N
After Making a Master
To increase the image density,
AAAA
press the {{{{WWWW}}}} key. To reduce the
image density, press the {{{{VVVV}}}} key.
Note
❒ The faster the printing speed be-
comes, the lighter the printing
density is. If you want darker
prints, decrease the printing
speed.
1
Press the {{{{Start}}}} key.
BBBB
25
Page 45

1
Operation
Tint Mode
Use this function to make halftone
prints.
GRTINT0E
Press the [Original] key.
AAAA
Select the [Tint] with the [←←←←] [→→→→]
BBBB
or {{{{~~~~}}}} {{{{}}}}}}}} keys.
Press the {{{{Start}}}} key.
CCCC
26
Page 46

Changing the Printing Speed
Use the {{{{WWWW}}}} or {{{{VVVV}}}} key to adjust the
printing speed. The relationship between printing speed and print quality depends on the type of paper you
use.
Press the {{{{VVVV}}}} key to increase the
AAAA
speed and press the {{{{WWWW}}}} key to reduce the speed.
Changing the Printing Speed
1
Note
❒ The following speeds are avail-
able:
• Setting 1:
60 sheets/minute
• Setting 2:
75 sheets/minute
• Setting 3 (default):
90 sheets/minute
• Setting 4:
105 sheets/minute
• Setting 5:
120 sheets/minute
❒ The faster the printing speed be-
comes, the lighter the printing
density is, and vice versa.
❒ When the machine is used in
low temperature conditions, the
image density might decrease.
In this case, slow the printing
speed down to setting 1 or 2.
27
Page 47

Operation
Stopping a Multi-print Run
1
Stopping a Multi-print Run to
Print Another Original
Press the {{{{Clear/Stop}}}} key.
AAAA
Set the original.
BBBB
Enter the number of prints and
CCCC
press the {{{{Start}}}} key.
Changing the Number of
Prints Entered and Checking
Completed Prints
Press the {{{{Clear/Stop}}}} key.
AAAA
Change the number of prints or
BBBB
check the completed prints.
Note
❒ To change the number of prints,
press the {{{{Clear/Stop}}}} key, and
then re-enter the number of
prints with the number keys.
28
Press the {{{{Print}}}} key.
CCCC
Page 48

Reducing and Enlarging Using Preset Ratios
Reducing and Enlarging Using Preset
Ratios
Use this function to have originals reduced or enlarged by a preset ratio. A
total of 7 ratios are available (3 enlargement ratios, 4 reduction ratios).
GRRATI0E
Note
❒ The leading edge of the print im-
age does not shift when a print image is made with this function.
❒ You can select a ratio regardless of
the size of an original or printing
paper. With some ratios, parts of
the image might not be printed or
margins will appear on prints.
❒ You can change the preset repro-
duction ratios with the user tools.
See “Reproduction Ratio” on p.156
“3-4 Reproduction Ratio”.
❒ Prints can be reduced or enlarged
as follows.
❖❖❖❖ Metric version
Ratio (%) Original →→→→ Print paper size
141 A4 → A3, A5 → A4, B5 → B4
122 A4 → B4, A5 → B5
115 B4 → A3, B5 → A4
93 —
87 A3 → B4, A4 → B5
82 B4 → A4, B5 → A5
1
1. Place on the exposure glass
2. Place in the optional document
feeder
* Paper feed direction
a = 8mm, 0.32"
71 A3 → A4, A4 → A5, B4 → B5
❖❖❖❖ Inch version
Ratio (%) Original →→→→ Print paper size
155 5
129 8
121 8
93 —
77 8
74 11" × 15" → 8
65 11" × 17" → 8
1
/2" × 8 1/2" → 8 1/2" × 14"
1
/2" × 11" → 11" × 17", 5
1
/2" × 8 1/2" → 8 1/2" × 11"
1
/2" × 14" → 11" × 17"
1
/2" × 14" → 8 1/2" × 11"
1
/2" × 11"
1
1
/2" × 11" → 5 1/2" × 8 1/2"
/2" × 11", 8
29
Page 49

Operation
1
Press the [Ratio] key.
AAAA
Select the desired ratio with the
BBBB
[←←←←] [→
→] or {{{{~~~~}}}} {{{{}}}}}}}} keys.
→→
Press the [OK] key.
CCCC
Check the image position on the
GGGG
trial or proof print.
Note
❒ If the image position is not cor-
rect, adjust it using the [Image
====] key. See p.24 “Adjusting the
Position of Printed Images”.
Make your prints.
HHHH
Make sure that the original and
DDDD
the print paper are the correct
size.
Place your original on the expo-
EEEE
sure glass or in the optional document feeder.
Press the {{{{Start}}}} key.
FFFF
30
Page 50

Auto Magnification
Auto Magnification
Use this function to have the machine choose an appropriate enlargement or reduction ratio based on the size of your original and the paper size you select.
GRAUTO0E
Note
❒ The range of ratios which the machine can select depends on where you place
the original:
• On the exposure glass: 50 – 200%
1
❒ The table below shows the reproduction ratios that can be selected for various
combinations of original and paper size.
❖❖❖❖ Metric version
Original A3L B4L A4L A4K B5L B5K A5L
*2
Paper
A3L 100% 115% 141% -- 163% -- 200% --
B4L 87% 100% 122% -- 141% -- 173% --
A4L 71% 82% 100% 100%
A4K 71%
*1
82%
*1
100%
*1
B5L 61% 71% 87% 87%
B5K 61%
*1
71%
*1
87%
*1
A5L 50% 50% 71% 71%
B6L -- 50% 61% 61%
*1
The machine automatically rotates the original image by 90° to match the paper
*1
115% 115%
100% 115%
*1
100% 100%
87% 100%
*1
82% 82%
*1
71% 71%
*1
*1
*1
141% 141%
115% 141%
*1
122% 122%
100% 122%
*1
100% 100%
*1
87% 87%
*1
*1
direction and selects an appropriate reproduction ratio. See p.85 “Image Rotation”.
*2
Place these originals in the optional document feeder.
A5K
141%
122%
*2
*1
*1
*1
*1
31
Page 51

Operation
❖❖❖❖ Inch version
1
1
Original 11" ×
Paper
11" × 17"L 100% 121% 129% -- 200% --
1
8
/2" ×
14"L
1
8
/2" ×
11"L
81/2" ×
11"K
1
/2" ×
8
1
/2" L
5
*1
The machine automatically rotates the original image by 90° to match the paper
17"L
77% 100% -- -- 155% --
65% 77% 100% 100%
65%
50% 61% 65% 65%
8
/2" ×
14"L
*1
77%
*1
1
8
/2" ×
11"L
100%
1
8
/2" ×
11"K
*1
*1
100% 129%
*1
1
8
/2" ×
1
5
/2"L
129% 129%
*1
100% 100%
*2
81/2 × 51/2"
*2
K
129%
*1
*1
direction and selects an appropriate reproduction ratio. See p.85 “Image Rotation”.
*2
Place these originals in the optional document feeder.
❒ Depending on the original type, a suitable reproduction ratio might not be
able to be selected. See p.13 “Originals” and see p.127 “Originals”.
Place your original on the exposure glass or in the optional document feed-
AAAA
er.
Press the [Ratio] key.
BBBB
Select [Auto] with the [
CCCC
Press the [OK] key.
DDDD
] or {{{{}}}}}}}} key.
→→→→
32
Page 52

Auto Magnification
Press the {{{{Start}}}} key.
EEEE
Check the image position on the trial or proof print.
FFFF
Note
❒ If the image position is not correct, adjust it using the [Image ====] keys. See
p.24 “Adjusting the Position of Printed Images”.
Make your prints.
GGGG
1
33
Page 53

Operation
Zoom
1
Use this function to fine-tune the reproduction ratio in increments of 1%.
GRZOOM0E
Note
❒ The range of ratios you can select
depends on where you place the
original:
• On the exposure glass: 50–200%
Press the [Ratio] key.
AAAA
Note
❒ To select a custom ratio, select
the closest ratio with the [←←←←]
[→
→] or {{{{~~~~}}}} {{{{}}}}}}}} keys. Then
→→
press the {{{{||||}}}} or {{{{{{{{}}}} key and go
to step F.
Press the [OK] key.
CCCC
Make sure that [Zoom] is selected.
DDDD
Press the [OK] key.
EEEE
Select the desired reproduction
FFFF
ratio in one of the following
ways:
Note
❒ To change the value entered,
press the {{{{Clear/Stop}}}} key and
enter the new value.
34
Select [Mag.] with the [→
BBBB
key.
→] or {{{{}}}}}}}}
→→
Using the [←←←←] [→
keys
A Adjust the ratio with the [←←←←]
[→
→] or {{{{~~~~}}}} {{{{}}}}}}}} keys.
→→
→] or {{{{~~~~}}}} {{{{}}}}}}}}
→→
Page 54

Using the number keys
A Enter the ratio with the num-
ber keys.
B Press the {{{{qqqq}}}} key.
Check the image position on the
KKKK
trial or proof print.
Note
❒ If the image position is not cor-
rect, adjust it using the [Image
====] key. See p.24 “Adjusting the
Position of Printed Images”.
Make your prints.
LLLL
Zoom
1
Press the [OK] key.
GGGG
Make sure that the original and
HHHH
the print paper are the correct
size.
Place your original on the expo-
IIII
sure glass or in the optional document feeder.
Press the {{{{Start}}}} key.
JJJJ
35
Page 55

Operation
Directional Magnification (%)
1
Use this function to choose different
reproduction ratios for the horizontal
and vertical directions. The result is a
squeezing or stretching effect.
a%
b%
CP2P01EE
Note
❒ The range of ratios you can select
depends on where you place the
original:
• On the exposure glass: 50 –
200%
Press the [Ratio] key.
AAAA
Select [Direct.Mag.(%)] with the [→→→→]
DDDD
or {{{{}}}}}}}} key.
Press the [OK] key.
EEEE
Enter the vertical and horizontal
FFFF
ratio.
Note
❒ To change the value entered,
press the {{{{Clear/Stop}}}} key and
enter the new value.
36
Select [Mag.] with the [→
BBBB
key.
Press the [OK] key.
CCCC
→] or {{{{}}}}}}}}
→→
Adjusting ratios with the [←←←←] [→→→→]
or {{{{~~~~}}}} {{{{}}}}}}}} keys
A Adjust the vertical ratio with
the [←←←←] [→
B Press the {{{{{{{{}}}} key.
C Adjust the horizontal ratio
with the [←←←←] [→
keys.
Entering ratios with the number
keys
A Enter the vertical ratio with the
number keys.
B Press the {{{{qqqq}}}} key.
→] or {{{{~~~~}}}} {{{{}}}}}}}} keys.
→→
→] or {{{{~~~~}}}} {{{{}}}}}}}}
→→
Page 56

C Enter the horizontal ratio with
the number keys.
D Press the {{{{qqqq}}}} key.
Press the [OK] key.
GGGG
Make sure that the original and
HHHH
the print paper are the correct
size.
Place your original on the expo-
IIII
sure glass or in the optional document feeder.
Press the {{{{Start}}}} key.
JJJJ
Directional Magnification (%)
1
Check the image position on the
KKKK
trial or proof print.
Note
❒ If the image position is not cor-
rect, adjust it using the [Image
====] key. See p.24 “Adjusting the
Position of Printed Images”.
Make your prints.
LLLL
37
Page 57

Operation
Directional Magnification (Size)
1
Use this function to have the machine
select suitable reproduction ratios
based upon the dimensions of the
print you require and the size of the
original you specify.
1
24
1. Horizontal original size
2. Vertical original size
3. Horizontal print size
4. Vertical print size
Note
❒ You can enter sizes within the fol-
lowing ranges.
Metric version
1 - 999mm (in 1mm steps)
3
CP2M01EE
Press the [Ratio] key.
AAAA
Select [Mag.] with the [→
BBBB
key.
Press the [OK] key.
CCCC
Select [Direct.Mag.(Size)] with the
DDDD
[→
→] or {{{{}}}}}}}} key.
→→
→] or {{{{}}}}}}}}
→→
Inch version 0.1" - 99.9" (in 0.1" steps)
❒ The range of ratios which the ma-
chine can select depends on where
you place the original:
• On the exposure glass: 50-200%
❒ If the calculated ratio is over the
maximum or under the minimum
ratio, it is corrected within the
range of ratios automatically.
38
Press the [OK] key.
EEEE
Page 58

Directional Magnification (Size)
Enter the vertical original size
FFFF
with the number keys and press
the {{{{qqqq}}}} key.
Note
❒ To change the value entered,
press the {{{{Clear/Stop}}}} key and
enter the new value.
❒ Up to 999mm, 99.9" can be en-
tered.
Enter the vertical print size with
GGGG
the number keys, and then press
the {{{{qqqq}}}} key.
Enter the horizontal original size
HHHH
with the number keys, and then
press the {{{{qqqq}}}} key.
Press the {{{{Start}}}} key.
MMMM
Check the image position on the
NNNN
trial or proof print.
Note
❒ If the image position is not cor-
rect, adjust it using the [Image
====] key. See p.24 “Adjusting the
Position of Printed Images”.
Make your prints.
OOOO
1
Enter the horizontal print size
IIII
with the number keys.
Press the [OK] key.
JJJJ
The machine will select appropriate reproduction ratios for the vertical and horizontal directions.
Make sure that the original and
KKKK
the print paper are the correct
size.
Place your original on the expo-
LLLL
sure glass or in the optional document feeder.
39
Page 59

Operation
Erasing Center and Edge Margins
1
When printing from thick books, or
similar originals, the binding margin
at the center and the edges might appear on prints. To prevent this, perform the following steps.
Important
❒ Be sure to keep the platen cover at
an angle of at least 25 degrees with
the exposure glass.
❒ If you do not press hard on the
book while it is scanned, the margin at the center might no be
erased completely.
Set the book on the exposure
AAAA
glass.
Keep the exposure glass cover at
BBBB
an angle of at least 25 degrees
with the exposure glass.
Press the {{{{Start}}}} key.
CCCC
Note
❒ If your originals have solid images
at the edges, the machine might
recognize the solid images as shadows and not copy them. In this
case, use Edge Erase mode so that
only the shadows are not copied.
See p.41 “Edge Erase”.
40
Note
❒ Press hard on the book with
your hand while it is scanned.
Check the image position on the
DDDD
trial or proof print.
Note
❒ If the image position is not cor-
rect, adjust it using the [Image
====] key. See p.24 “Adjusting the
Position of Printed Images”.
Make your prints.
EEEE
Page 60

Edge Erase
Edge Erase
This function erases all four margins
of the original image.
❖❖❖❖ Using Edge Erase mode
AB AB
GRERAS0E
❖❖❖❖ When not using Edge Erase mode
When printing from thick books,
or similar originals, the binding
margin at the center and the edges
might appear on prints. The machine erases these margins automatically. If you do not use Edge
Erase mode using the following
kind of originals, the images to be
printed might be also erased.
AB
Press the {{{{Edge Erase}}}} key.
AAAA
Image Density
Stamp
Make-Up
Over lay
Skip Feed
Select the size and direction of the
BBBB
Edge Erase
original with the [←←←←] [→
Lighter
Normal
Darker 1
Darker 2
Economy Mode
Original Storage
On Line
Auto On Line
Job Separator
→] or {{{{~~~~}}}}
→→
{{{{}}}}}}}} keys.
1
ZDZS150N
GRERAS1E
Note
❒ You can adjust the size of the mar-
gins with the user tools. The default is 2mm, 0.1". See p.158 “3-11
Margin Erase Area”.
Press the [OK] key.
CCCC
Place your original on the expo-
DDDD
sure glass or in the optional document feeder.
Press the {{{{Start}}}} key.
EEEE
41
Page 61

1
Operation
Check the image position on the
FFFF
trial or proof print.
Note
❒ If the image position is not cor-
rect, adjust it using the [Image
====] key. See p.24 “Adjusting the
Position of Printed Images”.
Make your prints.
GGGG
42
Page 62

Printing onto Various Kinds of Paper
Printing onto Various Kinds of Paper
Before printing onto thick paper, thin
paper, envelopes or special kinds of
paper loaded in the paper feed tray,
you must select the paper type.
Printing onto Thick Paper
If you wish to print onto thick (128 to
209.3g/m
paper, perform the following steps.
Press the [Ppr.Type] key.
AAAA
2
, 34 to 55.6 lb or heavier)
Printing onto Standard Paper
If you wish to print onto standard
(47.1 to 105g/m
perform the following steps.
Press the [Ppr.Type] key.
AAAA
2
, 12.5 to 28 lb) paper,
1
Select [Thick] with the [→
BBBB
key.
Press the [OK] key.
CCCC
→] or {{{{}}}}}}}}
→→
Make sure that [Std.] is selected.
BBBB
Press the [OK] key.
CCCC
43
Page 63

1
Operation
Printing onto Envelopes
Press the [Ppr.Type] key.
AAAA
If your envelopes do not feed in
EEEE
well, lift the paper feed tray a little, and then lower it so that it
slants up slightly.
Select [Special] with the [→→→→] or
BBBB
{{{{}}}}}}}} key.
Press the [OK] key.
CCCC
Place the envelopes in the paper
DDDD
feed tray as shown in the illustration.
ZDZY030E
Printing onto Special Kinds of
Paper
Preparation
To use this function, you have to
register the special paper type in
User1
] or [
User2
[
See
p.161 “4-19 Type of Paper”
Press the [Ppr.Type] key.
AAAA
] with the user tools.
.
44
GRENVE0E
* Paper feed direction
Note
❒ When you use envelopes, the
paper feed tray capacity is
about 150 sheets (85g/m
or enough to load a stack up to
105mm, 4.1" high.
2
, 22 lb)
Select [User1] or [User2] with the
BBBB
[←←←←] [→
→] or {{{{~~~~}}}} {{{{}}}}}}}} keys.
→→
Press the [OK] key.
CCCC
Page 64

----To prevent paper misfeeds:
If paper misfeeds occur frequently,
even if you have selected a suitable
paper, follow the steps below.
Press the [Select] key.
A
Select the type of paper misfeed
B
and frequency with the {{{{~~~~}}}}, {{{{}}}}}}}},
{{{{||||}}}}, or {{{{{{{{}}}} keys.
Printing onto Various Kinds of Paper
1
Press the [OK] key.
C
If paper misfeeds occur frequently in
the paper exit section, even if you are
using standard or thin paper and
have selected [Std.], do the following:
Set the wing guide to the “Down”
A
position with the user tools. See
“Deflector Angle” on p.146 “4.
Mode Setting”.
If A4 – B5, 8
1
/2" × 11" thick paper is
not delivered properly to the paper
delivery tray, do the following:
Set the wing guide to the “Up” po-
A
sition with the user tools. See “De-
flector Angle” on p.146 “4. Mode
Setting”.
45
Page 65

1
Operation
Selecting Original Modes
Select one of the following five modes
to match your originals:
❖❖❖❖ Letter mode
Select when originals contain only
letters (no pictures).
❖❖❖❖ Letter/Photo mode
Select when originals contain photographs or pictures with letters.
❖❖❖❖ Photo mode
Select when originals contain photographs or pictures with delicate
tones.
❖❖❖❖ Pencil mode
Select when originals are written
in pencil.
❖❖❖❖ Tint mode
Select when you want to make
halftone printing.
Letter/Photo Mode Printing
Preparation
You can adjust the contrast of the
image.
Press the [Original] key.
AAAA
Select [Letter/Photo] with the [→→→→]
BBBB
or {{{{}}}}}}}} key.
Note
❒ You can adjust the sharpness of
text in Letter mode with the user
tools. See “Adjusting sharpness of
letters” on p.146 “4. Mode Setting”.
❒ When using Photo mode to print
originals with both text and photographs, the text will appear lighter.
To avoid this, select Letter/Photo
mode. Alternatively, use the optional Make-up mode to specify
Letter mode for text areas and Photo mode for photograph areas.
Press the [Contrast] key.
CCCC
46
Page 66

Adjust the contrast with the [←←←←]
DDDD
[→
→] or {{{{~~~~}}}} {{{{}}}}}}}} keys.
→→
Note
❒ Use "High" to produce clear
prints of people's faces.
❒ Use "Low" to produce clear
prints of landscapes and scenery etc.
Press the [OK] key.
EEEE
Selecting Original Modes
Photo Mode Printing
Press the [Original] key.
AAAA
Select [Photo] with the [→
BBBB
key.
→] or {{{{}}}}}}}}
→→
1
Place your original on the expo-
FFFF
sure glass or in the optional document feeder.
Press the {{{{Start}}}} key.
GGGG
Check the image position on the
HHHH
trial or proof print.
Note
❒ If the image position is not cor-
rect, adjust it using the [Image
====] key. See p.24 “Adjusting the
Position of Printed Images”.
Press the [OK] key.
CCCC
Adjusting the photo mode
contrast
A Press the [Contrast] key.
Make your prints.
IIII
47
Page 67

Operation
1
B Adjust the contrast with the
[←←←←][→
→] or {{{{~~~~}}}}{{{{}}}}}}}} keys.
→→
C Press the [OK] key.
Note
❒ Use "High" to produce clear
prints of people's faces.
❒ Use "Low" to produce clear
prints of landscapes and
scenery etc.
Select the dot pattern with the
DDDD
[←←←←] [→
→] or {{{{~~~~}}}} {{{{}}}}}}}} keys.
→→
Press the {{{{Start}}}} key.
GGGG
Check the image position on the
HHHH
trial or proof print.
Note
❒ If the image position is not cor-
rect, adjust it using the [Image
====] key. See p.24 “Adjusting the
Position of Printed Images”.
Make your prints.
IIII
Note
❒ Four dot patterns are available:
• Setting 1: clearest
• Setting 2: clearer than setting 3
• Setting 3: clearer than setting 4
• Setting 4: clearer than the
standard setting
Press the [OK] key.
EEEE
Place your original on the expo-
FFFF
sure glass or in the optional document feeder.
Pencil Mode Printing
Note
❒ Originals written in pencil should
be placed on the exposure glass.
Press the [Original] key.
AAAA
48
Page 68

Selecting Original Modes
Select [Pencil] with the [→
BBBB
key.
Press the [OK] key.
CCCC
Place your original on the expo-
DDDD
sure glass.
Press the {{{{Start}}}} key.
EEEE
→] or {{{{}}}}}}}}
→→
1
Check the image position on the
FFFF
trial or proof print.
Note
❒ If the image position is not cor-
rect, adjust it using the [Image
====] key. See p.24 “Adjusting the
Position of Printed Images”.
Make your prints.
GGGG
49
Page 69

1
Operation
Economy Mode
When you want to save ink, select
Economy mode.
Note
❒ Prints will be lighter in this mode.
Press the {{{{Economy Mode}}}} key.
AAAA
Image Density
Stamp
Make-Up
Lighter
Normal
Darker 1
Darker 2
On Line
Auto On Line
Over lay
Skip Feed
Place your original on the expo-
BBBB
Edge Erase
Economy Mode
Original Storage
Job Separator
sure glass or in the optional document feeder.
Press the {{{{Start}}}} key.
CCCC
Check the image position on the
DDDD
trial or proof print.
ZDZS020N
50
Note
❒ If the image position is not cor-
rect, adjust it using the [Image
====] key. See p.24 “Adjusting the
Position of Printed Images”.
Make your prints.
EEEE
Page 70

Auto Cycle
Use the {{{{Auto Cycle}}}} key to process
masters and make prints in a single
operation.
If the indicator of {{{{Auto Cycle}}}} key
AAAA
is off, press the {{{{Auto Cycle}}}} key.
Press the {{{{Start}}}} key.
BBBB
Auto Cycle
1
51
Page 71

Operation
All Class Mode
1
Preparation
You have to store the number of
students in each class with the user
tools. See p.157 “3-5 Class Enter
No.”.
Use the {{{{Class}}}} key to make sets of
prints from the same original. All the
stored numbers of prints are made for
each set.
This feature is useful for teachers who
frequently make multiple print sets
for classes e.g. notes, handouts, tests
etc.
Using a standard print mode, the
teacher would have to stand by the
machine entering the number of
prints and pressing the {{{{Print}}}} key for
each class. However, All Class mode
allows you to store the number of students in each class into the machine
memory beforehand with the user
tools. Whenever you need to make
print sets for all the classes, place
your original, select [ALL] and press
the {{{{Start}}}} key. Print sets will be
made containing the correct number
of prints for each class.
Note
❒
When you choose All Class mode,
Job Separation mode is automatically turned on. The job separator
pulls the top sheet of the each set
delivered to the paper delivery tray
to mark the end of each printed set.
The next cycle begins automatically. See
❒ You can cancel Job Separation
mode in All Class mode with the
user tools. See “Auto Separate” on
p.146 “4. Mode Setting”.
Press the {{{{Class}}}} key.
AAAA
Make sure that [ALL] is selected.
BBBB
p.79 “Job Separation”
.
52
GRCLAS2E
Press the [OK] key.
CCCC
Place one original on the expo-
DDDD
sure glass or in the optional document feeder.
Page 72

Press the {{{{Start}}}} key.
EEEE
Check the image position on the
FFFF
trial or proof print.
Note
❒ If the image position is not cor-
rect, adjust it using the [Image
====] key. See p.24 “Adjusting the
Position of Printed Images”.
All Class Mode
1
Make your prints.
GGGG
53
Page 73

Operation
Auto Class Mode
1
Preparation
You have to store the number of
students in each class with the user
tools. See p.157 “3-5 Class Enter
No.”.
Use the {{{{Class}}}} key to make sets of
prints from the same original. The
stored numbers of prints are made for
each set.
This feature is useful for teachers who
frequently make multiple print sets
for their classes, e.g. notes, handouts,
tests etc.
Using a standard print function, the
teacher would have to stand by the
machine entering the number of
prints and pressing the {{{{Print}}}} key for
each class. However, Auto Class
mode allows you to store the number
of students in each class into the machine memory beforehand with the
user tools. Then, whenever you need
to make print sets for several classes,
place your original, select the classes
that need prints and press the {{{{Start}}}}
key. Print sets will be made containing the correct number of prints for
each class.
Note
❒
When you set Auto Class mode,
Job Separation mode is automatically turned on. The job separator
pulls the top sheet of the each set
delivered to the paper delivery tray
to mark the end of each printed set.
The next cycle begins automatically. See
❒ You can cancel Job Separation
mode in Auto Class mode with the
user tools. See “Auto Separate” on
p.146 “4. Mode Setting”.
Press the {{{{Class}}}} key.
AAAA
Select [By-class] with the [→→→→] or
BBBB
{{{{}}}}}}}} key.
p.79 “Job Separation”
.
54
GRCLAS2E
Press the [OK] key.
CCCC
Select the desired classes for each
DDDD
grade.
Page 74

Auto Class Mode
Selecting classes with the {{{{~~~~}}}},
{{{{}}}}}}}}, {{{{||||}}}}, or {{{{{{{{}}}} key
A Select the desired class for the
st
grade with the {{{{}}}}}}}} key.
1
The number of students is displayed on the counter.
Note
❒ When you want to select all
the classes, select [ALL].
B Press the [Select] key.
Note
❒ Repeat steps A and B until
you have finished designating classes for the 1st grade.
❒ To cancel a class selection, se-
lect that class with the {{{{~~~~}}}},
{{{{}}}}}}}}, {{{{||||}}}}, or {{{{{{{{}}}} key, and
then press the [Cancel] key.
❒ When you want to select
many classes for one grade,
first select [ALL] and press the
[Select] key, and then deselect the unnecessary classes
with the [Cancel] key.
C Press the {{{{{{{{}}}} key.
Selecting classes with the
number keys
A Enter the desired grade and
class with the number keys.
Note
❒ For example, to select grade 2
class 4, enter 24.
❒ When you want to select all
the classes for one grade, enter the grade number followed by 0.
B Press the {{{{qqqq}}}} key.
1
Now you can select classes for
nd
the 2
D Select the desired class for the
2
{{{{||||}}}}, or {{{{{{{{}}}} key.
E Press the [Select] key.
❒ Repeat steps C to E until
grade.
nd
grade with the {{{{~~~~}}}}, {{{{}}}}}}}},
Note
you have finished designating all the desired classes.
Note
❒ To cancel a class, select that
class with the {{{{~~~~}}}}, {{{{}}}}}}}}, {{{{||||}}}},
or {{{{{{{{}}}} key, and then press
the [Cancel] key.
❒ Repeat steps A and B until
you have finished selecting
all the desired classes.
Press the [OK] key.
EEEE
55
Page 75

1
Operation
Place one original on the expo-
FFFF
sure glass or in the optional document feeder.
Press the {{{{Start}}}} key.
GGGG
Check the image position on the
HHHH
trial or proof print.
Note
❒ If the image position is not cor-
rect, adjust it using the [Image
====] key. See p.24 “Adjusting the
Position of Printed Images”.
Make your prints.
IIII
56
Page 76

Manual Class Mode with One Original
Manual Class Mode with One Original
Use the {{{{Class}}}} key to make sets of
prints from the same original. Various numbers of prints are made for
each set.
GRCLAS2E
Note
❒
When you set the Manual Class
mode, Job Separation mode is automatically turned on. The job separator pulls the top sheet of each set
delivered to the paper delivery tray
to mark the end of each printed set.
The next cycle begins automatically. See
p.79 “Job Separation”
.
Select [Manual] with the [→→→→] or
BBBB
{{{{}}}}}}}} key.
Press the [OK] key.
CCCC
Enter the desired number of
DDDD
prints for the first set with the
number keys.
Press the {{{{qqqq}}}} key.
EEEE
1
❒ To stop Job Separation mode from
automatically turning on, use the
user tools. See “Auto Separate” on
p.146 “4. Mode Setting”.
Press the {{{{Class}}}} key.
AAAA
57
Page 77

Operation
1
Enter the desired number of
FFFF
prints for the second set with the
number keys.
Press the {{{{qqqq}}}} key.
GGGG
Note
❒ Repeat steps F and G for each
set.
❒ The maximum number of sets
that can be made is 20.
Press the [OK] key.
HHHH
Make your prints.
LLLL
Place one original on the expo-
IIII
sure glass or in the optional document feeder.
Press the {{{{Start}}}} key.
JJJJ
Check the image position on the
KKKK
trial or proof print.
Note
❒ If the image position is not cor-
rect, adjust it using the [Image
====] key. See p.24 “Adjusting the
Position of Printed Images”.
58
Page 78

Manual Class Mode with two or More Originals
Manual Class Mode with two or More
Originals
Preparation
To use this function, you have to
select “by each original” with the
“Class Manual Set” setting in the
user tools. See “Class Manual Set”
on p.146 “4. Mode Setting”.
Use the {{{{Class}}}} key to make sets of
prints from different originals. Various numbers of prints are made for
each set.
A
A
B
B
C
D
Note
❒ When you set Manual Class mode,
Job Separation mode is automatically turned on. The job separator
pulls the top sheet of each set delivered to the paper delivery tray
to mark the end of each printed set.
The next cycle begins automatically. See p.79 “Job Separation”.
❒ You can suspend Job Separation
mode whenever you set the Manual Class mode with the user tools.
See “Auto Separate” on p.146 “4.
Mode Setting”.
❒ With the optional document feed-
er, you can place several originals
and make prints of all of them at
once. See p.130 “Manual Class
Mode with Two or More Originals”.
C D
GRCLAS1E
Press the {{{{Class}}}} key.
AAAA
Select [Manual] with the [→→→→] or
BBBB
{{{{}}}}}}}} key.
Press the [OK] key.
CCCC
Enter the desired number of
DDDD
prints for the first original with
the number keys.
1
59
Page 79

Operation
1
Press the {{{{qqqq}}}} key.
EEEE
Enter the desired number of
FFFF
prints for the second original
with the number keys.
Press the {{{{Start}}}} key.
JJJJ
Check the image position on the
KKKK
trial or proof print.
Note
❒ If the image position is not cor-
rect, adjust it using the [Image
====] keys. See p.24 “Adjusting
the Position of Printed Images”.
Press the {{{{Auto Cycle}}}} key.
LLLL
Press the {{{{qqqq}}}} key.
GGGG
Note
❒ Repeat steps F and G for each
original.
❒ Up to 20 classes can be set.
Press the [OK] key.
HHHH
Place the first original face down
IIII
on the exposure glass.
Press the {{{{Print}}}} key.
MMMM
60
Page 80

After the first set is completed,
NNNN
place the second original on the
exposure glass, and then press the
{{{{Start}}}} key.
Note
❒ Repeat step N until you have
finished printing.
Manual Class Mode with two or More Originals
1
61
 Loading...