

Programs
You can store frequently used copy
job settings in memory and recall
them for future use.
Note
❒ You can store up to 10 programs.
❒ You can select standard mode or
program No. 10 as the mode to be
set when modes are cleared or reset, or immediately after the operation switch is turned on. ⇒ p.99
“Change Initial Mode”
❒ Paper settings are stored based on
size. So, if paper of the same size is
set for more than one tray, the paper tray prioritized with User
Tools (System Settings) will be selected first. ⇒“Paper Settings”
General Settings Guide
3. Program
Storing a Program
Edit the copy settings so that all
AAAA
functions you want to store in this
program are selected.
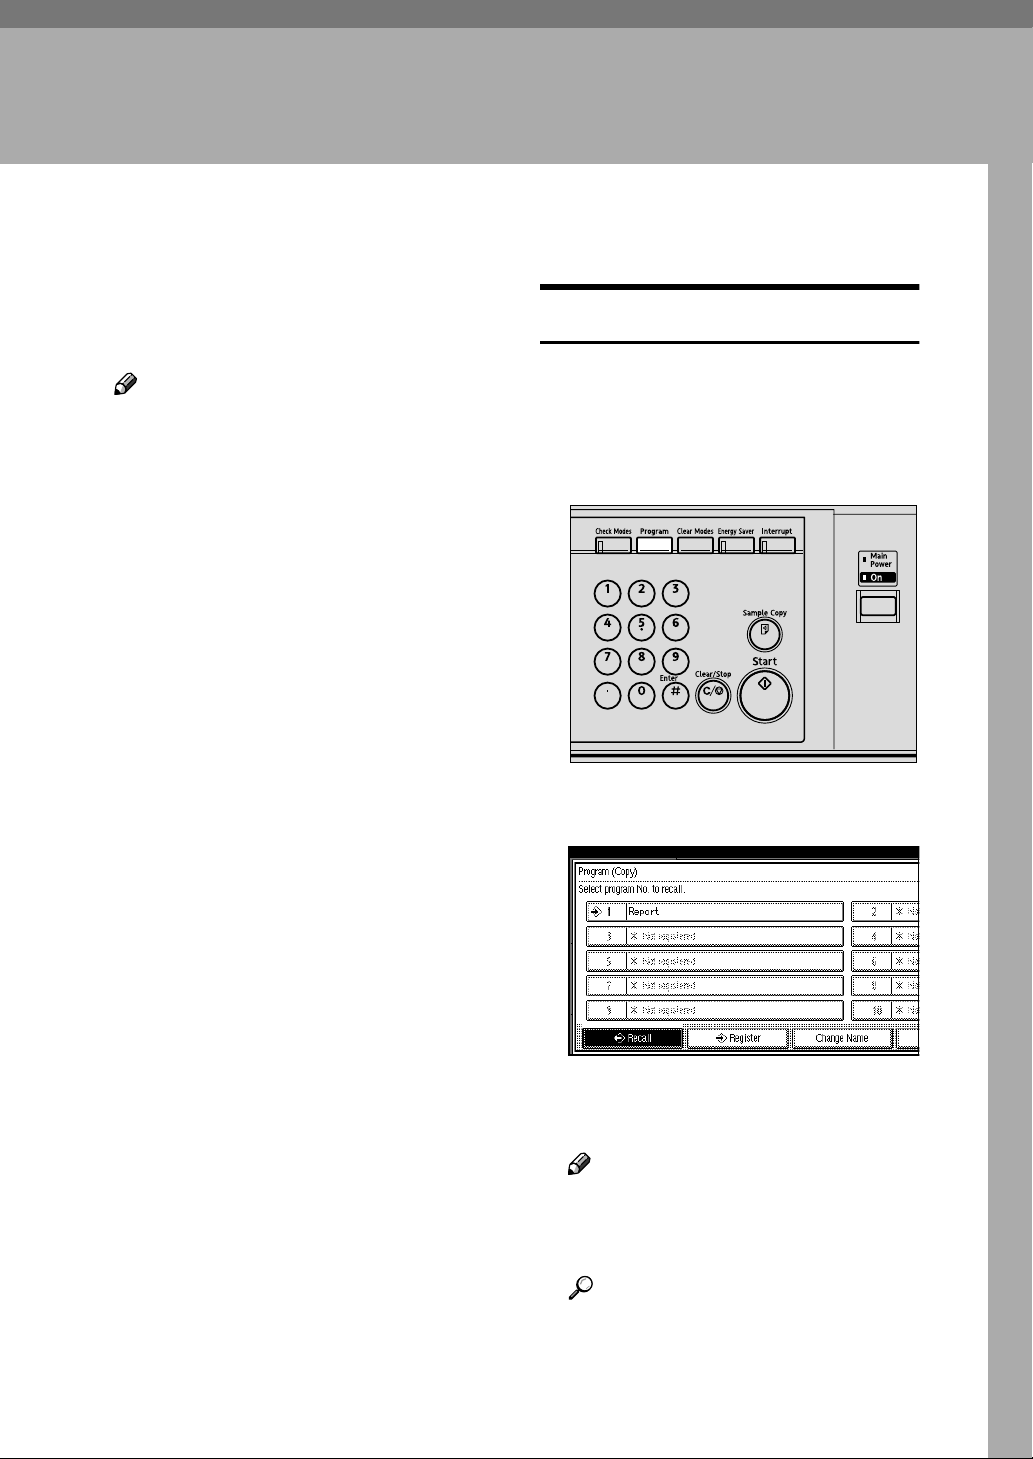
Press the {{{{Program}}}} key.
BBBB
ZGVS050E
❒ Programs are not cleared by turn-
ing the power off or by pressing
the {{{{Clear Modes}}}} key. They are
canceled only when you delete or
overwrite them with another program.
Press the [Register] key.
CCCC
Press the program number you
DDDD
want to store.
Note
❒ Program numbers with m
against them already have settings in them.
Reference
⇒ p.80 “Changing a stored pro-
gram”
79
Program
3
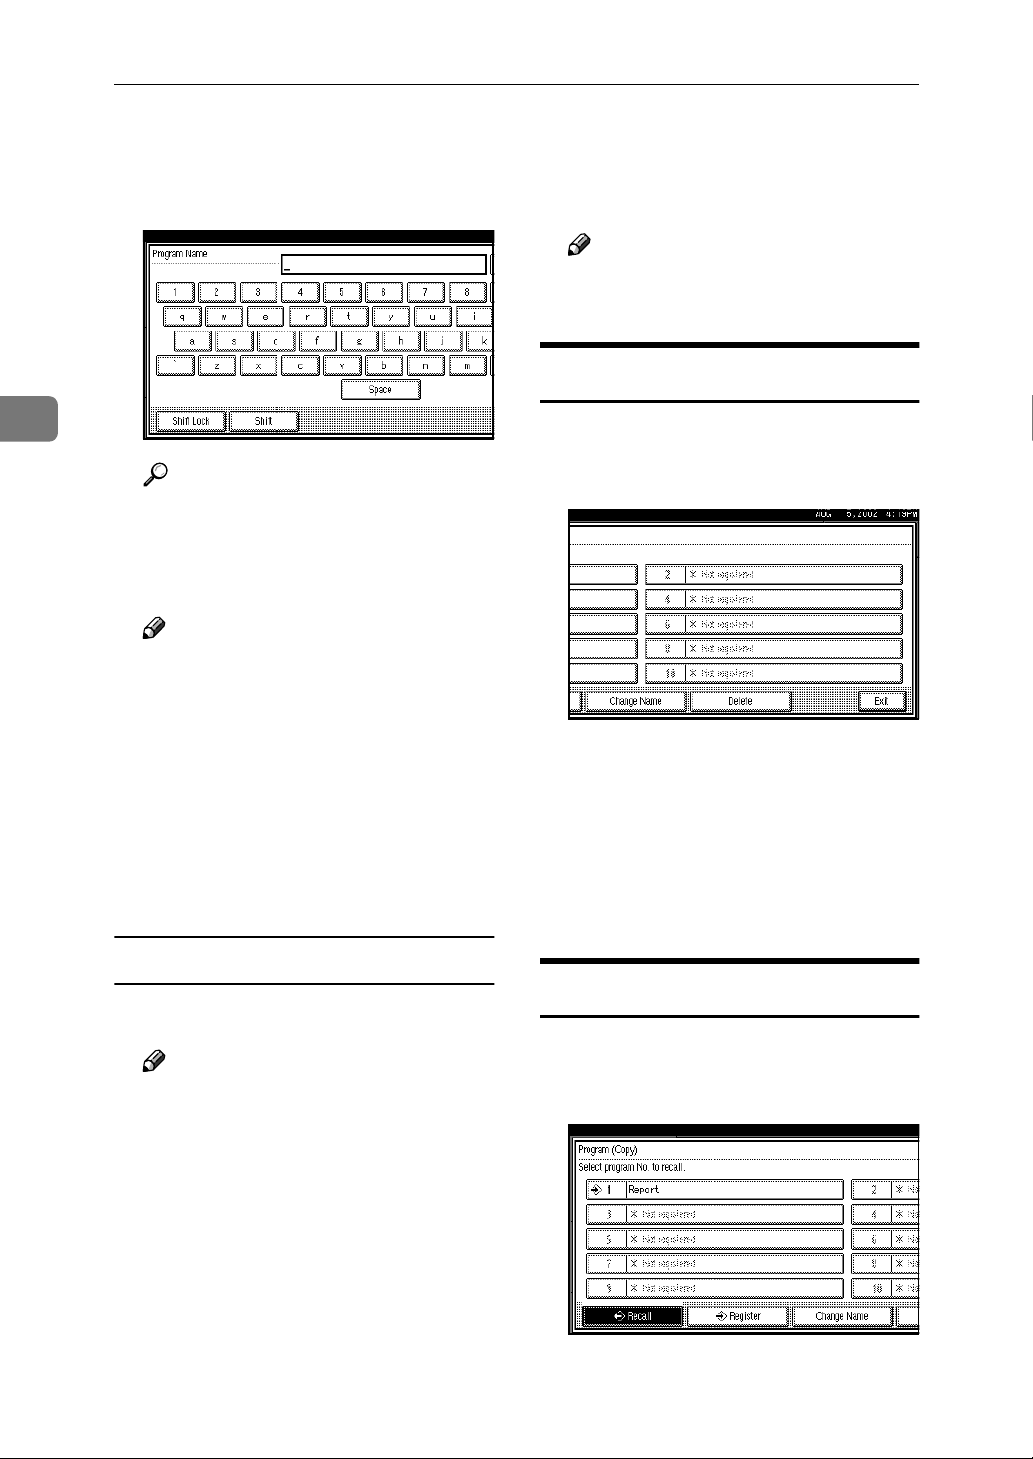
Enter the program name with the
EEEE
letter keys on the display panel.
You can enter up to 40 characters.
Reference
For details on entering characters, see “Entering Text Characters” in the General Settings
Guide.
Note
❒ If you do not wish to enter the
program name, go to step
Press the [Register] key.
CCCC
Repeat steps E, F of ”Storing a Pro-
gram”.
Note
❒ This overwrites the previous
program.
Deleting a Program
Press the {{{{Program}}}} key.
AAAA
Press the [Delete] key.
BBBB
.
F
Press the [OK] key.
FFFF
When the settings are successfully
stored, the mmmm indicator before the
program number goes on, followed by the program name. The
screen returns to the initial copy
display after a short time.
Changing a stored program
Check the program settings.
AAAA
Note
❒ When you want to check the
contents of a program, recall the
program. ⇒ p.80 “Recalling a
Program”
Repeat steps AAAA to DDDD of “Storing a
BBBB
Program”.
Press the program number you
CCCC
want to delete.
Press the [Yes] key.
DDDD
The program is deleted, and the
screen returns to the initial copy
display.
Recalling a Program
Press the {{{{Program}}}} key.
AAAA
Press the [Recall] key.
BBBB
80

Press the program number you
CCCC
want to recall.
Stored settings are displayed.
Note
❒ Only programs with m against
them contain a program.
Place your originals, and then
DDDD
press the {{{{Start}}}} key.
Programs
3
81

3
Program
82

4. Troubleshooting
If Your Machine Does Not Operate as You
Want
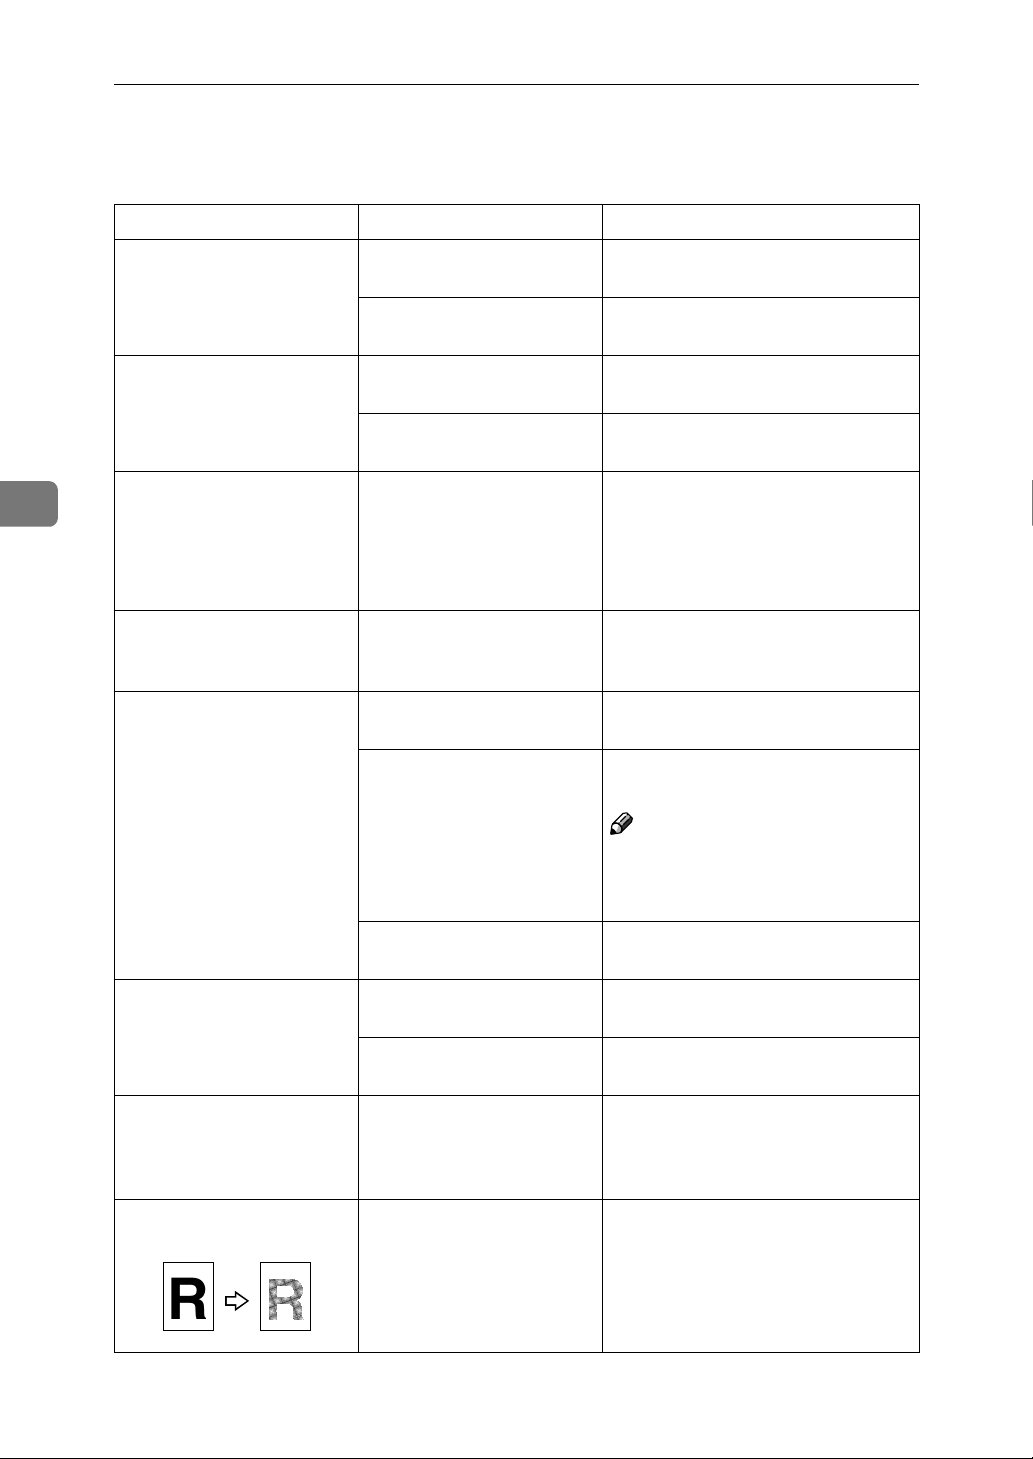
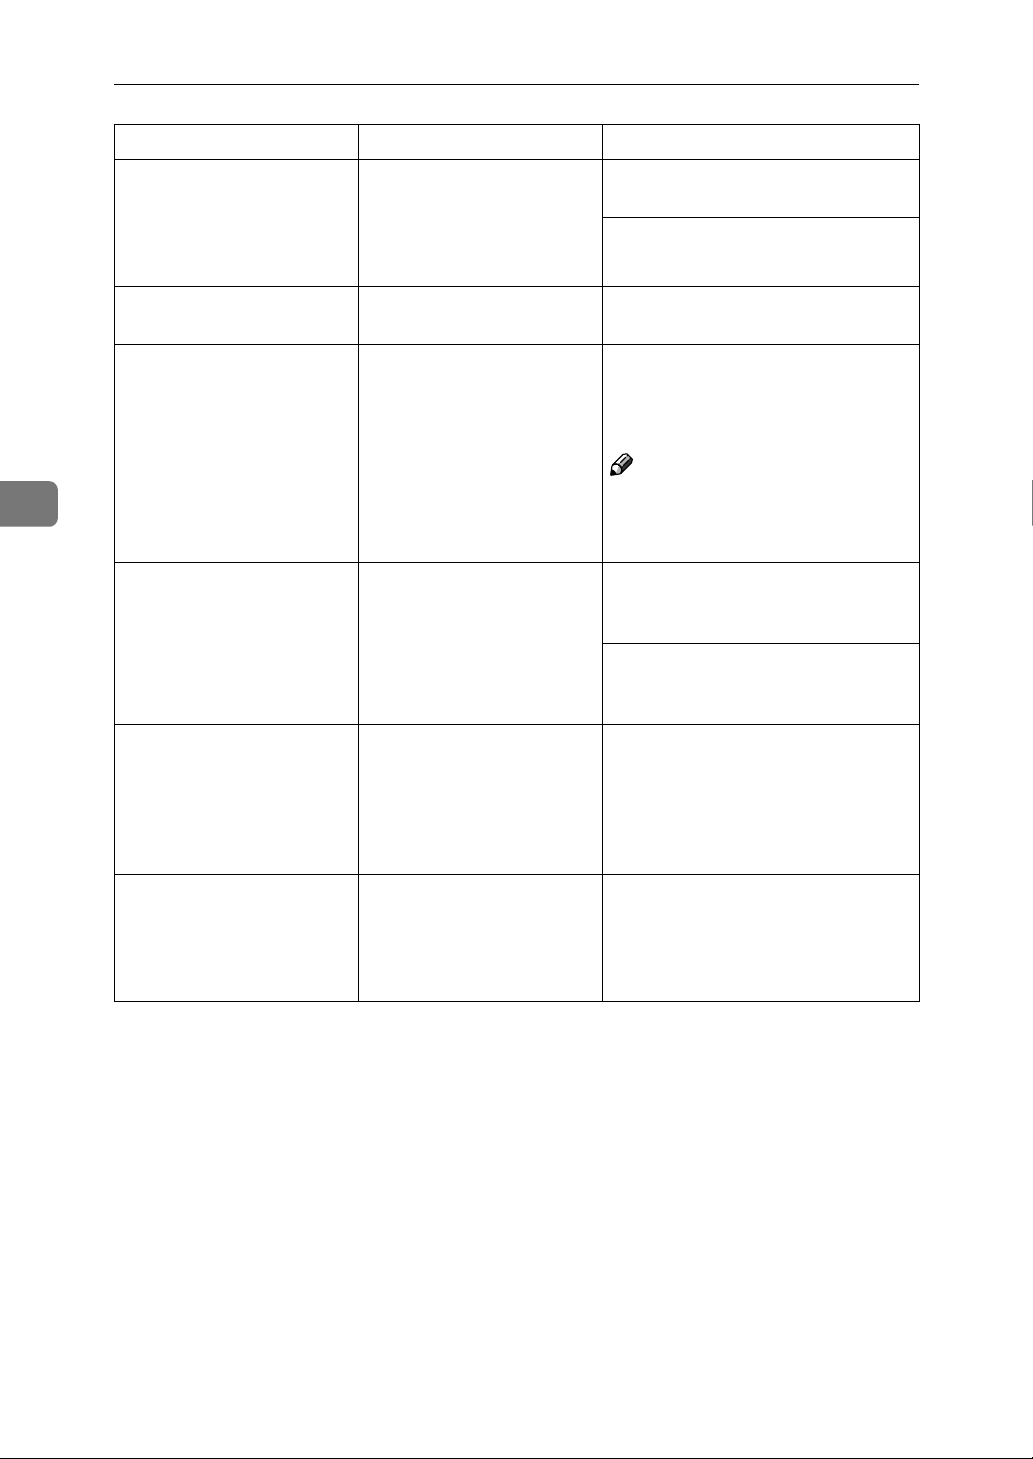
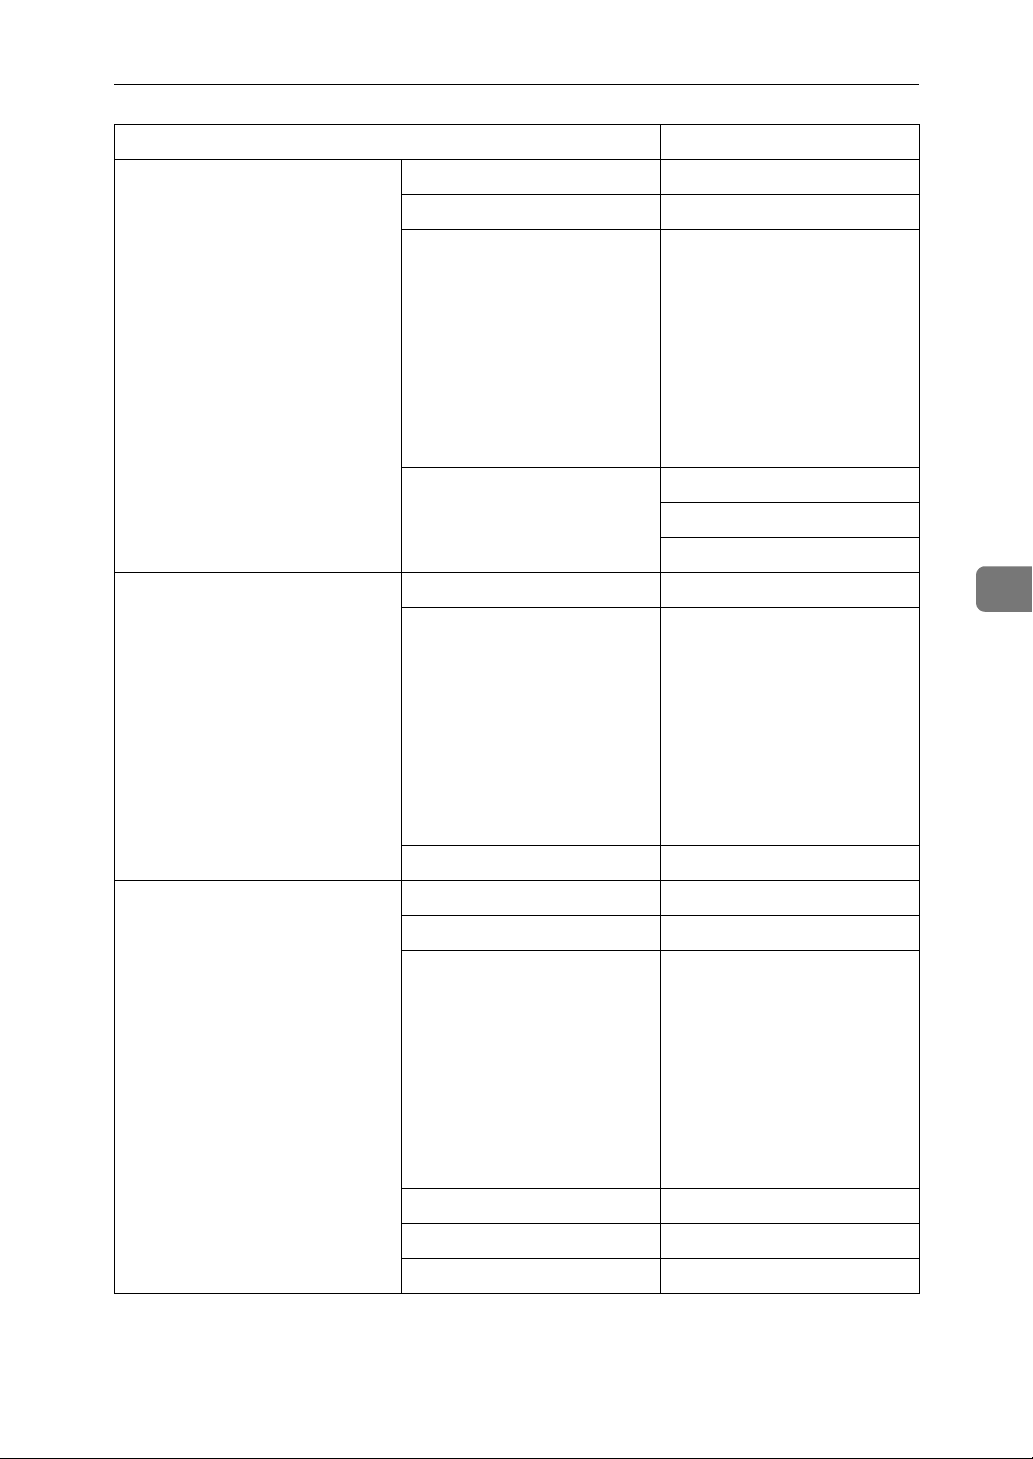
When a Message is Displayed
The following chart contains explanations of common messages. If other messages appear, follow the instructions as they are displayed.
Messege Cause Action
Cannot detect original size. The size of the originals
placed is difficult to detect.
⇒ p.9 “Sizes difficult to de-
tect”
Original is not placed. Place your originals.
Check original orientation. There is no copy paper in
the same direction as the
originals.
Check paper size. In correct paper size is set. If you press the {{{{
Rotate Sort is not available
with this paper size.
It is over stapling capacity. The number of sheets per
Cannot staple paper of this
size.
Duplex is not avilable with
this paper size.
Maximum number of sets
is .
Cannot copy. Original is
being scanned by other
functions.
A size of paper for which
Rotate Sort is not available
is selected.
set is over the staple capacity.
The Staple function cannot
be used with the paper size
selected.
A paper size not available
in Duplex mode has been
selected.
The number of copies exceeds the maximum copy
quantity.
The Document Server function is in use.
Place the original on the exposure
glass. ⇒ p.13 “Placing Originals on
the Exposure Glass”
If the original size is difficult to detect, select the size manually.
Do not use Auto Reduce/Enlarge
mode.
Place the original in the same direction as the copy paper.
}}}} key, copy
Start
will start onto the selected paper.
Select the correct paper size. ⇒ p.35
“Sort”
Check the stapler capacity. ⇒ p.37
“Staple”
Select a paper size that can be used
in Staple mode. ⇒ p.37 “Staple”
Select the proper paper size.
You can change the maximum copy
quantity. ⇒ p.99 “Max. Copy Quantity”
To cancel the job in process, press
the [
{{{{
the {{{{
sage ” [
storing?” appears, press the [
key.
] key, and then press the
Exit
Document Server
Clear/Stop
Stop
}}}} key. Next, press
}}}} key. When the mes-
] key was pressed. Stop
Stop
]
83
Troubleshooting
;
;;;
y
yyy
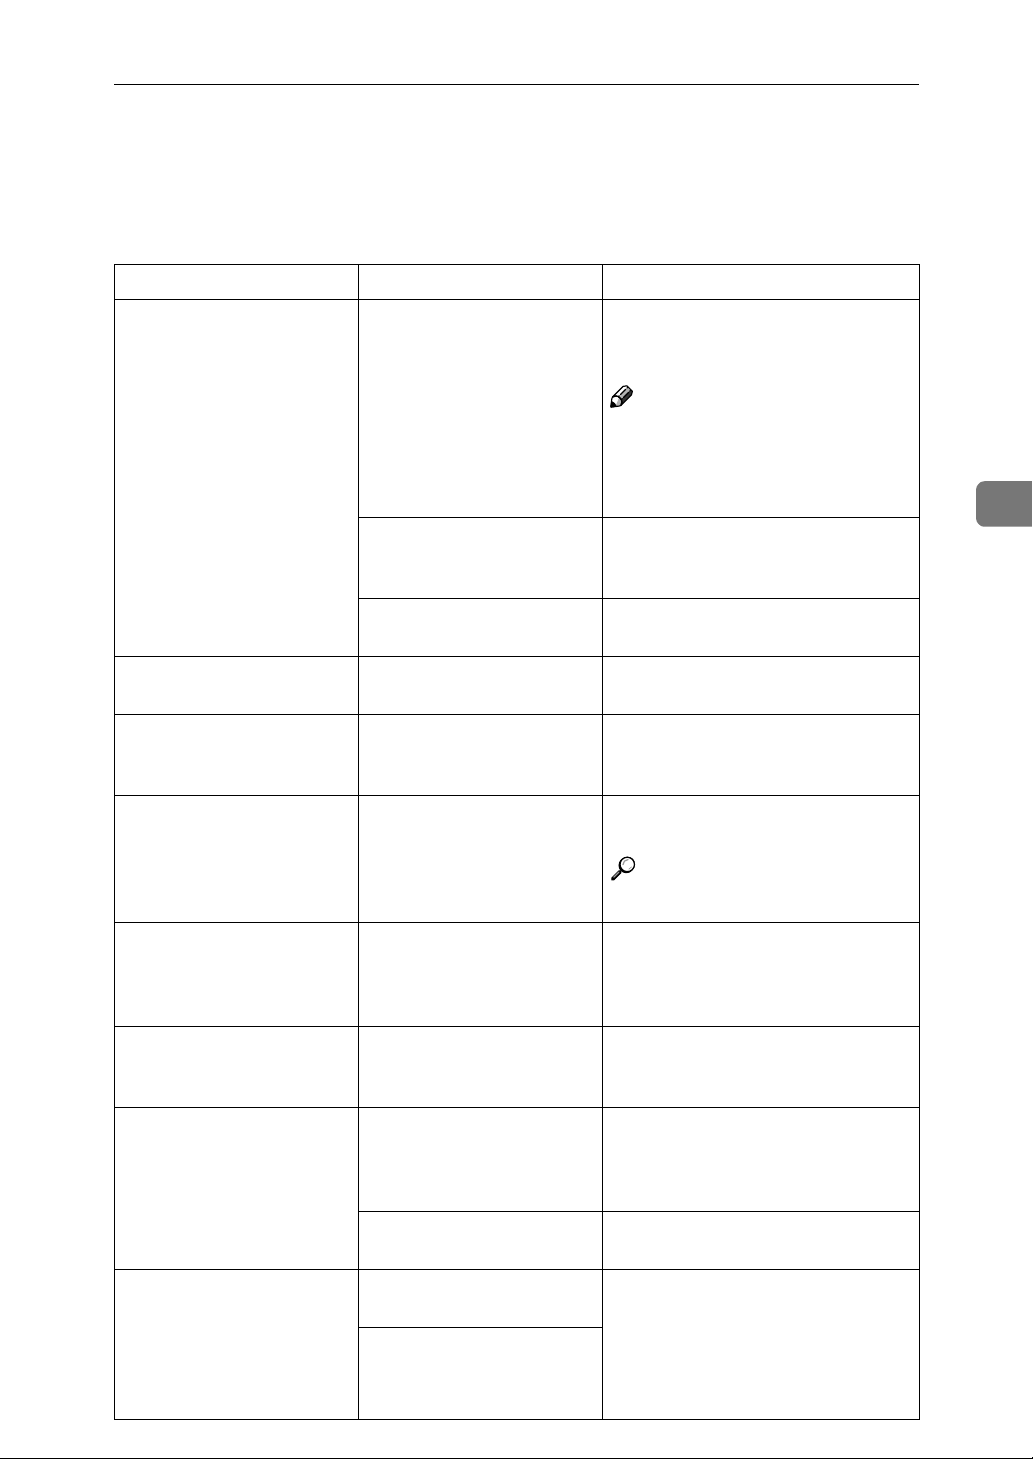
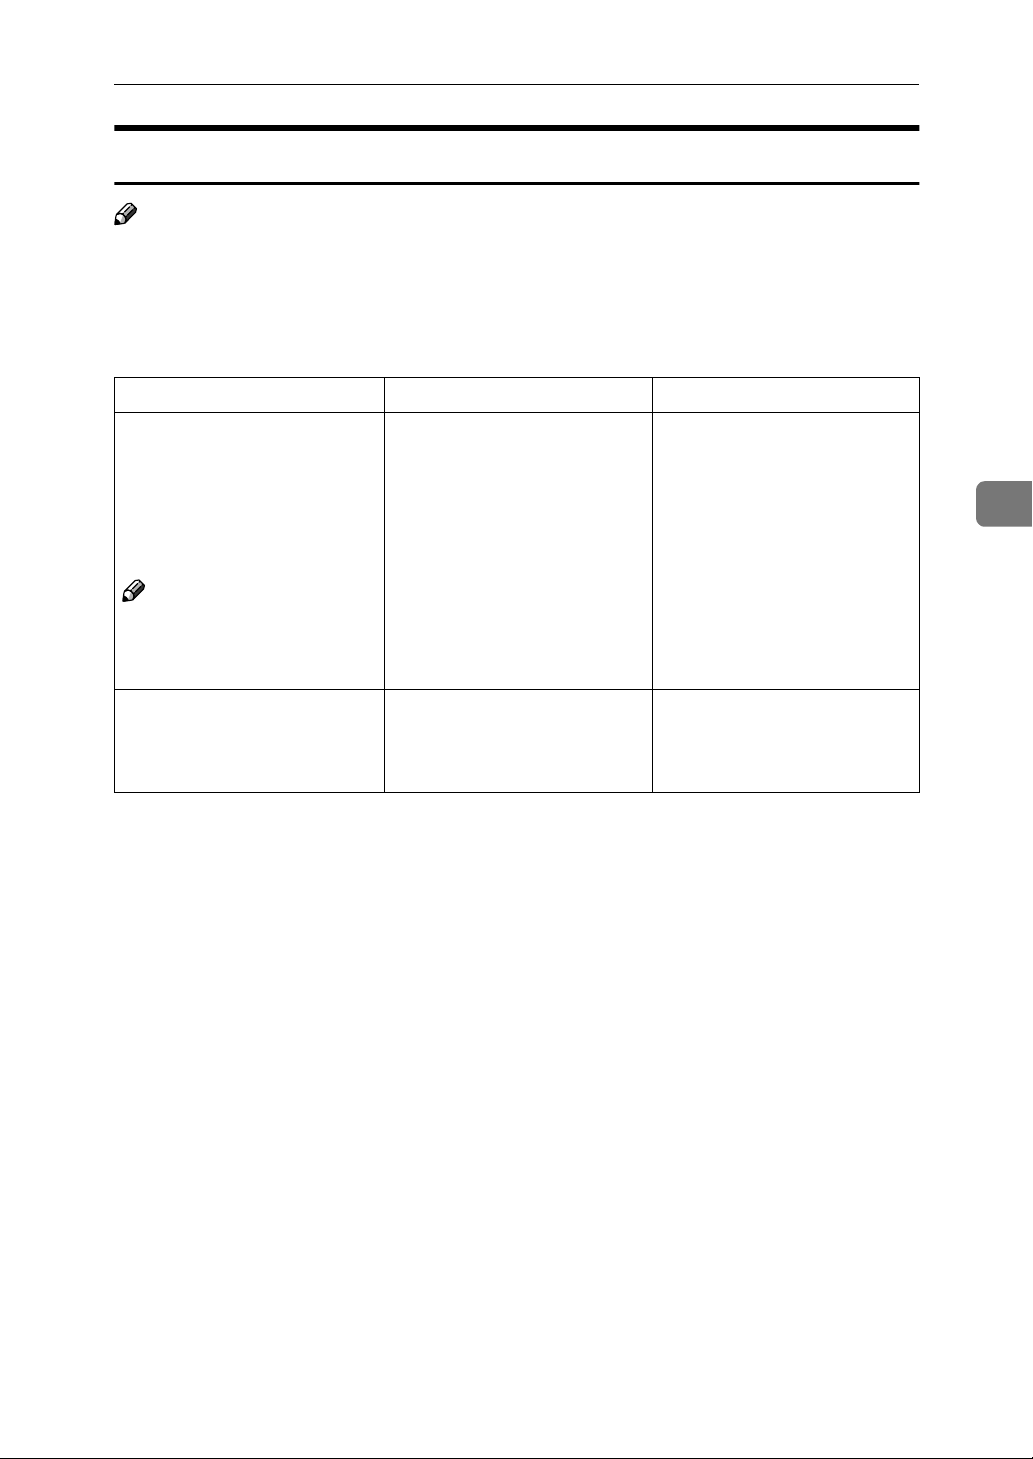
If You Cannot Make Clear Copies
Problem Cause Action
4
Copies appear dirty. The image density is too
dark.
Auto Image Density is not
selected.
The reverse side of an original image is copied.
A shadow appears on copies if you use pasted originals.
The same copy area is dirty
whenever making copies.
Copies are too light. The image density is too
The image density is too
dark.
Auto Image Density is not
selected.
The image density is too
dark.
The exposure glass or document feeder is dirty.
light.
The paper size is not appropriate.
Adjust the copy density. ⇒ p.25
“Adjusting Copy Image Density”
Adjust the auto density. ⇒ p.25
“Adjusting Copy Image Density”
Adjust the copy density. ⇒ p.25
“Adjusting Copy Image Density”
Adjust the auto density. ⇒ p.25
“Adjusting Copy Image Density”
Adjust the copy density. ⇒ p.25
“Adjusting Copy Image Density”
Change the direction of the original.
Put mending tape on the pasted
part.
Clean them. ⇒ “Maintainging Your
Machine” in the General Settings
Guide
Adjust the copy density. ⇒ p.25
“Adjusting Copy Image Density”
Use the recommended paper. ⇒
General Settings Guide
Note
❒ A light copy may result when
you use damp or rough grain paper.
84
Toner cartridge is almost
empty.
Parts of the image are not
copied.
Copies are blank. The original is not set cor-
A moiré pattern is produced on copies.
The original is not set correctly.
An improper paper size is
selected.
rectly.
Your original has a dot pattern image or many lines.
R
Add toner. ⇒ “D Adding Toner” in
the General Settings Guide
Set originals correctly. ⇒ p.12 “Plac-
ing Originals”
Select the proper paper size.
When using the exposure glass, face
the originals down. When using the
document feeder, face them up. ⇒
p.12 “Placing Originals”
Place the original on the exposure
glass at a slight angle.
If You Cannot Make Copies As You Want
If You Cannot Make Copies As You Want
This section explains causes and remedies when copy results are not as expected.
Problem Cause Action
Copies are not stapled. There are jammed staples
in the stapler.
The number of copies exceeds the capacity of the
stapler.
Copy paper is curled. Turn the copy paper over in the
Staples are wrongly positioned.
Paper jams occur frequently.
You cannot combine several functions.
Originals are not set correctly.
The paper size is not correct.
Selected functions cannot
be used together.
Remove jammed staples. ⇒ ” e Re-
moving Jammed Staple” in the General Settings Guide
Note
❒ After removing jammed staples,
staples might not be ejected the
first few times you try to use the
stapler.
Check the stapler capacity. ⇒ p.37
“Staple”
tray.
Check the correct position to place
the originals. ⇒ p.37 “Staple”
Set the correct paper size. ⇒
“Changing the Paper Size”in the
General Settings Guide
Check the combination of functions
and make the settings again.
Reference
⇒ p.109 “Combination Chart”
4
When sorting, the pages
are divided into two
blocks.
In Double Copies mode,
parts of the original image
are not copied.
In Border, Center, or Center/Border mode, parts of
the original image are not
copied.
In Margin Adjustment
mode, parts of the original
image are not copied.
The memory became full in
the middle of sorting and
the pages were delivered in
two blocks.
Combination of original
and copy paper is not correct.
You set a wide erased margin.
Originals are not scanned
correctly.
You set a wide erased margin.
There is a lack of margin
space on the opposite side
of the binding position.
You can interrupt copying when the
memory becomes full. ⇒ p.106
“Memory Full Auto Scan Restart”
Select A3L for A4 K originals and
A4 for A5 originals (when using a
100% ratio).
Make the margin width narrower.
You can adjust it between 2–99mm.
⇒ p.101 “Erase Border Width” and
⇒ p.101 “Erase Center Width”
Set the originals correctly.
Set a narrower margin with the User
Tools. ⇒ p.101 “Front Margin :
Left/Right”, ⇒ p.101 “Front Margin
: Top/Bottom”, ⇒ p.101 “Back Margins : Left/Right”, ⇒ p.101 “Back
Margin : Top/Bottom”
85
Troubleshooting
Problem Cause Action
4
In Image Repeat mode, the
original image is not copied repeatedly.
The stamp position is
wrong.
When using Combine,
parts of the image are not
copied.
Order of copies is not correct.
When using Duplex, copy
is made Top/Bottom even
though Left/Right is selected, or copy is made
Left/Right even though
Top/Bottom is selected.
You selected copy paper
the same size as the originals, or you did not select
the proper reproduction
ratio.
The paper orientation is
wrong.
You specified a reproduction ratio that does not
match the sizes of your
originals and copy paper.
You placed originals in incorrect order.
You placed originals in the
wrong direction.
Select copy paper larger than the
originals.
Select the proper reproduction ratio.
Check the paper orientation and
stamp position.
When you specify a reproduction
ratio using Manual Paper Select
mode, make sure the ratio matches
your originals and the copy paper.
Note
❒ Select the correct reproduction
ratio before using Combine
mode.
When placing a stack of originals in
the document feeder, the last page
should be on the bottom.
If you place an original on the exposure glass, start with the first page to
be copied.
Place originals in the correct orientation. ⇒ p.12 “Original Orientation”
86
Paper does not output during printing with stapling.
If you stop printing while
using the staple function,
papers not stapled during
printing may be left in the
staple unit.
Press the {{{{Reset}}}} key and cancel
copy settings, including stapling.
If You Cannot Make Copies As You Want
When Memory Is Full
Note
❒ If you set "Memory Full Auto Scan Restart" in User Tools (⇒ p.106) to "Yes",
the memory overflow message will not be displayed, but Connect Copy continues to scan originals automatically. Connect Copy continues scanning and
copying until the job is finished. Note that copy sets will be printed separately
at this time.
Message Cause Solution & Reference
Memory is full. ## originals
have been scanned.
Press [
originals.
Do not remove remaining
originals.
] to copy scanned
Print
Note
❒ Copying will stop and this
message will be displayed
when memory is full.
Press [
Continue
printing.
[
] [
Stop
Continue
] to continue
]
The scanned original exceeds
the number of pages that can
be stored in memory.
The machine checks if the remaining original should be
copied, after the scanned original has been printed.
Press the [
scanned originals and clear
the scanning data. Press the
[
Print Inquiry List
the scanning data and not
copy.
To continue copying, remove
all copies then press the [
] key. To stop copying,
tinue
press the [
] key to copy
Output
] key to clear
] key.
Stop
Con-
4
87

4
Troubleshooting
88
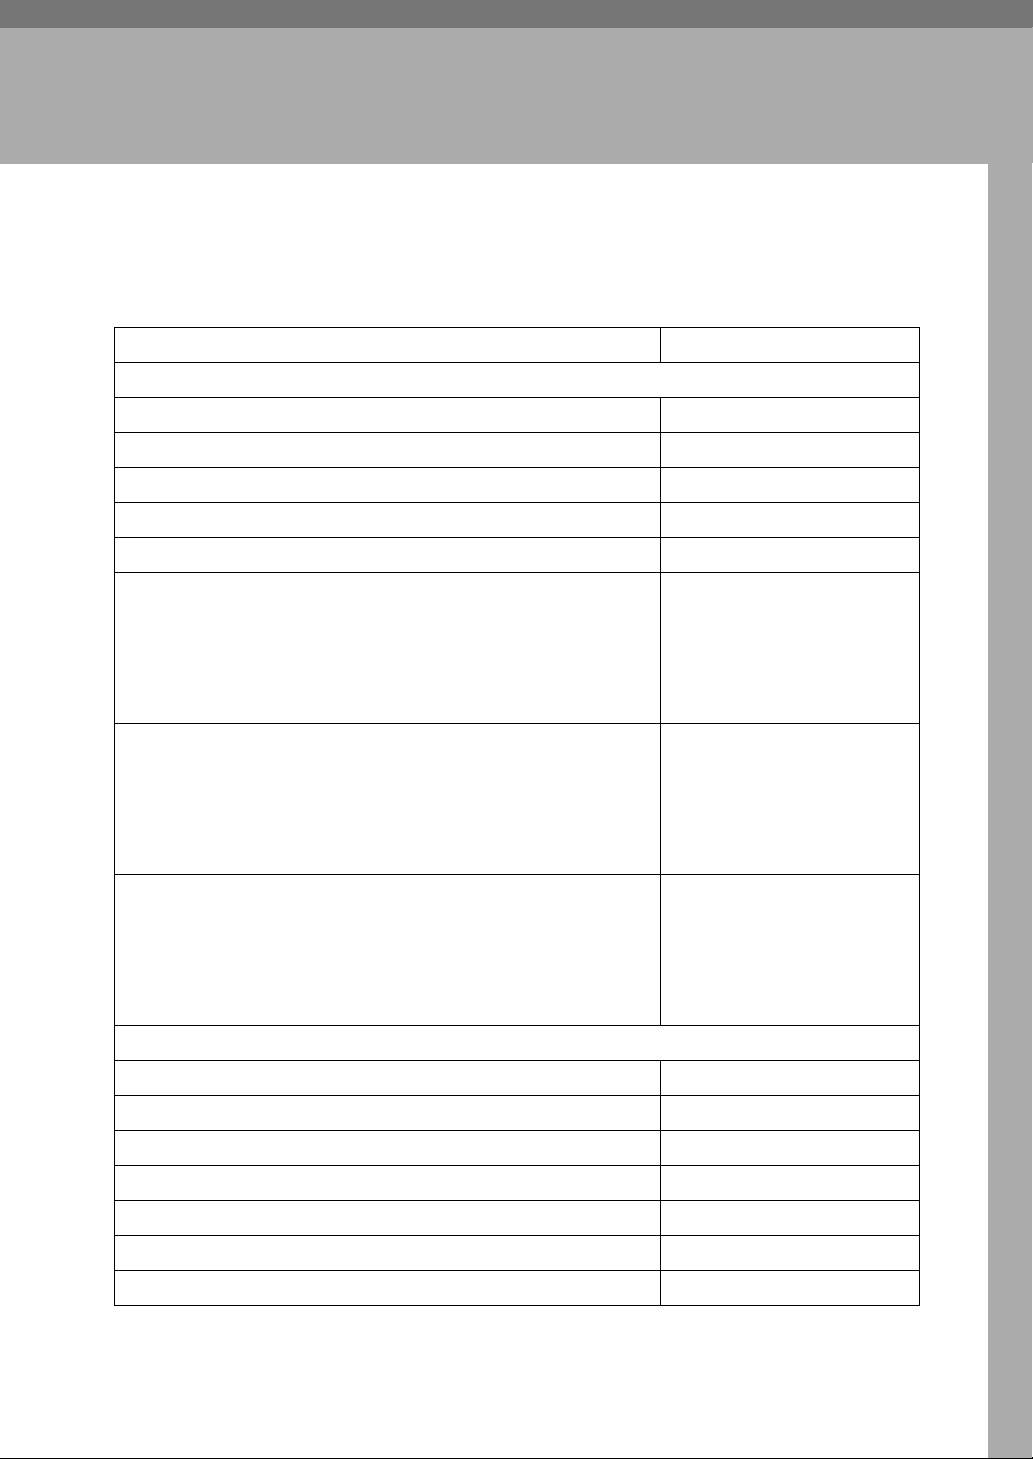
5. User Tools (Copy/Document
Server Features)
User Tools Menu (Copier/Document
Server Features)
User Tools Item Names Default Settings
1
General Features 1/5 ⇒ p.97 “General Features
Auto Paper Select Priority ON
Auto Tray Switching With image rotation
Paper Display Display
Original Type Priority Text
Original Type Display Display
Auto Image Density Priority Text: On
/5”
Text/Photo: On
Photo: Off
Pale: On
Generation Copy: On
Copy Quality Text: Normal
Text/Photo: Normal
Photo: Print Photo
Pale: Normal
Generation Copy: Normal
Image Density Text: Normal
Text/Photo: Normal
Photo: Normal
Pale: Normal
Generation Copy: Normal
General Features 2/5 ⇒ p.99 “General Features
Duplex Mode Priority 1 Sided → 1 Sided
Copy Orientation in Duplex Mode Top to Top
Original Orientation in Duplex Mode Top to Top
Change Initial Mode Standard
Max. Copy Quantity 999 Sheets
Tone: Original remains ON
Job End Call ON
2
/5”
89

5
User Tools (Copy/Document Server Features)
User Tools Item Names Default Settings
General Features 3/5 ⇒ p.99 “General Features 3/5”
Copy Function Key: F1–F5 • F1: 1 Sided → 2 Sided: T to
T
• F2: 2 Sided: T to T → 2 Sid-
ed: T to T
• F3: 1 Sided → 1 Sided Com-
bine
• F4: 1 Sided → 1 Sided Com-
bine: 4 originals
• F5: Create Margin
General Features 4/5 ⇒ p.99 “General Features
Document Server Storage Key: F1–F5 • F1: 2 Sided Original Top to
General Features 5/5 ⇒ p.100 “General Features
4
/5”
5
/5”
Top
• F2: 1 Sided → 1 Sided Com-
bine
• F3: 1 Sided → 1 Sided Com-
bine: 4 originals
• F4: 1 Sided → 1 Sided Com-
bine: 8 originals
• F5: Create Margin
Document Server Print Key: F1–F5 • F1: 2 Sided Top to Top
• F2: 2 Sided Top to Bottom
• F3: Booklet
• F4: Magazine
• F5: Off
90
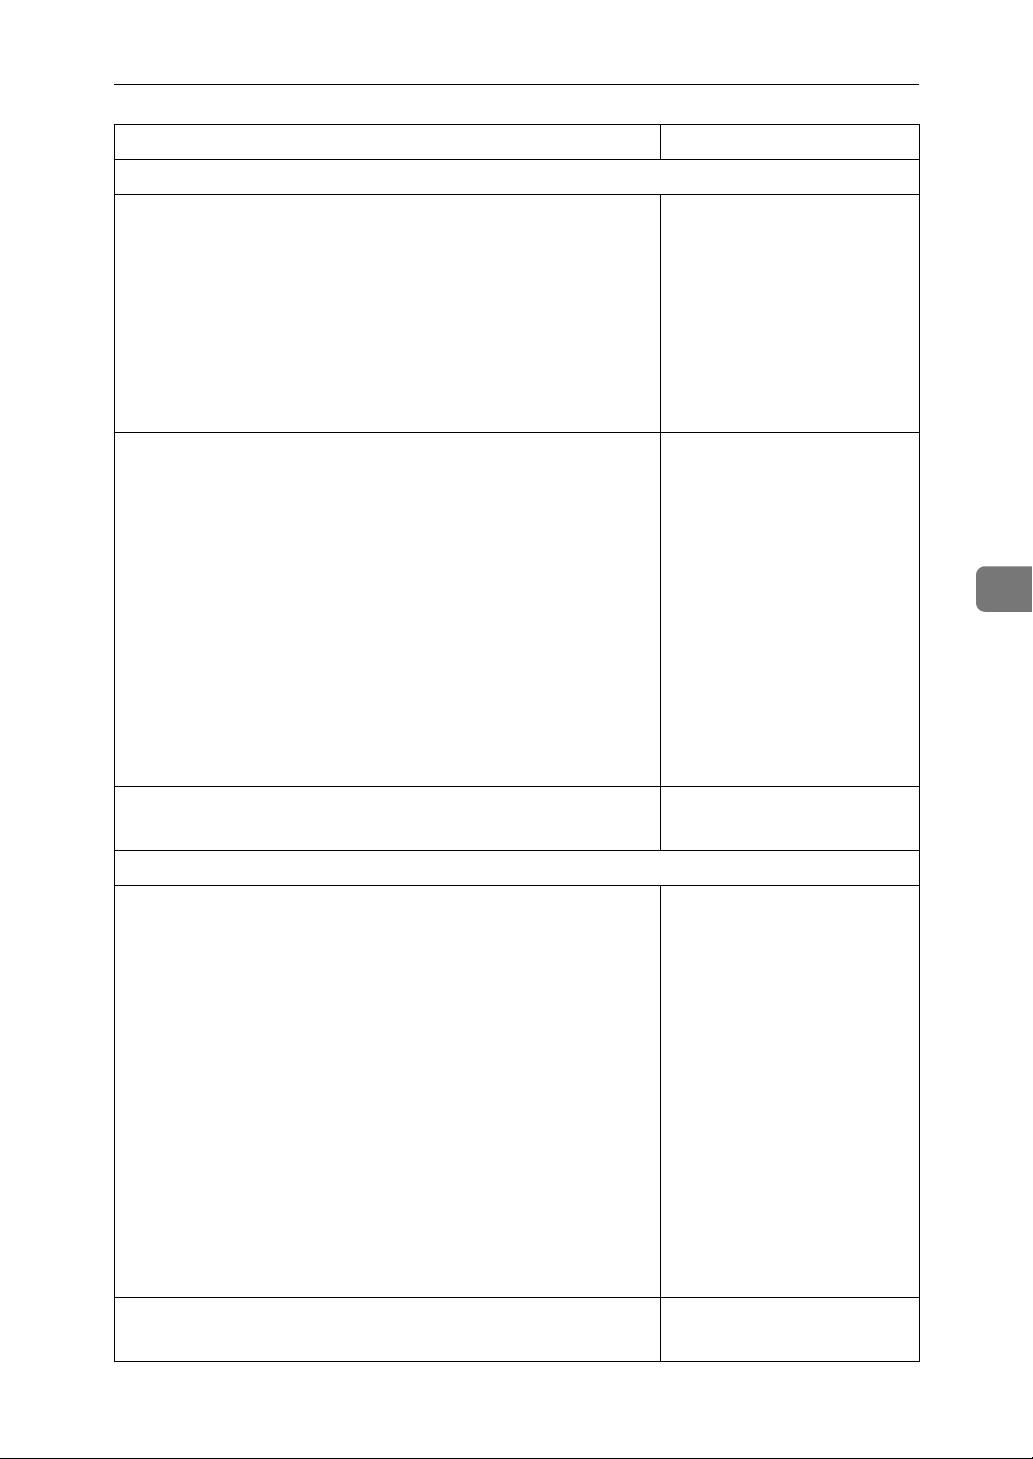
User Tools Menu (Copier/Document Server Features)
User Tools Item Names Default Settings
Reproduction Ratio 1/2 ⇒ p.100 “Reproduction Ratio 1/2”
Shortcut R/E 1–3 Metric version
• Shortcut R/E 1: 71%
• Shortcut R/E 2: 141%
• Shortcut R/E 3: 93%
Inch version
• Shortcut R/E 1: 73%
• Shortcut R/E 2: 155%
• Shortcut R/E 3: 93%
Enlarge 1–5 Metric version
• Enlarge 1: 115%
• Enlarge 2: 122%
• Enlarge 3: 141%
• Enlarge 4: 200%
• Enlarge 5: 400%
Inch version
• Enlarge 1: 121%
• Enlarge 2: 129%
• Enlarge 3: 155%
• Enlarge 4: 200%
• Enlarge 5: 400%
5
Priority Setting: Enlarge Metric version 141%
Inch version 155%
Reproduction Ratio 2/2 ⇒ p.100 “Reproduction Ratio
Reduce 1–6 Metric version
Priority Setting: Reduce Metric version: 71%
2
/2”
• Reduce 1: 25%
• Reduce 2: 50%
• Reduce 3: 65%
• Reduce 4: 71%
• Reduce 5: 75%
• Reduce 6: 82%
Inch version
• Reduce 1: 25%
• Reduce 2: 50%
• Reduce 3: 65%
• Reduce 4: 73%
• Reduce 5: 78%
• Reduce 6: 85%
Inch version: 73%
91

5
User Tools (Copy/Document Server Features)
User Tools Item Names Default Settings
Ratio for Create Margin 93%
R/E Priority Reduce
Edit 1/2 ⇒ p.101 “Edit
Front Margin: Left/Right Metric version: Left 5 mm
Back Margin: Left/Right Metric version: Right 5 mm
Front Margin: Top/Bottom Metric version: T/B 0 mm
Back Margin: Top/Bottom Metric version: T/B 0 mm
1 Sided → 2 Sided Auto Margin: T to T Metric version: Right 5 mm
1 Sided → 2 Sided Auto Margin: T to B Metric version: T/B 0 mm
1
/2”
Inch version: Left 0.2”
Inch version: Right 0.2”
Inch version: T/B 0”
Inch version: T/B 0”
Inch version: Right 0.2”
Inch version: T/B 0”
Erase Border Width Metric version: 10 mm
Inch version: 0.4”
Erase Original Shadow in Combine Yes
Erase Center Width Metric version: 10 mm
Inch version: 0.4”
Edit 2/2 ⇒ p.102 “Edit
Image Repeat Separation Line None
Double Copies Separation Line None
Separation Line in Combine None
Copy Back Cover Outside
Front Cover Copy in Combine Combine
Copy on Designating Page in Combine Combine
Orientation: Booklet, Magazine Open to left
Copy Order in Combine From left to right
Stamp ⇒ p.104 “Stamp”
Background Numbering Size Normal
2
/2”
Density Normal
92
User Tools Menu (Copier/Document Server Features)
User Tools Item Names Default Settings
Preset Stamp Stamp Priority Copy
Stamp Language English
Stamp Position Metric version
• Position: Top right
• Top Margin: 24 mm
• Right Margin: 24 mm
Inch version
• Position: Top right
• Top Margin: 1.0"
• Right Margin: 1.0"
Stamp Format Size: 1×
Density: Normal
All pages
User Stamp Program/Delete Stamp
Stamp Position: 1~4 Metric version
• Position: Top right
• Top Margin: 24 mm
• Right Margin: 24 mm
Inch version
• Position: Top right
• Top Margin: 1.0"
• Right Margin: 1.0"
Stamp Format : 1~4 All pages
Date Stamp Format MM/DD/YYYY
Font Font 1
Stamp Position Metric version
• Position: Top left
• Top Margin: 8 mm
• Right Margin: 32 mm
Inch version
• Position: Top left
• Top Margin: 0.3"
• Right Margin: 0.8"
5
Stamp Setting All pages
Size Auto
Superimpose No
93

User Tools (Copy/Document Server Features)
User Tools Item Names Default Settings
Page Numbering Stamp Format P1, P2...
Font Font 1
Size Auto
5
Duplex Back Page Stamping
Position
Page Numbering in Combine Per original
Stamp on Designated Slip
Sheet
Stamp Position Metric version
Opposite position
No
• Position
P1, 1/5, P.1, 1: Top right
-1-, 1–1: Bottom center
• Top/Bottom Margin
P1, 1/5, P.1, 1: 12 mm
-1-, 1–1: 8 mm
• Left/Right Margin
P1, 1/5, P.1, 1: 12 mm
-1-, 1–1: 0 mm
Inch version
• Position
P1, 1/5, P.1, 1: Top right
-1-, 1–1: Bottom center
• Top/Bottom Margin
P1, 1/5, P.1, 1: 0.5"
-1-, 1–1: 0.3"
• Left/Right Margin
P1, 1/5, P.1, 1: 0.5"
-1-, 1–1: 0.0"
94
Superimpose No
Input/Output
Switch to Batch Batch
SADF Auto Reset 5 seconds
Rotate Sort: Auto Paper Continue No
Auto Sort No
Memory Full Auto Scan Restart No
Select Stapling Position (Top Left) Top
Select Stapling Position (Bottom Left) Finisher 3000B(100-sheet sta-
1
/2 ⇒ p.106 “Input/Output 1/2”
ples): Top Slant
Finisher 3000M(50-sheet staples): Top Slant
Booklet Finisher: Saddle
Stitch
 Loading...