Savin 4090, 40105, 9002, 10512, LD090 Settings Guide

...

#

Changing the Paper Size

Be sure to select the paper size with Paper Tray Settings. Otherwise, misfeeds might occur. See p.170 “Copy Paper”.

If you want to change the paper size set in paper tray 1 or the LCT, contact your service representative.

%

For details about paper sizes and types, see p.93 “Paper Tray Settings” and p.170 “Copy Paper”.

Fan the paper before placing it in the tray.

If paper is curled or warped, straighten it before placing in the tray.

F ,54""N×"MN % # 1 % # "

M

The fence of the optional, A3/11" × 17" tray unit (Tray 1) is fixed to A4, 81/2" × 11" size.

When you set tab stock in the tray, always use the end fence.

To change the paper size of this tray, contact your service representative.

F % #$5

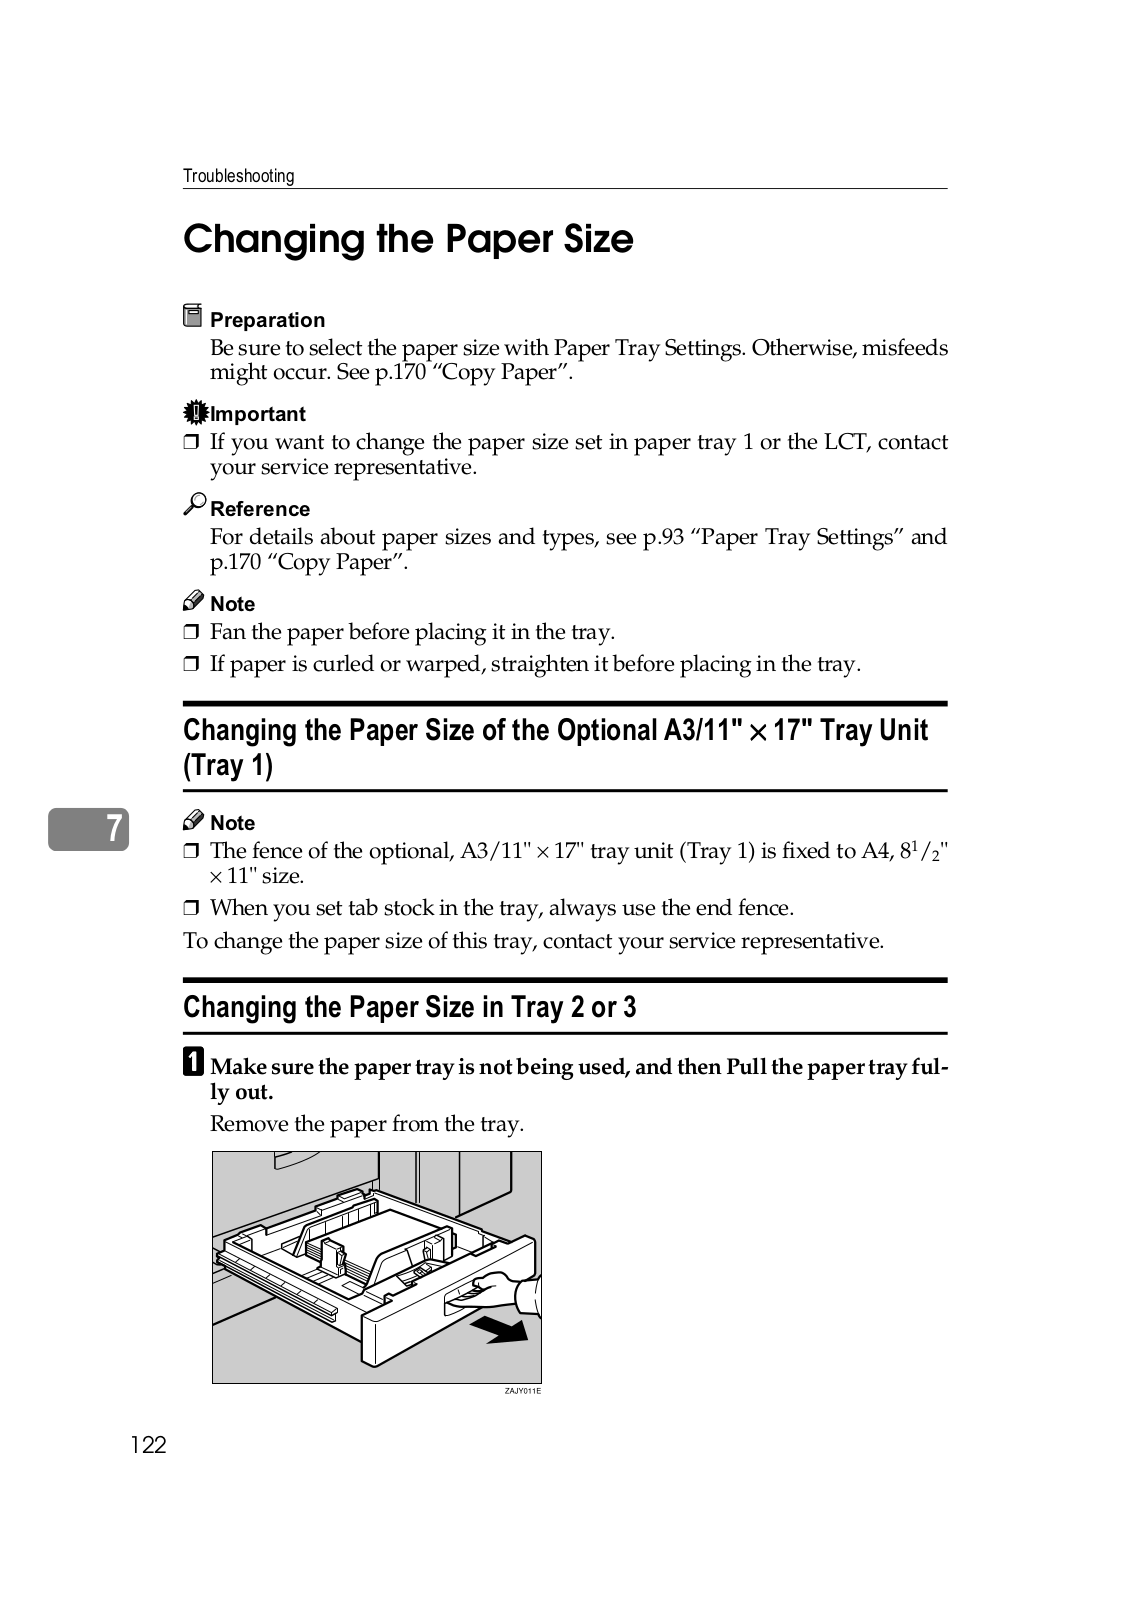
AMake sure the paper tray is not being used, and then Pull the paper tray fully out.

Remove the paper from the tray.

122

# # ' /

BPress the lock button, and then adjust the back and side fences to the new paper size while pushing the release lever.

CSquare the paper and load it in the paper tray, and then press the lock button.

M

Confirm that the top of the stack is not higher than the limit mark inside the tray.

Align the right edge of the copy paper stack to the right edge of the tray.

DSet the paper size selector knob inside the tray to the new size.

123

#

Problems might occur if the size of the paper set does not match the paper size selector, such as:

Misfeeds

Parts of the image are not copied

= < <

E F

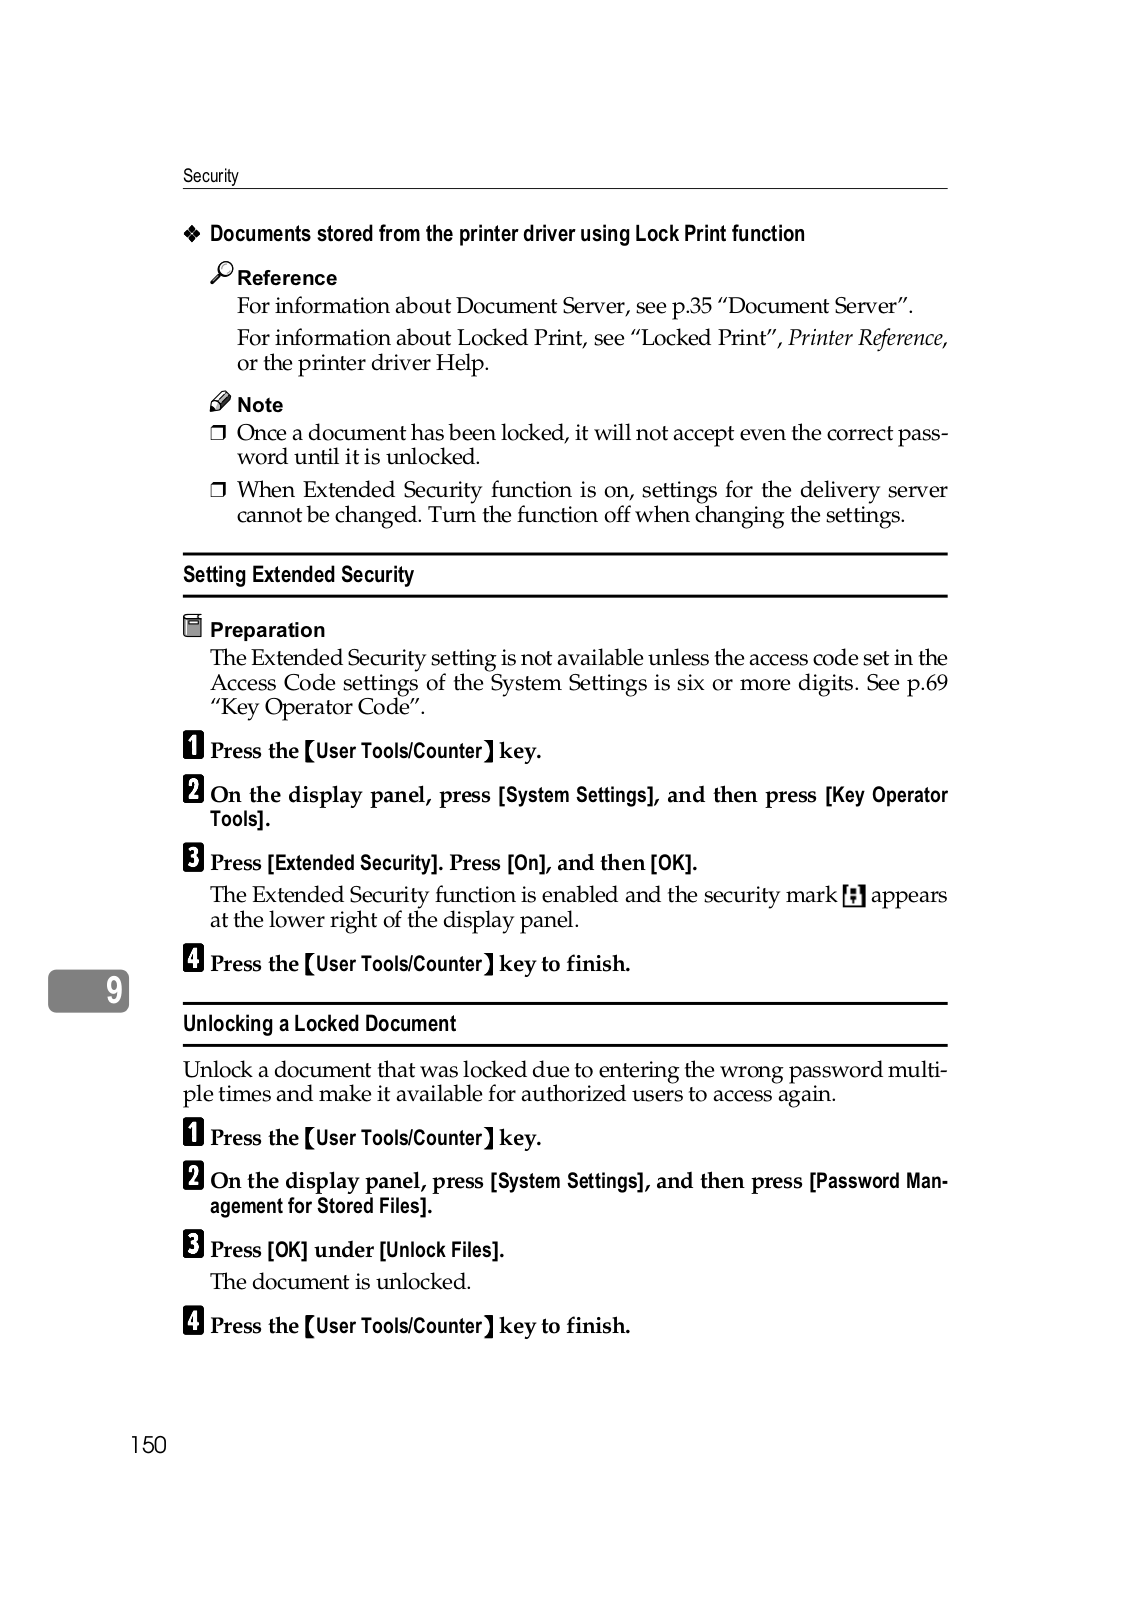
ASet the paper size selector knob to the pmark on the left.

BPress the {% #}key.

CPress )F*.

DSelect the size, and then press )6*.

EPress )/+* or press the {% #}key to exit the Tray Paper Setting.

Gently push the paper tray until it stops.

Check the paper size displayed on the display panel.

F ( # % # % # 9 B

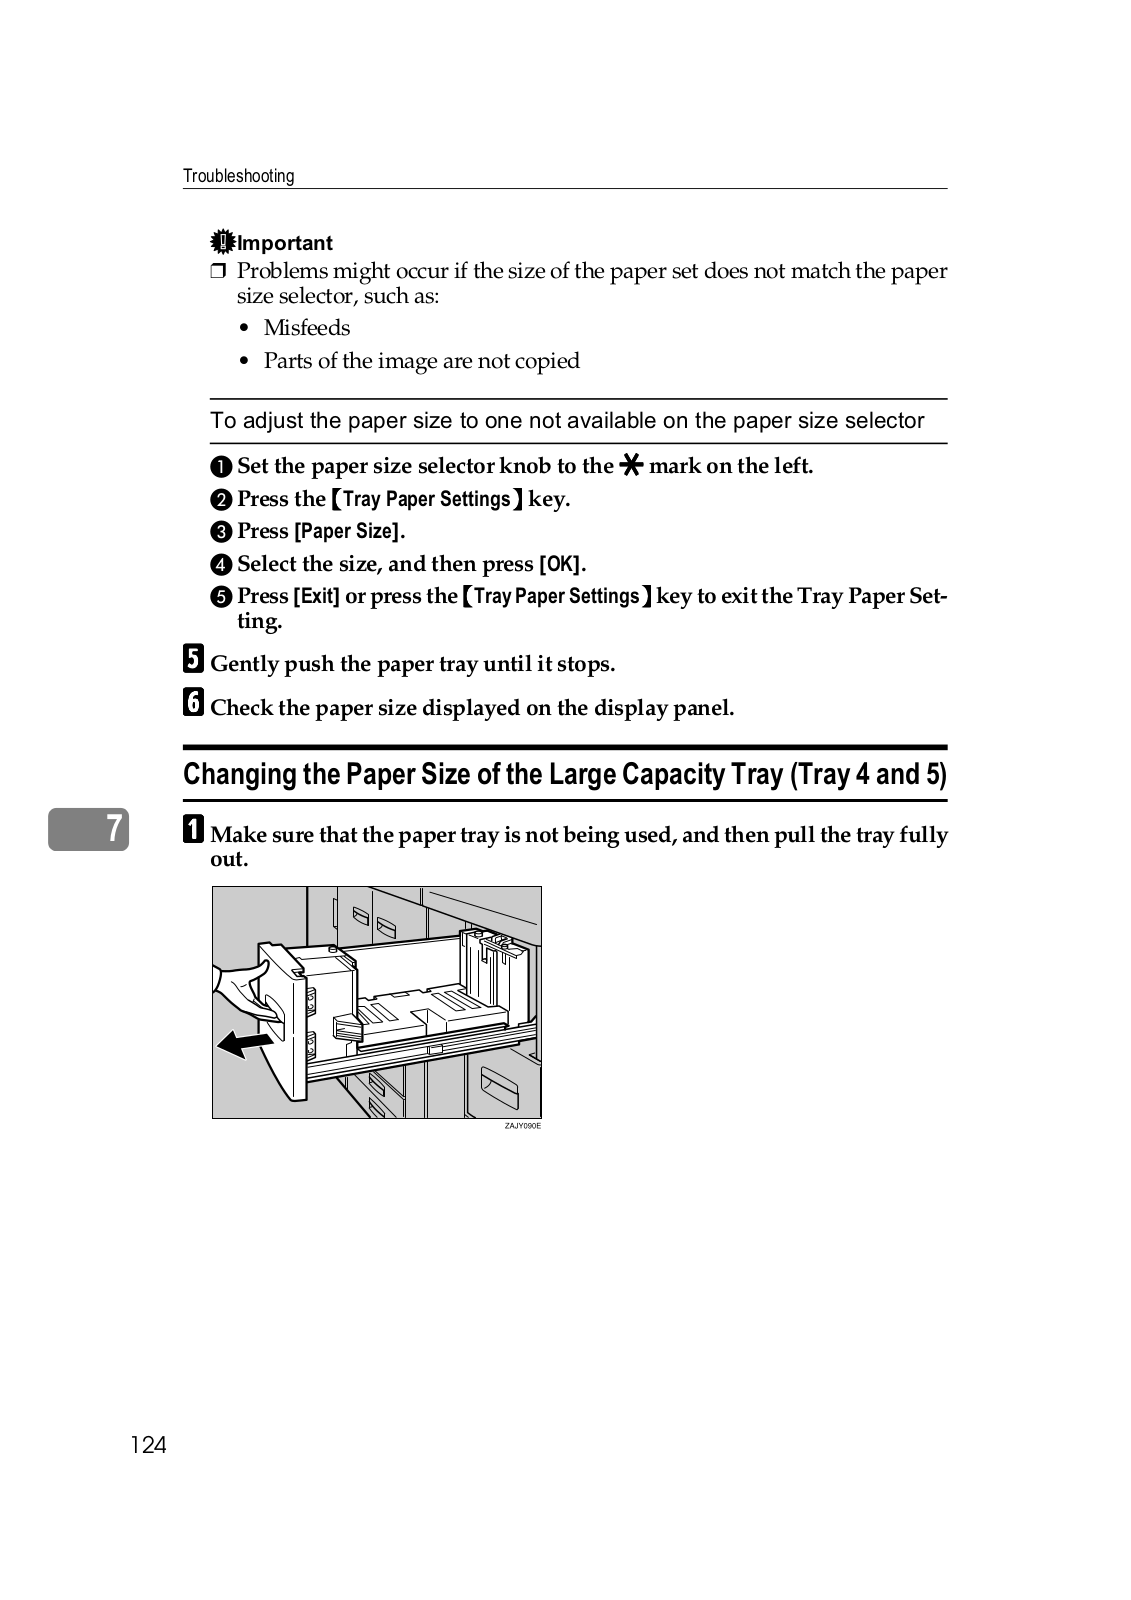
MAMake sure that the paper tray is not being used, and then pull the tray fully

out.

124

Savin 4090, 40105, 9002, 10512, LD090 Settings Guide

# # ' /

BPull out the screws fixing the side fence.

CSet the side fences to the size you want.

M

DFasten the side fence with the screws.

125

#

E

F

Set the end fence along the paper size.

Square the paper and set it in the tray.

M


Do not load over the lowest level mark.

GSet the paper size selector in the innermost part of the tray to the new paper size.

126

d #

d Adding Staples

When removing jammed staples, staples might not be ejected the first few times you try to use the stapler.

If you use a staple cartridge other than that recommended, staple failure or staple jams might occur.

A paper jam will occur if the machine staples using the booklet finisher without the saddle stitch stapler cartridge. Make sure the cartridge is set.

%

For details about the type of finisher, see p.19 “External Options”.

&

• Open the finisher front cover.

• Pull out the staple unit.

M

• Gently pull out the cartridge.

Pull up the upper unit of the cartridge while holding both sides of the cartridge.

127

#

• Take out the empty refill in the direction of the arrow.

• Align the arrows on the new refill and the cartridge, and then push in the refill until it clicks.

• Gently push down the upper unit into the cartridge.

M

• Pull out the ribbon.

• Push the cartridge down until it clicks.

• Return the staple unit to its original position.

• Close the finisher front cover.

128

d #

&

• Open the finisher front cover.

• Pull out the staple unit.

• Pull lever S2.

• Gently pull out the cartridge.

M

• Pull up the upper unit of the cartridge while holding both sides of the cartridge.

• Take out the empty refill in the direction of the arrow.

129

#

• Align the arrows on the new refill and the cartridge, and then push in the refill until it clicks.

• Gently push down the upper unit into the cartridge.

• Pull out the ribbon.

M

• Push the cartridge down until it clicks.

• Return lever S2 to its original position.

• Return the staple unit to its original position.

• Close the finisher front cover.

130

d #

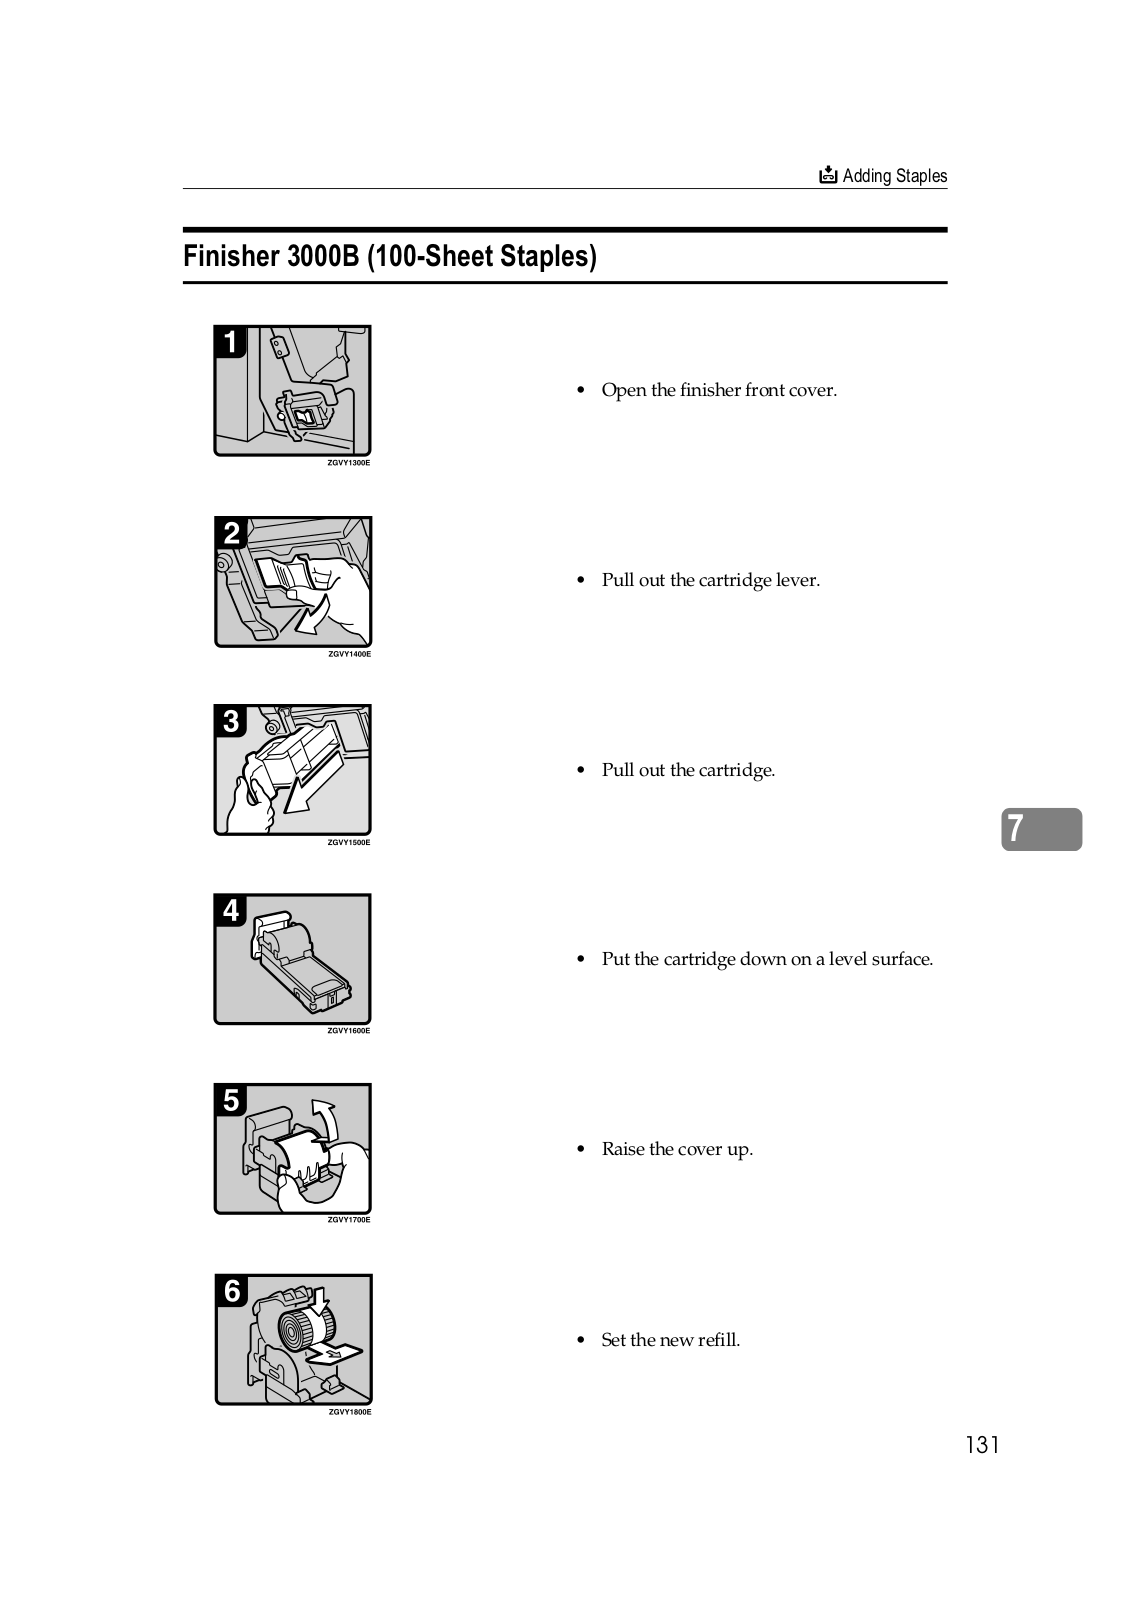
5OOO& "OO

• Open the finisher front cover.

• Pull out the cartridge lever.

• Pull out the cartridge.

M

• Put the cartridge down on a level surface.

• Raise the cover up.

• Set the new refill.

131

#

• Lower the cover until it clicks.

• Pull out the ribbon.

• Turn the cartridge around.

M

• Reinstall the cartridge.

• Push the cartridge in until it clicks.

• Close the finisher front cover.

132

e, ! # 0

e Removing Jammed Staples

A paper jam will occur if the machine staples using the booklet finisher without the saddle stitch stapler cartridge. Make sure the cartridge is set.

Staples might jam due to curled copy paper. If this happens, try turning the paper over in the tray. If there is no improvement, change to a stiffer paper.

When removing jammed staples, staples might not be ejected the first few times you try to use the stapler.

&

• Open the finisher front cover.

• Pull out the staple unit.

M

• Gently pull out the cartridge.

• Open the face plate.

• Remove jammed staples.

133

#

• Pull down the face plate of the cartridge until it clicks.

• Push the cartridge down until it clicks.

• Return the staple unit to its original position.

• Close the finisher front cover.

M&

• Open the finisher front cover.

• Pull out the staple unit.

• Pull lever S2.

• Gently pull out the cartridge.

134

e, ! # 0

• Open the face plate of the cartridge.

• Remove jammed staples.

Pull the face plate of the cartridge down until it clicks.

M

• Push the cartridge down until it clicks.

• Return lever S2 to its original position.

Return the staple unit to its original position.

Close the front cover of the finisher.

135

#

5OOO& "OO

• Open the finisher front cover.

• Turn knob R9 until the markings align.

• Pull lever R8 and pull the staple unit completely out.

• Turn knob R9 to rotate the staple unit.

• Pull out the cartridge lever.

M

• Pull out the cartridge.

• Push the buttons on the both sides of the cartridge and open the face plate.

136

e, ! # 0

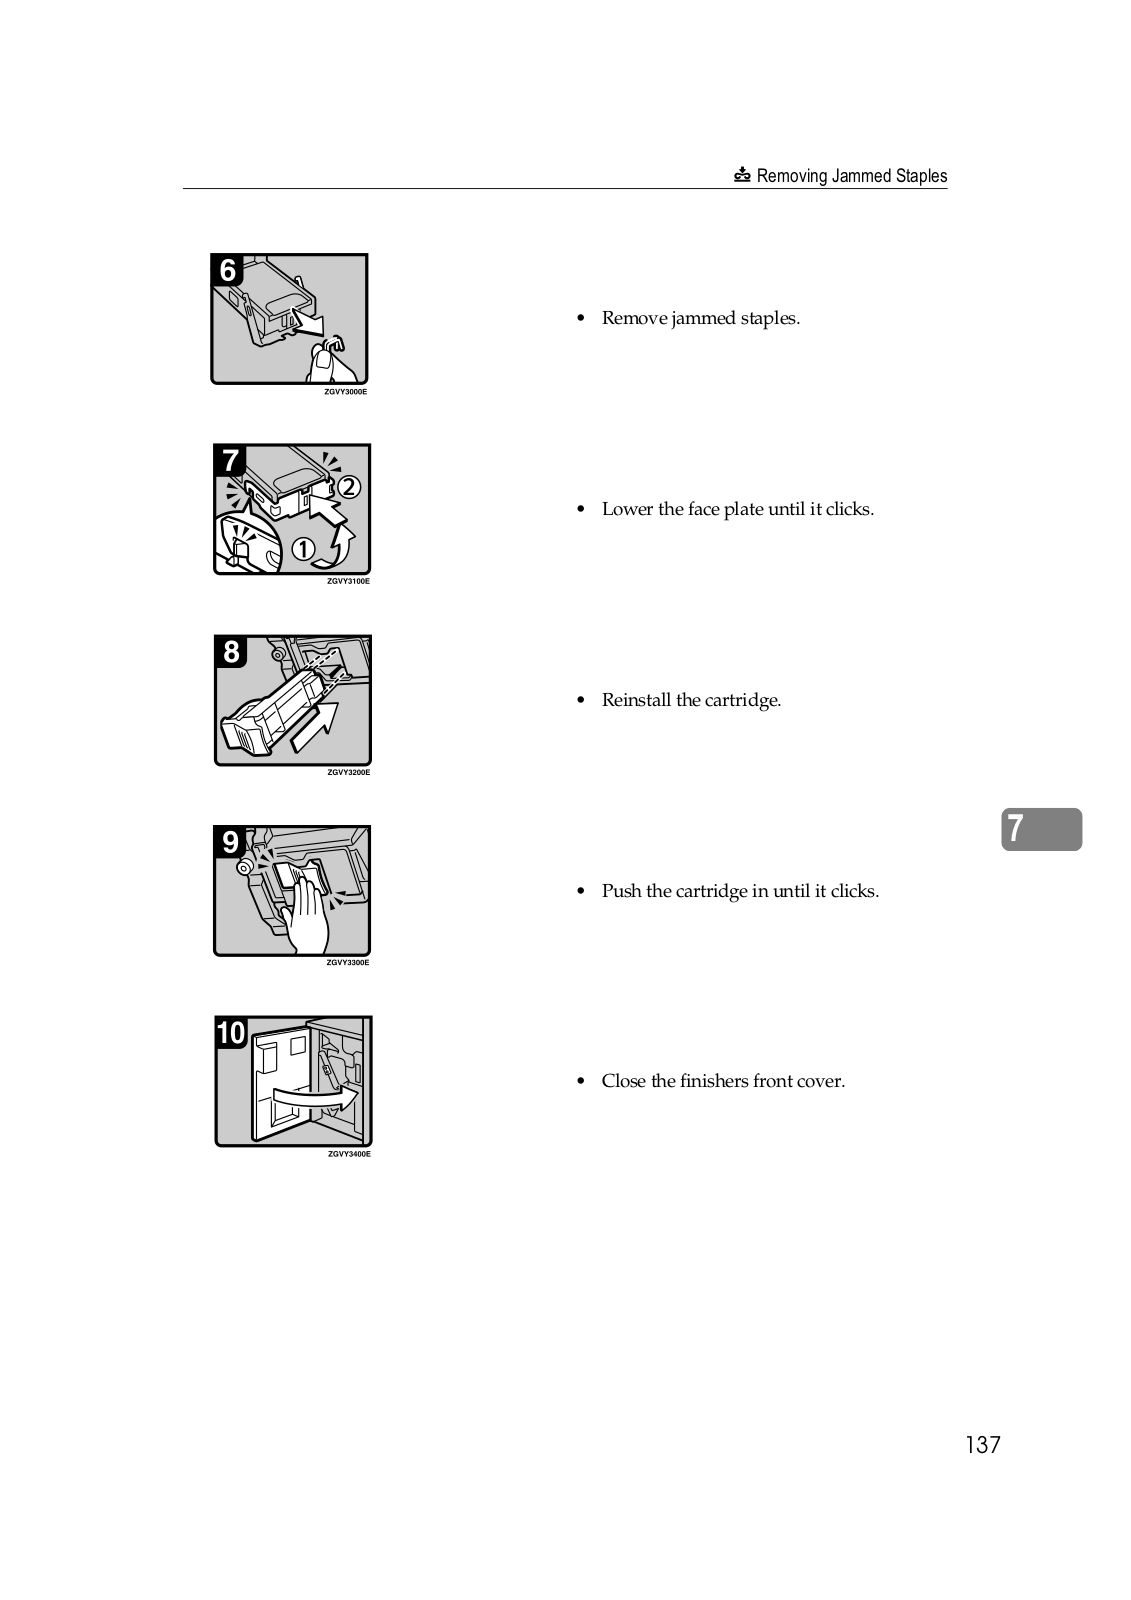
• Remove jammed staples.

• Lower the face plate until it clicks.

• Reinstall the cartridge.

M

• Push the cartridge in until it clicks.

• Close the finishers front cover.

137

#

y Removing Punch Waste

When the “Hole punch receptacle is full.” message appears, you cannot use the Punch function.

The procedures shown below is an example using the Finisher 3000B.

AOpen the finisher's front cover.

ZJBP020E

BPull out the punch waste box, and then remove punch waste.

M

CReinstall the punch waste box.

138

y, ! # '

DClose the front cover of the finisher.

The “Hole punch receptacle is full.” message disappears.

If the message is still displayed, reinstall the punch waste box.

M

139

Loading...
+ 39 hidden pages