

Page 1

SBPL
Programming Guide
USB
Ver 01.54.00
Page 2

Table of Contents
1. Printer Properties......................................................................................... 1
2. Adding a Port................................................................................................ 2
3. Port Setting................................................................................................... 3
4. Precautions................................................................................................... 4
Page 3
1
USB Interface
You must install a USB driver* in addition to a printer driver in order to use the USB port.
The USB driver is automatically installed when “SATO MR USB Port Monitor” is added to your
system. There are two ways to add the “SATO MR USB Port Monitor”. One way is to install it
when the printer driver is installed. And the other way is to install it after the printer driver is
installed.
In this manual, we will describe the second way. For the first way, refer to “4. How to install a
Printer Driver” on page 15 of the “SATO Barcode Label Printer Setup Guide”.
* This USB driver is supported by Windows 98 only. Use Windows 98 when you print labels via
USB connection.
1. Printer Properties
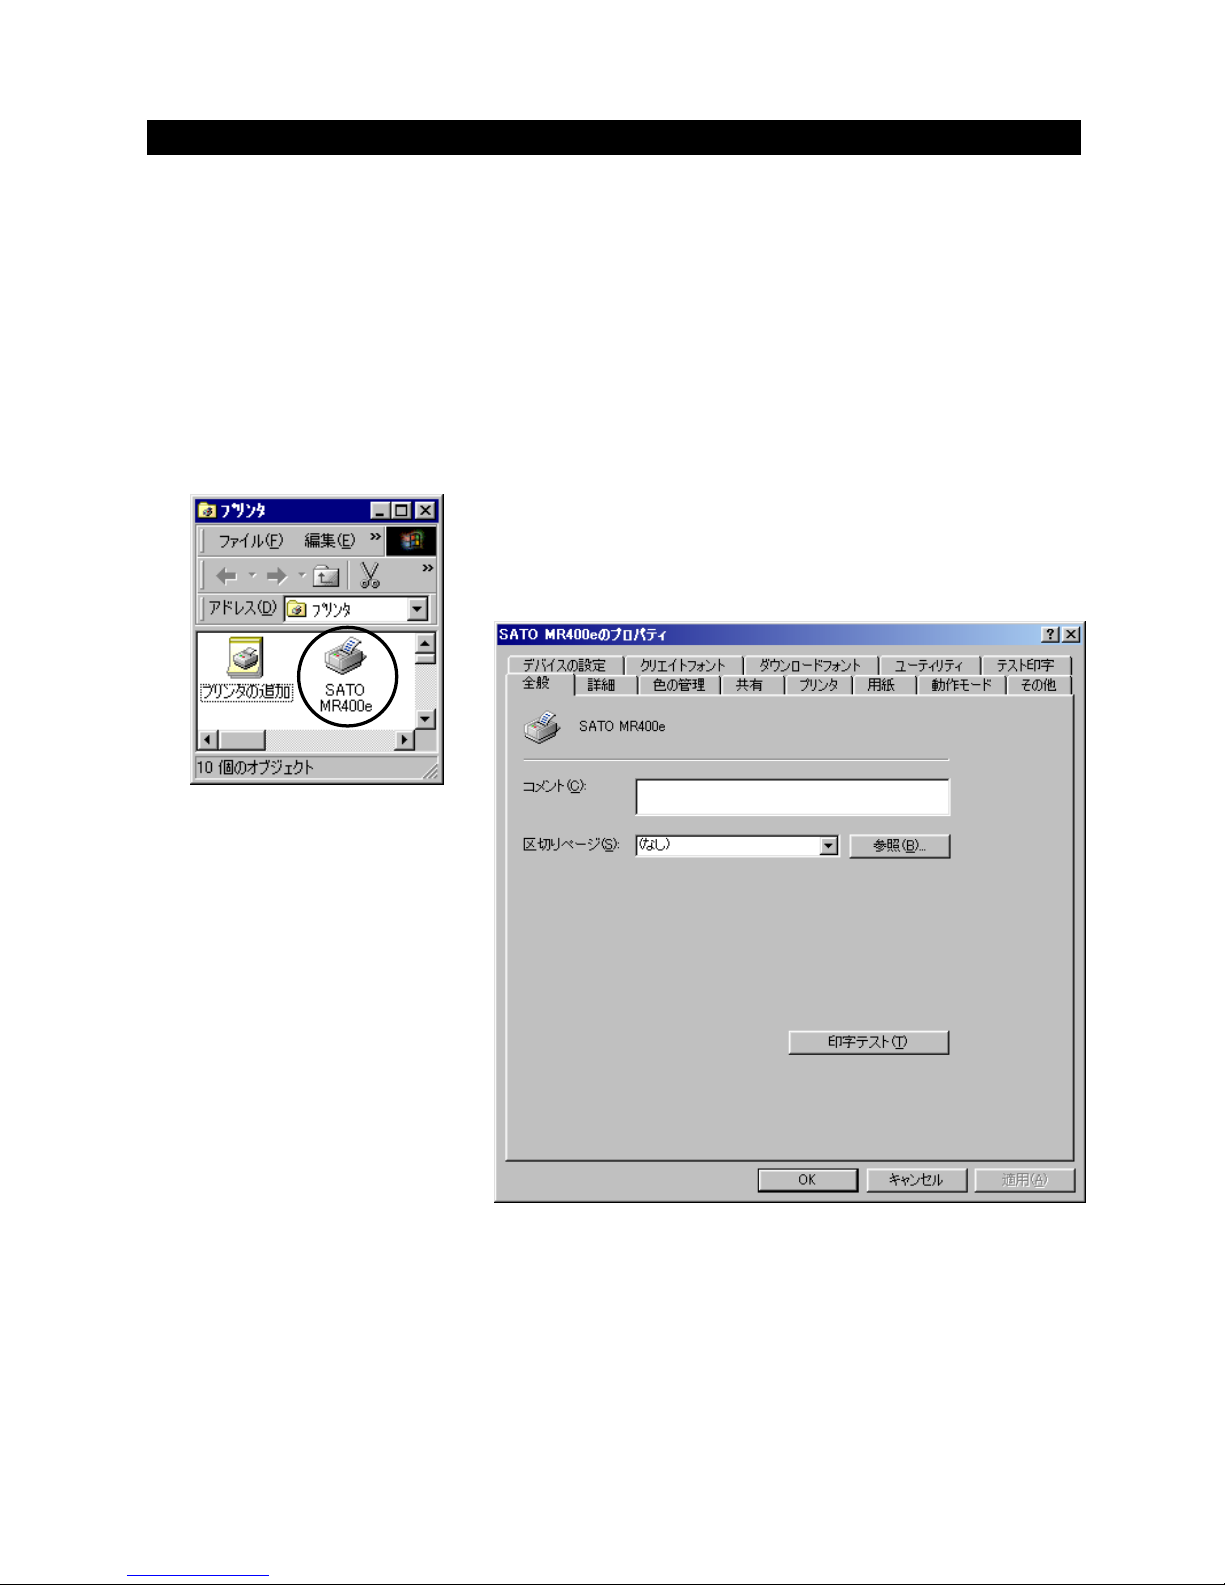
Select the [Printer] folder and open [Property] of the
MR400e/410e Printer that you are currently using.
Figure 1. Printer folder
Figure 2. Property of the Printer
Page 4
2
2. Adding a Port
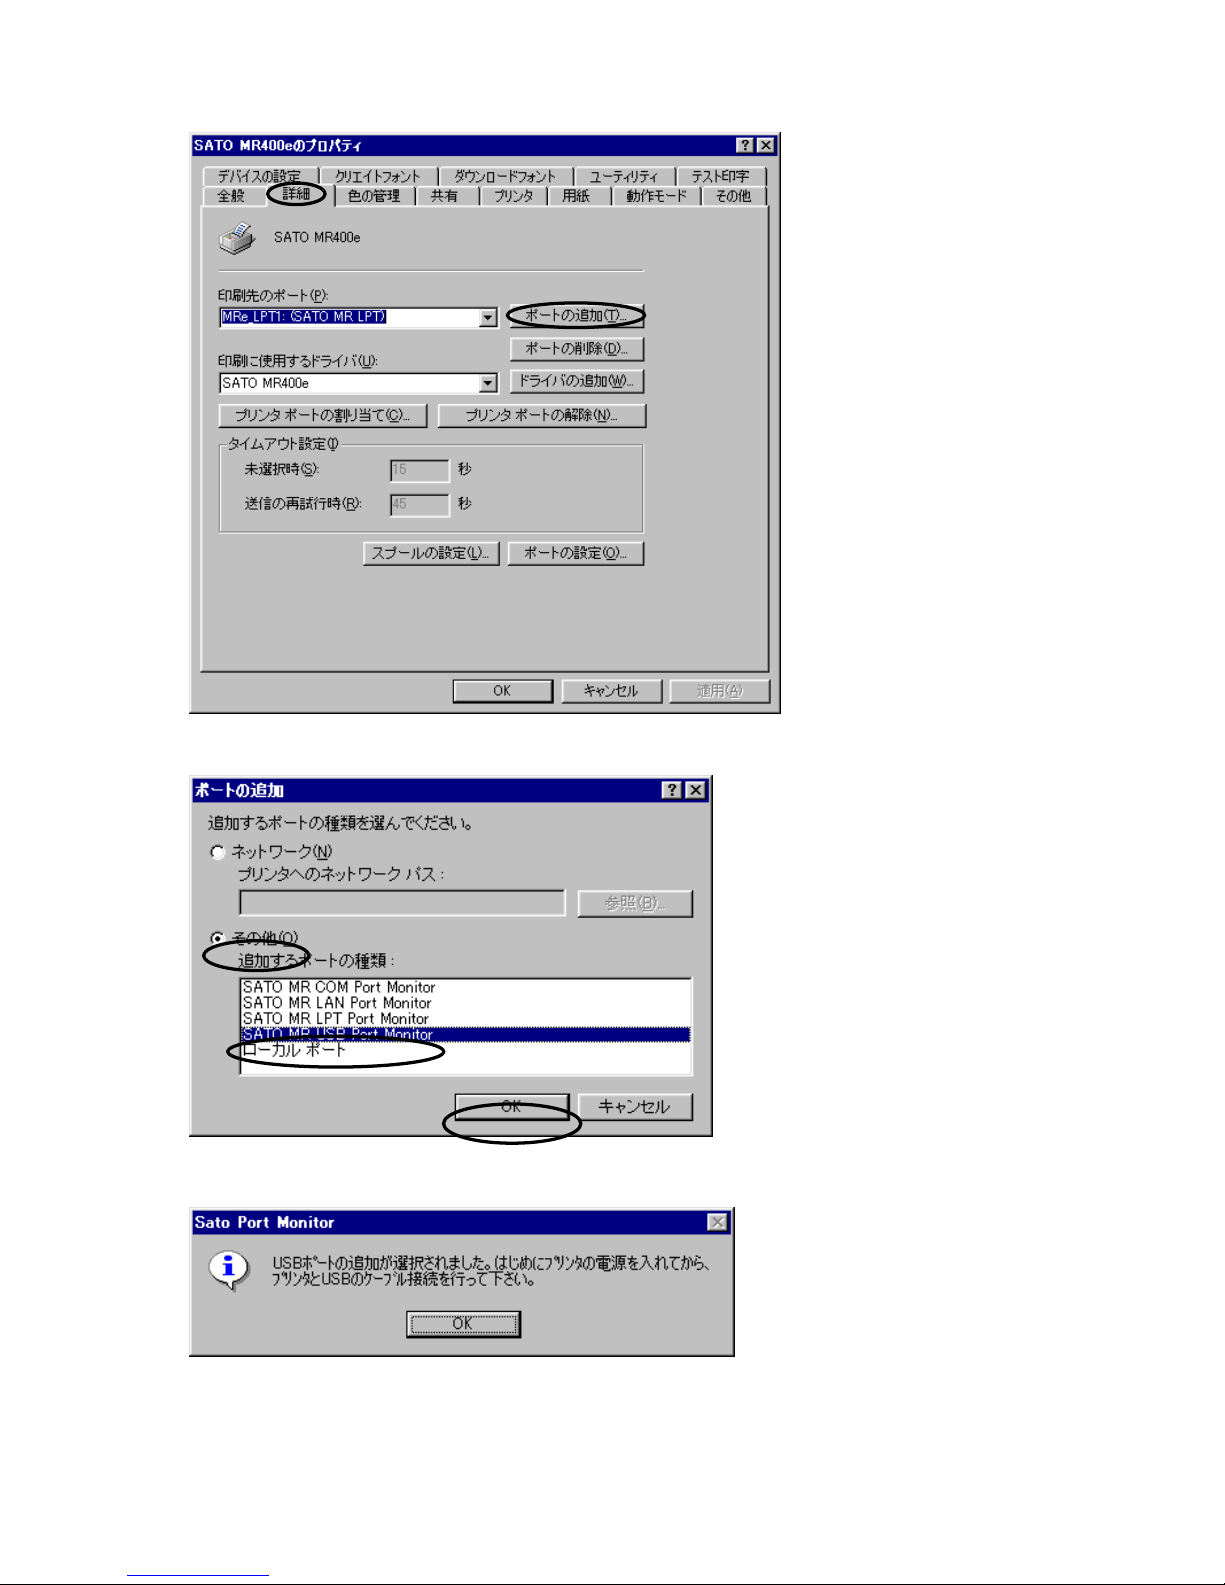
Select the [Details] tab and
click the [Add Port] button.
The [Add Port] dialog
appears.
Figure 3. [Details] dialog
Select the [Other] button. When
the [Port type to be added] list
becomes active, select “SATO MR
USB Port Monitor” and click [OK]
button. The dialog as shown in
Figure 5 appears. Turn on the
printer by following the message
and connect the USB cable to your
PC. Installation of the USB driver
is automatically started.
Figure 4. [Add Port] dialog
Figure 5. [Add USB Port] dialog
Page 5
3
3. Port Setting
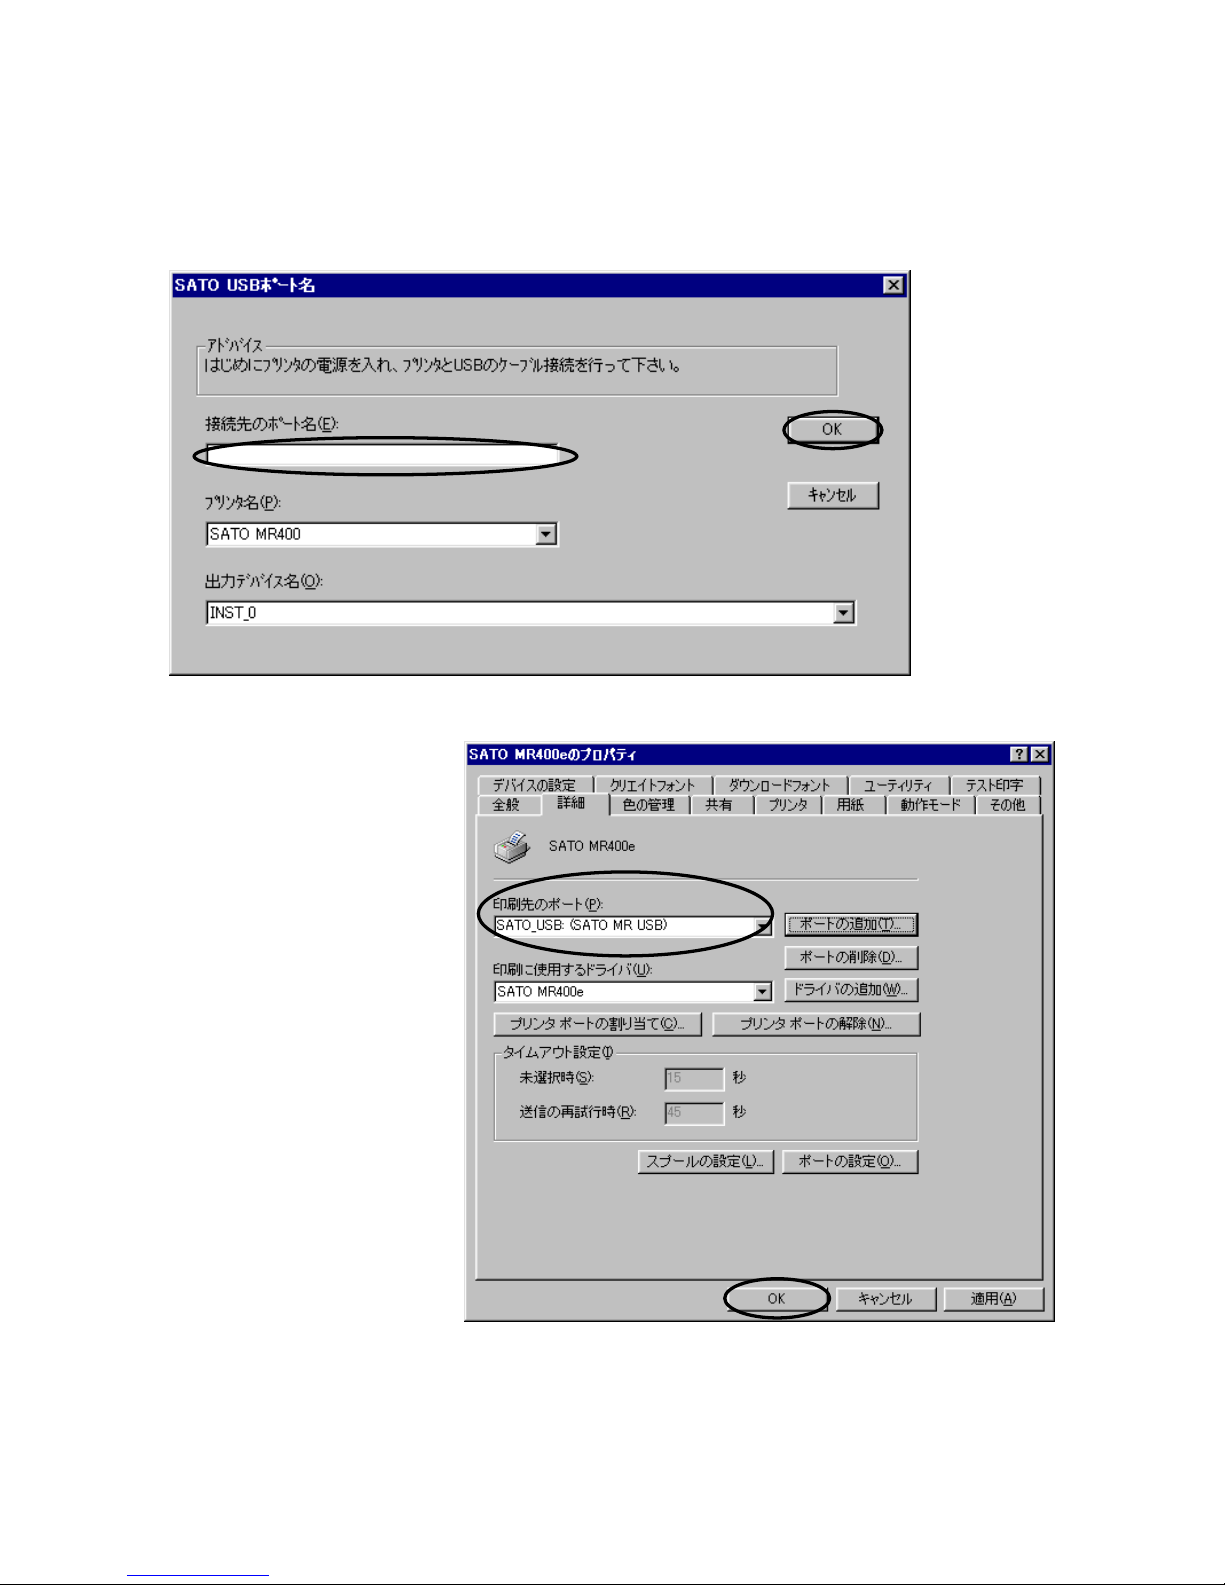
When the USB driver is installed, the [USB Port Setting] dialog as shown in Figure 6 appears.
Set any port name to the [Destination Port Name] and click the [OK] button. When the dialog as
shown in Figure 7 appears, confirm that the [Print Destination Port] is set to the added port and
click the [OK] button. This completes the USC port installation process.
Figure 6. [USB Port Setting] dialog
Figure 7. Print Destination Port Setting
Page 6
4
4. Precautions
1. The USB interface can only be used with Windows 98.
*Even if Windows 98 is installed, the USB interface might not be compatible with some
types of PC. Please refer to the manual that comes with your PC for more details. If
necessary, please contact with your nearest PC dealer.
2. The USB cable should be 1 m long.
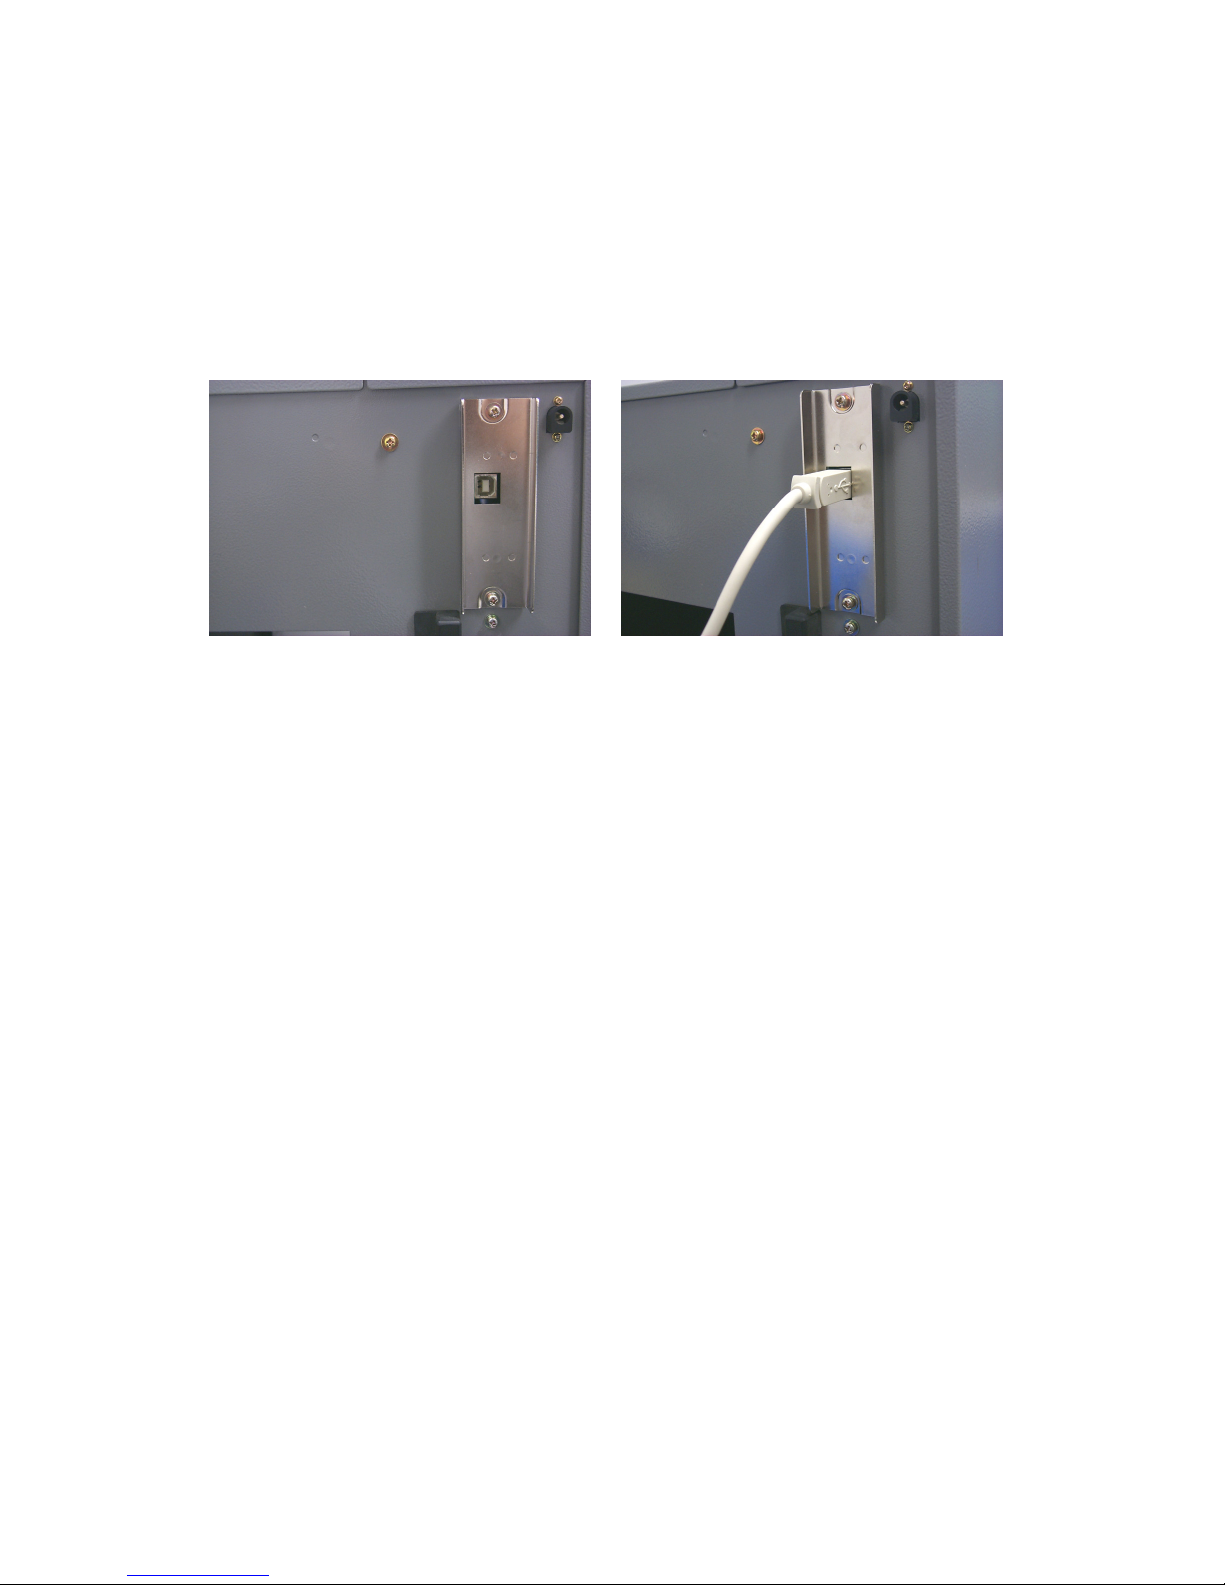
3. When the USB is connected, use the B-Type connector as shown in the photo below.
* When the USB interface is used, you must install the printer driver (on the CD-ROM) that
comes with the printer. Before installing the driver, refer to the “Setup Guide”.
 Loading...