

Page 1
US ER ’S M AN UA L
USER’ S MANUAL
Page 2

THE PROFESS ION AL EQU IPM ENT- --- --- ---------- -|U SER ’S MA NUAL| THE PROFESS ION AL EQU IPM ENT- --- --- ---------- -|U SER ’S MA NUAL|
Table of Contents
1.GUIDE.......................................................................
1.1 Important Safety Instructions............................
1.2 Unpacking.........................................................
1.3 PRODUCT OVERVIEW & ILLUSTRATION......
1.4 INSTALLATION OF METER.............................
2.OUTLINE...................................................................
3.THE MENU OSD INSTRUCTION..............................
3.1 Quick Search....................................................
3.1.1 Country....................................................
3.1.2 Channel....................................................
3.1.3 Frequency................................................
3.1.4 Bandwidth................................................
3.1.5 ANT Power...............................................
3.1.6 PowerEnable...........................................
3.1.0.1 Quick Search........................................
3.2 Freq-Checking..................................................
3.2.1 Signal Test...............................................
3.3 Multimedia........................................................
3.3.1 MUSIC.....................................................
3.3.2 VIDEO......................................................
3.3.4 Upgrade...................................................
3.4 System Setting..................................................
3.4.1 Language..................................................
3.4.2 Screen format...........................................
3.3.3 PICTRUE.................................................
3.4.3 Light setting............................................
3.4.4 Factory reset.........................................
3.4.5 Time Zone.............................................
3.4.6 Channel reset........................................
3.4.7 Mode, SW VER, Release Time.............
4. Channel.................................................................
4.1 Manager Channel..........................................
4.1.1 Rename Channel..................................
4.1.2 Del Channel..........................................
4.1.3 Lock Channel........................................
4.1.4 Skip Channel.........................................
4.2 Favorite Manager............................................
4.2.1 Favorite set...........................................
4.2.2 Rename................................................
4.2.3 Sort order..............................................
4.2.4 Favorite Sort..........................................
4.2.5 Sat sort..................................................
4.3 EPG.................................................................
4.4 Program List....................................................
4.4.1 Sort KEY...............................................
4.4.2 Multi key................................................
4.2.3 Fav key..................................................
4.5 Subtitle............................................................
5 Technical Specification........................................
6 Trouble Shooting...................................................
01
05
02
06
07
09
10
12
13
14
15
16
17
19
20
21
22
23
25
01
06
07
07
07
07
07
07
08
10
11
11
12
13
13
14
14
14
14
14
14
15
22
22
22
19
18
18
17
02
18
Page 3
THE PROFESS ION AL EQU IPM ENT- --- --- ---------- -|U SER ’S MA NUAL| THE PROFESS ION AL EQU IPM ENT- --- --- ---------- -|U SER ’S MA NUAL|
Do not remove the cover.
Do not let the unit exposed to extreme heat, cold or humid conditions.
Thank you for choosing our product. Before installation,
we would like to remind you some notes, which is very
important for operating safely and properly, as follows:
1 GUIDE
1.1 Important Safety Instructions
Be sure to read this user manual before starting your operation.
You must install the dish with correct direction and angle. If the dish is not working properly, contact your lo-cal
dealer.
When the unit is suddenly moved to a hot area from a
cold area, it may cause some problems. In that case, turn off the power, and turn on again after 1-2 hours.
Keep meter placed in clean space with sufficient ventilation.
Do not cover the meter with or place it on a unit that emits heat.
Clean the case by a soft cloth with a little washing liquid.
No liquids or any other materials to come inside of the
unit.
Do not use torch to exposure eyes.
1.2 Unpacking
Open the package and make sure it includes all below items, if any missing, please contact the reseller for replacement.
1.Digital Satellite Meter
2.User’s manual
3.AV cable
4.Car charger cable
5.Adaptor
6.Carrying bag
7.Strap of carrying bag
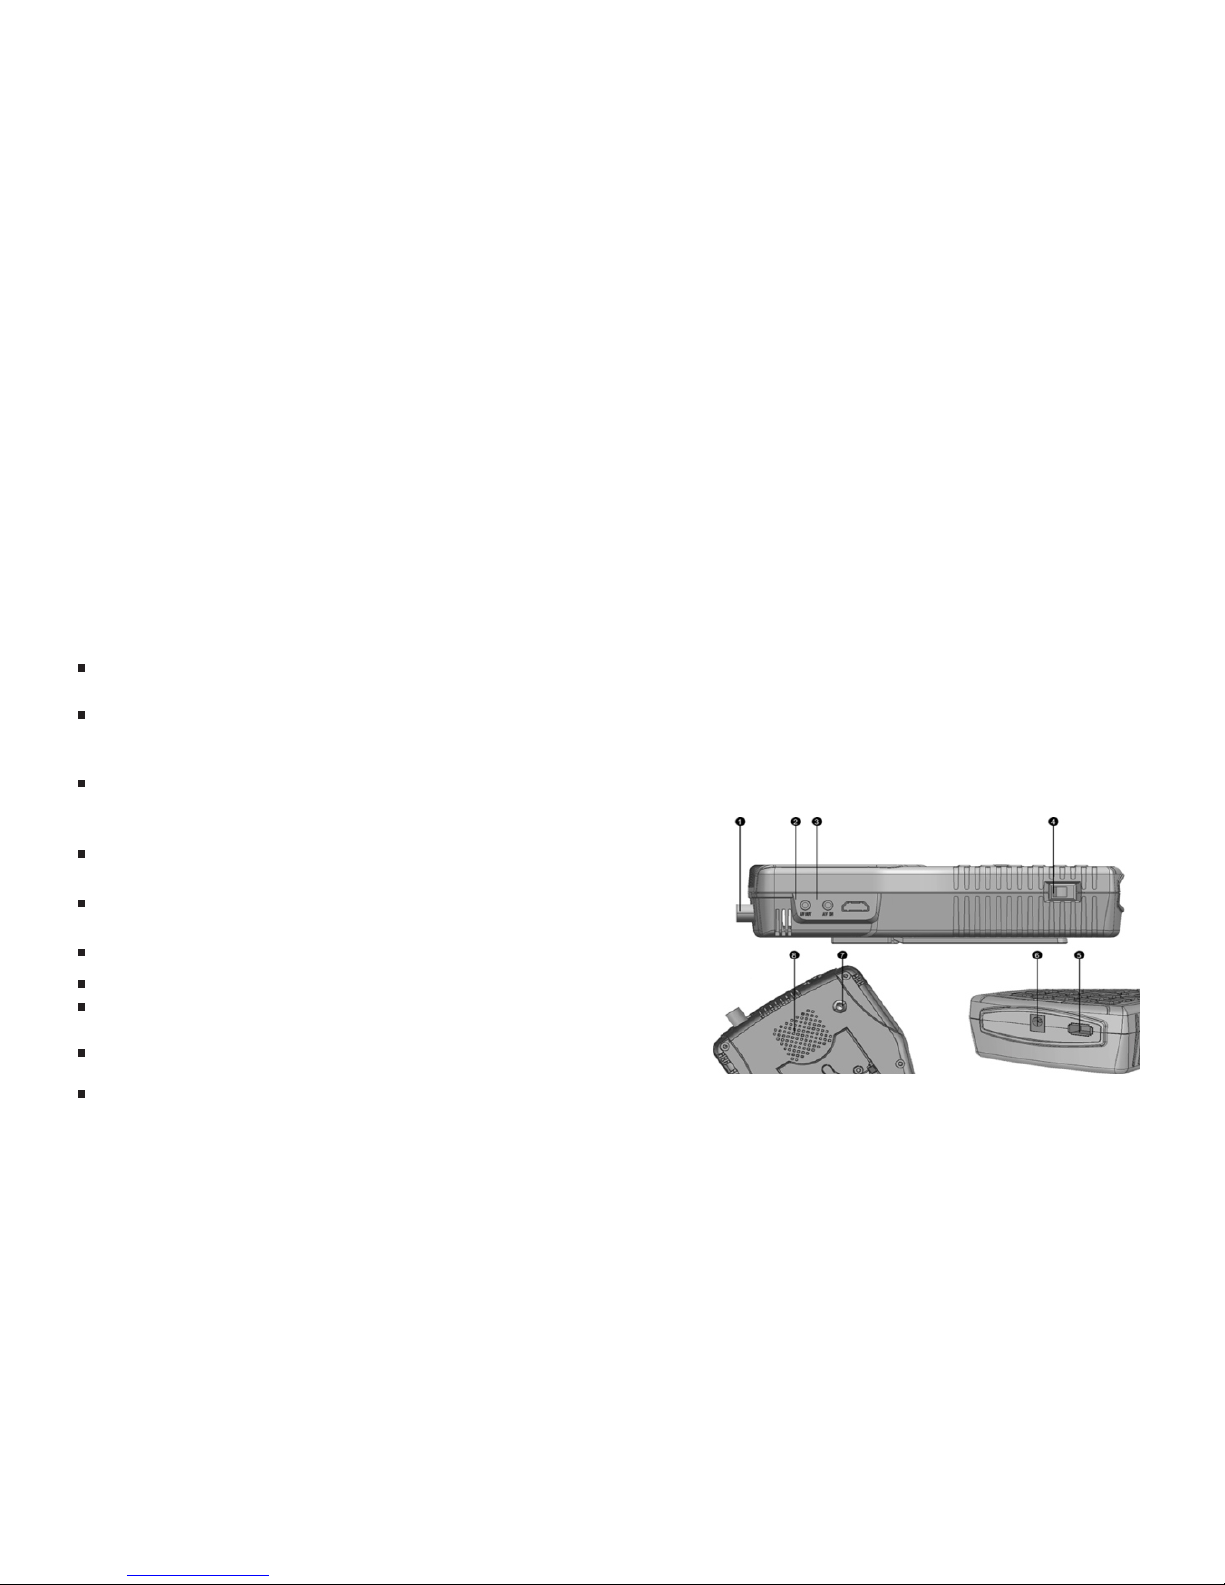
1.3 Product Overview & Illustration
01-Digita l Sat ell ite M ete r Digital Sat ell ite M ete r-0 2
Page 4
THE PROFESS ION AL EQU IPM ENT- --- --- ---------- -|U SER ’S MA NUAL| THE PROFESS ION AL EQU IPM ENT- --- --- ---------- -|U SER ’S MA NUAL|
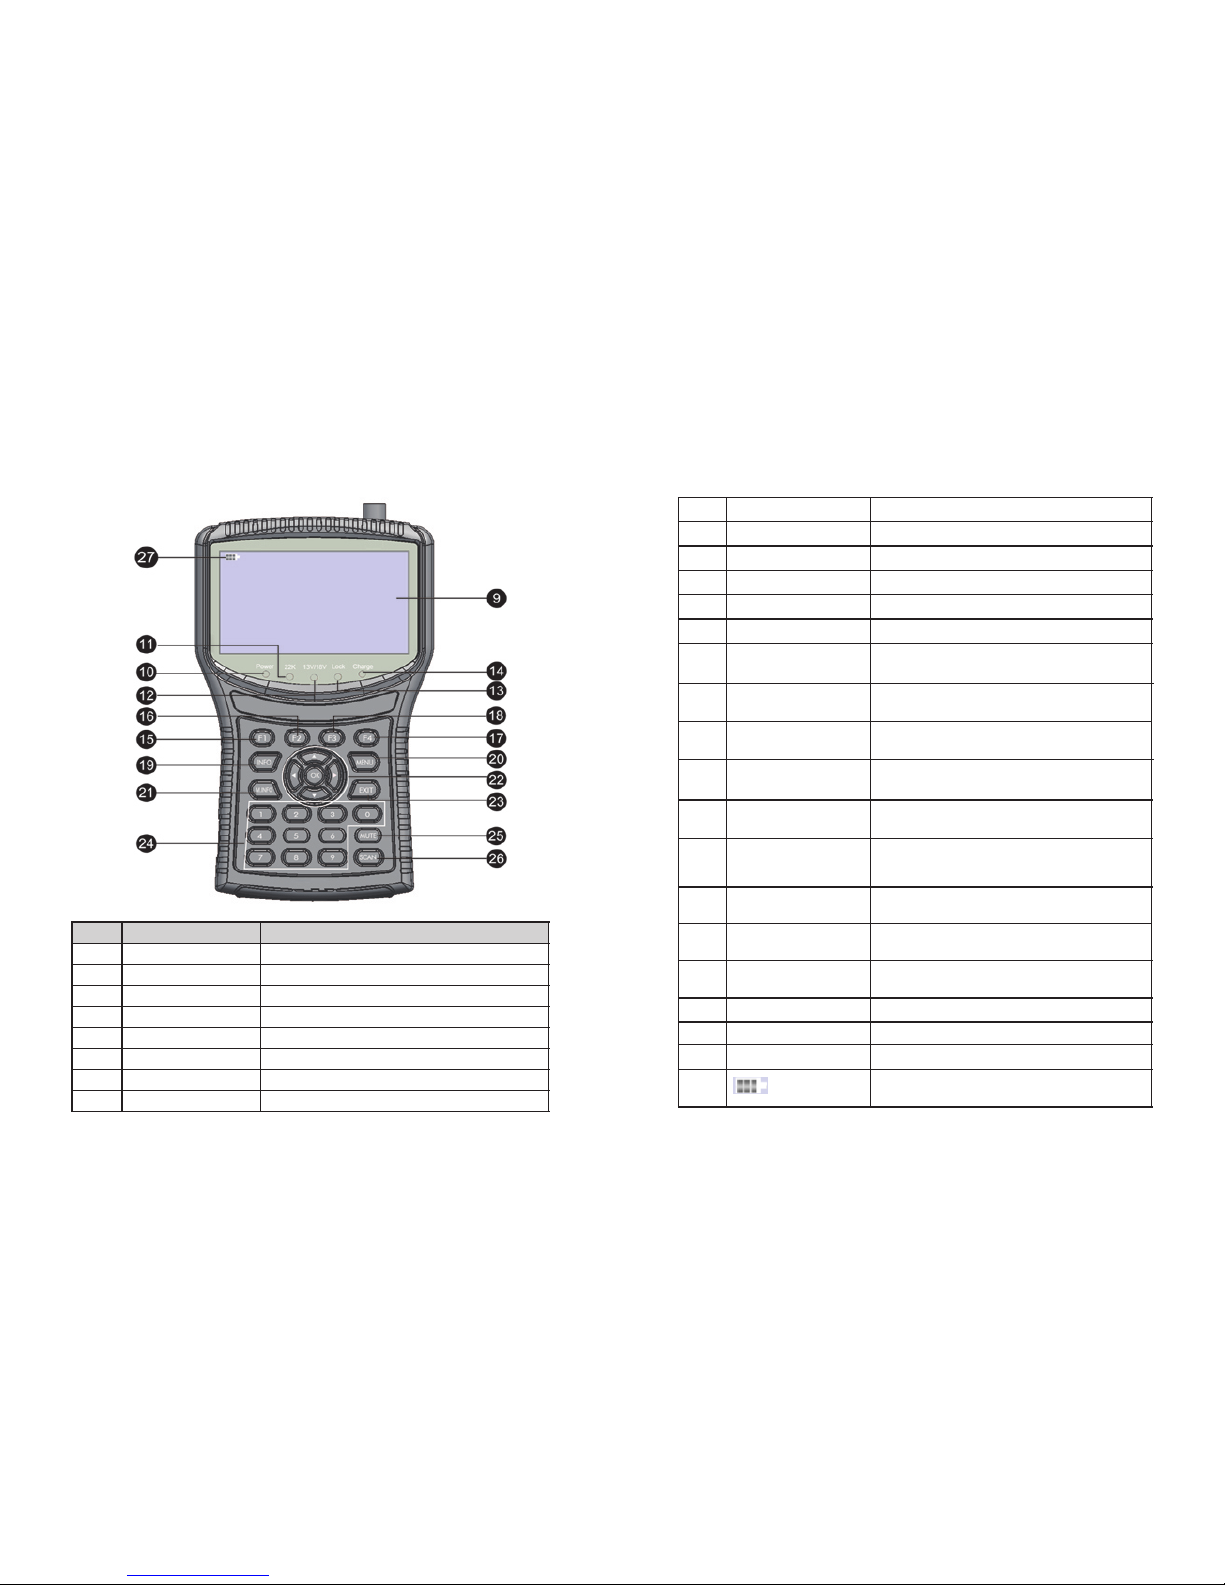
NO
Descripti on
FUNCTION
LNB IN Connect to sa tel lit e ant enn a cable
AV OUT
Connect to AV por t for TV
AV IN
Connect to AV por t for m eter
Power witc h
Tur n on/ off me ter
USB Port
Connect to US B mem ory
DC Slot
Connect to Ada pto r Inp ut
Torch LED
Night light ing
Speaker
Speaker Int egr ate d
LCD Screen
Vid eo di spl ay
Power Power indic ato r lig ht
5V ANT 5V out put i ndi cator light
12V/24V
ANT 12V/ 24V o utp ut indicator ligh t
LOCK
Signal lock i ndi cat or li ght
Charger (No te1 )
Charger ind ica tor l igh t
F1 (Note 2)
1)Shows the S ubt itl e men u ;
2)TV/Radi o swi tch
F2(Note 2)
1)Shows the E PG me nu;
2)Audio sel ect
F3(Note 2)
1)Shows the F avo rit e Man age r menu;
2)lock beep a lar m
F4(Note 2)
1)Shows Man age r Cha nne l men u;
2)TV system s wit ch
INFO
To display chan nel s tat us or v ari ous
program inf orm ati on of c urr ent channel
MENU
Show the main m enu o n the s cre en
or jump back to p rev iou s men u in
sub-menu se tti ng co ndi tio ns
M.INFO
NEVIGATION K EY
Volume Contr ol or m ove c urs or,
channel or ch ang e, co nfi rm et c
EXIT
Escape from p res ent m enu a nd sa ve
the setting s
0-9
Select chan nel s or en ter p rog ramming
MUTE
Enable or dis abl e the a udi o out put
SCAN
'Quick Sear ch' m enu s hor tcu t key
(Note 3)
When power on t he me ter ,
displays th e bat ter y lev el
1
2
3
4
5
6
7
8
9
10
11
12
13
14
15
16
17
18
19
20
21
22
23
24
25
26
27
03-Digita l Sat ell ite M ete r Digital Sat ell ite M ete r-0 4
Show 5 channe ls si gna l inf orm ation
for DVB-T
Page 5
THE PROFESS ION AL EQU IPM ENT- --- --- ---------- -|U SER ’S MA NUAL| THE PROFESS ION AL EQU IPM ENT- --- --- ---------- -|U SER ’S MA NUAL|
Note1:W hen the ada pter insert dc slot,Charg ing
indicat or scinti llation t hree times, then the indica tor is
often bri ght, when t he batteries charged sufficien t, the
charge in dicator i s going out .
Note2:K eeping th e key over 1 s, it will be the (2)function, o therwis e is the (1)f unction.
Note3:W hen the bat tery is on power failure,a voice
alarm, pl ease a time ly charge , do not continue to be used
to avoid th e interna l battery r uns out and shorten the usage time.
2. OUTLINE
4.3 Inch Hi gh Defini tion TF T LCD Screen
Fully MPE G-2/MPE G4 compliant
MPEG-2 / H. 264 Hardw are decoding
Digital m eter for si gnal strength and quality
Support s scan of Au to, Manua l.
Sound and L ight Alarm f or Lockin g Signal
Speaker I ntegrat ed
Support b oth AV ou t and AV in
Ant short pr otect
PAL-NTSC auto-c onversi on
8.4V/30 00mAh Lio n Battery Included
Softwar e upgrade v ia USB port
Easy to car ry
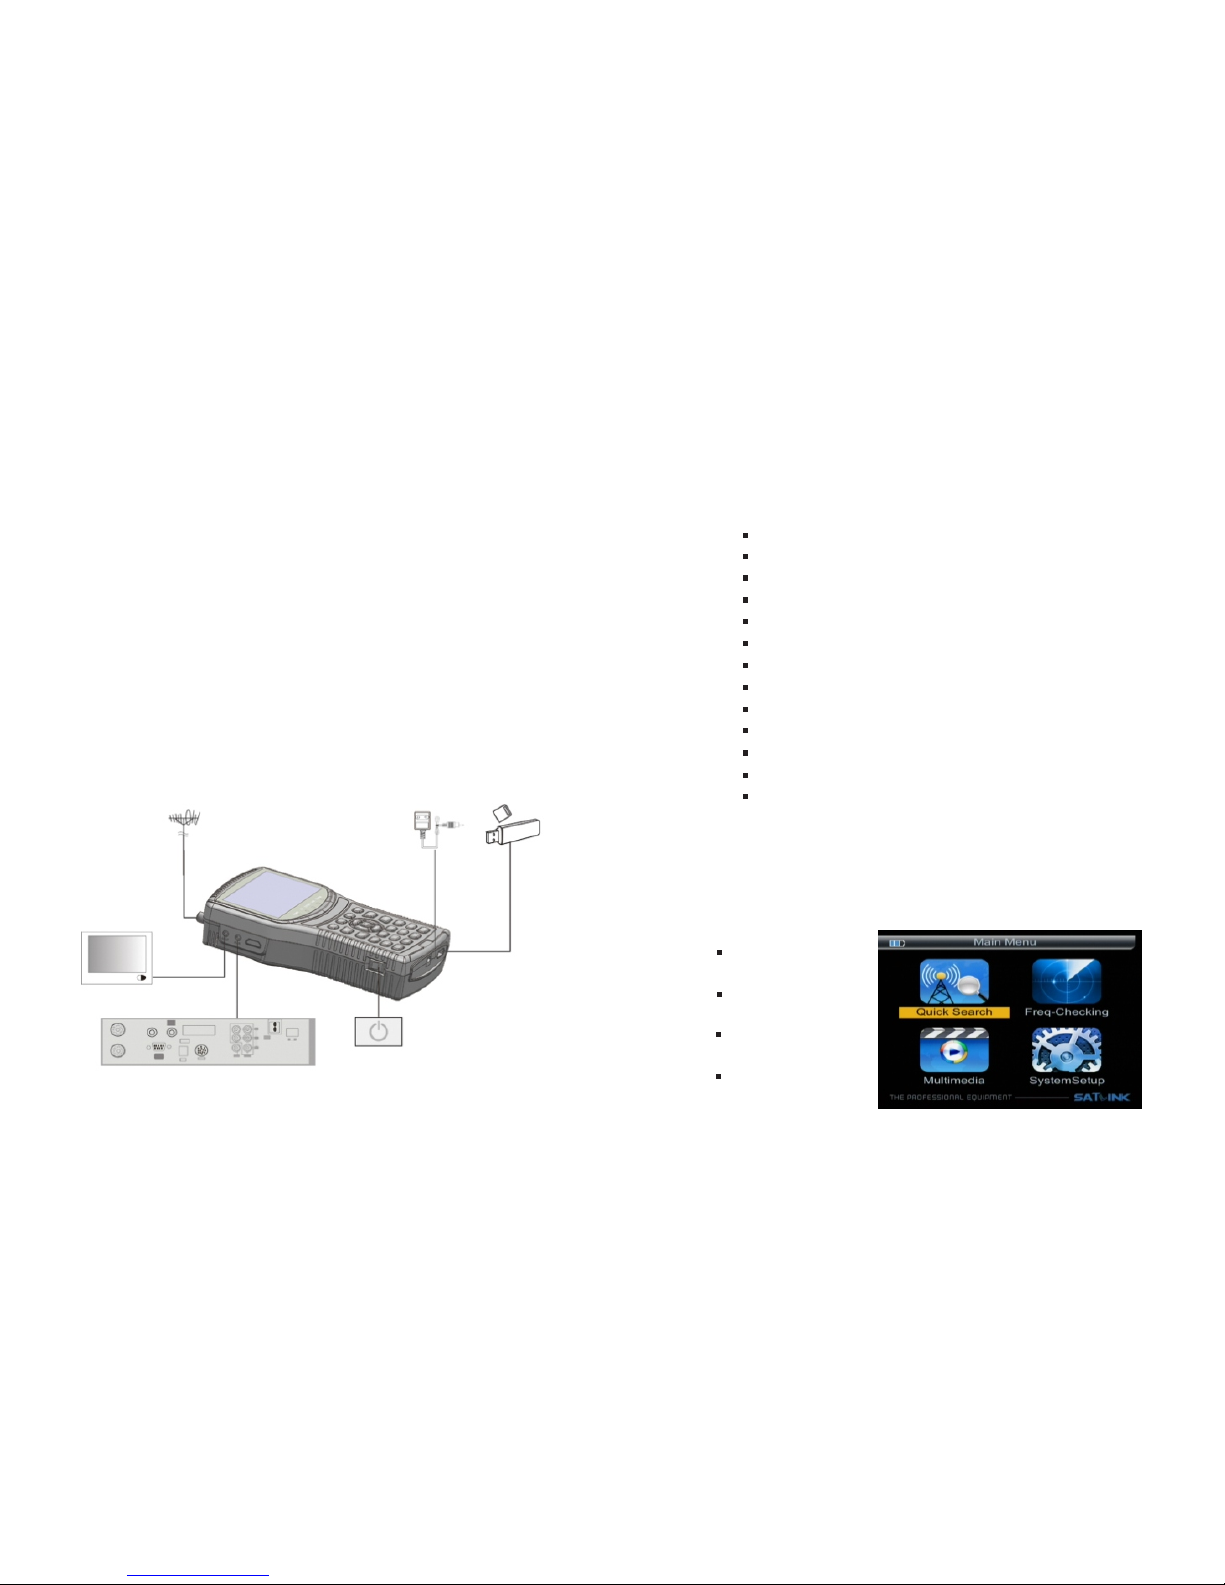
3. THE MENU OSD INSTRUCTION
If you have i nstalle d and connected the cables to the
meter, pre ssing MEN U key to disp lay the Main Menu.
Quick Sea rch
req-Che cking
Multime dia
System Se tup
05-Digita l Sat ell ite M ete r Digital Sat ell ite M ete r-0 6
1.4 INSTALLATI ON OFMETE R
Page 6
THE PROFESS ION AL EQU IPM ENT- --- --- ---------- -|U SER ’S MA NUAL| THE PROFESS ION AL EQU IPM ENT- --- --- ---------- -|U SER ’S MA NUAL|
Press the k eys of to move the c ursor up
or down in th e menu inte rface, th en use OK key to
confirm a s electio n.
▲▼◄►
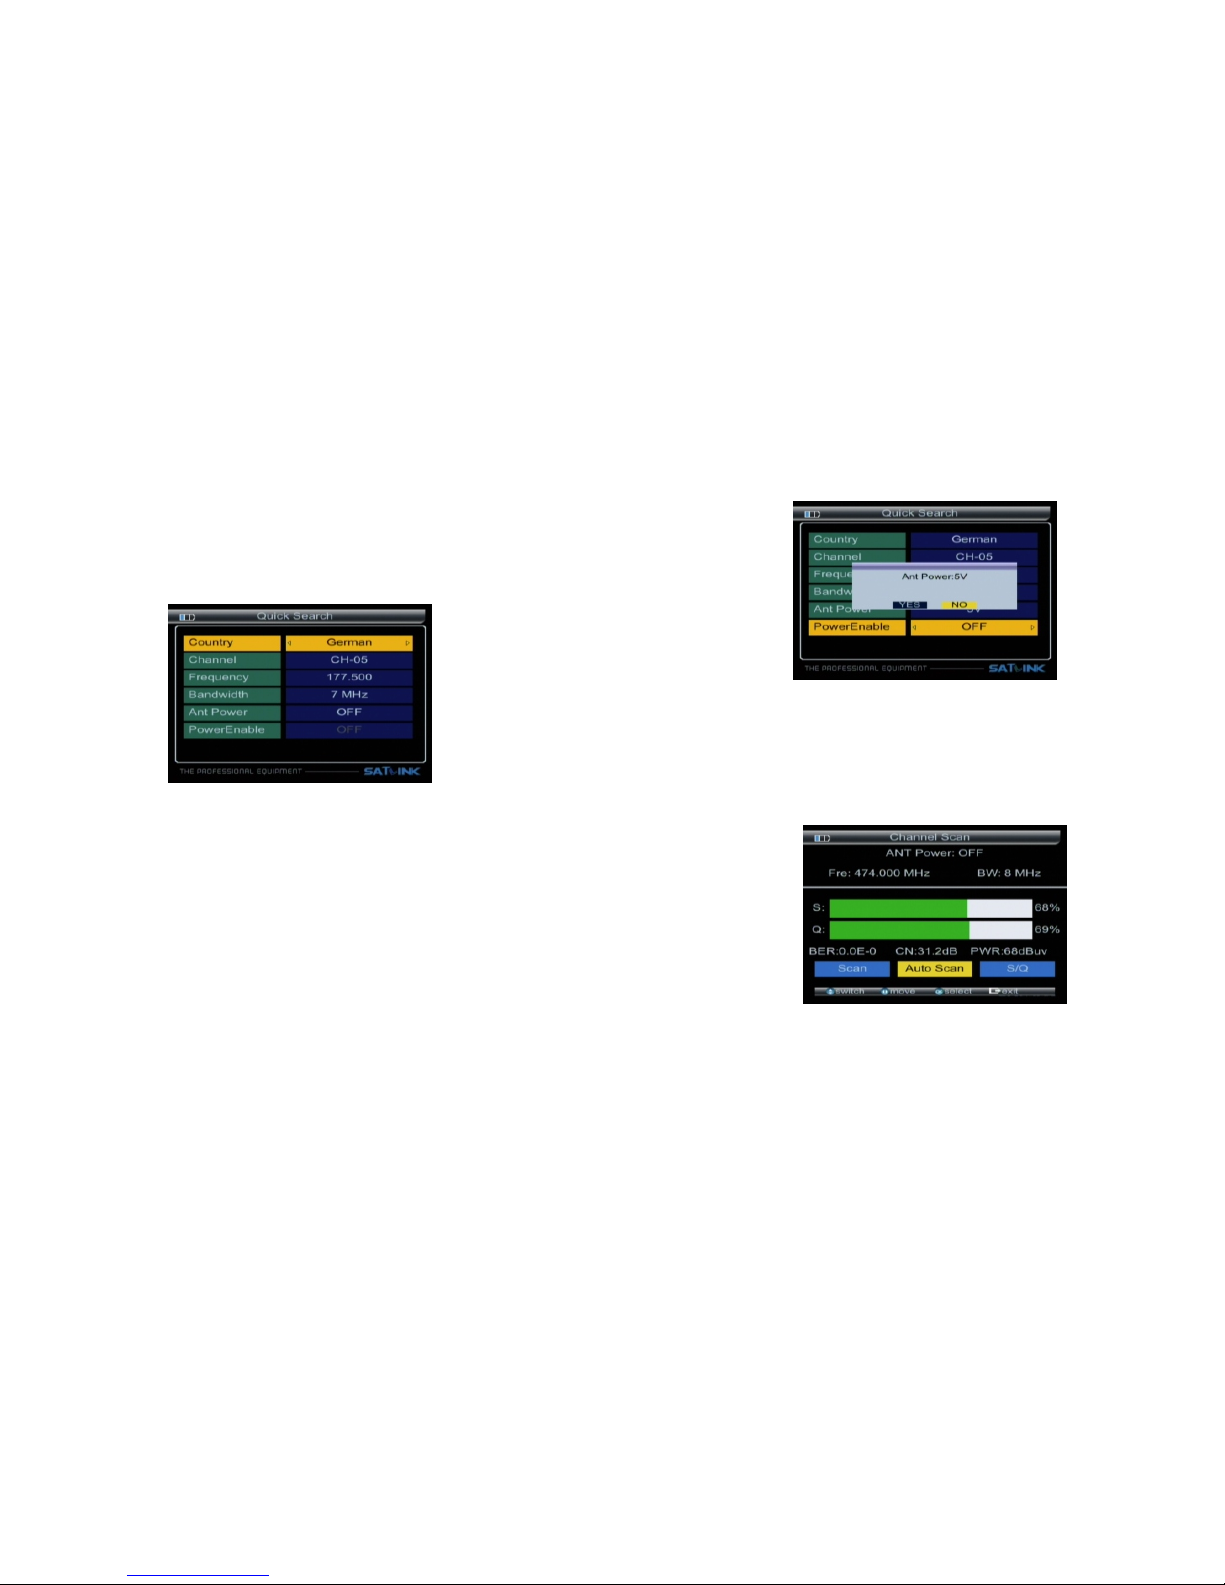
3.1 Quick S earch
3.1.6 Pow erEnabl e:Press ◄► key to Enable of AN T
voltage o utput, th en select OK, the ANT Power
output wi ll active .
3.1.1 Cou ntry : Pres s ◄► key to select the default
channel s of the coun try.
3.1.2 Cha nnel:Pr ess ◄► key to select the channe l.
3.1.3 Fre quency: Frequency of the current channel,
Input the v alue by usi ng the numeric keys.
3.1.4 Ban dwidth: Press ◄► key to select the ban dwidth. The type o f bandwid th has 6M/7M/8M.
3.1.5 ANT Po wer:Pre ss ◄► key to choice Ant volt age outpu t, it has 5V / 12 V / 2 4 V options.
Warning: you m ust choos e the correct voltage in
ANT P ower, othe rwise it will damage the
externa l amplifi er.
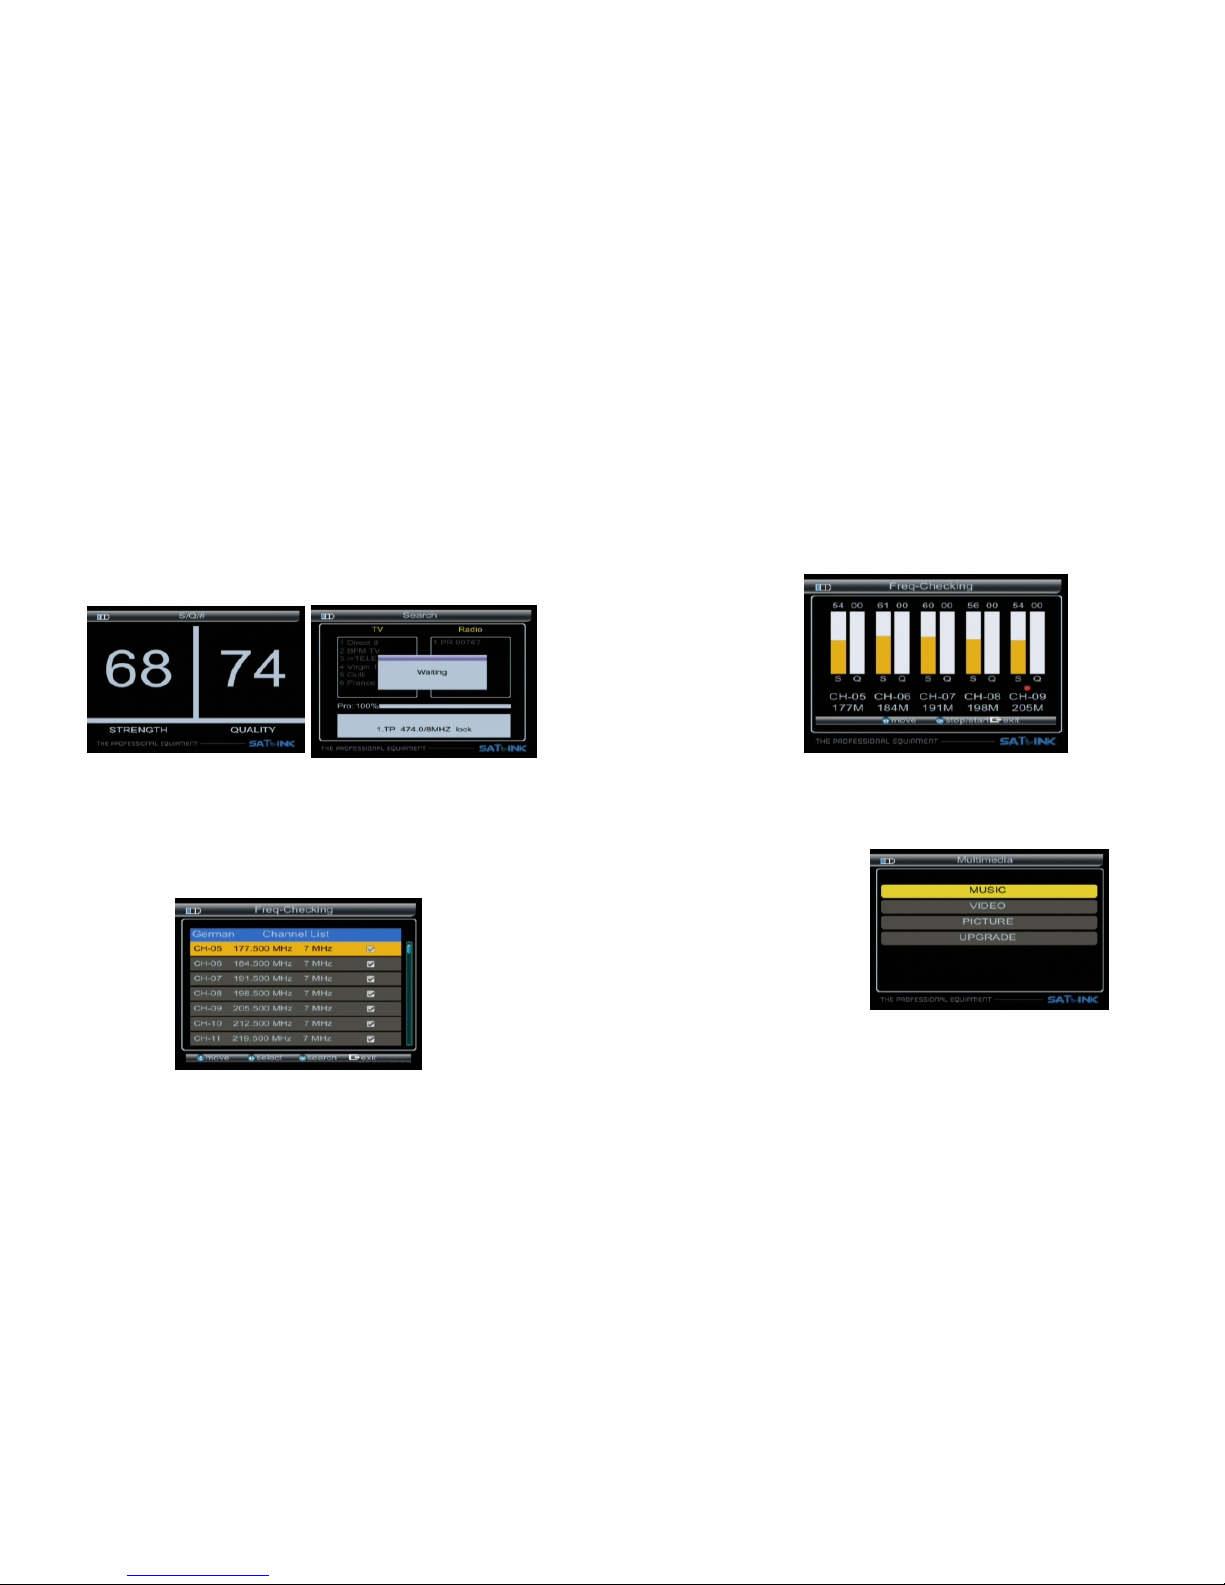
3.1.0.1 Q uick Sear ch:
enter
In the sate llite sea rch inter face,
pressin g OK key will the quick s earch.
Press BEE P key to op en lockin g sound.
Press ▲▼ key to change the chan nel
Press ◄► ke y to select S can, Auto Scan, S/Q;
press OK ke y enter fun ction.
07-Digita l Sat ell ite M ete r Digital Sat ell ite M ete r-0 8
Page 7
THE PROFESS ION AL EQU IPM ENT- --- --- ---------- -|U SER ’S MA NUAL| THE PROFESS ION AL EQU IPM ENT- --- --- ---------- -|U SER ’S MA NUAL|
■ Scan : According to the current channel, search program
■ Auto : Accor ding to the c hannels o f country, search
program . and quali ty.
■ S/Q:Enl arge show ing of the si gnal strength
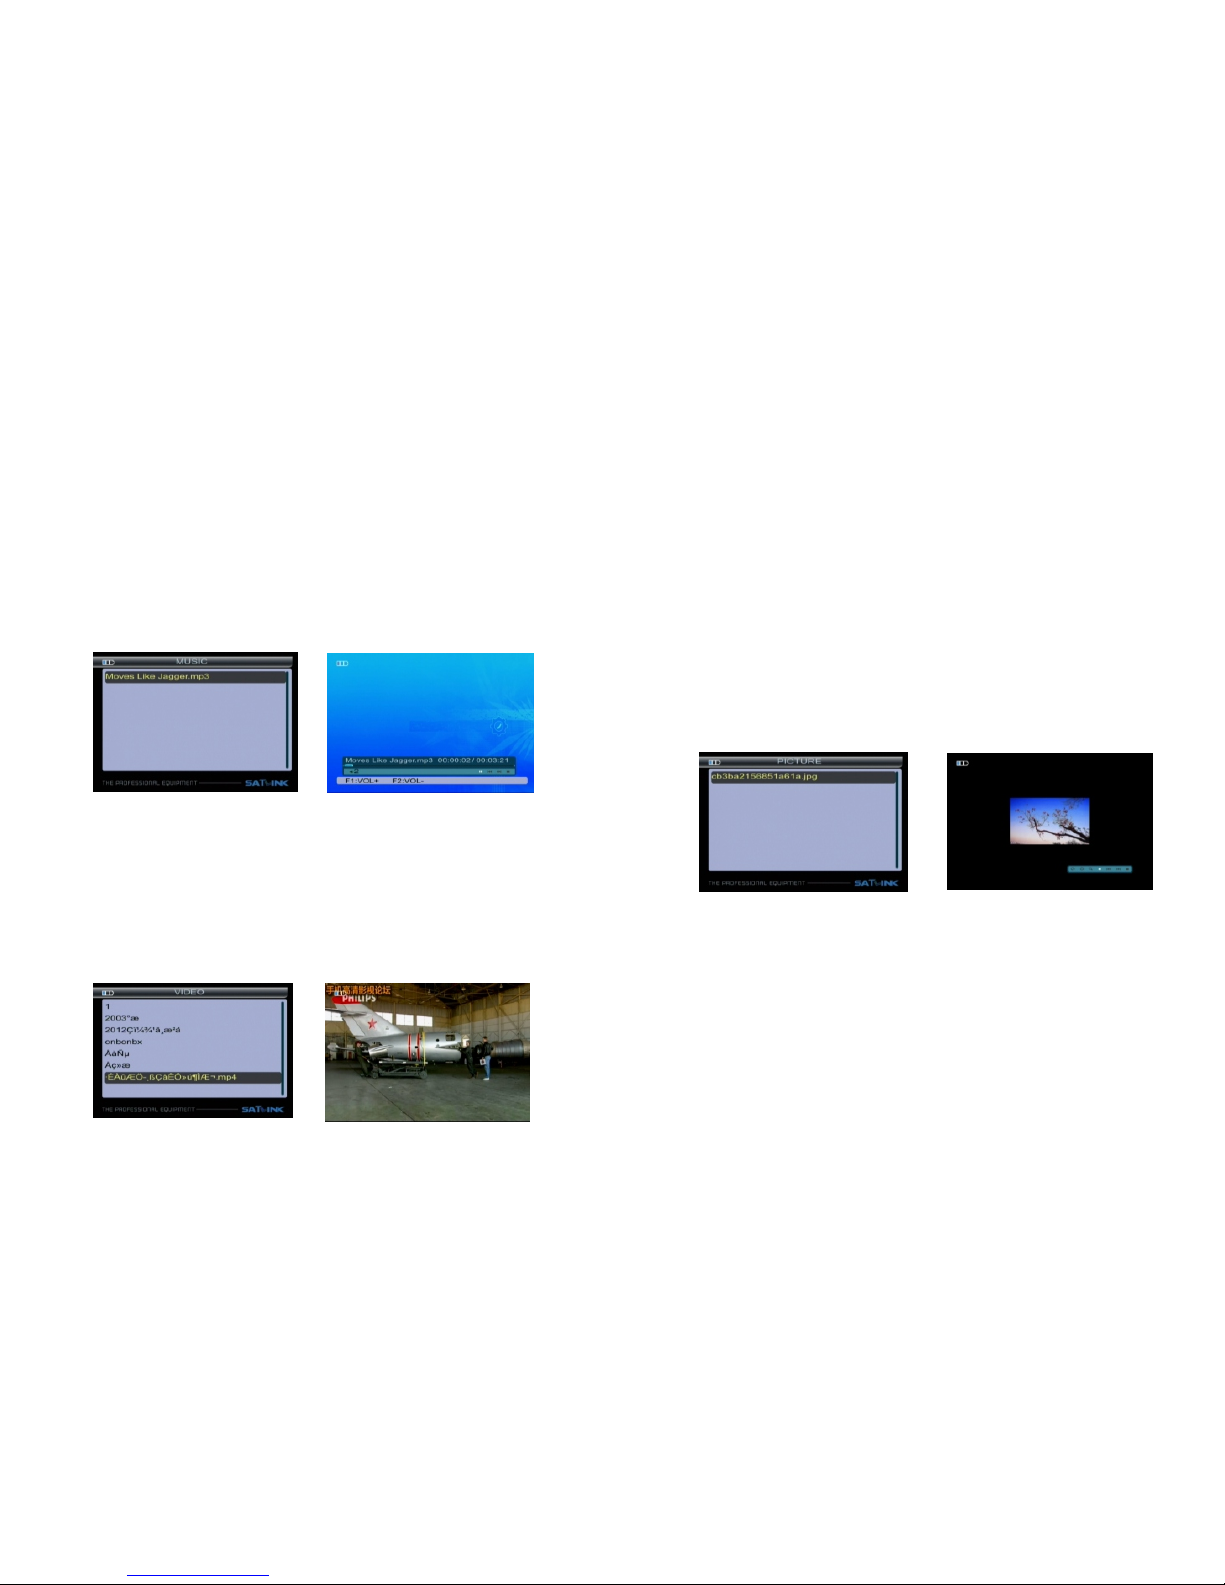
3.2 Freq- Checkin g:
make sign al test for M ulti-Ch annel
In the Fre– checkin g, we can
Press ◄► ke y to select the current chann el.
Press▲▼ key to chan ge channe l.
Press OK ke y to enter next menu for signal t esting
3.2.1 Sig nal Test :Check si gnals of five channel, in tur n.
Press ◄► ke y to switch n ext/Previous channels
Press OK ke y stop/st art check.
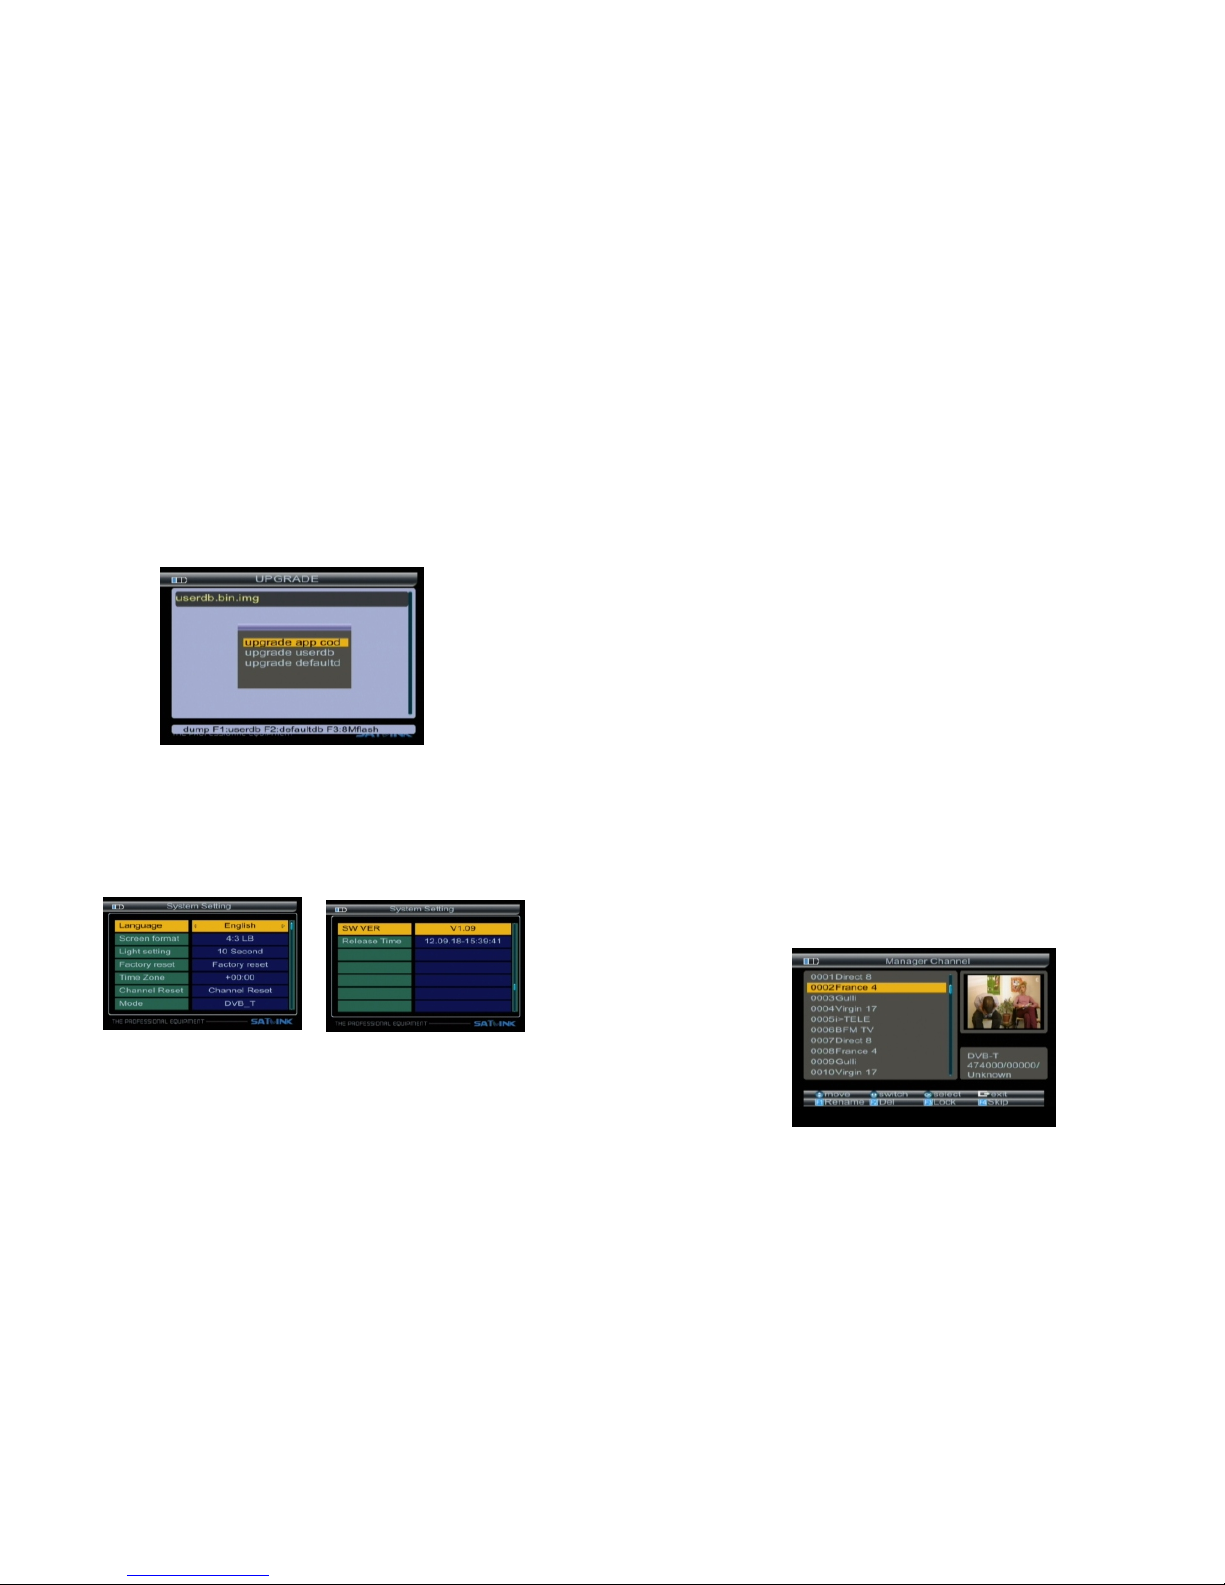
3.3 Multi media:
support the following device:
The meter USB port, which intergrate s
∙USB porta ble hardd isc
∙USB memor y
It will appear “storage devic e is insert ed ” when
USB devic e is insert ed to the USB p ort. The usb
device has been recognized and can b e used .
Otherwi se will appear “USB Device Not Found”.
09-Digita l Sat ell ite M ete r Digital Sat ell ite M ete r-1 0
Page 8
THE PROFESS ION AL EQU IPM ENT- --- --- ---------- -|U SER ’S MA NUAL| THE PROFESS ION AL EQU IPM ENT- --- --- ---------- -|U SER ’S MA NUAL|
USB feaut res:
Multi sys tem forma t support: Such as, FAT16, FAT32
and NTFS fo rmat.
Mulit fil e format su pport: wma, mp3,mp4,avi,jpg,jp eg,
bmp,img e tc
3.3.1 MUS IC
Press F1/ F2 key to con trol volume.
Press ◄►k ey to move th e cursor, then press OK key
to operat e functio n.
There are P lay/Pau se, Previ ous song, Next song, Stop.
Press ▲▼ key to sele ct song, then press OK key to pla y.
3.3.2 VID EO
Press ▲▼ key to select the vide o file, the n press OK
key to play.
Press ◄► ke y to contro l volume.
Press MEN U key to appe ar playin g bar.
Press ◄►k ey to move th e cursor, that the tips will appear on upp er right of s creen, th en press OK key to
operate f unction .
There are B ackward , Forward , Play/Pause, Previous
file, Nex t file, Sto p.
3.3.3 PIC TURE
Press ▲▼ key to sele ct picture, then press OK key t o play.
Press MEN U key to appe ar playin g bar.
Press ◄►k ey tomove t he cursor, then press OK key
to operat e functio n.
There are R otate, De lay set, ZOOM, Play/Pause, Previous Pic ture, Nex t picture , Stop.
3.3.4 Upg rade
Press F1 ke y to dump use r databas e.
Press F2 ke y to dump def ault database.
Press F3 ke y to dump fla sh.
11-D igi tal S ate llite Meter Digital Sat ell ite M ete r-1 2
Page 9
THE PROFESS ION AL EQU IPM ENT- --- --- ---------- -|U SER ’S MA NUAL| THE PROFESS ION AL EQU IPM ENT- --- --- ---------- -|U SER ’S MA NUAL|
Press ▲▼ key to select update f ile,
Then pres s OK key to sel ect upgrade part:
App code; u ser datab ase; defa ult database.
EXP:
If you want to update main code, please select the
main code file liking BT_CP09_V1_39_SA~N.img,the
size of file about a few Mbytes, then select upgrade
app code.
3.4 Syste m Setting
3.4.1 Lan guage:P ress ◄► key to select languag e.
3.4.2
format: 4:3PS/4 :3LB/16:9PS/16:9LB.
Screen fo rmat:Pr ess ◄► key to select Screen
3.4.3 Lig ht settin g: Press ◄► key to control dela y of
key light :off/ 5s/10s/20s.
3.4.4 Fac tory rese t: The factory default allows user to
restore t he factor y-reset values, when you pr ess
OK key, th e War ning wind ow will appear, if you
select ye s, the syst em setup will be reset to the
default v alues.
Warning: On se lecting f actory default you will los t all
of data and i nformat ion, whic h was previous installed.
3.4.5 Time Zone: Press ◄►k ey to setTime Zone.
3.4.6 Cha nnel rese t:The channel reset allows user to
restore t he defaul t channel, when you press OK
key, the Warn ing windo w will appear, if you sel ect yes, th e system se tup will be restored to the
default c hannels .
3.4.7 Mod e,SW VER, Release Time:You can look into
informa tion of har dware and software.
4. Channel
4.1 Manag er Channe l
Press F4 ke y into the ma nager channel interface
13-Digita l Sat ell ite M ete r Digital Sat ell ite M ete r-1 4
Page 10
THE PROFESS ION AL EQU IPM ENT- --- --- ---------- -|U SER ’S MA NUAL| THE PROFESS ION AL EQU IPM ENT- --- --- ---------- -|U SER ’S MA NUAL|
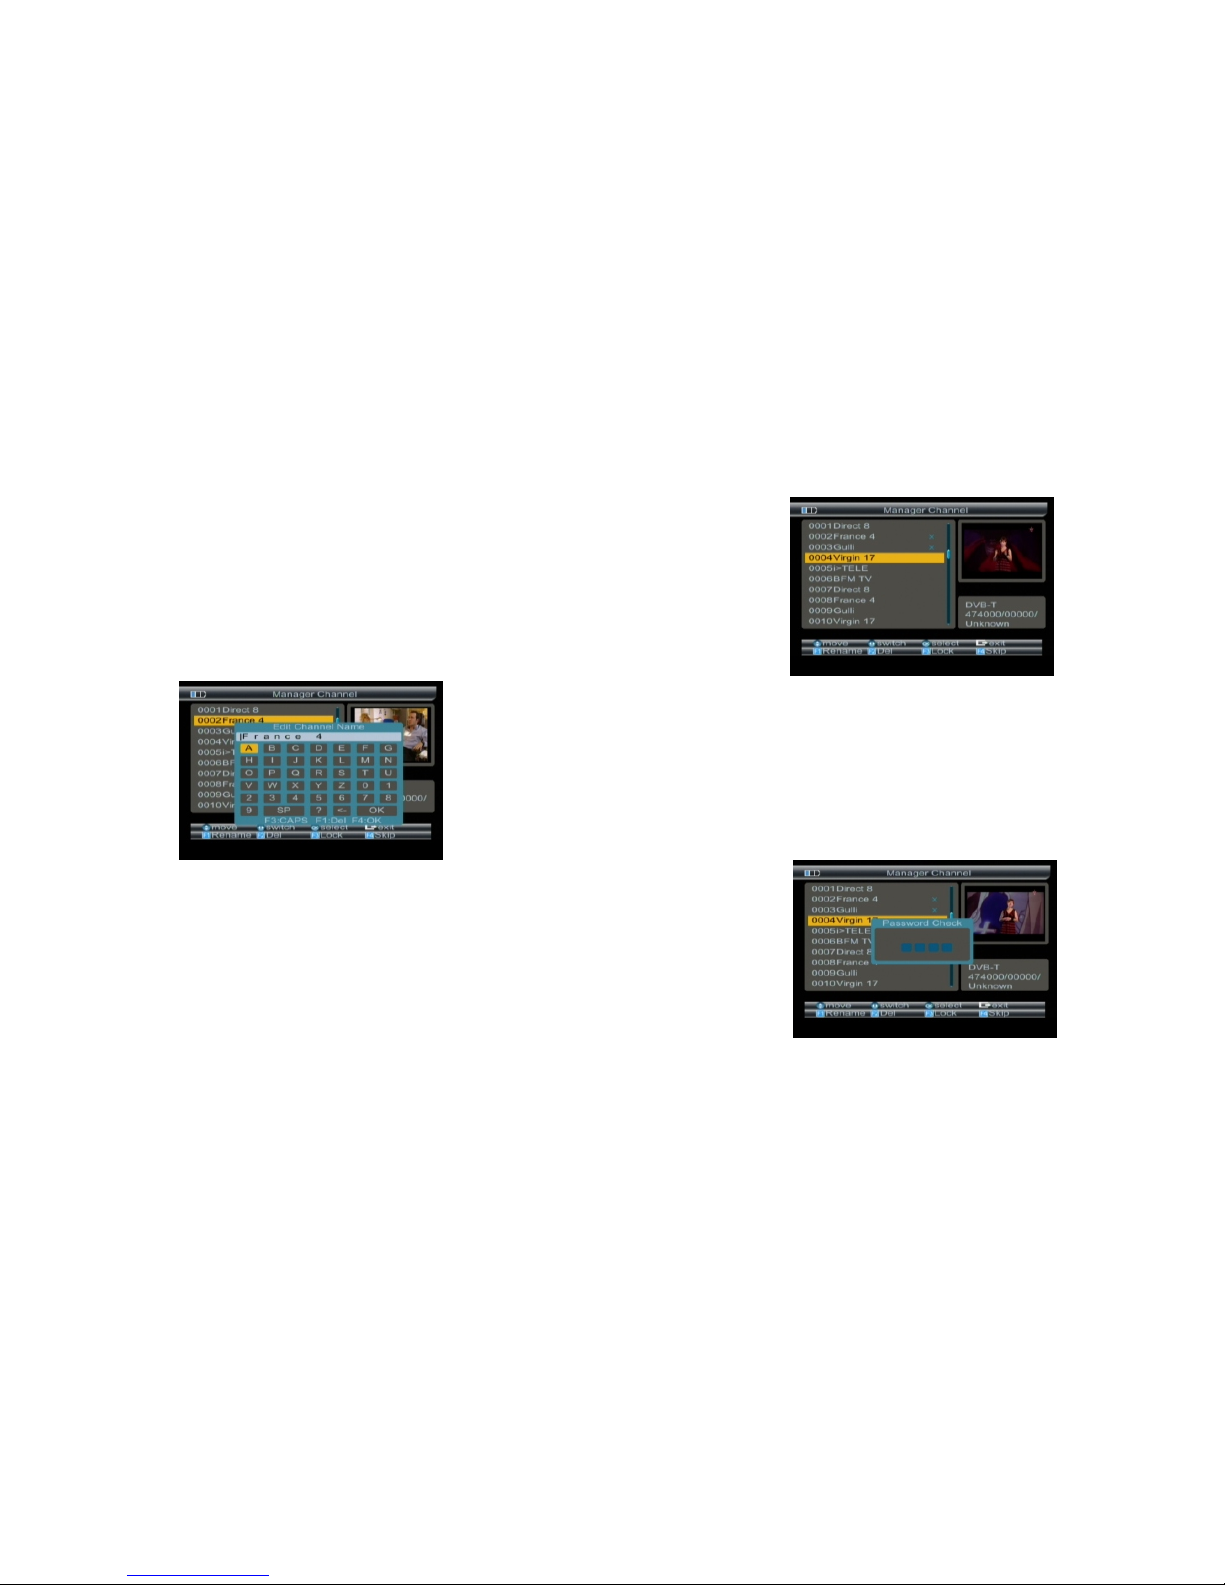
4.1.1 Ren ameChan nel
4.Press MENU key, the Warning window will app-ear,
if you select yes, the modification will be saved.
1.Press F1 k ey. You will n otice the K eyboard menu in scree n.
2.Press th e arrow key s to input channel name.
3.Press F3 k ey to switc h caps lock; press F1 key
to backsp ace; pres s F4 key to complete edit.
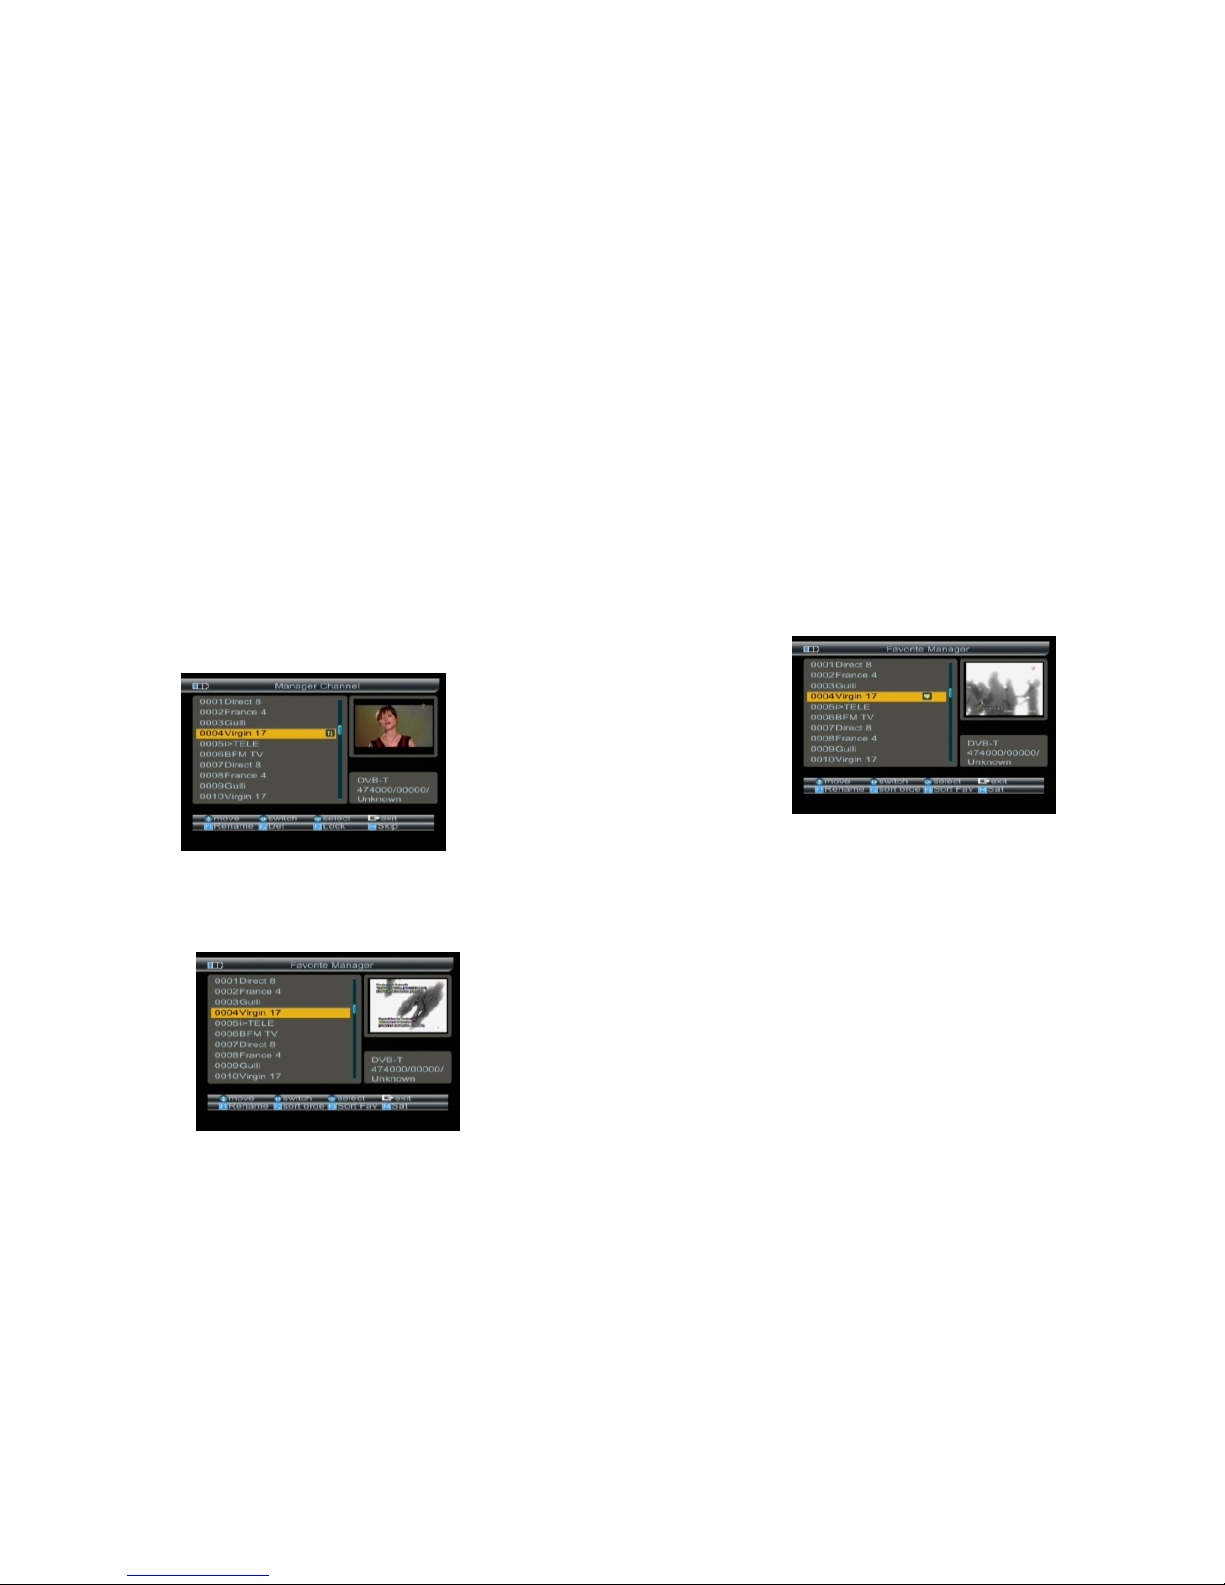
4.1.2 Del C hannel
1. Press ▲▼ key to select TV.
2. Press F2 key, the TV will be marked with the symbol “X”, marking all channels that you need to delete.
3. Press MENU key ,the Warning window will appear,
if you select yes, the modification will be saved.
4.1.3 Loc kChanne l
1.Press ▲▼ key t o sel ect TV.
2.Press F3 k ey, then i nput “0 ,0,0, 0”, the n TV wi ll
be mark ed wi th the sy mbol lo ck, m arking all TV
that yo u nee d to lo ck .
3.Press MENU key, the Warning window will appear,
If you select yes, the modification will be saved.
15-Digita l Sat ell ite M ete r Digital Sat ell ite M ete r-1 6
Page 11
4.1.4 Ski p Channel
THE PROFESS ION AL EQU IPM ENT- --- --- ---------- -|U SER ’S MA NUAL| THE PROFESS ION AL EQU IPM ENT- --- --- ---------- -|U SER ’S MA NUAL|
1.Press ▲▼ key to select TV.
2.Press F4 k ey, the TV will be ma rked with the
symbol “↑↓”.
3.Press ▲▼ key to skip TV, Press F4/ OK key to
confirm , skip all TV that you n eed.
4.Press MENU key, the Warning window will appear,
if you select yes, the modification will be saved.
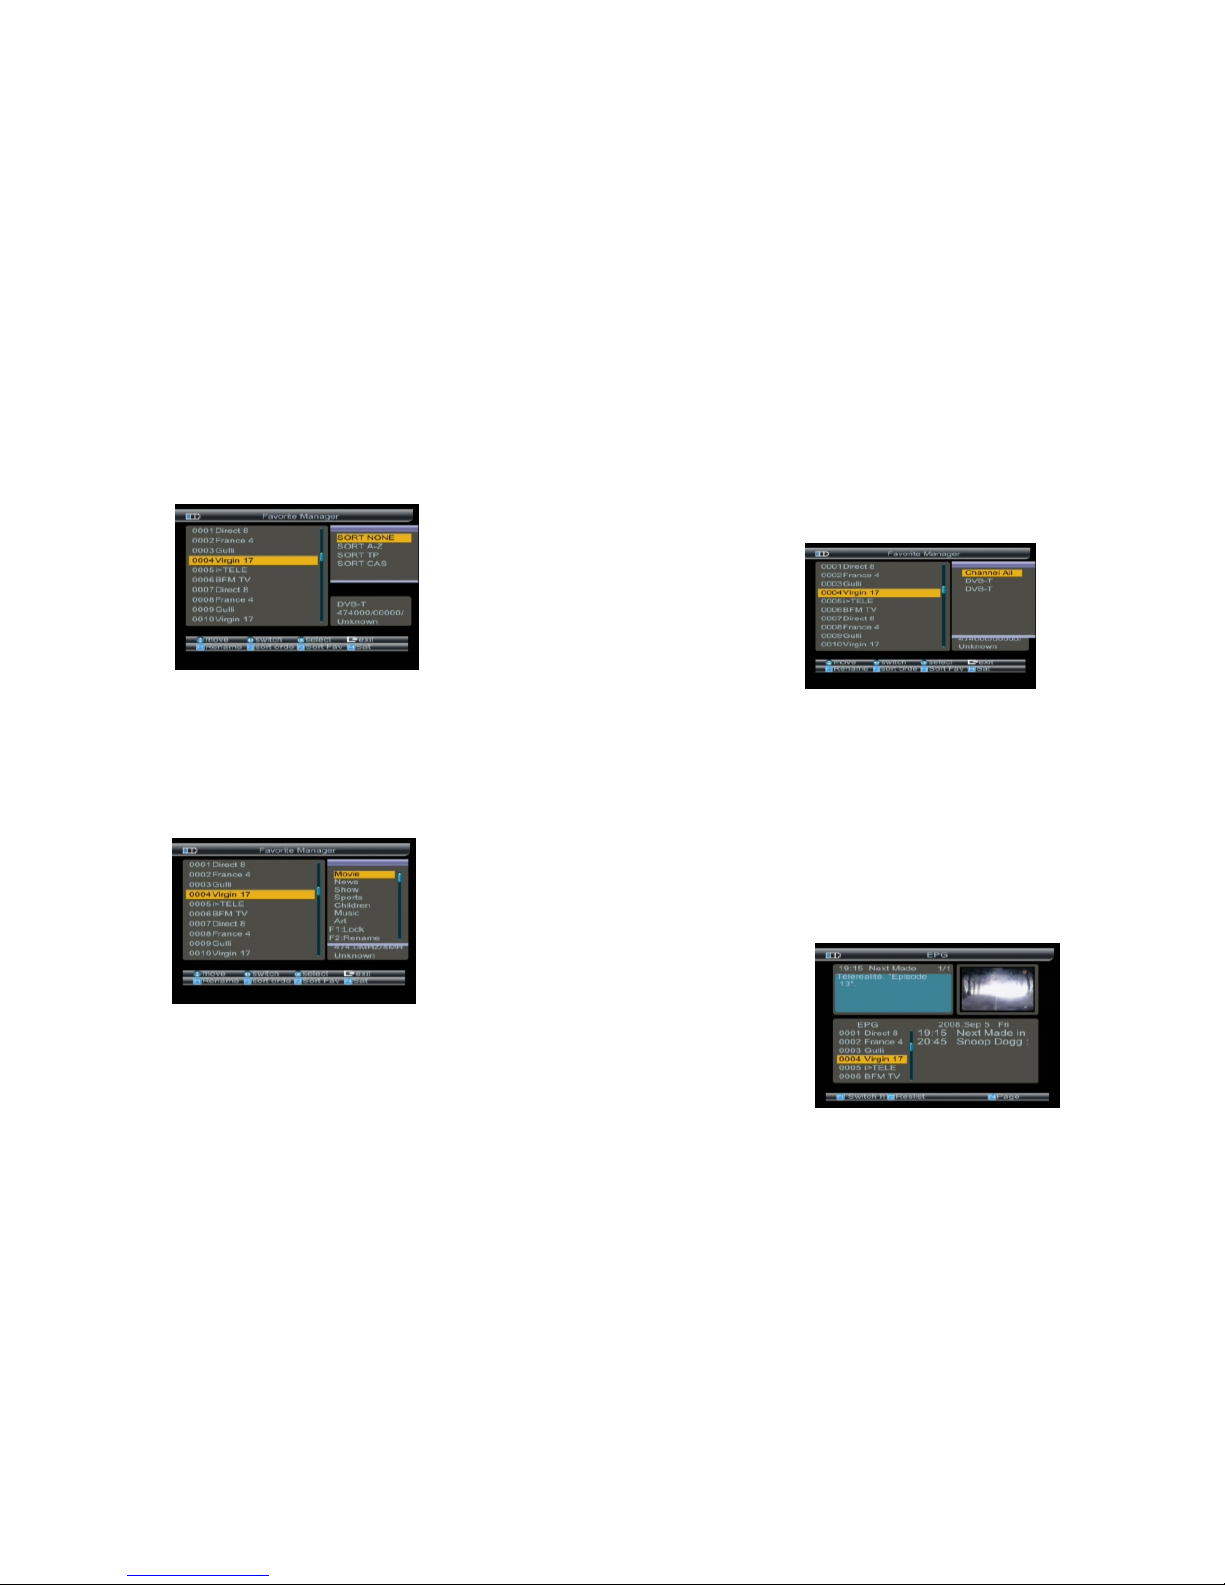
4.2 Favor ite Manag er
Press F3 ke y into the ma nager cha nnel sort interface , then pres s menu key to return favorite
manager.
4.2.1 Fav orite set
Press ▲▼ key to select TV.
Press OK ke y, the TV will be mar ked with the symbol '❤'.
Press MENU key, the Warning window will appear,
if you select yes, the modification will be saved.
4.2.2 Ren ame: Plea se make ref erence to rename of
“4.1.1 Re name chan nel”.
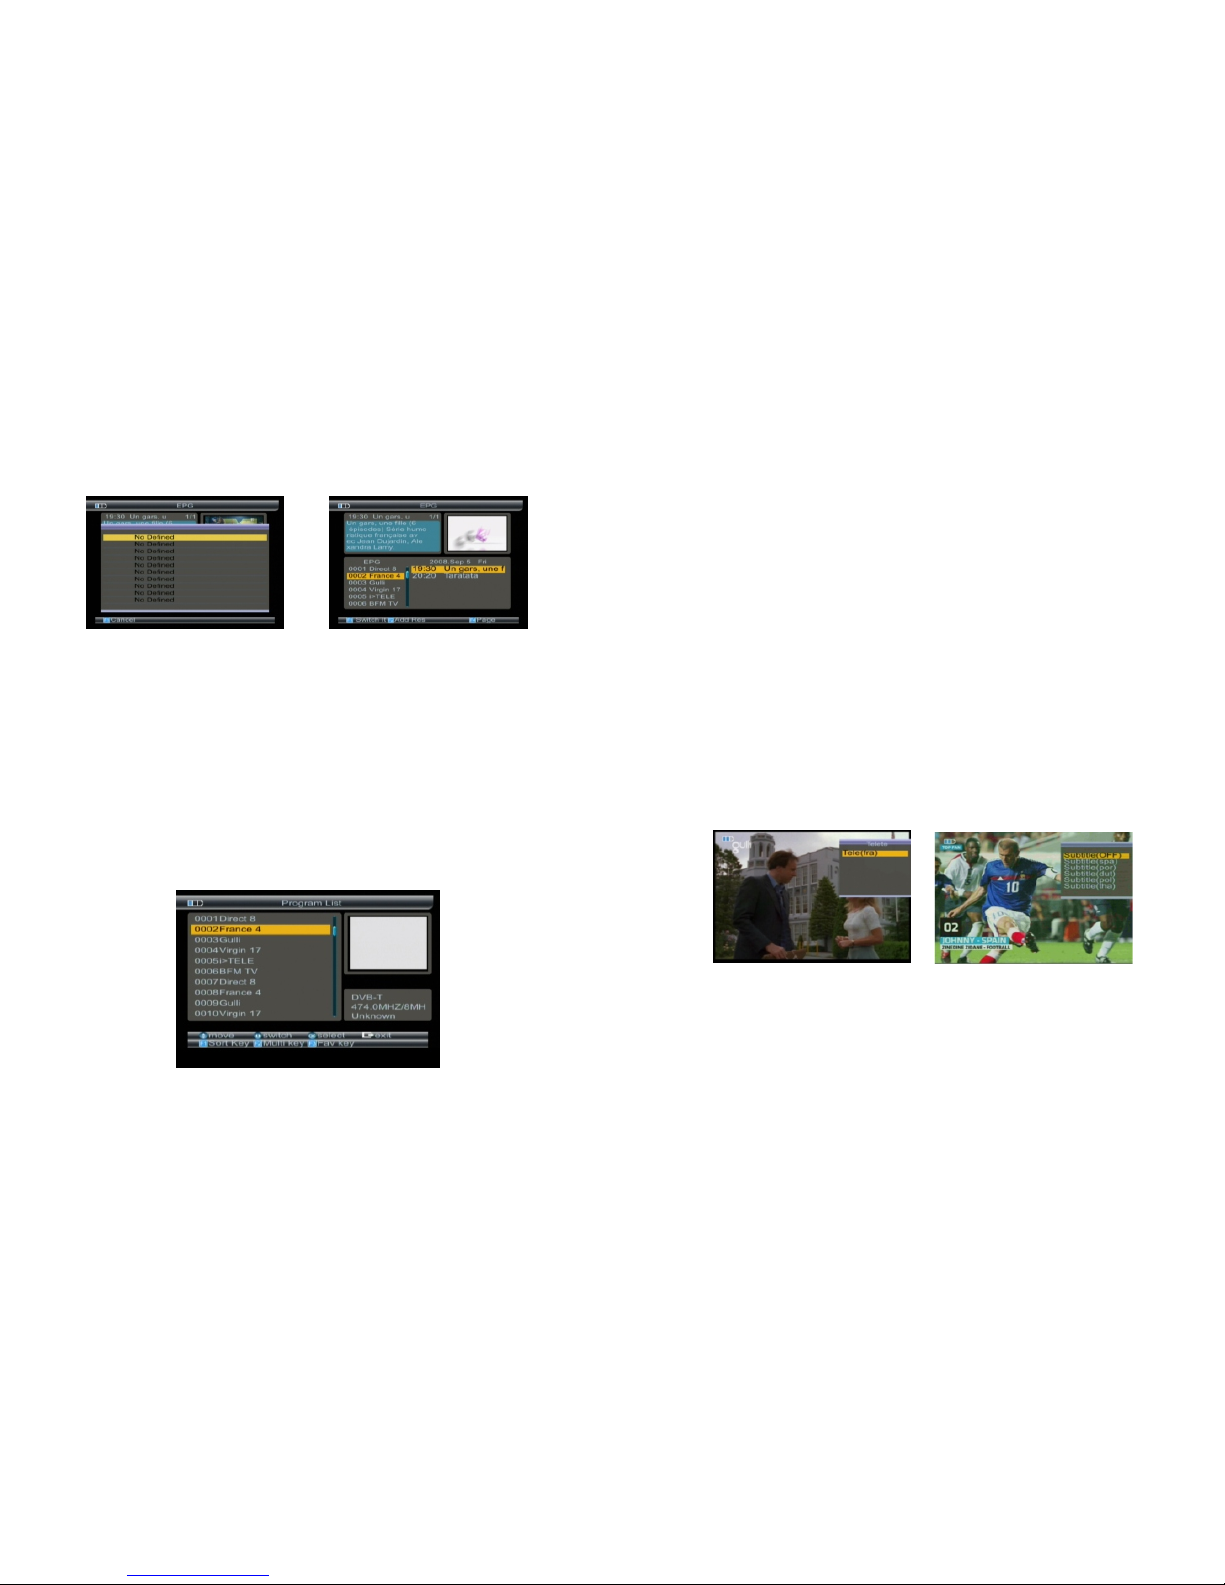
4.2.3 Sor t order
1.Press F2 k ey, you wi ll notice t he sub-menu with
sort orde r in screen .
2.Select t he desire d one of the fo ur sort order in
screen an d press OK.
3.Press MENU key, the Warning window will appear,
if you select yes, the modification will be saved.
17-Digita l Sat ell ite M ete r Digital Sat ell ite M ete r-1 8
Page 12
THE PROFESS ION AL EQU IPM ENT- --- --- ---------- -|U SER ’S MA NUAL| THE PROFESS ION AL EQU IPM ENT- --- --- ---------- -|U SER ’S MA NUAL|
4.2.4 Fav orite Sor t
Press F3 ke y, you wil l notice th e sub-menu with
sort orde r in screen .
Press ▲▼ key to select sort.
Favorit e setting w ill into th is sort.
Press MENU key, the Warning window will appear,
if you select yes, the modi-fication will be saved.
4.2.5 Sat s ort
1.Press F 4 key, you w ill notic e the sub-menu with
sort orde r in screen .
2.Press ▲ ▼ key to select sate llite sor t, the channel list wi ll be chang ed.
3.Press MENU key, the Warning window will appear,
if you select yes, the modification will be saved.
4.3 EPG
Press the F 2 key to show E PG menu.
The Guide supplies information such as program
listing, starting and ending items for all available
programs.
1.Press ▲▼ key to change curre nt channe l.
2.Press ◄►keys to view the information in 7 days.
3.Press F2 k ey to view th e booked items data.
In the book ed items me nu, press F1 key to cancle the cur rent item , press menu to return.
Press F1 ke y to items se tecting.
19-Digita l Sat ell ite M ete r Digital Sat ell ite M ete r-2 0
Page 13
THE PROFESS ION AL EQU IPM ENT- --- --- ---------- -|U SER ’S MA NUAL| THE PROFESS ION AL EQU IPM ENT- --- --- ---------- -|U SER ’S MA NUAL|
1.Press F1 k ey, retu rn to chann el select.
2.Press ▲▼, key to select item.
3.Press F4 k ey to chang e detail in formation page.
4.Press F 2 key to book t he current item,and enter
the booke d items men u.
4.4 Progr am List
If there ar e some prog rams stored in the meter,
user can pr ess OK to ent er the menu.
Press ▲▼and ◄► key to change current channel.
Press OK ke y to select c hannel,then return.
4.4.1 Sor t KEY
Press F1 ke y to sort cha nnel
Please ma ke refere nce to“4. 2.3Sort order”.
4.4.2 Mul ti key
Press F2 ke y to select c hannel so urce
Please ma ke refere nce to“4. 2.5Sat sort”.
4.2.3 Fav k ey
Press F3 ke y to select f avorite channel
Please ma ke refere nce to“4. 2.4 Favorite Sort”.
4.5 Subti tle
1.Press F1 k ey, you wi ll notice t he sub-menu with
sort orde r in screen .
2.Press▲▼ key to change subti ltle.
3.Press OK k ey to confi rm.
21-Digita l Sat ell ite M ete r Digital Sat ell ite M ete r-2 2
Page 14
THE PROFESS ION AL EQU IPM ENT- --- --- ---------- -|U SER ’S MA NUAL| THE PROFESS ION AL EQU IPM ENT- --- --- ---------- -|U SER ’S MA NUAL|
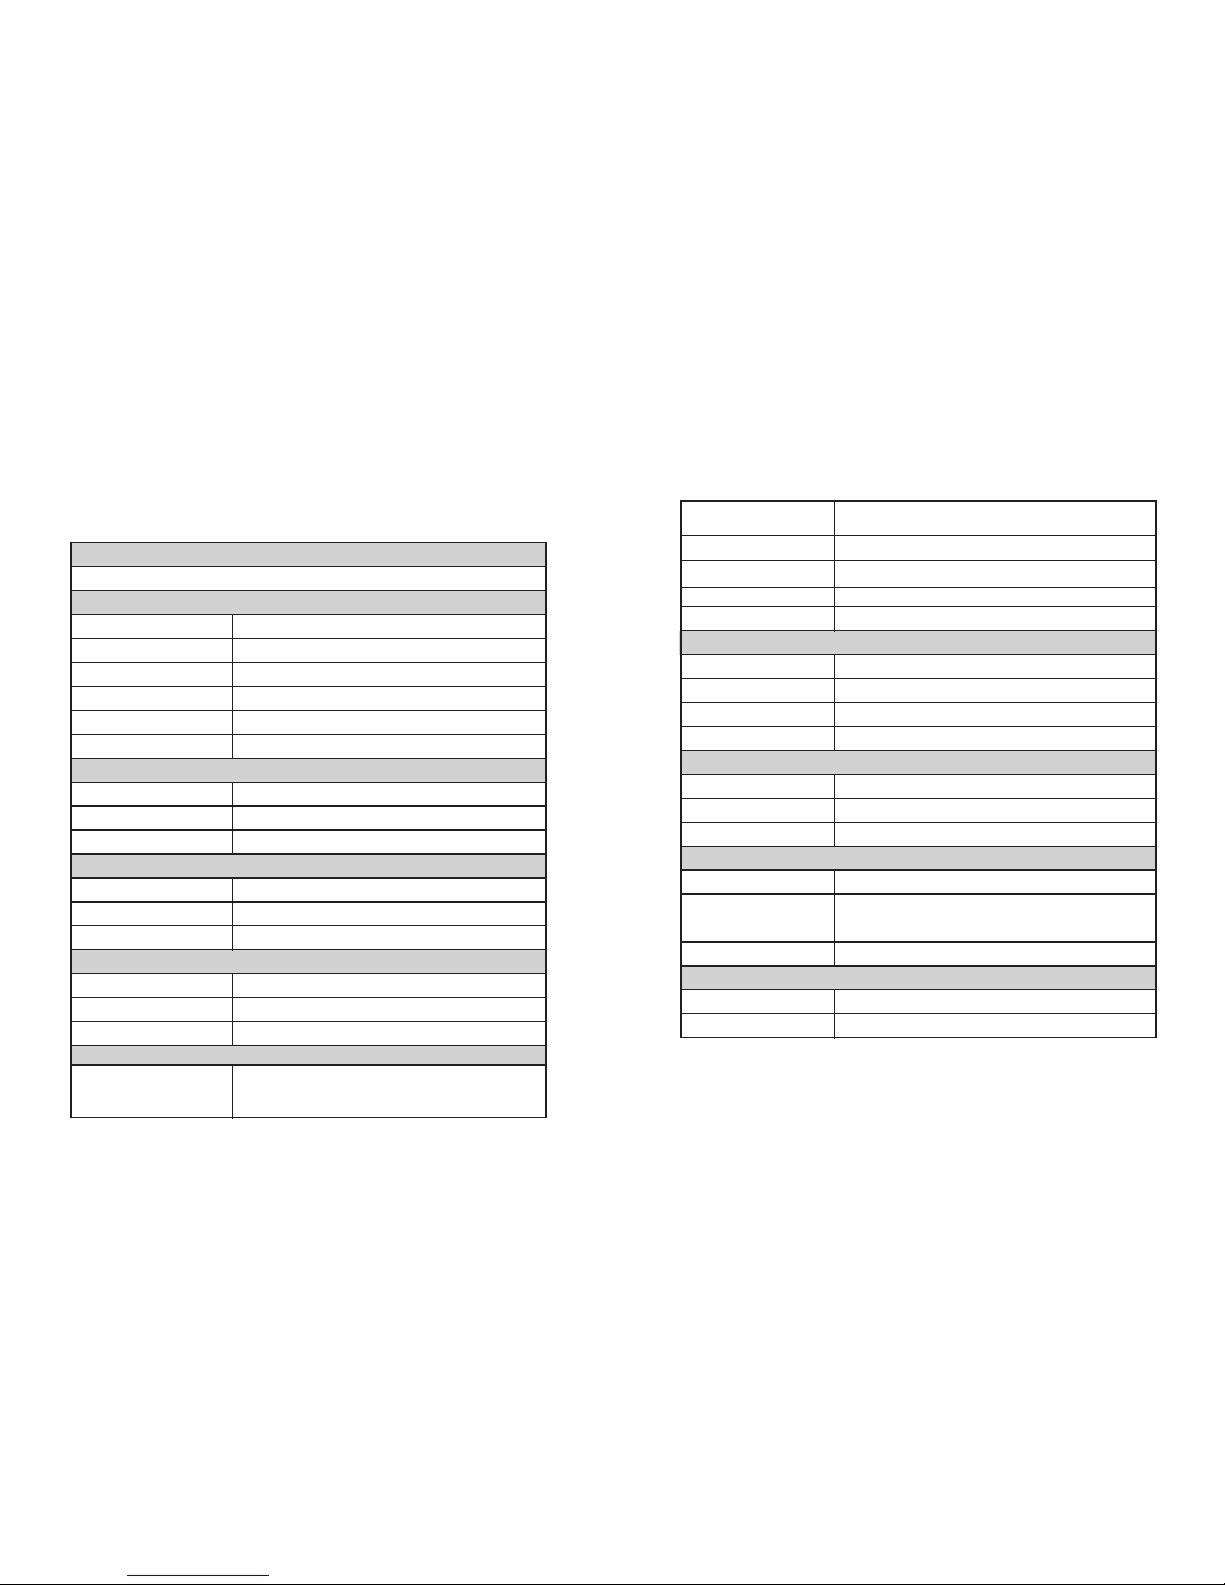
5 Technical Specification
TRANSMISS ION S TANDARDS
DVB-T, MPEG-2 ,MP EG- 4,H .264
SATE LLI TE IN PUT /DEMODULATI ON
Connector Ty pe
F Type F ema le
Input Frequ enc y
46 to 862 MHz
Input imped anc e
75 ohms
Band width
6M/7M/8M
ANT Powe r
5V<150mA 12V /24 V<3 00m A,
Demodulat ion Ty pe
COFDM :QPSK ,16 QAM ,64 QAM
LCD FEATU RES
LCD Type
TFT TRANS MIS SIV E
Number of Dot s
480(RGB) x2 72
Active area ( WxH )
2
95.04x53. 86 mm
AV out put i nte rfa ce
Connector Ty pe
3.5 mm Jack
Vid eo Ou tpu t
CVBS,
Audio outpu t
Stereo Au dio L /R output
AV inp ut in ter fac e
Connector Ty pe
3.5 mm Jack
Vid eo in put
CVBS,
Audio input
Stereo Au dio L /R input
AUD IO/V IDEO P ROCESSING
Vid eo de com pre ssion
MPEG-2 MP@H L, MP EG- 1 Dec oding,
MPEG-4 AS P@L 5 HD resolution,
H.264 MP&HP @L4 ,HW J PEG d eco ding
Res olvi ng rate
PAL- 25 fr ame @72 0*576,NTSC-30
frame@720 *48 0,
Sig nal compatibi lit y
Support con ver sio n for d ifferen t vid eo fo rma ts
Vid eo Form at
4:3,16:9, By Pa n & Sca n and L etter Box convers ion
Aud io deco mpre ssio n
MPEG-1 Laye r I/I I ,MPE G-2 L ayer I/II,
Aud io outp ut mode
Stereo, Mon o,R /L
DATA SERV ICE POR T
Con necto r
USB
Dat a proto col
USB2.0 inte rfa ce
File manage men t sys tem
NTFS,FAT32, FAT16
fil e format
wma,mp3,m p4, avi ,jp g,j peg,bmp,im g
MIC ROPRO CESSOR
Mic roprocessor
Amlogic
Clo ck Freq uenc y
180MHz
SDR AM Memo ry
512Mbit
Power SUPPLY
Li_ Ion Bat tery
8.4V/3000 mAh
Ada pter
OUTPUT :DC1 2V/ 1.5A,
INTUPT :100 -24 0VAC 50/60 Hz
Power consumption
Max. 10W
PHY SICA L CHARA CERSTICS
Siz e (W x D x H)
3
205x125x4 5(m m )
Net We ight
0.66KG
23-Digita l Sat ell ite M ete r Digital Sat ell ite M ete r-2 4
Page 15
THE PROFESS ION AL EQU IPM ENT- --- --- ---------- -|U SER ’S MA NUAL| THE PROFESS ION AL EQU IPM ENT- --- --- ---------- -|U SER ’S MA NUAL|
25-Digita l Sat ell ite M ete r Digital Sat ell ite M ete r-2 6
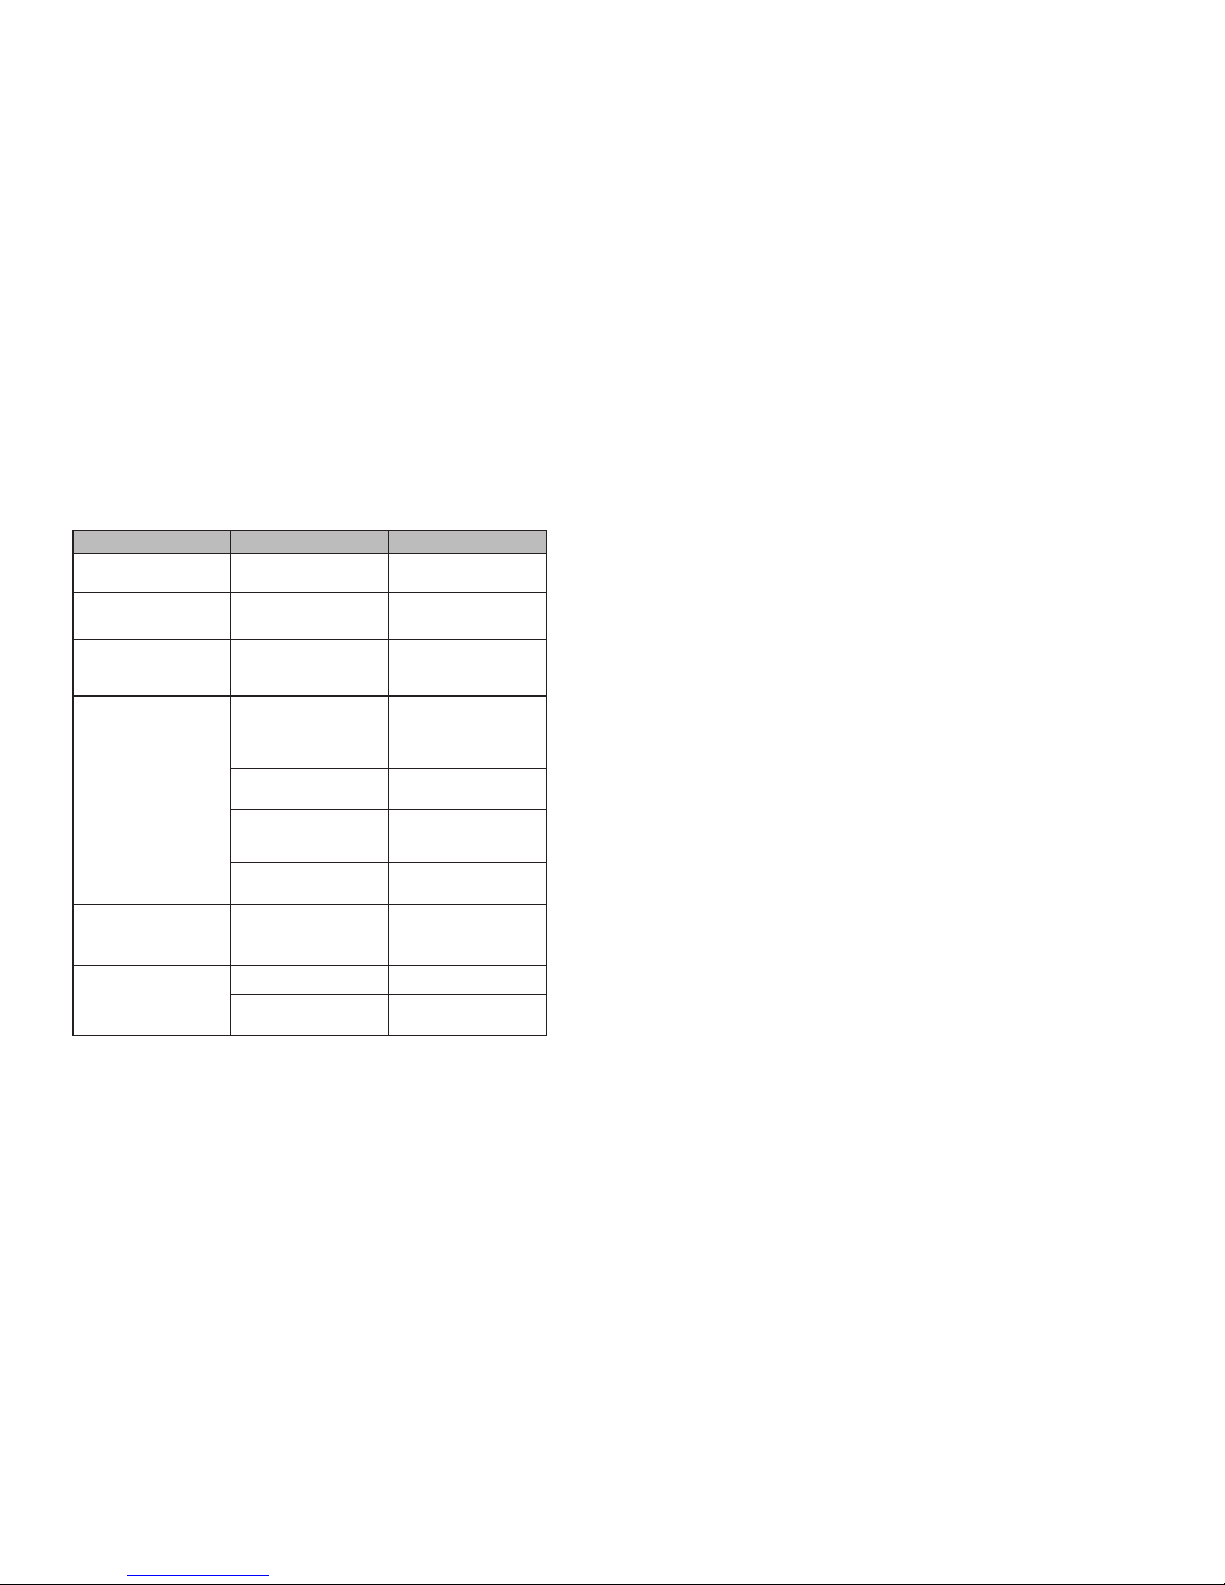
6 Trouble Shooting
Problem
Pos sibl e Caus es
Wha t To Do
No display li ght u p
Power switch is not on
Run out of batteries
Check to make surepower
on. Even on adapter
No sound or pic tur e,
but the front p ane l
power light i s ON.
AV IN ja ck in ser t,
but no video in put
Pull out AV IN cable
No sound or pic tur e
Adjust the di sh. C hec k
the Signal Le vel i n the
Antenna Set up Me nu
The satellite dish is not
pointing at the satellite.
No signal or weak
signal
Check the cab le co nnections ofa nte nna and
meter Adjust men t direction of an ten na.
The satellite dish in not
pointing at the satellite
Adjust the di sh.
Signal is too s tro ng
Connect a sig nal a tte nuator to the a nte nna ,
or don't use an ten na
Antenna imp eda nce
mismatch
Change a mism atc h
antenna
Bad picture
/Blocking E rro r
AV out N o pic tur e
(Vi deo )
The system is connected by SCART cable and
TV is not in AV mode.
ChecktheUHFchannel,
fixed in your system and
turn the UHF properly.
The key is not wo rki ng
Out of batter y
Even on adapt er
make sure no blocks
between the front panel
Key blocks
Note: If yo u still can not resolve the problem with the
above ref erences . Please co ntact the local dealer or
their aft er-sale s service center.
 Loading...