

Page 1
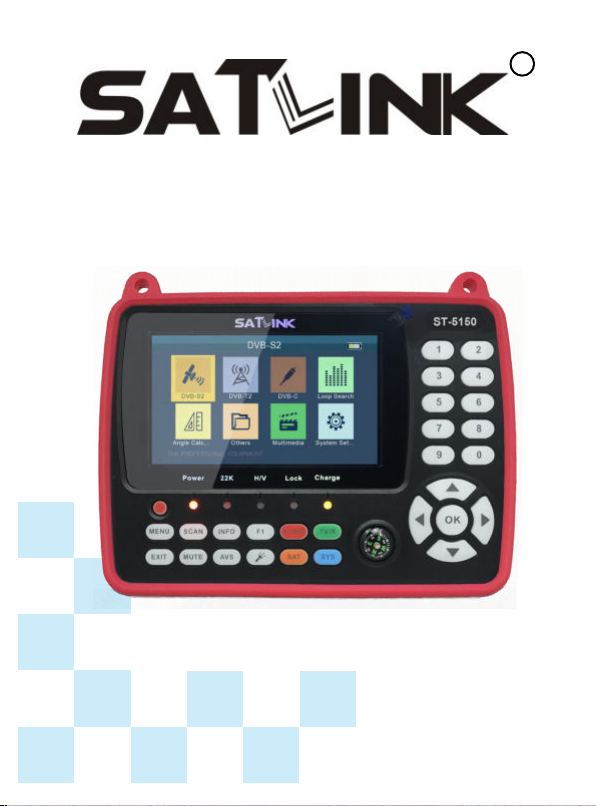
SATELLITE FINDER
ST-5150
R
User's Manual
Page 2

Page 3

English
CONTENTS
1. GUIDE ........................................................................................................1
1.1 IMPORTANT SAFETY INSTRUCTIONS ................................................... 1
1.2 UNPACKING ................................................................................................... 1
1.3 PRODUCT OVERVIEW& ILLUSTRATION .............................................. 2
2. OUTLINE ..................................................................................................5
3. THE MENU OSD INSTRUCTION .............................................. ...............6
3.1 DVBS2 ........................................................................................................... 6
3.2 DVBT2 ...........................................................................................................9
3.3 DVBC ............................................................................................................12
3.4 LOOP SEARCH ............................................................................................13
3.5 ANGLE CALCULATION ..............................................................................13
3.6 OTHERS .........................................................................................................13
3.7 MULTIMEDIA ...............................................................................................17
3.8 SYSTEM SETTING ..................................................................................... 18
4. TECHNICAL SPECIFICATION ............................................................... 20
5. TROUBLE SHOOTING ...........................................................................23
Page 4

Page 5

English
1. GUIDE
1.1 IMPORTANT SAFETY INSTRUCTIONS
Thank you for choosing our product. Before installation, we
would like to remind you some notes, which is very important
for operating safely and properly, as follows:
• Be sure to read this user manual before starting your
operation.
•You must install the dish with correct direction and angle. If
the dish is not working properly, contact your local dealer.
• When the unit is suddenly moved to a hot area from a cold
area, it may cause some problems. In that case, turn o the
power, and turn on again after 1-2 hours.
• Keep meter placed in clean space with sucient ventilation.
• Do not cover the meter with or place it on a unit that emits
heat.
•Clean the case by a soft cloth with a little washing liquid.
• Do not remove the cover.
• Do not let the unit exposed to extreme heat, cold or humid
conditions.
•No liquids or any other materials to come inside of the unit.
1.2 UNPACKING
Open the package and make sure it includes all below items, if
any missing,please contact the reseller for replacement.
1. Digital Satellite Meter 4. Power adaptor
2. User’s manual 5. DC 12V connect line
3. AV cable 6. BNC-Connector
NOTE: Please refer to our actual configuration.
1
Page 6
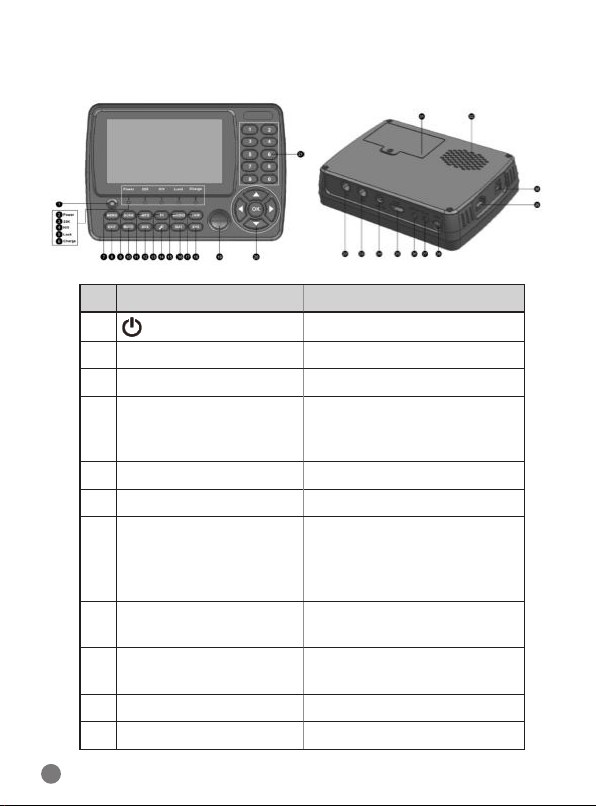
1.3 PRODUCT OVERVIEW& ILLUSTRATION
NO Description FUNCTION
1 Turn on/o meter
2 Power
3 22kHz 22kHz indicator light
4 H/V
5 LOCK Signal lock indicator light
6 Charge Charger indicator light
7 MENU
8 EXIT
9 SCAN
10 MUTE MUTE
11 INFO Channel information
Power indicator light
Vertical /Horizontal
polarization voltage output
light
Show the main menu on
the screen or jump back to
previous menu in sub-menu
setting conditions
Exit out form present menu
and save the settings
Shortcut key for DVB-S2
menu
2
Page 7
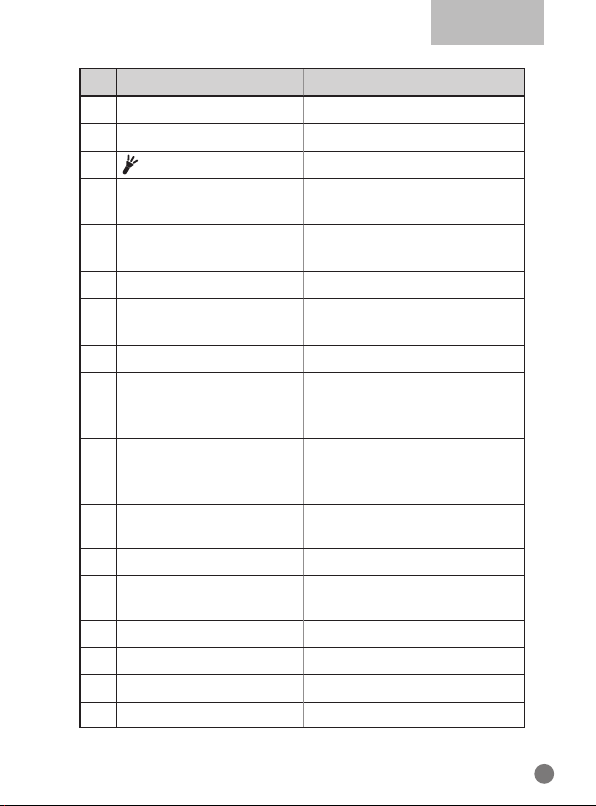
NO Description FUNCTION
12 AV-S AV IN/OUT switch key
13 F1 Auxiliary function key
14 Turn on/o Torch
15 AUDIO
16 SAT
17 TV/R TV/Radio switch key
18 SYS
19 Compass Mechanical compass
20 NAVIGATION KEY
21 0-9
22 RF
23 ANT
24 DC OUT
25 HDMI
26 AV OUT
27 AV IN
28 LED Torch
Audio type selection / Red
key
Shortcut key for
Sat Installation menu
Shortcut key for System
Setting menu
Volume Control or move
cursor, channel or change,
confirm etc
Number key to
select channels or enter
programming
Connect to satellite antenna
cable
Connect to antenna
DC 12V output for extern
equipment
HDMI output port
AV output port
AV input port
English
3
Page 8
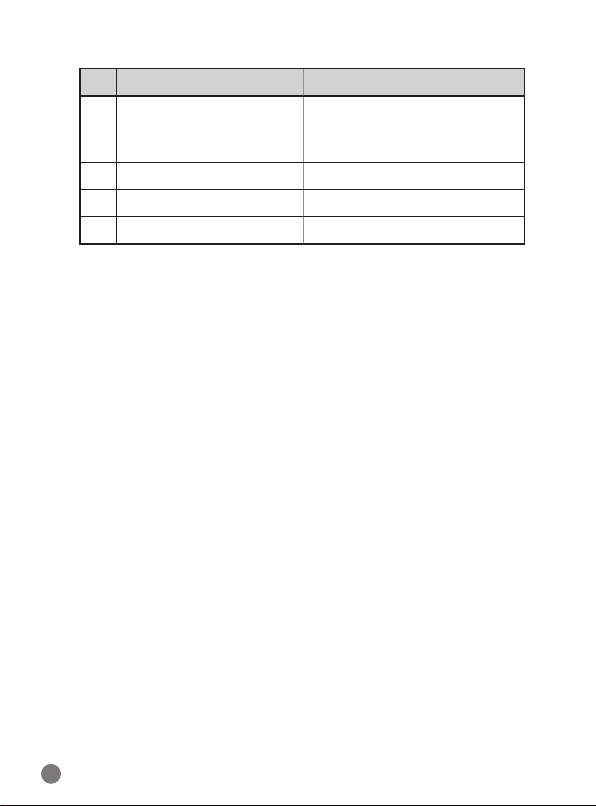
NO Description FUNCTION
USB port for software
29 USB
upgrading or multimedia
playing
30 DC IN Connect to power adaptor
31 Battery Batter y
32 Speaker Speaker integrated
4
Page 9

English
2. OUTLINE
•4.3 Inch High Definition TFT LCD Screen
•Fully DVB-S/S2/T/T2/C compliant
•MPEG2, MPEG4, H.264/MPEG4 AVC, H.265/HEVC hardware
decoding
•Digital meter for signal strength and quality
•Supports Auto Scan and Manual Scan
•Sound and Light Alarm for Locking Signal
•Auto Calculate Angle of AZ ,EL
•Supports DISEQC 1.0/1.1/1.2, Unicable, 0/22kHz Tone
•Speaker Integrated
•Support both AV out and AV in
Support HDMI out
•
•LNB short protect
•7.4V/2600mAh LiIon Battery Included
•Software upgrade via USB port
•Easy to carry
5
Page 10
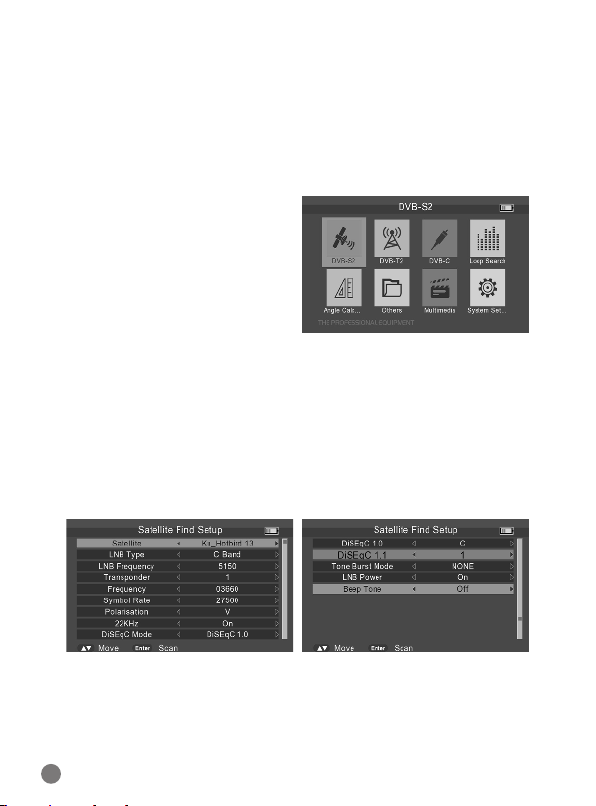
3. THE MENU OSD INSTRUCTION
If you have installed and connected the cables to the finder,
pressing MENU to display the Main Menu.
• DVB-S2
• DVB-T2
• DVB-C
• Loop Search
• Angle Calculation
• Others
• Multimedia
• System Setting
Press the keys of
the menu interface, then use OK to confirm a selection.
to move the cursor up or down in
YZAB
3.1 DVB-S2
Select DVB-S2, then press OK into the Satellite Find Setup.
6
Page 11

English
3.1.1 SATELLITE
Press AB key into the satellite list. Use YZ key to move the
cursor, then press OK to select the satellite you want.
3.1.2 LNB TYPE
There are 4 types you can select: C Band/Ku Band/Unicable I/
Unicable II.
3.1.3 LNB FREQUENCY
Press AB key to switch LNB frequency you want.
3.1.4 TRANSPONDER
Press AB key into the TP list. Use YZ key to move the cursor
then press OK to select the TP you want.
3.1.5 FREQUENCY
Frequency of the current transponder, input the value by using
the number keys.
3.1.6 SYMBOL RATE
Symbol rate of the current transponder, input the value by
using the number keys.
3.1.7 3.1.7 POLARISATION
Press
key to change vertical or horizontal of polarization.
AB
3.1.8 22KHZ
Press AB key to turn on or o 22kHz TONE Switch.
7
Page 12
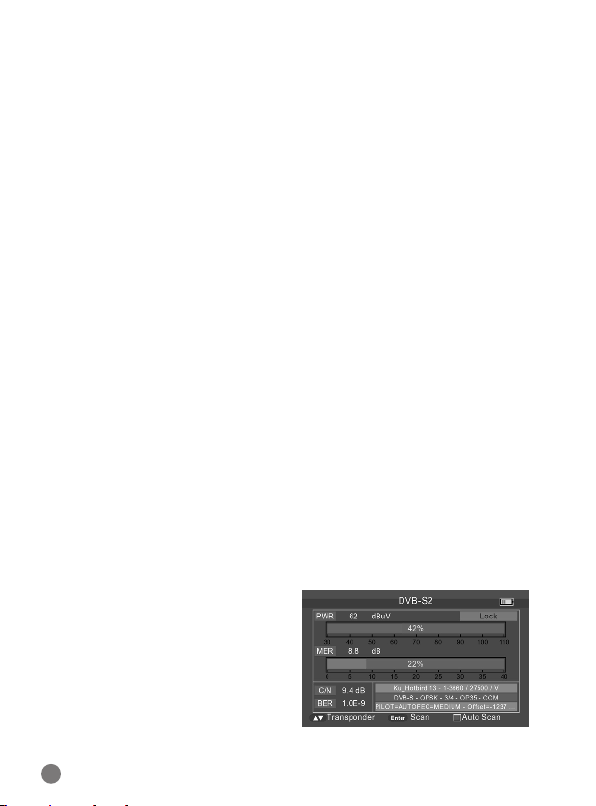
3.1.9 DISEQC MODE
Press AB key to set the type of port as None/DiSEqC1.0/1.1.
3.1.10 DISEQC T YPE & INPUT
In C/Ku Band mode:
we can press AB key to set DiSEqC 1.0/1.1 as A/B port, and set
Tone Burst Mode as NONE/Tone Burst A/B.
In Unicable mode:
we can press AB key to switch IF Index from 1 to 8, or use
number key to modify IF Freq, and then press AB key to select
A/B as Sat Position.
3.1.11 LNB POWER
Press AB key to Switch LNB Power ON/OFF.
3.1.12 BEEP TONE
Press AB key to Switch beep tone ON/OFF. If we open it, the
beep of lock alarm will open when we enter into the search
screen.
3.1.13 QUICK SEARCH
When parameters have been
set done, press OK into quick
search. There will have some
signal information displayed
on the screen.Press YZ key
to change transponder.
8
Page 13
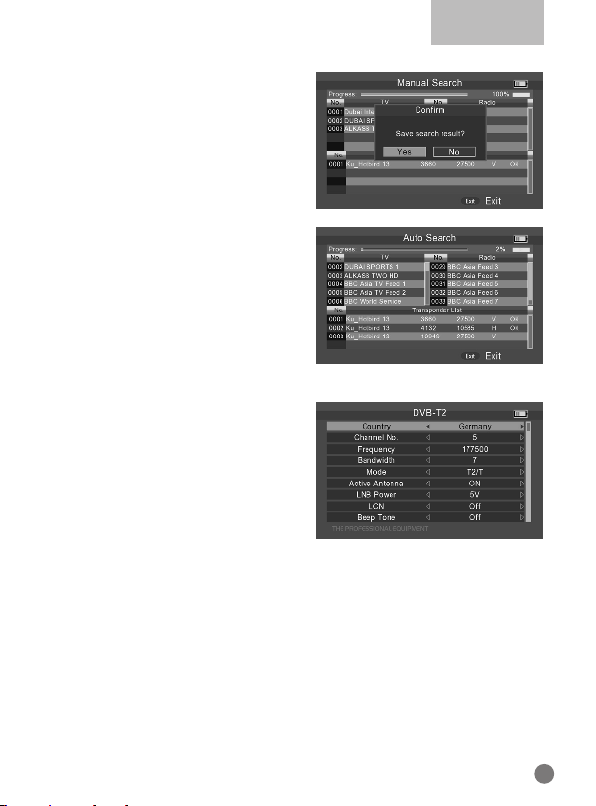
• Scan: Press the ENTER key to
search the current TP.
• Auto Scan: Press the red
key to auto blind search the
current satellite.
3.2 DVB-T 2
Select DVB-T2, then press OK
into the Scan Setup.
3.2.1 COUNTRY
Press AB key to change the default country.
English
3.2.2 CHANNEL NO
Press AB key to change the channel number.
9
Page 14

3.2.3 FREQUENCY
Frequency of the current channel, input the value by using the
number keys.
3.2.4 BANDWIDTH
Press AB key to change the bandwidth, we can select 5, 6, 7
or 8M.
3.2.5 MODE
Press AB key to change the DVB standard, we have there
types including T/T2/T+T2, you can select one you want.
3.2.6 ACTIVE ANTENNA
Press AB key to switch antenna power ON/OFF.
3.2.7 LNB POWER
Press AB key to change the antenna power, there are 3 types
including 5V/12V/24V.
3.2.8 LCN
Press AB key to switch LCN ON/OFF.
3.2.9 BEEP TONE
Press AB key to Switch beep tone ON/OFF. If we open it, the
beep of lock alarm will open when we enter into the search
screen.
10
Page 15
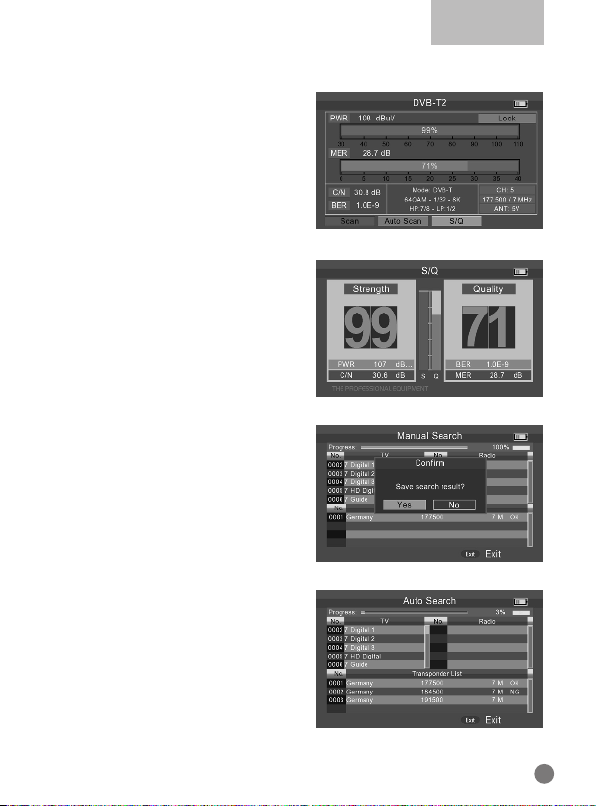
3.2.10 QUICK SEARCH
When parameters have been
set done, press OK into quick
search. There will have some
signal information displayed on
the screen.
• Scan: Press OK or red key to
search current channel.
• Auto Scan: Press green key
to auto search the current
channel.
•S/Q: Press blue key to enlarge
showing of the signal strength
and quality.
English
11
Page 16
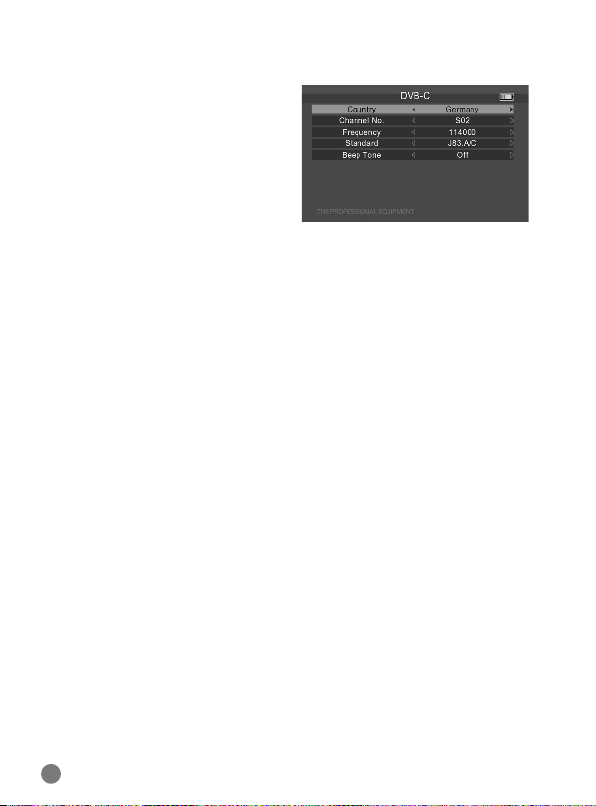
3.3 DVB-C
Select DVB-C, then press OK
into the Scan Setup.
3.3.1 COUNTRY
Press AB key to change the default country.
3.3.2 CHANNEL NO.
Press AB key to change the channel number.
3.3.3 FREQUENCY
Frequency of the current channel, input the value by using the
number keys.
3.3.4 STANDARD
There are 2 types of standard you can select: J83.A/C and J83.B.
3.3.5 BEEP TONE
Press AB key to switch beep tone. If we open the it, the beep
of lock alarm will open when we enter into the search screen.
3.3.6 QUICK SEARCH
Please refer to 3.2.10.
12
Page 17
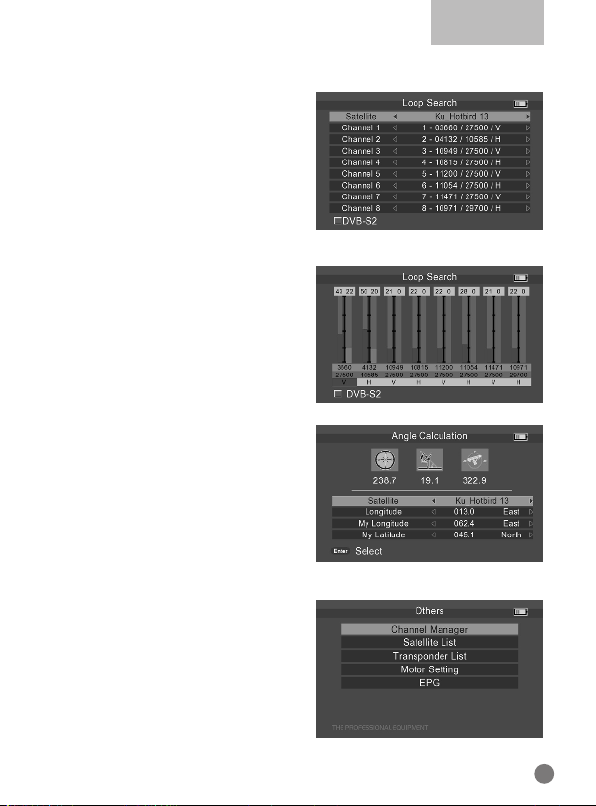
3.4 LOOP SEARCH
We can see 8 TP or channels
when we enter into this
interface, and press OK to edit.
There are 3 modes we can
choose: DVB-S2,DVB-T2 and
DVB-C. Press the red key
to change.
It will finish loop search after
edition, then singal strenth and
quality of each TP or channel
will be displayed on the screen.
3.5 ANGLE CALCUL ATION
Input satellite longitude, local
longitude and latitude by
number key, and device will
calculate the polarization angle,
azimuth and elevation on the
top of the screen.
3.6 OTHERS
•Channel Manager
•Satellite List
•Transponder List
•Motor Setting
•EPG
English
13
Page 18

3.6.1 CHANNEL LIST
• SAT
Press F1 key to
switch dierent channel list.
• Lock
Press YZ key to
select programs we want to lock, then press the red key to
lock them.
• Del
Press the green key to delete current channel.
• Move
Select a channel first, then press the orange key to move to
other position.
• Edit
Press the blue key to confirm channels which need operating.
3.6.2 SATELLITE LIST
All the satellite will be
displayed on the screen.
14
Page 19
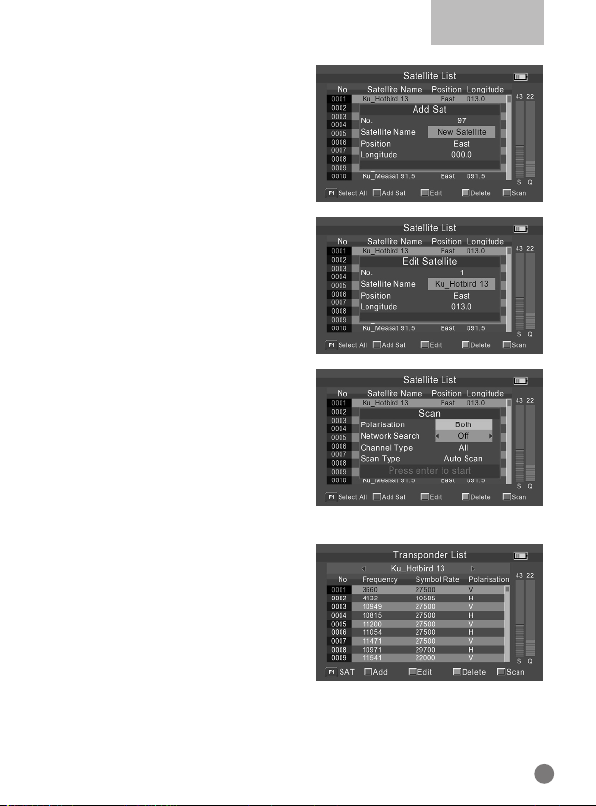
Press the red key to add a new
satellite.
Press the green key to edit
current satellite.
Press the orange key to delete
current satellite.
Press the blue key to scan
current satellite.
3.6.3 TRANSPONDER LIST
All the transponders under the
current satellite will be displayed
on the screen, and press AB
key to switch satellite.
English
15
Page 20
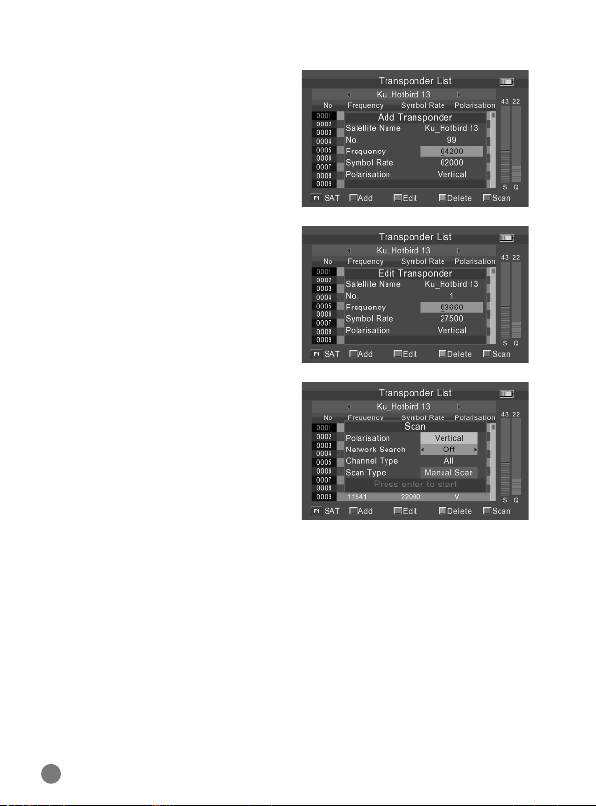
Press the red key to add a
new transponder.
Press the green key to edit
current transponder.
Press the orange key to
delete current transponder.
Press the blue key to scan
current transponder.
3.6.4 MOTOR SETTING
There are 5 modes in motor setting:
• USALS
Controling motor according to your local position, you can
modify it in Angle Calculation.
• DiSEqC 1.2
There are 64 position you can select to move motor.
• Set East Limit
Move motor to east.
16
Page 21
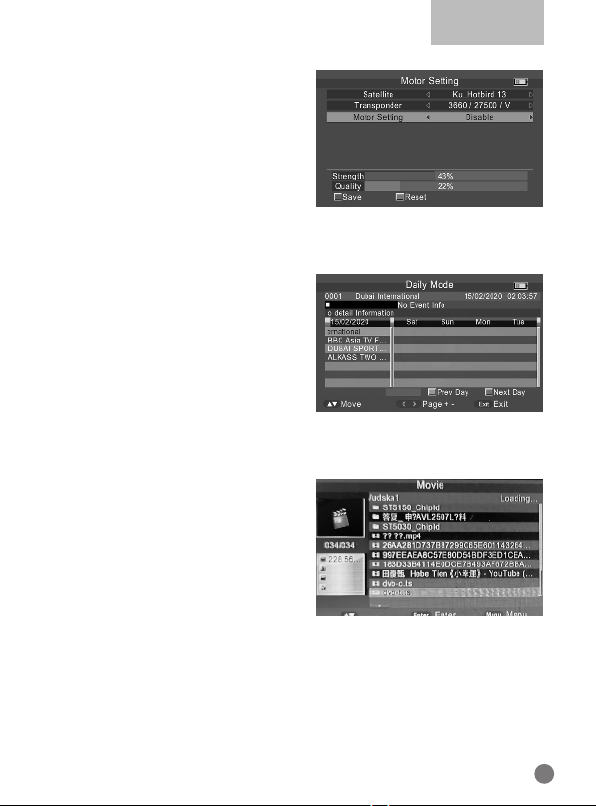
• Set West Limit
Move motor to west.
• Disable Limits
Unlimited movement.
Press the red key to
save setting.
Press the green key to reset setting.
3.6.5 EPG
Press YZ key to change
program. If the current program
has EPG information, it will
appear on the right side of
the window. Press AB key to
change date of the EPG.
3.7 MULTIMEDIA
Will need to play the files in the
USB and insert it into the USB
port.
English
Select a file and press OK to play it.
17
Page 22

3.8 SYSTEM SETTING
• Language
Press AB key to change the OSD language, default is English.
• Country
Press AB key to change the country.
• Aspect Ratio
Press AB key to change the aspect ratio: 4:3 LB/4:3 PS/16:9/
full screen.
• Video Resolution
Press AB key to change the video output resolution:
480p/576p/720p/1080i/1080p.
•HDMI Audio
Press AB key to change the digital audio output format: PCM/
RAW/MUTE.
•Time Zone
Press AB key to change the Time Zone.
• System Lock
Press AB key to switch system lock on/o.
• PWR Unit
Press AB key to change the PWR unit: dBm/dBuV/dBmV.
• Torch
Press AB key to switch torch on/o.
• Back LED
Press AB key to switch keyboard LED on/o.
• KeyTone
Press AB key to switch key tone on/o.
• Speaker
Press AB key to switch speaker on/o.
• 12V
Press AB key to switch DC 12V output on/o.
18
Page 23

English
• Upgrade
Will upgrade the file into the USB, then insert the machine.
Press OK to upgrade interface, use the direction key to select
update file, and press OK to mupgrade.
Warning: Please don’t turn power off or pull out the USB,
otherwise it will damage the machine’s software, and can’t
boot again.
• Factory Reset
Press OK to start factory reset.
NOTE: if you set factory setting, all the user settings and the
database will be reset.
• Version
Press OK to see some information about this hardware/
software.
•Save Channel - USB
Save channel list to USB disk as default database.
• Upgrade Channel - USB
Restore channel list from USB disk as default database.
19
Page 24
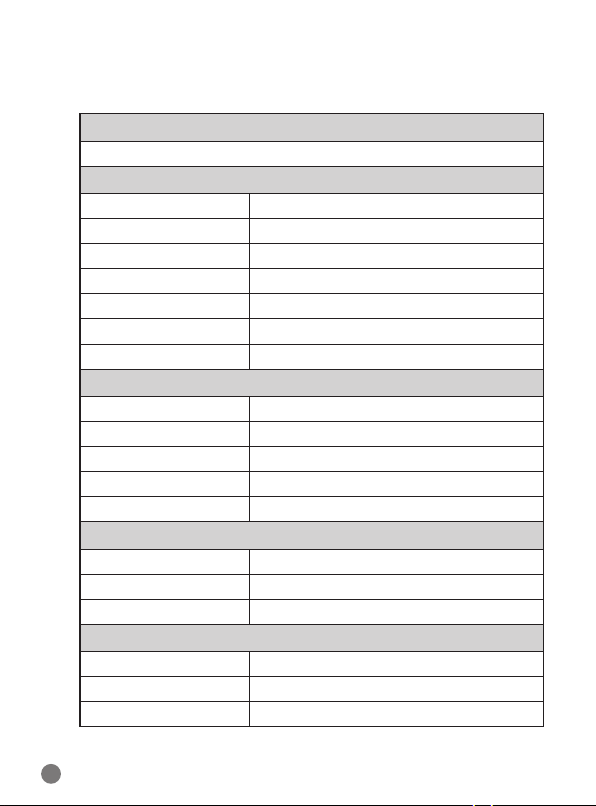
4. TECHNICAL SPECIFICATION
TRANSMISSION STANDARDS
DVB-S2/S, DVBT/T2, DVB-C
SATELLITE INPUT/DEMODULATION
Connector Type F Type
Input Frequency 950 to 2150 MHz
Signal Input Level - 65 to -25 dBm
Band Switch Control 22KHz
LNB Supply 13V/18V, IMax 400mA
Demodulation Type QPSK,8PSK,16APSK,32APSK
Symbol Rate 2<Rs<45Mband(SCPC/MCPC)
DVB-T/T2/C INPUT/DEMODULATION
Connector Type Female Type
Input Frequency 48 to 862 MHz
Signal Input Level -79.5dBm (MAX)
ANT Supply 5V, 12V/24V Imax 100mA
Demodulation Type QPSK,16QAM.64QAM,256QAM
LCD FEATURES
LCD Type TFT Transmissive
Number of Dots 480 (RGB) x 272
Active area (WxH) 95.04x53.86 mm
AV output interface
Connector Type 3.5 mm jack
Video Output CVBS
Audio Output Stereo Audio L/R output
2
20
Page 25
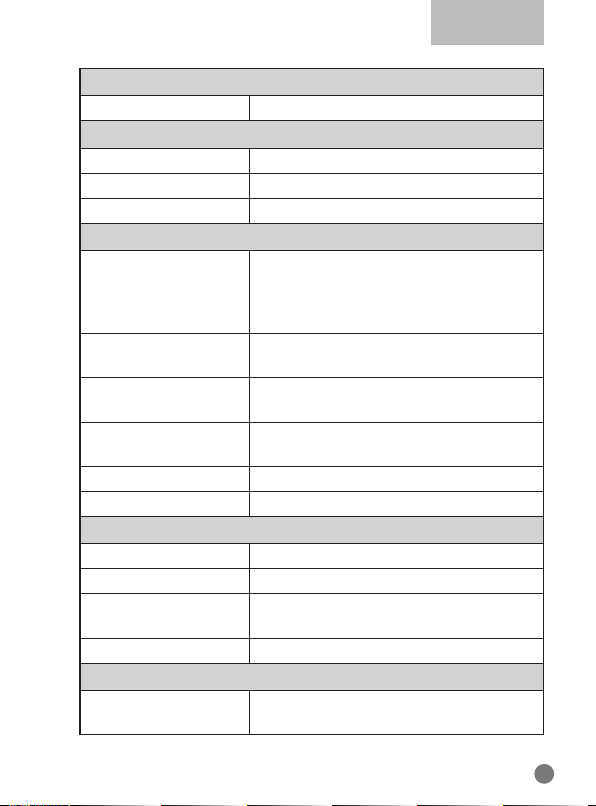
English
HDMI output connecter
Format HDMI 1.4
AV input interface
Connector Type 3.5 mm jack
Video Input CVBS
Audio Input Stereo Audio L/R input
AUDIO/VIDEO PROCESSING
MPEG-2 MP@HL, MPEG-1
Video decompression
Resolving rate PAL-25 frame@720*576,NTSC-30
Signal compatibility
Video Format
Audio Decompression MPEG-1 Layer I/II, MPEG-2 Layer I/II
Audio Output Mode Stereo, Mono,R/L
DATA SERVICE PORT
Connector USB
Data Protocol USB2.0 interface
File Management
System
File Format wma,mp3,mp4,avi,jpg,jpeg,bmp,img
POWER SUPPLY
LiIon Battery 7.4V/2600mAh(The machine behind
Decoding,MPEG4 ASP@L5 HD
resolution,H.264 MP&HP@L4,
H.265/HEVC,HW JPEG decoding
frame@720*480
Support conversion for dierent video
formats
4:3,16:9,By Pan & Scan and Letter Box
conversion
NTFS,FAT32,FAT16
labeling shall prevail)
21
Page 26
Adapter OUTPUT :DC12V/1.2A, INTUPT
:100~240VAC 50/60Hz(Will
be subject to actual configuration)
Power Consumption Max. 10W
PHYSICAL CHARACERSTICS
Size (W x D x H) 17 x 12 x 4 (cm3)
Net Weight 1kg
22
Page 27
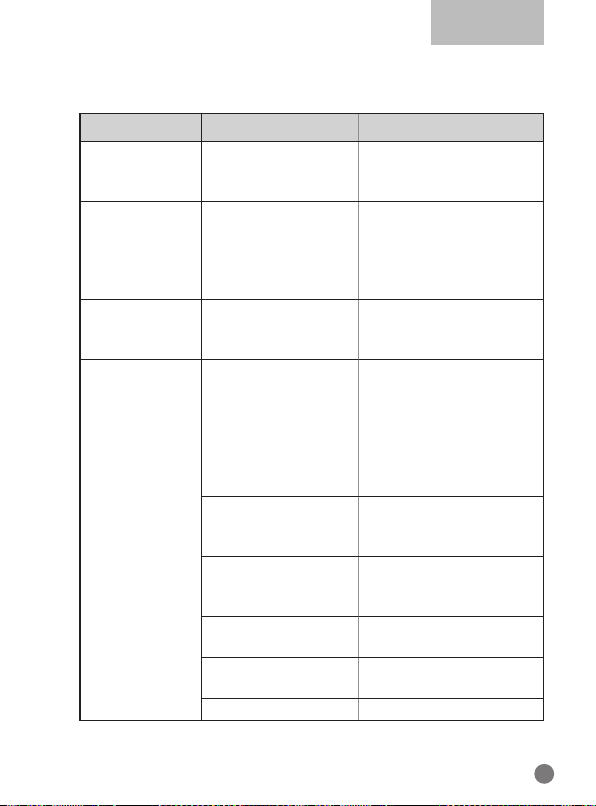
5. TROUBLE SHOOTING
Problem Possible Causes What To Do
No display light
up
No sound or
picture,but the
front panel
power light is
ON.
No sound or
picture
Bad picture/
Blocking Error
Power switch is not
on Run out of
batteries
AV IN jack insert, but
no video input
The satellite dish is
not pointing at the
satellite.
No signal or weak
signal
The satellite dish in
not pointing at the
satellite
Signal is too strong
Satellite dish is too
small
LNB noise factor too
high
The LNB is faulty Change the LNB
Check to make sure
power on. Even on
adapter
Pull out AV IN cable
Adjust the dish. Check
the Signal Level in the
Antenna Setup Menu
Check the cable
connections.
LNB and other
equipment connected
between the LNB and
the meter and adjust
the dish.
Adjust the dish.
Connect a signal
attenuator to the LNB
input
Change to a larger dish
Change to an LNB with
lower noise factor
English
23
Page 28

AV out No
picture(Video)
The key is not
working
The system is
connected by SCART
cable and TV is not
in AV mode.
Check the UHF channel
fixed in your system and
tune the UHF properly.
Out of battery Even on adapter
Key blocks
make sure no blocks
between the front panel
24
Page 29

Page 30

 Loading...