

SaskTel 1120E,1140E Quick Reference Manual

Red lamp: Missed Call / Message Waiting indicator
The red lamp on the top right corner of your set turns on to
indicate that you have either missed a call or have a
message waiting.
If you miss a call but have no new messages, the red lamp
will appear solid.
If you have a new message, the red lamp will fl ash. There
will also be an icon by the Msg Wait feature key. On the
1140E set, a small envelope will also appear on the display
below the word Centrex.
To turn the lamp off, acknowledge the missed call(s) by
pressing the Msg/Inbox key and retrieving any new
messages. Refer to the Messaging Service section for
details.
Blue lamp: Data Waiting indicator
The blue lamp on the top left corner of your set turns on to
indicate that you are on an active call (data is transmitting).
Feature keys
You can access many pages of programmable Feature
keys. Use the Navigation key to scroll through the pages
on the display and use the keys on the left and right of the
display screen to activate them. (The 1120E has four keys;
the 1140E has six.)
To program these keys with phone numbers, refer to the
Autodial keys section.
To program these keys with features, contact your
telephone administrator.
Soft keys
The four soft keys are located below the display screen. The
function of these keys changes as you navigate through the
menus of your set.
Copy key
This key is for future service enhancements.
Services & Quit keys
The Services key opens the Menu on your display and the
Quit key closes the Menu. (You can also open the Menu with
the soft key labeled “Menu.”)
Navigation key - This key, located below the soft keys,
allows you to navigate up, down, left, or right within menus.
Msg/Inbox & Shift/Outbox keys
Press these keys to view the last ten incoming calls (Msg/
Inbox key) or the last ten outgoing calls (Shift/Outbox key).
Here, you can select a call and choose from the options to
Dial, Display, or Store the phone number.
To place a call, press the Msg/Inbox or Shift/Outbox key,
select the number, and lift the handset OR press the
Handsfree key OR press Dial > Ok.
To clear the Inbox or Outbox, select Menu > History
> Reset Inbox or Reset Outbox. When the confi rmation
screen appears, select Yes.
Directory key
Refer to the following Directory section.
Directory
IP phone functions
If you have multiple lines, you can toggle between them
using just the line features keys instead of the Hold key.
1. Ensure that the Bluetooth functionality has been
enabled.*
2. Press the Headset key twice to access the Bluetooth
menu, select Use Bluetooth headset and press Ok.
3. Select your device and press Ok.
4. Pair the device with your set as directed in your
Bluetooth user guide.
*Refer to the Nortel IP phone 1140E user guide on
www.sasktel.com/centrex-ip-support for details.
Labeling Autodial keys
1. Select Menu > Feature.
2. Select an Autodial number from the list > Ok.
3. Select Label, and enter the label name > Ok.
Assigning numbers to Autodial keys
Press the Autodial key you’ve labeled, enter the number
(as you would dial it) you want to assign, and press the
Autodial key again.
To change the number, dial the new number, press the
Autodial key, wait for the number to appear on the display,
and press the Autodial key again.
To delete the number (but not the label), press the Autodial key and then the # key.
Placing a call
Obtain a dial tone and press the Autodial key.
Assigning numbers to Speed Call Short codes
Press the SpdCalShrt key, enter a one-digit code (0-9),
enter the number (as you would dial it), and press the
SpdCalShrt key again.
Note: Ensure that you keep a list of your Speed Call
numbers, as Speed Call Short lists cannot be reviewed and
will not be saved if Speed Call Short is moved to a different
feature key on the set.
To remove a number, press the SpdCalShrt key, enter the
one-digit code for the number to erase and press # to clear
the number, and then press the SpdCalShrt key again.
Placing a call
Obtain a dial tone and press SpdCalShrt > one-digit code.
dial * > one-digit code > #.)
Managing calls with your IP phone
Use the Directory feature to create and store up to 16
directory entries consisting of names and numbers.
Adding a Contact
1. Press the Directory key.
2. Scroll through the Directory menu using the navigation
key, select [New Entry], and press Ok. (The fi nal item
in the directory is [New Entry].)
3. Select and enter the number (as you would dial it)
Surname, and First Name of your contact, and press
Ok after each one.
4. Select Feature Key Format, scroll through the op-
tions, select your desired display format, and press
Ok.
5. Select Save, press Ok, and Yes to confi rm the save.
Editing a Contact
1. Press the Directory key.
2. Scroll through the Directory menu using the navigation
key, select the entry you wish to edit, and press Ok.
3. Scroll to Edit and press Ok.
4. Edit the number, surname, fi rst name or feature key as
required, and press Ok.
5. Select Save, press Ok, and Yes to confi rm the save.
Deleting a Contact
1. Press the Directory key.
2. Scroll through the Directory menu using the navigation
key, select the entry you wish to delete, and press Ok.
3. Scroll to Delete, which is the third item in the list.
4. Press Ok to delete the entry or press Cancel to return
to the Directory menu. If you press Ok, press Yes to
confi rm the removal of the entry from your directory.
Placing a Call
1. Press the Directory key.
2. Scroll through the Directory menu using the navigation
key, and select the entry you wish to dial.
3. Lift the handset OR press the Handsfree key OR
press Dial > Ok.
Speed Call Short codes
To set the ring pattern
1. Select Menu > Audio > Ok.
2. Select Play Ringer Patterns > Ok.
3. To test ringer patterns, select one, press Ok > Play > Stop
(repeat).
4. Select the desired Ringer Pattern, press Ok > Apply > Ok.
Adjusting volume
To temporarily adjust the volume for a call in progress,
use the Volume keys beside the key pad.
To set the default volume
1. Select Menu > Audio > Ok.
2. Select Default Volumes > Ok.
3. Select Handset, Headset, Handsfree, Ringer, or Buzzer.
4. Adjust the volume by scrolling right and left with the
navigation key and then press Ok.
5. Press the Quit key to close the menu.
Muting calls
To prevent a caller from hearing you, press the Mute key.
The Mute key indicator lamp will be lit, indicating that the
microphone is off.
To allow the caller to hear you, press the Mute key again.
Using the Handsfree mode
To activate the Handsfree mode, press the Handsfree key
or the feature key for your line while the handset is in the
cradle.
Note: Ensure your IP phone has Disable Handsfree turned off.
Select Menu > Audio > Disable Handsfree > select “Off” >
Ok.
Ending calls - To end your call press the Goodbye key.
Expand key - This key is for future service enhancements.
Using a headset
Ensure that your headset is turned on and has been charged.
To activate your headset while it is in the cradle, ensure
your IP phone has Disable Handsfree turned on. Select
Menu > Audio > Disable Handsfree > select “On” > Ok.
To answer a call, press the fl ashing line key.
To place a call, press the Headset key to obtain dial tone
and dial the number.
Managing calls on hold
To place a call on hold, press the Hold key. The indicator
will fl ash beside the line that has been placed on hold.
To retrieve the call, press the feature key beside the fl ashing
indicator.
Autodial keys - phone numbers for feature keys
Setting up a Bluetooth headset (1140 only)
Call Forward Universal
To forward your calls to another number, press the
Forward key, enter the number (as you would dial it), and
press the Forward key again. An icon will appear next to the
Forward key on your display.
To deactivate, press the Forward key. The icon will
disappear.
To reactivate to the same number, press the Forward key
twice.
To activate to a different number, press the Forward key,
dial the new number, and press the Forward key again.
Call Park
To park a call during an active call, press the Park key or
the 3 Way Call key in the display area, wait for the dial tone,
then dial *77.
To retrieve the call from any phone within your customer
group, press the Park key or dial *78 and then dial the
extension number that the call was parked on.
Call Transfer
Once on a call, advise the caller to hold the line. Press the
3 Way Call key and dial the number of the person that you
want to transfer the call to. Press the 3 Way Call key again,
followed by the Goodbye key, either while the phone is
ringing to conduct a blind transfer or once the phone is
answered to announce the transfer.
Call Trace
To trace the original number of annoying or unlawful
calls, immediately after the call is received dial *957 or
press the CustTrace feature key. After tracing 5 calls, dial
1-800-651-1121 and select option 4 to report them to
SaskTel.
Last Number Redial
To redial the last number you dialed, obtain dial tone and
press ##.
Ring Again
After hearing a busy signal, press the Ring Again key to
have your phone ring when your caller’s line is available.
Three Way Call
Once on a call, advise the caller to hold the line. Press the 3
Way Call key. Dial the number you would like to add. When
the new party answers, announce the conference call. Press
the 3 Way Call key again to connect the original caller to the
conversation.
Popular calling features
The Messaging Service provided with SaskTel Centrex IP
will allow callers to leave a message when your phone would
normally ring busy or you are unable to answer the phone.
You will need to provide a personal greeting that callers will
hear upon entering your mailbox.
Accessing your Mail box
There are four ways you can access your mailbox:
1. Dial *99 from your phone and enter your password when
prompted.
2. If you already have a message waiting, you can press the
Msg Wait key and enter your password when prompted.
(This option isn’t available if you subscribe to Number
Replacement.)
3. Dial your area access code, as listed in the phone book,
and press # to notify the system that you have a mailbox.
The system will then prompt for your mail box number,
which is your 10-digit phone number (area code
required) and your password.
4. Go to www.msging.sasktel.net and login with your
10-digit phone number (area code required) and your
password.
Your Password
Upon initial entry to the mailbox, your password is your
10-digit phone number. You will be asked to change this
password immediately.
Make sure to choose a password that only you will know to
ensure the privacy of your mailbox.
Messaging Service Menu
Once in the mail box, you will be provided with options for
functions you may wish to complete. The voice prompts will
always indicate what keys you need to press to perform any
of the mailbox functions.
If at any time you require further assistance, from within
your mailbox, dial 0 and the attendant will provide you with
additional information.
For more information, go to www.msging.sasktel.net and
click on the “SaskTel Voice Mail and TalkMail user guides”
link. From here, you can fi nd:
The “SaskTel Online Voice Mail User Guide,” with •
detailed instructions on using your mailbox.
The “MessageManager Business User Guide,” a •
two-page guide to your menu options.
Messaging service
The 911 service offered with VoIP systems, such as
SaskTel Centrex IP Service, differs from the 911 service
offered with traditional phone systems.
At this time, it is not possible to automatically
transmit your physical location to the operator using
VoIP service. Therefore, it is critical that you provide
your physical location and follow the instructions of the
operator.
1. Dial 9-911*. (Note that 9 is the default steering digit
for your phone. If you have changed the default,
press the new steering digit followed by 911.)
2. Your call will fi rst be routed to an operator. Be
prepared to state your physical location**, 10-digit
phone number, and emergency.
3. The operator will then route your call to the
appropriate Public Safety Answering Point (PSAP).
4. Once connected to the PSAP operator, state that
you are calling from an IP (VoIP) phone, once again
state your emergency, and follow the instructions
of the operator. You may be asked to repeat your
physical location**, and 10-digit phone number.
* With SaskTel Centrex IP Service, 911 calls can only
be routed to PSAPs located in Canada. For
emergencies located outside of Canada, local
emergency personnel should be contacted by other
means.
**If there is a problem communicating your physical
address, the operator will use your last known
address.
For more information on
SaskTel Centrex IP Service,
please visit our website at
www.sasktel.com/centrex-ip
To move, add, or change your features,
contact your telephone administrator.
To report phone trouble, contact
SaskTel Repair at 9-611.
911 emergency calling
SaskTel Centrex IP Service
Quick Reference Guide
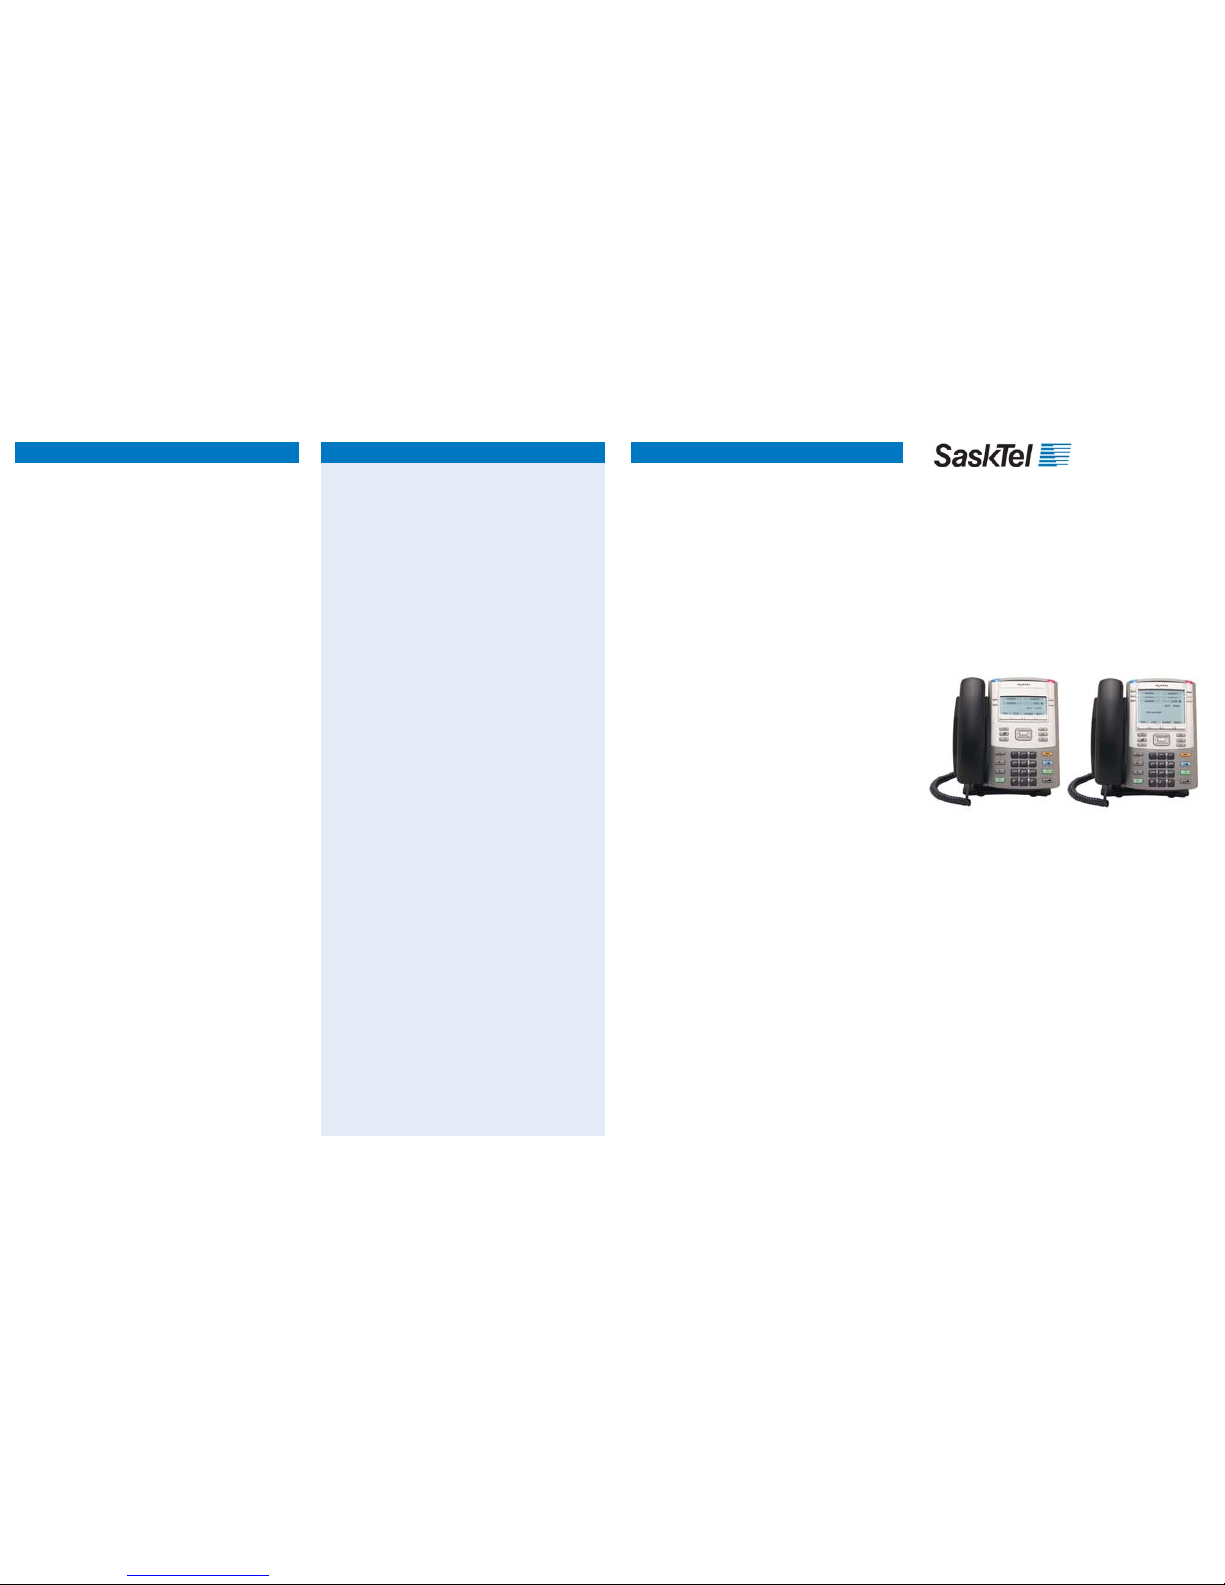
IP Phones
1120E & 1140E
01/15/2010
 Loading...