

Sartorius YDP20-0CE Operating Instructions Manual
Operating Instructions | Betriebsanleitung |
Installation et mode d’emploi
Sartorius YDP20-0CE
Data Printer | Messwertdrucker | Imprimante
98647-004-35

English – page 3
In cases involving questions of interpretation,
the German-language version shall prevail.
Deutsch – Seite 40
Im Auslegungsfall ist die deutsche Sprache
maßgeblich.
Français – page 77
En cas de questions concernant l’interprétation,
la version en langue allemande fera autorité.
2

Intended Use 4
Safety Instructions 5
Installation 6
Operation 9
Printing the Measured Value from the
Connected Weighing Instrument 10
Statistical Evaluation
of Measured Values 11
Use in Legal Metrology in the EU 19
ISO/GLP-compliant Data Records 20
Configuration 21
Setting the Date and Time 21
Settings for ISO/GLP-compliant
Data Records 23
Printer Port Settings 24
Statistics Application Settings 28
Printing a Hard Copies of Settings 30
Troubleshooting Guide 32
Maintenance 33
Accessories 37
Specifications 37
C Marking 38
Test certificate 39
3
Contents

Intended Use
The YDP20-0CE data printer is designed to receive
weighing data from a connected weighing instrument
and print it on plain paper (roll width:
57.5 mm), with up to 24 characters per line.
The data printer is equipped with a real-time clock.
After the printer has been configured according to
the required settings, it is suitable for use as auxiliary
apparatus in legal metrology.
The YDP20-0CE data printer meets the quality standards of the chemical and pharmaceutical industries, in
compliance with the requirements of GLP (Good Laboratory Practice) and GMP (Good Manufacturing Practice).
In addition to recording individual weighing data, the
data printer can generate a statistical evaluation of
weighing data. All values transferred from an on-line
weighing instrument are stored. The following can be
printed out, depending on your printer configuration:
– Number of weighing operations
– Mean value
– Standard deviation
– Variation coefficient
– Lowest measured value
– Highest measured value
– Difference between lowest and highest measured values
– Date and time
Data is transferred either automatically or manually, at
the press of a key.
4

Safety Instructions
The data printer complies with the EC
Directives and Standards for electrical
equipment and electromagnetic
compatibility.
Use only size AA nickel-metal hydride
rechargeable batteries, order no.
69Y03136.
Avoid draining the batteries excessively,
as this will reduce their recharging
capacity.
Used batteries are hazardous waste
and must be properly disposed of in
accordance with your local hazardous
waste disposal regulations.
If you need to use an external power
supply, use only an original Sartorius AC
adapter (see “Accessories”). The external
power supply is required only if the
printer is operated in conjunction with
equipment that do not provide sufficient voltage for the YDP20-0CE.
Please contact your Sartorius dealer
if you require an external power supply.
Use only a slightly moistened cloth
to clean the equipment, and make sure
that no liquid enters the printer
housing.
Caution: The serrated edge for tearing
off printouts is sharp; direct contact can
result in injury.
§ Deactivate the ISO/GLP-compliant
printout function for the following
instruments:
– Economy/Express Series, EA/EB scales
(up to serial numbers 912xxxxx from
December 1999)
– GT/PT/QS/QT/XQ balances and scales
(with MP 10 processors)
– QS/TS scales (with MP 12 processors)
– MA model moisture analyzers
$ To change this setting, refer to the
section entitled “Settings for ISO/GLP-
compliant Data Records”.
5
Installation
Equipment Supplied
The following components are supplied:
– Interface cable for connecting the printer to a weighing
instrument
– Ink ribbon
– 4 rechargeable batteries
– Paper roll
Installing the Batteries
§ Remove the batteries from their packaging
(batteries are discharged)
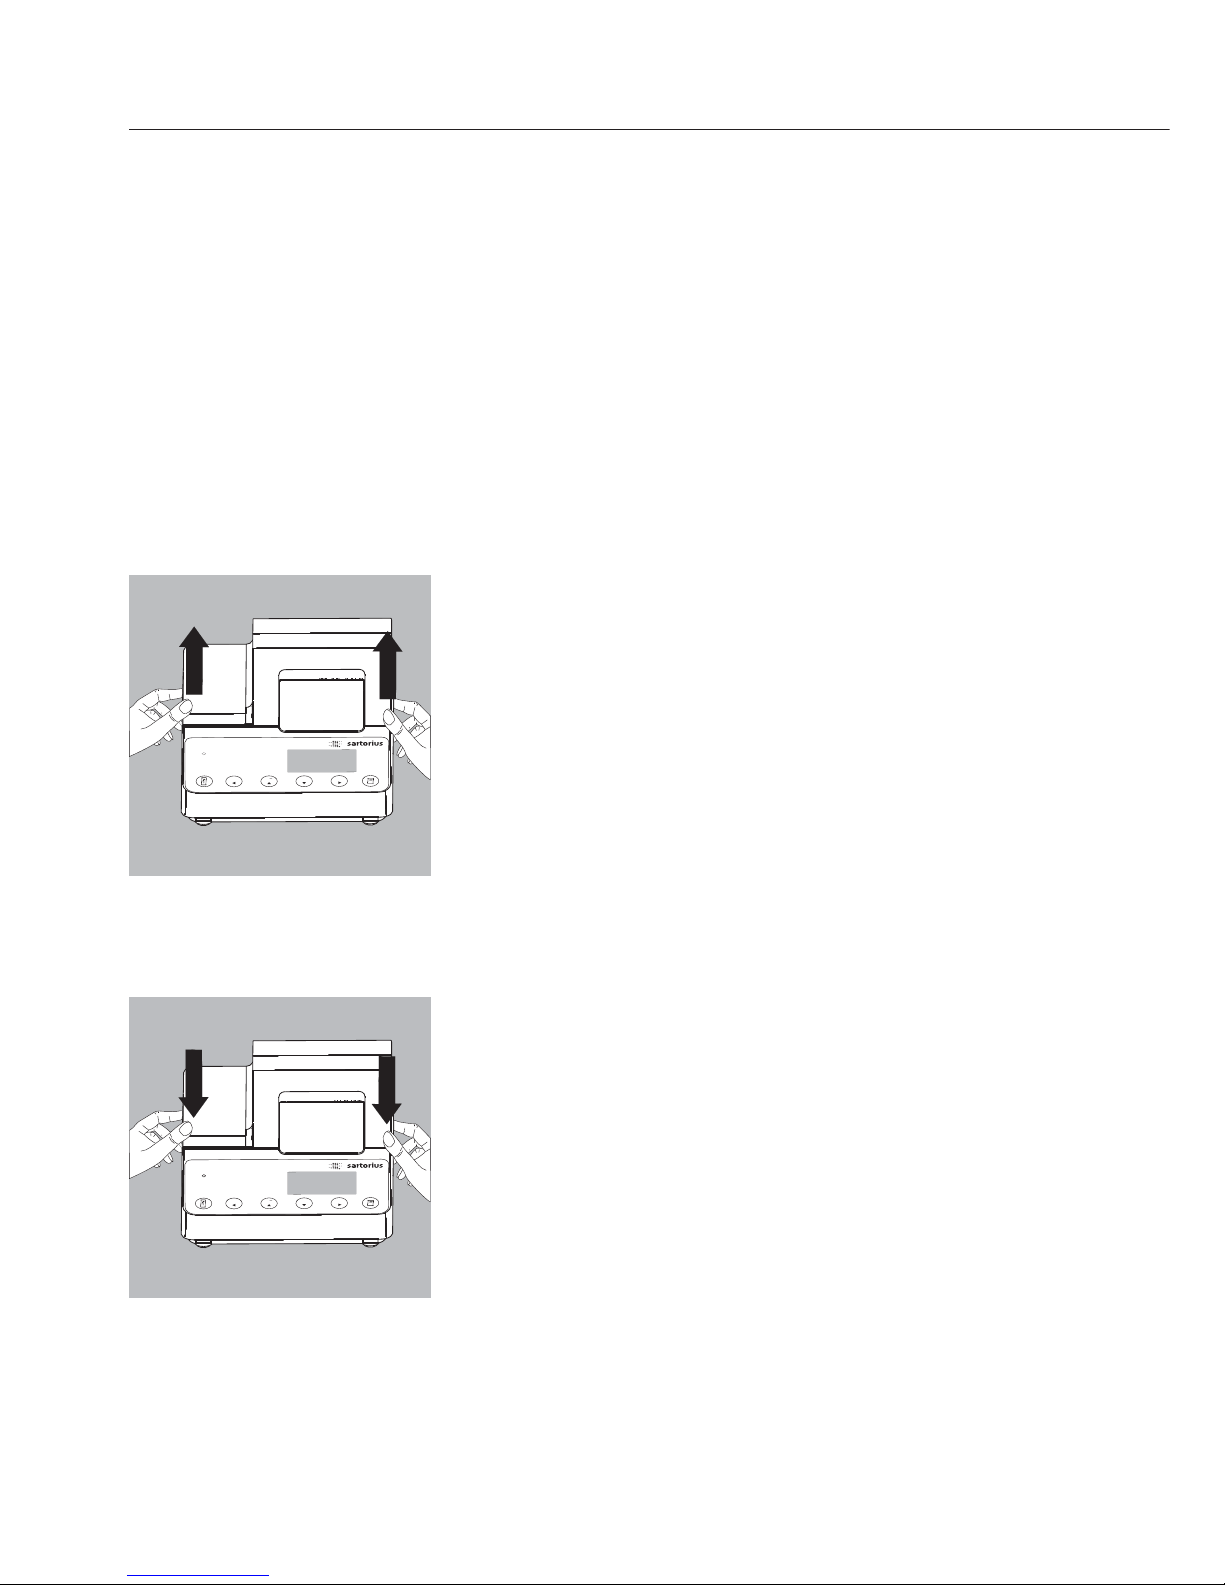
§ Lift the cover of the paper roll compartment
§ Tilt back the cover of the battery compartment
§ Insert the 4 batteries in the battery compartment,
making sure the polarity is correct
§ Close the battery compartment
§ Close the paper roll compartment
– The printer must be switched on to the thread the
paper through the rollers.
6
L
F
S
TAT
DA
TE
C
N
N
/
N
S
TAT
DA
TE
C
N
N
/
N
L
F
ST
AT
DA
TE
C
N
N
/
N
ST
AT
DA
TE
C
N
N
/
N

Connecting the Data Printer to a Weighing
Instrument
§ Connect the interface cable to the printer and the
weighing instrument you are using. Secure the
connection.
Turning On the Weighing Instrument and the Printer
§ Plug in the AC adapter
§ Switch on the weighing instrument
> The printer switches on automatically
> All segments of the printer display light up (self-test)
> The LED on the left-hand side of the front panel lights
up.
Charging the Batteries for Initial Operation
§ Leave the weighing instrument on
> The batteries are charged while the weighing
instrument is in standby mode
> Allow 28 hours to fully charge the batteries in the
printer
$ If the battery symbol does not go out after 3 hours at
the latest, replace the batteries (see page 35)
Installing the Ink Ribbon Cassette
§ For instructions on installing the ink ribbon cassette,
see “Maintenance” on page 34
7

Inserting the Paper Roll
§ Insert the paper roll as described in “Maintenance” on
page 33
Setting the Date and Time
§ For instructions on setting the date and time,
please refer to “Configuration” on page 20.
If you connect the printer to an instrument
that does not supply sufficient voltage to the YDP20-
0CE, use only an original Sartorius AC adapter (external
power supply) for this printer
(see “Accessories”).
Contact your Sartorius dealer if you need an external
power supply. The external power supply is required,
for example, if the printer is connected to one of the
following devices:
– MP8-1/MP8-2 weighing instrument with data input
software
– Economy Series weighing instrument
(model EA…, EB…)
– Infrared dryer, model 7393…/YDU01L
– External keyboard, such as model 73392
§ Plug the original Sartorius AC adapter into an
electrical outlet
§ Insert the right-angle plug into the jack on the right-
hand side of the printer’s rear panel.
The green LED lights up to indicate that the printer is
energized.
$ Install the batteries (see page 6)
$ Connect and switch on the printer and the weighing
instrument as described in the previous section
8
Operation
The data printer has 6 function keys for
operation:
: Line feed: Advances the paper by one blank line
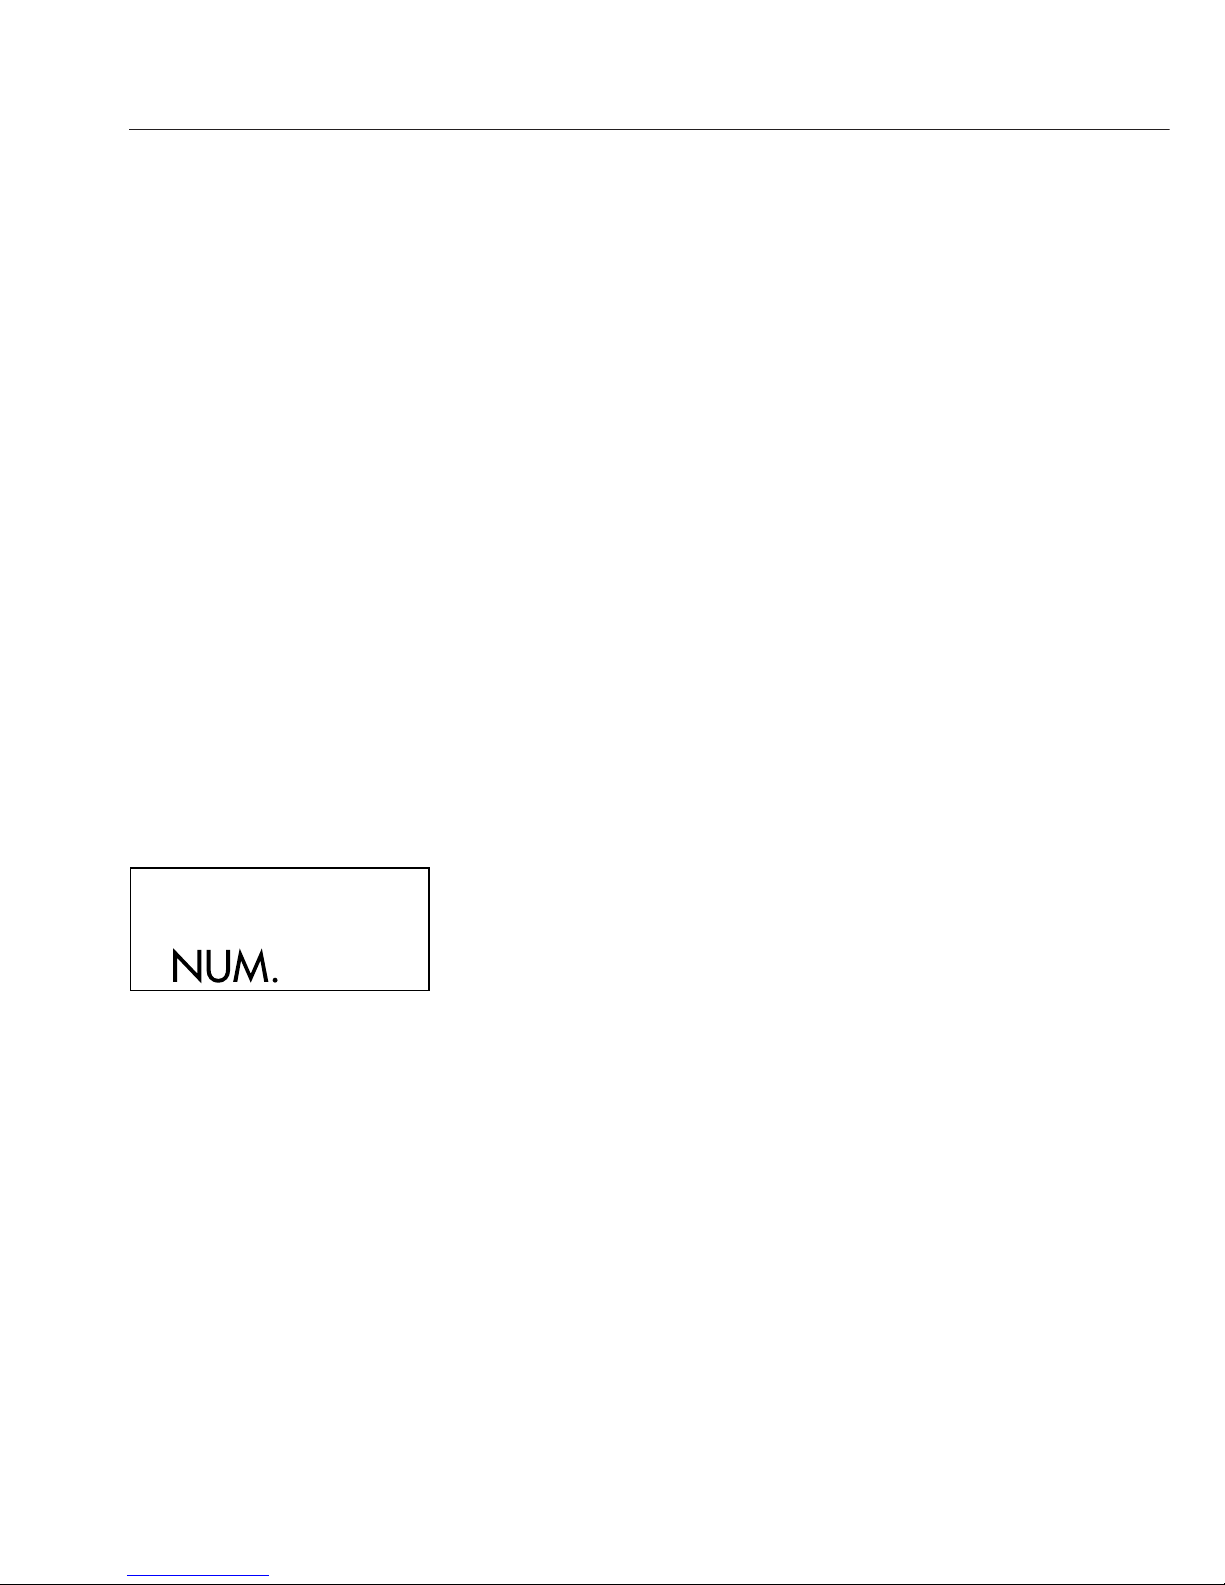
: “Numerator”: Switches the function for number-
ing measured values on the printout on and off.
This option is available only if the numerator
function (-P4-) is activated in the printer port
settings (see page 24). When the numerator
function is active, “NUM.” is displayed.
: “Clear Numerator”: Resets the numerator to 001
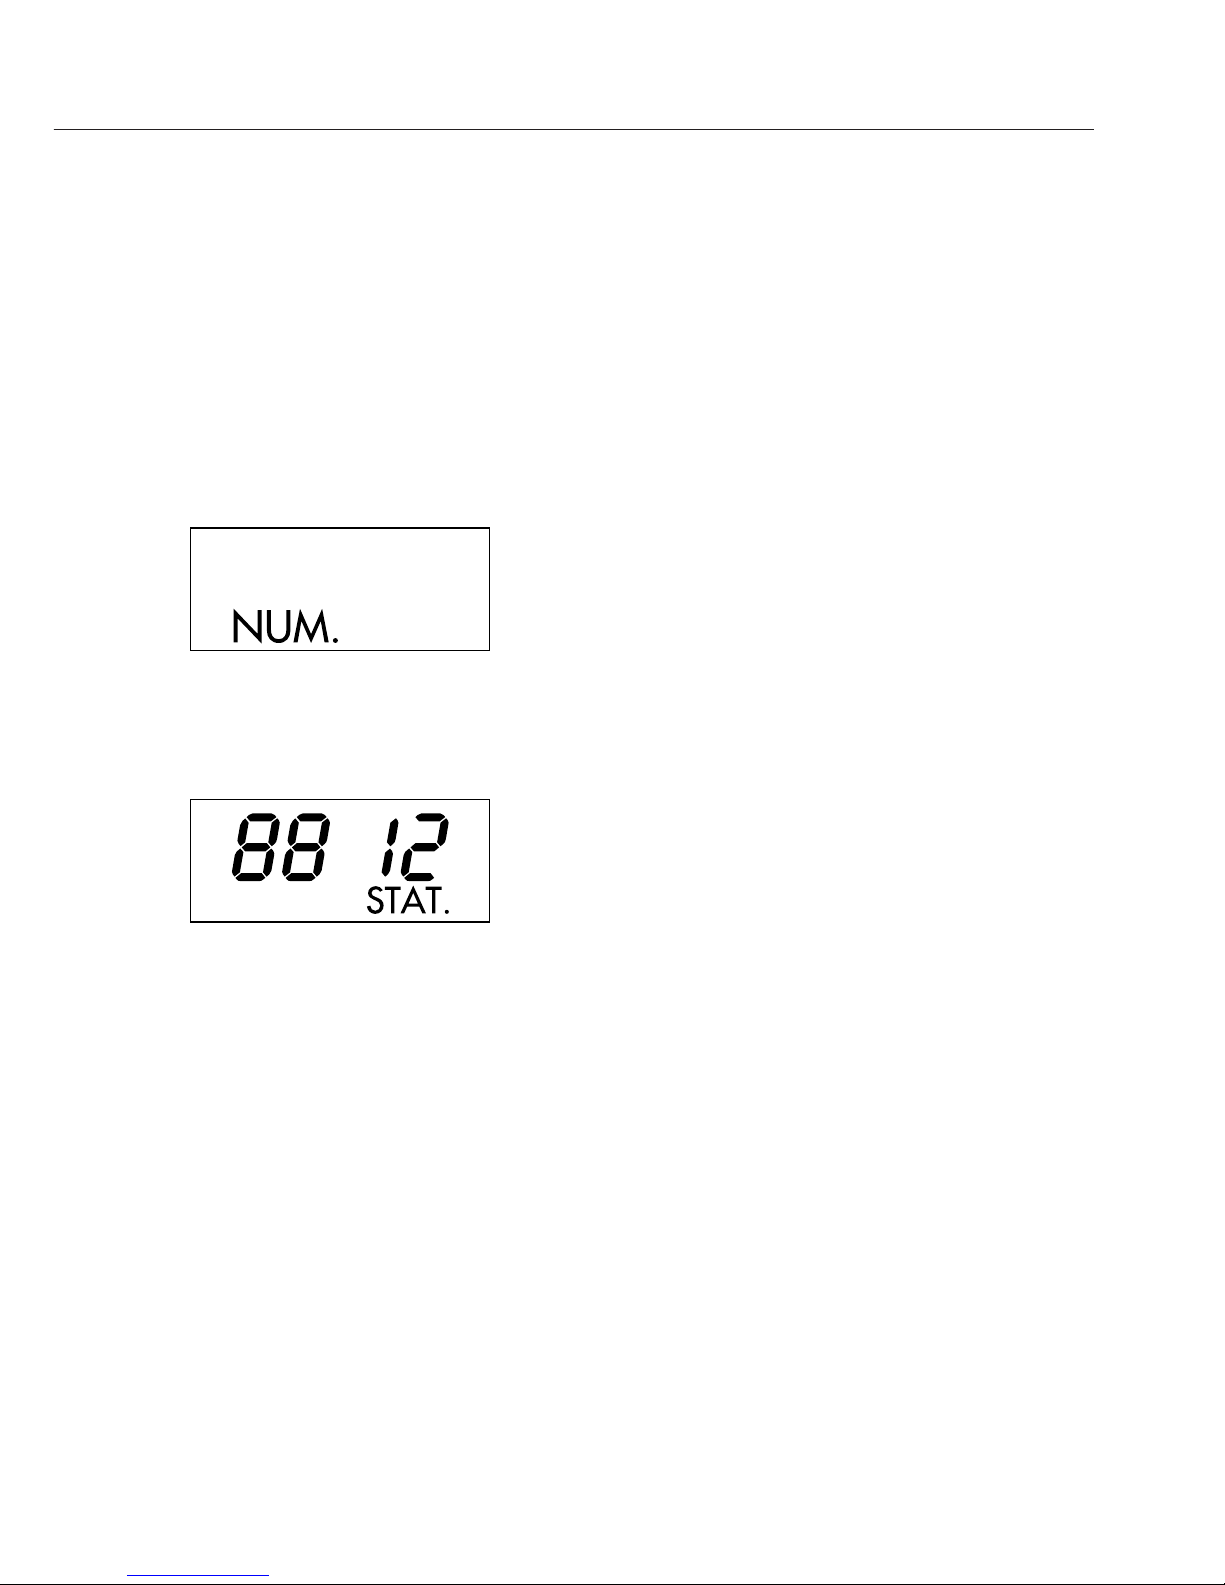
: Statistical evaluation of the collected values.
This option is available only if the statistics program (-A3-) is activated in the statistics application menu has been activated (see page 27).
When this option is active, the display shows the
number of measured values in memory each time
a value is added (in the example on the left, the
12th value has just been added).
: Prints the date and time
:
Sends the active value to the printer or stores
it in memory.
If the statistics program is not active, this key
prints the measured value currently active in the
connected weighing instrument without statistics
With active statistics program (-A3-; see page
28), the function depends on your application
settings.
In the manual data storage mode, pressing
this key adds the current measured value to the
statistics memory (regardless of whether the print
function is active)
In the automatic data transfer mode, pressing
this key starts automatic data transfer
9

Printing the Measured Value from the Connected
Weighing Instrument
$ If necessary, advance the paper first: Press the line feed
key repeatedly or press and hold the key
$ Print date and time if desired: Press the key
> The printout should be similar to the example
on the left
§ To print the measured value, press the key
$ To reset the numerator, press the key
$ To turn off the numerator, press the key
10
22-Jan-08 10:25:38
123456789012345678901234
001: + 123.4 g

Statistical Evaluation of Measured Values
The printer’s built-in statistics program can evaluate all
values transferred from a connected weighing instrument. To use this function, activate the
statistics program (-A3-) in the statistics application
menu (see “Configuration”). When this function
is active, “STAT.” is displayed for one-half a second,
together with the total number of values added
to the statistics memory, each time a value is added to
the statistics memory.
Values are added to the statistics program by
pressing the key. In manual data storage mode,
the current value is added when you press . The
allows you to select individual values for evaluation. In
automatic data storage mode, once you press
the key all subsequent values are added to the
statistics memory.
To print statistics, press the key. Once the data
has been printed, the statistics memory is cleared and
either the time or the date is displayed.
Configuring the Printer for Statistical Evaluations
Which of the following statistical values are included
on the statistics printout depends on your settings in
the statistics application menu:
– Number of weighing operations n (-S3-)
– Mean value x¯(-S4-)
– Standard deviation s (-S5-)
– Variation coefficient s
rel
(-S6-)
– Sum of the individual values Σx(-S7-)
– Lowest value min (-S8-)
– Highest value max (-S9-)
– Difference between the lowest
and highest values diff (-S10)
– Date and time date (-S11)
11
11
Printing Individual Values
To print all values included in the statistical evaluation,
configure the following settings in the statistics
application menu:
– Printout of statistics program values = 1 (-A4-)
(factory setting = 1: all values are printed)
If the numerator is switched off (by pressing the
key), the individual values are not printed,
but are added to the statistics memory. The number
displayed by the transaction counter increases by 1 with
each value added.
Numbering Each Value
To have all individual values printed with their
transaction numbers, configure the printer port settings
as follows:
– Numerator (-P4-) = 1
(factory setting = 1)
The display shows “NUM.”
To switch off the numerator during operation,
press the key
Tare Function
To have the weighing instrument tared automatically
after data transfer, configure the statistics application
menu as follows:
– Automatic taring (-A2-) = 1 (factory setting = 0)
12

Data Transfer and Statistical Evaluation in Manual
Mode
Printer Configuration
Configure the following in the statistics application
menu:
– Statistics program (-A3-) = 1
(factory setting = 1)
The display shows “STAT.”
– Print measured values (-A4-) = 1
– Store measured values manually (-P6-) = 0.
Recording and Evaluating Data
§ Press the key to clear the statistics memory prior
to initial data transfer
> Any values in memory are evaluated and the results
printed, and then the statistics are deleted.
§ Place the first sample on the weighing pan
§ Press the key to store the value
> The value may be printed as well, depending on printer
configurations
> The display shows the number of values stored
13

If the automatic taring function (-A2-) is switched
off:
§ Remove the sample from the weighing pan
§ Place the next sample on the weighing pan
§ Press the key to store the value
> Measured values are printed (see example on the
left)
If the automatic taring function (-A2-) is switched
on:
§ Leave the first sample on the weighing pan
§ Add the next sample to the one already on the
weighing pan
§ Make sure the total weight does not exceed the
weighing instrument’s maximum capacity (if it does,
“H” is displayed)
§ Press the key to store the value
> The value is printed
§ Continue as described above until all samples have
been weighed
§ Press the key to print the statistics
> Calculated values are printed (see example on the
left)
> After printing, the measured values are deleted from
the printer’s memory
Vartext1, Vartext2
You can define a header of up to two lines, with
up to 24 characters per line. The header lines are
designated “Vartext1” and “Vartext2” and are stored
in the printer’s non-volatile memory. For details on
defining header texts, see page 21 in the chapter
entitled “Configuration”.
14
123456789012345678901234
001: + 123.6 g
002: + 117.8 g
003: + 119.1 g
n 12
x 99.8 g
s 3.55 g
srel 3.57 %
x 1203.4 g
min 96.0 g
max 103.2 g
Diff 7.2 g
22-Jan-08 16:02:11

Data Transfer and Statistical Evaluation in the
Automatic Mode
Storing Measured Values
The first value stored must be greater than 30 scale
intervals of the weighing instrument’s display
(e.g. > 3.0 g on a decigram scale). A value can be stored
only when the stability symbol is displayed (i.e., when
fluctuation < 1 scale interval). The first value stored is
used as the reference value for the statistics. The next
value cannot be stored until the weighing instrument
has been unloaded (i.e., until the load on the pan is less
than 30% of the reference value). The next value is
stored only if it is > 70%
of the reference value.
Printer Configuration
Configure the following in the statistics application
menu:
– Statistics program (-A3-) = 1
– Automatic data transfer = 1 (-P6-).
Weighing Instrument Configuration
The following must be configured in the weighing
instrument (see weighing instrument instructions
for details):
– Automatic printing
– Data output without stability
15
Recording and Evaluating Data
§ Press the key to clear the statistics memory prior
to initial data transfer
> Any values in memory are evaluated and the results
printed
§ Place the first sample on the weighing pan
§ Press the key to store the measured value
> The total number of transactions is displayed
(see example on the left)
> “STAT” is displayed for approximately 0.5 sec.
> The measured value is stored in the statistics
memory as the reference value
If the automatic taring function is switched off:
§ Remove the sample from the weighing pan
§ Place the first sample on the weighing pan
> The value is stored automatically once the weighing
instrument has stabilized
> Measured values are printed (see example on the left)
If the automatic taring function is switched on:
> The weighing instrument is tared automatically after
initial data transfer
§ Leave the first sample on the weighing pan
§ Add the next sample to the one already on the
weighing pan
§ Make sure the total weight does not exceed the
weighing instrument’s maximum capacity (if it does,
“H” is displayed)
> The value is stored automatically once the weighing
instrument has stabilized
> The value is printed
16
123456789012345678901234
001: + 123.6 g
002: + 117.8 g
003: + 119.1 g

§ Continue as described above until all samples have
been weighed
§ Press the key to print the statistics
> The next weight is printed out (see example on the
left)
> After printing, the measured values are deleted from
the printer’s memory
Example
Weighing tablets and generating a statistical evaluation of the weight values The weighing instrument
is verified for use in legal metrology. Configure the
following settings for the statistics program in the
printer’s “Application Settings” menu:
– Generate an ISO/GLP-compliant printout = 1 (-A1-)
– Automatic taring after each
value is stored = 1 (-A2-)
– Statistics program = 1 (-A3-)
– Printout after each value is stored = 1 (-A4-)
Press and hold the key approximately
6 seconds, configure the desired settings,
and press the key to store.
Configure the following printer port settings as
desired:
– Number each value consecutively and
include number of printout (numerator) = 1 (-P4-)
– Store values automatically = 0 (-P6-)
Press and hold the key approximately
6 seconds, configure the desired settings,
and press the key to store.
§ In addition, configure the weighing instruments for
ISO/GLP-compliant printouts (see weighing instru-
ment instructions for details)
§ Press the key to clear the statistics memory
prior to initial data transfer
> Any values in memory are evaluated and the results
printed.
§ Place the first tablet on the weighing pan
§ Press the key to store the measured value
> Once the weighing instrument has stabilized, this
value stored in the statistics memory as the refer-
ence weight
17
n 12
x 99.8 g
s 3.55 g
srel 3.57 %
x 1203.4 g
min 96.0 g
max 103.2 g
Diff 7.2 g
22-Jan-08 16:02:11
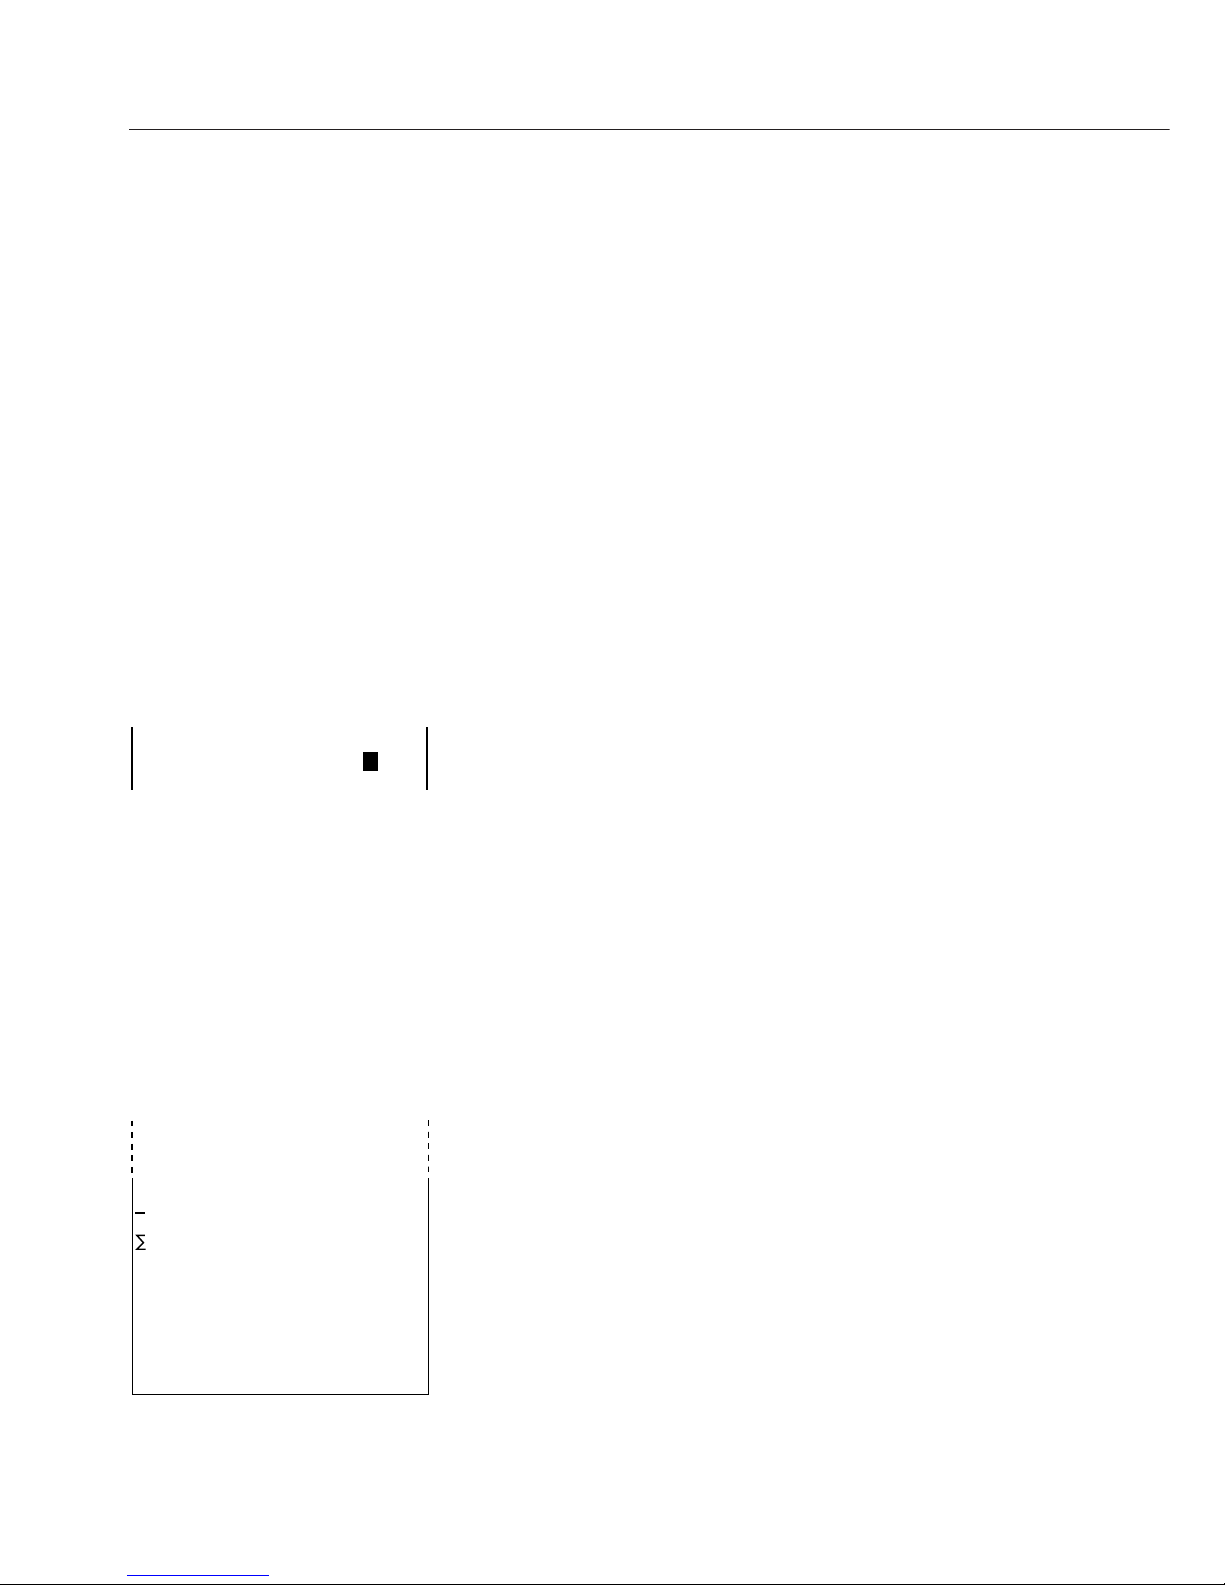
> The last digit of the weight must be printed inversely if
the scale interval (d) of the weighing instrument used in
legal metrology is not equal to its verification scale
interval (e). If the weighing instrument has a scale
interval (d) that matches its verification scale interval
(e), none of the digits are marked (no inverse printing).
If the weighing instrument is not in accuracy class K,
no digits are printed inversely.
> After a value has been stored, the printer sends a signal
that prompts taring of the weighing instrument
§ Leave the tablet on the weighing pan
§ Add the next tablet to the one already on the
weighing pan
> The weight is automatically stored once the weighing
instrument has stabilized
> The next weight is printed out (see example on the left)
> The weighing instrument is tared
When the weighing instrument displays a zero
readout:
§ Add the next tablet to the weighing pan
§ Press the key
§ Continue adding tablets as described above each time
the weighing instrument has been tared
When you have placed the last tablet on the weighing
pan and the last weight is displayed and printed:
§ Generate a statistical evaluation by pressing the
key
> The statistical evaluation is printed. Which data is
included on the printout depends on the settings
configured in the “Application Settings” menu for the
printer’s statistics application, and can include quantity,
mean, total, lowest and highest measured values, and
date and time.
§ Press the c key on the weighing instrument
> The ISO/GLP footer is printed
18
123456789012345678901234
002: + 10.13 g
123456789012345678901234
n 12
X 9.98 g
x 120.34 g
min 9.60 g
max 10.32 g
End : 10:31:56
Name :

Information on use of the printer in legal metrology
(legal-for-trade applications):
The German National Institute of Physics and Metrology
(PTB) has issued an independent test certificate for the
YDP20-0CE (see certificate for number). With this certificate, the printer can be operated in legal metrology
in the EU and the EEA. This applies only when the
printer is connected to a weighing instrument that has
an EC type approval certificate, or a national equivalent,
certifying that the weighing instrument is verifiable for
legal metrology.
– Set up the printer so that you can view both the print-
out and the weight readout of the connected weighing
instrument
– For verified weighing instruments in which e does not
equal d:
For verified weighing instruments with e d: For a verified weighing instrument that does not transfer the
designation of the last display digit to the printer,
configure the data printer so that the last digit
of the weight value is inversely printed (see “Printer
Port Settings” in the chapter entitled “Configuration”)
Note:
For verified weighing instruments with e = d and d
< 0.1 mg, inverse printing of the last digit of the weight
value is not permitted.
If the printer is subsequently connected to a verified
weighing instrument that is used in legal metrology,
notify your local weights and measures inspection
office, or contact your local Sartorius service center if
you wish to have the data printer configured and prepared for verification for legal metrology.
The above does not apply to printers that are used in
legal metrology upon initial commissioning.
19
N + 208 76 g
N + 218 88 g
N + 220 3 3 g
N + 222 6 5 g
N + 224 0 2 g

ISO/GLP-compliant Data Records
An ISO/GLP*-compliant printout must include the
following data with each measurement:
– Weighing instrument manufacturer
– Weighing instrument model
– Weighing instrument serial number
– Date and time of the start and finish of each
measurement
– Operator/workstation ID
– Operator signature
§ To configure the data printer for ISO/GLP-compliant
data printouts, see “Settings for ISO/GLP-compliant
Data Records” in the chapter entitled “Configuration”
on page 61
§ The corresponding settings must be configured in the
weighing instrument as well. Refer to the section on
ISO/GLP-compliant records or printouts in the weighing
instrument instruction manual for details.
* ISO: International Organization for Standardization
GLP: Good Laboratory Practice
20

Configuration
Setting the Date and Time
Note:
To activate the date/time setting mode, either turn on
the data printer and the weighing instrument and,
while all display segments are lit,
§ Press the key
or, at any time during operation,:
§ Press and hold the key for at least 5 seconds
> The display is as shown on the left. “HH” indicates
“hours”.
You can exit the “Set Date and Time” mode at this
point, or at any point during the subsequent steps, as
follows:
$ To exit the date/time setting mode, press the key,
repeatedly if necessary, until the menu is closed
You can also return to the previous menu level as follows during any of the subsequent steps:
$ To return to the previous menu level, press the
key
§ To set the hour, press the key
> The two “hours” digits flash (see example on the left)
§ To select the desired hour, press the key or the
key, repeatedly if necessary
> The “hours” digits are adjusted (see example on the
left)
21

§ To store the setting, press the key
> The two “minutes” digits flash (see example on the left)
§ To set the minutes, press the key or key,
repeatedly if necessary
> The “minutes” digits are adjusted (see example on the
left)
§ To store the setting, press the key
> The display returns to the previous status
§ To set the date, press the key
> The display is as shown on the left; “dd” stands for
“day”
§ To select the desired day, press the key
§ Enter the day and month in the same manner as the
hours and minutes
§ To set the year, press the key
> The display is as shown on the left; “YY” stands for
“year”
§ Enter the year (the last two digits) in the same
manner as the minutes:
80 to 99 for 1980 to 1999
00 to 79 for 2000 to 2079
§ To exit the date/time setting mode, press the key,
and then press .
> Press
22

Settings for ISO/GLP-compliant Data Records
To configure ISO/GLP-compliant data records, begin by
opening the statistics application menu. To open the
statistics application menu immediately after switching
on the printer (or weighing instrument):
§ Press the key while all display segments are lit
To open the statistics application menu during
operation:
§ Press and hold the key for at least 5 seconds
> The display shows “-A1-”
To activate configuration of the ISO/GLP-compliant
data record, press the key
> The display is as shown on the left (example).
The dot indicates the currently active setting
§ To configure the ISO/GLP-compliant data record, press
either the key or the key until “1” is displayed
> The display is as shown on the left
§ To store the setting, press the key
§ To exit the statistics application menu, press the
key
§ The corresponding settings must be configured in the
weighing instrument as well. Refer to the section on
ISO/GLP-compliant records or printouts in the weighing
instrument instruction manual for details.
> In all subsequent printouts, an ISO/GLP header and
footer similar to the example shown on the left are
printed automatically
$ To print the settings, press the key
23
SARTORIUS
Model ED6202S
S/N 040240772
Id 564
Date : 22-Jan-08
Start: 10:25:14
Ser. :
End : 10:25:32
Name :

Printer Port Settings
You can prevent unauthorized changes in this configu-
ration menu by defining a four-digit number (PIN) as a
password. If you lose or forget this number, contact
your local Sartorius Service Center.
All settings are loaded in the printer’s memory (EEP-
ROM) when the printer is switched on and applied dur-
ing operation.
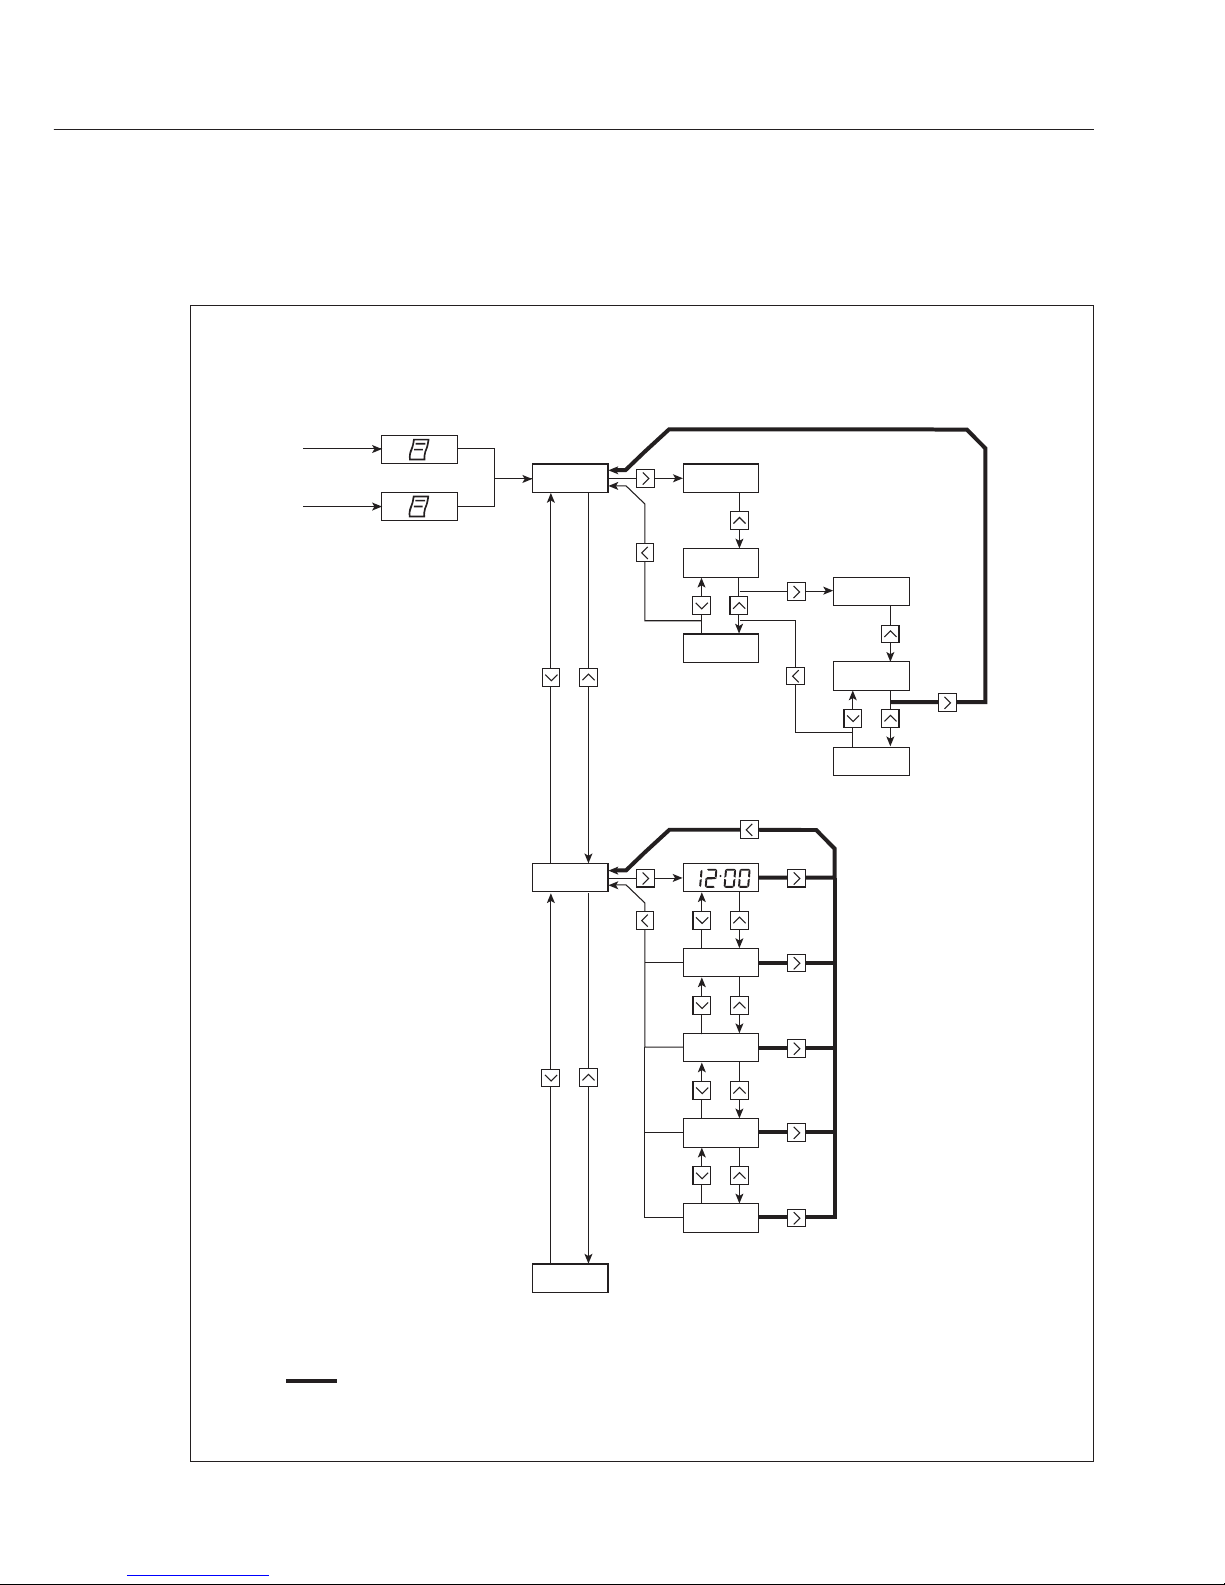
There are two ways to open the menu for configuring
printer port settings:
– Hold down the key when you switch on the print-
er, or, during operation,
– Press and hold the key for at least 5 seconds
The , , and keys then have the
navigation functions indicated by the arrows.
The diagram on the next page illustrates the procedure
for configuring the “Code” (PIN code) and “Baud” (data
transfer rate) settings. All parameter options in the
printer port configuration menu
are listed on the subsequent page, following the dia-
gram.
To print the menu settings, open the Setup menu and
press the key.
Note:
The “C” or “L” printed after the program version num-
ber indicates whether menu settings can be changed:
C: “Change” Settings can be changed
L “Locked” The menu is locked; settings cannot
be changed
Note:
The time cannot be set when the menu is locked.
24
25
cO de -- --
01 --
99 --
21 --
21 01
21 99
B
B
B
ba ud
pa ry
24 00
48 00
96 00
19 20
When printer is started
or > 5 sec.
…
…
B
= Example
= New value is stored
= Dot indicates previously set value
1st Level 2nd Level 3rd Level
12:00
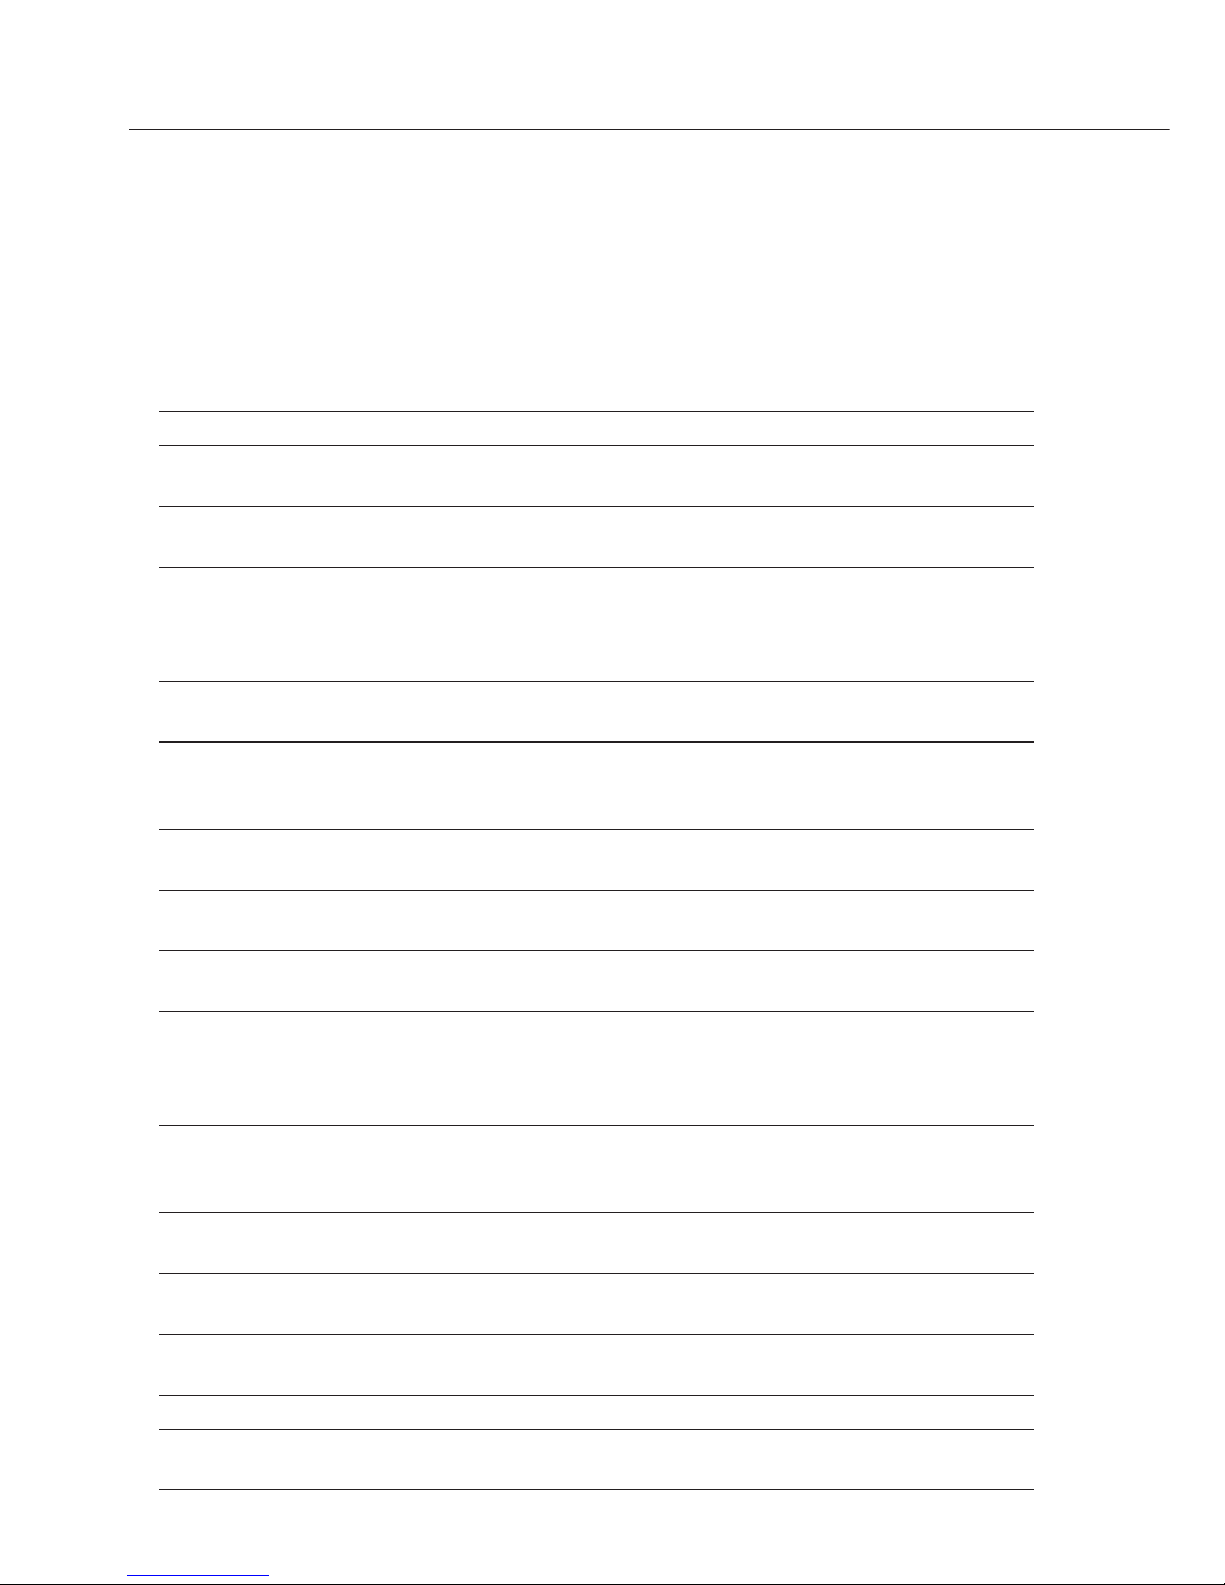
Options for Printer Port Settings
Designation Display Factory Options
settings
Password code 0100 to 9999
Transmission rate baud 1,200 1,200, 2,400, 4,800, 9,600,
(Baud rate) 19,200
Number of data bits: data 7 7 data bits
8 data bit
Parity Pary Odd Odd
Even
0 = Space
1 = Mark
RS-232C handshake HAnd 0 0 = Hardware = DTR/CTS
DTR/CTS 1 = Software = XON/XOFF
Print with <CR, LF> -P1- 1 0 = OFF = no
(print without CR/LF)
(send CR/LF) on 1 = on = yes (print with CR/LF)
Print right or left justified -P2- 0 0 = Right justified
(print format) Right 1 = Left justified
Print period or comma -P3- 0 0 = Period (decimal point)
(decimal separator) Period 1 = Comma
Numerator on/off -P4- 1 0 = OFF = Print without numerator
(numbering function) ON 1 = ON = Print with numerator
Inverse printing -P5- 0 0 = No inverse printing,
1 = Last digit inverse,
2 = Last 2 digits inverse,
3 = Last 3 digits inverse
Manual/automatic storage -P6- 0 0 = Standard = Values stored
of measured values Standard individually
1 = Values stored automatically
Date/time when printer starts -P7- 1 0 = OFF = Not printed
(date/time printout) on 1 = ON = Date and time printed
Print VARTEXT1 on startup -P8- 0 0 = OFF = VARTEXT1 not printed
OFF 1 = ON = VARTEXT1 printed
Print VARTEXT2 on startup -P9- 0 0 = OFF = VARTEXT2 not printed
OFF 1 = ON = VARTEXT2 printed
Time display format -C1- 24 12 or 24 hours
Date/time display -C2- 0 0 = Time
(display) Time 1 = Date
26

User-defined Text Input for the First and Second Lines
(Vartext1, Vartext2)
§ This requires a computer (PC) with a BASIC interpreter.
The following BASIC program transfers text over the interface of a connected computer
(PC). The BASIC interpreter that comes with the computer executes this program.
CLS
PRINT “ 123456789012345678901234”
LINE INPUT “VARTEXT1 ? “, VarText1$
LINE INPUT “VARTEXT2 ? “, Vartext2$
OPEN “com1: 1200,0,7,1,CD0,DS0” FOR RANDOM AS #1
PRINT
#1,CHR$(27)+”j”+VarText1$+”_”+CHR$(13)+CHR$(10)
PRINT
#1,CHR$(27)+”k”+Vartext2$+”_”+CHR$(13)+CHR$(10)
CLOSE #1
27

Statistics Application Settings
All settings are loaded in the printer’s memory (EEPROM) when the printer is switched on and applied during operation.
There are two ways to open the menu for configuring
statistics application settings:
– Hold down the key when you switch on the print-
er, or, during operation,
– Press and hold the key for at least 5 seconds
The , , and keys then have the
navigation functions indicated by the arrows.
Menu navigation is analogous to navigation in the
printer port configuration menu. All parameter options
in the statistics application menu are listed on the next
page.
To print the current settings, press the key
The “C” or “L” printed after the program version number indicates whether menu settings can be changed:
C: “Change” Settings can be changed
L “Locked” The menu is locked; settings cannot
be changed
28

Configuration Options for the Statistics Application
Designation Display Factory Options
settings
GLP/GMP printout -A1- 1 0 = no, 1 = yes
Tare weighing instrument
automatically -A2- 0 0 = no, 1 = yes
Statistics program -A3- 1 0 = no, 1 = yes
Print measured values -A4- 1 0 = no, 1 = yes
Index data storage header -A5- 0 0 to 50
for values in statistics (details available on request)
Print Vartext1 -S1- 0 0 = no, 1 = yes
with statistics
Print Vartext2 -S2- 0 0 = no, 1 = yes
with statistics
Print no. of measurements -S3- 1 0 = no, 1 = yes
Print mean value -S4- 1 0 = no, 1 = yes
Print standard deviation -S5- 1 0 = no, 1 = yes
Print variation coefficient -S6- 1 0 = no, 1 = yes
Print sum of individual values -S7- 1 0 = no, 1 = yes
Print lowest measured value -S8- 1 0 = no, 1 = yes
Print highest measured value -S9- 1 0 = no, 1 = yes
Print difference between -S10- 1 0 = no, 1 = yes
highest and lowest values
Print date/time -S11- 0 0 = no, 1 = yes
29

Printing Hardcopies of Settings
Printing a Hardcopy of the Printer Port Settings
§ Open the printer port menu:
– Hold down the key while switching on the printer,
or
– Press and hold the key (> 5 sec)
> The display is as shown on the left
§ To print the settings, press the key
> Data is printed as shown on the left (example shows
factory settings)
§ To exit the printer port menu, press the key
30
 Loading...