

Sartorius XQ 6100,XQ 6100 B Installation And Operating Instructions Manual
Sartorius XQ 6100, XQ 6100 B.
Electronic Paint Mixing Scales
Installation and Operating Instructions

Sartorius
XQ 6100, XQ 6100 B.
Please read these installation and operating instructions carefully before operating your new scale.
With this Sartorius Scale you have acquired a sophisticated,
user-friendly electronic precision weighing instrument which
will enable you to consistently match any colour to meet your
paint supplier's high quality Standards.
When operating this scale, please observe a few simple basic
rules.
Should you have additional questions after familiarizing your
paint with this manual, please contact your paint supplier.
Pursuant to the german Directive for the Implementation of Regulations for Prevention of Accidents
"Elektrische Anlagen und Betriebsmittel (VBG 4)"
[Electrical Installations and Equipment] of April
1986, it is hereby certified that the equipment
delivered, "electronic precision scale, model XQ
6100 or XQ 6100 B" is manufactured and tested in
compliance with the following DIN/VDE regulations
DIN IEC348/VDE0411 Safety requirements for
DlN lEG 380/VDE 0806 Safety of electrically
DIN IEC601/VDE0750 Safety of medical electrical
When you use electrical equipment in installations
and under ambient conditions requiring higher
safety Standards, you must comply with the
provisions as specified in the applicable regulations
for installation in your country.
electronic measuring apparatus
energized office machines
equipment
2

Contents.
Equipment Supplied 5
Installation Instructions 6
Startup 7
Operation 8
Examples for Paint Mixing 9
Calibration 15
Accessories (Options) 17
Spezifications 17
Page
3
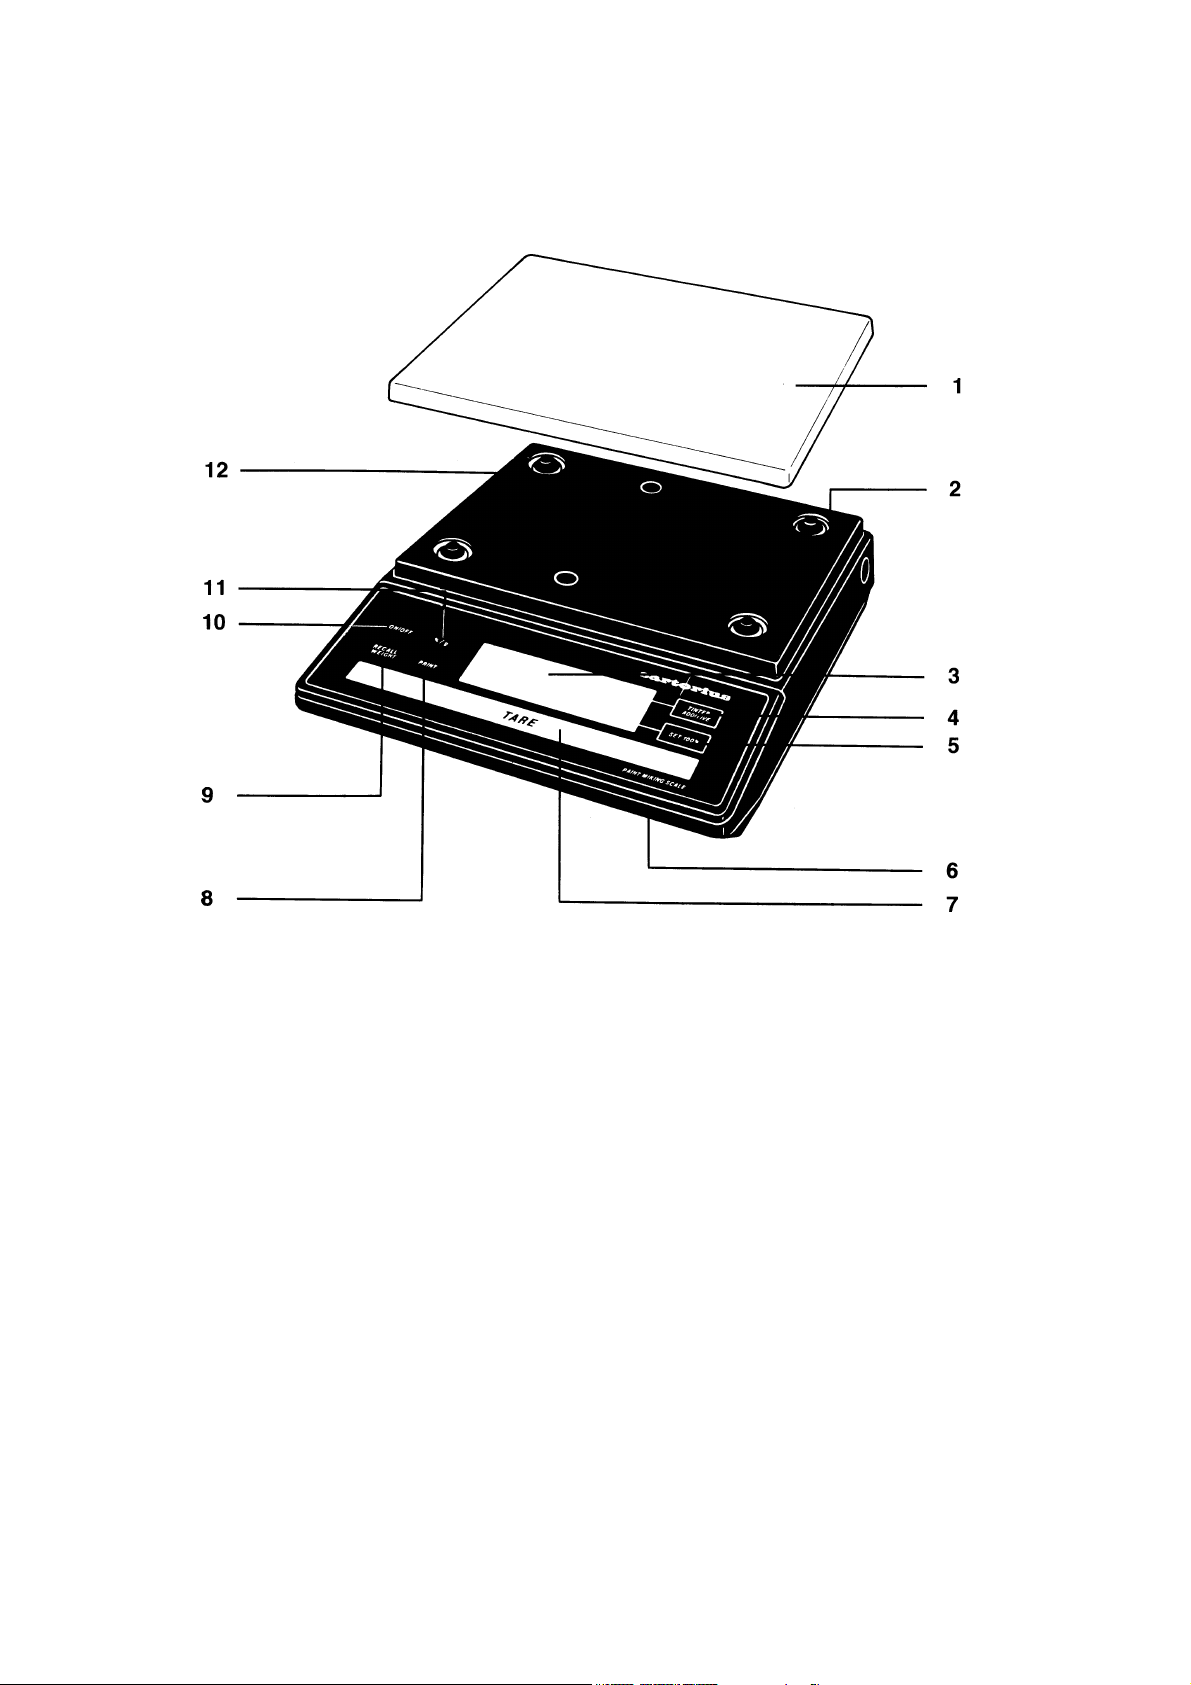
1
Weighing pan
3
Weight and linear range display
5
Set 100% key
7
Tare control
has a built-in interface)
9
RECALL WEIGHT-Taste
11
%/g key
base plate of the scale)
4
12
10
2
Power receptacle
4
TINTER/ADDITIVE key
6
Access switch (for calibration)
8
PRINT key (functions only if the scale
ON/OFF key
Manufacturer’s label (on the bottom of the
Equipment Supplied.
Do not miss out on the benefits of our warranty.
Please fill out the warranty card, indicating the date of installation, and return the card to your Sartorius dealer.
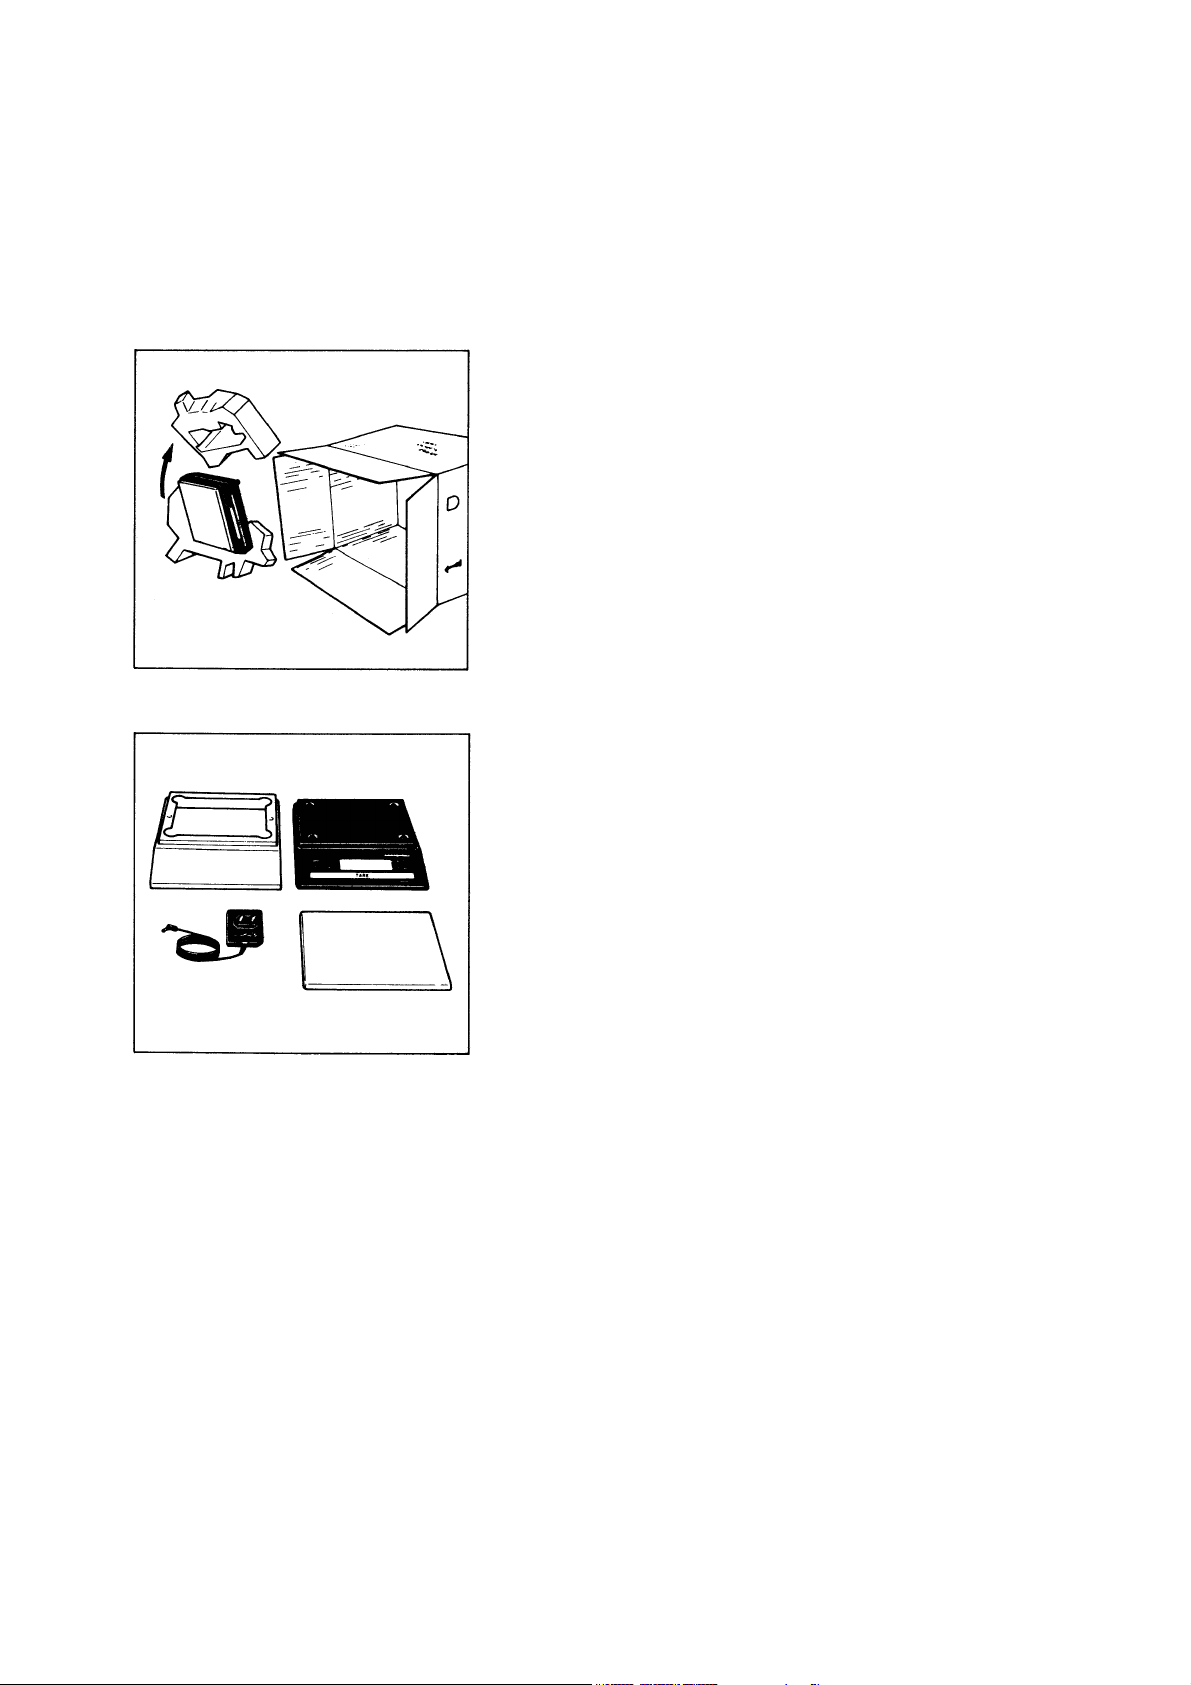
Carefully unpack the scale and the accessory components.
Save all packing material for future use.
The equipment supplied comprises the components shown on
the left:
- Scale
- Dust cover
- AG adapter
- Weighing pan
lf you wish to send in your scale for repair work, please proceed as follows:
- remove all splashes or spills of paint
- include a description of the equipment failures/faults.
This will save you time and unnecessary expense for servicing. Please replace the cardboard between the scale base
and the weighing pan (1) to prevent damage to the weighing
system during shipment.
5

Installation Instructions.
Your Sartorius Scale provides exact readouts even under less
than ideal conditions.
However, exposure to extreme heat, vibrations or drafts may
adversely affect the weighing accuracy and should be avoided
whenever possible.
The scale can be adapted to your particular requirements and
to the specific ambient conditions simply by changing the
menu code settings in the scale operating program. Please
contact your dealer for assistance.
After you have plugged your scale into the AC adapter and
turned it on, allow for at least 30 minutes warmup. Once the
scale has been warmed up, the STANDBY feature will enable
you to skip the warmup procedure.
Important Note
Make sure to unplug the AC adapter from the wall outlet before you connect or disconnect additional devices (printer or
PC) to or from the interface connector (Option).
Startup.
Remove the white backing from the adhesive disks on the
dust cover. Attach the dust cover to the scale base by
slightly pressing down on the adhesive disks.
Mount the weighing pan (1) on the scale.
Double-check to be sure that the base dust cover does not
come in contact with the weighing pan.
Your scale is powered by an AC adapter. Check that the voltage rating printed on this unit is identical to your local line
voltage.
Plug the line cord of the adapter into the power receptacle of
the scale. Now plug the AC adapter into an electrical or wall
outlet.
Whenever possible, avoid connecting your scale to overloaded networks (compressors or similar equipment).
lf you have problems with your local line power supply, use a
suitable voltage stabilizer or an emergency power supply unit
(Option). Be sure to contact your dealer for technical information.
6
 Loading...