

Page 1
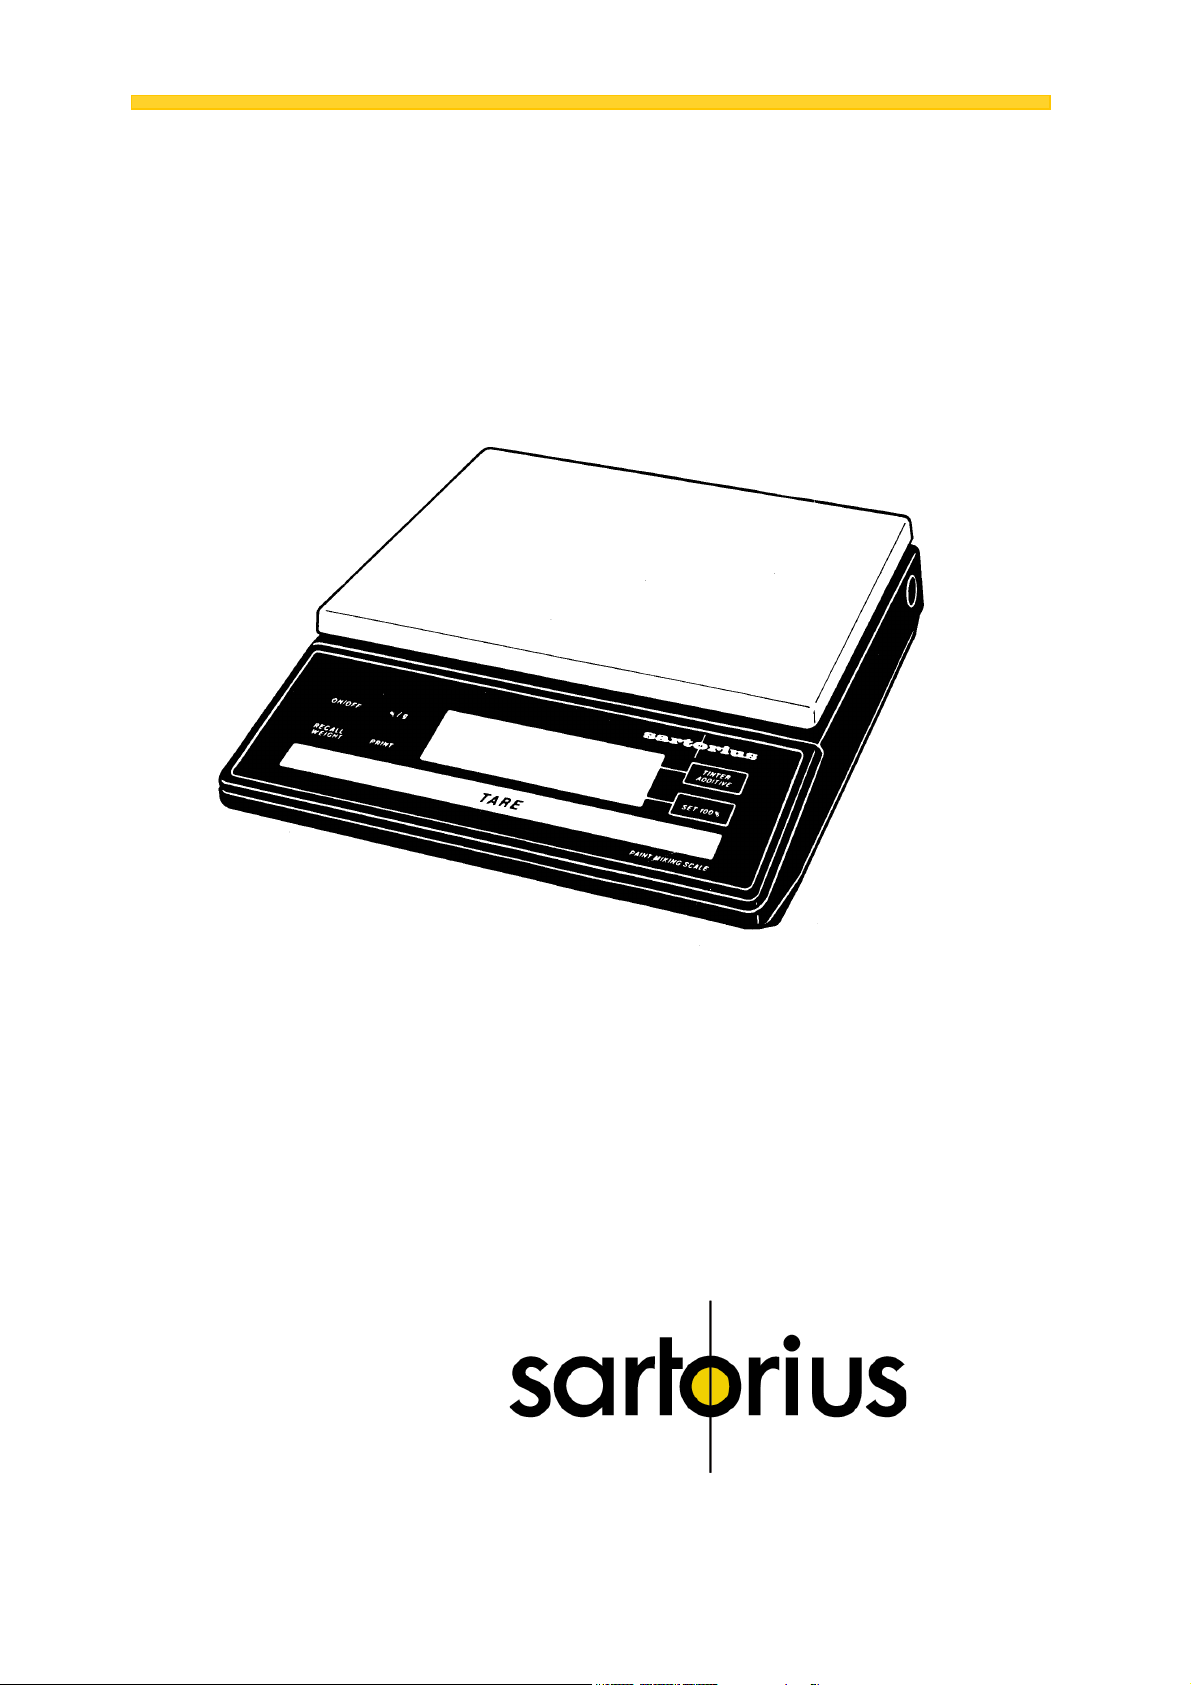
Sartorius XQ 6100, XQ 6100 B.
Electronic Paint Mixing Scales
Installation and Operating Instructions
Page 2
Sartorius
XQ 6100, XQ 6100 B.
Please read these installation and operating instructions carefully before operating your new scale.
With this Sartorius Scale you have acquired a sophisticated,
user-friendly electronic precision weighing instrument which
will enable you to consistently match any colour to meet your
paint supplier's high quality Standards.
When operating this scale, please observe a few simple basic
rules.
Should you have additional questions after familiarizing your
paint with this manual, please contact your paint supplier.
Pursuant to the german Directive for the Implementation of Regulations for Prevention of Accidents
"Elektrische Anlagen und Betriebsmittel (VBG 4)"
[Electrical Installations and Equipment] of April
1986, it is hereby certified that the equipment
delivered, "electronic precision scale, model XQ
6100 or XQ 6100 B" is manufactured and tested in
compliance with the following DIN/VDE regulations
DIN IEC348/VDE0411 Safety requirements for
DlN lEG 380/VDE 0806 Safety of electrically
DIN IEC601/VDE0750 Safety of medical electrical
When you use electrical equipment in installations
and under ambient conditions requiring higher
safety Standards, you must comply with the
provisions as specified in the applicable regulations
for installation in your country.
electronic measuring apparatus
energized office machines
equipment
2
Page 3

Contents.
Equipment Supplied 5
Installation Instructions 6
Startup 7
Operation 8
Examples for Paint Mixing 9
Calibration 15
Accessories (Options) 17
Spezifications 17
Page
3
Page 4
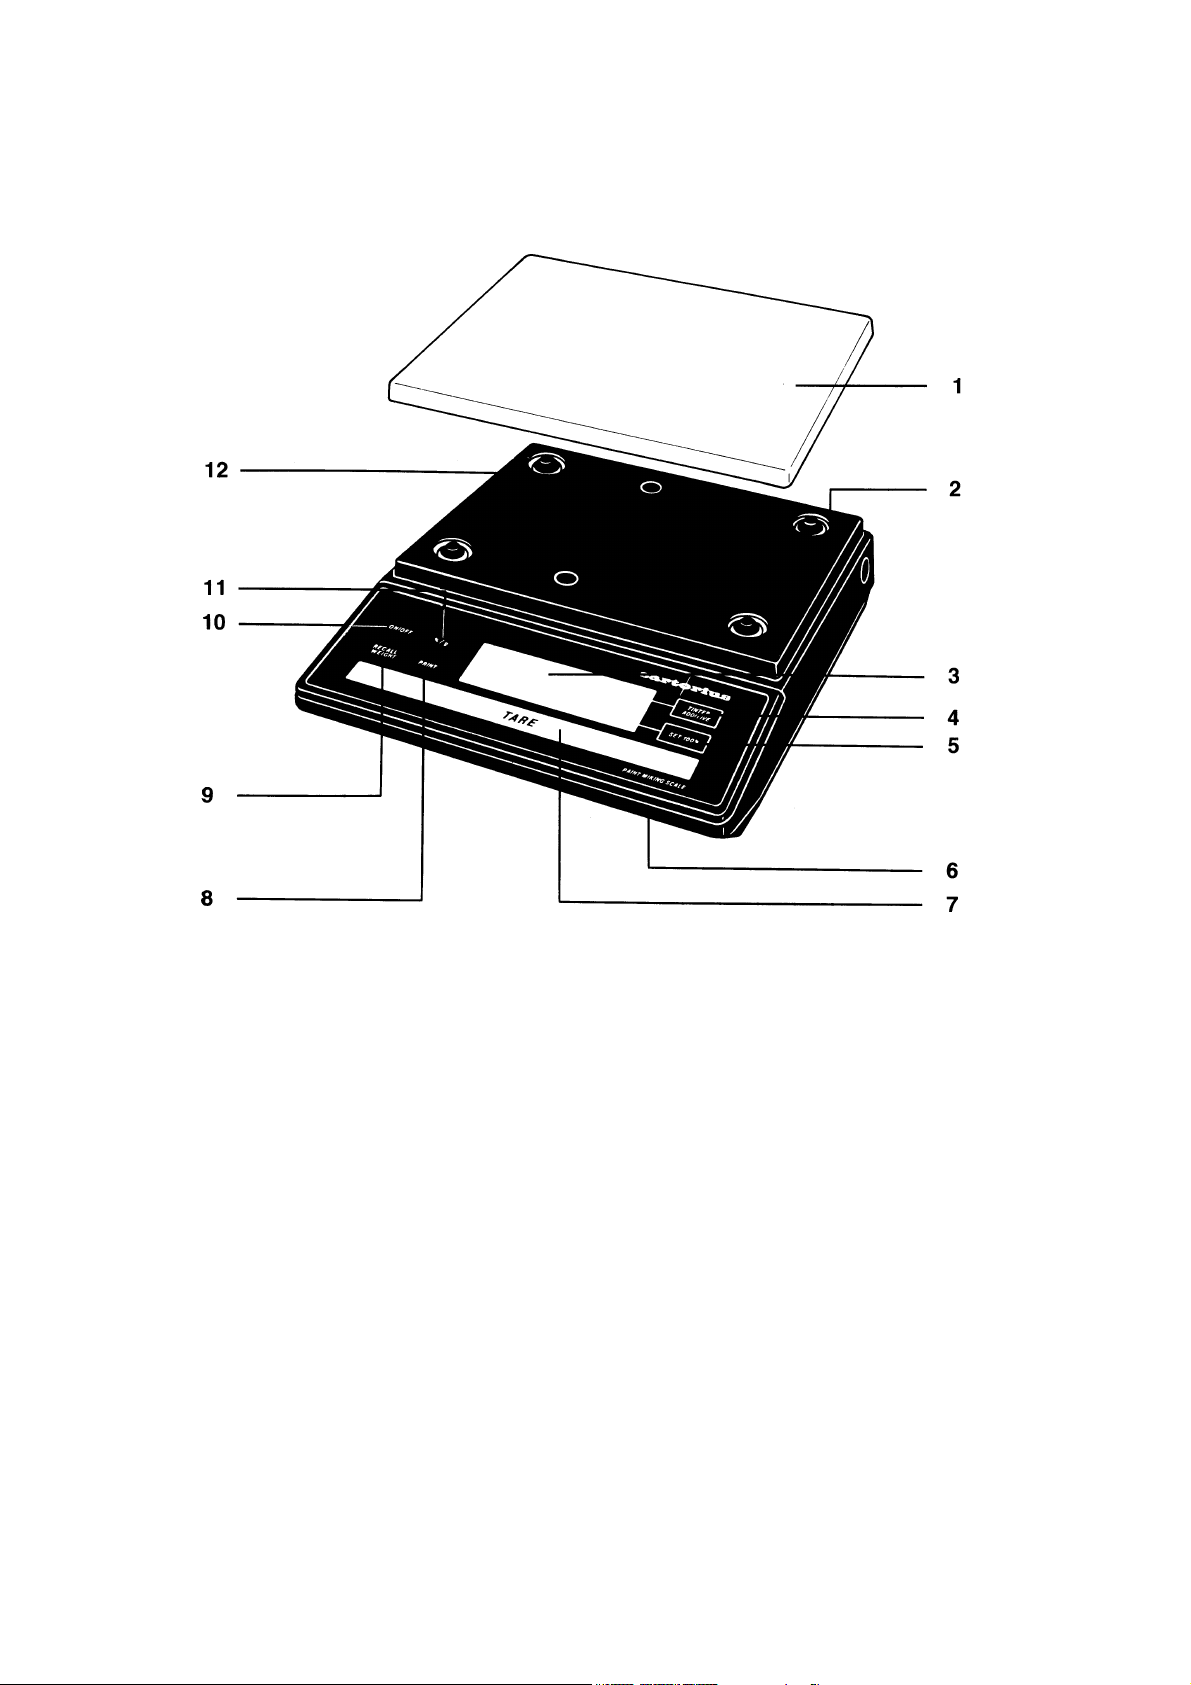
1
Weighing pan
3
Weight and linear range display
5
Set 100% key
7
Tare control
has a built-in interface)
9
RECALL WEIGHT-Taste
11
%/g key
base plate of the scale)
4
12
10
2
Power receptacle
4
TINTER/ADDITIVE key
6
Access switch (for calibration)
8
PRINT key (functions only if the scale
ON/OFF key
Manufacturer’s label (on the bottom of the
Page 5
Equipment Supplied.
Do not miss out on the benefits of our warranty.
Please fill out the warranty card, indicating the date of installation, and return the card to your Sartorius dealer.
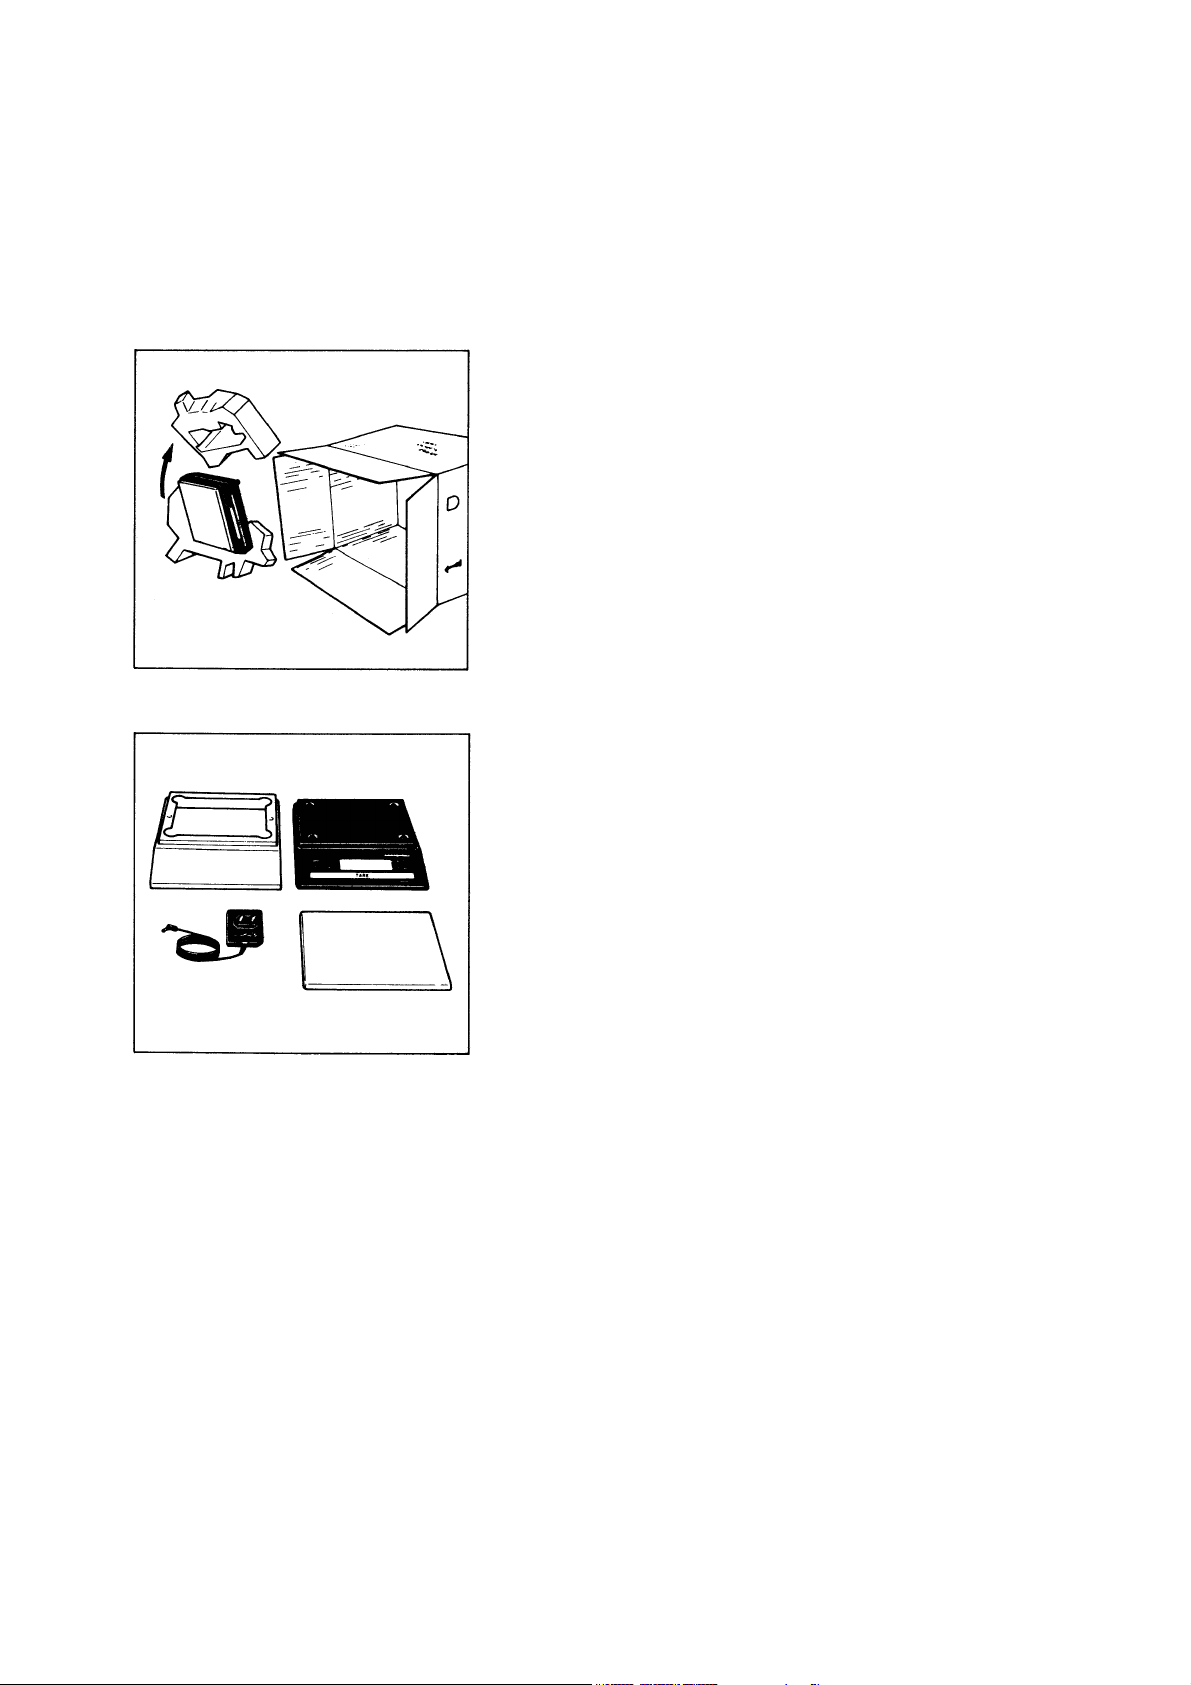
Carefully unpack the scale and the accessory components.
Save all packing material for future use.
The equipment supplied comprises the components shown on
the left:
- Scale
- Dust cover
- AG adapter
- Weighing pan
lf you wish to send in your scale for repair work, please proceed as follows:
- remove all splashes or spills of paint
- include a description of the equipment failures/faults.
This will save you time and unnecessary expense for servicing. Please replace the cardboard between the scale base
and the weighing pan (1) to prevent damage to the weighing
system during shipment.
5
Page 6

Installation Instructions.
Your Sartorius Scale provides exact readouts even under less
than ideal conditions.
However, exposure to extreme heat, vibrations or drafts may
adversely affect the weighing accuracy and should be avoided
whenever possible.
The scale can be adapted to your particular requirements and
to the specific ambient conditions simply by changing the
menu code settings in the scale operating program. Please
contact your dealer for assistance.
After you have plugged your scale into the AC adapter and
turned it on, allow for at least 30 minutes warmup. Once the
scale has been warmed up, the STANDBY feature will enable
you to skip the warmup procedure.
Important Note
Make sure to unplug the AC adapter from the wall outlet before you connect or disconnect additional devices (printer or
PC) to or from the interface connector (Option).
Startup.
Remove the white backing from the adhesive disks on the
dust cover. Attach the dust cover to the scale base by
slightly pressing down on the adhesive disks.
Mount the weighing pan (1) on the scale.
Double-check to be sure that the base dust cover does not
come in contact with the weighing pan.
Your scale is powered by an AC adapter. Check that the voltage rating printed on this unit is identical to your local line
voltage.
Plug the line cord of the adapter into the power receptacle of
the scale. Now plug the AC adapter into an electrical or wall
outlet.
Whenever possible, avoid connecting your scale to overloaded networks (compressors or similar equipment).
lf you have problems with your local line power supply, use a
suitable voltage stabilizer or an emergency power supply unit
(Option). Be sure to contact your dealer for technical information.
6
Page 7

Operation.
Press the ON/OFF key (10) to turn the scale on or off.
The display will go out whenever you turn off the scale. All
other circuits will remain energized (STAND-BY state). This
means the scale is immediately ready to operate without requiring warmup the next time you switch it on.
Important Note
To use the STANDBY feature, the scale must have been
plugged into the AC adapter for at least 30 minutes (initial
warmup).
After the scale is turned on, an automatic self-test of the
scale's electronic circuitry is performed. This self-test ends
with the readout 0.0 g.
Any other readout indicates an error. In this case, please contact your dealer, describing exactly what the display reads
7
Page 8

lf you wish to use a Container or if the weight display does not
indicate 0.00 g (or the equivalent with the weight unit of your
choice), press the tare control to zero the display.
Important Note
The small circle in the lower left-hand corner shows that the
scale has been exactly tared so the display reads
Do not wait to replace worn dust covers.
Make sure that paint spills over the sides of the housing
do not harden, making the pan stick to the base.
Frequent cleaning with solvents (such as paint thinner)
will warp the dust cover which may then push against the
pan, causing the readout to drift.
"0."
8
Page 9

Examples for Paint Mixing.
Y
st
1
Example
Mix paint components with hardener (35% of the total
weight of the paint quantity) and 20% thinner. The 20%
thinner is in proportion to the total weight of the paint
components and hardener.
———————————————————————————
Place an empty container on the scale and tare
———————————————————————————
Weigh in the 1
and then store it -
press the
———————————————————————————
weigh in the 2
and then store it -
press the
ou can repeat this procedure as many times as
the number of paint components you have
available.
———————————————————————————
st
paint component according to your formula
key (4)
nd
paint component according to your formula
key (4)
9
Page 10
You can obtain a display of the total net weight of the paint
components by pressing the
key (9)
———————————————————————————
To store the total net weight as 100 % –
press the
The decimal place will automatically disappear once the total
weight is stored as 100 % or "E" will be displayed if the paint
components are too light for the particular shade of paint. If
"E" is displayed, press the RECALL WEIGHT key and increase the minimum amount of the individual paint
components.
———————————————————————————
Add 35% hardener
———————————————————————————
To display the momentary weight
(paint components + hardener) –
key (5)
10
press the
———————————————————————————
To store the total weight-
press the
———————————————————————————
key (11)
key (9)
Page 11

Again, to store the total weight as 100 % –
press the
———————————————————————————
Add 20% thinner
Important Note:
Make sure that the 20% thinner is in proportion to the total
weight of the paint components and to the hardener.
———————————————————————————
to display the update total weight
(paint components + hardener + thinner) –
key (5)
press the
———————————————————————————
The
percentages..
key (11)
key (9) deletes the stored factor for calculation the
11
Page 12

nd
2
Example
Mix paint components with 13.5% hardener and 6.5%
thinner. These percentages are in proportion to the total
weight of the paint quantity
st
(1
paint component + 2nd component = 100%).
———————————————————————————
^Place empty container on the scale and tare.
———————————————————————————
To weigh in the paint components according to your formula and store them, see "1
st
Example" on page 9.
———————————————————————————
Display the total net weight of the paint components by pressing the
key (9)
———————————————————————————
12
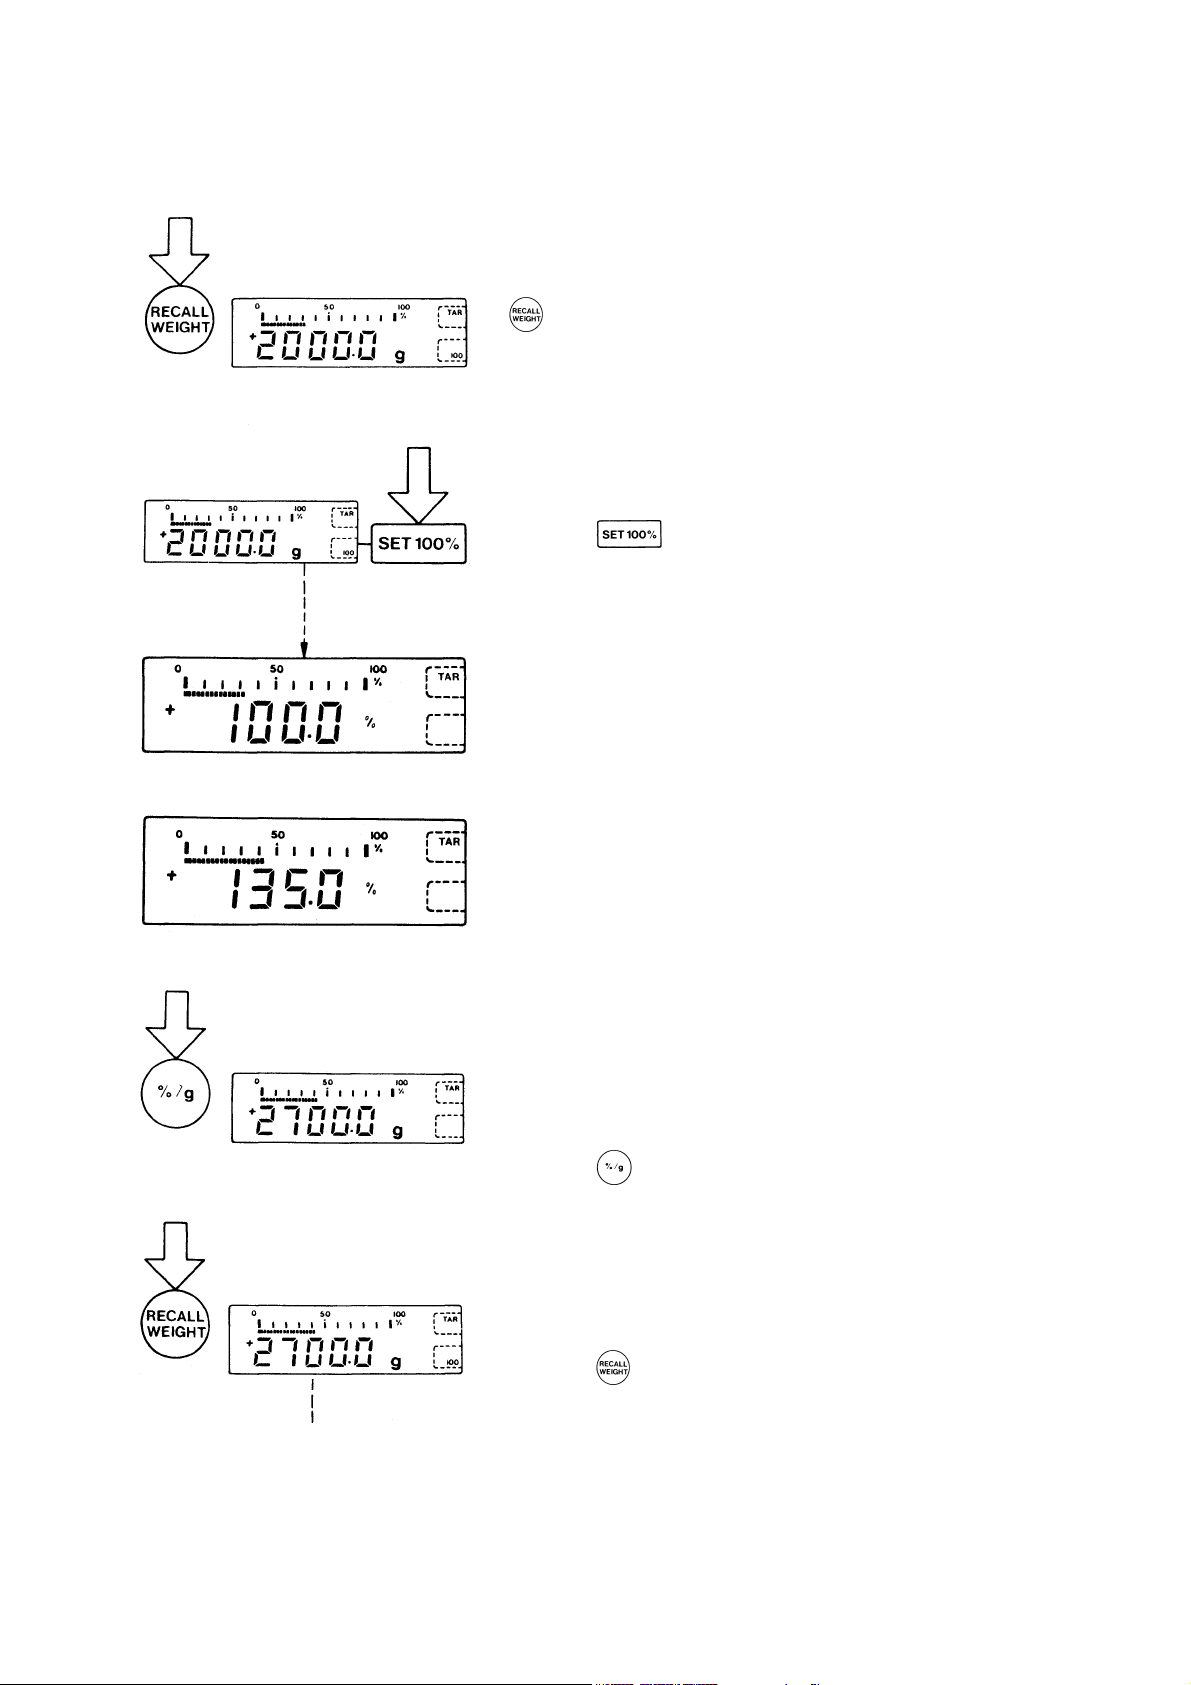
Page 13

To store the total net weight as 100 % -
press the
The decimal place will automatically disappear once the total
weight is stored as 100 % or "E" will be displayed if the paint
components are too light for the particular shade of paint. lf
"E" is displayed, press the RECALL WEIGHT key and increase the minimum amount of the individual paint
components..
———————————————————————————
To store the amount as 100% –
press the
———————————————————————————
Add 13.5% hardener
———————————————————————————
key (5)
- key (4)
13
Page 14

To add and store the updated total weight,
press the
———————————————————————————
Add 6,5% thinner
If you wish to weight in additional components,
proceed as described for the hardener and the
dinner.
———————————————————————————
Display the total net weight in percent by pressing the
key (4)
key (9)
———————————————————————————
To display the total net weight in the particular weight unit selected (in this case “g”) –
press the
———————————————————————————
The
percentages.
key (11)
key (9) deletes the stored factor for calculating the
14
Page 15

Calibration.
Have your scale checked and recalibrated, if necessary, by
your dealer on the basis of a regular maintenance schedule.
lf you have an accurate calibration weight (5,000 g ± 0.03 g;
see Sartorius "Accessories" on page 17), proceed as follows:
Remove the protective cap located on the front right of your
scale and slide the access switch (6) in the direction of the arrow.
Turn off the scale, hold down the TINTER/ADDITIVE key (4)
and briefly press the ON/OFF key (10).
Upon the completion of the self-test release
TINTER/ADDITIVE key when "C" is displayed.
Unload the scale and tare.
Press the TINTER/ADDITIVE key (4) when the display reads
zero. "CAL" and the calibration weight readout will now be
displayed.
15
Page 16

Centre the calibration weight on the weighing pan.
Now the weight unit symbol is displayed. lt indicates the end
of the calibration procedure.
Relock the calibration access function by sliding the access
switch back to its original setting, and replace the protective
cap.
After calibration, use the ON/OFF key (10) to turn the scale off
and then on again.
Even if you do not calibrate your scale, this will not affect the
accuracy of the mixing ratio so you will always obtain the correct shade of paint, provided you weigh in the components
correctly.
However, the overall amount of your paint formula may slightly
vary.
16
Page 17

Accessories (Options).
Dust cover 69 60Q610
Calibration weight (1 x 5000 g) 7072 13
Antitheft locking device 6087
For information on additional accessories, please contact your
dealer.
Options:
Interface
External rechargeable battery
Printer
Voltage stabilizer
Emergency power supply unit
Specifications.
Model XQ 6100 XQ 6100 B
Capacity g 6100 6100
Readability g 0,1 0,1
Tare range (by subtraction) g 6100 6100
Standard deviation g
Max. linearity g
Stabilization (typical) s 1,5
Display update
— at stability (depends on the filter level
selected
— when load is changed
Adaptation to operating requirement
and ambient conditions
Stability range d 0,25 ... 32 (selectable)
Ambient temperature range K 273 — 313 (0oC .. +40oC)
Allowable relative humidity % 15 ... 85 (moisture-proof rating; non-condensing)
Sensitivity drift
within 10 ... 30
Pan size mm 235 x 180
Scale base (W x D x H) mm 250 x 270 x 65
Net weight, approx. kg 4 3,5
Line voltage,
(mains); frequency: 50-60 Hz
Allowable voltage fluctuation -20% ... +15%
Power consumption VA 7,5 (typical)
Wattage rating of the scale for an input
voltage of 12 V
o
C /oC
s
s
115 or 230 V, depending on the AC adapter used
w 0,55 0,36
≤± 0,05 ≤± 0,5
≤± 0,1 ≤± 0,5
0,1; 0,2; 0,4
0,1
by selecting one of 3 optimised filter level
≤± 5 ∙ 10
-6
≤± 2,5 ∙ 10
-5
17
Page 18

Sartorius AG
B 37070 Göttingen
P Weender Landstraße 94–108, 37075 Göttingen
T (0551) 308-0, F (0551) 308-3289
Internet: http://www.sartorius.com
Copyright by Sartorius AG, Göttingen, Deutschland.
All rights reserved. No part of this publication may be
printed or translated in any form or by any means without
the prior written permission of Sartorius AG.
Sartorius AG reserves the right to make change to the
technology, features, specification and design of the equipment
without notice.
 Loading...