

Installation Instructions | Installationsanleitung | Notice d’installation | Manuale d’installazione |
Instrucciones de instalación | Instrukcja montażu | 設置説明書
PMA.Evolution | PMA.HD
EVO1S1 | SPO1S1
Paint-mixing Scales | Farbmischwaagen | Balances pour peintures | Bilance per la miscelazione di vernici |
Balanzas para la mezcla de pinturas | Wagi do mieszania farb |
ペイント調合用天びん
1000047790

Contents of DVD:
− Operating instructions as a pdf file in various
international languages
− Adobe Reader
− Software drivers for configuration of USB interfaces
English – page 3
In cases involving questions of interpretation,
the German-language version shall prevail.
Deutsch – Seite 11
Im Auslegungsfall ist die deutsche Sprache maßgeblich.
Download online: www.sartorius.com/paintmixing
System Requirements:
– Windows, MacOS X
– Browser with JavaScript enabled
– PDF-Reader
Use start.html to run the application
Français – page 19
En cas de questions concernant l
la version en langue allemande fera autorité.
Italiano – pagina 27
In caso di questioni relative all’interpretazione,
la precedenza è data alla lingua tedesca.
Español – página 35
En caso de interpretación, la versión en lengua
alemana será determinante.
Polski - strona 43
W kwestiach budzących wątpliwości,
znaczenie nadrzędne ma niemiecka wersja językowa.
日本語 – ページ 51
解釈上の問題が起きた場合、ドイツ語版が優先するものとし
ます。
’
interprétation,
English
Contents
1 About This Document.....................................3
1.1 Scope.................................................. 3
1.2 Symbols Used .........................................3
2 Safety Instructions
2.1 Intended Use..........................................3
2.2 Personnel Qualification...............................4
2.3 Significance of these Instructions ....................4
2.4 Proper Working Order of the Device .................4
2.5 Work on the Electrical Equipment of the Device.....4
2.6 Personal Protective Equipment....................... 5
2.7 Safety Instructions Concerning Operation
of the Device.......................................... 5
3 Installation
3.1 Scope of Delivery .....................................5
3.2 Unpacking.............................................5
3.3 Selecting a Setup Location ...........................5
3.4 Installing the Scale....................................5
3.5 Establishing the Power Supply........................6
3.6 Anti-theft Locking Device ............................6
3.7 Leveling ...............................................7
3.8 Warm-up Time........................................7
4 Cleaning and Maintenance
4.1 Cleaning............................................... 7
4.2 Servicing ..............................................7
5 Disposal
5.1 Information on Decontamination ....................8
................................................5
. . . . . . . . . . . . . . . . . . . . . . . . . . . . . . . . . . . . . . . . . . . . . . . . . . . . 8
........................................3
...............................7
CAUTION
Denotes a danger with risk that moderate or minor injury may
result if it is not avoided.
NOTICE
Denotes a danger that can result in property damage if the
risk is not avoided.
1.2.2 Other Symbols
t
y
[ ] Text inside brackets refers to control and display
Figures on the Operating Display
The figures in these instructions are based on “standard”
scales. On verified scales, some displays and reports may
deviate slightly from the figures. Where this is significant for
operation, the differences will be explained in the text.
Required action: Describes actions which must be
carried out.
Result: Describes the result of the actions carried
out.
elements.
This symbol provides information for the sale of
scales verified for use in legal metrology.
In the following, the term “verified” is used to
mean “verified for use in legal metrology” or
“conformity-assessed.”
6 Accessories
7 Technical Data
7.1 General Data..........................................9
7.2 Model-specific Data .................................10
7.3 Verified Models with EC Type Approval Certificate:
8 EU Declaration of Conformity
.................................................8
.............................................9
Model-Specific Technical Specifications.............10
..........................10
1 About This Document
1.1 Scope
These instructions apply to color-mixing scale models:
− EVO1S1
− SPO1S1
1.2 Symbols Used
The term “device” used in these instructions always refers to
the combined unit of scale and AC adapter.
1.2.1 Warnings
2 Safety Instructions
2.1 Intended Use
This scale is only intended for mixing colors and paints outside
of potentially explosive atmospheres. Appropriate containers
must be used for loading each type of material.
The scale can be operated via the display as a stand-alone
device or using application software (e.g., a paint-mixing
program from a paint manufacturer) installed on a connected
PC. The PC is connected to the scale via a USB cable.
These instructions are part of the device. The device is
intended exclusively for use in accordance with these
instructions.
Any further use beyond this is considered improper. If the
device is not used properly:
The protective systems of the device may be impaired. This
can lead to unforeseeable personal injury or property damage.
In the event of use in systems and under ambient conditions
with higher safety requirements, you must observe the
requirements and provisions applicable in your country.
WARNING
Denotes a danger with risk that death or severe injury may
result if it is not avoided.
Installation Instructions EVO1S1 | SPO1S1 3
Operating Conditions for the Device
The device may only be used indoors.
The device may only be used with the equipment and under
the operating conditions described in the Technical Data
section of these instructions.
You may not modify the device or make any technical
changes on your own. Any retrofitting or technical changes to
the device are only permitted with prior written permission by
Sartorius.
Target
group
Operator The operator of the device is responsible for
Knowledge/responsibilities
compliance with safety requirements and
workplace safety regulations.
The operator must ensure that anyone working
with the device has access to the relevant information and is trained to work with the device.
Do not expose the device or accessories supplied by Sartorius
to extreme temperatures, aggressive chemical vapors, moisture, shock, vibrations or strong electromagnetic fields.
Consider the ambient conditions. The casing on all connection
cables between the devices as well as on the wires inside the
device housing is made of PVC. Chemicals that corrode this
material must be kept away from these cables.
2.2 Personnel Qualification
These instructions are addressed to the target groups mentioned below. All persons working on the device must possess
the stated knowledge and authorizations.
If no qualifications are indicated for the actions described in
these instructions: The actions described are addressed to the
“User” target group.
If individual actions must be carried out by other target
groups or by Sartorius Service personnel: The qualification
required will be indicated in the description of the action.
Target
group
User The user is familiar with the operation of the
Operating
engineer/
laboratory
manager
Electrician A qualified electrician has the specialized train-
Knowledge/responsibilities
device and the associated work processes. They
understand the hazards which may arise when
working with the device and can avoid these
hazards.
The user is trained in the operation of the
device. Training takes place during startup and
is carried out by the operating engineer/laboratory manager or the operator of the device.
The operating engineer/laboratory manager
makes decisions about the use and configuration of the device.
The operating engineer/laboratory manager has
been trained in the operation of the device.
Training takes place during startup and is performed by Sartorius Service or the operator.
ing, knowledge, and experience as well as familiarity with applicable regulations to evaluate
the assigned work and identify possible hazards.
2.3 Significance of these Instructions
Failure to follow the instructions in this manual can have
serious consequences, e.g. exposure of individuals to electrical,
mechanical or chemical hazards.
t Before working with the device: Read the instructions
carefully and completely.
t If these instructions are lost: Request a replacement or
download the latest version from the Sartorius website
(www.sartorius.com).
t The information contained in these instructions must be
available to all individuals working on the device.
2.4 Proper Working Order of the Device
A damaged device can cause malfunctions or lead to hard-todetect hazards.
t Only operate the device when it is safe and in perfect
working order.
t Immediately disconnect the damaged device from the
power.
t Have any malfunctions or damage repaired immediately by
Sartorius Service.
2.5 Work on the Electrical Equipment of the Device
Work on and modifications to the electrical equipment of the
device may only be carried out by Sartorius Service personnel.
The device may only be opened by Sartorius Service personnel.
Seal on Scales Verified for Use in Legal
Metrology
Legislation requires that a seal be affixed to
verified scales. On Sartorius devices, this seal takes
the form of a sticker with the “Sartorius” logo. If
the seal is removed, the validity of verification
will become void and you must have your scale
re-verified. The verification supplied here is for
verified weighing instruments for use in the EEA.
Please keep it in a safe place.
4 Installation Instructions EVO1S1 | SPO1S1
English
2.6 Personal Protective Equipment
Personal protective equipment to protect against risks arising
from the material being processed.
t When the workplace or the process in which the device is
used requires personal protective equipment: Wear
personal protective equipment.
2.7 Safety Instructions Concerning Operation of the Device
− Take care that the glass panel of the operating display is
not damaged (e.g., by falling objects, impact, or extreme
pressure). If the glass panel is damaged, disconnect the
device from the power supply immediately.
− The surface of the operating display should not be touched
with pointed, sharp, hard, or rough objects. You should
only use the touch pen provided or your fingertips. Do not
use parts of clothing (e.g., sleeves) or sponges for cleaning
because these can scratch the surface (e.g., due to rivets or
buttons in the sleeve or sand in the sponge).
− Avoid generating static electricity on theglass panel of
the operating display and plastic casing.
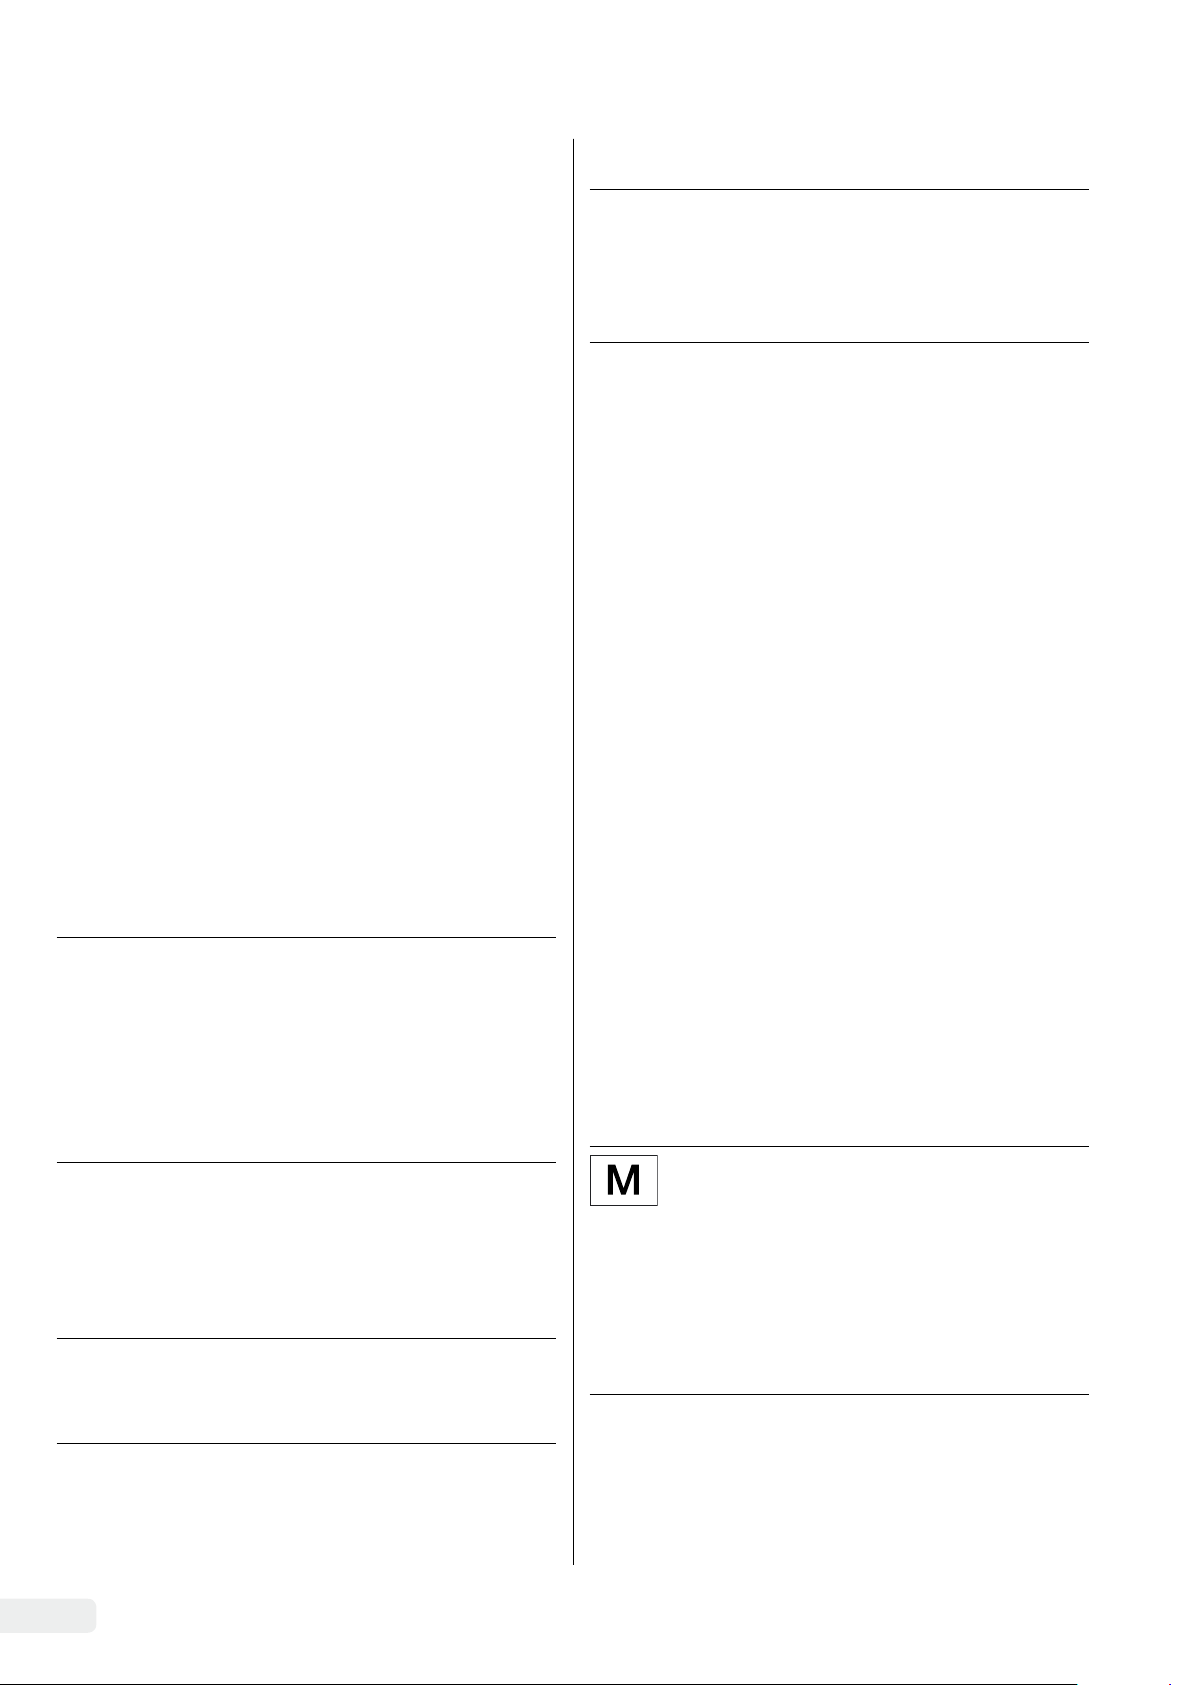
Danger of Damage to the Scale!
Never close a paint can using a hammer while
it is still on the weighing pan.
When closing, place the paint can on a firm,
stable surface.
3 Installation
see Chapter “7.1 General Data,” page 9).
t Save the box and all parts of the packaging for any future
transport. All cables should be unplugged during transport.
3.3 Selecting a Setup Location
Select the right setup location:
− Set up the device on a stable, even surface that is not
exposed to vibrations.
− Maintain free access to the device at all times.
− The devices must be handled carefully according to the IP
protection rating. The environment must be suitably
secured.
− In the event of use in systems and under ambient conditions with higher safety requirements, you must observe
the requirements and provisions applicable in your
country.
t Choose a location that is not subject to the following
negative influences:
− Heat (heater or direct sunlight)
− Drafts from open windows, AC systems, and doors
− Extreme vibrations during weighing
− Heavy traffic areas (personnel)
− Extremely high humidity
− Electromagnetic fields
− Extremely dry air
Acclimatization
Condensation from humidity can form on the surfaces of a
cold device when it is brought into a warm area. You should
therefore let a device that has been disconnected from its
power source acclimatize for approximately 2hours before
reconnecting it to the supply voltage.
3.1 Scope of Delivery
Model PMA.
Evolution
Large weighing pan: d 233 mm
Small weighing pan: d 180 mm
USB cable x x
AC adapter with country-specific
mains adapter
Installation instructions x x
x –
– x
Optional Optional
PMA.HD
3.2 Unpacking
Procedure
t Open the packaging, making sure to remove all parts
carefully.
t After unpacking the device, check it immediately for any
external damage.
t If the device is stored temporarily: Store the device
according to the ambient conditions (ambient conditions
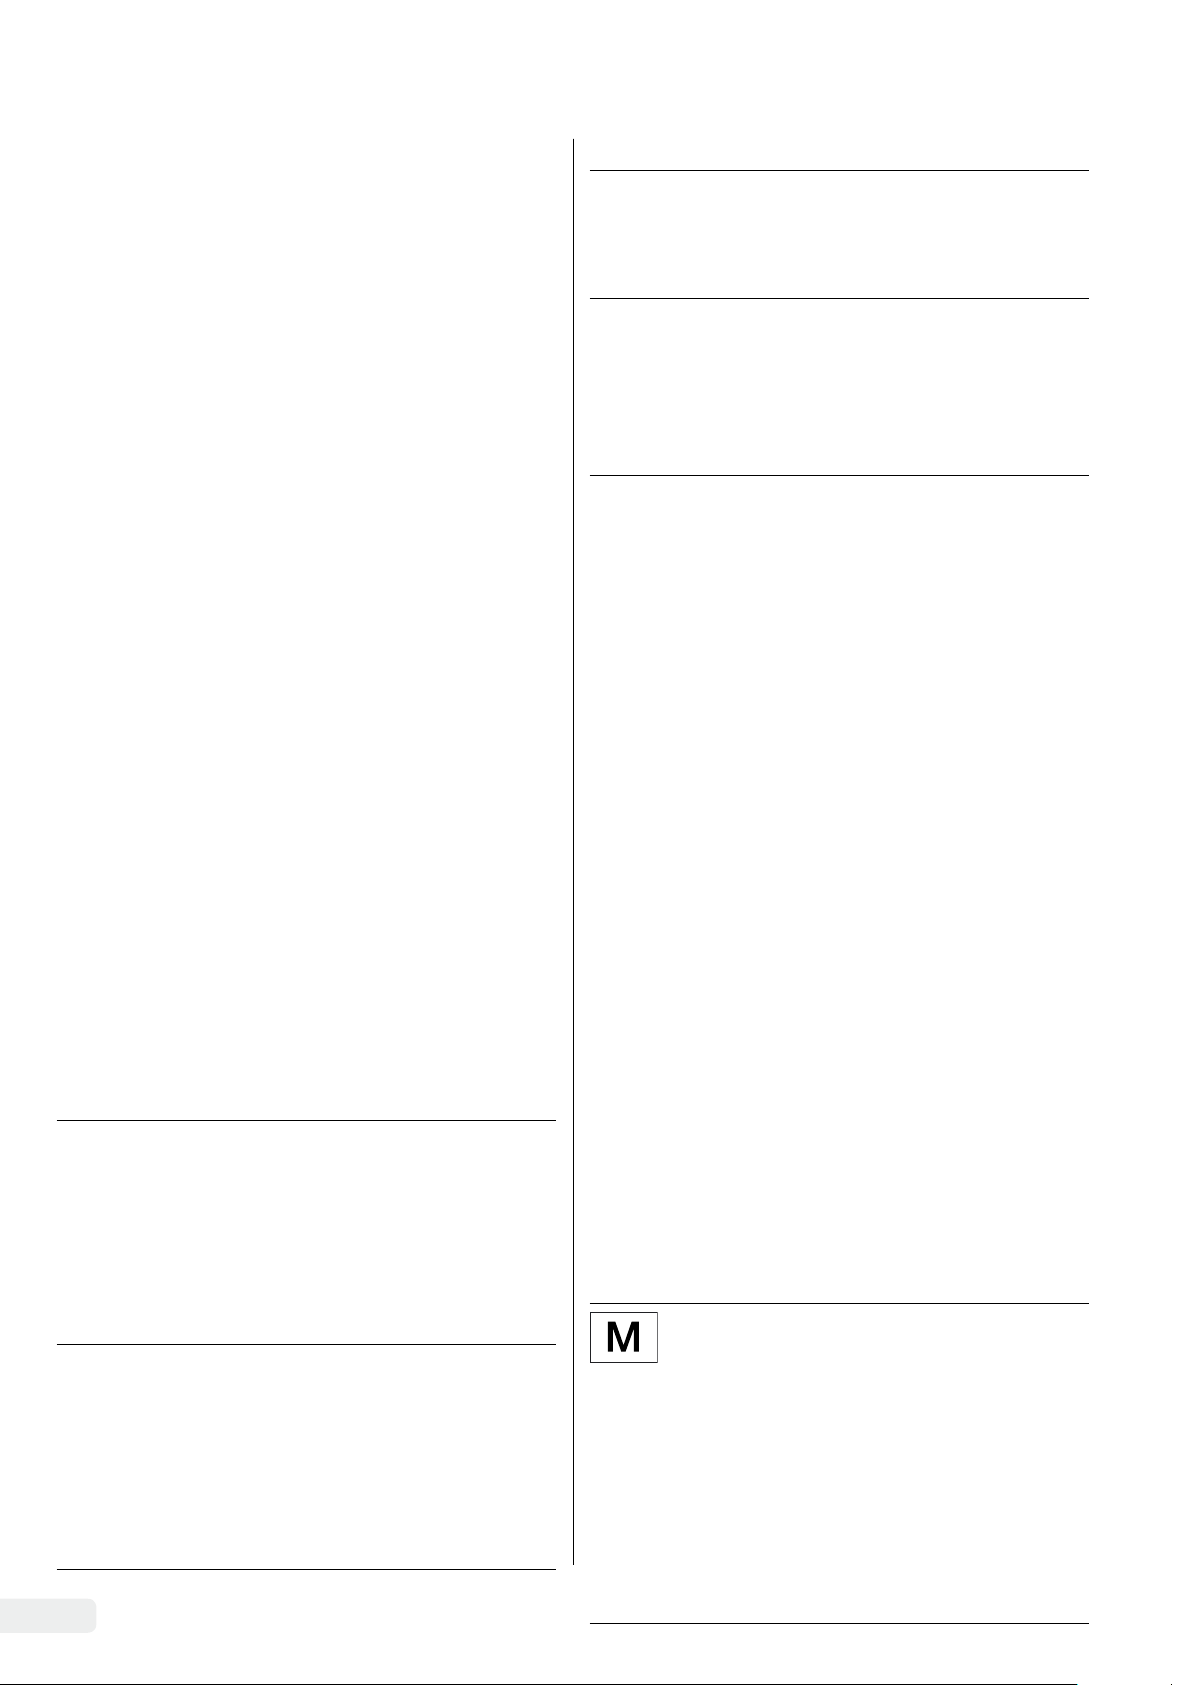
3.4 Installing the Scale
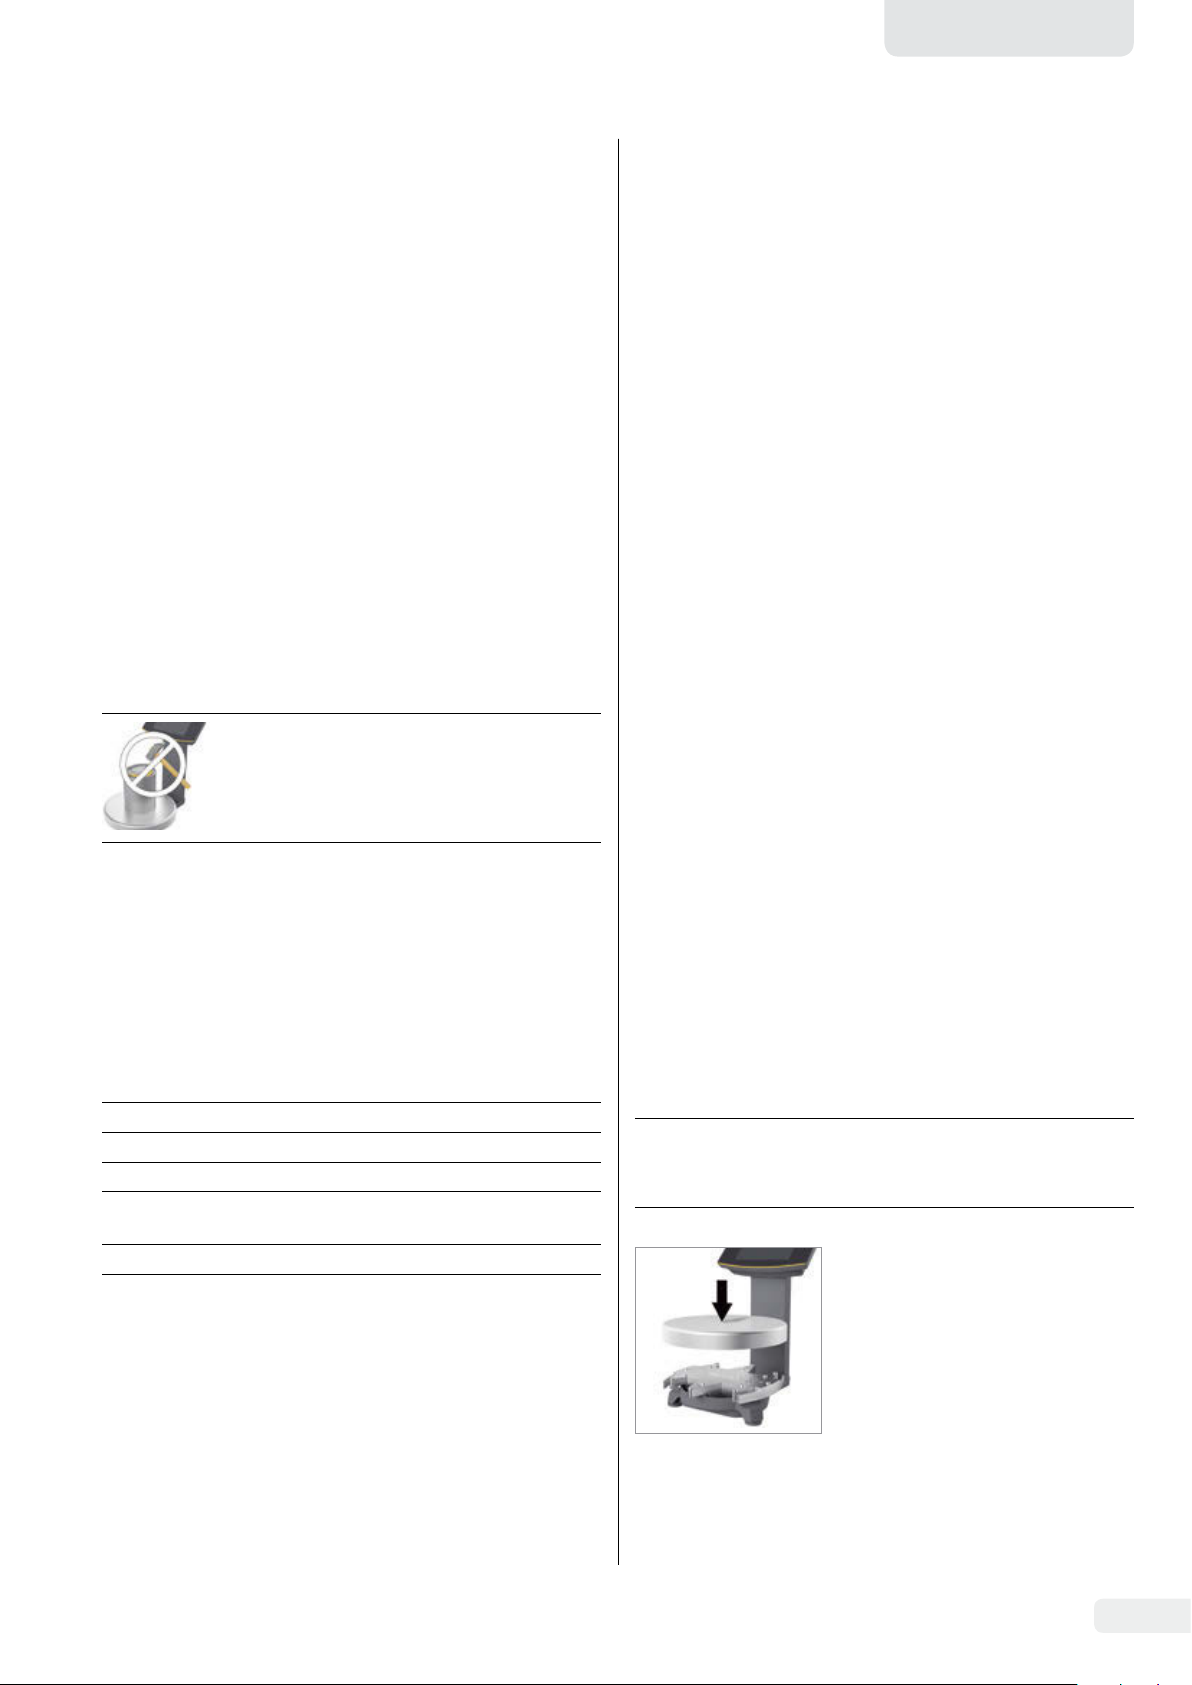
3.4.1 Place the weighing pan on the scale
NOTICE
The device must be disconnected from the power supply for
all assembly work.
t Place the weighing pan onto the
scale from above.
Installation Instructions EVO1S1 | SPO1S1 5
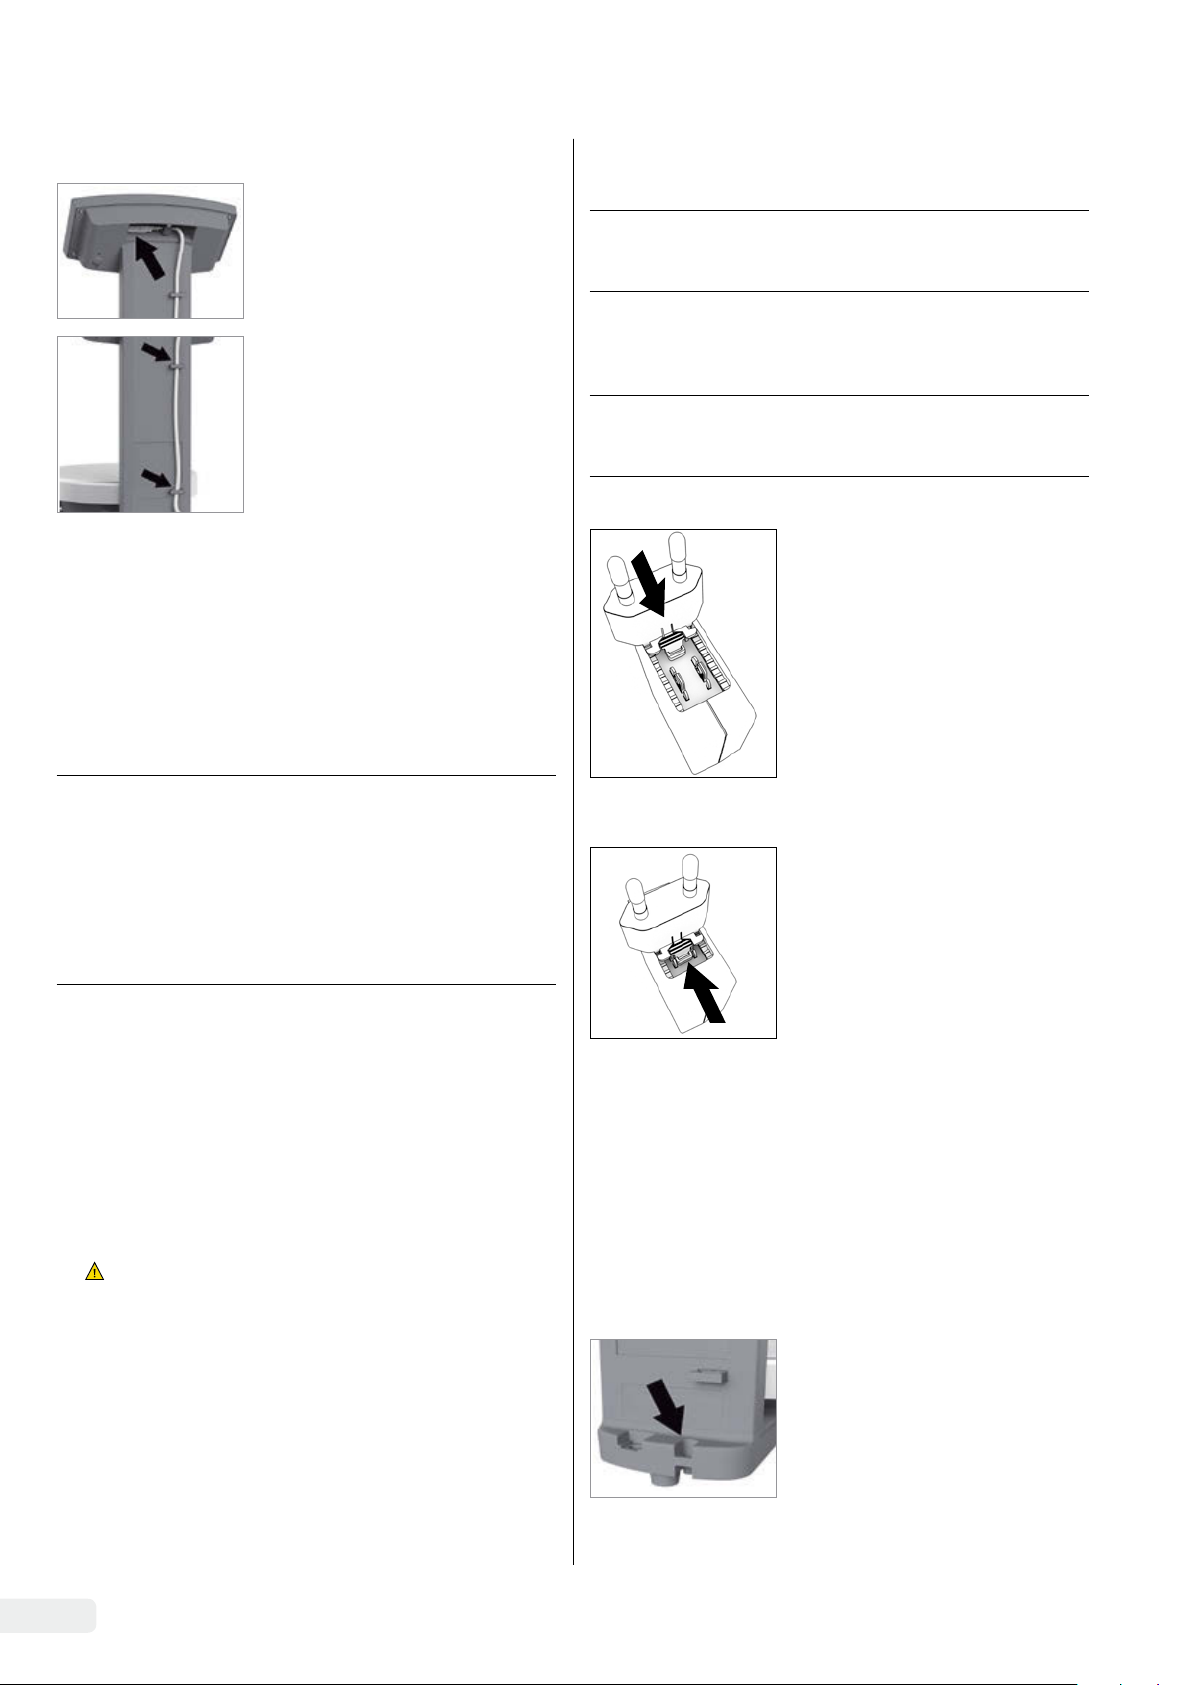
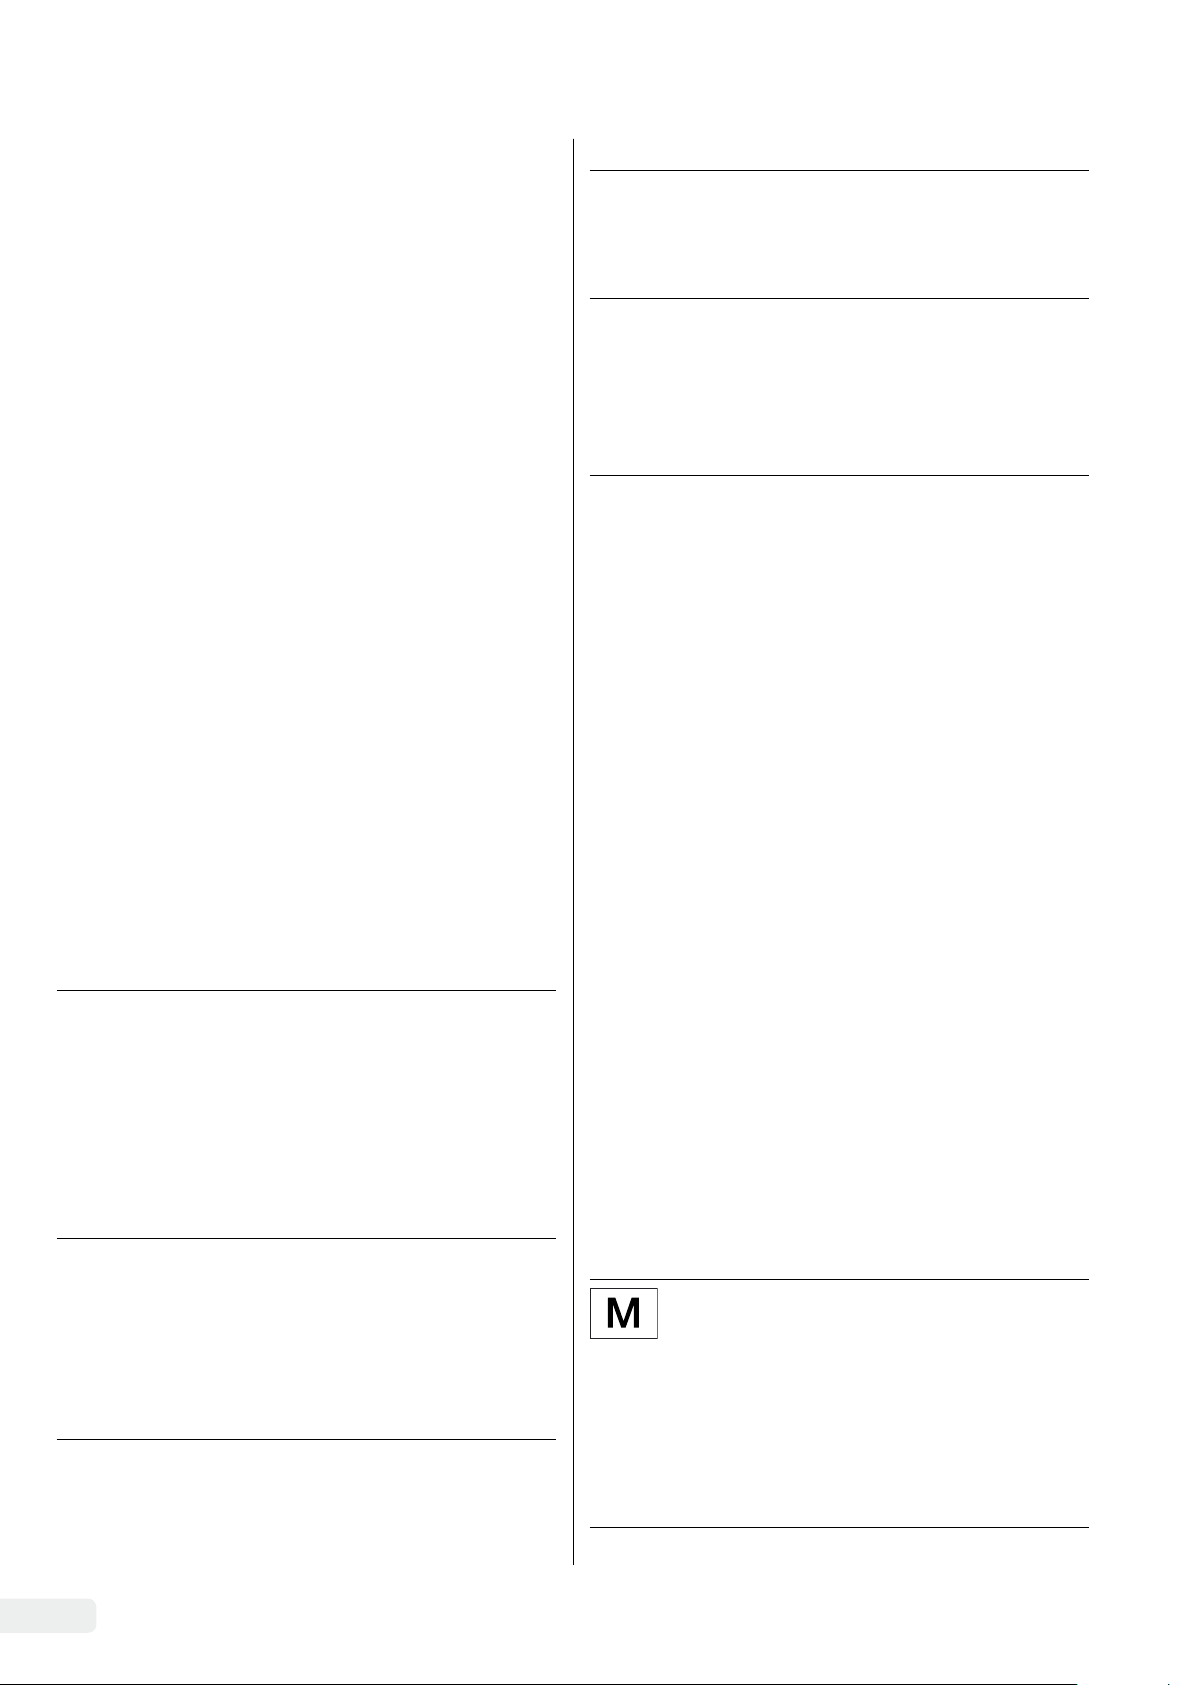
3.4.2 Connecting the Scale
Mains adapter sets
t Insert the USB cable into the
USB socket on the back of the
display.
t Feed the USB cable through the
cable holders on the back of the
scale.
3.5 Establishing the Power Supply
The scale is normally powered via the USB connection of your
PC, which also supplies data for the scale. If this USB connection is not available, you can use AC adapter YEPS01-USB (see
Chapter “6 Accessories,” page 8) for the power supply,
which comes with different, country-specific mains adapters.
NOTICE
− Ensure that the voltage rating printed on the AC adapter
is identical to your local mains voltage (for connection
data, see Chapter “7.1 General Data,” page 9).
− If the stated supply voltage or the plug design of the
power supply does not comply with your country's
standard then please inform your nearest Sartorius
representative.
Power supply via the AC adapter is only required:
− When no PC or notebook is available.
− In exceptional cases, when the output voltage of the USB
interface of the PC or notebook is not sufficient.
AC adapter assembly is described in the following.
Bag Region/country
YEPS01-PS1 − USA and Japan (US+JP)
− Europe (EU)
− United Kingdom (GB)
YEPS01-PS6 − Argentina (AR)
− Brazil (BR)
− Australia (AU)
− South Africa (ZA)
YEPS01-PS7 − China (CN)
− India (IN)
− Korea (KR)
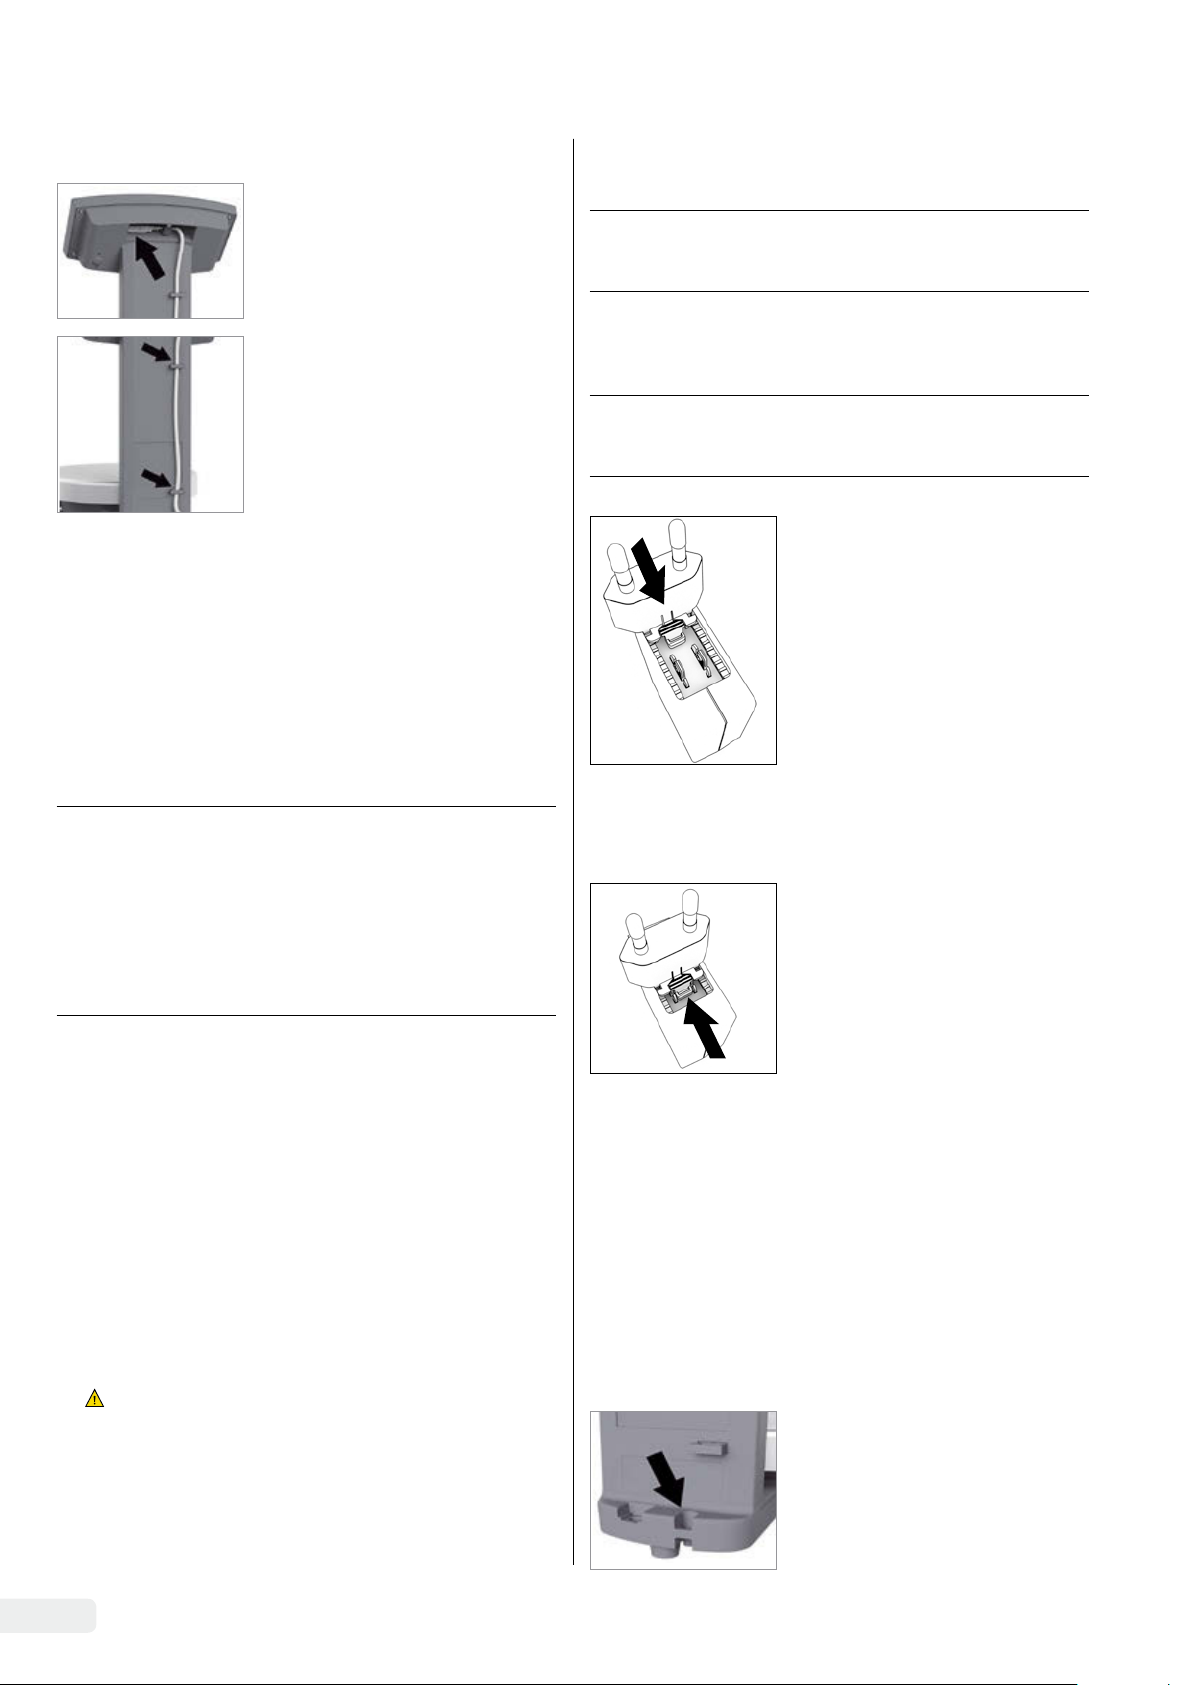
t Insert the power plug adapter
into the power supply. The
grooved button must be facing
upwards.
t Push the power plug adapter as
far as you can until it clicks into
place.
t Check whether the power plug
adapter is securely locked in
place by pulling it gently.
y If the power plug adapter does
not move, it is locked in place.
Removing/Replacing the Mains
Adapter
t Press the grooved button from
above and pull back on the
mains adapter.
t Push the power plug adapter
out of the power supply and
remove it.
Connection to the Power Supply
t Insert the USB cable into a USB socket (e.g., on a PC or
laptop).
3.5.1 Power Supply Assembly
If using a power supply, it will need to be assembled.
WARNING Lethal electric shock and equipment
t
damage due to incorrect power plug adapter! Only use the
country-specific power plug adapter. Never plug the
power plug adapter into the socket when it is disconnected from the power supply.
t Select the correct mains adapter for your mains power
supply. The mains adapter must be suitable for use with
the wall outlet at the installation site..
6 Installation Instructions EVO1S1 | SPO1S1
Connecting an AC Adapter (Option)
t Insert the USB cable into the YEPS01-USB AC adapter.
t Plug the AC adapter into the wall outlet (supply voltage).
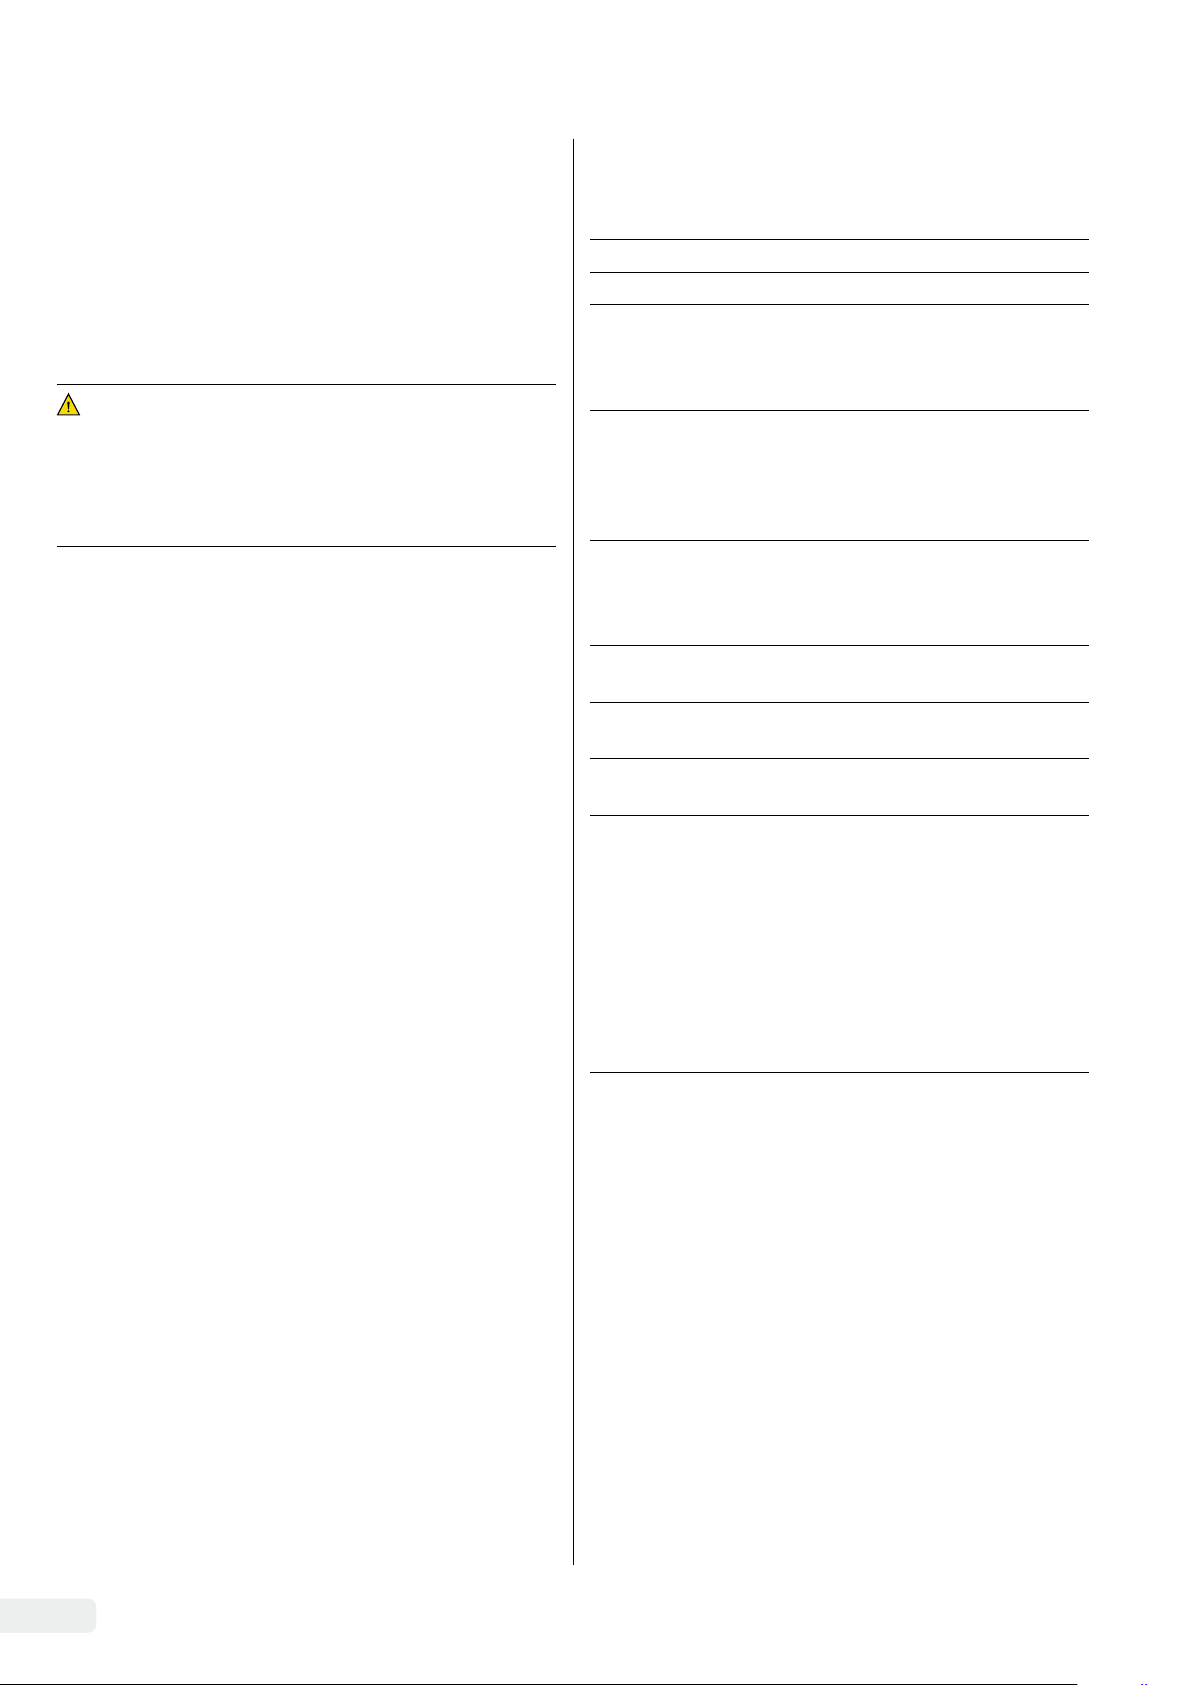
3.6 Anti-theft Locking Device
t If required, secure the scale at
the back.
0
30
English
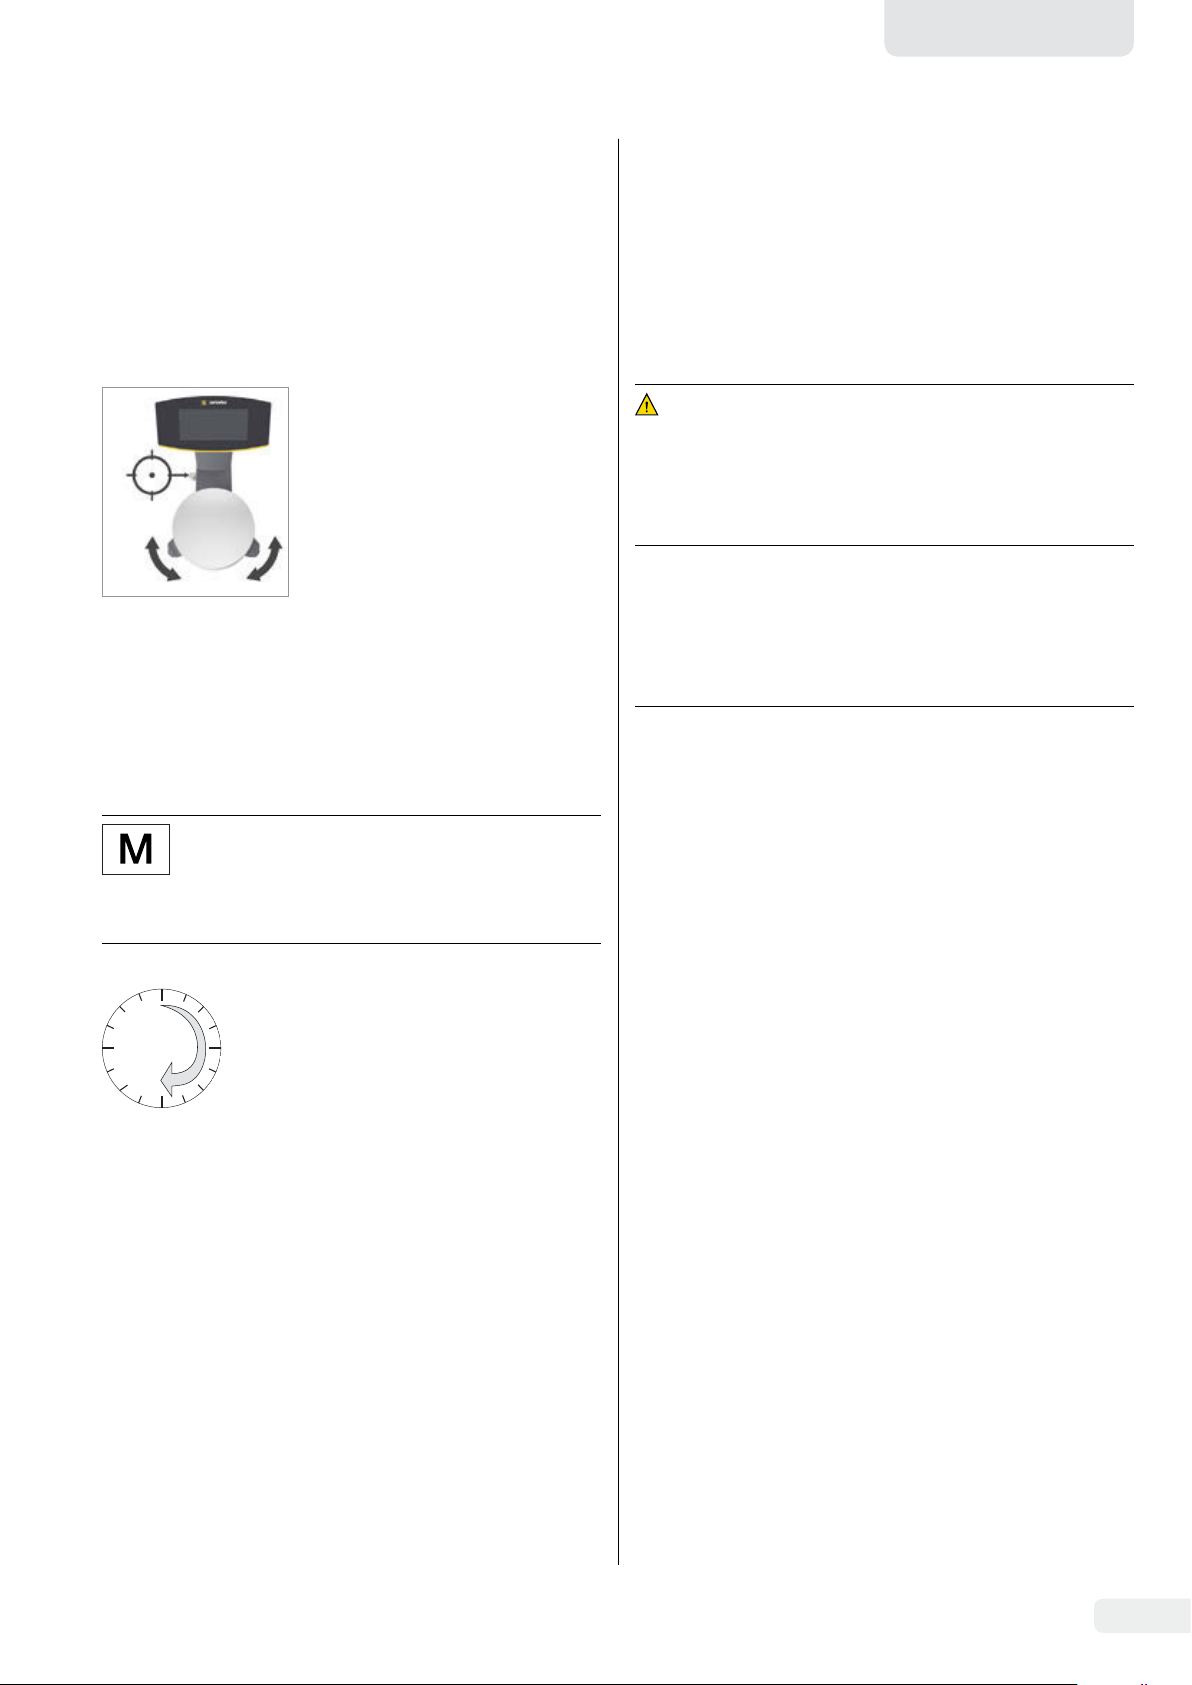
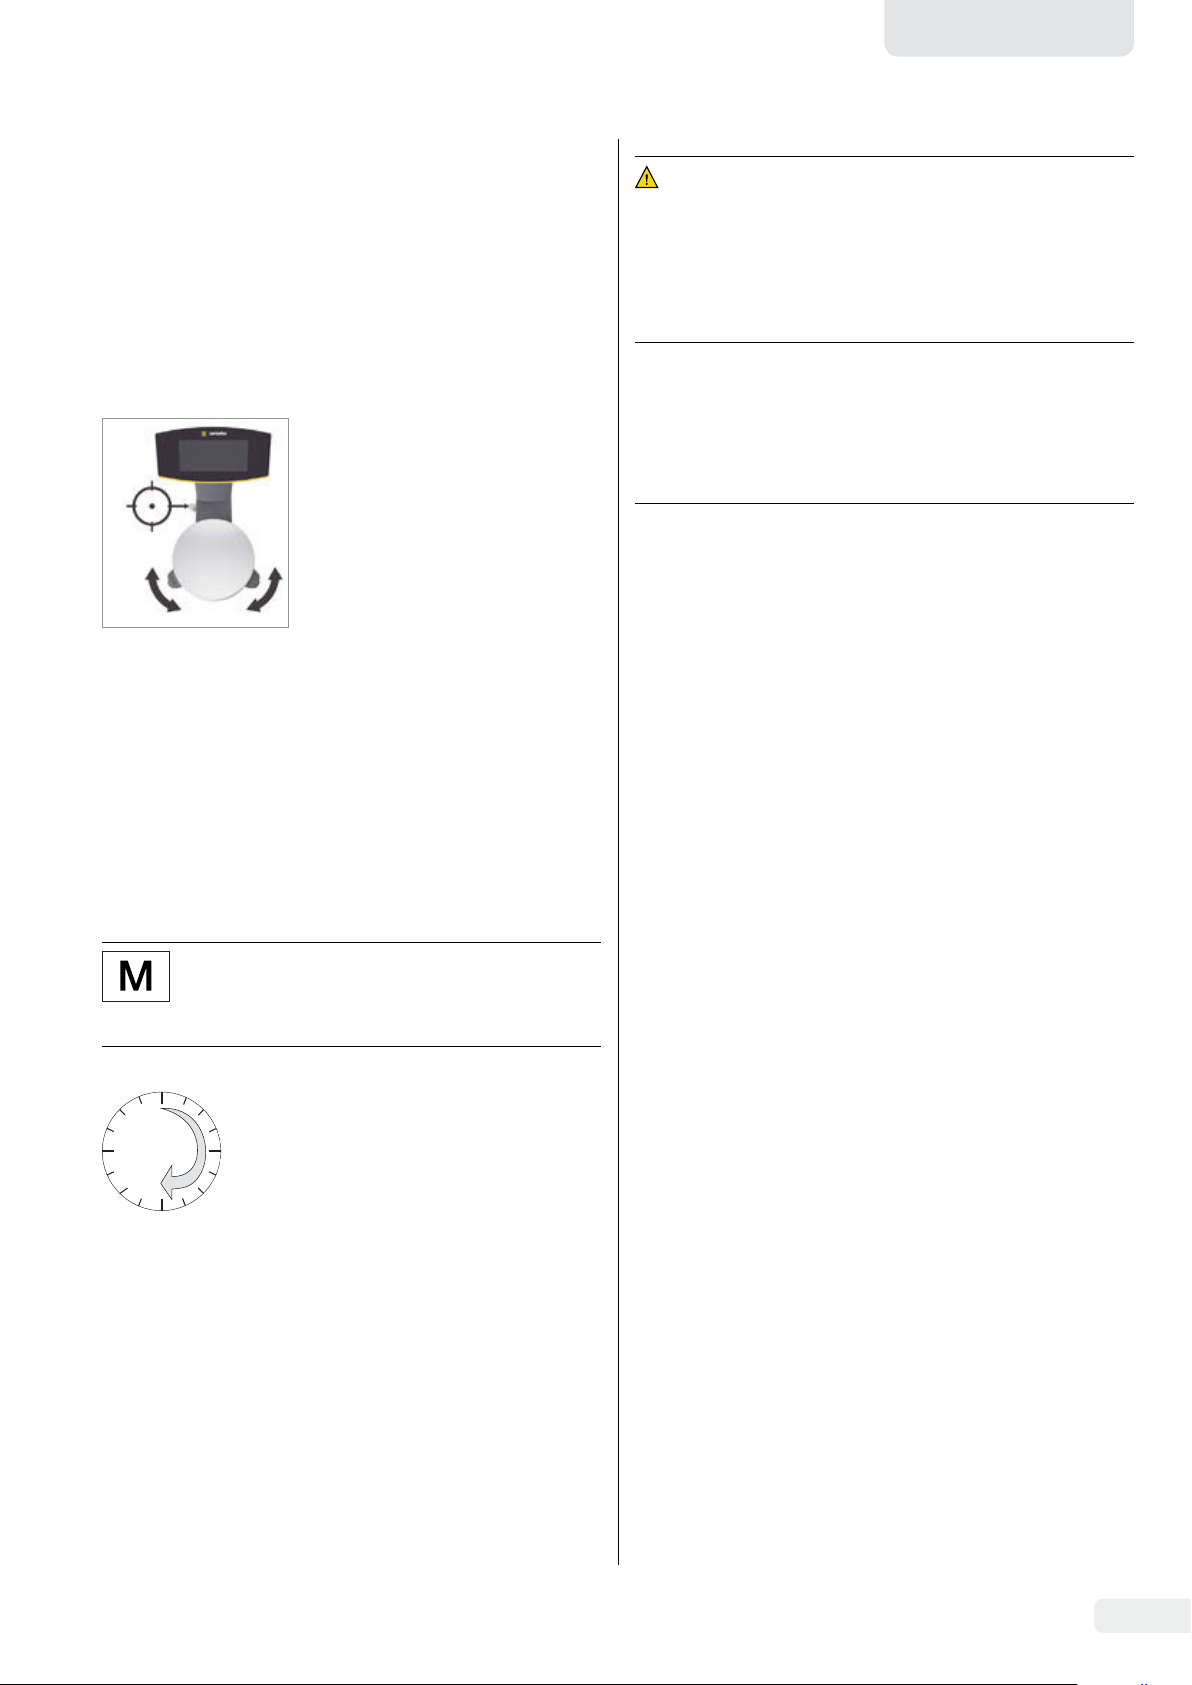
3.7 Leveling
Leveling for PMA.HD and Verified Models
Leveling the scale compensates for slant or unevenness at the
place of installation. The scale must be perfectly horizontal to
ensure consistent, reproducible weighing results.
The scale needs to be re-leveled and then adjusted if necessary each time its setup location is changed.
t Turn the two leveling feet as
shown in the illustration until
12*
9*
6*
* o'clock
the air bubble is centered within
the circle of the level indicator.
− Air bubble at “12 o'clock:” Turn
both feet clockwise.
− Air bubble at “3 o'clock:” Turn
the left foot clockwise and the
right foot counterclockwise.
− Air bubble at “6 o'clock:” Turn
both feet counterclockwise.
− Air bubble at “9 o'clock:” Turn
the left foot counterclockwise
and the right foot clockwise.
4 Cleaning and
Maintenance
4.1 Cleaning
Before cleaning the AC adapter or the scale: Disconnect all
devices from the power supply.
WARNING Electrical Hazard from Voltage or
Current
Disconnect the AC adapter (if connected) from the mains.
Unplug any connected data cables from the PC. Never open
the scale or the AC adapter. The parts contained in these
cannot be cleaned, repaired or replaced by the operator.
NOTICE
Do not clean the following parts with acetone or aggressive
cleaning agents:
− Mains socket
− Data interface
− Labels, and all other plastic parts
3.8 Warm-up Time
Using a Scale Verified for Use in Legal Metrology:
Ensure that there is a warm-up time of at least
24hours after initial connection to the power
supply.
To ensure accurate results are
delivered, the scale must warm up
for at least 30minutes after initial
connection to the power supply.
Only then will the device have
reached the required operating
temperature.
Procedure
t Disconnect the device from the power supply.
t NOTICE Make sure that no liquid or dust gets into the
scale or the AC adapter.
t NOTICE Corrosion or damage to the device due to
unsuitable cleaning agents!
t Do not use corrosive, chloride-containing and aggres-
sive cleaning agents.
t Do not use cleaning agents that contain abrasive
ingredients, e.g. scouring agents, steel wool.
t Only use soft brushes and cloths for cleaning.
t Do not use solvent-based cleaning agents.
Cleaning the Control Panel
t Before cleaning the control panel: Turn off the device as
touching the screen could trigger unwanted inputs.
Cleaning the Device Housing
t Wipe off the housing with a slightly damp cloth. For more
severe contamination, use a mild soap solution.
t Wipe the device with a soft cloth.
4.2 Servicing
To ensure the continued accuracy of your scale, we recommend scheduling regular servicing at least once a year.
Sartorius Service offers different service contracts with
maintenance intervals that are tailored to your needs.
A calibration certificate should always be issued as part of
every maintenance session. Safety inspections of the power
supply and its connections must be performed at appropriate
intervals by a qualified electrician (e.g. every two years).
Installation Instructions EVO1S1 | SPO1S1 7
5 Disposal
6 Accessories
5.1 Information on Decontamination
The operator is responsible for adhering to local legislation on
the proper declaration of transport and disposal and the
proper disposal of the device.
WARNING
Risk of injury due to contaminated devices!
Devices contaminated with hazardous materials (NBC contamination) will not be accepted for repair or disposal.
5.1.1 Information on Disposal
The device and its accessories do not belong in your regular
household waste, since they are made of high-grade materials
which can be recycled and reused. All parts must be disposed
of properly by disposal facilities.
The packaging is made of environmentally friendly materials
that can be used as secondary raw materials.
5.1.2 Disposal
Requirements
The device has been decontaminated.
Procedure
t Dispose of the device. Follow the disposal instructions on
our website (www.sartorius.com).
t Dispose of the packaging in accordance with local
government regulations.
Accessories Order Number
USB cable YCC01-0040M5
Power supply (5.2 V/1.4 A) YEPS01-USB
Mains adapter set for YEPS01-USB YEPS01-PS1
− USA and Japan (US+JP)
− Europe (EU)
− United Kingdom (GB)
Mains adapter set for YEPS01-USB YEPS01-PS6
− Argentina (AR)
− Brazil (BR)
− Australia (AU)
− South Africa (ZA)
Mains adapter set for YEPS01-USB YEPS01-PS7
− China (CN)
− India (IN)
− Korea (KR)
In-use cover for control panel,
pack of 10
In-use cover for support arm,
PMA.Evolution, pack of 10
In-use cover for weighing pan,
PMA.Evolution, pack of 10
Calibration weights
for PMA.Evolution:
− 5kg, accuracy class F2 YCW654-AC-00
− 2 kg, accuracy class F2 YCW624-AC-00
− 1 kg, accuracy class F2 YCW614-AC-00
for PMA.HD:
− 2kg, accuracy class F1 YCW623-AC-00
− 1kg, accuracy class F1 YCW613-AC-00
YDC03PMA10
YDC03PMA-CO10
YDC03PMA-WP10
8 Installation Instructions EVO1S1 | SPO1S1
English
7 Technical Data
7.1 General Data
Specification Unit Value
Scale
Supply voltage Only via USB interface or Sartorius AC adapter YEPS01-USB
Input voltage V
Power consumption W 2.0
Further data IP40 in accordance with EN 60529/IEC 60529
Ambient conditions
The technical specifications apply under the following ambient conditions:
Environment For indoor use only
Ambient temperature* °C +10 to +30
Operational capability °C Guaranteed between +5 and +45
Storage and shipping °C -10 to +60
Relative humidity % 15 to 80 for temperatures up to 30°C non-condensing,
Interface connection USB, type B (virtual serial interface)
Format 7-bit ASCII, 1 start bit, 1 or 2 stop bits
Parity Even, odd, none
Transmission rate 600 to 57,600bps
Handshake Software or hardware
Electromagnetic compatibility In accordance with EN 61326-1/IEC61326-1 Electrical equipment for
Interference resistance Basic requirements
Transient emissions Class B
DC
+5.0
decreasing linearly to 50% relative humidity at 40°C
measurement, control and laboratory use – EMC requirements – Part 1:
General Requirements
Suitable for use in residential areas and areas that are connected to a
low voltage network that also supplies residential buildings.
Verified scales in accordance with EU requirements comply with the
requirements of Council Directive 2014/31/EU with EN 45501:2015 and
OIML R76:2006.
* For verified scales in accordance with EU requirements, refer to the
information on the scale.
** For verified scales in accordance with EU requirements, the legal
regulations apply.
Available application programs Recalculation, formula
Power supply YEPS01-USB (optional)
USB power plug Type FSP007-P01P (manufacturer’s designation)
Primary
Secondary 5.2 V
Further data Protection class II
100–240 V~, ±10%, 50–60 Hz, ±5%, < 0.2 A
, ± 5%, 1.4 A (max.)
DC
IP40 in accordance with EN 60529/IEC 60529
Installation Instructions EVO1S1 | SPO1S1 9

7.2 Model-specific Data
Unit Value Value
Model PMA.Evolution, EVO1S1 PMA.HD, SPO1S1
Weighing capacity g 7500 | 999.95 2200
Readability g 0.1 | 0.05 0.01 | 0.1
Tare range (subtractive) g -7500 -2200
External adjustment weight /
accuracy class
Size of weighing pan
Net weight kg 2.4 2.3
kg 1, 2, 5 /
F2 or better
d mm
233 180
1, 2 /
F1 or better
7.3 Verified Models with EC Type Approval Certificate: Model-Specific Technical Specifications
Unit Value Value
Model PMA.Evolution, EVO1S1 PMA.HD, SPO1S1
Accuracy class II III
Type PMA-EV PMA-HD
Weighing capacity max. g 7500 2200
Scale interval d g 0.1 1
Verification scale interval e g 1 1
Temperature range +10°C to +30°C +10°C to +40°C
Tare equalization range (subtractive)
< 100% from max. weighing
capacity
< 100% from max. weighing
capacity
8 EU Declaration of Conformity
The attached Declaration of Conformity hereby confirms compliance of the device with the directives cited.
The declaration of conformity supplied here is for verified balances for use in the EEA. Please keep it in a safe place.
10 Installation Instructions EVO1S1 | SPO1S1

Deutsch
Inhalt
1 Über dieses Dokument...................................11
1.1 Gültigkeit ............................................11
1.2 Darstellungsmittel ...................................11
2 Sicherheitshinweise
2.1 Bestimmungsgemäße Verwendung..................11
2.2 Personalqualifikation ................................12
2.3 Bedeutung dieser Anleitung .........................12
2.4 Einwandfreiheit des Geräts ..........................12
2.5
Arbeiten an der elektrischen Ausrüstung des Geräts
2.6 Persönliche Schutzausrüstung.......................13
2.7 Sicherheitshinweise zur Bedienung des Gerätes.....13
3 Installation
3.1 Lieferumfang.........................................13
3.2 Auspacken ...........................................13
3.3 Aufstellort wählen ...................................13
3.4 Waage montieren....................................13
3.5 Spannungsversorgung herstellen....................14
3.6 Diebstahlsicherung...................................14
3.7 Nivellieren............................................15
3.8 Anwärmzeit ..........................................15
4 Reinigung und Wartung
4.1 Reinigen..............................................15
4.2 Warten ...............................................15
5 Entsorgung
5.1 Hinweise zur Dekontamination......................16
6 Zubehör
7 Technische Daten
7.1 Allgemeine Daten....................................17
7.2 Modellspezifische Daten.............................18
7.3 Geeichte Modelle mit EG-Bauartzulassung:
8 EU-Konformitätserklärung
...............................................13
...............................................16
...................................................16
Modellspezifische technische Daten .................18
......................................11
..12
.................................15
........................................17
..............................18
VORSICHT
Kennzeichnet eine Gefährdung, die eine mittelschwere oder
leichte Körperverletzung zur Folge haben kann, wenn sie nicht
vermieden wird.
ACHTUNG
Kennzeichnet eine Gefährdung, die Sachschäden zur Folge
haben kann, wenn sie nicht vermieden wird.
1.2.2 Weitere Darstellungsmittel
t
y
[ ] Verweis auf Bedien- und Anzeigeelemente
Abbildungen der Bedienanzeige
Die Abbildungen in dieser Anleitung basieren auf „Standard“-Waagen. Bei den geeichten Waagen können einige
Anzeigedarstellungen und Protokolle von den Abbildungen
etwas abweichen. Wo dies für den Betrieb von Bedeutung ist,
werden die Unterschiede im Text erläutert.
Handlungsanweisung: Beschreibt Tätigkeiten, die
ausgeführt werden müssen.
Ergebnis: Beschreibt das Ergebnis der ausgeführten Tätigkeiten.
Dieses Symbol gibt einen Hinweis für den eichpflichtigen Verkehr für konformitätsbewertete
(geeichte) Waagen.
Im weiteren Text steht der Begriff ‚geeicht‘ für
den Fachausdruck konformitätsbewertet.
2 Sicherheitshinweise
2.1 Bestimmungsgemäße Verwendung
1 Über dieses Dokument
1.1 Gültigkeit
Diese Anleitung gilt für Farbmischwaagen der Modelle:
− EVO1S1
− SPO1S1
1.2 Darstellungsmittel
Der in der Anleitung verwendete Begriff Gerät bezeichnet
immer die Kombination Waage und Netzgerät.
1.2.1 Warnungen
WARNUNG
Kennzeichnet eine Gefährdung, die Tod oder schwere Körperverletzung zur Folge haben kann, wenn sie nicht vermieden wird.
Diese Waage ist nur bestimmt für das Mischen von Farben und
Lacken außerhalb von explosionsgefährdeten Bereichen. Zur
Aufnahme der Materialien müssen geeignete Gefäße verwendet werden.
Die Waage darf sowohl über das Display im Stand Alone
Betrieb, als auch mit Hilfe einer auf dem PC installierten
Applikationssoftware, z. B. eine Farbmischapplikation des
Lackherstellers gesteuert werden. Der PC wird dabei über ein
USB Kabel mit der Waage verbunden.
Die Anleitung ist Teil des Geräts. Das Gerät ist ausschließlich
für den Einsatz gemäß dieser Anleitung bestimmt.
Jede weitere Verwendung gilt als nicht bestimmungsgemäß.
Wenn das Gerät nicht bestimmungsgemäß eingesetzt wird:
Die Schutzmaßnahmen des Geräts können beeinträchtigt
werden. Dies kann zu unabsehbaren Personenschäden oder
Sachschäden führen.
Bei Verwendung in Anlagen und Umgebungsbedingungen mit
erhöhten Sicherheitsanforderungen die Auflagen und Bestimmungen Ihres Landes beachten.
Installationsanleitung EVO1S1 | SPO1S1 11
Einsatzbedingungen für das Gerät
Das Gerät nur in Gebäuden verwenden.
Das Gerät nur mit den Ausstattungen und unter Betriebsbe-
dingungen einsetzen wie sie in den technischen Daten dieser
Anleitung beschrieben sind.
Das Gerät nicht eigenmächtig umbauen oder technisch
verändern. Umbaumaßnahmen und technische Änderungen
am Gerät sind nur nach einer vorherigen schriftlichen
Genehmigung durch Sartorius gestattet.
Das Gerät sowie das von Sartorius gelieferte Zubehör nicht
extremen Temperaturen, aggressiven chemischen Dämpfen,
Feuchtigkeit, Stößen, Vibrationen oder starken elektromagnetischen Feldern aussetzen. Die Umgebungsbedingungen
beachten. Die Verbindungskabel zwischen den Geräten sowie
die Ummantelung der Litzen der inneren Verdrahtungen
bestehen aus PVC-Materialien. Chemikalien, die diese Materialien angreifen, müssen von diesen Leitungen ferngehalten
werden.
2.2 Personalqualifikation
Diese Anleitung richtet sich an die unten genannten Zielgruppen. Alle Personen, die am Gerät arbeiten, müssen über die
genannten Kenntnisse und Zuständigkeiten verfügen.
Wenn bei den beschriebenen Tätigkeiten in dieser Anleitung
keine Qualifikation angegeben ist: Die beschriebenen Tätigkeiten richten sich an die Zielgruppe „Bediener“.
Zielgruppe Kenntnisse und Zuständigkeiten
Elektrofachkraft
Betreiber Der Betreiber des Geräts ist für die Einhaltung
Die Elektrofachkraft kann aufgrund ihrer fachlichen Ausbildung, Kenntnisse und Erfahrungen
sowie Kenntnis der einschlägigen Bestimmungen die ihr übertragenen Arbeiten beurteilen
und mögliche Gefahren erkennen.
der Sicherheits- und Arbeitsschutzbestimmungen zuständig.
Der Betreiber muss sicherstellen, dass alle Personen, die am Gerät arbeiten, Zugang zu den relevanten Informationen haben und in die Arbeit
am Gerät eingewiesen sind.
2.3 Bedeutung dieser Anleitung
Die Nichtbeachtung der Anleitung kann ernste Folgen haben,
z. B. Gefährdung von Personen durch elektrische, mechanische
oder chemische Einflüsse.
t Vor allen Arbeiten am Gerät die Anleitung aufmerksam
und vollständig durchlesen.
t Bei Verlust der Anleitung Ersatz anfordern oder die
aktuelle Anleitung von der Sartorius-Internetseite herunterladen (www.sartorius.com).
t Die Informationen aus der Anleitung müssen für alle
Personen verfügbar sein, die am Gerät arbeiten.
Wenn einzelne Tätigkeiten durch andere Zielgruppen oder den
Sartorius Service ausgeführt werden müssen: Die benötigte
Qualifikation ist bei der Beschreibung der Tätigkeit
angegeben.
Zielgruppe Kenntnisse und Zuständigkeiten
Bediener Der Bediener ist mit dem Betrieb des Geräts und
den damit verbundenen Arbeitsprozessen vertraut. Er kennt die Gefahren, die bei Arbeiten
mit dem Gerät auftreten können und kann diese
Gefahren vermeiden.
Der Bediener ist in den Betrieb des Geräts eingewiesen. Die Einweisung erfolgt im Rahmen
der Inbetriebnahme und wird durch den
Betriebsingenieur / Laborleiter oder den Betreiber des Geräts durchgeführt.
Betriebsingenieur /
Laborleiter
Der Betriebsingenieur / Laborleiter entscheidet
über den Einsatz und die Parametrierung des
Geräts.
Der Betriebsingenieur / Laborleiter ist in den
Betrieb des Geräts eingewiesen. Die Einweisung
erfolgt im Rahmen der Inbetriebnahme und
wird durch den Sartorius Service oder den
Betreiber durchgeführt.
2.4 Einwandfreiheit des Geräts
Ein beschädigtes Gerät kann zu Fehlfunktionen führen oder
schwer erkennbare Gefährdungen hervorrufen.
t Das Gerät nur in sicherheitstechnisch einwandfreiem
Zustand betreiben.
t Beschädigtes Gerät sofort spannungslos schalten.
t Beschädigungen umgehend durch den Sartorius Service
beheben lassen.
2.5 Arbeiten an der elektrischen Ausrüstung des Geräts
Jegliche Arbeiten und Modifikationen an der elektrischen
Ausrüstung des Geräts dürfen nur vom Sartorius Service
vorgenommen werden. Das Gerät darf nur vom Sartorius
Service geöffnet werden.
Versiegelungsmarke an geeichten Varianten
Der Gesetzgeber fordert eine Versiegelung der
geeichten Waage. Diese Versiegelung erfolgt
mittels einer Klebemarke mit Namenszug „Sartorius“. Wird sie entfernt, erlischt die Eichgültigkeit
und die Waage muss geeicht werden. Bei geeichten Waagen für den Einsatz im EWR gilt die bei
der Eichung ausgestellte und der Waage beigelegte Konformitätserklärung. Bitte unbedingt
aufbewahren.
12 Installationsanleitung EVO1S1 | SPO1S1

Deutsch
2.6 Persönliche Schutzausrüstung
Die persönliche Schutzausrüstung schützt vor Gefährdungen
durch die verarbeiteten Materialien.
t Wenn der Arbeitsbereich oder der Prozess, in dem das
Gerät eingesetzt wird, eine persönliche Schutzausrüstung
erfordert: Die persönliche Schutzausrüstung tragen.
2.7 Sicherheitshinweise zur Bedienung des Gerätes
− Die Glasscheibe des Bediendisplays nicht beschädigen (z. B.
durch herabfallende Gegenstände, Schläge oder starken
Druck). Wird die Glasscheibe beschädigt, ist das Gerät
sofort vom Netz zu trennen!
− Die Oberfläche des Bediendisplays nicht mit spitzen,
scharfen, harten oder rauen Gegenständen berühren,
sondern ausschließlich mit einem dafür vorgesehenen
Touchpen oder mit den Fingerspitzen. Zum Reinigen
keinesfalls Teile der Kleidung (z. B. Jackenärmel) oder
Schwämme verwenden, da diese die Oberfläche zerkratzen
können (z. B. durch Nieten oder Knöpfe im Jackenärmel
oder Sand in Schwämmen).
− Elektrostatische Aufladung der Glasscheibe des Bediendisplays und des Kunststoffgehäuses vermeiden.
Beschädigungsgefahr der Waage!
Verschließen Sie nie die Farbdose mit einem
Hammer, solange diese auf der Waagschale
steht.
Stellen Sie die Farbdose zum Verschließen auf
einen festen stabilen Untergrund.
3 Installation
äußere Beschädigungen.
t Wenn das Gerät zwischengelagert wird: Das Gerät gemäß
den Umgebungsbedingungen lagern (Umgebungsbedingungen siehe Kapitel „7.1 Allgemeine Daten“, Seite 17
t Bewahren Sie alle Teile der Originalverpackung für einen
eventuellen Rücktransport auf. Lassen Sie beim Versand
keine Kabel stecken.
3.3 Aufstellort wählen
Den richtigen Standort wählen:
− Das Gerät auf eine stabile, erschütterungsarme, gerade
Fläche stellen.
− Zugang zu dem Gerät jederzeit freihalten.
− Die Geräte gemäß dem IP-Schutz sorgfältig behandeln. Die
Umgebung muss entsprechend gesichert sein.
− Bei Verwendung in Anlagen und Umgebungs bedingungen
mit erhöhten Sicherheitsanforderungen die Auflagen und
Bestimmungen Ihres Landes beachten.
t Bei der Aufstellung Standorte mit ungünstigen Einflüssen
vermeiden:
− Hitze (Heizung, Sonneneinstrahlung)
− Direkter Luftzug durch offene Fenster, Klimaanlagen
und Türen
− Erschütterungen während der Messung
− Personendurchgangsverkehr
− Extrem hohe Luftfeuchtigkeit
− Elektromagnetische Felder
− Extrem trockene Luft
Akklimatisieren
Wenn ein kaltes Gerät in eine warme Umgebung gebracht
wird kann dies zu Kondensation von Luftfeuchtigkeit führen
(Betauung). Akklimatisieren Sie das vom Netz getrennte Gerät
ca. 2 Stunden, bevor Sie es wieder an die Versorgungsspannung anschließen.
3.1 Lieferumfang
Modell PMA.
Evolution
Waagschale groß: d 233 mm
Waagschale klein: d 180 mm
USB-Kabel x x
Netzgerät mit länder-
spezifischem Netzadapter
Installationsanleitung x x
x –
– x
optional optional
PMA.HD
3.2 Auspacken
Vorgehen
t Öffnen Sie die Verpackung und entnehmen Sie vorsichtig
alle Teile.
t Überprüfen Sie das Gerät nach dem Auspacken sofort auf
3.4 Waage montieren
3.4.1 Waagschale aufsetzen
ACHTUNG
Für alle Montagearbeiten muss das Gerät von der Spannungsversorgung getrennt sein.
t Setzen Sie die Waagschale von
oben auf die Waage auf.
Installationsanleitung EVO1S1 | SPO1S1 13
3.4.2 Waage anschließen
Netz-Adaptersets
t Stecken Sie das USB-Kabel auf
der Rückseite des Displays in die
USB-Buchse.
t Verlegen Sie das USB-Kabel
durch die Kabelhalter auf der
Rückseite der Waage.
3.5 Spannungsversorgung herstellen
Die Spannungsversorgung der Waage erfolgt in der Regel über
den USB-Anschluss ihres PCs, der auch die Daten für die
Waage liefert. Sollte dieser USB-Anschluss nicht verfügbar
sein, kann die Spannungsversorgung durch das Netzgerät
YEPS01-USB (siehe Kapitel „6 Zubehör“, Seite 16) erfolgen,
das mit verschiedenen länderspezifischen Netzadaptern
geliefert wird.
ACHTUNG
− Der auf dem Netzgerät aufgedruckte Spannungswert muss
mit der lokalen Netzspannung übereinstimmen (Anschlussdaten siehe Kapitel „7.1 Allgemeine Daten“, Seite 17).
− Sollte die angegebene Netzspannung oder die Steckerausführung des Netz gerätes nicht der verwendeten Ländernorm entsprechen, verständigen Sie bitte die nächste
Sartorius-Vertretung.
Die Spannungsversorgung über das Netzgerät wird nur
benötigt:
− wenn kein PC oder Notebook vorhanden ist.
− in Ausnahmefällen die Ausgangsspannung der
USB-Schnittstelle des PCs oder Notebooks nicht ausreichend ist.
Beutel Region / Land
YEPS01-PS1 − USA und Japan (US+JP)
− Europa (EU)
− Großbritannien (GB)
YEPS01-PS6 − Argentinien (AR)
− Brasilien (BR)
− Australien (AU)
− Südafrika (ZA)
YEPS01-PS7 − China (CN)
− Indien (IN)
− Korea (KR)
t Den Netzsteckeradapter in die
Aufnahme des Netzgeräts
schieben. Die geriffelte Taste
muss nach von zeigen.
t Den Netzsteckeradapter bis zum
Anschlag schieben, bis er hörbar
einrastet.
t Prüfen, ob der Netzsteckeradap-
ter fest verriegelt ist. Dazu den
Netzsteckeradapter leicht
zurückziehen.
y Wenn sich der Netzsteckeradap-
ter nicht verschieben lässt: Der
Netzsteckeradapter ist verriegelt.
Netzadapter demontieren /
tauschen
t Von oben auf die geriffelte Taste
drücken und dabei den Netzadapter nach hinten schieben.
t Den Netzadapter aus dem
Netzgerät herausschieben und
entnehmen.
Anschluss an Spannungsversorgung
t Stecken Sie das USB-Kabel in eine USB-Buchse, z. B.
Personalcomputer, Laptop.
Der Zusammenbau des Netzgerätes ist im Folgenden
beschrieben.
3.5.1 Netzgerät zusammensetzen
Wenn ein Netzgerät eingesetzt wird: Das Netzgerät muss
montiert werden.
WARNUNG Tödliche Stromschläge und Geräteschäden
t
durch falsche Netzsteckeradapter! Nur den länderspezifischen Netzsteckeradapter verwenden. Den Netzsteckeradapter nie getrennt vom Netzgerät in die Steckdose stecken.
t Wählen Sie den zu Ihrem Stromnetz passenden Netzadap-
ter aus. Der Netzadapter muss für die Steckdose am
Aufstellort geeignet sein.
14 Installationsanleitung EVO1S1 | SPO1S1
Anschluss an Netzgerät (Option)
t Stecken Sie das USB-Anschlusskabel in das Netzgerät
YEPS01-USB.
t Stecken Sie das Netzgerät in eine Steckdose (Netzspan-
nung).
3.6 Diebstahlsicherung
t Sichern Sie die Waage bei
Bedarf an der Rückseite.
3.7 Nivellieren
0
30
Nivellieren bei Modell PMA.HD und bei geeichten Modellen
Mit der Nivellierung der Waage können Neigungen am
Aufstellort der Waage ausgeglichen werden. Eine exakte
waagerechte Stellung der Waage gewährleistet genaue
Wägeergebnisse.
Die Waage muss nach jedem Standortwechsel neu nivelliert
und danach gegebenenfalls justiert werden.
t Drehen Sie die beiden Fuß-
schrauben gemäß Abbildung,
12*
9*
6*
* Uhr
bis die Luftblase der Libelle in
der Kreismitte steht.
− Luftblase bei »12 Uhr«: beide
Fußschrauben im Uhrzeigersinn
drehen.
− Luftblase bei »3 Uhr«: linke
Fußschraube im Uhrzeigersinn,
rechte Fußschraube gegen den
Uhrzeigersinn drehen.
− Luftblase bei »6 Uhr«: beide
Fußschrauben gegen den
Uhrzeigersinn drehen.
− Luftblase bei »9 Uhr«: linke
Fußschraube gegen den Uhrzeigersinn, rechte Fußschraube
im Uhrzeigersinn drehen.
Deutsch
WARNUNG Gefahr durch elektrische Span-
nung!
Vorhandenes Netzgerät (optional) vom Netz trennen. Gegebenenfalls angeschlossenes Datenkabel am PC abziehen. Öffnen
Sie niemals die Waage oder das Netzgerät. Diese enthalten
keine Geräteteile, die vom Bediener gereinigt, repariert oder
ausgetauscht werden können.
ACHTUNG
Folgende Teile nicht mit Aceton oder aggressiven Reinigungsmitteln reinigen:
− Netzsteckereingang
− Datenschnittstelle
− Schilder sowie alle restlichen Kunststoffteile
Vorgehen
t Das Gerät von der Spannungsversorgung trennen.
t ACHTUNG Darauf achten, dass keine Flüssigkeit oder
Staub in die Waage oder in das Netzgerät gelangen.
t ACHTUNG Korrosion oder Beschädigungen am Gerät
durch ungeeignete Reinigungsmittel!
t Keine ätzenden, chloridhaltigen und aggressiven
Reinigungsmittel verwenden.
t Keine Reinigungsmittel verwenden, die scheuernde
Bestandteile enthalten, z. B. Scheuermilch, Stahlwolle.
t Zur Reinigung nur weiche Bürsten und Putzlappen
verwenden.
t Keine lösemittelhaltigen Reinigungsmittel verwenden.
3.8 Anwärmzeit
Geeichte Waagen im eichpflichtigen Verkehr
einsetzen:
Anwärmzeit von mindestens 24 Stunden einhalten
nach erstmaligem Anschluss an das Stromnetz.
Um genaue Resultate zu liefern,
benötigt die Waage eine Anwärmzeit von mindestens 30 Minuten
nach erstmaligem Anschluss an die
Spannungsversorgung. Erst dann
hat das Gerät die notwendige
Betriebstemperatur erreicht.
4 Reinigung und Wartung
4.1 Reinigen
Vor Reinigen des Netzgerätes oder der Waage: Alle Geräte
spannungslos schalten.
Bedienfeld reinigen
t Vor dem Reinigen des Bedienfeldes: Das Gerät ausschalten,
da durch die Berührung sonst ungewollt Eingaben
erfolgen können.
Gerätegehäuse reinigen
t Das Gehäuse mit einem leicht feuchten Reinigungstuch
abwischen. Für stärkere Verschmutzungen eine milde
Seifenlauge verwenden.
t Das Gerät danach mit einem weichem Tuch abwischen.
4.2 Warten
Um die fortdauernde Messsicherheit Ihrer Waage zu gewährleisten, empfehlen wir die regelmäßige, mindestens jährliche
Wartung. Der Sartorius Service bietet Ihnen hierzu unterschiedliche Wartungsverträge an, die wir individuell an Ihre
Bedürfnisse anpassen.
Im Rahmen jeder Wartung sollte immer ein Kalibrierzertifikat
erstellt werden. Lassen Sie eine sicherheitstechnische Überprüfung des Netzgerätes und dessen Anschlüsse in angemessenen
Abständen von einer Elektrofachkraft durchführen (z. B. alle
2 Jahre).
Installationsanleitung EVO1S1 | SPO1S1 15
5 Entsorgung
6 Zubehör
5.1 Hinweise zur Dekontamination
Der Betreiber ist für die Einhaltung der landesrechtlichen
Bestimmungen zur sachgerechten Deklaration bei Transport
und Entsorgung und zur sachgerechten Entsorgung des Geräts
verantwortlich.
WARNUNG
Verletzungsgefahr durch kontaminierte Geräte!
Mit gefährlichen Stoffen kontaminierte Geräte (ABC-Kontamination) werden nicht zur Reparatur und Entsorgung
zurückgenommen.
5.1.1 Hinweise zur Entsorgung
Das Gerät und das Zubehör gehören nicht in den Hausmüll,
denn sie sind aus hochwertigen Materialien hergestellt, die
recycelt und wiederverwendet werden können. Alle Teile
müssen durch Entsorgungseinrichtungen fachgerecht entsorgt
werden.
Die Verpackung besteht aus umweltfreundlichen Materialien,
die als Sekundärrohstoffe dienen können.
5.1.2 Entsorgen
Voraussetzungen
Das Gerät ist dekontaminiert.
Vorgehen
t Das Gerät entsorgen. Dazu die Entsorgungshinweise auf
unserer Internetseite (www.sartorius.com) beachten.
t Die Verpackung gemäß den landesrechtlichen Bestimmun-
gen entsorgen.
Zubehör Bestellnummer
USB-Kabel YCC01-0040M5
Netzgerät (5,2 V / 1,4 A) YEPS01-USB
Netzadapterset für YEPS01-USB YEPS01-PS1
− USA und Japan (US+JP)
− Europa (EU)
− Großbritannien (GB)
Netzadapterset für YEPS01-USB YEPS01-PS6
− Argentinien (AR)
− Brasilien (BR)
− Australien (AU)
− Südafrika (ZA)
Netzadapterset für YEPS01-USB YEPS01-PS7
− China (CN)
− Indien (IN)
− Korea (KR)
Arbeitsschutzhaube für Bedienfeld,
10er Pack
Arbeitsschutzhaube für Stativ,
PMA.Evolution, 10er Pack
Arbeitsschutzhaube für Waagschale,
PMA.Evolution, 10er Pack
Justiergewichte
für PMA.Evolution:
− 5 kg, Genauigkeitsklasse F2 YCW654-AC-00
− 2 kg, Genauigkeitsklasse F2 YCW624-AC-00
− 1 kg, Genauigkeitsklasse F2 YCW614-AC-00
für PMA.HD:
− 2 kg, Genauigkeitsklasse F1 YCW623-AC-00
− 1 kg, Genauigkeitsklasse F1 YCW613-AC-00
YDC03PMA10
YDC03PMA-CO10
YDC03PMA-WP10
16 Installationsanleitung EVO1S1 | SPO1S1

Deutsch
7 Technische Daten
7.1 Allgemeine Daten
Angabe Einheit Wert
Waage
Spannungsversorgung nur über USB-Schnittstelle oder Sartorius Netzgerät YEPS01-USB
Eingangsspannung V
Leistungsaufnahme W 2,0
Weitere Daten IP40 gemäß EN 60529/IEC 60529
Umgebungsbedingungen
Die technischen Daten gelten bei folgenden Umgebungsbedingungen:
Umgebung Verwendung nur in Innenräumen
Umgebungstemperatur* °C +10 – +30
Betriebsfähigkeit °C Gewährleistet zwischen +5 – +45
Lager und Transport °C –10 – +60
Relative Luftfeuchte % 15 – 80 für Temperaturen bis zu 30 °C nicht-kondensierend,
Schnittstellenanschluss USB, Typ B (virtuelle serielle Schnittstelle)
Format 7 Bit ASCII, 1 Startbit, 1 oder 2 Stop-Bits
Parität gerade, ungerade, keine Parität
Übertragungsgeschwindigkeit 600 bis 57600 Bit/s
Handshake Software oder Hardware
Elektromagnetische Verträglichkeit gemäß EN 61326-1/IEC61326-1 Elektrische Mess-, Steuer-, Regel- und
Störfestigkeit Grundanforderungen
Störaussendung Klasse B
DC
+5,0
linear abnehmend bis zu 50 % relativer Luftfeuchte bei 40 °C
Laborgeräte – EMV-Anforderungen – Teil 1: Allgemeine Anforderungen
Geeignet für den Gebrauch im Wohnbereich und Bereichen, die direkt
an ein Niederspannungsnetz angeschlossen sind, das (auch) Wohngebäude versorgt.
Geeichte Waagen gemäß EU entsprechen den Anforderungen der
EG-Richtlinie 2014/31/EU mit EN45501:2015 bzw. OIML R76:2006.
* Bei geeichten Waagen gemäß EU, siehe Angaben auf der Waage.
** Bei geeichten Waagen gemäß EU gelten die gesetzlichen Vorschriften
Wählbare Anwendungsprogramme Rekalkulation, Rezeptur
Netzgerät YEPS01-USB (optional)
USB Steckernetzteil Type FSP007-P01P (Herstellerbezeichnung)
Primär
Sekundär 5,2 V
Weitere Daten Schutzklasse II
100 – 240 V~, ±10 %, 50 – 60 Hz, ±5 %, < 0,2 A
, ± 5 %, 1,4 A (max.)
DC
IP40 gemäß EN 60529/IEC 60529
Installationsanleitung EVO1S1 | SPO1S1 17

7.2 Modellspezifische Daten
Einheit Wert Wert
Modell PMA.Evolution, EVO1S1 PMA.HD, SPO1S1
Wägebereich g 7500 | 999,95 2200
Ablesbarkeit g 0,1 | 0,05 0,01 | 0,1
Tarierbereich (subtraktiv) g -7500 -2200
Externer Justiergewichtswert /
Genauigkeitsklasse
Größe der Waagschale
Nettogewicht kg 2,4 2,3
kg 1, 2, 5 /
F2 oder besser
d mm
233 180
1, 2 /
F1 oder besser
7.3 Geeichte Modelle mit EG-Bauartzulassung: Modellspezifische technische Daten
Einheit Wert Wert
Modell PMA.Evolution, EVO1S1 PMA.HD, SPO1S1
Genauigkeitsklasse II III
Bauart PMA-EV PMA-HD
Wägebereich Max g 7500 2200
Ziffernschritt d g 0,1 1
Eichwert e g 1 1
Temperaturbereich +10°C – +30°C +10°C – +40°C
Taraausgleichsbereich (subtraktiv)
< 100% vom maximalen Wägebereich
< 100% vom maximalen Wägebereich
8 EU-Konformitätserklärung
Mit der beigefügten Konformitätserklärung wird die Übereinstimmung des Geräts mit den benannten Richtlinien erklärt.
Bei geeichten Waagen für den Einsatz im EWR gilt die der Waage beigelegte Konformitätserklärung. Bitte unbedingt
aufbewahren.
18 Installationsanleitung EVO1S1 | SPO1S1
Français
Table des matières
1 À propos de ce manuel ..................................19
1.1 Validité...............................................19
1.2 Typographie..........................................19
2 Consignes de sécurité
2.1 Utilisation conforme.................................19
2.2 Qualification du personnel ..........................20
2.3 Importance de ce manuel............................20
2.4 État de l'appareil.....................................20
2.5 Travaux sur l’équipement électrique de l’appareil...20
2.6 Équipement de protection individuelle..............21
2.7 Consignes de sécurité concernant l’utilisation de
l’appareil .............................................21
3 Installation
3.1 Contenu de la livraison ..............................21
3.2 Déballage ............................................21
3.3 Choisir le lieu d'installation..........................21
3.4 Monter la balance ...................................21
3.5 Raccorder l'appareil à l'alimentation électrique.....22
3.6 Système antivol......................................22
3.7 Mettre à niveau......................................23
3.8 Temps de préchauffage..............................23
4 Nettoyage et maintenance
4.1 Nettoyage............................................23
4.2 Maintenance .........................................23
5 Recyclage
5.1 Instructions de décontamination....................24
...............................................21
. . . . . . . . . . . . . . . . . . . . . . . . . . . . . . . . . . . . . . . . . . . . . . . . . 24
....................................19
..............................23
1.2.1 Avertissements
AVERTISSEMENT
Signale un danger qui est susceptible d’entraîner la mort ou
des blessures graves s’il n’est pas évité.
ATTENTION
Signale un danger qui est susceptible d'entraîner des blessures
moyennes ou légères s'il n'est pas évité.
AVIS
Signale un danger qui est susceptible de provoquer des
dommages matériels s'il n'est pas évité.
1.2.2 Autres signes typographiques
t
y
[ ]
Instruction : décrit des actions qui doivent être
effectuées.
Résultat : décrit le résultat des actions qui viennent
d'être effectuées.
Référence à des éléments de commande et d'affichage
Ce symbole donne une indication relative à l’utilisation
en métrologie légale de balances évaluées conformes
(approuvées pour l’utilisation en métrologie légale).
Par la mention « approuvé pour l’utilisation en
métrologie légale », le texte fait référence à l’évaluation de la conformité.
6 Accessoires
7 Caractéristiques techniques
7.1 Caractéristiques générales...........................25
7.2 Caractéristiques techniques spécifiques aux
7.3 Modèles approuvés pour l’utilisation en métrologie
8 Déclaration de conformité UE
................................................24
.............................25
différents modèles ...................................26
légale avec approbation CE de type :
caractéristiques techniques spécifiques aux
différents modèles ...................................26
..........................26
1 À propos de ce manuel
1.1 Validité
Ce manuel d'installation est valable pour les modèles de
balances pour peintures suivants :
− EVO1S1
− SPO1S1
1.2 Typographie
Le terme « appareil » utilisé dans le manuel désigne toujours la
combinaison de la balance et du bloc d’alimentation.
Affichage sur l'écran de commande
Les illustrations représentées dans ce manuel se basent sur les
balances « standard ». Si vous utilisez une balance approuvée
pour l'usage en métrologie légale, il se peut que certains
affichages à l'écran et certains rapports diffèrent légèrement
des illustrations représentées. Ces différences sont expliquées
si cela s'avère nécessaire pour le fonctionnement.
2 Consignes de sécurité
2.1 Utilisation conforme
Cette balance doit uniquement être utilisée pour mélanger des
peintures et des vernis à l'extérieur d’atmosphères explosibles.
Utilisez des récipients adaptés pouvant contenir les matières.
La balance peut être commandée par l’intermédiaire de l’écran
en fonctionnement autonome ou à l’aide d’un logiciel d’application installé sur un ordinateur (par ex. une application de
mélange de peinture du fabricant de peinture). Pour ce faire, le
PC est connecté à la balance à l’aide d’un câble USB.
Le manuel fait partie intégrante de l'appareil. Lorsque vous
utilisez l'appareil, respectez obligatoirement les instructions
qui se trouvent dans ce manuel.
Toute autre utilisation est considérée comme non conforme. Si
l’appareil n’est pas utilisé de manière conforme : cela peut
Manuel d'installation EVO1S1 | SPO1S1 19
nuire aux mesures de protection prises au niveau de l'appareil
et entraîner des dommages corporels ou matériels imprévisibles.
Dans des installations et des conditions ambiantes exigeant
des mesures de sécurité accrues, vous devez respecter les
instructions et les dispositions en vigueur dans votre pays.
Conditions d’utilisation de l’appareil
Utilisez l'appareil uniquement dans des bâtiments.
Utilisez l’appareil uniquement avec l’équipement et dans les
conditions de fonctionnement qui sont spécifiés dans les
caractéristiques techniques de ce manuel.
N'apportez aucune transformation ni aucun changement
technique à l'appareil. Les transformations et modifications
techniques apportées à l’appareil nécessitent une autorisation
écrite préalable de Sartorius.
N’exposez pas l’appareil ainsi que les accessoires fournis par
Sartorius à des températures extrêmes, des vapeurs chimiques
agressives, de l’humidité, des chocs, des vibrations ou de forts
champs électromagnétiques. Respectez les conditions
ambiantes. Les câbles de raccordement entre les appareils
ainsi que les gaines des cordons de câblage internes sont en
PVC. Les produits chimiques pouvant endommager ces
matériaux doivent être tenus à l’écart de ces câbles.
2.2 Qualification du personnel
Ce mode d’emploi s’adresse aux groupes cibles mentionnés
ci-dessous. Toutes les personnes qui travaillent sur l'appareil
doivent disposer des connaissances et des compétences
mentionnées.
Si aucune qualification n'est indiquée avec les opérations
décrites dans ce manuel : les opérations décrites s'adressent
au groupe cible « Opérateur ».
Si certaines opérations doivent être effectuées par d'autres
groupes cibles ou par le Sartorius Service : la qualification
nécessaire est indiquée dans la description de l’opération.
Groupe cible Connaissances et compétences
Groupe cible Connaissances et compétences
Électricien
qualifié
Exploitant L'exploitant de l'appareil est responsable de
L’électricien qualifié peut évaluer les travaux
qui lui sont attribués et identifier les éventuels
dangers grâce à sa formation spécialisée, ses
connaissances et son expérience, ainsi que ses
connaissances des réglementations en vigueur.
faire respecter les règles de protection et de
sécurité au travail.
L'exploitant doit s'assurer que toutes les personnes qui travaillent sur l'appareil ont accès
aux informations importantes et ont reçu une
formation sur la manière d'utiliser l'appareil.
2.3 Importance de ce manuel
Le non-respect du manuel peut avoir des conséquences
graves, par ex. mise en danger des personnes par des évènements électriques, mécaniques ou chimiques.
t Avant toute intervention sur l’appareil, lisez le manuel
avec attention et dans son intégralité.
t En cas de perte du mode d'emploi, demandez-en un autre
exemplaire ou téléchargez la version la plus récente sur le
site Internet de Sartorius (www.sartorius.com).
t Toutes les personnes qui travaillent sur l'appareil doivent
avoir accès aux informations contenues dans le manuel.
2.4 État de l'appareil
Un appareil endommagé peut entraîner des dysfonctionnements ou des risques difficilement détectables.
t Utilisez l’appareil uniquement s’il est dans un état tech-
nique irréprochable.
t Si l'appareil est endommagé, mettez-le immédiatement
hors tension.
t En cas de dommages, demandez immédiatement au
Sartorius Service d'y remédier.
Opérateur L'opérateur connaît le fonctionnement de l'appa-
reil et les processus de travail qui y sont associés. Il
connaît les dangers potentiels lors du travail avec
l'appareil et il est en mesure de les éviter.
L'opérateur a reçu une formation pour savoir faire
fonctionner l'appareil. Cette formation a lieu dans
le cadre de la mise en service et est dispensée par
l'ingénieur d'exploitation / le responsable du laboratoire ou par l'exploitant de l'appareil.
Ingénieur
d'exploitation / responsable du
laboratoire
20 Manuel d'installation EVO1S1 | SPO1S1
L'ingénieur d'exploitation / le responsable du
laboratoire prend les décisions concernant
l'utilisation et le paramétrage de l'appareil.
L'ingénieur d'exploitation / le responsable du
laboratoire a reçu une formation pour savoir
faire fonctionner l'appareil. Cette formation a
lieu dans le cadre de la mise en service et est
dispensée par le Sartorius Service ou par l'exploitant de l'appareil.
2.5 Travaux sur l’équipement électrique de l’appareil
Seuls des techniciens du Sartorius Service sont autorisés à
effectuer des opérations et des modifications sur l'équipement
électrique de l'appareil. Seuls les membres du Sartorius Service
sont autorisés à ouvrir l’appareil.
Sceau adhésif sur les modèles approuvés pour
l’utilisation en métrologie légale
La législation exige que les balances approuvées
pour l’utilisation en métrologie légale portent un
sceau. Ce sceau est constitué d’une marque
adhésive portant l’inscription « Sartorius ». Si on
l’enlève, l’autorisation pour l’utilisation en métrologie légale n’est plus valide et la balance doit faire
l’objet d’une nouvelle vérification. Pour les balances
approuvées pour l’utilisation en métrologie légale
au sein de l’EEE, la déclaration de conformité jointe
à la balance et délivrée lors du calibrage s’applique.
Il est obligatoire de la conserver.
Français
2.6 Équipement de protection individuelle
L’équipement de protection individuelle protège contre les
risques qui émanent des matières traitées.
t Si la zone de travail ou le processus dans lequel l’appareil
est intégré nécessite un équipement de protection
individuelle : portez l'équipement de protection individuelle.
2.7 Consignes de sécurité concernant l’utilisation de l’appareil
− Veillez à ce que la vitre en verre de l’écran de commande
ne soit pas endommagée (par ex. par la chute d’objets, des
coups ou une forte pression). Si la vitre en verre est
endommagée, débranchez immédiatement l’appareil du
secteur !
− Ne touchez pas la surface de l’écran de commande avec
des objets pointus, coupants, durs ou rugueux, mais
exclusivement avec le stylet prévu à cet effet ou du bout
des doigts. Pour nettoyer l’écran, n’utilisez en aucun cas
des parties de vos vêtements (par ex. vos manches) ou des
éponges, car cela pourrait rayer la surface (par ex. à cause
d’œillets ou de boutons sur vos manches ou de sable dans
les éponges).
− Évitez que la vitre en verre de l’écran de commande et le
boîtier en plastique ne soient chargés électrostatiquement.
Risque de dommages sur la balance !
Ne fermez jamais les bidons de peinture avec
un marteau s'ils sont encore posés sur le
plateau de pesée.
Avant de fermer les bidons de peinture,
posez-les sur une surface stable et solide.
t Aussitôt après avoir déballé l’appareil, vérifiez s’il ne
présente aucune détérioration externe visible.
t Si vous entreposez l'appareil temporairement : conservez
l’appareil conformément aux conditions ambiantes
(conditions ambiantes, voir le chapitre « 7.1 Caractéristiques générales », page 25).
t Conservez tous les éléments de l’emballage pour les
retours éventuels. Débranchez tous les câbles avant de
réexpédier l'appareil !
3.3 Choisir le lieu d'installation
Choisissez un lieu d’installation adapté :
− Posez l’appareil sur une surface plane, stable et sans
vibrations.
− L’accès à l’appareil doit être libre en permanence.
− Manipulez les appareils avec soin conformément à l’indice
de protection IP. L’environnement doit être sécurisé en
conséquence.
− Dans des installations et des conditions ambiantes
exigeant des mesures de sécurité accrues, vous devez
respecter les instructions et les dispositions en vigueur
dans votre pays.
t Lors de l’installation, choisissez un emplacement adéquat
afin de ne pas exposer la balance aux influences externes
suivantes :
− Chaleur due à un radiateur ou aux rayons du soleil
− Courants d'air directs causés par des fenêtres ou des
portes ouvertes ou encore par un climatiseur
− Vibrations pendant la pesée
− Passage de personnes
− Humidité de l’air très élevée
− Champs électromagnétiques
− Air très sec
3 Installation
3.1 Contenu de la livraison
Modèle PMA.
Evolution
Grand plateau de pesée : d 233 mm
Petit plateau de pesée : d 180 mm
Câble USB x x
Bloc d'alimentation avec adaptateur
secteur spécifique au pays
Manuel d'installation x x
3.2 Déballage
Procédure
t Ouvrez l'emballage et retirez toutes les pièces avec
précaution.
x –
– x
En option En option
Adapter l'appareil à l'environnement
De la condensation peut se former lorsqu’un appareil froid est
placé dans un environnement plus chaud. Dans ce cas, adaptez
l'appareil débranché du secteur à la température de la pièce
pendant environ deux heures avant de le raccorder au secteur.
3.4 Monter la balance
PMA.HD
3.4.1 Poser le plateau de pesée.
AVIS
Ne branchez pas l’appareil au secteur avant d’avoir terminé le
montage.
t Posez le plateau de pesée sur la
balance par le dessus.
Manuel d'installation EVO1S1 | SPO1S1 21

3.4.2 Raccorder la balance
Jeux d’adaptateurs secteur
t Branchez le câble USB dans le
port USB à l’arrière de l’écran.
t Insérez le câble USB dans les
fixations à l’arrière de la
balance.
3.5 Raccorder l'appareil à l'alimentation électrique
En général, la balance est alimentée par le port USB de votre
PC qui fournit également les données pour la balance.
Si le port USB n’est pas libre, l’appareil peut être alimenté à
l’aide du bloc d’alimentation YEPS01-USB qui est livré avec
différents adaptateurs secteur spécifiques aux pays (voir
chapitre « 6 Accessoires », page 24).
AVIS
− Veillez à ce que la tension indiquée sur le bloc d’alimentation corresponde à la tension d’alimentation secteur sur
votre lieu d’installation (caractéristiques de connexion,
voir le chapitre « 7.1 Caractéristiques générales »,
page 25).
− Si la tension secteur ou le type de la fiche du bloc d'alimentation ne correspondent pas aux normes en vigueur
dans votre pays, contactez votre représentant Sartorius.
L’alimentation électrique à l’aide du bloc d’alimentation est
nécessaire uniquement dans les cas suivants :
− si aucun PC ou ordinateur n'est disponible,
− si, dans des cas exceptionnels, la tension de sortie du port
USB du PC ou de l’ordinateur portable n’est pas suffisante.
L'assemblage du bloc d'alimentation est décrit ci-après.
3.5.1 Assemblage du bloc d’alimentation
Si vous utilisez un bloc d’alimentation : le bloc d’alimentation
doit être monté.
AVERTISSEMENT Électrocutions mortelles et dom-
t
mages sur l’appareil en cas d’adaptateur secteur inadapté !
Utilisez uniquement l'adaptateur secteur spécifique au
pays. Ne branchez jamais l’adaptateur secteur dans la prise
de courant s’il n’est pas inséré dans le bloc d’alimentation.
t Choisissez le bloc d’alimentation adapté à votre réseau
électrique. L’adaptateur secteur doit être adapté à la prise
de courant sur le lieu d’installation de l’appareil.
Sachet Région / Pays
YEPS01-PS1 − États-Unis et Japon (US+JP)
− Europe (EU)
− Grande-Bretagne (GB)
YEPS01-PS6 − Argentine (AR)
− Brésil (BR)
− Australie (AU)
− Afrique du Sud (ZA)
YEPS01-PS7 − Chine (CN)
− Inde (IN)
− Corée (KR)
t Poussez l’adaptateur secteur
dans la fixation du bloc d’alimentation. La touche striée doit
être tournée vers l’avant.
t Enfoncez l’adaptateur secteur
jusqu’à ce que vous l’entendiez
s’enclencher.
t Vérifiez que l’adaptateur secteur
est parfaitement fixé en le tirant
légèrement vers l’arrière.
y Si l’adaptateur secteur ne bouge
pas : il est correctement
verrouillé.
Démontage / remplacement de
l’adaptateur secteur
t Appuyez sur le dessus de la
touche striée tout en poussant
l’adaptateur secteur vers
l’arrière.
t Poussez l’adaptateur secteur et
enlevez-le du bloc d’alimentation.
Raccordement à l'alimentation électrique
t Branchez le câble USB dans un port USB (par ex. sur un PC
ou un ordinateur portable).
Connexion au bloc d’alimentation (option)
t Raccordez le câble USB au bloc d’alimentation
YEPS01-USB.
t Branchez le bloc d’alimentation dans une prise (tension
électrique).
3.6 Système antivol
t Si nécessaire, fixez la balance à
l'aide du système antivol qui se
trouve à l'arrière.
22 Manuel d'installation EVO1S1 | SPO1S1

0
30
Français
3.7 Mettre à niveau
Mettre à niveau le modèle PMA.HD et les modèles approuvés pour l’utilisation en métrologie légale
La mise à niveau de la balance permet de compenser une
inclinaison ou des inégalités de la surface de travail sur
laquelle est installée la balance. Un positionnement horizontal
exact garantit des résultats de pesée précis.
La balance doit être remise à niveau et ajustée à chaque fois
qu’elle est déplacée.
t Tournez les deux pieds de
réglage comme indiqué sur
12*
9*
6*
* Heure
l’illustration jusqu’à ce que la
bulle d’air du niveau se trouve
au milieu du cercle.
− Bulle d’air à « 12 h » : tournez
les deux pieds de réglage dans le
sens horaire.
− Bulle d’air à « 3 h » : tournez le
pied de réglage gauche dans le
sens horaire et le pied de
réglage droit dans le sens
anti-horaire.
− Bulle d’air à « 6 h » : tournez les
deux pieds de réglage dans le
sens anti-horaire.
− Bulle d’air à « 9 h » : tournez le
pied de réglage gauche dans le
sens anti-horaire et le pied de
réglage droit dans le sens
horaire.
3.8 Temps de préchauffage
Utiliser des balances approuvées en métrologie
légale :
Observer un temps de préchauffage d’au moins
24 heures après le premier raccordement au
secteur.
Après le premier raccordement au
secteur, la balance a besoin d’un
temps de préchauffage d’au moins
30 minutes afin de pouvoir fournir
des résultats précis. L’appareil
atteindra alors la température de
fonctionnement nécessaire.
4 Nettoyage et
maintenance
4.1 Nettoyage
Avant de procéder au nettoyage du bloc d’alimentation ou de
la balance : mettez tous les appareils hors tension.
AVERTISSEMENT Danger dû à la tension
électrique !
Débranchez le bloc d'alimentation (optionnel) du secteur. Si
un câble de données est connecté au PC, débranchez-le.
N'ouvrez jamais la balance ni le bloc d'alimentation. Ils ne
contiennent pas de pièces qui doivent être nettoyées, réparées
ou remplacées par l'utilisateur.
AVIS
Ne nettoyez pas les parties suivantes avec de l’acétone ou des
produits de nettoyage corrosifs :
− Entrée de la fiche secteur
− Interface de données
− Plaques et tous les autres éléments en plastique
Procédure
t Débranchez l’appareil de l’alimentation électrique.
t AVIS Assurez-vous qu’aucun liquide ni aucune poussière
ne pénètre dans la balance ou dans le bloc d’alimentation.
t AVIS Des produits de nettoyage inadaptés risquent de
provoquer de la corrosion ou d'endommager l’appareil.
t N'utilisez pas de produits de nettoyage corrosifs,
agressifs et contenant du chlore.
t N'utilisez pas de produits nettoyants qui contiennent
des composants récurants (par ex. des produits à
récurer, laine d'acier).
t Pour nettoyer la balance, utilisez uniquement des
brosses souples et des chiffons.
t N’utilisez pas de produits de nettoyage qui contiennent
des solvants.
Nettoyer le panneau de commande
t Avant de nettoyer le panneau de commande : éteignez
l’appareil pour éviter d’effectuer involontairement des
saisies lorsque vous touchez le panneau.
Nettoyer le boîtier de l’appareil
t Essuyez le boîtier avec un chiffon légèrement humide. En
cas de saletés plus importantes, utilisez un savon doux.
t Ensuite, essuyez l’appareil avec un chiffon doux.
4.2 Maintenance
Il est conseillé d’effectuer la maintenance de votre balance au
moins une fois par an pour garantir en permanence des
mesures précises. À cet effet, le Sartorius Service propose
différents contrats de maintenance modulables selon vos
besoins.
Manuel d'installation EVO1S1 | SPO1S1 23

Un certificat de calibrage doit toujours être délivré dans le
cadre de la maintenance. Faites vérifier régulièrement la
sécurité du bloc d'alimentation et de ses connecteurs par un
électricien qualifié (par ex. tous les deux ans).
5 Recyclage
5.1 Instructions de décontamination
Il incombe à l’exploitant de l’appareil de faire respecter les
réglementations en vigueur relatives à la déclaration appropriée pour le transport et à l'élimination adéquate de
l'appareil.
AVERTISSEMENT
Risque de blessures causées par des appareils contaminés !
Les appareils contaminés par des matières dangereuses
(contaminations NBC) ne sont pas repris pour être réparés ou
éliminés.
5.1.1 Remarques concernant l'élimination et le
recyclage
L’appareil ainsi que les accessoires ne doivent pas être jetés
dans les ordures ménagères normales, car ils sont fabriqués à
partir de matériaux de grande qualité pouvant être recyclés et
réutilisés. Tous les éléments doivent être éliminés de manière
appropriée par des entreprises spécialisées.
L'emballage se compose entièrement de matériaux écologiques pouvant être recyclés.
5.1.2 Recyclage
Conditions requises
L'appareil a été décontaminé.
Procédure
t Recyclez l'appareil. Consultez à cet effet les consignes
d'élimination disponibles sur notre site Internet
(www.sartorius.com).
t Recyclez l'emballage conformément aux réglementations
en vigueur dans votre pays.
6 Accessoires
Accessoires Référence
Câble USB YCC01-0040M5
Bloc d’alimentation (5,2 V / 1,4 A) YEPS01-USB
Jeu d’adaptateurs secteur pour
YEPS01-USB
− États-Unis et Japon (US+JP)
− Europe (EU)
− Grande-Bretagne (GB)
Jeu d’adaptateurs secteur pour
YEPS01-USB
− Argentine (AR)
− Brésil (BR)
− Australie (AU)
− Afrique du Sud (ZA)
Jeu d’adaptateurs secteur pour
YEPS01-USB
− Chine (CN)
− Inde (IN)
− Corée (KR)
Housse de protection pour le panneau
de commande, boîte de 10
Housse de protection pour la colonne,
PMA.Evolution, boîte de 10
Housse de protection pour le plateau
de pesée, PMA.Evolution, boîte de 10
Poids d’ajustage
pour PMA.Evolution :
− 5 kg, classe de précision F2 YCW654-AC-00
− 2 kg, classe de précision F2 YCW624-AC-00
− 1 kg, classe de précision F2 YCW614-AC-00
pour PMA.HD :
− 2 kg, classe de précision F2 YCW623-AC-00
− 1 kg, classe de précision F2 YCW613-AC-00
YEPS01-PS1
YEPS01-PS6
YEPS01-PS7
YDC03PMA10
YDC03PMA-CO10
YDC03PMA-WP10
24 Manuel d'installation EVO1S1 | SPO1S1

Français
7 Caractéristiques techniques
7.1 Caractéristiques générales
Caractéristique Unité Valeur
Balance
Alimentation électrique Uniquement via port USB ou bloc d’alimentation Sartorius YEPS01-USB
Tension d'entrée V
Puissance absorbée W 2,0
Autres caractéristiques IP40 selon EN 60529 / CEI 60529
Conditions ambiantes
Les caractéristiques techniques sont valables pour les conditions ambiantes suivantes :
Environnement Utilisation uniquement à l’intérieur
Température ambiante* °C +10 – +30
Capacité opérationnelle °C Garantie entre +5 – +45
Stockage et transport °C –10 – +60
Humidité relative de l'air % 15 – 80 % pour des températures jusqu'à 30 °C sans condensation,
Port d’interface USB, type B (interface série virtuelle)
Format 7 bits ASCII, 1 bit de départ, 1 ou 2 bits d’arrêt
Parité Paire, impaire, pas de parité
Vitesse de transmission De 600 à 57 600 bits/s
Handshake Logiciel (Software) ou matériel (Hardware)
Compatibilité électromagnétique Selon EN 61326-1 / IEC61326-1 : Appareils électriques de mesure, de
Immunité aux émissions parasites Exigences de base
Émissions parasites Classe B
DC
+5,0
décroissance linéaire jusqu'à 50 % d'humidité relative de l'air à 40 °C
commande et de laboratoire – Exigences relatives à la CEM – Partie 1 :
exigences générales
Convient à une utilisation dans les zones résidentielles et les zones
directement raccordées au réseau basse tension alimentant (également)
des habitations.
Les balances approuvées pour une utilisation en métrologie légale selon
l’UE répondent aux exigences de la directive européenne 2014/31/UE
avec les normes EN45501:2015 ou OIML R76:2006.
* Pour les balances approuvées pour l’utilisation en métrologie légale
selon l’UE, voir les indications apposées sur la balance.
** Pour les balances approuvées pour l’utilisation en métrologie légale
selon l’UE, la législation en vigueur s’applique.
Programmes d'application sélectionnables
Bloc d’alimentation YEPS01-USB
(en option)
Bloc d’alimentation USB Type FSP007-P01P (désignation du fabricant)
Primaire
Secondaire 5,2 V
Autres caractéristiques Classe de protection II
Recalcul, formulation
100 – 240 V~, ±10 %, 50 – 60 Hz, ±5 %, < 0,2 A
, ± 5 %, 1,4 A (max.)
DC
IP40 selon EN 60529 / IEC 60529
Manuel d'installation EVO1S1 | SPO1S1 25

7.2 Caractéristiques techniques spécifiques aux différents modèles
Unité Valeur Valeur
Modèle PMA.Evolution, EVO1S1 PMA.HD, SPO1S1
Étendue de pesée g 7500 | 999,95 2200
Précision de lecture g 0,1 | 0,05 0,01 | 0,1
Étendue de tarage (soustractive) g -7500 -2200
Valeur du poids d'ajustage externe /
classe de précision
Dimensions du plateau de pesée
Poids net kg 2,4 2,3
kg 1, 2, 5 /
F2 ou mieux
d mm
233 180
1, 2 /
F1 ou mieux
7.3 Modèles approuvés pour l’utilisation en métrologie légale avec approbation CE de type : caractéristiques techniques spécifiques aux différents modèles
Unité Valeur Valeur
Modèle PMA.Evolution, EVO1S1 PMA.HD, SPO1S1
Classe de précision II III
Type PMA-EV PMA-HD
Étendue de pesée maximale g 7500 2200
Échelon réel d g 0,1 1
Échelon de vérification e g 1 1
Plage de température +10 °C – +30 °C +10 °C – +40°C
Étendue de compensation de tare
(soustractive)
< 100 % de l’étendue de pesée
maximale
< 100 % de l’étendue de pesée
maximale
8 Déclaration de conformité UE
Par la déclaration de conformité ci-jointe, la société Sartorius atteste que l'appareil est conforme aux directives mentionnées.
La déclaration de conformité fournie avec la balance est valide pour les balances approuvées pour l’utilisation en métrologie
légale dans l’Espace Économique Européen. Il est obligatoire de la conserver.
26 Manuel d'installation EVO1S1 | SPO1S1
Italiano
Indice
1 Riguardo questo manuale ...............................27
1.1 Validità...............................................27
1.2 Spiegazione dei simboli..............................27
2 Istruzioni di sicurezza
2.1 Uso previsto..........................................27
2.2 Qualificazione del personale.........................28
2.3 Importanza del manuale.............................28
2.4 Stato ineccepibile dell'apparecchio..................28
2.5
Interventi sulla dotazione elettrica dell'apparecchio
2.6 Attrezzature di protezione individuale ..............29
2.7
Istruzioni di sicurezza per l'utilizzo dell'apparecchio
3 Installazione
3.1 Equipaggiamento fornito............................29
3.2 Disimballare..........................................29
3.3 Scegliere il luogo di installazione....................29
3.4 Montare la bilancia ..................................29
3.5 Collegare all'alimentazione elettrica ................30
3.6 Dispositivo antifurto.................................30
3.7 Livellare ..............................................31
3.8 Tempo di preriscaldamento..........................31
4 Pulizia e manutenzione
4.1 Pulizia................................................31
4.2 Manutenzione .......................................31
5 Smaltimento
5.1 Indicazioni per la decontaminazione ................32
6 Accessori
7 Dati tecnici
7.1 Dati generali .........................................33
7.2 Dati specifici del modello............................34
7.3 Modelli omologati con approvazione CE del tipo:
dati tecnici specifici del modello ....................34
. . . . . . . . . . . . . . . . . . . . . . . . . . . . . . . . . . . . . . . . . . . . . . 29
..............................................32
..................................................32
...............................................33
....................................27
..28
..29
..................................31
ATTENZIONE
Questo simbolo segnala un pericolo che potrebbe causare
lesioni di media o lieve entità se non fosse evitato.
AVVISO
L'avviso segnala un pericolo che potrebbe causare danni
materiali se non fosse evitato.
1.2.2 Ulteriori simboli utilizzati
t
y
[ ] Rimanda ad elementi di comando e visualizza-
Schermate del display di comando
Le illustrazioni in questo manuale si basano sulle bilance
“standard”. Per le bilance omologate CE-M alcune schermate e
rapporti possono differire leggermente dalle illustrazioni. Se
queste differenze sono importanti ai fini del funzionamento,
verranno spiegate nel testo.
Istruzione operativa: descrive delle attività che
devono essere eseguite.
Risultato: descrive il risultato delle attività eseguite.
zione
Questo simbolo informa sull'uso metrico-legale
delle bilance per le quali è stata eseguita la valutazione della conformità (bilance omologate CE-M).
In tutto il testo con il termine 'omologato CE-M'
s'intende il termine tecnico 'valutato conforme'.
2 Istruzioni di sicurezza
8 Dichiarazione di conformità UE
.........................34
1 Riguardo questo manuale
1.1 Validità
Il presente manuale concerne i seguenti modelli di bilance per
la miscelazione di vernici:
− EVO1S1
− SPO1S1
1.2 Spiegazione dei simboli
Il termine 'apparecchio' usato nel presente manuale indica
sempre la combinazione bilancia ed alimentatore.
1.2.1 Avvertimenti
AVVERTENZA
Questo simbolo segnala un pericolo che potrebbe causare
lesioni gravi o mortali se non fosse evitato.
2.1 Uso previsto
Questa bilancia è destinata esclusivamente alla miscelazione
di colori e vernici al di fuori delle aree a rischio di esplosione.
Per la pesatura dei materiali devono essere usati contenitori
idonei.
La bilancia può essere comandata tramite il display nel
funzionamento stand alone oppure tramite software applicativo installato su PC, per es. un'applicazione di miscelazione
vernici del produttore della vernice. Nel secondo caso il PC
viene collegato mediante un cavo USB alla bilancia.
Il manuale fa parte dell’apparecchio. L'apparecchio è destinato
ad essere usato solo in conformità a quanto descritto nel
presente manuale.
Qualsiasi altro uso è da considerarsi non conforme alla
destinazione. Se l'apparecchio non viene usato per la destinazione prevista: si può compromettere il funzionamento dei
dispositivi di protezione dell'apparecchio. Ciò può causare
danni imprevedibili a persone o a cose.
In caso di utilizzo in impianti o condizioni ambientali che
richiedono maggiori standard di sicurezza, rispettare le
disposizioni in materia vigenti nel proprio Paese.
Manuale d'installazione EVO1S1 | SPO1S1 27

Condizioni di utilizzo per l'apparecchio
Utilizzare l'apparecchio solo all’interno di edifici.
Utilizzare l'apparecchio solo con le dotazioni e nel rispetto
delle condizioni d'esercizio che sono descritte nei dati tecnici
di questo manuale.
Non trasformare l'apparecchio o non apportarvi modifiche
tecniche di propria iniziativa. Interventi di trasformazione o
modifiche tecniche sull'apparecchio sono consentite solo
previa autorizzazione scritta da parte di Sartorius.
Destinatari Conoscenze e competenze
Gestore Il gestore dell'apparecchio è responsabile del
rispetto delle norme di sicurezza e di prevenzione e protezione sui luoghi di lavoro.
Il gestore deve garantire che tutte le persone
che lavorano con l'apparecchio abbiano accesso
alle informazioni rilevanti e siano istruite su
come lavorare con l'apparecchio.
Non esporre l'apparecchio nonché gli accessori forniti da
Sartorius, a temperature estreme, vapori chimici aggressivi,
umidità, urti, vibrazioni o forti campi elettromagnetici.
Rispettare le condizioni ambientali. I cavi di collegamento tra
gli apparecchi, nonché le guaine dei cavetti dei cablaggi
interni sono in PVC. I prodotti chimici che corrodono questi
materiali devono essere tenuti a debita distanza da questi
cavi.
2.2 Qualificazione del personale
Questo manuale si rivolge ai destinatari elencati qui di
seguito. Tutte le persone che lavorano con l'apparecchio
devono possedere le conoscenze e competenze menzionate.
Se tra le attività descritte in questo manuale non è indicata la
qualificazione: le attività descritte sono rivolte agli operatori.
La qualificazione richiesta sarà indicata nella descrizione
dell'attività qualora delle singole attività debbano essere
eseguite da altri destinatari oppure dal Sartorius Service.
Destinatari Conoscenze e competenze
Operatore L'operatore conosce il modo di funzionamento
dell'apparecchio e le procedure di lavoro correlate. Conosce i pericoli che possono insorgere
lavorando con l'apparecchio ed è in grado di prevenirli.
L'operatore è stato istruito sul funzionamento
dell'apparecchio. L'addestramento viene eseguito
nell'ambito della messa in funzione e viene
impartito dall'ingegnere aziendale / direttore di
laboratorio oppure dal gestore dell'apparecchio.
Ingegnere
aziendale /
direttore di
laboratorio
Elettricista
specializzato
L'ingegnere aziendale / direttore di laboratorio
decide sull'utilizzo e sulla parametrizzazione
dell'apparecchio.
L'ingegnere aziendale / direttore di laboratorio è
stato istruito sul funzionamento dell'apparecchio. L'addestramento viene eseguito nell'ambito della messa in funzione e viene impartito
dal Sartorius Service oppure dal gestore.
L'elettricista specializzato, in virtù della sua formazione tecnica, know how ed esperienza, nonché della conoscenza delle regolamentazioni in
materia, è in grado di valutare i lavori che gli
sono affidati e di riconoscere i potenziali pericoli.
2.3 Importanza del manuale
Il mancato rispetto delle istruzioni contenute in questo
manuale può avere conseguenze gravi, per es. pericolo per le
persone dovuto a influssi elettrici, meccanici o chimici.
t Leggere attentamente e completamente il presente
manuale prima di lavorare con l'apparecchio.
t In caso di perdita del manuale, richiederne una copia
oppure scaricare il manuale aggiornato dal nostro sito
web: www.sartorius.com
t Le informazioni contenute nel manuale devono essere
messe a disposizione a tutte le persone che lavorano con
l'apparecchio.
2.4 Stato ineccepibile dell'apparecchio
Un apparecchio danneggiato può provocare malfunzionamenti o causare dei pericoli difficilmente riconoscibili.
t Usare l'apparecchio solo se è in condizioni tecniche
perfette e sicure.
t Se l'apparecchio è danneggiato, scollegarlo immediata-
mente dalla rete elettrica.
t Se ci sono dei danni, essi devono essere eliminati immedia-
tamente da parte del Sartorius Service.
2.5 Interventi sulla dotazione elettrica dell'apparecchio
Qualsiasi intervento e modifica sulla dotazione elettrica
dell'apparecchio devono essere eseguiti solo da parte del
Sartorius Service. L'apparecchio può essere aperto solo dal
Sartorius Service.
Apposizione del sigillo sulle versioni omologate
CE-M
Per legge, sulla bilancia omologata CE-M deve
essere apposta una sigillatura. Questa sigillatura
consiste in un marchio adesivo portante il logo
“Sartorius”. Se il marchio adesivo viene tolto,
decade la validità della verifica metrica e la bilancia
deve essere omologata nuovamente. Per le bilance
omologate CE-M destinate all'utilizzo all'interno
dello Spazio economico europeo (SEE) vale la
dichiarazione di conformità compilata al momento
della verifica e allegata alla bilancia. Si prega di
conservare scrupolosamente tale dichiarazione.
28 Manuale d'installazione EVO1S1 | SPO1S1

Italiano
2.6 Attrezzature di protezione individuale
Le attrezzature di protezione individuale servono a proteggere
contro i pericoli causati dai materiali trattati.
t Indossare le attrezzature di protezione individuale qualora
l'ambiente di lavoro o il processo in cui viene impiegato
l'apparecchio lo richiedano.
2.7 Istruzioni di sicurezza per l'utilizzo dell'apparecchio
− Non danneggiare il pannello in vetro del display di comando
(per es. a causa di oggetti che cadono, colpi o forte pressione). Se il pannello in vetro viene danneggiato, staccare
immediatamente l'apparecchio dalla rete elettrica!
− Non toccare la superficie del display di comando con
oggetti acuminati, affilati, duri o ruvidi, bensì esclusivamente con un pennino apposito o con le punte delle dita.
Per la pulizia non usare in nessun caso parti dell'abbigliamento (per es. la manica della giacca) o spugne, poiché
queste potrebbero graffiare la superficie (per es. per la
presenza di rivetti o bottoni nella manica della giacca
oppure di sabbia nelle spugne).
− Evitare il caricamento elettrostatico del pannello in vetro
del display di comando e dell'alloggiamento in plastica.
Rischio di danneggiamento della bilancia!
Non chiudere mai il contenitore di vernice
con un martello finché è ancora sul piatto di
pesata.
Per chiudere il contenitore di vernice metterlo su un piano solido e stabile.
t Se l'apparecchio viene stoccato temporaneamente,
Stoccare l'apparecchio rispettando le condizioni ambientali (condizioni ambientali vedi capitolo “7.1 Dati generali”,
pagina 33).
t Conservare tutte le parti dell'imballaggio per un'eventuale
trasporto di ritorno. In caso di spedizione scollegare tutti i
cavi.
3.3 Scegliere il luogo di installazione
Scegliere un luogo di installazione adatto:
− Mettere l'apparecchio su una superficie piana, stabile e
insensibile alle vibrazioni.
− L'accesso all'apparecchio deve essere possibile in ogni
momento.
− Gli apparecchi devono essere trattati con cura secondo il
grado di protezione IP. L'ambiente circostante deve essere
protetto in modo adeguato.
− In caso di utilizzo in impianti o condizioni ambientali che
richiedono maggiori standard di sicurezza, rispettare le
disposizioni in materia vigenti nel proprio Paese.
t Per l'installazione evitare luoghi con condizioni sfavore-
voli:
− Calore forte (riscaldamento, irraggiamento solare)
− Correnti d'aria dirette provenienti da finestre e porte
aperte ed impianti di climatizzazione
− Forti vibrazioni durante le operazioni di pesatura
− Aree di forte passaggio di persone
− Umidità dell'aria molto elevata
− Campi elettromagnetici
− Aria molto secca
3 Installazione
3.1 Equipaggiamento fornito
Modello PMA.
Evolution
Piatto di pesata grande: d 233 mm
Piatto di pesata piccolo: d 180 mm
Cavo USB x x
Alimentatore con adattatore speci-
fico del paese
Manuale di installazione x x
x –
– x
opzionale opzionale
3.2 Disimballare
Procedura
t Aprire l'imballaggio e togliere con cautela tutte le parti.
t Subito dopo aver disimballato l'apparecchio, controllare
che non sia danneggiato esternamente.
PMA.HD
Acclimatare
Quando un apparecchio freddo viene portato in un ambiente
caldo, l'umidità dell'aria può condensarsi sulle superfici
dell'apparecchio. Acclimatare l'apparecchio per circa 2 ore,
staccato dalla rete elettrica, prima di collegarlo nuovamente
alla tensione di alimentazione.
3.4 Montare la bilancia
3.4.1 Posizionare il piatto della bilancia
AVVISO
L'apparecchio deve essere scollegato dall'alimentazione
elettrica durante tutti i lavori di montaggio.
t Collocare dall'alto il piatto di
pesata sulla bilancia.
Manuale d'installazione EVO1S1 | SPO1S1 29

3.4.2 Collegare la bilancia
Set di adattatori
t Inserire il cavo USB nella presa
USB che si trova sul retro del
display.
t Posizionare il cavo USB lungo il
retro della bilancia inserendolo
nei fissacavi.
3.5 Collegare all'alimentazione elettrica
La bilancia viene alimentata normalmente mediante l'attacco
USB del proprio computer che fornisce anche i dati per la
bilancia. Qualora l'attacco USB non fosse disponibile, per
l'alimentazione della bilancia si può usare l'alimentatore
YEPS01-USB (vedi capitolo “6 Accessori”, pagina 32), il
quale viene fornito insieme a diversi adattatori per prese
elettriche specifiche del paese.
Busta Regione / Paese
YEPS01-PS1 − USA e Giappone (US+JP)
− Europa (UE)
− Gran Bretagna (GB)
YEPS01-PS6 − Argentina (AR)
− Brasile (BR)
− Australia (AU)
− Sudafrica (ZA)
YEPS01-PS7 − Cina (CN)
− India (IN)
− Corea (KR)
t Inserire l’adattatore nella sede
dell’alimentatore. Il tasto
zigrinato deve essere rivolto in
avanti.
t Spingere l’adattatore fino
all’arresto, fino a sentire lo
scatto di innesto.
t Controllare che l’adattatore sia
saldamente bloccato. A questo
scopo estrarre leggermente
l’adattatore.
y Se l’adattatore non si sposta:
significa che è bloccato.
AVVISO
− Il valore di tensione riportato sull'alimentatore deve
coincidere con la tensione della rete locale (dati di collegamento vedi capitolo “7.1 Dati generali”, pagina 33).
− Se la tensione di rete o la forma della spina dell'alimentatore non corrispondono alla norma del paese di utilizzo,
contattare la più vicina rappresentanza Sartorius.
È necessario usare l'alimentatore solo se:
− non è disponibile un PC o computer portatile,
− in casi eccezionali la tensione di uscita dell'interfaccia USB
del PC o computer portatile non è sufficiente.
L'assemblaggio dell'alimentatore è descritto qui di seguito.
3.5.1 Assemblare l’alimentatore
Se viene usato un alimentatore: l’alimentatore deve essere
montato.
AVVERTENZA L’uso di adattatori non adatti può
t
causare scosse elettriche letali e danni all’apparecchio!
Utilizzare esclusivamente l'adattatore per presa elettrica
specifico del paese. Non inserire mai l'adattatore nella
presa elettrica se è separato dall'alimentatore.
t Scegliere l’adattatore adatto all’alimentazione elettrica
locale. L’adattatore deve essere idoneo al tipo di presa
elettrica presente sul luogo di installazione.
Rimuovere / sostituire l’adattatore
t Premere dall’alto il tasto
zigrinato e nello stesso tempo
spingere all’indietro l’adattatore.
t Spingere fuori l’adattatore
dall’alimentatore e toglierlo.
Collegamento all'alimentazione elettrica
t Inserire il cavo USB in una presa USB, per es. del computer,
computer portatile.
Collegamento all’alimentatore (opzione)
t Inserire il cavo di collegamento USB nell’alimentatore
YEPS01-USB.
t Inserire l’alimentatore in una presa elettrica (tensione di
rete).
3.6 Dispositivo antifurto
t Se necessario, è possibile
installare un dispositivo antifurto sul retro della bilancia.
30 Manuale d'installazione EVO1S1 | SPO1S1

0
30
Italiano
3.7 Livellare
Livellamento per il modello PMA.HD e i modelli omologati
CE-M
L'operazione di livellamento della bilancia permette di
compensare le inclinazioni del piano su cui è installata.
Un'esatta posizione orizzontale della bilancia garantisce la
precisione dei risultati di pesata.
La bilancia deve essere livellata di nuovo ogni volta che si
cambia il luogo di installazione e poi deve essere eventualmente regolata.
t Girare i due piedini come
mostrato in figura fino a
12*
9*
6*
* ore
quando la bolla d'aria si trova
nel centro della livella.
− Bolla d'aria sulle “ore 12”: girare
i due piedini in senso orario.
− Bolla d'aria sulle “ore 3”: girare
il piedino sinistro in senso orario
e il piedino destro in senso
antiorario.
− Bolla d'aria sulle “ore 6”: girare i
due piedini in senso antiorario.
− Bolla d'aria sulle “ore 9”: girare
il piedino sinistro in senso
antiorario e il piedino destro in
senso orario.
3.8 Tempo di preriscaldamento
Impiego di bilance omologate CE-M per uso
metrico-legale:
Osservare un tempo di preriscaldamento di
almeno 24 ore dopo il primo collegamento alla
rete elettrica.
Per fornire risultati precisi la
bilancia richiede un tempo di
preriscaldamento di almeno 30
minuti dopo il primo collegamento
all'alimentazione elettrica. Solo
dopo questo tempo l'apparecchio
ha raggiunto la temperatura
d'esercizio necessaria.
4 Pulizia e manutenzione
4.1 Pulizia
Prima di pulire l'alimentatore o la bilancia: scollegare tutti gli
apparecchi dalla rete elettrica.
AVVERTENZA Pericolo dovuto alla tensione
elettrica!
Scollegare l'alimentatore (opzionale) dalla rete elettrica.
Staccare il cavo dati nel caso in cui sia collegato al PC. Mai
aprire la bilancia o l'alimentatore. Questi apparecchi non
contengono delle parti che possono essere pulite, riparate o
sostituite dall’operatore.
AVVISO
Le seguenti parti non devono essere pulite con acetone o
detergenti aggressivi:
− Presa di rete
− Interfaccia dati
− Etichette e tutte le altre parti in materiale plastico
Procedura
t Scollegare l'apparecchio dall'alimentazione elettrica.
t AVVISO Fare attenzione che non penetri del liquido o
della polvere nella bilancia o nell'alimentatore.
t AVVISO Rischio di corrosione o danneggiamento dell'ap-
parecchio dovuto a prodotti detergenti non appropriati!
t Non usare detergenti corrosivi, aggressivi o contenenti
cloruro.
t Non usare detergenti che contengono componenti
abrasivi, per es. crema abrasiva, lana d'acciaio.
t Usare per la pulizia solo spazzole e panni morbidi.
t Non usare detergenti contenenti solventi.
Pulire il pannello dei comandi
t Spegnere l'apparecchio prima di iniziare la pulizia del
pannello dei comandi, poiché toccandolo si potrebbero
eseguire degli inserimenti accidentali.
Pulire l'alloggiamento della bilancia
t Pulire l'alloggiamento con un panno leggermente umido.
Usare un detergente delicato in presenza di sporco più
ostinato.
t Infine passare l'apparecchio con un panno morbido.
4.2 Manutenzione
Per garantire una precisione costante della bilancia, consigliamo di eseguire la manutenzione regolarmente, almeno una
volta all'anno. A tale scopo, il Sartorius Service offre diversi
contratti di manutenzione che personalizziamo in base alle
vostre esigenze.
Manuale d'installazione EVO1S1 | SPO1S1 31

Nell'ambito di un intervento di manutenzione dovrebbe essere
sempre rilasciato un certificato di calibrazione. L'ispezione di
sicurezza dell'alimentatore e dei suoi attacchi deve essere
eseguita ad intervalli appropriati da parte di un elettricista
qualificato (per es. ogni 2 anni).
5 Smaltimento
5.1 Indicazioni per la decontaminazione
Per il trasporto e lo smaltimento il gestore è responsabile del
rispetto delle normative nazionali concernenti la dichiarazione
pertinente e lo smaltimento a norma dell'apparecchio.
AVVERTENZA
Pericolo di lesioni dovuto ad apparecchi contaminati!
Gli apparecchi contaminati con sostanze pericolose (contaminazione NBC) non saranno ritirati per lavori di riparazione e
per lo smaltimento.
5.1.1 Indicazioni per lo smaltimento
L'apparecchio e gli accessori non devono essere smaltiti con i
rifiuti domestici, poiché sono costituiti da materiali di alta
qualità che possono essere riciclati e riutilizzati. Tutti i
componenti devono essere smaltiti in modo appropriato dai
centri di smaltimento rifiuti.
L'imballaggio è composto di materiali non inquinanti, riciclabili come materie prime secondarie.
5.1.2 Smaltire
Requisiti
L'apparecchio è decontaminato.
6 Accessori
Accessori Codice d'ordine
Cavo USB YCC01-0040M5
Alimentatore (5,2 V / 1,4 A) YEPS01-USB
Set di adattatori per YEPS01-USB YEPS01-PS1
− USA e Giappone (US+JP)
− Europa (EU)
− Gran Bretagna (GB)
Set di adattatori per YEPS01-USB YEPS01-PS6
− Argentina (AR)
− Brasile (BR)
− Australia (AU)
− Sudafrica (ZA)
Set di adattatori per YEPS01-USB YEPS01-PS7
− Cina (CN)
− India (IN)
− Corea (KR)
Copertina di protezione per il pannello
dei comandi, confezione da 10
Copertina di protezione per la colonnina,
PMA.Evolution, confezione da 10
Copertina di protezione per il piatto di
pesata, PMA.Evolution, confezione da 10
Pesi di regolazione
per PMA.Evolution:
− 5 kg, classe di precisione F2 YCW654-AC-00
− 2 kg, classe di precisione F2 YCW624-AC-00
− 1 kg, classe di precisione F2 YCW614-AC-00
per PMA.HD:
− 2 kg, classe di precisione F1 YCW623-AC-00
− 1 kg, classe di precisione F1 YCW613-AC-00
YDC03PMA10
YDC03PMA-CO10
YDC03PMA-WP10
Procedura
t Smaltire l'apparecchio. Consultare a riguardo le indicazioni
per lo smaltimento disponibili nel nostro sito Internet
(www.sartorius.com).
t Smaltire l'imballaggio secondo le normative nazionali
vigenti.
32 Manuale d'installazione EVO1S1 | SPO1S1

Italiano
7 Dati tecnici
7.1 Dati generali
Indicazione Unità Valore
Bilancia
Alimentazione elettrica Solo tramite l'interfaccia USB o l'alimentatore Sartorius YEPS01-USB
Tensione d'ingresso V
Potenza assorbita W 2,0
Ulteriori dati IP40 conforme a EN 60529/IEC 60529
Condizioni ambientali
I dati tecnici sono validi per le seguenti condizioni ambientali:
Ambiente Utilizzo solo in ambienti interni
Temperatura ambiente* °C +10 – +30
Capacità operativa °C Garantita tra +5 e +45
Stoccaggio e trasporto °C –10 – +60
Umidità relativa dell'aria % 15 – 80 per temperature fino a 30°C, non condensante, con riduzione
Attacco interfaccia USB, tipo B (interfaccia seriale virtuale)
Formato 7 bit ASCII, 1 bit di start, 1 oppure 2 bit di stop
Parità Pari, dispari, nessuna parità
Velocità di trasmissione 600 - 57600 bit/s
Handshake Software oppure hardware
Compatibilità elettromagnetica Conforme alla norma EN 61326-1/IEC61326-1 Apparecchi elettrici di
Immunità ai disturbi Requisiti essenziali
Emissione di disturbi Classe B
DC
+5,0
lineare fino al 50% di umidità relativa a 40°C
misura, controllo e laboratorio – Prescrizioni di compatibilità elettromagnetica – Parte 1: Prescrizioni generali
Idoneità all'utilizzo in ambienti residenziali e in ambienti collegati direttamente a una rete a bassa tensione che alimenta (anche) edifici d'abitazione.
Le bilance omologate CE-M in conformità ai requisiti UE soddisfano le
prescrizioni della Direttiva CE 2014/31/UE con EN45501:2015 e OIML
R76:2006.
* Per le bilance omologate CE-M in conformità ai requisiti UE si vedano
le indicazioni riportate sulla bilancia.
** Per le bilance omologate CE-M in conformità ai requisiti UE si
applicano le disposizioni vigenti.
Programmi applicativi selezionabili Ricalcolo, formulazione
Alimentatore YEPS01-USB (opzionale)
Alimentatore USB Tipo FSP007-P01P (denominazione del costruttore)
Primario
Secondario 5,2 V
Ulteriori dati Classe di protezione II
100 – 240 V~, ±10 %, 50 – 60 Hz, ±5 %, < 0,2 A
, ± 5 %, 1,4 A (max.)
DC
IP40 conforme a EN 60529/IEC 60529
Manuale d'installazione EVO1S1 | SPO1S1 33

7.2 Dati specifici del modello
Unità Valore Valore
Modello PMA.Evolution, EVO1S1 PMA.HD, SPO1S1
Campo di pesata g 7500 | 999,95 2200
Precisione di lettura g 0,1 | 0,05 0,01 | 0,1
Campo di tara (sottrattiva) g -7500 -2200
Peso di regolazione esterno /
classe di precisione
Dimensioni del piatto di pesata
Peso netto kg 2,4 2,3
kg 1, 2, 5 /
F2 o superiore
d mm
233 180
1, 2
F1 o superiore
7.3 Modelli omologati con approvazione CE del tipo: dati tecnici specifici del modello
Unità Valore Valore
Modello PMA.Evolution, EVO1S1 PMA.HD, SPO1S1
Classe di precisione II III
Modello PMA-EV PMA-HD
Campo di pesata Max g 7500 2200
Divisione di lettura d g 0,1 1
Divisione di verifica e g 1 1
Campo di temperatura +10°C – +30°C +10°C – +40°C
Campo di compensazione della tara
(sottrattiva)
< 100% della portata max. < 100% della portata max.
8 Dichiarazione di conformità UE
Con la dichiarazione di conformità allegata si attesta che l'apparecchio è conforme alle direttive menzionate.
Per le bilance omologate CE-M destinate all'utilizzo all'interno dello Spazio economico europeo (SEE) vale la dichiarazione di
conformità allegata alla bilancia. Si prega di conservare scrupolosamente tale dichiarazione.
34 Manuale d'installazione EVO1S1 | SPO1S1

Español
Índice
1
Acerca de este documento
1.1 Validez ...............................................35
1.2 Medios de representación ...........................35
2 Indicaciones de seguridad
2.1 Uso conforme a las instrucciones....................35
2.2 Cualificación del personal ...........................36
2.3 Importancia de estas instrucciones de uso ..........36
2.4 Perfecto estado del aparato .........................36
2.5 Trabajos en el equipo eléctrico del aparato .........36
2.6 Equipo de protección individual.....................37
2.7
Indicaciones de seguridad para el manejo del aparato
3 Instalación
3.1 Volumen de suministro ..............................37
3.2 Desembalar...........................................37
3.3 Elección del lugar de colocación.....................37
3.4 Montar la balanza ...................................37
3.5 Establecer alimentación de tensión..................38
3.6 Protección antirrobo.................................38
3.7 Nivelación............................................39
3.8 Tiempo de calentamiento previo.....................39
4 Limpieza y mantenimiento
4.1 Limpieza..............................................39
4.2 Mantenimiento ......................................39
5 Eliminación
5.1 Indicaciones para la descontaminación..............40
6 Accesorios
7 Datos técnicos
7.1 Datos generales......................................41
7.2 Datos específicos de modelos........................42
7.3
................................................37
...............................................40
................................................40
............................................41
Modelos verificados con certificado de aprobación CE
de tipo: datos técnicos específicos de cada modelo
...............................35
...............................35
..............................39
..37
...42
ATENCIÓN
Identifica un riesgo que podría tener como consecuencias
lesiones corporales medias o leves si no se evita.
AVISO
Identifica un peligro que podría provocar daños materiales si
no se evita.
1.2.2 Otros medios de representación
t
y
[ ] Hace referencia a elementos de manejo y
Ilustraciones de la pantalla de usuario
Las figuras en este manual se basan en balanzas “estándar”. En
las balanzas calibradas puede haber pequeñas diferencias en
la forma en que se muestran los avisos y en los protocolos de
las figuras. En los casos importantes para el funcionamiento,
se explicarán las diferencias en el texto.
Instrucción de actuación: describe tareas que
deben realizarse.
Resultado: describe el resultado de las tareas
realizadas.
visualización.
Este símbolo hace referencia a la metrología
legal para balanzas de conformidad evaluada
(verificadas).
Más adelante aparece el término “verificado”
para la expresión técnica de la evaluación de la
conformidad.
2 Indicaciones de seguridad
8 Declaración de conformidad UE
........................42
1 Acerca de este documento
1.1 Validez
Estas instrucciones corresponden a las balanzas para la mezcla
de pinturas de los modelos:
− EVO1S1
− SPO1S1
1.2 Medios de representación
El término “aparato” utilizado en estas instrucciones identifica
siempre a la combinación de balanza y fuente de alimentación.
1.2.1 Advertencias
ADVERTENCIA
Identifica un riesgo que podría tener como consecuencias la
muerte o graves lesiones corporales si no se evita.
2.1 Uso conforme a las instrucciones
Esta balanza solo es adecuada para la mezcla de pinturas y
lacas fuera de áreas potencialmente explosivas. Para contener
los materiales se deben usar envases apropiados.
La balanza puede controlarse tanto de forma independiente
con ayuda de una pantalla como con un software de aplicación instalado en un PC (p. ej. una aplicación de mezcla de
pinturas del fabricante de pinturas). Para ello, el ordenador
se conectará a la balanza por medio de un cable USB.
Estas instrucciones forman parte del aparato. El aparato está
diseñado para utilizarse exclusivamente de acuerdo con las
presentes instrucciones.
Cualquier uso distinto se considera inadecuado. Si el aparato
no se va a utilizar conforme a las instrucciones,
las medidas de protección del aparato pueden verse afectadas.
Esto puede provocar incalculables daños personales o
materiales.
En caso de uso en instalaciones y condiciones ambientales
con requisitos de seguridad mayores, se deben respetar las
condiciones y disposiciones del país.
Instrucciones de instalación EVO1S1 | SPO1S1 35

Condiciones de uso para el aparato
Utilizar el aparato únicamente en edificios.
Utilizar el aparato únicamente con el equipamiento y en las
condiciones de funcionamiento que se describen en los datos
técnicos de estas instrucciones.
No desmontar ni modificar técnicamente el aparato de
manera arbitraria. Las medidas de desmontaje y las modificaciones técnicas necesitan la autorización previa y por escrito
de Sartorius.
El aparato, así como los accesorios suministrados por Sartorius, no deben someterse a temperaturas extremas, vapores
químicos agresivos, humedad, golpes, vibraciones ni campos
electromagnéticos fuertes. Observar las condiciones de
seguridad. Tanto los cables de conexión de aparatos como los
recubrimientos de los hilos interiores del cable están fabricados en PVC. Mantenga alejado de estos conductores cualquier
producto químico agresivo para estos materiales.
2.2 Cualificación del personal
Estas instrucciones van dirigidas a los grupos de destinatarios
mencionados más abajo. Todas las personas que utilicen el
aparato deberán contar con los conocimientos y responsabilidades mencionados.
Grupo de
destinatarios
Operador El operador del aparato es responsable del
Conocimientos y responsabilidades
cumplimiento de las disposiciones de seguridad
y protección en el trabajo.
El operador debe asegurar que todas las personas que trabajan con el aparato tienen acceso a
la información relevante y han sido instruidas
en el manejo del aparato.
2.3 Importancia de estas instrucciones de uso
El incumplimiento de las instrucciones puede tener graves
consecuencias como, por ejemplo, peligros para personas por
influencias eléctricas, mecánicas o químicas.
t Antes de efectuar cualquier trabajo en el aparato, leer las
instrucciones atenta y completamente.
t En caso de pérdida del manual puede solicitar uno nuevo o
descargar el manual más reciente de la página de Internet
de Sartorius (www.sartorius.com).
t La información del manual de instrucciones debe estar al
alcance de todas las personas que trabajan con el aparato.
Si en la tareas descritas en estas instrucciones no se indica
ninguna cualificación, significa que estas están orientadas al
grupo de destinatarios “Usuario”.
En el caso de que algunas tareas deban realizarlas otros
grupos de destinatarios o el Sartorius Service, se indica la
cualificación necesaria en la descripción de la tarea.
Grupo de
destinatarios
Usuario El usuario está familiarizado con el uso del apa-
Ingeniero
técnico/
jefe de
laboratorio
Personal
electricista
especializado
Conocimientos y responsabilidades
rato y los procesos de trabajo relacionados con
este. Conoce los posibles peligros relacionados
con el uso del aparato y sabe cómo evitarlos.
El usuario ha recibido formación sobre el uso
del aparato. La instrucción la realiza durante la
puesta en marcha el ingeniero técnico/jefe de
laboratorio, o bien el operador del aparato.
El ingeniero técnico/jefe de laboratorio es el
encargado de tomar las decisiones relacionadas
con el uso y la parametrización del aparato.
El ingeniero técnico/jefe de laboratorio ha recibido formación sobre el uso del aparato. La instrucción inicial se produce en el marco de la
puesta en marcha y la imparte el Sartorius
Service o el operador.
El personal electricista especializado, gracias a
su formación técnica, conocimientos, experiencia y conocimiento de las normas aplicables,
puede evaluar los trabajos encomendados y
detectar los posibles peligros.
2.4 Perfecto estado del aparato
Un aparato dañado puede ocasionar funcionamientos
incorrectos o dar lugar a peligros difíciles de identificar.
t El aparato debe utilizarse únicamente en un estado
perfecto en razón de la seguridad.
t Desconectar el aparato dañado de la corriente de inme-
diato.
t Encargar la resolución de daños a Sartorius Service de
inmediato.
2.5 Trabajos en el equipo eléctrico del aparato
Todos los trabajos y modificaciones en el equipo eléctrico del
aparato deben encomendarse exclusivamente al Sartorius
Service. Solo Sartorius Service puede abrir el aparato.
Sello en las variantes verificadas
El legislador exige un sello de la balanza verificada. Para garantizar la seguridad de los aparatos
verificados se coloca una marca adhesiva con el
nombre “Sartorius”. En caso de que esta se
elimine, se extingue la validez de la verificación y
la balanza debe regularse de nuevo. Para las
balanzas verificadas que se vayan a emplear en el
EEE es válida la verificación efectuada y la
declaración de conformidad adjuntada. Guárdela
sin falta.
36 Instrucciones de instalación EVO1S1 | SPO1S1

Español
2.6 Equipo de protección individual
El equipo de protección individual protege contra peligros
derivados de los materiales procesados.
t Si el área de trabajo o el proceso en el que se va a utilizar
el aparato requieren un equipo de protección individual,
utilizar el equipo de protección individual.
2.7 Indicaciones de seguridad para el manejo del aparato
− No dañar el vidrio de la pantalla de manejo (p. ej. por
caídas de objetos, golpes o presión excesiva). Si la placa de
vidrio sufre algún daño, desenchufar inmediatamente el
aparato de la alimentación eléctrica.
− No tocar la superficie de la pantalla de manejo con objetos
puntiagudos, cortantes, duros ni rugosos, sino exclusivamente con un lápiz táctil previsto para este fin o con las
yemas de los dedos. Para limpiar, no utilizar bajo ningún
concepto prendas de vestir (como mangas, etc.) ni esponjas, ya que pueden arañar la superficie (p. ej. debido a
remaches o botones en las mangas o a arena en las
esponjas).
− Evitar que el vidrio de la pantalla de manejo y la carcasa
de plástico se carguen electrostáticamente.
Riesgo de daños en la balanza.
No cerrar nunca la lata de pintura con un
martillo mientras esta se encuentre sobre el
plato de pesaje.
Colocar la lata de pintura sobre una superficie estable para cerrarla.
3 Instalación
t Si el aparato se va a almacenar temporalmente, hacerlo de
acuerdo con las condiciones ambientales (ver el Capítulo “7.1 Datos generales”, página 41).
t Conservar todas las piezas del embalaje original para un
eventual envío de retorno. Antes del envío, desconectar
todos los cables.
3.3 Elección del lugar de colocación
Elegir el lugar correcto:
− Colocar el aparato sobre una superficie estable, libre de
vibraciones y nivelada.
− Mantener el acceso al aparato en todo momento libre.
− Manejar los aparatos cuidadosamente, cumpliendo las
normas de protección IP. El entorno debe estar correspondientemente asegurado.
− En caso de uso en instalaciones y condiciones ambientales
con requisitos de seguridad mayores, se deben respetar las
condiciones y disposiciones del país.
t Para la colocación, evitar lugares con influencias inade-
cuadas:
− Calor (calefacción, entrada de rayos solares)
− Corriente de aire directa por ventana abierta, instalación de aire acondicionado o puertas
− Sacudidas durante la medición
− Lugar de tráfico de personas
− Humedad del aire extremadamente alta
− Campos electromagnéticos
− Aire extremadamente seco
Aclimatar
Cuando un aparato frío se lleva a un entorno caluroso, puede
causar condensación de la humedad del aire (empañamiento).
Por eso, aclimate el aparato desconectado de la tensión,
durante unas 2 horas, antes de conectarlo nuevamente a la
tensión de alimentación.
3.1 Volumen de suministro
Modelo PMA.
Evolution
Plato de pesaje grande: d 233 mm
Plato de pesaje pequeño: d 180 mm
Cable USB x x
Fuente de alimentación con adapta-
dor específico del país
Instrucciones de instalación x x
x –
– x
opcional opcional
PMA.HD
3.2 Desembalar
Procedimiento
t Abrir el embalaje y sacar cuidadosamente todas las piezas.
t Inmediatamente después de desembalar, comprobar si el
aparato tiene daños externos.
3.4 Montar la balanza
3.4.1 Colocar el plato de pesaje
AVISO
Para todos los trabajos de montaje, el aparato debe estar
desconectado de la alimentación eléctrica.
t Poner el plato de pesaje desde
arriba sobre la balanza.
Instrucciones de instalación EVO1S1 | SPO1S1 37

3.4.2 Conexión de la balanza
Juegos de adaptadores de red
t Enchufar el cable USB en la
hembrilla USB de la parte
posterior de la pantalla.
t Pasar el cable USB por el
soporte de cable de la parte
posterior de la balanza.
3.5 Establecer alimentación de tensión
La alimentación eléctrica a la balanza normalmente se realiza
a través de la conexión USB del PC, que también suministra
los datos para la báscula. Si esta conexión USB no estuviera
disponible, el aparato se puede alimentar con la fuente de
alimentación YEPS01-USB (ver el Capítulo “6 Accesorios”,
página 40), que se suministra con diferentes adaptadores de
red específicos para cada país.
AVISO
− El valor de tensión eléctrica indicado en la fuente de
alimentación debe coincidir con la tensión de red local
(para los datos de conexión, ver el Capítulo “7.1 Datos
generales”, página 41).
− Si la tensión de red indicada o el modelo de enchufe de la
fuente de alimentación no se corresponden con las normas
utilizadas en el país, póngase en contacto con la representación de Sartorius más próxima.
La alimentación eléctrica con la fuente de alimentación solo
será necesaria:
− cuando no esté disponible un PC o portátil,
− en casos excepcionales cuando la tensión de salida de la
interfaz USB del PC o portátil no es suficiente.
El ensamblaje de la fuente de alimentación se describe a
continuación.
3.5.1 Ensamblar la fuente de alimentación
Bolsa Región/País
YEPS01-PS1 − EE. UU. y Japón (US+JP)
− Europa (EU)
− Gran Bretaña (GB)
YEPS01-PS6 − Argentina (AR)
− Brasil (BR)
− Australia (AU)
− Sudáfrica (ZA)
YEPS01-PS7 − China (CN)
− India (IN)
− Corea (KR)
y Introduzca el adaptador de red
en el alojamiento de la fuente de
alimentación. La tecla estriada
debe mirar hacia delante.
y Deslice el adaptador de red hasta
el tope, hasta que encaje y haga
clic.
y Compruebe que el adaptador de
red esté bien encajado. Para ello,
tire suavemente del adaptador
de red.
y Si no se puede mover el adapta-
dor de red, significa que está
bloqueado.
Desmontaje/sustitución del
adaptador de red
t Desde arriba, pulse la tecla
estriada mientras desliza el
adaptador de red hacia atrás.
t Extraiga y retire el adaptador de
red de la fuente de alimentación.
Conexión al suministro eléctrico
t Conecte el cable USB a una hembrilla USB (p. ej., ordena-
dor personal o portátil).
Conexión a la fuente de alimentación (opcional)
t Conecte el cable USB a la fuente de alimentación
YEPS01-USB.
t Conecte la fuente de alimentación a una toma de pared
(tensión de red).
Si se utiliza una fuente de alimentación, esta debe montarse.
ADVERTENCIA Peligro de electrocución y de daños en
t
el aparato por un adaptador de red incorrecto. Utilizar solo
el adaptador de red específico del país. No enchufar jamás
el adaptador de red separado de la fuente de alimentación.
t Seleccione el adaptador de red adecuado para la red
eléctrica. El adaptador de red debe ser apropiado para el
enchufe del lugar de instalación.
38 Instrucciones de instalación EVO1S1 | SPO1S1
3.6 Protección antirrobo
t Asegure la balanza por el lado
posterior, en caso necesario.

0
30
Español
3.7 Nivelación
Nivelación del modelo PMA.HD y de modelos verificados
Con la nivelación de la balanza pueden compensarse inclinaciones en el lugar de instalación. Una colocación exacta y
horizontal de la balanza garantiza resultados de pesaje
precisos.
La balanza debe nivelarse y ajustarse de nuevo en caso
necesario cada vez que se cambie su ubicación.
t Gire los dos tornillos de las patas
tal y como se muestra en la
12*
9*
6*
* horas
figura, hasta que la burbuja de
aire del nivel esté en el centro
del círculo.
− Burbuja a las “12 horas”: girar
las dos patas en sentido horario.
− Burbuja a las “3 horas”: girar la
pata izquierda en sentido
horario, la pata derecha en
sentido antihorario.
− Burbuja a las “6 horas”: girar las
dos patas en sentido antihorario.
− Burbuja a las “9 horas”: girar la
pata izquierda en sentido
antihorario, la pata derecha en
sentido horario.
3.8 Tiempo de calentamiento previo
Utilización de balanzas verificadas para la
metrología legal:
Respetar un tiempo de precalentamiento de
mínimo 24 horas después de conectarla a la red
eléctrica.
Para obtener resultados exactos, la
balanza necesita un tiempo de
precalentamiento mínimo de
30 minutos después de conectarla
por primera vez al suministro de
corriente. En ese momento, el
aparato habrá alcanzado la temperatura de funcionamiento necesaria.
4 Limpieza y mantenimiento
4.1 Limpieza
Antes de limpiar la fuente de alimentación o la balanza,
desconectar todos los aparatos.
ADVERTENCIA Peligro por tensión eléctrica.
Desconecte la fuente de alimentación (opcional) de la red
eléctrica. En caso necesario, desconecte el cable de datos
conectado al PC. No abra jamás la balanza ni la fuente de
alimentación. No contienen piezas del aparato que el usuario
pueda limpiar, reparar o sustituir.
AVISO
No limpie las siguientes piezas con acetona o productos de
limpieza agresivos:
− Entrada del conector de alimentación
− Interfaz de datos
− Rótulos y los demás componentes de plástico
Procedimiento
t Desconectar el aparato del suministro eléctrico.
t AVISO Asegúrese de que no entre polvo ni líquido en la
balanza o la fuente de alimentación.
t AVISO Corrosión y daños en el aparato por productos de
limpieza inadecuados.
t No utilizar productos de limpieza cáusticos, clorados ni
agresivos.
t No utilizar productos de limpieza que incluyan
componentes decapantes, como por ejemplo crema
limpiadora o lana de acero.
t Utilizar un cepillo blando y un paño para la limpieza.
t No utilizar productos de limpieza con disolventes.
Limpieza del panel de control
t Antes de limpiar el panel de control, desconectar el
aparato para evitar la introducción accidental de datos por
pulsaciones involuntarias.
Limpieza de la carcasa
t Limpiar la carcasa con un paño de limpieza ligeramente
humedecido. Utilizar agua jabonosa para eliminar las
impurezas más persistentes.
t A continuación, limpiar el aparato con un paño suave.
4.2 Mantenimiento
Para garantizar la seguridad de medición constante de su
balanza, recomendamos un mantenimiento regular, al menos
una vez al año. Sartorius Service le ofrece al efecto diversos
contratos de mantenimiento, que podemos adecuar a sus
necesidades.
Instrucciones de instalación EVO1S1 | SPO1S1 39

En el marco de todos los mantenimientos, se deberá emitir
siempre un certificado de calibración. Haga realizar una
comprobación de seguridad técnica de la fuente de alimentación y sus conexiones a un electricista en intervalos adecuados
(p. ej., cada 2 años).
5 Eliminación
5.1 Indicaciones para la descontaminación
El operador es el responsable del cumplimiento de las normas
locales para la declaración adecuada de transporte y eliminación, y para la eliminación adecuada del aparato.
ADVERTENCIA
Peligro de lesiones por aparatos contaminados.
No se admitirá para su reparación y desecho ningún aparato
contaminado con sustancias peligrosas (contaminación ABC).
5.1.1 Indicaciones para la eliminación
El aparato y los accesorios incluidos no deben desecharse
junto con los residuos domésticos, ya que están fabricados con
materiales de gran calidad que se pueden reciclar y reutilizar.
Todas las piezas deben desecharse correctamente a través de
centros de recogida de residuos.
El embalaje está compuesto por materiales respetuosos con el
medio ambiente que se pueden utilizar como materia prima
reciclada.
5.1.2 Eliminar
Requisitos
Este aparato está descontaminado.
Procedimiento
t Desechar el aparato. Usar para ello las indicaciones de
eliminación de nuestra página web (www.sartorius.com).
t Desechar el embalaje de conformidad con las normas
locales.
6 Accesorios
Accesorios Número de
pedido
Cable USB YCC01-0040M5
Fuente de alimentación (5,2 V/1,4 A) YEPS01-USB
Juego de adaptadores de red para
YEPS01-USB YEPS01-PS1
− EE. UU. y Japón (US+JP)
− Europa (EU)
− Gran Bretaña (GB)
Juego de adaptadores de red para
YEPS01-USB YEPS01-PS6
− Australia
− Argentina (AR)
− Brasil (BR)
− Australia (AU)
− Sudáfrica (ZA)
Juego de adaptadores de red para
YEPS01-USB YEPS01-PS7
− China (CN)
− India (IN)
− Corea (KR)
Cubierta protectora para el panel de
control,
paquete de 10
Cubierta protectora para el soporte,
PMA.Evolution,
paquete de 10
Cubierta protectora para el plato
de pesaje,
PMA.Evolution, paquete de 10
Pesas de ajuste
para PMA.Evolution:
− 5 kg, clase de precisión F2 YCW654-AC-00
− 2 kg, clase de precisión F2 YCW624-AC-00
− 1 kg, clase de precisión F2 YCW614-AC-00
para PMA.HD:
− 2 kg, clase de precisión F1 YCW623-AC-00
− 1 kg, clase de precisión F1 YCW613-AC-00
YDC03PMA10
YDC03PMA-CO10
YDC03PMA-WP10
40 Instrucciones de instalación EVO1S1 | SPO1S1

Español
7 Datos técnicos
7.1 Datos generales
Especificaciones Unidad Valor
Balanza
Alimentación de tensión Solo mediante interfaz USB o fuente de alimentación YEPS01-USB de
Sartorius
Tensión de entrada V
Consumo de potencia W 2,0
Otros datos IP40 según EN 60529/IEC 60529
Condiciones ambientales
Las especificaciones técnicas son válidas para las siguientes condiciones medioambientales:
Entorno Utilizar solo en espacios interiores
Temperatura ambiente* °C +10 – +30
Operatividad °C Garantizada entre +5 – +45
Almacenamiento y transporte °C -10 – +60
Humedad relativa del aire % 15 – 80 para temperaturas de hasta 30 °C, sin condensación, disminu-
Conexión de interfaz USB, tipo B (interfaz serie virtual)
Formato ASCII 7 bits, 1 bit de inicio, 1 o 2 bits de parada
Paridad Par, impar, sin paridad
Velocidad de transferencia De 600 a 57600 bits/s
Handshake De software o hardware
Compatibilidad electromagnética Según EN 61326-1/IEC61326-1 Equipos eléctricos de medida, control,
Resistencia a interferencias Requisitos básicos
Emisión de interferencias Clase B
CC
+5,0
yendo linealmente hasta el 50 % de humedad relativa del aire a 40 °C
regulación y uso en laboratorio – Requisitos CEM – Parte 1: Requisitos
generales
Apto para el uso en zonas urbanas y zonas conectadas directamente a la
red de baja tensión que (también) da suministro a viviendas.
Las balanzas verificadas según la UE cumplen las exigencias de la
directiva europea 2014/31/UE con EN45501:2015 o, en su caso,
OIML R76:2006.
* En balanzas verificadas conforme a la UE, ver los datos en la balanza.
** En balanzas verificadas conforme a la UE, se aplica la normativa legal.
Aplicaciones seleccionables Recálculo, formulación
Fuente de alimentación YEPS01-USB
(opcional)
Adaptador de alimentación USB Tipo FSP007-P01P (denominación del fabricante)
Primaria
Secundaria 5,2 V
Otros datos Clase de protección II
100 – 240 V~, ±10 %, 50 – 60 Hz, ±5 %, < 0,2 A
, ± 5 %, 1,4 A (máx.)
DC
IP40 según EN 60529/IEC 60529
Instrucciones de instalación EVO1S1 | SPO1S1 41

7.2 Datos específicos de modelos
Unidad Valor Valor
Modelo PMA.Evolution, EVO1S1 PMA.HD, SPO1S1
Rango de pesaje g 7500 | 999,95 2200
Legibilidad g 0,1 | 0,05 0,01 | 0,1
Rango de tara (sustractiva) g -7500 -2200
Valor de la pesa externa de ajuste/
Categoría de precisión
Tamaño del plato de pesaje
Peso neto kg 2,4 2,3
kg 1, 2, 5 /
F2 o mejor
d mm
233 180
1, 2 /
F1 o mejor
7.3 Modelos verificados con certificado de aprobación CE de tipo: datos técnicos específicos de cada modelo
Unidad Valor Valor
Modelo PMA.Evolution, EVO1S1 PMA.HD, SPO1S1
Clase de precisión II III
Tipo de construcción PMA-EV PMA-HD
Rango de pesaje máximo g 7500 2200
Incremento de indicación d g 0,1 1
Valor verificable e g 1 1
Rango de temperatura +10 °C – +30 °C +10 °C – +40 °C
Rango de compensación de tara (sus-
tractivo)
< 100 % del rango de pesaje
máximo
< 100 % del rango de pesaje
máximo
8 Declaración de conformidad UE
Con la declaración de conformidad adjunta se ratifica que el aparato cumple las Directivas mencionadas.
Para las balanzas verificadas que se vayan a emplear en el EEE es válida la declaración de conformidad adjuntada. Guárdela sin
falta.
42 Instrucciones de instalación EVO1S1 | SPO1S1

Polski
Spis treści
1 Informacje o niniejszym dokumencie....................43
1.1 Obowiązywanie ......................................43
1.2 Sposoby prezentacji..................................43
2 Wskazówki bezpieczeństwa
2.1 Użytkowanie zgodne z przeznaczeniem..............43
2.2 Kwalifikacje personelu ...............................44
2.3 Znaczenie niniejszej instrukcji .......................44
2.4 Bezusterkowość urządzenia..........................44
2.5 Prace przy wyposażeniu elektrycznym urządzenia ...44
2.6 Środki ochrony indywidualnej........................45
2.7 Wskazówki bezpieczeństwa dotyczące obsługi
urządzenia............................................45
3 Instalacja
3.1 Zakres dostawy.......................................45
3.2 Rozpakowanie........................................45
3.3 Wybór miejsca ustawienia ...........................45
3.4 Montaż wagi .........................................45
3.5 Podłączanie zasilania.................................46
3.6 Zabezpieczenie przed kradzieżą......................46
3.7 Poziomowanie........................................47
3.8 Czas nagrzewania....................................47
4 Czyszczenie i konserwacja
4.1 Czyszczenie ..........................................47
4.2 Konserwacja..........................................47
5 Utylizacja
5.1 Wskazówki dotyczące odkażania.....................48
6 Akcesoria
..................................................45
.................................................48
..................................................48
..............................43
................................47
PRZESTROGA
Oznacza zagrożenie, które może skutkować średnimi albo
lekkimi obrażeniami ciała, jeżeli się go nie uniknie.
NOTYFIKACJA
Oznacza zagrożenie, które może skutkować szkodami
materialnymi, jeżeli się go nie uniknie.
1.2.2 Inne sposoby prezentacji
t
y
[ ] Odsyłacz do elementów obsługowych
Rysunki zawierające wyświetlane komunikaty i informacje
Zawarte w niniejszej instrukcji rysunki bazują na wagach
„standardowych”. W przypadku wag legalizowanych niektóre
z wyświetlanych komunikatów i informacji mogą wyglądać
inaczej niż na ilustracjach. Tam, gdzie ma to znaczenie dla
eksploatacji, różnice objaśniono w tekście.
Instrukcja postępowania: opisuje czynności,
jakie należy wykonać.
Wynik: opisuje wynik wykonanych czynności.
i wskaźnikowych
Symbol ten oznacza wskazówkę dotyczącą
eksploatacji wag poddanych ocenie zgodności
(legalizowanych) w metrologii prawnej.
W dalszym tekście pojęcie „legalizowana” oznacza
wyrażenie specjalistyczne „poddana ocenie
zgodności”.
7 Dane techniczne
7.1 Dane ogólne..........................................49
7.2 Dane dotyczące modelu..............................50
7.3 Modele legalizowane z zatwierdzeniem wzoru WE:
Dane techniczne specyficzne dla modelu ............50
8 Deklaracja zgodności UE
. . . . . . . . . . . . . . . . . . . . . . . . . . . . . . . . . . . . . . . . . . 49
.................................50
1 Informacje o niniejszym
dokumencie
1.1 Obowiązywanie
Niniejsza instrukcja dotyczy wag do mieszania farb, modeli:
− EVO1S1
− SPO1S1
1.2 Sposoby prezentacji
Stosowane w niniejszej instrukcji pojęcie „urządzenie” oznacza
zawsze zespół składający się z wagi i zasilacza sieciowego.
1.2.1 Ostrzeżenia
OSTRZEŻENIE
Oznacza zagrożenie, które może skutkować śmiercią lub
poważnymi obrażeniami ciała, jeżeli się go nie uniknie.
2 Wskazówki
bezpieczeństwa
2.1 Użytkowanie zgodne z przeznaczeniem
Niniejsza waga jest przeznaczona tylko do mieszania farb
i lakierów poza obszarami zagrożonymi wybuchem. Do przyjęcia materiałów należy zastosować odpowiednie naczynia.
Wagą można sterować zarówno za pomocą wyświetlacza
w trybie Stand Alone, jak i za pomocą zainstalowanego na
komputerze oprogramowania, np. aplikacji do mieszania farb
dostarczanej przez producenta lakierów. Komputer łączy się
w takim przypadku z wagą za pośrednictwem kabla USB.
Niniejsza instrukcja jest częścią urządzenia. Urządzenie jest
przeznaczone wyłącznie do użytkowania zgodnego z niniejszą
instrukcją.
Każdy inny sposób użytkowania uznaje się za niezgodny
z przeznaczeniem. Jeżeli urządzenie jest eksploatowane
niezgodnie z przeznaczeniem:
Może to pogarszać właściwości ochronne urządzenia. Może
to prowadzić do nieprzewidywalnych szkód osobowych
i materialnych.
Instrukcja instalacji EVO1S1 | SPO1S1 43

W przypadku stosowania w instalacjach i warunkach otoczenia
o podwyższonych wymaganiach dotyczących bezpieczeństwa
przestrzegać przepisów obowiązujących w kraju instalacji.
Warunki stosowania urządzenia
Urządzenie wolno stosować wyłącznie w budynkach.
Urządzenia używać tylko z wyposażeniem i w warunkach
zgodnych z opisem zawartym w danych technicznych
w niniejszej instrukcji.
Nie wolno samowolnie przebudowywać urządzenia ani
wprowadzać w nim zmian technicznych. Przebudowy urządzenia oraz zmiany o charakterze technicznym dozwolone są tylko
po uprzednim uzyskaniu pisemnej zgody firmy Sartorius.
Nie narażać urządzenia ani akcesoriów dostarczanych przez
firmę Sartorius na działanie ekstremalnych temperatur, żrących
oparów chemicznych, wilgoci, uderzeń, drgań ani silnych pól
elektromagnetycznych. Zwracać uwagę na warunki otoczenia.
Kable łączące urządzenia a także izolacja żył okablowania
wewnętrznego są wykonane z PVC. Chemikalia wchodzące
w reakcje z tymi materiałami należy trzymać z dala
od przewodów.
2.2 Kwalifikacje personelu
Instrukcja jest skierowana do następujących grup docelowych.
Wszystkie osoby pracujące przy urządzeniu muszą dysponować
wymaganą wiedzą i kompetencjami.
Jeżeli w opisie czynności w niniejszej instrukcji nie określono
kwalifikacji: opisane czynności dotyczą grupy docelowej
„Operator”.
Grupa
docelowa
Wykwalifikowany elektryk
Użytkownik Użytkownik urządzenia jest odpowiedzialny za
Wiedza i kompetencje
Wykwalifikowany elektryk potrafi na podstawie swojego wykształcenia, wiedzy i doświadczenia, a także na podstawie znajomości odpowiednich aktualnych przepisów ocenić przekazane mu prace i rozpoznać ewentualne niebezpieczeństwa.
przestrzeganie przepisów bezpieczeństwa i
higieny pracy.
Użytkownik musi zapewnić, że wszystkie osoby
pracujące przy urządzeniu będą miały dostęp
do właściwych informacji oraz zostaną przeszkolone w zakresie pracy przy urządzeniu.
2.3 Znaczenie niniejszej instrukcji
Nieprzestrzeganie instrukcji może pociągać za sobą poważne
skutki, np. zagrożenie osób ze strony czynników elektrycznych,
mechanicznych lub chemicznych.
t Przed rozpoczęciem wszelkich prac przy urządzeniu
przeczytać uważnie całą instrukcję.
t W razie zagubienia instrukcji poprosić o dodatkowy
egzemplarz lub pobrać aktualną instrukcję ze strony firmy
Sartorius (www.sartorius.com).
t Zawarte w instrukcji informacje muszą być dostępne dla
wszystkich osób pracujących przy urządzeniu.
2.4 Bezusterkowość urządzenia
Jeżeli poszczególne czynności muszą być wykonywane przez
osoby należące do innych grup docelowych albo przez Sartorius
Service: w opisie czynności wyszczególniono wymagane
kwalifikacje.
Grupa
docelowa
Operator Operator jest zaznajomiony z eksploatacją urzą-
Inżynier ds.
eksploatacji /
kierownik
laboratorium
Wiedza i kompetencje
dzenia i związanymi z nią procesami roboczymi.
Zna niebezpieczeństwa, jakie mogą wystąpić
podczas pracy z urządzeniem i potrafi ich
uniknąć.
Operator został przeszkolony w zakresie
eksploatacji urządzenia. Szkolenie odbywa się
w ramach rozruchu i przeprowadza je inżynier
ds. eksploatacji / kierownik laboratorium albo
użytkownik urządzenia.
Inżynier ds. eksploatacji / kierownik laboratorium decyduje o zastosowaniu i parametryzacji
urządzenia.
Inżynier ds. eksploatacji / kierownik laboratorium został przeszkolony w zakresie eksploatacji
urządzenia. Szkolenie odbywa się w ramach rozruchu i przeprowadza je Sartorius Service albo
użytkownik.
Uszkodzenie urządzenia może skutkować nieprawidłowym
działaniem lub trudno rozpoznawalnymi zagrożeniami.
t Urządzenie wolno stosować wyłącznie w stanie bezusterko-
wym, zapewniającym bezpieczeństwo techniczne.
t Odłączyć uszkodzone urządzenie od zasilania.
t Niezwłocznie zlecać usunięcie uszkodzeń firmie Sartorius
Service.
2.5 Prace przy wyposażeniu elektrycznym urządzenia
Wszelkie prace i modyfikacje wyposażenia elektrycznego
urządzenia mogą wykonywać wyłącznie pracownicy Sartorius
Service. Urządzenie mogą otwierać tylko pracownicy Sartorius
Service.
Plomba w wersjach legalizowanych
Ustawodawca wymaga zaplombowania wagi
legalizowanej. Plombę wykonuje się za pomocą
nalepki z napisem „Sartorius”. Jej usunięcie unieważnia legalizację i oznacza konieczność ponownej
legalizacji wagi. W przypadku wag legalizowanych
przeznaczonych do zastosowania na EOG obowiązuje deklaracja zgodności dołączona do wagi przy
legalizacji. Należy ją koniecznie zachować.
44 Instrukcja instalacji EVO1S1 | SPO1S1
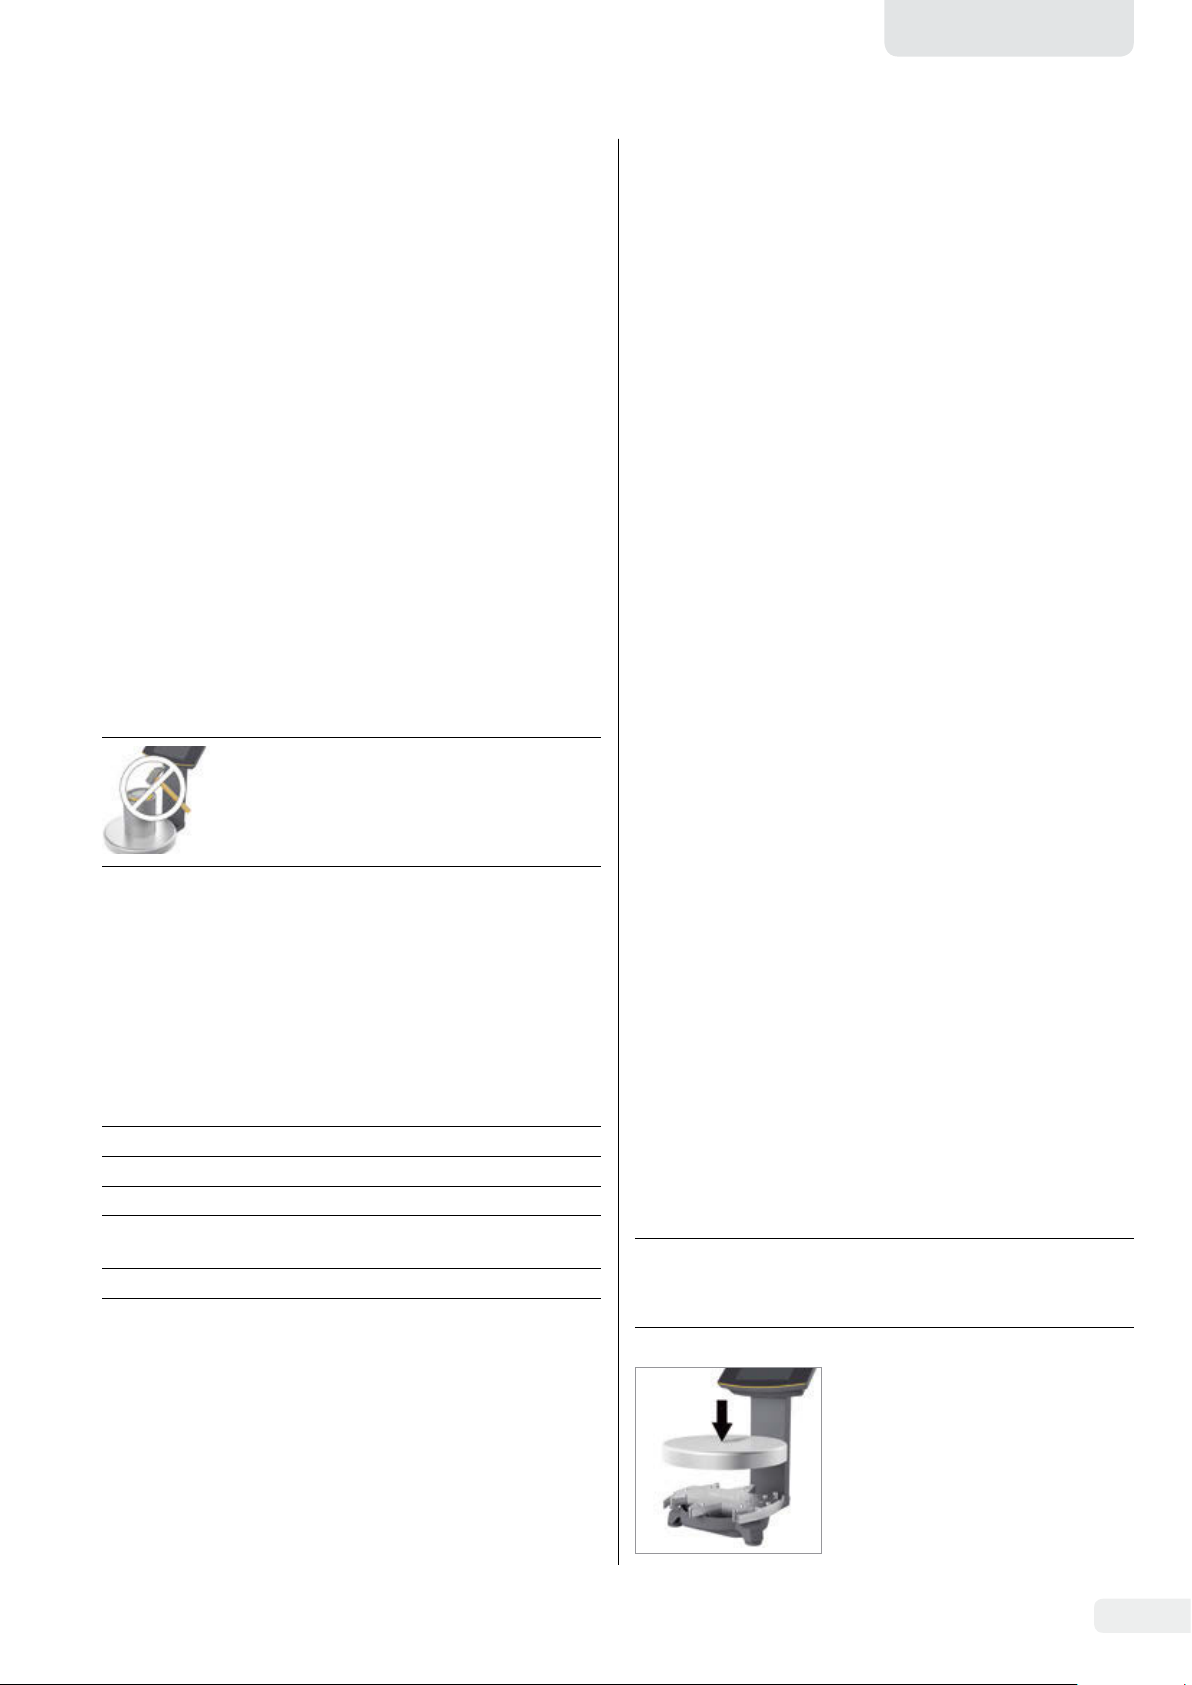
Polski
2.6 Środki ochrony indywidualnej
Środki ochrony indywidualnej chronią przed zagrożeniami
stwarzanymi przez przetwarzane materiały.
t Jeżeli na obszarze roboczym albo w procesie, w którym
stosowane jest urządzenie, wymagane jest użycie środków
ochrony indywidualnej: Nosić środki ochrony indywidualnej.
2.7 Wskazówki bezpieczeństwa dotyczące obsługi urządzenia
− Nie uszkodzić szybki wyświetlacza (przyczyną mogą być np.
spadające przedmioty, uderzenia albo silny nacisk). W przypadku uszkodzenia szybki natychmiast odłączyć urządzenie
od sieci!
− Nie dotykać powierzchni wyświetlacza ostro zakończonymi,
ostrymi, twardymi ani chropowatymi przedmiotami – dotykać wyłącznie przewidzianym do tego celu rysikiem albo
końcem palca. Nigdy nie używać do czyszczenia fragmentów odzieży (np. mankietu płaszcza) ani gąbek, ponieważ
można nimi zarysować powierzchnię (np. nitami albo
guzikami na rękawie płaszcza, piaskiem w gąbce).
− Unikać gromadzenia się ładunków elektrostatycznych na
szybie wyświetlacza i obudowie z tworzywa sztucznego.
Niebezpieczeństwo uszkodzenia wagi!
Nigdy nie zamykać puszki z farbą młotkiem,
dopóki puszka stoi na szalce wagi.
Do zamykania ustawić puszkę z farbą na
mocnym, stabilnym podłożu.
t W przypadku przejściowego składowania urządzenia:
Przechowywać urządzenie odpowiednio do warunków
otoczenia (warunki otoczenia – patrz Rozdział „7.1 Dane
ogólne”, strona 49).
t Wszystkie części oryginalnego opakowania przechowywać
w celu ewentualnego późniejszego zwrotu. W przypadku
wysyłki nie pozostawiać podłączonych do gniazd kabli.
3.3 Wybór miejsca ustawienia
Wybrać właściwe miejsce ustawienia:
− Ustawić urządzenie na stabilnej, wolnej od drgań i równej
powierzchni.
− Zapewnić swobodny dostęp do urządzenia w każdej chwili.
− Z urządzeniami obchodzić się starannie, zgodnie ze
stopniem ochrony IP. Otoczenie musi być odpowiednio
zabezpieczone.
− W przypadku stosowania w instalacjach i warunkach
otoczenia o podwyższonych wymaganiach dotyczących
bezpieczeństwa przestrzegać przepisów obowiązujących
w kraju instalacji.
t Podczas ustawiania unikać miejsc narażonych na działanie
poniższych czynników:
− Wysoka temperatura (ogrzewanie, promieniowanie
słoneczne)
− Bezpośredni przeciąg przez otwarte okna, drzwi,
klimatyzację
− Wstrząsy podczas pomiaru
− Ruch osób
− Ekstremalnie wysoka wilgotność powietrza
− Pola elektromagnetyczne
− Ekstremalnie suche powietrze
3 Instalacja
3.1 Zakres dostawy
Model PMA.
Evolution
Szalka wagi duża: d 233 mm
Szalka wagi mała: d 180 mm
Kabel USB x x
Zasilacz z adapterem
odpowiednim dla danego kraju
Instrukcja instalacji x x
x –
– x
Opcjonalnie Opcjonalnie
3.2 Rozpakowanie
Sposób postępowania
t Otworzyć opakowanie i ostrożnie wyjąć wszystkie części.
t Po rozpakowaniu natychmiast sprawdzić urządzenie pod
kątem widocznych uszkodzeń zewnętrznych.
PMA.HD
Aklimatyzacja
W przypadku umieszczenia zimnego urządzenia w ciepłym
pomieszczeniu może dojść do kondensacji wilgoci zawartej
w powietrzu (obroszenia). Dlatego przed podłączeniem do sieci
należy przeprowadzić aklimatyzację urządzenia, pozostawiając
je odłączone od sieci na ok. 2 godziny.
3.4 Montaż wagi
3.4.1 Nasadzanie szalki wagi
NOTYFIKACJA
Na czas wykonywania wszelkich prac montażowych odłączyć
urządzenie od zasilania elektrycznego.
t Nasadzić od góry szalkę wagi na
wagę.
Instrukcja instalacji EVO1S1 | SPO1S1 45

3.4.2 Podłączanie wagi
Zestaw adaptera sieciowego
t Podłączyć kabel USB z tyłu
wyświetlacza do portu USB.
t Ułożyć kabel USB z tyłu wagi
przez uchwyty kablowe.
3.5 Podłączanie zasilania
Zasilanie wagi odbywa się w zasadzie poprzez port USB
komputera, dostarczającego również dane do wagi. Jeżeli port
USB nie jest dostępny, zasilanie może się odbywać z zasilacza
typu YEPS01-USB (patrz Rozdział „6 Akcesoria”, strona 48),
dostarczanego z różnymi adapterami odpowiednimi dla
danego kraju.
NOTYFIKACJA
− Wydrukowana na zasilaczu wartość napięcia musi być
zgodna z napięciem panującym lokalnie w sieci (dane
przyłączeniowe – patrz Rozdział „7.1 Dane ogólne”,
strona 49).
− Jeśli podane napięcie sieciowe lub wersja wtyczki zasilacza
nie odpowiadają normom obowiązującym w kraju użytkowania, skontaktować się z lokalnym przedstawicielem firmy
Sartorius.
Zasilanie przez zasilacz potrzebne jest tylko, gdy:
− nie jest dostępny komputer ani notebook,
− w wyjątkowych przypadkach, jeżeli napięcie wyjściowe
portu USB komputera albo notebooka nie jest wystarczające.
Torebka Region/kraj
YEPS01-PS1 − USA i Japonia (US+JP)
− Europa (EU)
− Wielka Brytania (GB)
YEPS01-PS6 − Argentyna (AR)
− Brazylia (BR)
− Australia (AU)
− RepublikaPołudniowej Afryki (ZA)
YEPS01-PS7 − Chiny (CN)
− Indie (IN)
− Korea (KR)
y Nasunąć adapter sieciowy na
gniazdo w zasilaczu. Żłobkowane
przyciski muszą być skierowane
w górę.
y Nasunąć adapter sieciowy na
gniazdo w zasilaczu aż do oporu
i usłyszenia trzasku.
y Sprawdzić, czy adapter sieciowy
jest zablokowany. W tym celu
lekko pociągnąć adapter.
y Jeżeli adapter sieciowy nie
przesuwa się: adapter sieciowy
jest zablokowany.
Demontaż/wymiana adaptera
sieciowego
t Nacisnąć żłobkowane przyciski
i
przesunąć adapter sieciowy do
tyłu.
t Wysunąć adapter sieciowy
z zasilacza i zdjąć.
t
Podłączenie do napięcia zasilającego
t Podłączyć kabel USB do portu USB, np. w komputerze
osobistym albo laptopie.
Montaż zasilacza opisano w dalszej części tekstu.
3.5.1 Montaż zasilacza
W przypadku zamiaru użycia zasilacza: zasilacz musi być
zamontowany.
OSTRZEŻENIE Niebezpieczeństwo śmiertelnego poraże-
t
nia prądem i uszkodzenia urządzenia wskutek stosowania
niewłaściwego kabla adaptera sieciowego! Używać tylko
adapterów odpowiednich dla danego kraju. Nigdy nie
wkładać do gniazda adaptera sieciowego odłączonego od
zasilacza.
t Wybrać adapter sieciowy dostosowany do sieci. Adapter
sieciowy musi być dostosowany do gniazda zasilającego na
miejscu montażu.
46 Instrukcja instalacji EVO1S1 | SPO1S1
Podłączenie do zasilacza (opcja)
t Podłączyć kabel przyłączeniowy USB do zasilacza
YEPS01-USB.
t Podłączyć zasilacz do gniazda (napięcia sieciowego).
3.6 Zabezpieczenie przed kradzieżą
t W razie potrzeby zabezpieczyć
wagę z tyłu.

0
30
Polski
3.7 Poziomowanie
Poziomowanie modelu PMA.HD oraz modeli legalizowanych
Dzięki poziomowaniu można skompensować nierówności
w miejscu ustawienia wagi. Dokładne wypoziomowanie wagi
zapewnia precyzyjne wyniki ważenia.
Po każdej zmianie miejsca ustawienia należy ponownie
wypoziomować i skalibrować wagę.
t Należy przekręcać obie stopki
zgodnie z rysunkiem, dopóki
12*
9*
6*
* godzina
pęcherzyk powietrza w poziomicy
nie znajdzie się pośrodku okręgu.
− Pęcherzyk powietrza na godzinie
12: obracać obie stopki w kierunku ruchu wskazówek zegara.
− Pęcherzyk powietrza na godzinie
3: obracać lewą stopkę w kierunku ruchu wskazówek zegara,
a prawą w kierunku przeciwnym
do ruchu wskazówek zegara.
− Pęcherzyk powietrza na godzinie
6: obracać obie stopki w kierunku
przeciwnym do ruchu wskazówek
zegara.
− Pęcherzyk powietrza na godzinie
9: obracać lewą stopkę w kierunku przeciwnym do ruchu
wskazówek zegara, a prawą
w kierunku ruchu wskazówek
zegara.
3.8 Czas nagrzewania
Stosowanie wag zalegalizowanych w metrologii
prawnej:
Po pierwszym podłączeniu do sieci zasilającej
zachować co najmniej 24-godzinny czas
nagrzewania.
Aby uzyskać dokładne wyniki, waga
wymaga przynajmniej 30-minutowego nagrzewania po pierwszym
przyłączeniu do zasilania. Dopiero
wtedy urządzenie osiąga konieczną
temperaturę roboczą.
4 Czyszczenie i konserwacja
4.1 Czyszczenie
Przed rozpoczęciem czyszczenia zasilacza lub wagi: Odłączyć
wszystkie urządzenia od zasilania.
OSTRZEŻENIE Niebezpieczeństwo ze strony
napięcia elektrycznego!
Odłączyć zasilacz (opcjonalny) od sieci. W razie potrzeby wyciągnąć podłączony kabel transmisji danych z komputera. Nigdy
nie otwierać wagi ani zasilacza sieciowego. Nie zawierają one
żadnych części, które operator musiałby czyścić, naprawiać
bądź wymieniać.
NOTYFIKACJA
Następujących części nie czyścić acetonem ani żrącymi
środkami czyszczącymi:
− Wejście wtyczki sieciowej
− Złącze danych
− Tabliczki oraz pozostałe elementy z tworzyw sztucznych
Sposób postępowania
t Odłączyć urządzenie od zasilania.
t NOTYFIKACJA Zwracać uwagę, aby do wnętrza systemu
wagowego nie dostały się ciecz ani pył.
t NOTYFIKACJA Korozja lub uszkodzenie urządzenia wskutek
stosowania nieodpowiednich środków czyszczących!
t Nie stosować żrących, zawierających chlor ani agresyw-
nych środków czyszczących.
t Nie stosować środków czyszczących zawierających
cząstki ścierne, np. mleczka ściernego, wełny stalowej.
t Do czyszczenia używać tylko miękkich szczotek i ścierek.
t Nie stosować środków czyszczących zawierających
rozpuszczalniki.
Czyszczenie panelu obsługi
t Przed przystąpieniem do czyszczenia panelu obsługi:
Wyłączyć urządzenie, ponieważ dotknięcie może spowodować mimowolne wprowadzanie poleceń.
Czyszczenie obudowy urządzenia
t Obudowę urządzenia przecierać lekko wilgotną szmatką.
Do silniejszych zabrudzeń stosować łagodny roztwór mydła.
t Następnie osuszyć urządzenie miękką szmatką.
4.2 Konserwacja
Aby zapewnić pewność pomiarów wykonywanych na wadze,
zalecamy regularną, co najmniej coroczną, konserwację.
Sartorius Service oferuje różne umowy o konserwację, które
są indywidualnie dostosowywane do potrzeb klienta.
W ramach każdej konserwacji należy zawsze udostępnić
certyfikat kalibracji. Zlecać elektrykowi wykonanie kontroli
bezpieczeństwa technicznego zasilacza i jego przyłączy
w rozsądnych odstępach czasu (np. co 2 lata).
Instrukcja instalacji EVO1S1 | SPO1S1 47

5 Utylizacja
6 Akcesoria
5.1 Wskazówki dotyczące odkażania
Użytkownik odpowiada za przestrzeganie krajowych przepisów
w sprawie odpowiedniej deklaracji w przypadku transportu oraz
utylizacji, a także za prawidłową utylizację urządzenia.
OSTRZEŻENIE
Niebezpieczeństwo odniesienia obrażeń ciała spowodowanych skażeniem urządzeń!
Urządzenia skażone niebezpiecznymi substancjami (kontaminacja ABC) nie zostaną przyjęte ani do naprawy, ani utylizacji.
5.1.1 Wskazówki dotyczące utylizacji
Urządzenie i akcesoria nie stanowią odpadów domowych,
ponieważ zostały wyprodukowane z wysokogatunkowych
materiałów, które można poddać recyklingowi i ponownie
wykorzystać. Wszystkie części należy zutylizować w odpowiednich instalacjach do utylizacji.
Opakowanie jest wykonane z materiałów ekologicznych,
mogących służyć jako surowce wtórne.
5.1.2 Utylizacja
Warunki
Urządzenie jest odkażone.
Sposób postępowania
t Zutylizować urządzenie. Przestrzegać wskazówek dotyczą-
cych utylizacji zamieszczonych na naszej stronie internetowej (www.sartorius.com).
t Opakowanie zutylizować zgodnie z przepisami krajowymi.
Akcesoria Nr katalogowy
Kabel USB YCC01-0040M5
Zasilacz (5,2 V / 1,4 A) YEPS01-USB
Zestaw adaptera sieciowego do
YEPS01-USB YEPS01-PS1
− USA i Japonia (US+JP)
− Europa (EU)
− Wielka Brytania (GB)
Zestaw adaptera sieciowego do
YEPS01-USB YEPS01-PS6
− Argentyna (AR)
− Brazylia (BR)
− Australia (AU)
− Republika Południowej Afryki (ZA)
Zestaw adaptera sieciowego do
YEPS01-USB YEPS01-PS7
− Chiny (CN)
− Indie (IN)
− Korea (KR)
Osłona robocza panelu obsługi,
10 szt. w opakowaniu
Osłona robocza statywu,
PMA.Evolution, 10 szt. w opakowaniu
Osłona robocza szalki wagi,
PMA.Evolution, 10 szt. w opakowaniu
Obciążniki kalibracyjne
do PMA.Evolution:
− 5 kg, klasa dokładności F2 YCW654-AC-00
− 2 kg, klasa dokładności F2 YCW624-AC-00
− 1 kg, klasa dokładności F2 YCW614-AC-00
do PMA.HD:
− 2 kg, klasa dokładności F1 YCW623-AC-00
− 1 kg, klasa dokładności F1 YCW613-AC-00
YDC03PMA10
YDC03PMA-CO10
YDC03PMA-WP10
48 Instrukcja instalacji EVO1S1 | SPO1S1

Polski
7 Dane techniczne
7.1 Dane ogólne
Dane Jednostka Wartość
Waga
Zasilanie elektryczne Tylko przez port USB albo zasilacz Sartorius YEPS01-USB
Napięcie wejściowe V
Pobór mocy W 2,0
Pozostałe dane IP40 wg normy EN 60529/IEC 60529
Warunki otoczenia
Dane techniczne obowiązują w następujących warunkach otoczenia:
Otoczenie Urządzenie wolno stosować wyłącznie w pomieszczeniach
Temperatura otoczenia* °C +10 – +30
Zdolność do pracy °C Gwarantowana pomiędzy +5 – +45
Przechowywanie i transport °C –10 – +60
Wilgotność względna powietrza % 15–80 dla temperatury do 30°C bez skraplania,
Port przyłączeniowy USB, typ B (wirtualny port szeregowy)
Format 7 bit ASCII, 1 bit startowy, 1 albo 2 bity stopu
Parzystość Parzystość, nieparzystość, brak parzystości
Prędkość transmisji 600 do 57 600 bitów/s
Handshake Ürogramowy albo sprzętowy
Kompatybilność elektromagnetyczna Zgodnie z normą EN 61326-1 / IEC 61326-1 Wyposażenie elektryczne do
Odporność na zakłócenia Wymagania podstawowe
Emisja zakłóceń Klasa B
DC
+5,0
liniowy spadek do 50% wilgotności względnej powietrza przy 40°C.
pomiarów, sterowania i użytku w laboratoriach -- Wymagania dotyczące
kompatybilności elektromagnetycznej (EMC) -- Część 1: Wymagania
ogólne
Nadaje się do zastosowania na środowiskach mieszkalnych i obszarach
podłączonych bezpośrednio do sieci niskiego napięcia, (również) zasilających budynek mieszkalny.
Wagi legalizowane zgodnie z dyrektywami UE odpowiadają dyrektywie
2014/31/UE z EN 45501:2015 lub OIML R76:2006.
* W przypadku wag legalizowanych zgodnie z przepisami UE, patrz dane
na wadze.
** W przypadku wag legalizowanych zgodnie z przepisami UE obowiązują
przepisy ustawowe
Aplikacje do wyboru Rekalkulacja, receptura
Zasilacz YEPS01-USB (opcja)
Zasilacz wtyczkowy ze złączem USB Typ FSP007-P01P (oznaczenie producenta)
Napięcie pierwotne
Napięcie wtórne 5,2 V
Pozostałe dane Klasa ochrony II
100–240 V~, ±10%, 50–60 Hz, ±5%, < 0,2 A
, ±5%, 1,4 A (maks.)
DC
IP40 wg normy EN 60529/IEC 60529
Instrukcja instalacji EVO1S1 | SPO1S1 49

7.2 Dane dotyczące modelu
Jednostka Wartość Wartość
Model PMA.Evolution, EVO1S1 PMA.HD, SPO1S1
Zakres ważenia g 7500 | 999,95 2200
Rozdzielczość g 0,1 | 0,05 0,01 | 0,1
Zakres tarowania (subtrakcyjny) g -7500 -2200
Wartość masy zewnętrznego
odważnika / klasa dokładności
Wielkość szalki wagi
Masa netto kg 2,4 2,3
kg 1, 2, 5 /
F2 albo lepsza
d mm
233 180
1, 2 /
F1 albo lepsza
7.3 Modele legalizowane z zatwierdzeniem wzoru WE: Dane techniczne specyficzne dla modelu
Jednostka Wartość Wartość
Model PMA.Evolution, EVO1S1 PMA.HD, SPO1S1
Klasa dokładności II III
Konstrukcja PMA-EV PMA-HD
Zakres ważenia maks. g 7500 2200
Rozdzielczość d g 0,1 1
Wartość kalibracji e g 1 1
Zakres temperatury +10°C – +30°C +10°C – +40°C
Zakres kompensacji tary (subtrakcyjny)
< 100% maksymalnego zakresu
ważenia
< 100% maksymalnego zakresu
ważenia
8 Deklaracja zgodności UE
Dołączona deklaracja zgodności stanowi potwierdzenie zgodności urządzenia z wymienionymi dyrektywami.
W przypadku wag poddanych ocenie zgodności przeznaczonych do zastosowania na EOG obowiązuje dołączona do wagi deklaracja
zgodności. Należy ją koniecznie zachować.
50 Instrukcja instalacji EVO1S1 | SPO1S1

日本語
目次
1 この文書について........................................51
1.1 対象範囲 ............................................51
1.2 使用している記号 ..................................51
2 安全上の注意
2.1 用途..................................................51
2.2 作業員の適格性 ....................................52
2.3 本書の説明の重要性...............................52
2.4 機器の正常な動作 .................................52
2.5 機器の電気装置に対する操作 ....................52
2.6 身体保護具 .........................................53
2.7 機器の操作に関する安全指示 ....................53
3 設置
4 クリーニングとメンテナンス
5 処分
6 アクセサリー
.......................................................53
3.1 同梱物の内容.......................................53
3.2 開梱..................................................53
3.3 設置場所の選択 . . . . . . . . . . . . . . . . . . . . . . . . . . . . . . . . . . . . 53
3.4 天びんの設置 .......................................53
3.5 電源の確立 .........................................54
3.6 盗難防止装置.......................................54
3.7 レベリング ..........................................55
3.8 ウォームアップタイム ..............................55
4.1 クリー ニング ........................................55
4.2 サービス ............................................55
.......................................................56
5.1 汚染除去に関する情報 ............................56
............................................51
.............................55
..............................................56
注意
回避しない 場合に、中程度の傷害や軽傷につながるリスク
を伴う危険 性を示します。
注記
回避しない 場合に、物的損害につながる可能性のある危
険性を示します。
1.2.2 その他の記号
t
y
[ ] 括弧内のテキストは、制御および表示要素を表
操作ディスプレイ上の数値
本説明書に記載されている数値は、「標準的な」天びんに
基づいています。検証済み天びんの場合、一部の表示また
は報告がこれらの数値とわずかに異なることがあります。
このことが操作に大きく影響する場合、本文中に相違点に
ついて説明があります。
必要な措置:実行する必要のある措置を表しま
す。
結果:実行した作業の結果を表します。
します。
この記号は、法定計量用としての検証済み天び
んの販売に関する情報を示します。
以下では、「検証済み」という用語は、「法定計量
用としての検証済み」または「適合性評価済み」
を意味します。
7 技術データ
7.1 一般データ..........................................57
7.2 モデル別データ.....................................58
7.3 EC型式承認証明書付き検証済みモデル:
8 EU適合宣言
...............................................57
モデル別技術仕様..................................58
..............................................58
1 この文書について
1.1 対象範囲
本書は、以下のペイント調合用天びんモデルに適用されます。
− EVO1S1
− SPO1S1
1.2 使用している記号
本書で使用されている「機器」という用語は、常に天びんと
ACアダプターの組み合わせを指します。
1.2.1 警告
2 安全上の注意
2.1 用途
この天びんは、潜在的な爆発環境以外での染料およびペ
イントの調合のみを目的としています。載せるサンプルの
種類に適した容器を使用する必要があります。
天びんは、スタンドアロンの機器としてディスプレイから、
または接続されたPCにインストールされたアプリケーショ
ンソフトウェア(ペイント製造元のペイント調合プログラム
など)を使 用して操作できます。PCはUSBケーブ ル によって
天びんに接続されます。
本書は機器の一部です。機器を使用する際には、本書に必
ず従ってください。
これ以外の使用方法は、不適切とみなされます。機器が正
しく使 用 されなかった場合。
機器の保護システムが故障することがあります。これが、予
測不能なケガや器物破損につながることがあります。
より高度な安全要件が求められるシステムおよび周囲環
境条件の下で使用する場合は、お住まいの国の該当する
要件および規定に必ず従ってください。
警告
回避しない 場合に、死亡や重傷につながるリスクを伴う危
険性を示します。
設置説明書 EVO1S1 | SPO1S1 51

機器の動作条件
この機器は、屋内でのみ使用可能です。
この機器は、本書の技術データに記載されている装置を使
い、記載されている動作条件でのみ使用できます。
機器の改造や技術的変更は行わないでください。機器に改
造や技術的変更を加えるには、事前にザルトリウスから書
面で許可を得る必要があります。
機器またはザルトリウスによって提供されたアクセサリー
を極端な温度、強烈な薬品蒸気、湿気、衝撃、振動、強い電
磁場にさらさないでください。周囲環境条件を確認してくだ
さい。機器間の接続ケーブルや機器ケース内の配線のカ
バーはPVC製です。この材料を腐食する薬品は、これらの
ケーブルから離しておく必要があります。
2.2 作業員の適格性
本書は、下記のターゲットグループを対象としています。機
器を操作する作業員には、記載されている知識と権限が必
要です。
本書に記載されている処置に、資格条件が示されていな
い場合:説明されている処置は、「ユーザー」ターゲットグ
ループを対象としています。
2.3 本書の説明の重要性
本書の説明に従わない場合、感電や機械的または化学的
危険など、深刻な結果につながる恐れがあります。
t 機器を使用する前に:本書を最後までよくお読みくだ
さい。
t 本書を紛失した場合:新しい説明書を要求するか、最新
バ ージョンを ザ ルトリウス Webサ イ ト( www.sartorius.com)
からダウンロードしてください。
t 本書に含まれている情報は、機器を使用するすべての
人が入手できるようにする必要があります。
2.4 機器の正常な動作
損傷した機器は、誤動作や、検出しにくい危険につながり
ます。
t 機器は、安全かつ正常に動作する場合にのみ、操作して
ください。
t 損傷した機器は、直ちに電源から取り外してください。
t 誤動作や損傷がある場合は、すぐにザルトリウスサー
ビスに修理を依頼してください。
2.5 機器の電気装置に対する操作
個々の処置を、他のターゲットグループまたはザルトリウ
スサービス担当者が実行する必要がある場合:必要な資
格は、処置の説明に記載されています。
タ ー ゲ ット
グループ
ユーザー ユーザーは、機器の操作とそれに関連する作
操作技術
者 / 主席
研究員
電気技師 資格を有し、専門の研修を受け、知識と経験
オペレーターオペレーターは、安全要件および作業場の安
知識 / 責任
業過程に精通しています。機器の操作時に起
こりうる危険を認識し、それらの危険を回避
できます。
ユーザーは、機器の操作について研修を受け
ます。研修は機器の使用開始時に行われ、操
作技術者/主席研究員または機器のオペレー
ターによって実行されます。
操作技術者 / 主席研究員は、機器の使用と構
成に関する決定を行います。
操作技術者 / 主席研究員は、機器の操作につ
いての研修を受講済みです。研修は、機器の
使用開始時にザルトリウスサービスまたはオ
ペレーターによって実行されます。
があります。当該の規制に精通していて、割り
当てられた作業を評価し、危険の可能性を識
別することがで きます。
全規制の順守について責任を負います。
オペレーターは、機器を使用するすべての人
が関連情報を入手でき、機器の操作について
研修を受けていることを確認する必要があり
ます。
機器の電気装置に対する操作や変更は、ザルトリウスサー
ビスの担当者だけが実行できます。機器を開けることがで
きるのは、ザルトリウスサービスの担当者のみです。
法定計量用としての検証済み天びんのシール
法律の求めにより、検証済み天びんにはシール
(証印)が貼付されていなければなりません。
ザルトリウスの機器では、このシールは
「 Sartorius」ロゴの付いたステッカーです。シー
ルが取り除かれた場合、検定の有効性が無効
になり、天びんの再検定が必要になります。ここ
に示した適合宣言書は、EEAで使用される検証
済み計量器用のものです。この宣言書は安全
な場所に保存してください。
52 設置説明書 EVO1S1 | SPO1S1

日本語
2.6 身体保護具
身体保護具は、処理中のサンプルのもたらすリスクから人
体を保護します。
t 機器が使用される作業場所またはプロセスにより、身
体保護具が必要とされるとき:身体保護具を着用してく
ださい。
2.7 機器の操作に関する安全指示
− 操作ディスプレイのガラスパネルが(物を落とす、衝撃、
極端な温度などによって)破損しないように注意してく
ださい。ガラスパネルが破損した場合は、すぐに機器を
電源から取り外してください。
− 操作ディスプレイの表面を尖ったもの、鋭利なもの、固
いもの、ざらざらしたもので触れないでください。付属
のタッチペンまたは指以外では触れないでください。
衣服の一部(袖など)や洗浄用スポンジを使用しないで
ください。袖の金具やボタン、スポンジ内の砂などによ
って表面が傷つくことがあります。
− 操作ディスプレイのガラスパネルやプラスチックケー
スに静電気が発生しないようにしてください。
天びんが破損する危険があります!
ペイント缶をひょう量皿に載せたまま、ハ
ンマーで閉じないでください。
閉じるときに は、ペイント缶を固く安定した
面に置いてください。
3 設置
t 箱やパッケージ内の部品は、今後の運搬に備えてすべ
て保管しておいてください。運搬時には、すべてのケー
ブルを 取り外してください。
3.3 設置場所の選択
設置に適した場所を選んでください。
− 機器は、振動が少なく、安定した水平な面に設置してく
ださい。
− 機器の周囲には障害物を置かないようにしてください。
− 機器は、IP保護等級に従って慎重に取り扱う必要があり
ます。セキュリティが適切に確保された環境でなければ
なりま せ ん 。
− より高度な安全要件が求められるシステムおよび周囲
環境条件の下で使用する場合は、お住まいの国の該当
する要件および規定に必ず従ってください。
t 以下のような好ましくない影響がある場所には設置し
ないでください。
− 熱(ヒーターや直射日光)
− 解放された窓や、エアコン、ドアなどからの空気の
流れ
− ひょう量中の強い振動
− 人が頻繁に通る場所
− 極端に高い湿度
− 電磁場
− 極度に乾燥した空気
環境順化
冷えた機器を暖かい環境へ移動させると、結露(空気中の
水分の凝縮)が発生する原因となります。したがって、電源
から取り外した機器は、電源に再度接続する前に、約2時間
順化させる必要があります。
3.1 同梱物の内容
モデル PMA.
Evolution
ひょう量皿(大):d 233 mm x -
ひょう量皿(小):d 180 mm - x
USBケーブル x x
各国専用のアダプター
付きACアダプター
設置手順 x x
オプ ション オプ ション
PMA.HD
3.2 開梱
手順
t 梱包を開梱し、すべての部品を慎重に取り出します。
t 機器を梱包から取り出したら、外部に損傷がないか、直
ちに点 検します。
t 機器を一時保管する場合:周囲環境条件に従って機器
を保管します(周囲環境条件については、第“7.1 一般デ
ー タ ” 章( 57ペ ー ジ )を 参 照 )。
3.4 天びんの設置
3.4.1 ひょう量皿を天びんに載 せる
注記
組立作業の間は、機器を主電源から取り外しておく必要が
ありま す。
t ひょう量皿を上から天びんに
載せます。
設置説明書 EVO1S1 | SPO1S1 53

3.4.2 天びんの接続
主 電 源アダプターセット
t USBケーブルをディスプレイ
背面のUSBソケット に 挿 入し
ます。
t USBケーブルを天びんの背面
のケーブルホルダーに通し
ます。
3.5 電源の確立
天びんは、通常、天びんのデータを入力するのと同じPCの
USB接続から給電されます。このUSB接続が使用できない
場合には、ACアダプターYEPS01-USB(第“6 アクセサリー” 章
(56ページ)参照)を使用することができ、ACアダプター
には国別アダプターが付属しています。
注記
− ACアダプターに印刷された電圧定格が地域の主電圧
と同じであることを確認してください(接続データにつ
い て は 、第 “ 7.1 一般データ”章(57ペ ー ジ )を 参 照 )。
− 記載されている供給電圧または電源プラグの形状がお
住まいの地域のものと一致しない場合は、最寄りのザ
ルトリウス代理店または販売店までご連絡ください。
ACアダプターによる電源供給は、次のような場合にのみ必
要です。
− PCまたはノートパソコンが使用できないとき。
− PCまたはノートパソコンの出力電圧が不十分な例外的
な場合。
ACアダプターの組立について、以下に説明します。
3.5.1 電源の組立
電源を使用する場合は、組立が必要です。
警告 不適切な電源プラグアダプターを使用すると、
t
致死的な感電や機器の損傷の原因となります。各国専
用の電源プラグアダプター以外は使用しないでくださ
い。電源から取り外されているときに、電源プラグアダ
プターをソケットに差し込まないでください。
t お使いの主電源に適合する主電源アダプターを選択し
てください。主電源アダプターは、必ず設置場所の壁コ
ンセントに適合するものを使用します。
バ ッグ 地域/国
YEPS01-PS1 − 米 国 、日 本( US+JP)
− ヨ ー ロ ッ パ( EU)
− 英 国( GB)
YEPS01-PS6 − ア ル ゼ ン チ ン( AR)
− ブ ラ ジ ル( BR)
− オ ー ス ト ラ リ ア( AU)
− 南アフリカ( ZA)
YEPS01-PS7 − 中 国( CN)
− イ ン ド( IN)
− 韓 国( KR)
t 電源プラグアダプターを電源
に差し込みます。溝付きのボタ
ンが上を向くようにします。
t カチッと音がするまで、電 源プ
ラグアダプターを押し込みま
す。
t 電源プラグアダプターを軽く
引っ張り、しっかり固定されて
いるかどうか確認します。
y しっかり固定されていれば、電
源プラグアダプターは動きま
せん。
主 電 源アダプターの取り外し/交換
t 溝付きのボタンを上から押し
て、主電源アダプターを手前
に引きます。
t 電源プラグアダプターを電源
から外します。
t
t
電源への接続
t USBケーブルを(PCまたはノートパソコンの)USBソケッ
トに 挿 入します。
ACアダプターの接続(オプション)
t USBケーブルをYEPS01-USB ACアダプターに 挿入しま
す。
t ACアダプターを壁コンセント(供給電圧)に差し込みま
す。
3.6 盗難防止装置
t 必要な場合は、天びんの背面
を固定してください。
54 設置説明書 EVO1S1 | SPO1S1

0
30
日本語
3.7 レ ベリング
PMA.HDおよび検証済みモデルのレベリング
設置場所が傾いていたり平坦ではなかったりする場合は、
天びんを水平調整することでこれを補正します。一貫した、
再現性のあるひょう量結果を確保するためには、天びんを
完全に水平にする必要があります。
設置場所を変更した場合は、変更のたびに水平調整を再
度行ってから、調整を行う必要があります。
t 図のように、気泡が水準器の
円の中心に位置するまで、左
12*
9*
6*
時
右のレ ベリングフットを 回し
ます。
− 気泡が12時の位置にあると
き:両方のフットを時計回りに
回します。
− 気泡が3時の位置にあるとき:
左のフットを時 計 回りに 回し、
右のフットを反時計回りに回
します。
− 気泡が6時の位置にあるとき:
両方のフットを反時計回りに
回します。
− 気泡が9時の位置にあるとき:
左のフットを反時計回りに回
し、右のフットを 時 計回りに回
します。
3.8 ウォームアップタイム
法定計量用としての検証済み天びんの使用:
最初に電源に接続してから少なくとも24時間の
ウォームアップタイムを確保してください。
正確な結果を得るためには、天び
んが最初に電源に接続されてか
ら 、少 な く と も 30分間のウォームア
ップが必要です。30分が経過する
と、ようやく機器が必要な動作温
度に達します。
4 クリーニングとメンテナ
ンス
4.1 クリー ニ ング
ACアダプターや天びんを清掃する前に:すべての機器を電
源から外してください。
警告 電圧または電流による電気的障害
ACアダプターが接続されている場合は、コンセントから外
します。PCからデータケーブ ルを取り外します。絶対に天び
んやACアダプターを開けないでください。天びんやACアダ
プタの内部部品は、オペレータが清掃したり修理したり、あ
るいは交換したりすることができません。
注記
次の部品をアセトンや強力な洗浄剤で清掃しないでくだ
さい。
− 電 源 ソ ケット
− データインターフェイス
− ラベル、およびその他すべてのプラスチック製部品
手順
t 機器を電源から外します。
t 注記 液体や粉塵などが天びんやACアダプターに入ら
ないようにしてください。
t 注記 不適切な洗浄剤の使用は、機器の腐食や損傷に
つながります。
t 塩化物を含み腐食性のある強力な洗浄剤は使用し
ないでください。
t 研磨剤を含む洗浄剤は使用しないでください(精練
剤、スチールウールなど)。
t クリーニングには、柔らかいブラシと布以外のもの
を使用しないでください。
t 溶剤系の洗浄剤は使用しないでください。
コントロールパネルの清掃
t コントロールパネルを清掃する前に:誤って画面に触
れて、不要な入力をしないように、装置の電源を切りま
す。
装置ハウジングの清掃
t 湿らせた布でハウジングを拭きます。汚れがひどいとき
は、刺激の弱い石鹸液を使用します。
t その後、柔らかい布で装置を拭きます。
4.2 サービス
お使いの天びんの正確さを保つために、少なくとも1年に1
度の定期サービスをお勧めしています。ザルトリウスサー
ビスは、お客様の必要に応じて、メンテナンス間隔が異な
るサービス契約を提供しています。
メンテナンスを行うと、その都度、校正証明書が発行され
ます。電源と接続の安全検査は、資格を有する電気技師が
適切な間隔で実施する必要があります(例:2年 ご と )。
設置説明書 EVO1S1 | SPO1S1 55

5 処分
6 アクセサリー
5.1 汚染除去に関する情報
オペレーターは、輸送と処分の適切な宣言と装置の適切な
処分に関する地域の法律を順守する責任があります。
警告
汚染された装置は、ケガにつながる危険があります。
危険性物質で汚染された機器(NBC汚染)は、修理または
廃棄の対象として承認されません。
5.1.1 処分に関する情報
機器とそのアクセサリーは、リサイクルや再利用が可能な
高品質材料を使用しているため、一般家庭ごみとして扱う
ことができません。すべての部品は、処理施設で適切に処
分する必要があります。
梱包材は環境にやさしい材料を使用しており、二次原料と
して再利 用 できます。
5.1.2 処分
要件
機器の汚染が除去されていること。
手順
t 機器を処分します。当社Webサ イ ト( www.sartorius.com)
の処分に関する指示に従ってください。
t 条例に従って梱包材を廃棄してください。
アクセサリー 注文番号
USBケーブル YCC01-0040M5
電 源( 5.2 V/1.4 A) YEPS01-USB
YEPS01-USB用主電源アダプターセット YEPS01-PS1
− 米 国 、日 本( US+JP)
− ヨ ー ロ ッ パ( EU)
− 英 国( GB)
YEPS01-USB用主電源アダプターセット YEPS01-PS6
− ア ル ゼ ン チ ン( AR)
− ブ ラ ジ ル( BR)
− オ ー ス ト ラ リ ア( AU)
− 南アフリカ( ZA)
YEPS01-USB用主電源アダプターセット YEPS01-PS7
− 中 国( CN)
− イ ン ド( IN)
− 韓 国( KR)
コントロールパネル使用時カバー、
10枚 パ ック
サポートアーム使用時カバー、
PMA.Evolution、10枚 パ ック
ひょう量皿使用時カバー、
PMA.Evolution、10枚 パ ック
校正分銅
PMA.Evolution用:
− 5 kg、精度等級F2 YCW654-AC-00
− 2 kg、精度等級F2 YCW624-AC-00
− 1 kg、精度等級F2 YCW614-AC-00
PMA.HD用:
− 2 kg、精度等級F1 YCW623-AC-00
− 1 kg、精度等級F1 YCW613-AC-00
YDC03PMA10
YDC03PMA-CO10
YDC03PMA-WP10
56 設置説明書 EVO1S1 | SPO1S1

日本語
7 技術データ
7.1 一般データ
仕様 単位 値
スケール
供給電圧 USBインターフェイスまたは ザ ルトリウスACアダプターYEPS01-USB
のみ
入力電圧 V
消費電力 W 2.0
その他のデータ EN 60529/IEC 60529に準拠したIP40
周囲環境条件
この技術仕様は、以下の周囲環境条件下で適用されます。
環境 屋内使用のみ
室温* °C +10〜+30
動作温度範囲 °C +5〜+45で保証
保管時および輸送時 °C -10〜+60
相対湿度 % 30°C(結露なし)の温度までは15〜80%、そ の 後 40°Cで50%の相対湿
インターフェイス 接 続 USB、タ イ プ B(仮想シリアルインターフェイス)
フォー マ ット 7ビ ット ASCII、スタートビット1、ス ト ッ プ ビ ッ ト 1または2
パリティビット 偶 数 、奇 数 、な し
伝送速度 600〜57,600 bps
ハ ンド シェ ーク ソフトウェアまた は ハ ードウェア
電磁環境適合性 EN 61326-1/IEC61326-1(計測、制御、実験室で使用するための電気
耐干渉性 基本要件
干 渉 ク ラ ス: クラス B
DC
+5.0
度まで直線的に減少
機器 - EMC要求事項 第1部:一般要求事項
住宅地域および住宅に電気を供給するための低電圧網に接続され
ている地域での使用に適合
EN 45501:2015およびOIML R76:2006を含む理事会指令2014/31/EUに
適合した、EU要件に準拠した検証済み天びん。
* EU要件に準拠した検証済み天びんについては、天びんに関する
情報を参照してください。
** EU要件に準拠した検証済み天びんについては、法的規制が適用
されます。
使用可能なアプリケーションプログラム Recalculation、formula
電源YEPS01-USB(オプション)
USB電源プラグ タイプFSP007-P01P(製造業者の指定)
一次
二次 5.2 V
その他のデータ 保護等級II
100-240 V〜、±10%、50–60 Hz、±5%、< 0.2 A
、± 5%、1.4 A(最大)
DC
EN 60529/IEC 60529準拠のIP40
設置説明書 EVO1S1 | SPO1S1 57

7.2 モデル別データ
単位 値 値
モデル PMA.Evolution、EVO1S1 PMA.HD、SPO1S1
ひょう量 g 7500 | 999.95 2200
読取限度 g 0.1 | 0.05 0.01 | 0.1
風袋引き(減算式) g -7500 -2200
外部調整用分銅/
精度等級
ひょう量皿のサイズ d mm 233 180
正味重量 kg 2.4 2.3
kg 1、2、5 /
F2以上
1、2 /
F1以上
7.3 EC型式承認証明書付き検証済みモデル:モデル別技術仕様
単位 値 値
モデル PMA.Evolution、EVO1S1 PMA.HD、SPO1S1
精 度クラス II III
型式 PMA-EV PMA-HD
ひょう量(最大) g 7500 2200
補助表示値d g 0.1 1
検証規模間隔 e g 1 1
温度範囲 +10°C〜+30°C +10°C〜+40°C
風袋引き(減算式) < 最大ひょう量の100% < 最大ひょう量の100%
8 EU適合宣言
ここに添付する適合宣言は、本機器が引用されている指令に準拠していることを確証するものです。
ここに示した適合宣言書は、EEAで使用する検証済み天びん用のものです。この宣言書は安全な場所に保存してください。
58 設置説明書 EVO1S1 | SPO1S1

EC/EU Declaration of Conformity
Installation and Operating Instructions EVO1S1 | SPO1S1 59
Traduction du document original
Déclaration de conformité UE
Fabricant
37070 Goettingen, Allemagne
Type d'appareil Balance pour peintures
Série
2014/30/UE Compatibilité électromagnétique
EN 61326-1:2013
2011/65/UE Limitation de l'utilisation de certaines substances dangereuses dans les équipements électriques et
EN 50581:2012
Sartorius Lab Instruments GmbH & Co. KG
déclare sous sa seule responsabilité que l’appareil
EVO1S1, SPO1S1
dans la version que nous avons mise sur le marché, est conforme à toutes les dispositions pertinentes
des directives européennes suivantes - y compris aux amendements en vigueur au moment de cette
déclaration - et répond aux exigences applicables des normes européennes harmonisées suivantes :
électroniques (RoHS)
Année de l'attribution du marquage CE :
16
Sartorius Lab Instruments GmbH & Co. KG
Goettingen, 20/04/2016
___________________________________________ ___ _______________________________________________________
Dr Reinhard Baumfalk
Vice President R&D Head of International Certification Management
Cette déclaration certifie la conformité avec les directives européennes citées plus haut, mais ne constitue pas une
garantie des propriétés. Cette déclaration n'est plus valable si le produit est modifié sans notre accord. Les
consignes de sécurité mentionnées dans la documentation correspondante du produit doivent être respectées.
Dr Dieter Klausgrete
___________________________________________________________________________________________
Doc : 2025577-01 SLI15CE001-01.fr 1 / 1 PMF : 2025573 OP-113_fo1_2015.10.12
60 Installation and Operating Instructions EVO1S1 | SPO1S1

Traduzione del testo originale
Dichiarazione di conformità CE
Fabbricante
37070 Goettingen, Germania
Tipo di
apparecchio Bilancia per miscelazione di vernici
Serie
2014/30/UE Compatibilità elettromagnetica
EN 61326-1:2013
2011/65/UE Restrizione dell’uso di determinate sostanze pericolose nelle apparecchiature elettriche ed elettroniche
EN 50581:2012
Sartorius Lab Instruments GmbH & Co. KG
dichiara sotto la propria responsabilità che l'apparecchiatura
EVO1S1, SPO1S1
nella versione da noi immessa sul mercato, è conforme a tutte le disposizioni pertinenti delle seguenti
direttive europee - comprese le loro modifiche vigenti al momento della dichiarazione - e soddisfa le
prescrizioni applicabili delle seguenti norme europee armonizzate:
(RoHS)
Anno della concessione del marchio CE:
16
Sartorius Lab Instruments GmbH & Co. KG
Goettingen, 20-04-2016
___________________________________________ ___ _______________________________________________________
Dr. Reinhard Baumfalk
Vice President R&D Head of International Certification Management
La presente dichiarazione certifica la conformità con le suddette direttive UE, non costituisce tuttavia alcuna
garanzia delle proprietà del prodotto. Qualora vengano apportate modifiche al prodotto senza la nostra
autorizzazione, la presente dichiarazione perde la sua validità. Vanno osservate le istruzioni di sicurezza contenute
nella documentazione del prodotto pertinente.
Dr. Dieter Klausgrete
___________________________________________________________________________________________
Doc: 2025577-01 SLI15CE001-01.it 1 / 1 PMF: 2025573 OP-113_fo1_2015.10.12
Installation and Operating Instructions EVO1S1 | SPO1S1 61

Traducción del original
Declaración de conformidad UE
Fabricante
37070 Goettingen, Alemania
Tipo de aparato Balanza para la mezcla de pintura
Serie
2014/30/UE Compatibilidad electromagnética
EN 61326-1:2013
2011/65/UE Restricciones a la utilización de determinadas sustancias peligrosas en aparatos eléctricos y electrónicos
EN 50581:2012
Sartorius Lab Instruments GmbH & Co. KG
declara bajo su sola responsabilidad que el medio de producción
EVO1S1, SPO1S1
en la variante comercializada por nosotros, cumple todas las disposiciones pertinentes de las siguientes
–
Directivas Europeas
los requisitos aplicables de las siguientes Normas Armonizadas Europeas:
(RUSP)
Año de concesión de la marca CE:
incluidas las modificaciones vigentes en el momento de la declaración– y cumple
16
Sartorius Lab Instruments GmbH & Co. KG
Goettingen, 20/04/2016
___________________________________________ ___ _______________________________________________________
Dr. Reinhard Baumfalk
Vice President R&D Head of International Certification Management
Esta declaración certifica la conformidad con las directivas de la UE enumeradas anteriormente, pero no constituye
una aseveración de características. En caso de modificar el producto sin coordinarse con nosotros, esta declaración
perderá su validez. Deberán observarse las indicaciones de seguridad contenidas en la documentación adjunta al
producto.
Dr. Dieter Klausgrete
___________________________________________________________________________________________
Doc: 2025577-01 SLI15CE001-01.es 1 / 1 PMF: 2025573 OP-113_fo1_2015.10.12
62 Installation and Operating Instructions EVO1S1 | SPO1S1

Tłumaczenie dokumentu oryginalnego
Deklaracja zgodności UE
Producent
37070 Getynga, Niemcy
Rodzaj
urządzenia Waga do mieszania farb
Seria
produkcyjna
2014/30/UE Kompatybilność elektromagnetyczna
EN 61326-1:2013
2011/65/UE Ograniczenie stosowania niektórych niebezpiecznych substancji w sprzęcie elektrycznym i elektronicznym
EN 50581:2012
Sartorius Lab Instruments GmbH & Co. KG
oświadcza z pełną odpowiedzialnością, że środek roboczy
EVO1S1, SPO1S1
w wersji wprowadzonej przez nas do obrotu jest zgodny ze wszystkimi właściwymi postanowieniami
następujących dyrektyw europejskich – włącznie ze zmianami do nich, obowiązującymi do dnia
wystawienia deklaracji – i spełnia mające zastosowanie wymogi następujących zharmonizowanych
norm europejskich:
(RoHS)
Liczba lat, na które przyznano oznaczenie CE:
16
Sartorius Lab Instruments GmbH & Co. KG
Getynga, 2016-04-20
___________________________________________ ___ _______________________________________________________
Dr Reinhard Baumfalk
Vice President R&D Head of International Certification Management
Niniejsza deklaracja poświadcza zgodność z wymienionymi dyrektywami UE, nie stanowi jednak zapewnienia o
właściwościach produktu. W przypadku nieuzgodnionej z nami zmiany produktu niniejsza deklaracja traci ważność.
Należy stosować się do wskazówek bezpieczeństwa zawartych w odpowiedniej dokumentacji produktu.
Dr Dieter Klausgrete
___________________________________________________________________________________________
Doc: 2025577-01 SLI15CE001-01.pl 1 / 1 PMF: 2025573 OP-113_fo1_2015.10.12
Installation and Operating Instructions EVO1S1 | SPO1S1 63
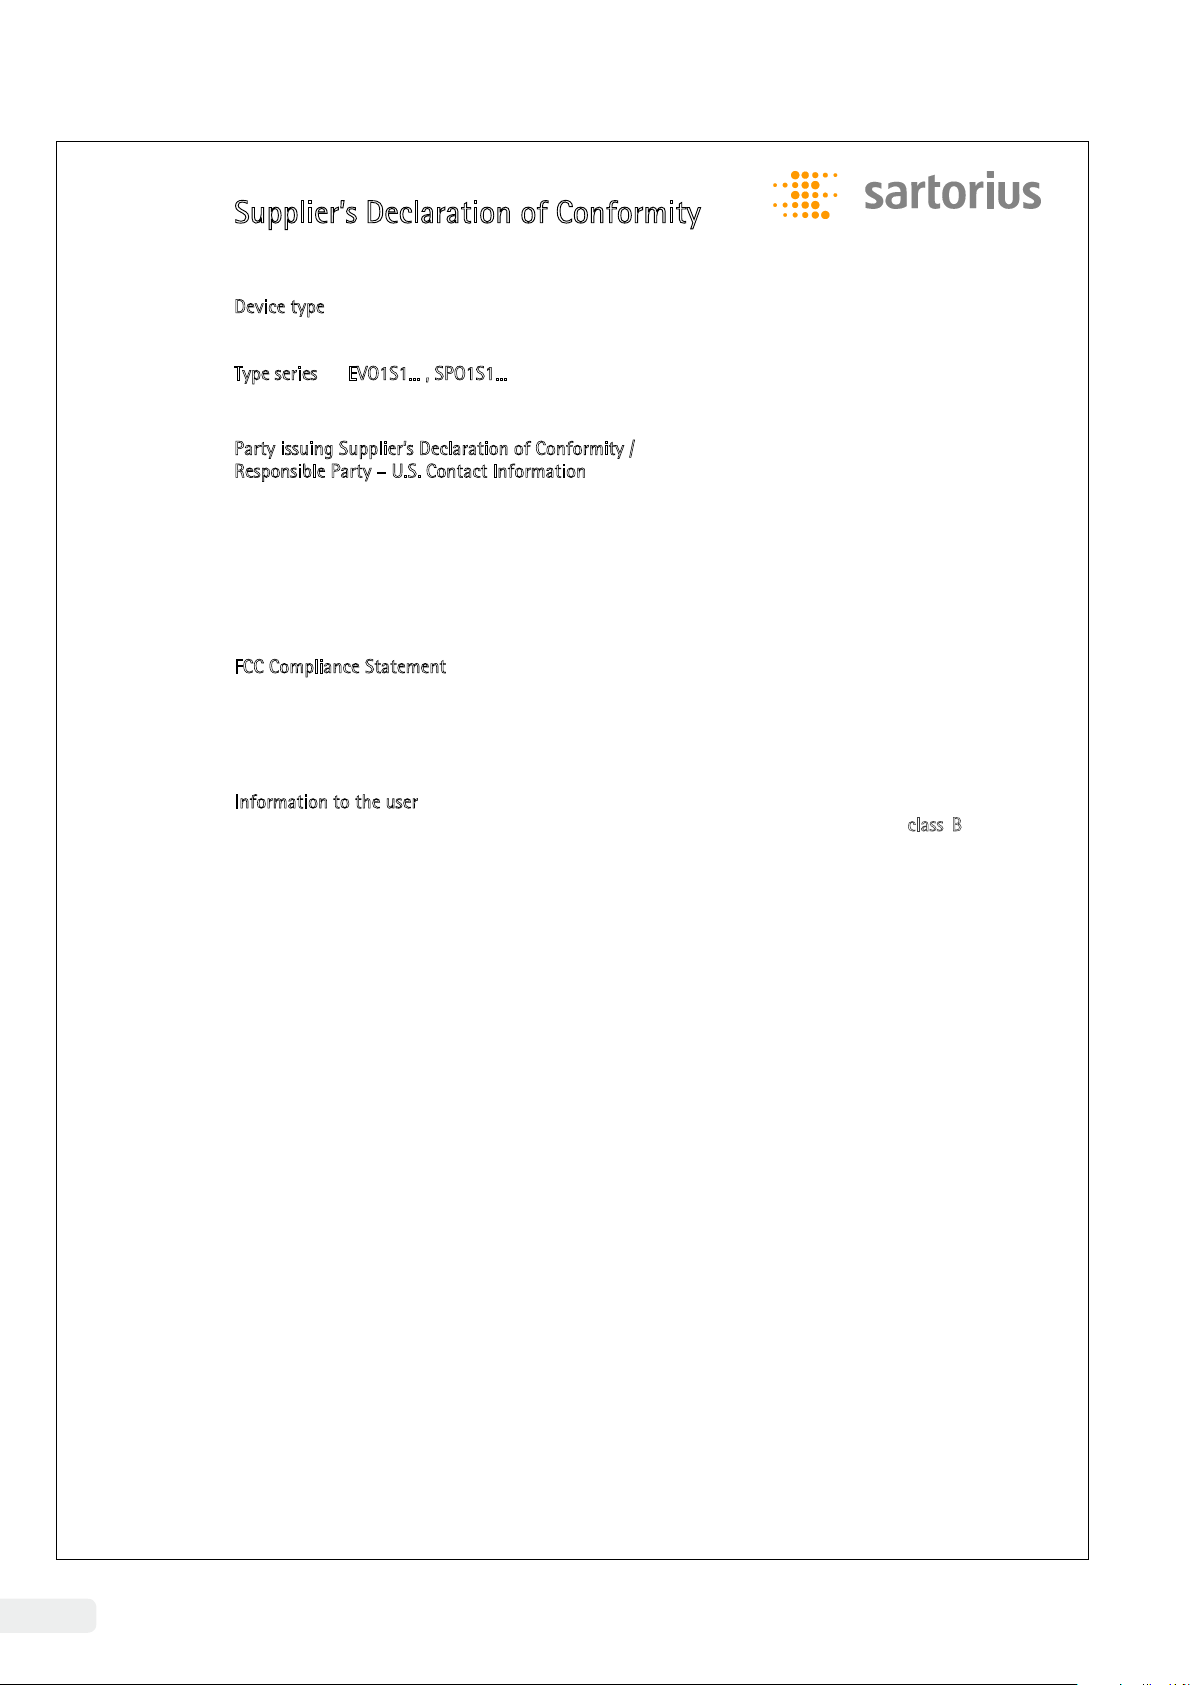
FCC
upplier’s Declaration of Conformity
S
evice type Paint mixing scale
D
T
ype series EVO1S1... , SPO1S1...
Party issuing Supplier’s Declaration of Conformity /
R
esponsible Party – U.S. Contact Information
Sartorius Corporation
5 Orville Dr Suite 200
11716 Bohemia, NY
USA
Telephone: +1.631.254.4249
FCC Compliance Statement
This device complies with Part 15 of the FCC Rules. Operation is subject to the following two
conditions: (1) This device may not cause harmful interference, and (2) this device must
accept any interference received, including interference that may cause undesired operation.
nformation to the user
I
Note: This equipment has been tested and found to comply with the limits for a c
digital device, pursuant to part 15 of the FCC Rules. These limits are designed to provide
reasonable protection against harmful interference in a residential installation. This
equipment generates, uses and can radiate radio frequency energy and if not installed and
used in accordance with the instructions, may cause harmful interference to radio
communications. However, there is no guarantee that interference will not occur in a
particular installation. If this equipment does cause harmful interference to radio or
television reception, which can be determined by turning the equipment off and on, the user
is encouraged to try to correct the interference by one or more of the following measures:
lass B
Reorient or relocate the receiving antenna.
Increase the separation between the equipment and receiver.
Connect the equipment into an outlet on a circuit different from that
to which the receiver is connected.
Consult the dealer or an experienced radio/TV technician for help.
Connections between the device and peripherals must be made using shielded cables in order
to maintain compliance with FCC radio frequency emission limits.
Any modifications made to this device that are not approved by Sartorius may void the
authority granted to the user by the FCC to operate this equipment.
___________________________________________________________________________________________
Doc: 2399148-00 SLI18FCC005-00.en 1 / 1 PMF: 2025573 OP-113_fo1_2015.10.12
64 Installation and Operating Instructions EVO1S1 | SPO1S1

Sartorius Lab Instruments GmbH & Co. KG
Otto-Brenner-Strasse 20
37079 Goettingen, Germany
Phone: +49.551.308.0
www.sartorius.com
The information and figures contained in these
instructions correspond to the version date
specified below.
Sartorius reserves the right to make changes
to the technology, features, specifications and
design of the equipment without notice.
Masculine or feminine forms are used to
facilitate legibility in these instructions and
always simultaneously denote the other
gender as well.
Copyright notice:
This instruction manual, including all of its
components, is protected by copyright.
Any use beyond the limits of the copyright law
is not permitted without our approval.
This applies in particular to reprinting,
translation and editing irrespective of the type
of media used.
© Sartorius Germany
Last updated:
08 | 2018
Printed in the EU on paper bleached
without chlorine. | UB
Publication No.: WEV6001ej180806
 Loading...