


This document courtesy of:
Data Weighing Systems, Inc.
Contact Us
For immediate assistance call
1-800-750-6842
98648-012-26
Operating Instructions
Sartorius Combics
Models CAPP..-LU, CAPS..-LU
Painted or Stainless Steel Weighing Platforms

2
Contents
2 Contents
2 Explanation of the Symbols
3 Safety Instructions
3 Warranty
4 Setting Up the Scale
5 Installation
8 Care and Maintenance
9 Declarations of Conformity
10 Accessories
The following symbols are used in these instructions:
§ indicates steps you must perform
$ indicates steps you must perform only under certain
conditions
> describes what happens after you have performed a certain
step
– appears before a bulleted item
!indicates a hazard

3
Safety Instructions
Combics weighing platforms have been constructed in accordance with the European
Directives as well as international regulations and standards for electrical equipment,
electromagnetic compatibility and safety.
- Do not expose the weighing platform unnecessarily to aggressive chemical vapors or to
extreme temperatures, moisture, shocks, or vibration.
- Do not use a Combics weighing platform in a Zone 0, 1, 20 or 22 hazardous area or a
Class 1, Division 1 or 2 hazardous location.
- You may operate any Combics weighing platform in a Zone 2 or 11 hazardous area.
- Avoid exposing the weighing platform to static electricity; be sure to connect the
equipotential bonding conductor to the junction box.
- Observe the particular IP protection rating of your scale: IP65 protection rating for
non-stainless steel models; IP67 protection rating for stainless steel models. First digit:
rating 6 indicates resistance to penetration by dust particles of a specified size. Second
digit: rating 5 indicates resistance to splashes of water as well as washdown-resistance.
Rating 7 indicates resistance to penetration by water during 30-minute immersion up
to a depth of 1 meter (~ 3¼ feet). The particular IP protection rating for the weighing
platforms is ensured only if the rubber gasket is installed on the junction box and all
cable gland screw fasteners are tightened securely.
Improper installation will result in forfeiture of all claims under the manufacturer´s
warranty.
- The junction box may be opened only by authorized service technicians who have been
trained by Sartorius and who follow Sartorius’ standard operating procedures for
maintenance and repair.
- If you see any indication that the weighing platform cannot be operated safely (for
example, because of equipment damage), turn off the platform and lock it in a secure
place so that it cannot be used for the time being.
- Suspension points are provided on platforms of a size of 36 x 36 inches or larger. If
you need to transport or lift the scale or load plate using a crane, do not step
underneath the suspended scale or load plate. Be sure to observe the corresponding
safety rules and regulations for prevention of accidents. Do not damage the junction
box or the load receptor during transportation.
- If you use suction lifting equipment to lift the load plate, always wear globes, hardtoed safety boots and protective clothing. Warning! This procedure can cause personal
injury! Therefore, only reliable staff who are qualified to perform such work are
allowed to use suction lifting equipment.
- Always make sure the weighing platform is disconnected from AC power before
performing any installation, cleaning, maintenance or repair work.
- Check the pin assignment if you use cables purchased from a different manufacturer.
Before connecting such a cable to Sartorius equipment, check the pin assignment on
the corresponding wiring diagram or chart and disconnect any wires that are identified
differently from those specified by Sartorius. The operator shall be solely responsible
for any damage or injuries that may occur when using cables not supplied by Sartorius.

4
Setting Up the Scale
§ Choose a suitable place to set up the weighing platform. This place should have a
dry, horizontal and even surface.The operating temperature range is between -10°C
and +40°C (+14°F and +104°F). The allowable structural load-carrying capacity of a
floor or surface must be sufficient to support both the weight of the weighing
platform and its maximum weighing capacity.
If you need to use the weighing platform in areas exposed to heavy traffic (e.g.,
fork-lift trucks), you should install a protective frame, consisting of angular braces,
around the weighing platform.
Do not expose the weighing platform unnecessarily to aggressive chemical vapors or
to extreme temperatures, moisture, shocks, or vibration, which could result in
damage.
Note:
This equipment has been tested and found to comply with the limits for a Class A
digital device, pursuant to Part 15 of the FCC rules. These limits are designed to
provide reasonable protection against harmful interference when the equipment is
operated in a commercial environment. This equipment generates, uses and can radiate
radio frequency energy and, if not installed and used in accordance with the instruction
manual, may cause harmful interference to radio communications. Operation of this
equipment in a residential area is likely to cause harmful interference in which case the
user will be required to correct the interference at his own expense. Changes or
modifications not expressly approved by Sartorius AG could void the user’s authority to
operate the equipment.
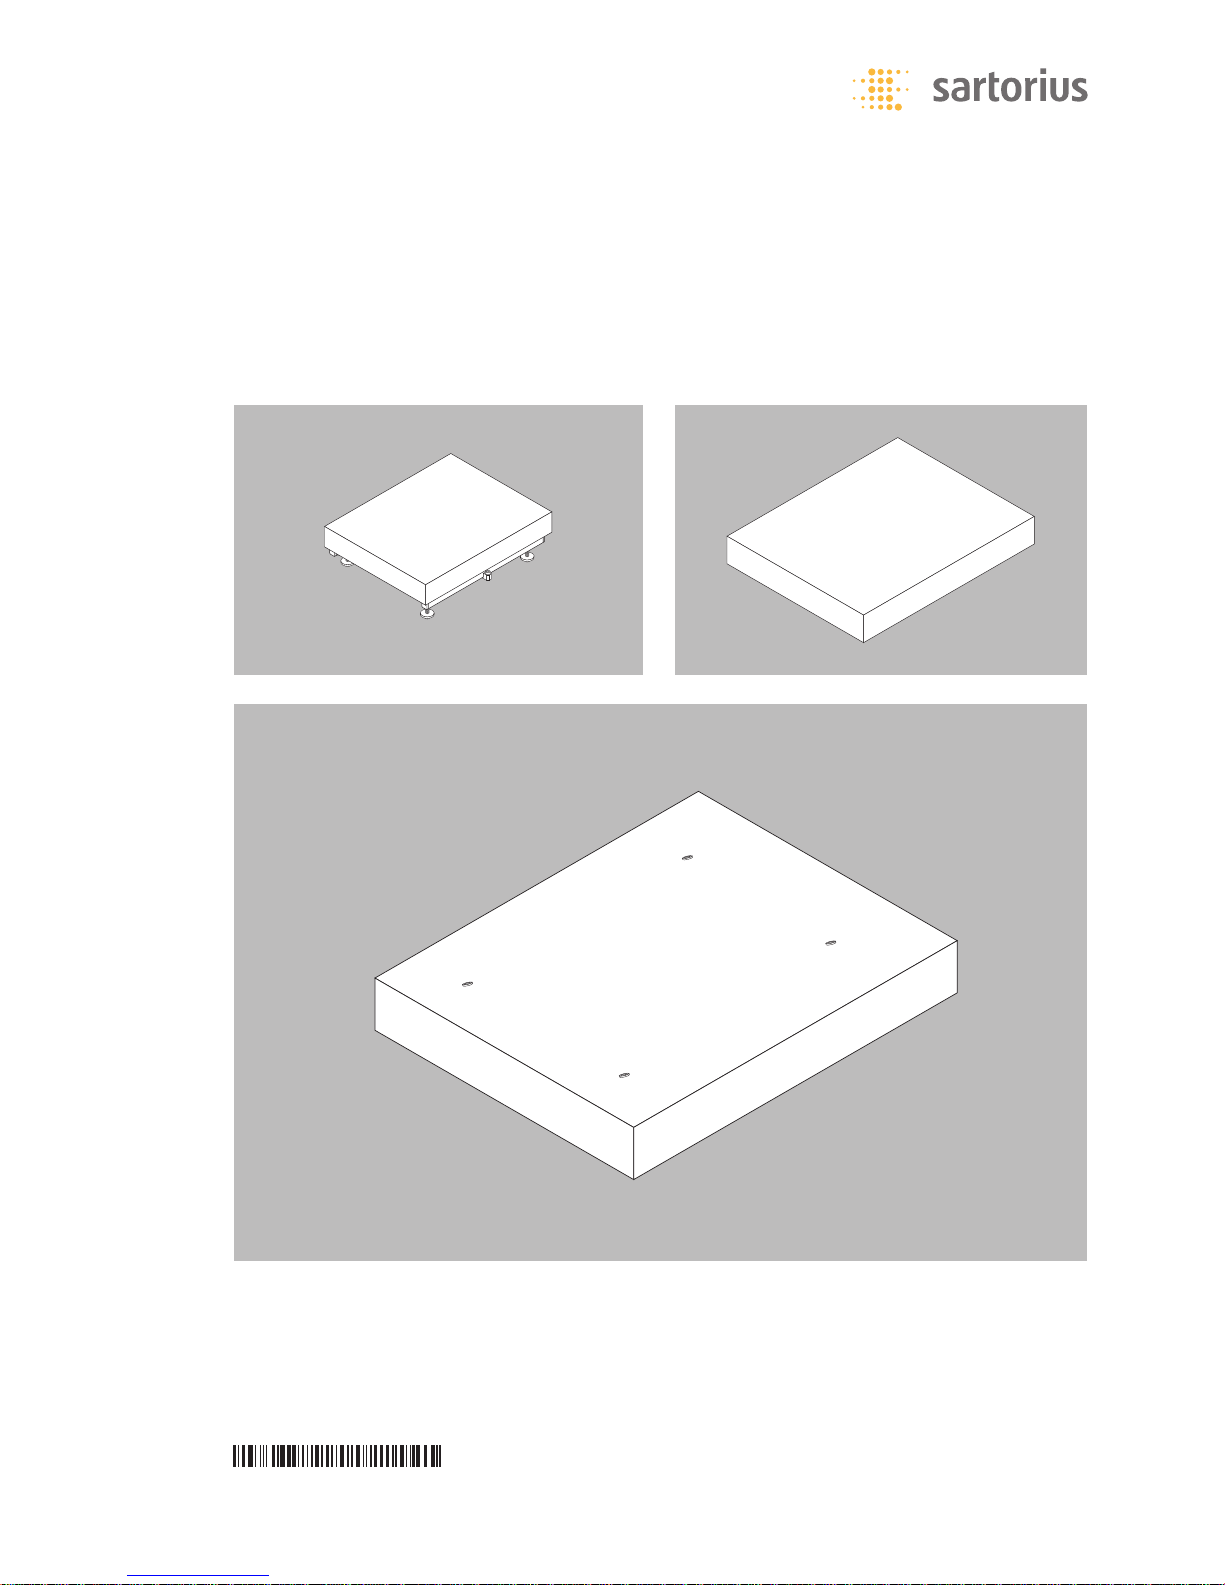
§ The air bubble must be centered within the circle on the level indicator.
§ Level the weighing platform using the leveling feet as described below:
§ Check to ensure that all leveling feet rest securely on the work surface.
> Each of the leveling feet must support an equal load!
§ Loosen the locknuts on the leveling feet using a 19-mm open-end wrench (spanner).
> Adjusting the leveling feet:
To raise the weighing platform, extend the leveling feet (turn clockwise).
To lower the weighing platform, retract the leveling feet (turn counterclockwise).
§ After leveling the weighing platform, retighten the locknuts securely as described
below:
Low-capacity platforms (1 load cell): tighten the locknuts against the platform
frame;
high-capacity platforms (4 load cells): tighten the locknuts against the platform
feet.

5
Installation
§ Strip off the insulation at the cable end and attach the cable as follows:
– Route the cable through the cable gland.
– Properly tighten the screw fasteners of the cable gland
– Remove the casing from a section of the cable end (see illustration). The shield (1)
must have contact with the clamps (2).
– Expose approximately 15 cm (6 inches) of the wires (3) for installation.
§ Attach the cable to the weighing platform as follows:
– Expose approximately 5 cm (2 inches) of the wires for installation.
– Expose approximately 1 cm (1/2 inch) of the wires and attach ferrules to the wires.
– Securely attach the wires to the screw terminals (blue = plus, brown or black = minus).
Wiring Diagram for the Indicator
No. Signal name Meaning
1 BR_POS Bridge supply voltage, positive
2 SENSE_POS Sense (+) Bridge supply voltage
3 OUT_POS Measuring voltage, positive
4 OUT_NEG Measuring voltage, negative
5 SENSE_NEG Sense (–) Bridge supply voltage
6 BR_NEG Bridge supply voltage, negative
Color Codes of the Wiring for Weighing Platforms, Models CAPP..-LU
Platform size Wiring Diagram for the Indicator
in inch Nr.: 1 2 3 4 5 6
12,6 x 9,5 Blue Green White Red Gray Black
15,8 x 11,8 Blue Green White Red Gray Black
19,7 x 15.8 Blue Green White Red Gray Black
24 x 18 Blue Green White Red Gray Black
24 x 24 Blue Green White Red Gray Black
30 x 24 Blue Green White Red Gray Black
30 x 30 Blue Green White Red Gray Black
36 x 36 Blue Green White Red Gray Black or Brown
48 x 48 Blue Green White Red Gray Black or Brown
60 x 48 Blue Green White Red Gray Black or Brown
60 x 60 Blue Green White Red Gray Black or Brown
§ Connect the cable of the weighing platform to the indicator.
Note:
The cable gland along with the screw fasteners is already pre-assembled. Use extreme
care when attaching or detaching a cable.

6
Color Codes of the Wiring for Weighing Platforms, Models CAPS..-LU
Platform size Wiring Diagram for the Indicator
in inch No.: 123456
12.6 x 9.5 Blue Green White Red Gray Black
15.8 x 11.8 Blue Green White Red Gray Black
19.7 x 15.8 Blue Green White Red Gray Black
24 x 18 Blue Green White Red Gray Black or Brown
24 x 24 Blue Green White Red Gray Black or Brown
30 x 24 Blue Green White Red Gray Black or Brown
30 x 30 Blue Green White Red Gray Black or Brown
36 x 36 Blue Green White Red Gray Black or Brown
48 x 48 Blue Green White Red Gray Black or Brown
60 x 48 Blue Green White Red Gray Black or Brown
60 x 60 Blue Green White Red Gray Black or Brown
Models code
Chart 1, Specifications/Dimensions of Specific Models
Code DC ED FE GE GG HG HH KK NN RN RR
Width(inches) 9,5 11,8 15,8 18 24 24 30 36 48 48 60
Length (inches) 12,6 15,8 19,7 24 24 30 30 36 48 60 60
Cable lengths
The cable lengths supplied with the weighing platforms as standard equipment are listed in the table below.
for painted versions CAPP…..:
Designation DC ED FE GE GG HG HH KK NN RN RR
Length (ft) approx. 10 10 10 10 10 10 10 20 20 20 20
for painted versions CAPS…..:
Designation DC ED FE GE GG HG HH KK NN RN RR
Length (ft) approx. 10 10 10 10 10 10 20 20 20 20 20
Selection of the
resolution LU:
Selection of the
resolution
LU:
up to 25.000 d or
up to 5.000 e NTEP
10
25
50
100
200
250 500
1000
2500 5000
Selection of the weighing capacity in lbs
Selection of the weighing capacity in lbs
- -
CAPP4U LU1000 KK
CAP P 4 U 1000 KK LU
Example for the order number of a Combics weighing platform:
CAPP4U-1000KK-LU
Finishing:
P = Combics standard
S = Combics stainless steel
Finishing:
P
= Combics standard
S
= Combics stainless steel
platform
10000
Dimensions
in inches
Dimensions
in
inches

7
Resolutions:Resolutions:
Resolutions:Resolutions:
Resolutions:
Readability HR configurable
LU
up to 5,000e up to 30.000 d
Weighing capacity NTEP non commercial
in lbs in lbs in lbs
10 0.002
25 0.005
50 0.01
100 0.02
200 0.05
250 0.05
500 0.1
1000 0.2
2500 0.5
5000 1
Operating Limits
You should not place loads on the scale that exceed its maximum weighing capacity.
Depending on the position of the load (center, side, one-sided corner load),
the maximum capacity of the weighing platform is in lbs as follows:
Model* Center Side Corner
DC 110 77 44
ED 286 187 99
FE 660 440 220
GE 660 440 220
GG 990 660 330
HG 1980 1320 660
HH 1980 1320 660
KK 9900 6600 3300
NN 9900 6600 3300
RN 9900 6600 3300
RR 9900 6600 3300
* Steel or Stainless steel

8
Care and Maintenance
Cleaning
$ Unplug the scale from the AC power before cleaning.
$ To clean the weighing platform in a dry area: use a piece of cloth
wet with a commercially available cleaning agent to wipe it down.
Follow the manufacturer’s instructions for the cleaning agent.
!Never use concentrated acids, bases, solvents or pure alcohol to
clean the weighing platform.
$ To clean the weighing platform in a wet area, wash it down using
a gentle stream of water (60°C, 140° F max.) sprayed over the top
of the load plate.
! Do not use high-pressure cleaning equipment to clean the
weighing platform.
> If the water that you use to clean the weighing platform is too
hot or too cold, the difference in temperature between the water
and the weighing platform can cause condensation within the
weighing platform. This condensation may cause the weighing
platform to malfunction.
$ If the scale is installed in a pit, make sure that no debris builds up
between the crevices between the pit and the platform to prevent
weighing errors.
$ Regularly remove debris from the bottom of the pit.
Cleaning the Interior of the Platform
$ To clean the inside of the weighing platform, remove the load
plate.
Be especially careful when removing the load plate from scales of
36 x 36 inches or larger.
! Please follow the safety instructions.
$ Use compressed air to blow debris out of the interior of the scale
or flush out using a gentle stream of water (60°C, 140° F max.).
Be sure that no debris builds up in the gap between the load
receptor and the fastening plate in order to prevent compromising
the overload protection.
Corrosive Environment
$ Remove all traces of corrosive substances from the weighing
platform on a regular basis.
Instructions for Recycling the Packaging
Sartorius products are packaged to ensure safe shipment
using environmentally friendly materials. If after successful
installation of the equipment, you will not need the
packaging, you should return it for recycling because it is a
valuable source of secondary raw material. For information
on recycling options, including recycling of old weighing
equipment, contact your municipal waste disposal center or
local recycling depot.
Care and Maintenance
Sartorius products are packaged to ensure safe shipment
using environmentally friendly materials.If after successful
installation of the equipment,you will not need the
packaging,you should return it for recycling because it is a
valuable source of secondary raw material.For information
on recycling options,including recycling of old weighing
equipment,contact your municipal waste disposal center or
local recycling depot.
Cleaning Stainless Steel Surfaces
Clean all stainless steel parts regularly. Remove the stainless
steel weighing pan and thoroughly clean it separately,
outside the hazardous area/location. Use a damp cloth or
sponge to clean any stainless steel parts on the scale.
You can use any commercially available household cleaning
agent that is suitable for use on stainless steel. Clean
stainless steel surfaces by wiping them down. Then clean
the weighing pan thoroughly,making sure to remove all
residues. Use a damp cloth or sponge to wipe down any
stainless steel parts on the scale again.Afterwards,allow
the scale to dry. If desired,you can apply oil to the cleaned
surfaces as additional protection.
!Do not use stainless steel cleaning agents that contain soda
lye (caustic), acetic acid,hydrochloric acid,sulfuric
acid or citric acid.The use of scrubbing sponges made with
steel wool is not permitted.Solvents are permitted for
use only on stainless steel parts.
Corrosive Environment
$ Remove all traces of corrosive substances from the weighing
platform on a regular basis.

9
Declarations of Conformity
The weighing platform complies with the requirements of
the applicable Council Directives of the European Union:
Council Directive 89/336/EEC
„Electromagnetic Compatibility“ (EMC)
Applicable European Standards:
1. Electromagnetic Compatibility:
1.1 Sources for 89/336/EEC: Office Journal of the
European Communities, No.2001/C105/03
EN 61326-1
Electrical equipment for measurement,
control and laboratory use
EMC requirements
Part 1: General requirements
Defined immunity to interference:
Industrial areas, continuously monitored operation
Limitation of emmissions: Residential areas, Class B
Important Note:
The operator shall be responsible for any modifications to
Sartorius equipment and for any connections of cables or
equipment not supplied by Sartorius and must check and, if
necessary, correct these modifications and connections. On
request, Sartorius will provide information on the minimum
operating specifications (in accordance with the Standards
listed above for defined immunity to interference). The
manufacturer declares the conformity of the equipment with
the Standards specified above.
Council Directive 73/23/EEC „Electrical equipment designed for
use within certain voltage limits“
Applicable European Standards
EN 60950 Safety of information technology
equipment including electrical
business equipment
EN 61010 Safety requirements for electrical
equipment for measurement, control
and laboratory use
Part 1: General requirements
If you use electrical equipment in installations and under
ambient conditions requiring higher safety standards, you must
comply with the provisions as specified in the applicable
regulations for installation in your country.

10
Accessories
Drive-on ramp, AISI 316 Ti stainless steel (tread plate)
for platform sizes:
latform
sizes: in inch Accessory no.
30 x 24 YAR-CWSST-24
30 x 24 YAR-CWSST-30
30 x 30 YAR-CWSST-30
36 x 36 YAR-CWSST-36
48 x 48 YAR-CWSST-48
60 x 48 YAR-CWSST-48
60 x 48 YAR-CWSST-60
60 x 60 YAR-CWSST-60
Frame for pit installation, painted, for platform sizes:
Platform
size in inch Accessory no.
30 x 24 YEG-HG-P
30 x 30 YEG-HH-P
36 x 36 YEG-KK-P
48 x 48 YEG-NN-P
60 x 48 YEG-RN-P
60 x 60 YEG-RR-P
Frame for pit installation, stainless steel, for platform sizes:
Platform
size in inch Accessory no.
30 x 24 YEG-HG-S
30 x 30 YEG-HH-S
36 x 36 YEG-KK-S
48 x 48 YEG-NN-S
60 x 48 YEG-RN-S
60 x 60 YEG-RR-S
Roller conveyor, painted, for platform sizes:
Size in inch Accessory no.
12.6 x 9.5 YRC01DCA
15.8 x 11.8 YRC01EDA
19.7 x 15.8 YRC01FEA
Roller conveyor, stainless steel, for platform sizes:
Size in inch Accessory no.
312.6 x 9.5 YRC01DCS
15.8 x 11.8 YRC01EDS
19.7 x 15.8 YRC01FES
Roller-ball load plate, for platform sizes:
Size in inch Accessory no.
15.8 x 11.8 YLP01CWS
19.7 x 15.8 YLP02CWS
Set of stainless steel floor fasteners Accessory no.
(2 fastening plates, 4 special dowel screws) YFP01CWS
Drive-on ramp, painted, for platform sizes:
Platform
sizes: in inch Accessory no.
30 x 24 YAR-CWP-24
30 x 24 YAR-CWP-30
30 x 30 YAR-CWP-30
36 x 36 YAR-CWP-36
48 x 48 YAR-CWP-48
60 x 48 YAR-CWP-48
60 x 48 YAR-CWP-60
60 x 60 YAR-CWP-60
Drive-on ramp, painted (tread plate), for platform sizes:
Platform
sizes: in inch Accessory no.
30 x 24 YAR-CWPT-24
30 x 24 YAR-CWPT-30
30 x 30 YAR-CWPT-30
36 x 36 YAR-CWPT-36
48 x 48 YAR-CWPT-48
60 x 48 YAR-CWPT-48
60 x 48 YAR-CWPT-60
60 x 60 YAR-CWPT-60
Drive-on ramp, stainless steel, for platform sizes:
Platform
sizes: in inch Accessory no.
30 x 24 YAR-CWS-24
30 x 24 YAR-CWS-30
30 x 30 YAR-CWS-30
36 x 36 YAR-CWS-36
48 x 48 YAR-CWS-48
60 x 48 YAR-CWS-48
60 x 48 YAR-CWS-60
60 x 60 YAR-CWS-60
Drive-on ramp, stainless steel (tread plate) for platform sizes:
Platform
sizes: in inch Accessory no.
30 x 24 YAR-CWST-24
30 x 24 YAR-CWST-30
30 x 30 YAR-CWST-30
36 x 36 YAR-CWST-36
48 x 48 YAR-CWST-48
60 x 48 YAR-CWST-48
60 x 48 YAR-CWST-60
60 x 60 YAR-CWST-60
Drive-on ramp, AISI 316 Ti stainless steel (tread plate)
for platform sizes:
Platform
sizes: in inch Accessory no.
30 x 24 YAR-CWSS-24
30 x 24 YAR-CWSS-30
30 x 30 YAR-CWSS-30
36 x 36 YAR-CWSS-36
48 x 48 YAR-CWSS-48
60 x 48 YAR-CWSS-48
60 x 48 YAR-CWSS-60
60 x 60 YAR-CWSS-60

11
Column, painted, for attaching
indicator to platform, for sizes:
Size in inch Accessory no.
DC (12.6 x 9.5), height 13 YDH01CWP
ED (15.8 x 11.8), height 19.7 and YDH02CWP
FE (19.7 x 15.8), height 19.7 YDH02CWP
FE (19.7 x 15.8), height 29.5 YDH03CWP
Column, stainless steel, for attaching
indicator to platform, for sizes:
Size in inch Accessory no.
DC (12.6 x 9.5), height 13 YDH01CWS
ED (15.8 x 11.8), height 19.7 and YDH02CWS
FE (19.7 x 15.8), height 19.7 YDH02CWS
FE (19.7 x1 5.8), height 29.5 YDH03CWS
Bench, painted
Size in inch Accessory no.
ED (15.8 x 11.8) height 24,18
Adjustable to a max. height of 25,31 YWT01CWP
FE (19.7 x1 5.8) height 24,18
Adjustable to a max. height of 25,31 YWT02CWP
Bench, stainless steel for size:
Size in inch Accessory no.
ED (15.8 x 11.8) height 24,18
Adjustable to a max. height of 25,31 YWT01CWS
FE (19.7 x1 5.8) height 24,18
Adjustable to a max. height of 25,31 YWT02CWS
Column for bench, painted, for attaching
indicator, adjustable height
Size in inch Accessory no.
5.8 x 11.8 height YDH01WTCWS
Plate for attaching indicator
and printer
to bench stand YPP01CWS
Set of castors for bench
(2 guide castors, 2 lockable castors) YRO01WTCW
Retainer for bar code scanner,
for attachment to bench stand YBH01CWS

Sartorius AG
Weender Landstrasse 94 –108
37075 Goettingen,Germany
Phone +49.551.308.0
Fax +49.551.308.3289
www.sartorius.com
Copyright by Sartorius AG,
Goettingen,Germany.
All rights reserved.No part
of this publication may
be reprinted or translated in
any form or by any means
without the prior written
permission of Sartorius AG.
The status of the information,
specifications and illustrations
in this manual is indicated
by the date given below.
Sartorius AG reserves the
right to make changes to the
technology,features,
specifications and design of the
equipment without notice.
Status:
August 2003,Sartorius AG,
Goettingen,Germany
Printed in Germany on paper that has
been bleached without any use of chlorine
MJ·KT
Publication No.:WCA6004-e03081
 Loading...