

Sarlo SS-18 User Manual
™
OWNERS MANUAL
STRAIGHT SHAFT TRIMMER
MODEL SS-18
SARLO MANUFACTURING
POWERED BY
P.O. BOX 1169 FORT MYERS, FL 33902
PHONE: 1-800-749-5296
CONTENTS PAGE
SAFETY RULES 1-2
ASSEMBLY 3
OPERATION 4
MAINTENANCE 5
SERVICE/ADJUSTMENTS 6
Model SS-18 Sting Trimmer
Shaft style Straight
Shaft length 62.5"
Engine 34cc 4-cycle
Briggs & Stratton
Cutting width
Line size .095"/2.4 mm
Unit weight 13.2 lbs
Head type Bump feed
Starting system Easy starting 4-cycle
Handle type Standard loop
Clutch No
Shoulder harness Yes
Warranty 2 year Consumer
15" - 18"
90 day Commercial
TROUBLE SHOOTING 7
NOTES 7
STORAGE 8
ILLUSTRATED PARTS LIST 9-10
WARRANTY INFORMATION 11
This unit is intended for occasional use. P/N 10005 12/03
RULES FOR SAFE OPERATION
SAFETY AND INTERNATIONAL SYMBOLS
This operator’s manual describes safety and international symbols and pictographs that
appear on this product. Read the operator’s manual for complete safety, assembly, operating,
maintenance and repair information.
SYMBOL MEANING
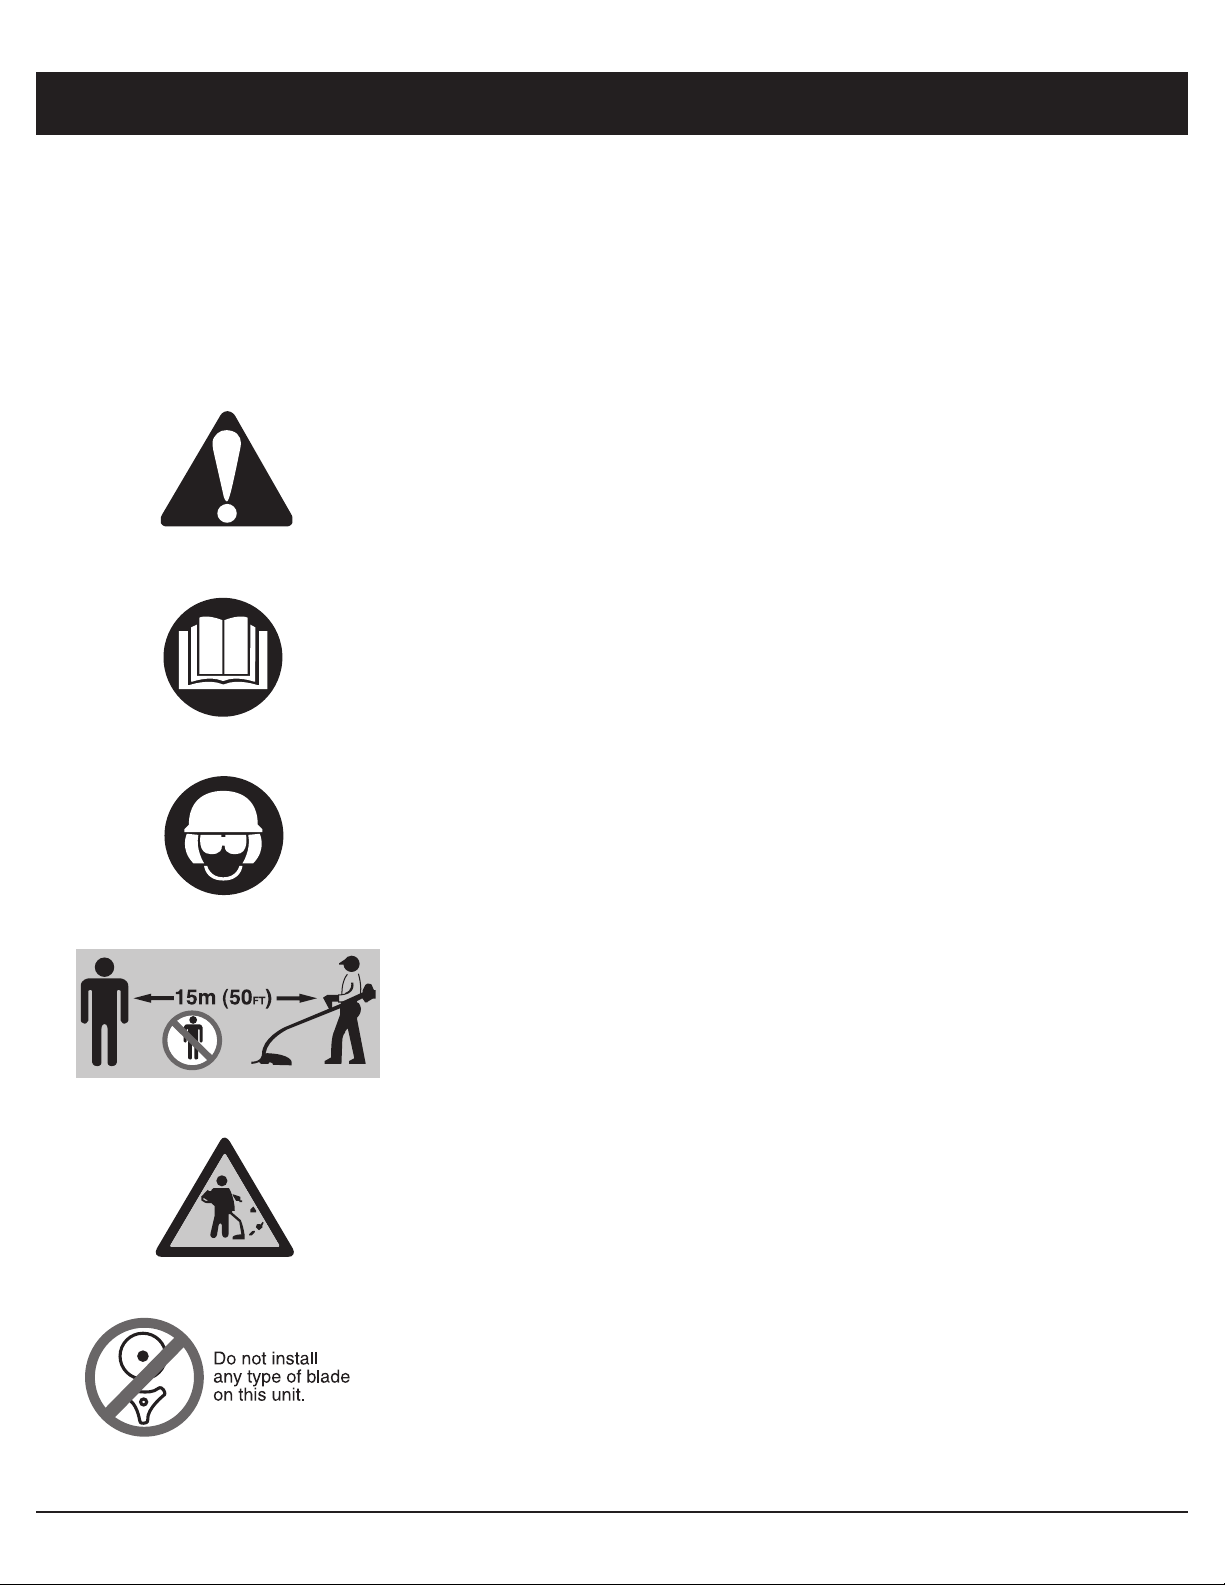
• SAFETY ALERT SYMBOL
Indicates danger, warning or caution. May be used in
conjunction with other symbols or pictographs.
• WARNING - READ OPERATOR’S MANUAL
Read the operator’s manual(s) and follow all warnings and
safety instructions. Failure to do so can result in serious
injury to the operator and/or bystanders.
• WEAR EYE AND HEARING PROTECTION
WARNING: Thrown objects and loud noise can cause severe
eye injury and hearing loss. Wear eye protection meeting ANSI
Z87.1 standards and ear protection when operating this unit.
Use a full face shield when needed.
• KEEP BYSTANDERS AWAY
WARNING: Keep all bystanders, especially children and pets,
at least 50 feet (15m) from the operating area.
• THROWN OBJECTS AND ROTATING CUTTER CAN
CAUSE SEVERE INJURY
WARNING: Do not operate without the cutting attachment
shield in place. Keep all from the rotating cutting attachment.
WARNING: Never use blades or flailing devices. This unit is
designed for line trimmer use only. Use of any other
accessories or attachments will increase the risk of injury.
1

SAFETY RULES
• Do not allow a person to use this unit unless instructions are read and understood. Never
allow children to operate or play with the unit.
• Do not operate this unit when tired, ill or under the influence of alcohol, drugs, or medication.
• Always wear heavy, long pants, boots, gloves, and a long sleeve shirt. Do not wear loose
clothing, jewelry, short pants, sandals, or go barefoot. Secure hair so it is above
shoulder level.
• Inspect unit before each use. Replace damaged parts. Check for fuel leaks. Make sure all
fasteners are in place and secure. Replace cutting attachment parts that are cracked,
chipped, or damaged in any way. Make sure the cutting attachment is properly installed and
securely fastened. Be sure the cutting attachment shield is properly attached, and in the
position recommended by the manufacturer. Use only flexible, non-metallic line
recommended by the manufacturer. Never use, for example, wire or wire-rope which can
break off and become a dangerous projectile.
• Keep firm footing and balance. Do not over-reach. Keep cutting attachment below waist
level. Keep all parts of your body away from the rotating cutting attachment and
hot surfaces.
• Never start or run the unit inside a closed room or building; breathing exhaust fumes can kill.
• Pour fuel outdoors where there are no sparks and flames. Slowly remove the fuel cap only
after stopping the engine. Do not smoke while fueling. Wipe spilled fuel from the unit. Move
at least 10 ft. (3 m) away from the fueling source and site before starting engine.
• Clear the area to be cut before each use. Remove all objects such as rocks, broken glass,
nails, wire, or string which can be thrown or become entangled in the cutting attachment.
Clear the area of children, bystanders and pets. At a minimum, keep all children, bystanders
and pets outside a 50 ft. (15 m) radius; outside the 50 ft. zone, there is still a risk of injury
to bystanders from being struck with the moving strings in the event of a cutting lines
thrust or other unexpected reaction of the saw.
• The cutting attachment may be spinning during carburetor adjustments. Wear your
protective equipment and observe all safety instructions. When the unit is turned off make
sure the cutting attachment has stopped before the unit
is set down.
• The handles and shield must be mounted according to the instructions. The unit is
designed to be used while positioned on the right side.
2
ASSEMBLY INSTRUCTIONS
■ TOOL LIST
• Screwdriver (Phillips or Standard)
• Allen wrench 4mm
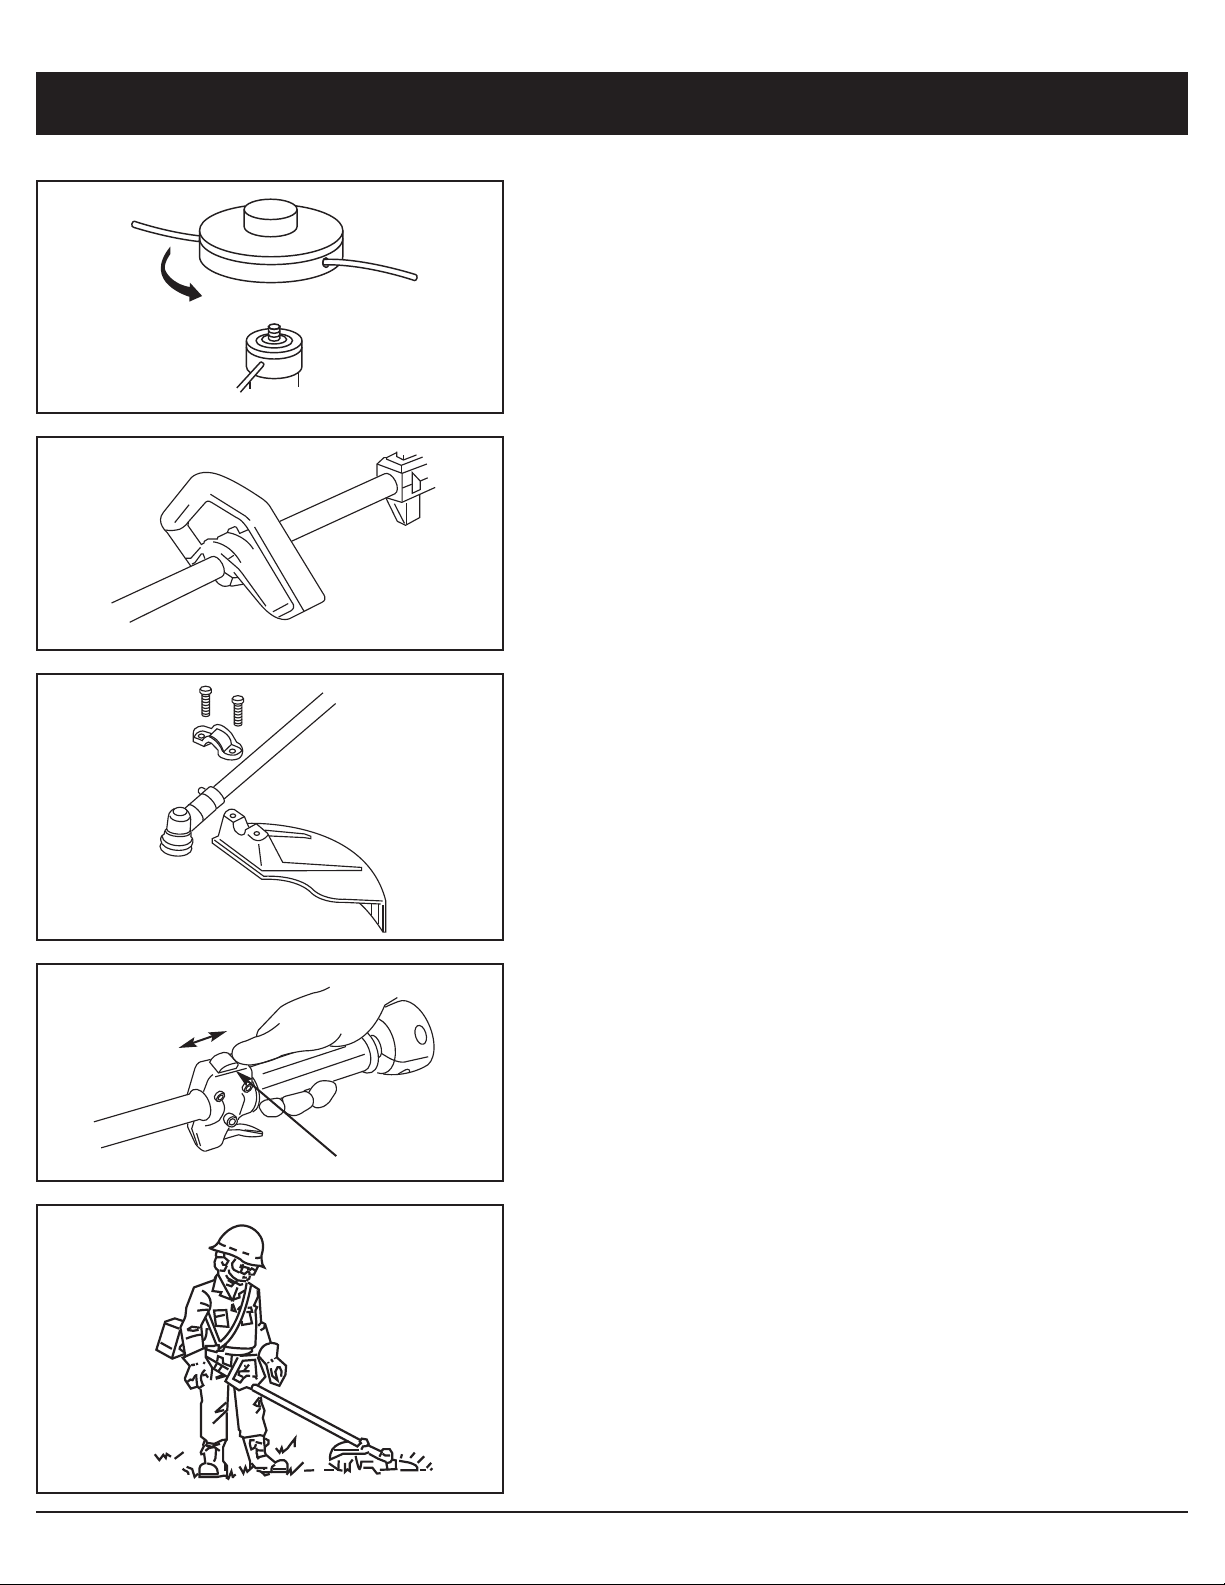
■ INSTALLING CUTTING HEAD
• Lock gear box by inserting a pin thru hole and
finding corresponding notch
• To install head, turn counterclockwise. Handtighten head securely.
• To remove head, turn clockwise
■ INSTALL ASSIST HANDLE
• Use the 3 screws provided for this assembly.
Mount the back edge of the handle clamp to
match the arrow on the tube. Adjust the handle
for comfort and good balance. Check that the
cutting line of the unit is away from your feet
and legs.
■ INSTALLING DEBRIS GUARD
• The top clamp is fixed to the tube in the proper
position. Attach the debris shield to the clamp
with the two screws and hardware provided.
Tighten the attaching screws firmly.
■ STOP AND START SWITCH
3
2
1
1. Ignition switch
2. Stop
3. Start
■ SHOULDER HARNESS
• Place the strap over your left shoulder and attach
clip to clamp eye on shaft tube.
• Loosen clamp screw and slide clamp up or down
until unit balances with head just touching
the ground.
• Tighten screw.
3
 Loading...