

Saris T-Rax Sport Series,T-Rax Sport 2,T-Rax Sport 4 Installation Manual
THE T-RAX SPORT
INSTALLATION MANUAL
Please READ and FOLLOW all instructions carefully.
T-Rax Sport 2 bike (502)
T-Rax Sport 4 bike (504)
1. MOUNT CARRIER TO VEHICLE
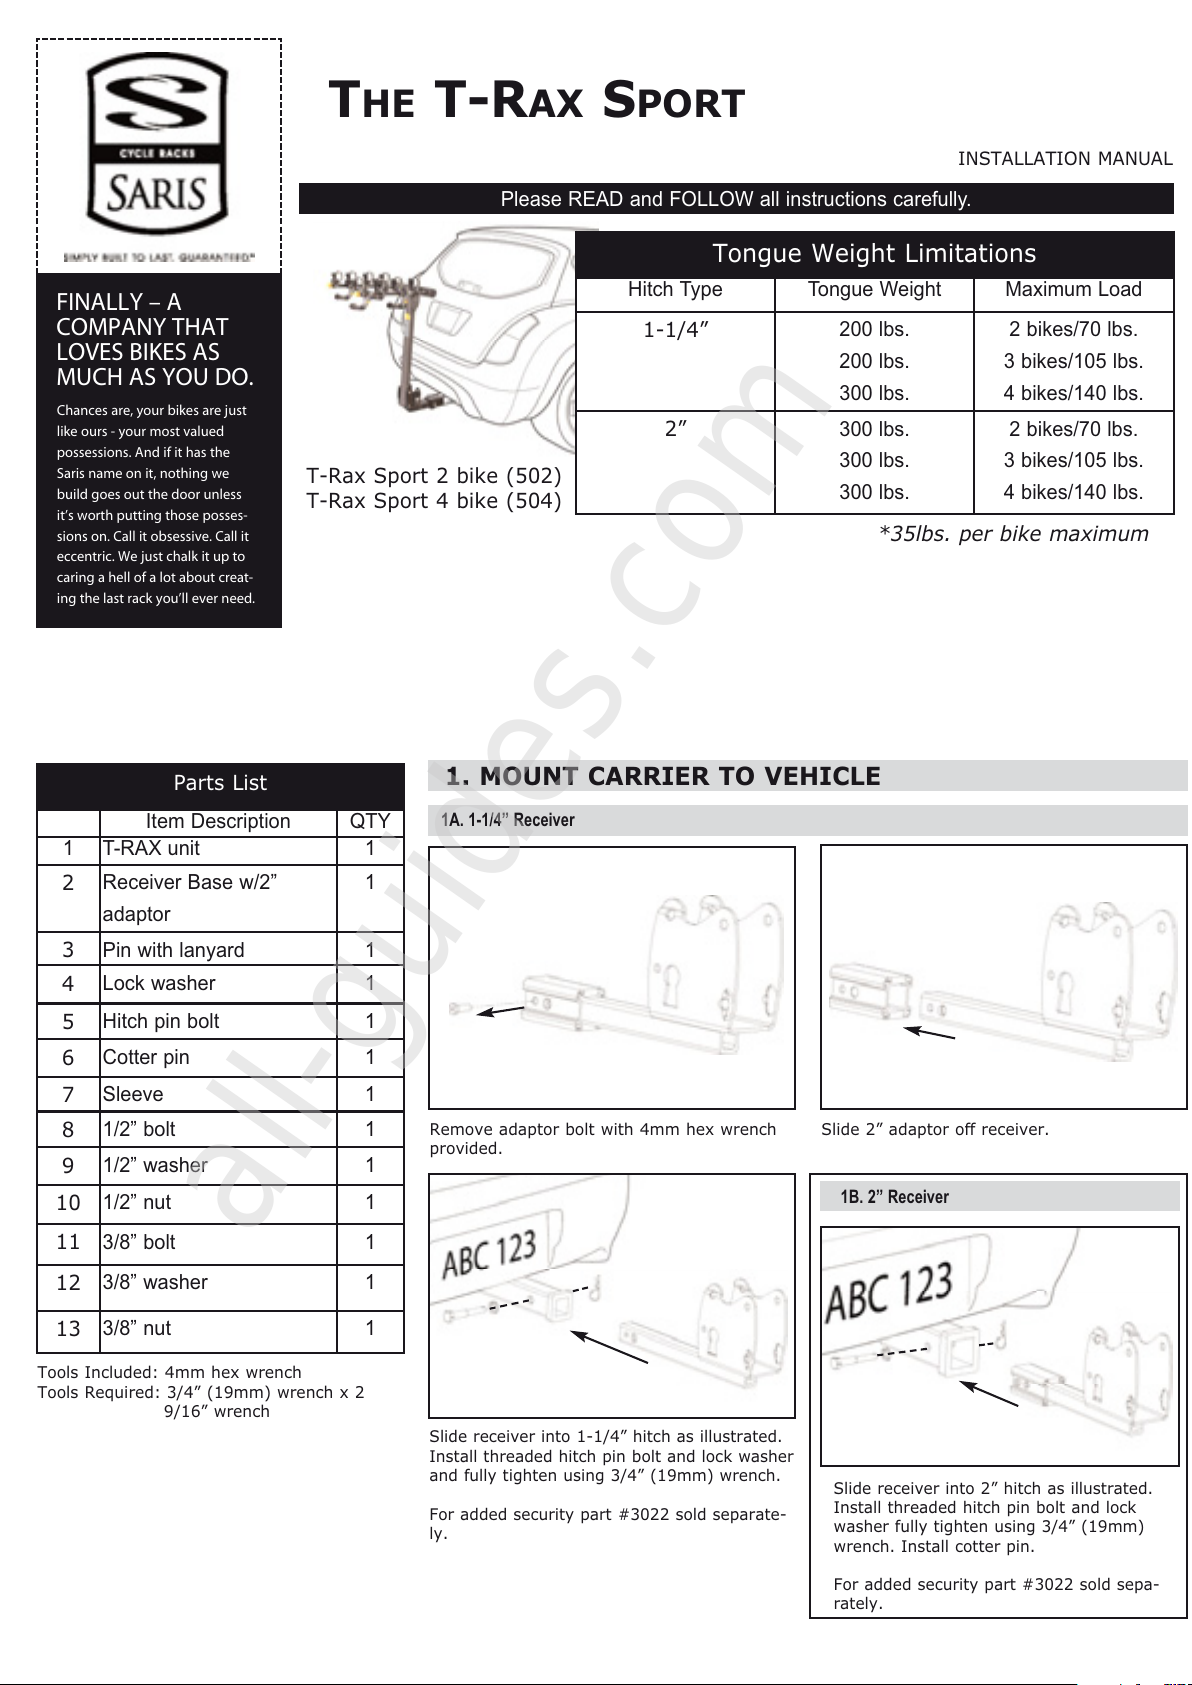
Tongue Weight Limitations
Hitch Type Tongue Weight Maximum Load
1-1/4”
200 lbs.
200 lbs.
300 lbs.
2 bikes/70 lbs.
3 bikes/105 lbs.
4 bikes/140 lbs.
2”
300 lbs.
300 lbs.
300 lbs.
2 bikes/70 lbs.
3 bikes/105 lbs.
4 bikes/140 lbs.
Remove adaptor bolt with 4mm hex wrench
provided.
*35lbs. per bike maximum
1A. 1-1/4” Receiver
Slide 2” adaptor off receiver.
Slide receiver into 1-1/4” hitch as illustrated.
Install threaded hitch pin bolt and lock washer
and fully tighten using 3/4” (19mm) wrench.
For added security part #3022 sold separate-
ly.
Slide receiver into 2” hitch as illustrated.
Install threaded hitch pin bolt and lock
washer fully tighten using 3/4” (19mm)
wrench. Install cotter pin.
For added security part #3022 sold sepa-
rately.
Chances are, your bikes are just
like ours - your most valued
possessions. And if it has the
Saris name on it, nothing we
build goes out the door unless
it’s worth putting those posses-
sions on. Call it obsessive. Call it
eccentric. We just chalk it up to
caring a hell of a lot about creat-
ing the last rack you’ll ever need.
FINALLY – A
COMPANY THAT
LOVES BIKES AS
MUCH AS YOU DO.
1B. 2” Receiver
Parts List
Item Description QTY
1 T-RAX unit 1
2
Receiver Base w/2”
adaptor
1
3
Pin with lanyard 1
4
Lock washer 1
5
Hitch pin bolt 1
6
Cotter pin 1
7
Sleeve 1
8
1/2” bolt 1
9
1/2” washer 1
10
1/2” nut 1
11
3/8” bolt 1
12
3/8” washer 1
13
3/8” nut 1
Tools Included: 4mm hex wrench
Tools Required: 3/4” (19mm) wrench x 2
9/16” wrench
All manuals and user guides at all-guides.com
all-guides.com
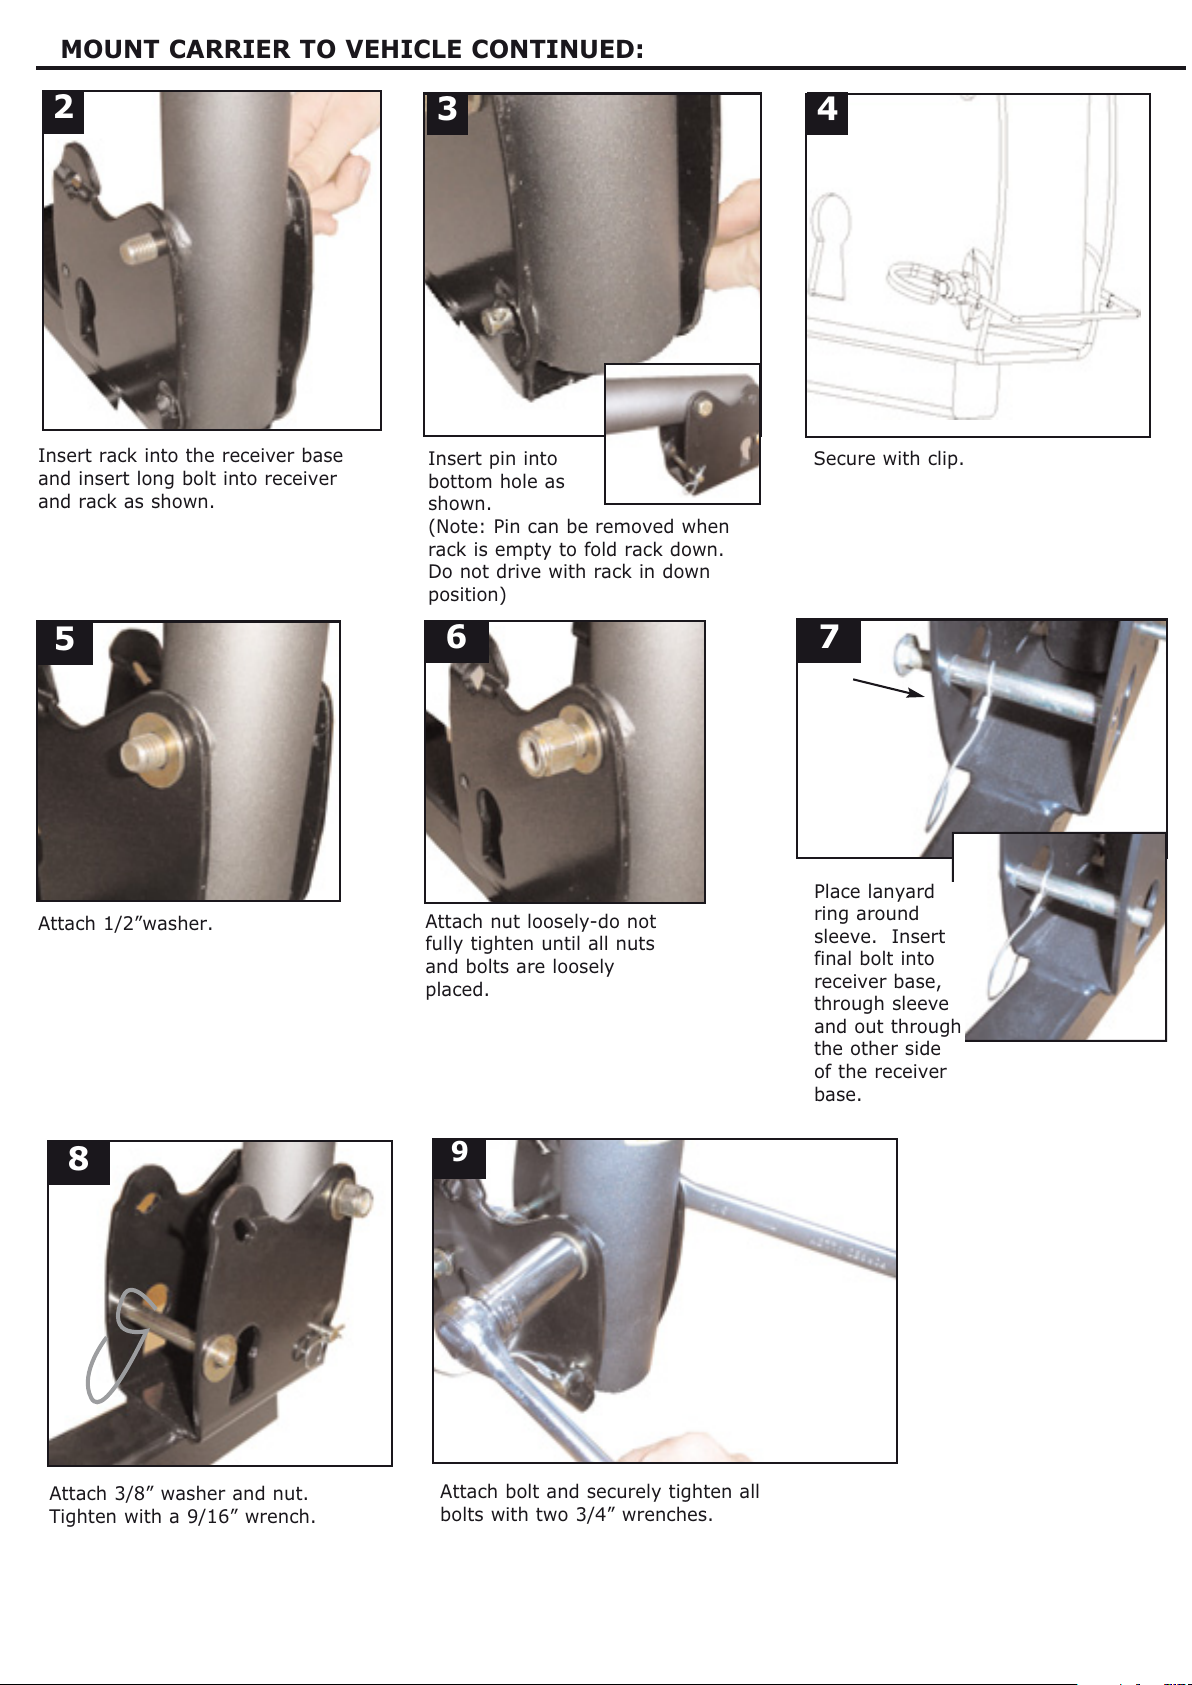
MOUNT CARRIER TO VEHICLE CONTINUED:
Place lanyard
ring around
sleeve. Insert
final bolt into
receiver base,
through sleeve
and out through
the other side
of the receiver
base.
Attach 3/8” washer and nut.
Tighten with a 9/16” wrench.
Attach bolt and securely tighten all
bolts with two 3/4” wrenches.
7
8
9
5
6
Attach nut loosely-do not
fully tighten until all nuts
and bolts are loosely
placed.
Attach 1/2”washer.
2
Insert rack into the receiver base
and insert long bolt into receiver
and rack as shown.
Insert pin into
bottom hole as
shown.
(Note: Pin can be removed when
rack is empty to fold rack down.
Do not drive with rack in down
position)
Secure with clip.
3 4
All manuals and user guides at all-guides.com
 Loading...