

Saris Bones RS Installation Instructions Manual
FINALLY – A
COMPANY THAT
LOVES BIKES AS
MUCH AS YOU DO.
Chances are, your bikes are just like
ours - your most valued possessions.
And if it has the Saris name on it,
nothing we build goes out the
door unless it’s worth putting those
possessions on. Call it obsessive. Call
it eccentric. We just chalk it up to
caring a hell of a lot about creating
the last rack you’ll ever need.
Bones RS
Installation Instructions
CAUTION
ATTENTION: Consult Saris Fit Guide before installation to obtain notch location on rack
for your vehicle. Available in box, at your local dealer, or at www.saris.com/bonesrs
Before installing carrier, clean all surfaces of vehicle which may come in contact with the
carrier or it’s belts. Make sure all pads and hooks are free of any debris that could scratch
vehicle’s fi nish. Clean all contact points periodically when using rack for prolonged periods.
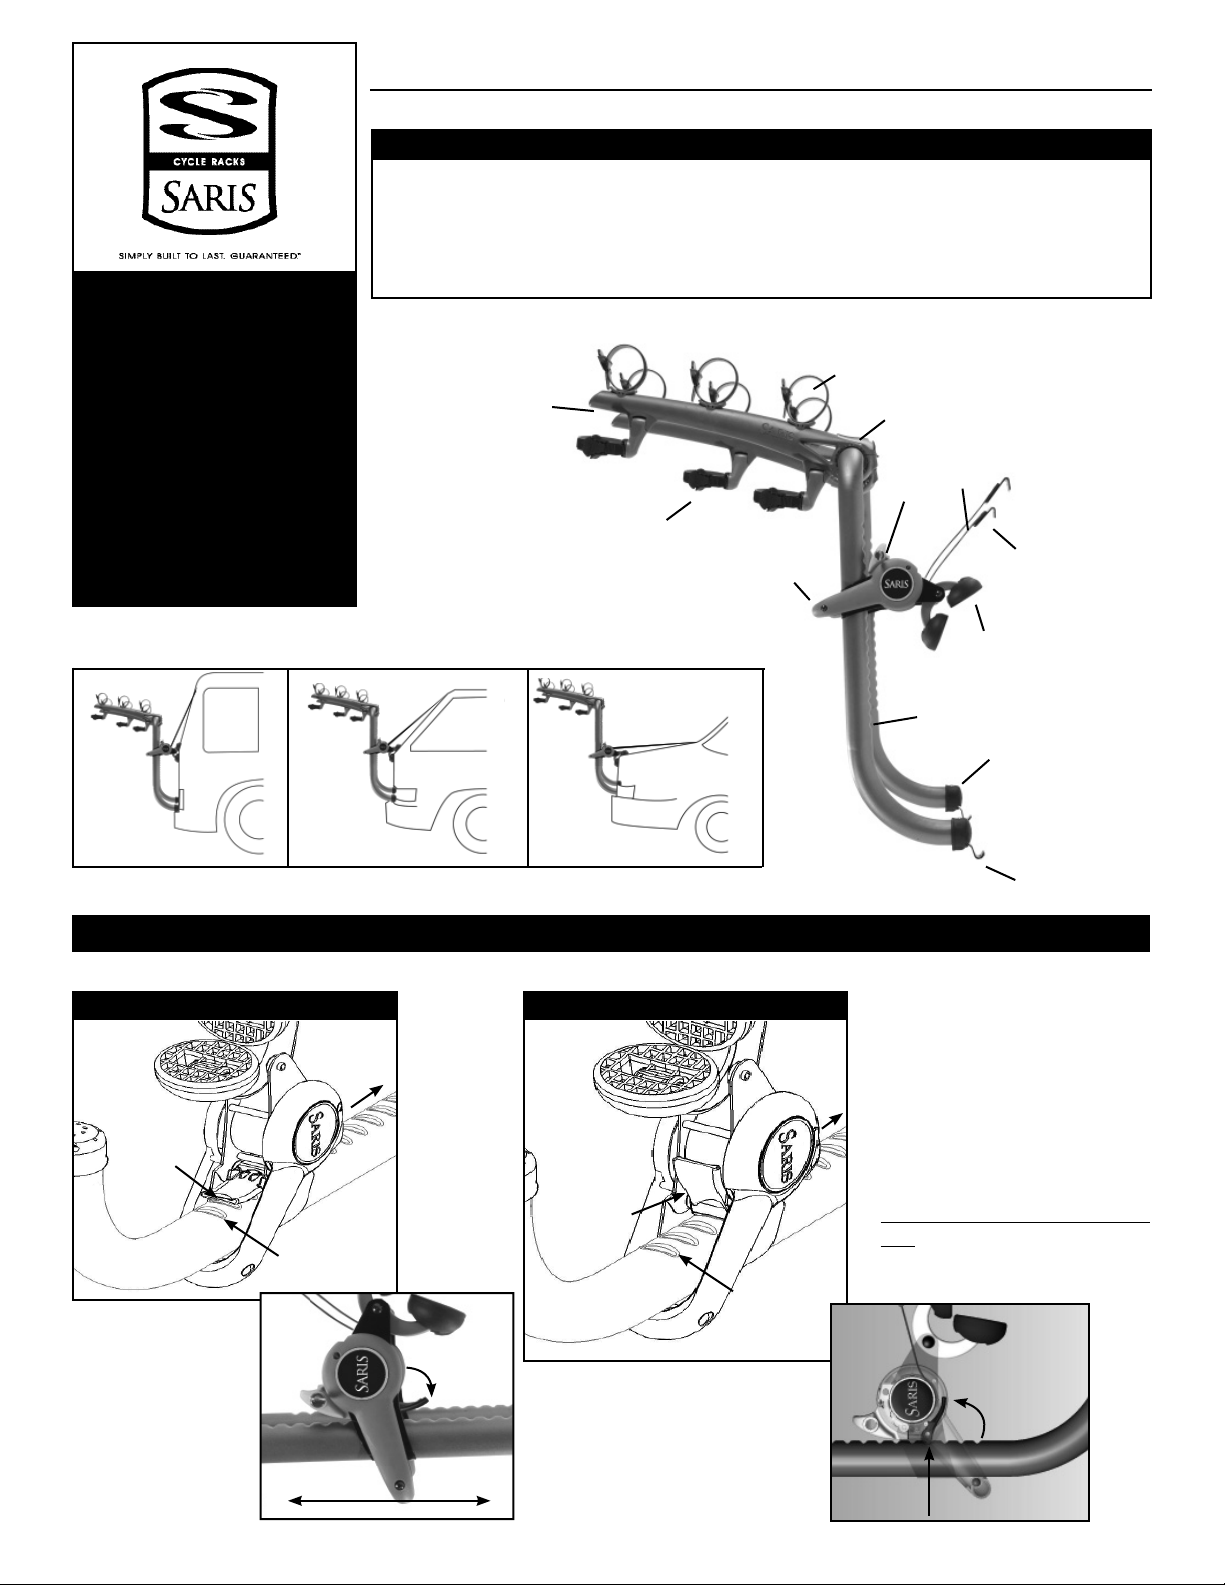
Hold-downs
Arms
Anti-sway
hold-downs
Ratchet Assembly
Cam Lever
Belts
Lock
Upper Hook
Foot pads
SUV Mount
Hatchback Mount
Sedan Mount
A. ADJUST RACK TO VEHICLE.
1. Release ratchet cam lever. 2. Adjust ratchet into position.
Lever
Lever
Notch #1
Notch #1
Notch #1
Rubber Pads
Bottom Hooks
Lay the Bones RS fl at to adjust.
Lock ratchet cam lever in place.
Reference Saris Fit Guide for
notch position on your vehicle.
Example pictured: Cam lever is
locked into notch #4 (3 visible
notches below cam lever).
Notch #1 is at the bottom of the
rack. Saris Fit Guide available at
dealer or saris.com
Release ratchet cam
lever. Slide ratchet
into desired notch
position.
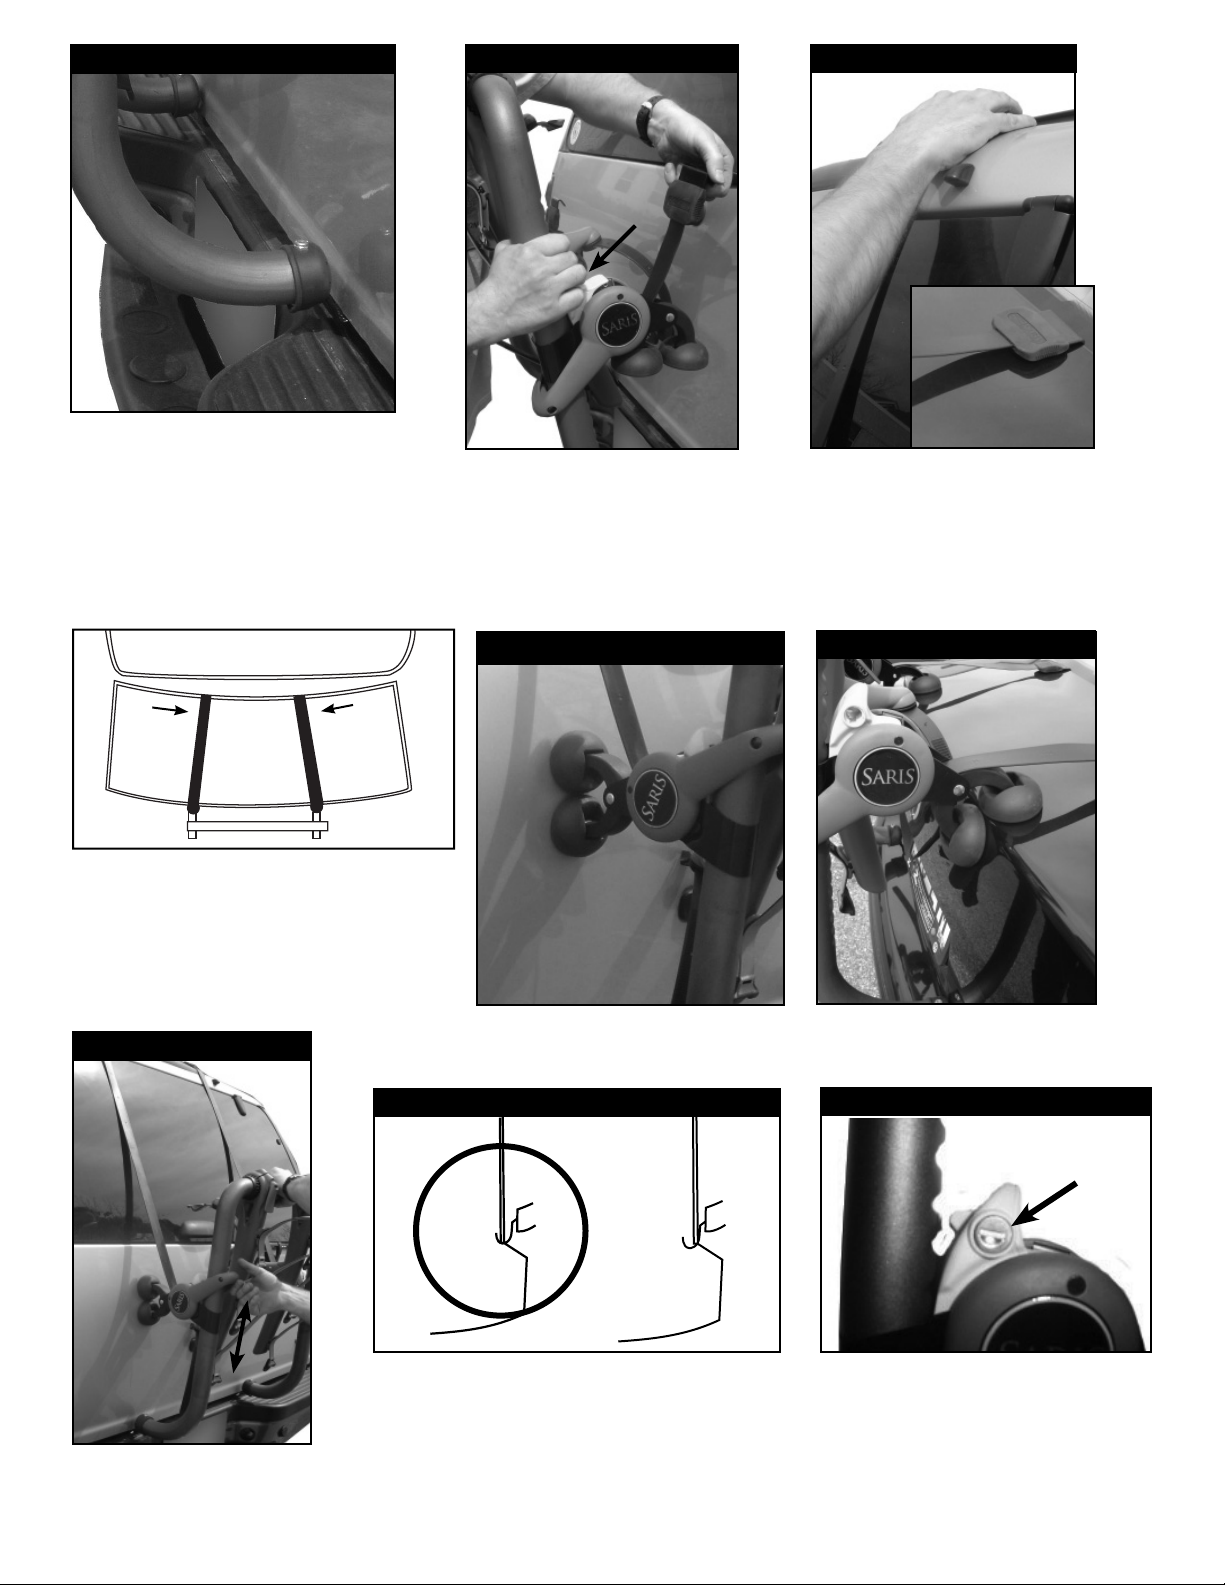
3. Bottom Hook Placement
Place the bottom hooks under the trunk lip
of the vehicle. (Some vehicles will require
an open trunk.)
4. Top Strap Placement
Pull back on the yellow lock to
release upper hook belts. (Note:
Ratchet handle must be in the
down postion to release)
5. Top Hook Attachment
Pull out belt to desired length and attach
upper hook belts to the hinge line of the
vehicle. Repeat for both straps. (Note:
Upper Hook attachment must be to a
supported hinge line - NEVER hook to
glass, unsupported plastic, or roof rack.
On vehicles with a curved hinge line,
make sure upper hooks will not slide
after tightening ratchet. Straps may angle
inward slightly.
7. Finger Tighten Ratchet
8. Correct Lower Hook Placement
6a. Trunk/Hatch Feet Placement
Place feet fl ush against the vehicle trunk (Note: Be careful of plastic surfaces,
rear windshield wipers or other trim). The upper foot may rest on glass on SUV
or hatchback style vehicles.
6b. Trunk/Hatch Feet Placement
9. Security Lock
WRONG
Tighten straps using ratchet
handle with an up and down motion. Be careful of the amount of
force used. Do not overtighten.
Rack is secure when straps are tight and
bottom hooks are engaged properly as
shown. Ensure that lower hook contacts
only the bottom edge of trunk lip. Verti-
cal portion of hook should not contact
vehicle. This may require moving position
of ratchet. (See steps 1&2)
Note: For safety and security, lock both
ratchet assemblies to secure rack to
vehicle as shown.
 Loading...