

Page 1
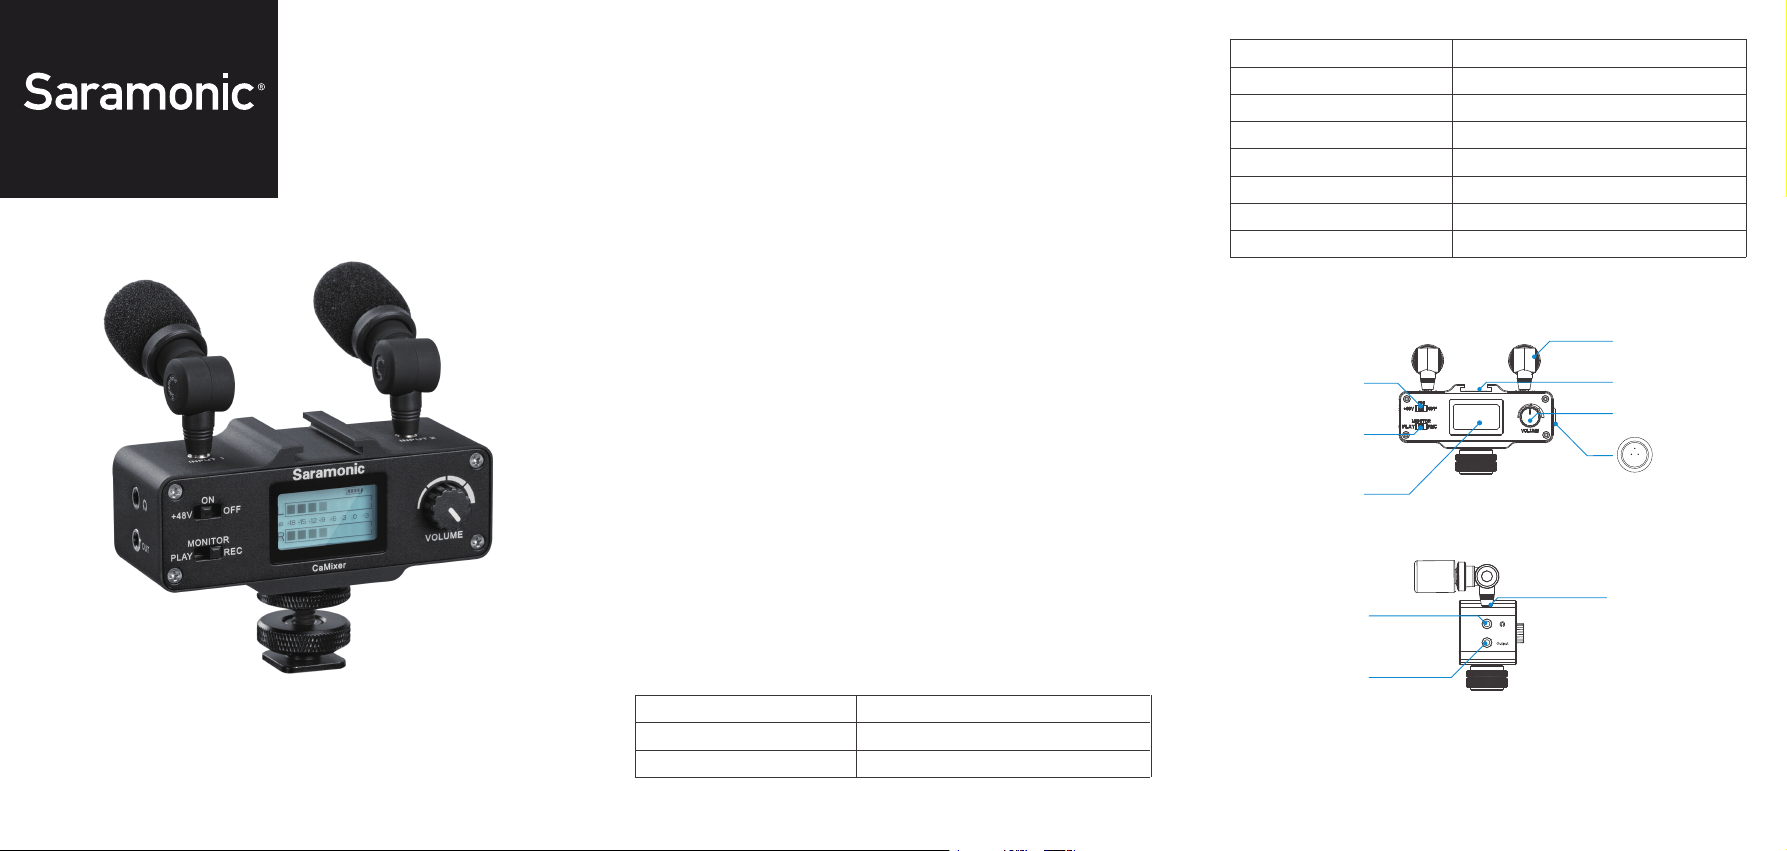
CaMixer
Mini Preamp Audio Mixer Kit
The Saramonic CaMixer is a compact audio interface with phantom
power and preamplifier, ideal for DSLR camera video production.
Introduction Manual
Introductions
The Saramonic CaMixer is a compact audio interface with phantom power
and preamplifier, ideal for DSLR camera video production.
The mixer features one mini XLR input for balanced microphones and two
microphone/line inputs for the included condenser microphones or other
user-supplied microphones. A volume control knob and level meter allow
easy adjustment of the input level. A headphone monitor output allows you
to monitor the input and playback signal.
The audio quality and versatile operation of the CaMixer make it ideal for
both professional and in-home applications.
Highlights
• Two 1/8”(3.5 mm) stereo line/mic inputs
• One mini XLR microphone input
( a mini-XLR to standard-XLR cable included)
• +48V phantom power
• One 1/8”(3.5 mm) stereo line output to camera
• One 1/8”(3.5 mm) headphone monitor output
• PLAY/REC monitor switch
• Independent L/R level meters
• Volume control knob
• Includes two plug-in power condenser microphones
• Power provided by 9V battery
Specifications
Frequency Response
Noise
Distortion
20 Hz to 20 Khz (+/-0.5 dB)
82 dB @ 1 kHz, -30 dBu input
less than 0.03% @ 1 kHz, -30 dBu input
INPUT 1 GAIN
INPUT 2 GAIN & MINI XLR Jack
INPUT 1 & INPUT 2 Power
MINI Jack Phantom Power
Level Meter
Power Requirements
Dimensions
Weight
Components
48V Phantom Power/
Power On / Power Off
PLAY / REC
Monitor Switch
Level Meter
Headphone Jack
Audio Output
15 dB
15 dB
5V power supplies
48V power supplies
-18 dB to +3 dB in 3 dB increments
9V alkaline or lithium battery
L 95 x W 35 x H 65 mm
156 g (5.5 oz.)
Condenser
Microphones
Cold Shoe
Volume Control Knob
Mini XLR
Microphone Input
Microphone Input
Page 2
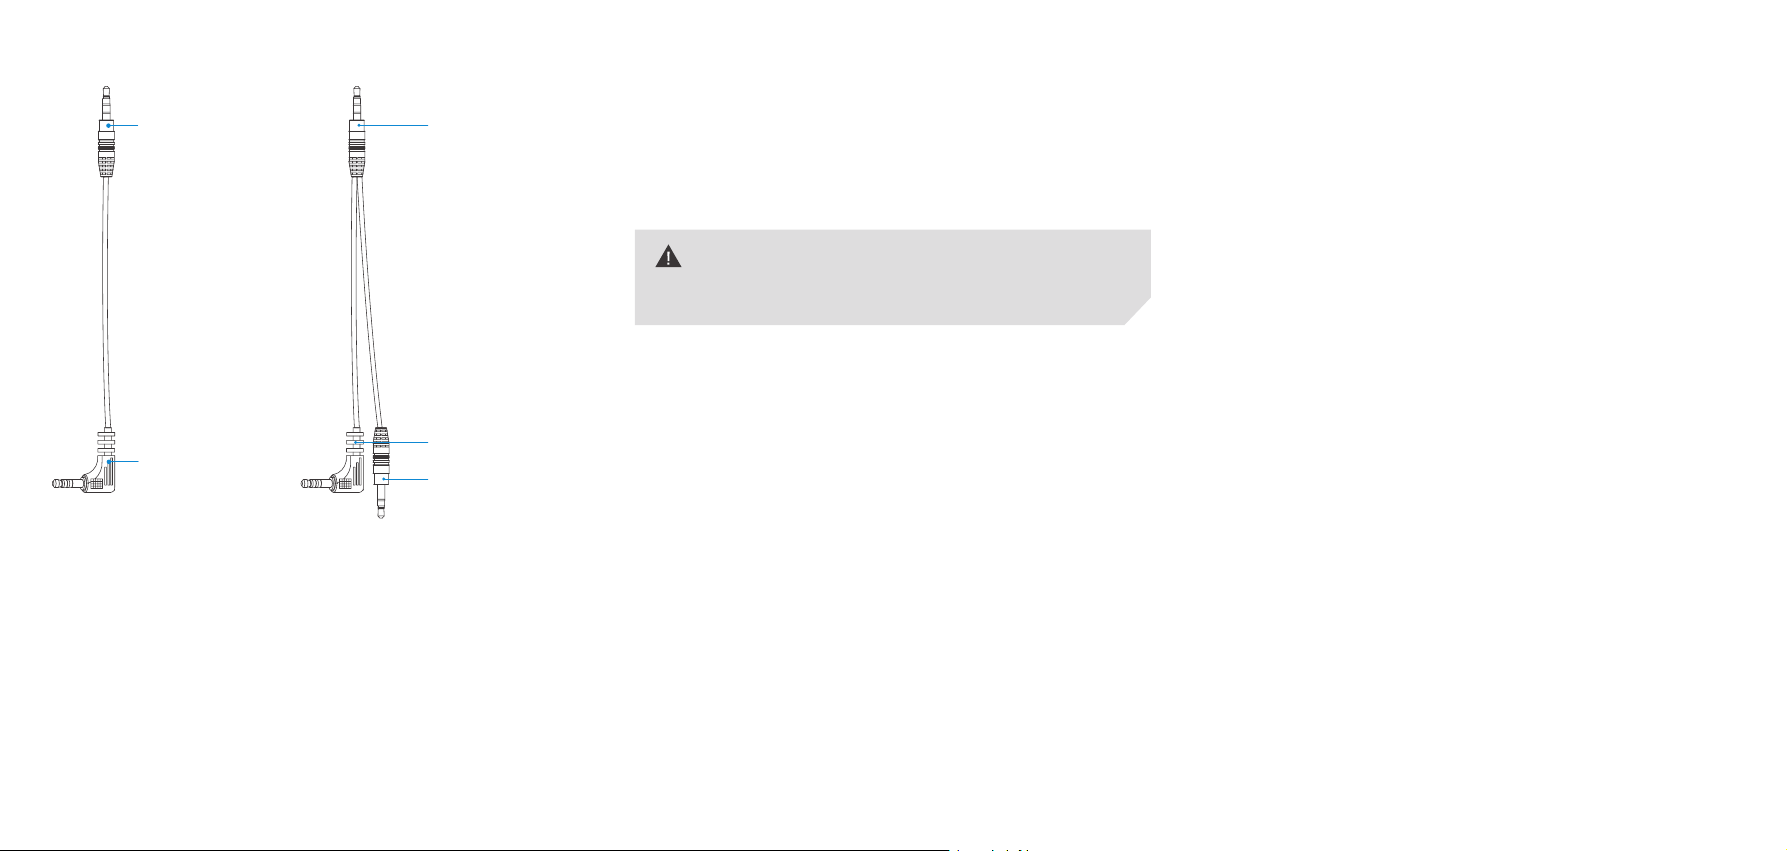
Output Cable for Cameras
Output Cable
Output
MIC input of camera
with headphone jack
Output
MIC input of camera
Headphone
Quick Start Guide
Install a 9V battery. Gently remove the battery cover at the back of unit.
Insert the battery with the “+” positive terminal lined up with the “+”
indicator on the battery compartment. A ribbon is provided for easy
battery removal.
Mount the CaMixer to your camera’s hot shoe or any other cold shoe
adapter.
Connect the supplied cable from the output jack(Output) of CaMixer to the
MIC input of camera. If your camera has a headphone monitor jack, please
connect the cable as shown in the image and select PLAY for monitoring
the playback audio from camera.
Plug in the supplied condenser microphones or other user-supplied XLR
microphones or audio sources to the inputs of CaMixer.
Turn on the CaMixer. Slide the power switch to ON.
If your microphone needs phantom power, please slide the power switch
to the +48V position to turn on the phantom power.
NOTE: Please turn on phantom power ONLY if the microphone clearly
say it’s needed, as the current may damage it.
Plug an earphone into the monitor jack on the CaMixer to monitor the
audio. Be sure that the volume control is set low before recording to avoid
excessively loud audio from damaging your hearing.
Select the PLAY/REC monitor switch
Select PLAY for monitoring playback audio from the camera.
Select REC for monitoring audio directly from the microphone or audio
source while recording.
You are now ready to record:
Adjust the volume control flexibly to get the the optimum signal levels.
If you hear echoes while recording, please lower the volume with the
volume control knob.
Packing List
CaMixer main unit
Two plug-in power condenser microphones
One mini-XLR to standard-XLR cable
One 1/8”(3.5 mm) output cable
One 1/8”(3.5 mm) output cable for playback monitor
User Manual
 Loading...