

SAPPHIRE TECHNOLOGY EDGEHD4 User Manual
TinyPC User Manual
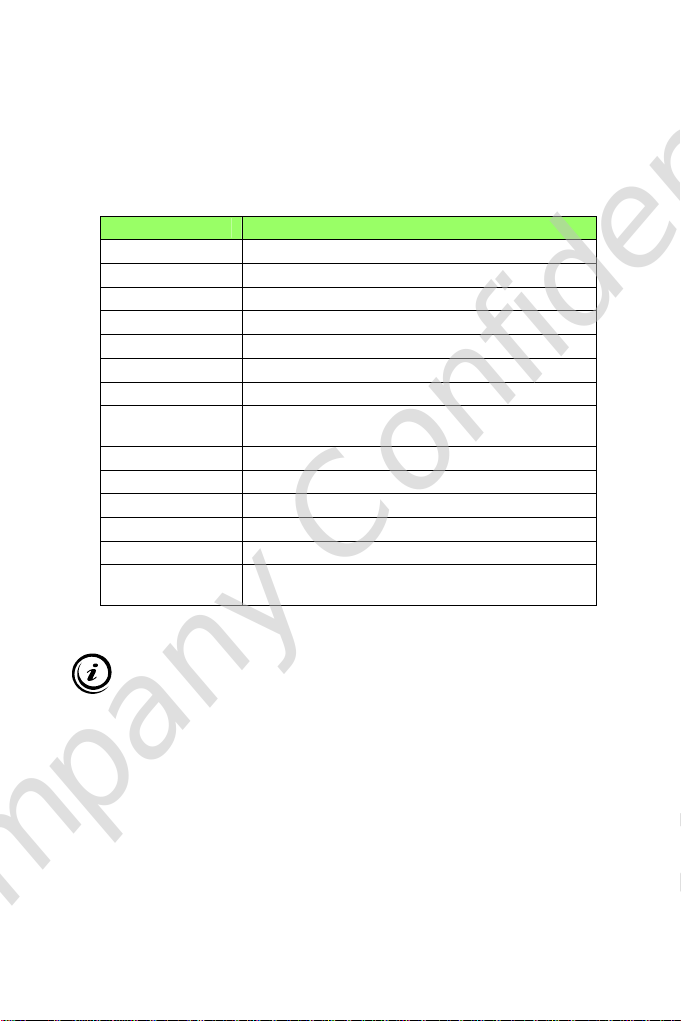
1. Product Specifications
Item Description
CPU Intel Sandy Bridge Celeron 847 dual-core 1.10GHz
Chipset Intel NM70
RAM 2GB/4GB – DDR3
Storage 2.5'' SATA 250GB / 320GB / 500GB HDD
Graphics Intel HD Graphics
LAN Built-in Ethernet supporting 10/100/1000 Mbps
WIFI Built-in WIFI supporting IEEE 802.11 b/g/n
I/O
Power AC 100~240V 50/60Hz,19v~3.42A 65W
Monitor Supplied separately
Keyboard/Mouse Supplied separately
Dimensions 19.3(L) X 14.8(W) X 2.2(H) cm
Weight 530g
Operating System Pre-installed with FREE DOS; Supports Win7/Win8
VGA x1, HDMI x1, RJ45x 1, 1 x USB 3.0 Ports, 3x
USB 2.0 Ports Audio-In x1, Line Out x1
Important information for your safety and comfort
Please read these instructions carefully before using the product and
save for future reference.
Ÿ Ensure that the Mini-PC is turned off and disconnected from the
mains supply before cleaning
Ÿ Do not use liquid or aerosol cleaners, a damp cloth should suffice
Ÿ Insert the power connector into the Mini PC before plugging the
mains cable into the AC power outlet.
Ÿ When you need to disconnect power to the equipment, unplug the
power cord from the AC power outlet before removing the power
connector from the Mini PC.
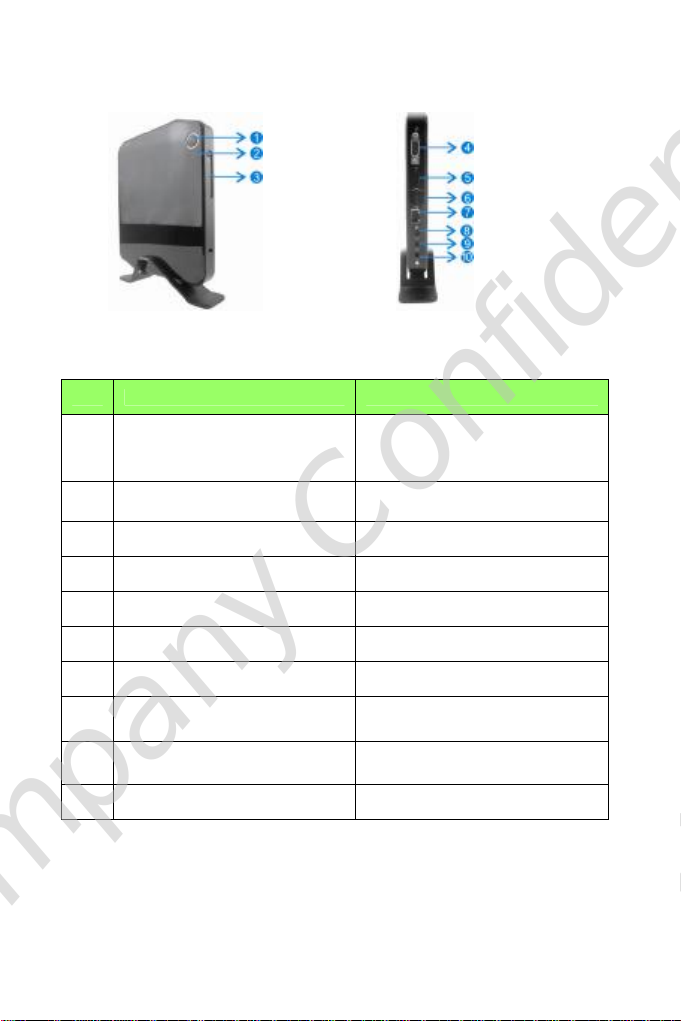
2. Product Overview
Features
No. Item Description
Power Switch and Power Indication
1
light
2
HDD Activity Indicator
3
VGA port To connect to a VGA monitor
4
HDMI port To connect to an HDMI monitor
5
Rear USB 2.0 Ports To connect to USB devices
6
LAN Port To connect to an Ethernet LAN cable
7
DC Input To connect the power supply
8
Audio out jack
9
Microphone in jack
10
Front USB3.0 Ports (remove cover) To connect to USB devices.
The power switch allows you to
switch the Mini PC ON or OFF. The
light will glow when the power is on
Light will glow when the hard disk is
in use
To connect to headphones or
speakers
To connect to a microphone or other
audio source
3. Sapphire Mini PC Setup and Connections
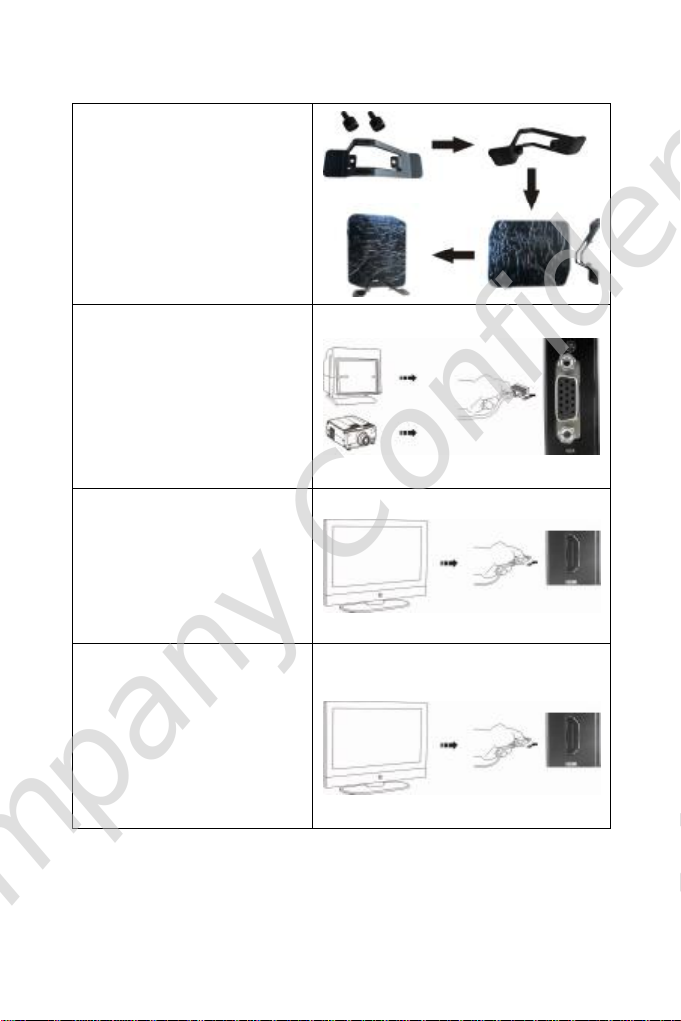
To attach the Desktop Stand
(1). Feed the thumb screw
provided through the hole
in the base of the stand
(2). Align stand with the base
of the Mini PC
(3). Hand tighten the screw
To connect to a VGA display
Connect the VGA monitor or
other display device to the 15
pin D-Sub connector found on
the rear of the unit.
To connect to an HDMI
display / TV
Connect the HDMI monitor or
other display device to the
HDMI connector found on the
rear of the unit.
To connect to a DVI display
(1). Connect the HDMI to DVI
adapter included with the
Mini PC to the HDMI port
found at the rear of the
unit.
(2). Connect the DVI monitor
to the female DVI port on
the adapter.
 Loading...