

Sapphire Audio HOSS 700 Owner's Manual
WARNING
HOSS 700 Rotary Cleaning Tool
Owner’s Manual
Sapphire Scientific • Sales: 866-445-3030 • Technical Support: 866-445-3030.
Congratulations on your purchase of a HOSS 700 Rotary Cleaning Tool from Sapphire! With a durable design and innovative cleaning features, the HOSS 700 makes
carpet cleaning easier, more effective and more profitable.
Patents pending
READ AND SAVE THESE INSTRUCTIONS
SAFETY INSTRUCTIONS
WARNING! Electric shock hazard, rotating parts, hot
surface hazards. Unplug unit before opening cover
for cleaning or servicing. Unit must be properly
grounded.
• Inspect the power cord before use. If cord is damaged, do not use. Always grasp the plug (not the
cord) to unplug.
• The unit must be operated on a 110V/60Hz circuit.
• Keep motor and wiring dry.
• Do not operate in standing water
• Do not operate in rain or snow. If electrical compo-
nents become wet, allow them to dry before usi ng.
• Do not attempt to repair the unit. For technical su pport, call Sapphire at 866-445-3030.
NOTICE: Protect from freezing during storage and
transport. Damage caused by freezing is not covered by
the product warranty.
INTRODUCTION
The HOSS 700 Rotary Cleaning Tool greatly improves
cleaning performance and efficiency on a wide v ariety of
carpet types.
• High-flow solution orifices and high efficiency vacuum plates
• ½ HP 1725 RPM motor
• Sealed low-maintenance gear box
• 6 in. non-scuffing wheels for easy transport
• Fully adjustable handle for maximum operator com-
fort and control
49-075C 2011-07 Warranty 49-071 1 Sapphire Scientific
PARTS IDENTIFICATION
A
J
E
C
B
M
L
H
Fig. 1
Fig. 2
IMPORTANT: The HOSS 700 is shipped with the handle and electrical cord unattached. Attach these items before using. See “Handle Installation Instructions,”
p. 4.
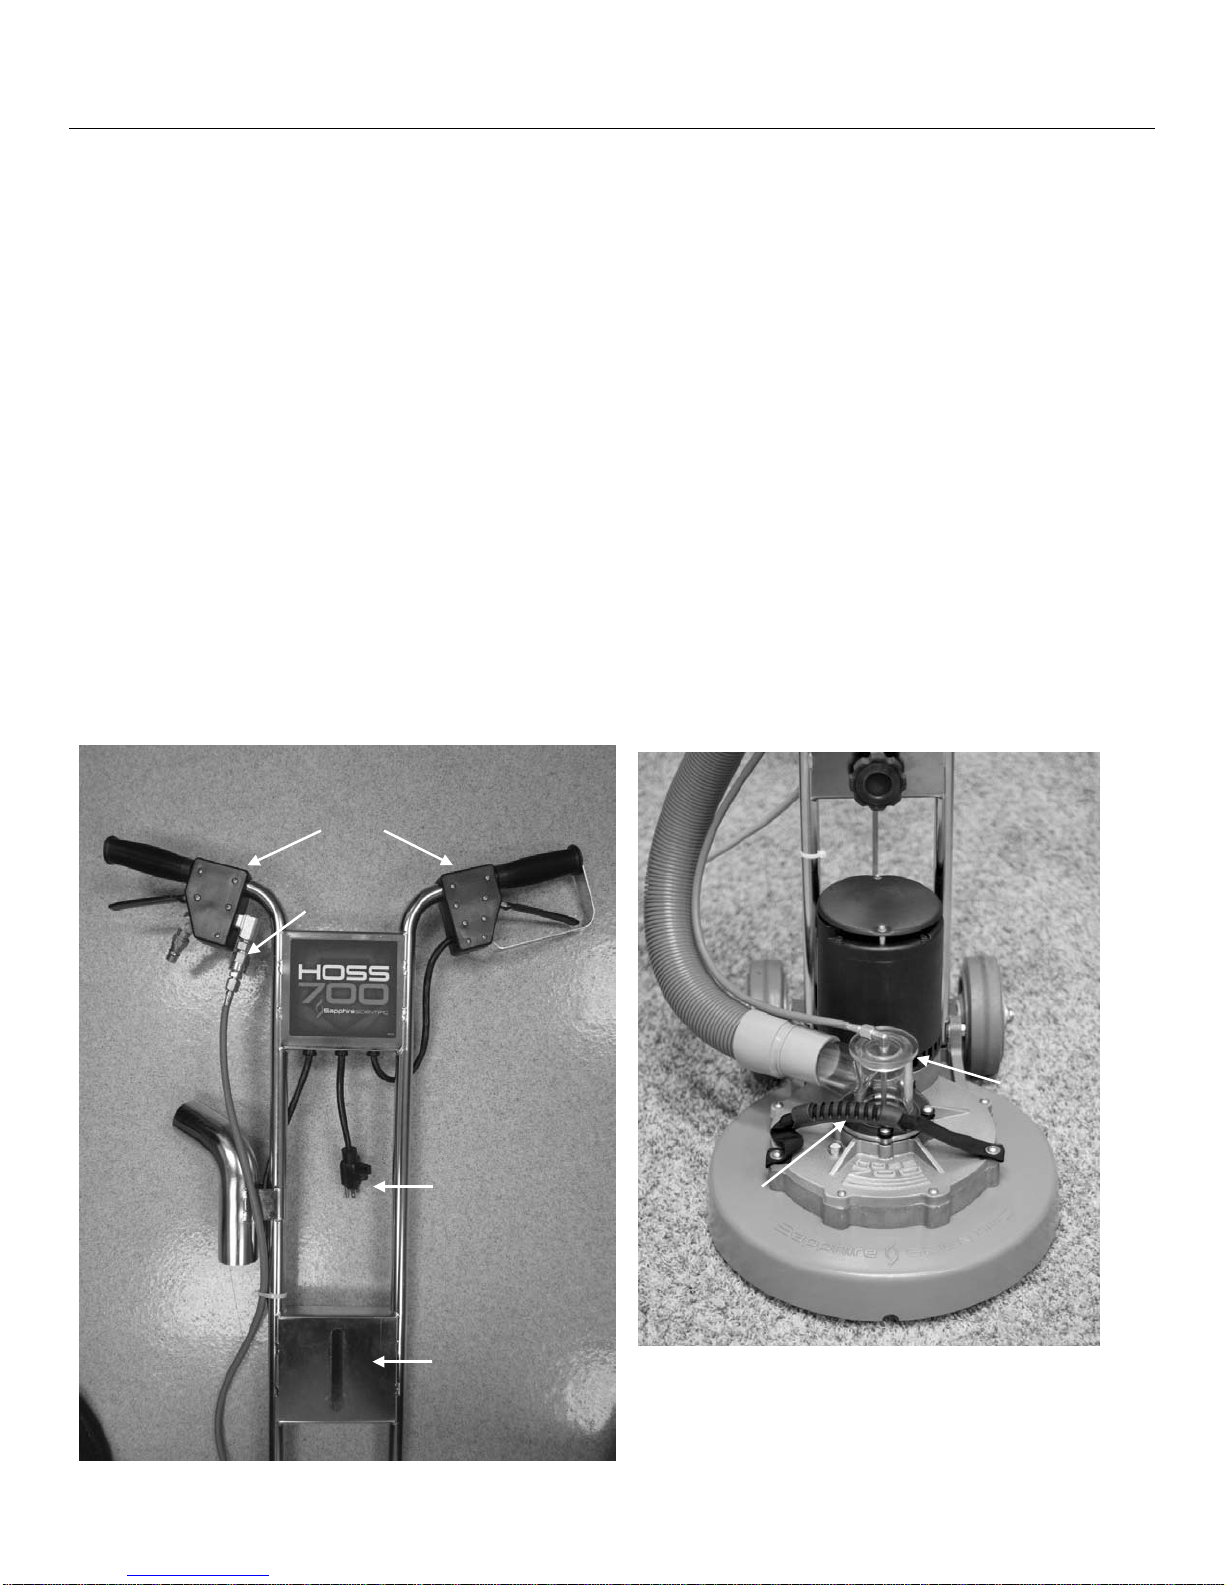
Figure 1
A. Handles.
B. Solution control lever. Squeeze to start solution flow.
C. Motor control lever. Squeeze to start head rotation.
D. Solution line inlet connection. Attach to solution line comin g from solution pump.
E. Connection for rotary head solution line. Factory installed.
F. Vacuum hose attachment. Connect to 2 in. vacuum hose, or use adaptor for 1½ in. hose.
G. Power cord connection. Use with a heavy duty extension cord with suitable amp rating.
H. Inline solution filter. Dissassemble for cleaning. See “Clean Inline Filter,” p. 8. Flow control orifice is also located
here. See “Cleaning and Operational Tips,” p. 8.
J. Handle height adjustment slot. Loosen knob to raise or lower handle. Ti ghten firmly after adjustment.
Figure 2
K. Transport wheels. Tip unit back on wheels to easily move unit from ro om to room.
L. Vacuum Inlet Cleanout Cap. Lift out for quick cleaning.
M. Carry handle. Use only when handle is in upright positi on and locked into position.
D
F
49-075C 2011-07 Warranty 49-071 2 Sapphire Scientific
K
G
PARTS IDENTIFICATION (cont.)
Q
N
P
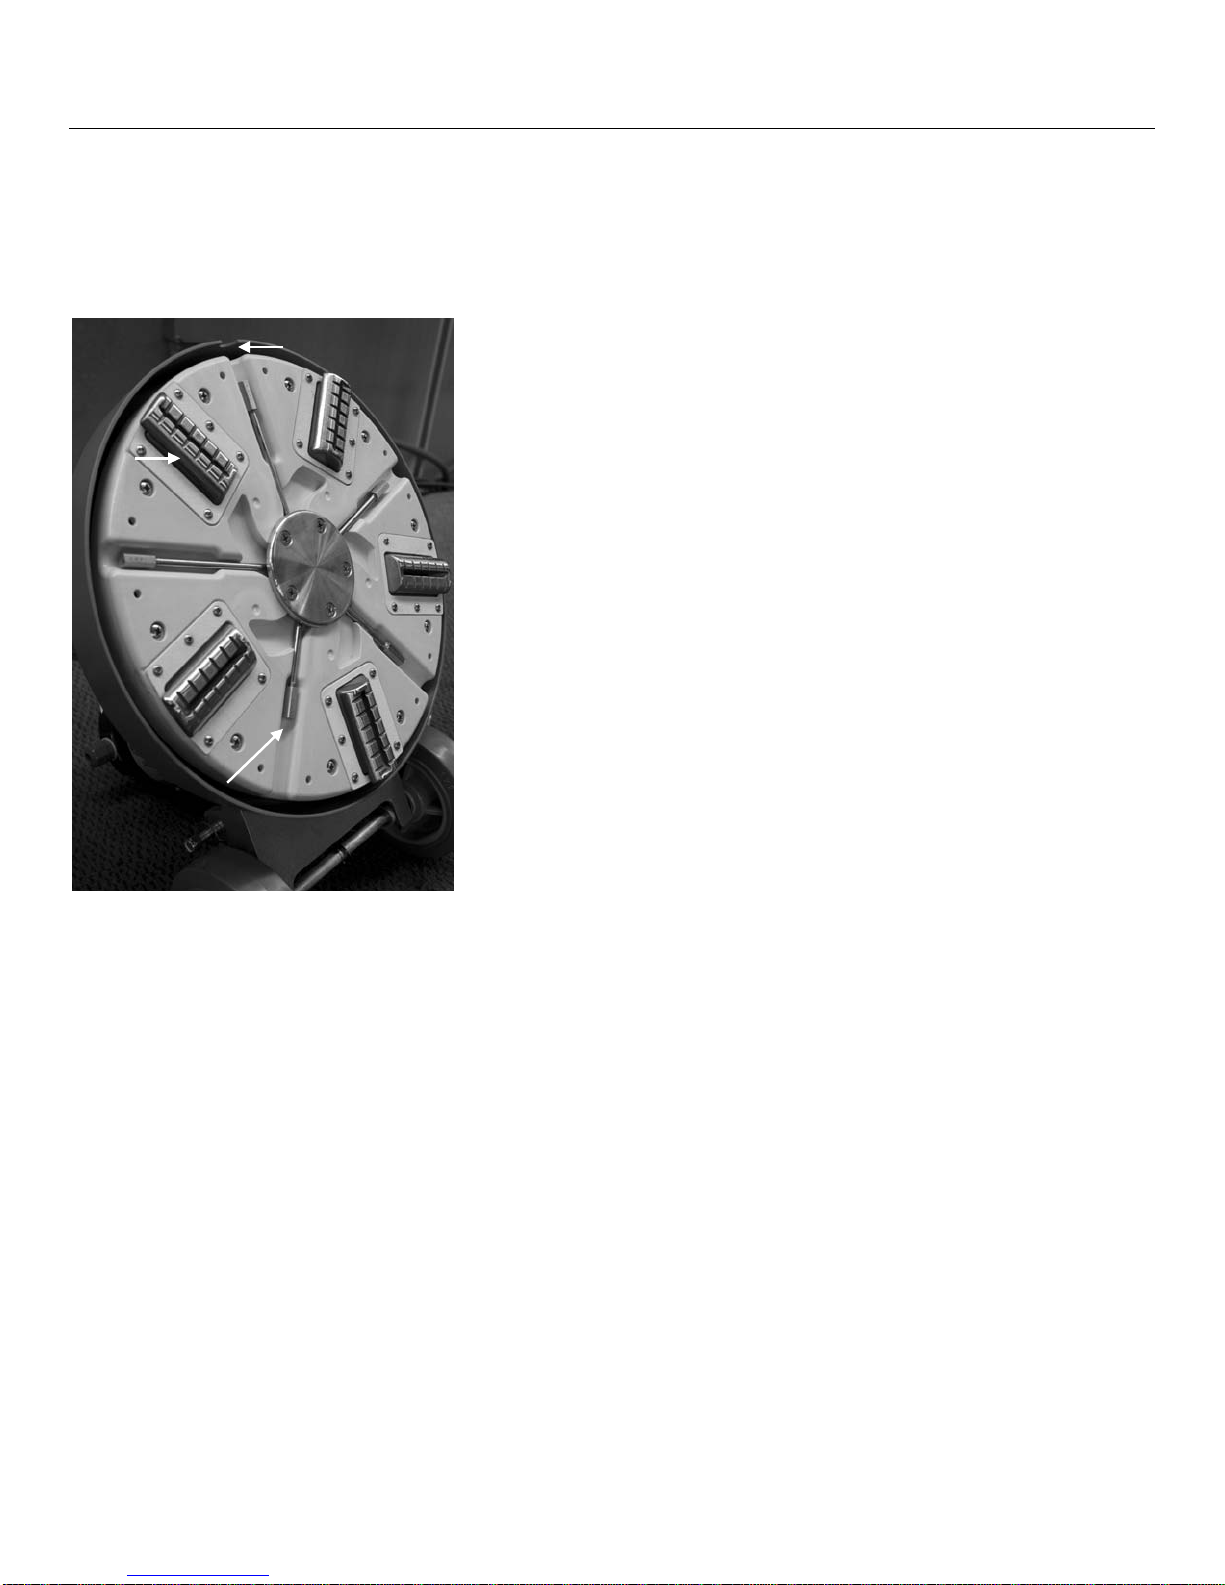
Figure 3
N. Solution orifices (×5). May be removed with a ⅜ in. socket or nut driver for cleanin g or replacement. Align rotor
with Access Notch P in housing to access each orifice.
Q. Vacuum feet Q (×5). May be removed for cleaning or replacement.
Fig. 3
49-075C 2011-07 Warranty 49-071 3 Sapphire Scientific
 Loading...