

Page 1
1
User’s Manual V1.0
Page 2

http://www.sapido.com.tw 2
User’s Manual V1.0
Index
COPYRIGHT STATEMENT............................................................................................................................. 7
FCC CAUTION ..................................................................................................................................... 7
SAFE SEATING GESTURES............................................................................................................. 8
CHAPTER 1 INTRODUCTION .......................................................................................................... 9
1.1 OVERVIEW.............................................................................................. 9
1.2 THE LED LABEL ..................................................................................... 10
1.3 THE BACK OF THE 3.5G DOWNLOAD SERVER ROUTER .................................... 12
1.4 HARDWARE SPECIFICATIONS .................................................................... 13
1.5 HOW TO OBTAIN IP ADDRESS AUTOMATICALLY UNDER WINDOWS XP ................ 14
CHAPTER 2 HARDWARE SETUP.................................................................................................. 17
2.1 FIGURES FOR CONNECTING HARDWARES TO N+ 3.5G NES SERVER.................. 17
2.1.1 Hardware Connection for Router Mode........................................ 17
2.1.2 Hardware Connection for AP Mode .............................................. 17
2.1.3 Hardware Connection for Wi-Fi AP Mode ..................................... 18
CHAPTER 3 ONE BUTTON SETUP CONFIGURATION....................................................... 19
3.1 ONE BUTTON SETUP CONFIGURATION FOR ROUTER MODE ............................... 19
3.2 ONE BUTTON SETUP CONFIGURATION FOR AP MODE...................................... 21
3.3 ONE BUTTON SETUP CONFIGURATION FOR WIFI AP MODE ............................. 23
CHAPTER 4 QUICK SETUP FOR THE 3.5G DOWNLOAD SERVER ROUTER .......... 26
4.1 ROUTER MODE CONFIGURATION............................................................... 28
4.2 QUICK SETUP FOR ROUTER MODE ............................................................. 28
4.2.1 Time Zone Setup ......................................................................... 29
4.2.2 LAN Interface Setup .................................................................... 29
4.2.3 WAN Setup .................................................................................. 29
4.2.4 3.5G Setup .................................................................................. 35
4.2.5 Wireless Setup ............................................................................ 36
4.2.6 Wireless Security Setup .............................................................. 36
4.2.7 Quick Setup Complete ................................................................. 38
4.2.8 Folder Management..................................................................... 38
4.2.9 Partition / Format SysDisk .......................................................... 39
4.2.10 User Account Management .......................................................... 39
4.2.11 FTP Server................................................................................... 40
4.2.13 Printer Server.............................................................................. 40
4.2.14 Webcam Server ........................................................................... 41
Page 3

http://www.sapido.com.tw 3
User’s Manual V1.0
4.2.15 Samba Server .............................................................................. 41
4.3 AP MODE CONFIGURATIONS..................................................................... 42
4.4 QUICK SETUP FOR AP MODE ................................................................... 42
4.4.1 Time Zone Setup ......................................................................... 43
4.4.2 Wireless Setup ............................................................................ 43
4.4.3 Wireless Security Setup .............................................................. 43
4.4.4 Quick Setup Complete ................................................................. 45
4.4.5 Folder management .................................................................... 48
4.4.6 Partition / Format SysDisk .......................................................... 49
4.4.7 User Account Management .......................................................... 49
4.4.8 FTP Server................................................................................... 50
4.4.9 Printer Server.............................................................................. 50
4.4.10 Web Camera................................................................................ 51
4.2.16 Samba Server .............................................................................. 51
4.5 WIFI AP MODE CONFIGURATION .............................................................. 52
4.6 QUICK SETUP FOR WIFI AP MODE ............................................................ 52
4.6.1 Time Zone Setup ......................................................................... 52
4.6.2 Wireless Site Survey And Security Setup..................................... 53
4.6.3 Wireless Security Setup .............................................................. 54
4.6.4 Quick Setup Complete ................................................................. 55
4.6.5 Folder Management..................................................................... 58
4.6.6 Partition / Format SysDisk .......................................................... 58
4.6.7 User Account Management .......................................................... 59
4.6.8 FTP Server................................................................................... 59
4.6.9 Printer Server.............................................................................. 60
4.6.10 Web Camera................................................................................ 61
4.6.11 Samba Server .............................................................................. 61
CHAPTER 5 ADVANCED CONFIGURATION FOR ROUTER MODE............................... 62
5.1 IP CONFIG ........................................................................................... 62
5.1.1 WAN Interface Setup .................................................................. 62
5.1.2 LAN Interface Setup .................................................................... 75
5.1.3 Dynamic DNS Setting .................................................................. 77
5.2 WIRELESS SETUP ................................................................................... 78
5.2.1 Wireless Basic Settings ............................................................... 78
5.2.2 Wireless Advanced Settings ........................................................ 84
5.2.3 Wireless Security Setup .............................................................. 85
5.2.4 Wireless Access Control .............................................................. 88
5.2.5 WDS Settings .............................................................................. 91
Page 4

http://www.sapido.com.tw 4
User’s Manual V1.0
5.2.6 WPS ............................................................................................ 96
5.3 NAT ................................................................................................ 100
5.3.1 Visual Server ............................................................................. 100
5.3.2 Visual DMZ ................................................................................ 102
5.4 FIREWALL ......................................................................................... 103
5.4.1 QoS ........................................................................................... 103
5.4.2 Port Filtering ............................................................................. 105
5.4.3 IP Filtering ................................................................................ 106
5.4.4 MAC Filtering............................................................................. 107
5.4.5 URL Filtering ............................................................................. 109
5.5 SERVER.............................................................................................. 110
5.5.1 Samba Server ............................................................................ 110
5.5.2 FTP Server................................................................................. 112
5.5.3 Webcam Server ......................................................................... 113
5.5.4 Printer Server............................................................................ 121
5.5.5 Download Server ....................................................................... 128
5.6 SYSTEM MANAGEMENT .......................................................................... 129
5.6.1 Change Password ...................................................................... 129
5.6.2 Firmware Upgrade..................................................................... 130
5.6.3 Profiles Save ............................................................................. 131
5.6.4 Time Zone Setting ..................................................................... 135
5.6.5 UPnP & UPnP AV Setting ........................................................... 136
5.5.6 Language Setting ...................................................................... 137
5.5.7 User Account Management ........................................................ 138
5.5.8 Folder Management................................................................... 139
5.6 LOG & STATUS .................................................................................... 140
5.6.1 Network Config ......................................................................... 140
5.6.2 Event Log .................................................................................. 141
5.7 LOGOUT ............................................................................................. 142
CHAPTER 6 ADVANCED CONFIGURATION FOR AP MODE................................................ 143
6.1 IP CONFIG ......................................................................................... 143
6.1.1 LAN Setup ................................................................................. 143
6.1.2 LAN Interface Setup .................................................................. 143
6.2 WIRELESS SETUP ................................................................................. 145
6.2.1 Wireless Basic Settings ............................................................. 145
6.2.2 Wireless Advanced Settings ...................................................... 150
6.2.3 Wireless Security Setup ............................................................ 152
6.2.4 Wireless Access Control ............................................................ 154
Page 5

http://www.sapido.com.tw 5
User’s Manual V1.0
6.2.5 WDS Settings ............................................................................ 157
6.2.6 WPS .......................................................................................... 162
6.3 SERVER.............................................................................................. 167
6.3.1 Samba Server ............................................................................ 167
6.3.2 FTP Server................................................................................. 169
6.3.3 Webcam Server ......................................................................... 171
6.3.4 Printer Server............................................................................ 177
6.3.5 Download Server ....................................................................... 185
6.4 SYSTEM MANAGEMENT .......................................................................... 186
6.4.1 Change Password ...................................................................... 186
6.4.2 Firmware Upgrade..................................................................... 187
6.4.3 Profiles Save ............................................................................. 188
6.4.4 Time Zone Setting ..................................................................... 192
6.4.5 UPnP & UPnP AV Setting ........................................................... 193
6.4.6 Language Setting ...................................................................... 194
6.4.7 User Account Management ........................................................ 195
6.4.8 Folder Management................................................................... 196
6.5 LOG & STATUS .................................................................................... 197
6.5.1 Network Config ......................................................................... 197
6.5.2 Event Log .................................................................................. 198
6.5 LOGOUT ............................................................................................. 199
CHAPTER 7 ADVANCED CONFIGURATION FOR WIFI AP MODE .......................... 200
7.1 IP CONFIG ......................................................................................... 200
7.1.1 IP Config - LAN ........................................................................... 200
7.1.2 LAN Interface Setup ................................................................... 201
7.2 WIRELESS SETUP ................................................................................. 202
7.2.1 Wireless Basic Setting ............................................................... 203
7.2.2 Wireless Advanced Settings ...................................................... 206
7.2.3 Wireless Site Survey ................................................................. 208
7.2.4 Wireless Security Setup ............................................................ 208
7.2.5 Access Control........................................................................... 211
7.2.6 WPS .......................................................................................... 213
7.3 SERVER.............................................................................................. 219
7.3.1 Samba Server ............................................................................ 219
7.3.2 FTP Server................................................................................. 221
7.3.3 Webcam Server ......................................................................... 222
7.3.4 Printer Server............................................................................ 229
7.3.5 Download Server ....................................................................... 236
Page 6

http://www.sapido.com.tw 6
User’s Manual V1.0
7.4 SYSTEM MANAGEMENT .......................................................................... 237
7.4.1 Change Password ...................................................................... 237
7.4.2 Firmware Upgrade..................................................................... 238
7.4.3 Profiles Save ............................................................................. 239
7.4.4 Time Zone Setting ..................................................................... 244
7.4.5 UPnP & UPnP AV Setting ........................................................... 245
7.4.6 Language Setting ...................................................................... 246
7.4.7 User Account Management ........................................................ 247
7.4.8 Folder Management................................................................... 248
7.5 LOG & STATUS .................................................................................... 249
7.5.1 Network Config ......................................................................... 249
7.5.2 Event Log .................................................................................. 250
7.6 LOGOUT ............................................................................................. 251
CHAPTER 8 DDNS ACCOUNT SETUP .................................................................................... 252
CHAPTER 9 Q & A ........................................................................................................................... 257
9.1 INSTALLATION..................................................................................... 257
9.2 LED LIGHTS........................................................................................ 259
9.3 IP ADDRESS ....................................................................................... 260
9.4 OPERATING SYSTEM SETTINGS................................................................ 260
9.5 3.5G DOWNLOAD SERVER ROUTER SETUP ................................................. 262
9.6 WIRELESS NETWORK ............................................................................ 263
9.7 SUPPORTS .......................................................................................... 266
9.8 OTHERS ............................................................................................. 266
CHAPTER 10 APPENDIX ................................................................................................................ 267
10.1 OPERATING SYSTEM ............................................................................. 267
10.2 BROWSERS ......................................................................................... 267
10.3 SADOGO UTILITY................................................................................. 267
Page 7

http://www.sapido.com.tw 7
User’s Manual V1.0
Copyright Statement
The products, including accessories and software are the property of SAPIDO Technology
Inc. It is prohibited to reproduced, transcribed, transmitted and stored without authorization
from SAPIDO. SAPIDO may update, revise, and change the contents of this manual without
further notice. Users can visit the official website for reference. After reviewing this manual, if
you have any problem or suggestion. You are welcome to contact us. Our Technical Support
Engineer will reply related problem as soon as possible.
All trademarks and trade names are the properties of their respective owners.
Copyright© 2009 All Right Reserved by SAPIDO.
FCC Caution
1. The device complies with Part 15 of the FCC rules. Operation is subject to the following
conditions:
2. This device may not cause harmful interference, and this device must accept any
interference received, including interference that may cause undesired operation.
3. FCC RF Radiation Exposure Statement:The equipment complies with FCC RF
radiation exposure limits set forth for an uncontrolled environment. This equipment
should be installed and operated with a minimum distance of 20 centimeters between
the radiator and your body.
4. This Transmitter must not be co-located or operating in conjunction with any other
antenna or transmitter.
5. Changes or modifications to this unit not expressly approved by the party responsible
for compliance could void the user authority to operate the equipment.
Page 8
http://www.sapido.com.tw 8
User’s Manual V1.0
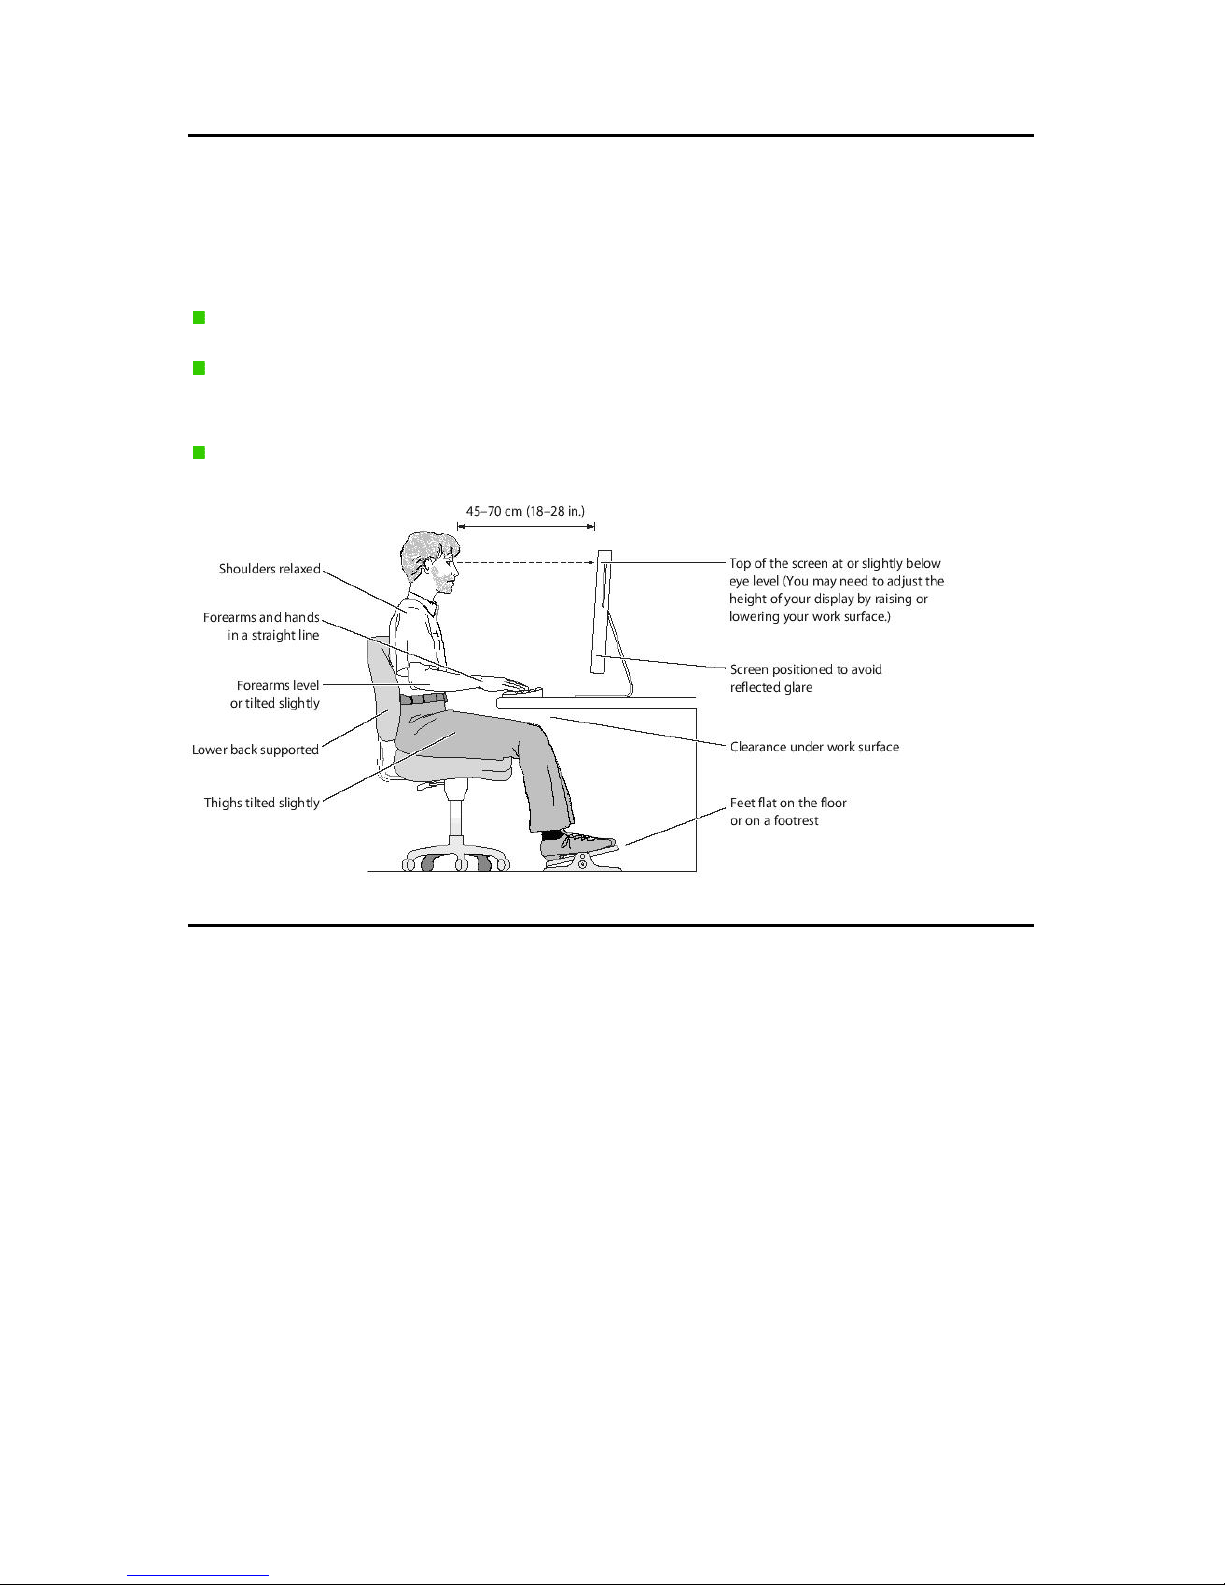
Safe Seating Gestures
You should follow the manufacturer’s instructions for adjusting the backrest to fit your body
properly.
An adjustable chair that provides firm, comfortable support is best.
Adjust the height of the chair so your thighs are horizontal and your feet flat on the
floor.
The back of the chair should support your lower back (lumbar region).
CE Statement of Conformity
Our product has been tested in typical configuration by Ecom Sertech Corp and was found
to comply with the essential requirement of “Council Directive on the Approximation of the
Laws of the Member States relating to Electromagnetic Compatibility” (89/336/EEC;
92/31/EEC; 93/68/EEC)
Page 9

http://www.sapido.com.tw 9
User’s Manual V1.0
Chapter 1 Introduction
1.1 Overview
The main feature of N+ 3.5G NES Server is to combine Router、AP、WiFi AP three
functions in one unit. Users can switch between 3 operation modes for different
purpose. While several computers are sharing Internet connection, they can use
firewall and WEP/WPA/WPS security system to protect network. N+ 3.5G NES
Server is designed for both home and enterprise use, provided with high security,
reliability, and easy to operate solutions for network.
1.1.1 Features
Cautious management:N+ 3.5G NES Server has cautious settings for
Wireless security and firewall. Secure the customer data safety on network
also provides a tight management system.
Easy to operate:N+ 3.5G NES Server has a friendly user interface; it can
lead users to finish settings easily and quickly step by step. Users without
knowledge of complex network theory can still use higher management
functions like Multiple APs.
Multi-language PC Utility setting interface:Installed on computer. Users
can easily connect to the network by following the instruction of setup wizard
step by step. Multi-language interface supports:
Arabic、English、French、German、Italian、Japanese、Korean、Portuguese、
Russian、Spanish、Simplified Chinese、Traditional Chinese.
USB Device Supports:N+ 3.5G NES Server can share files to other users in
local area network through Samba service. With a webcam it can become a
real-time surveillance tool. N+ 3.5G NES Server can also become a FTP
server by connecting with USB drives.
One Touch for wireless encryption connection:N+ 3.5G NES Server has
a WPS button; the encryption for wireless network is just need “One Touch”.
Multiple wireless network modes:N+ 3.5G NES Server provides 3
wireless modes: Router / AP / WiFi AP. It is not just a 3.5G Download Server
Router; it can also be a bridge or a wireless network card. To base on different
conditions, users can switch between 3 operating modes. Multiple mode
choices make operation more flexible.
Page 10
http://www.sapido.com.tw 10
User’s Manual V1.0
Highly Efficiency:Provides better P2P service system, N+ 3.5G NES Server
has 20000 sessions, it can give users better efficiency on P2P download rate.
BT Download:Provides download function through BT. Users can download
their files without keep their PCs on always.
3.5G Connection:Users can connect to the Internet through an external
3.5G USB adapter.
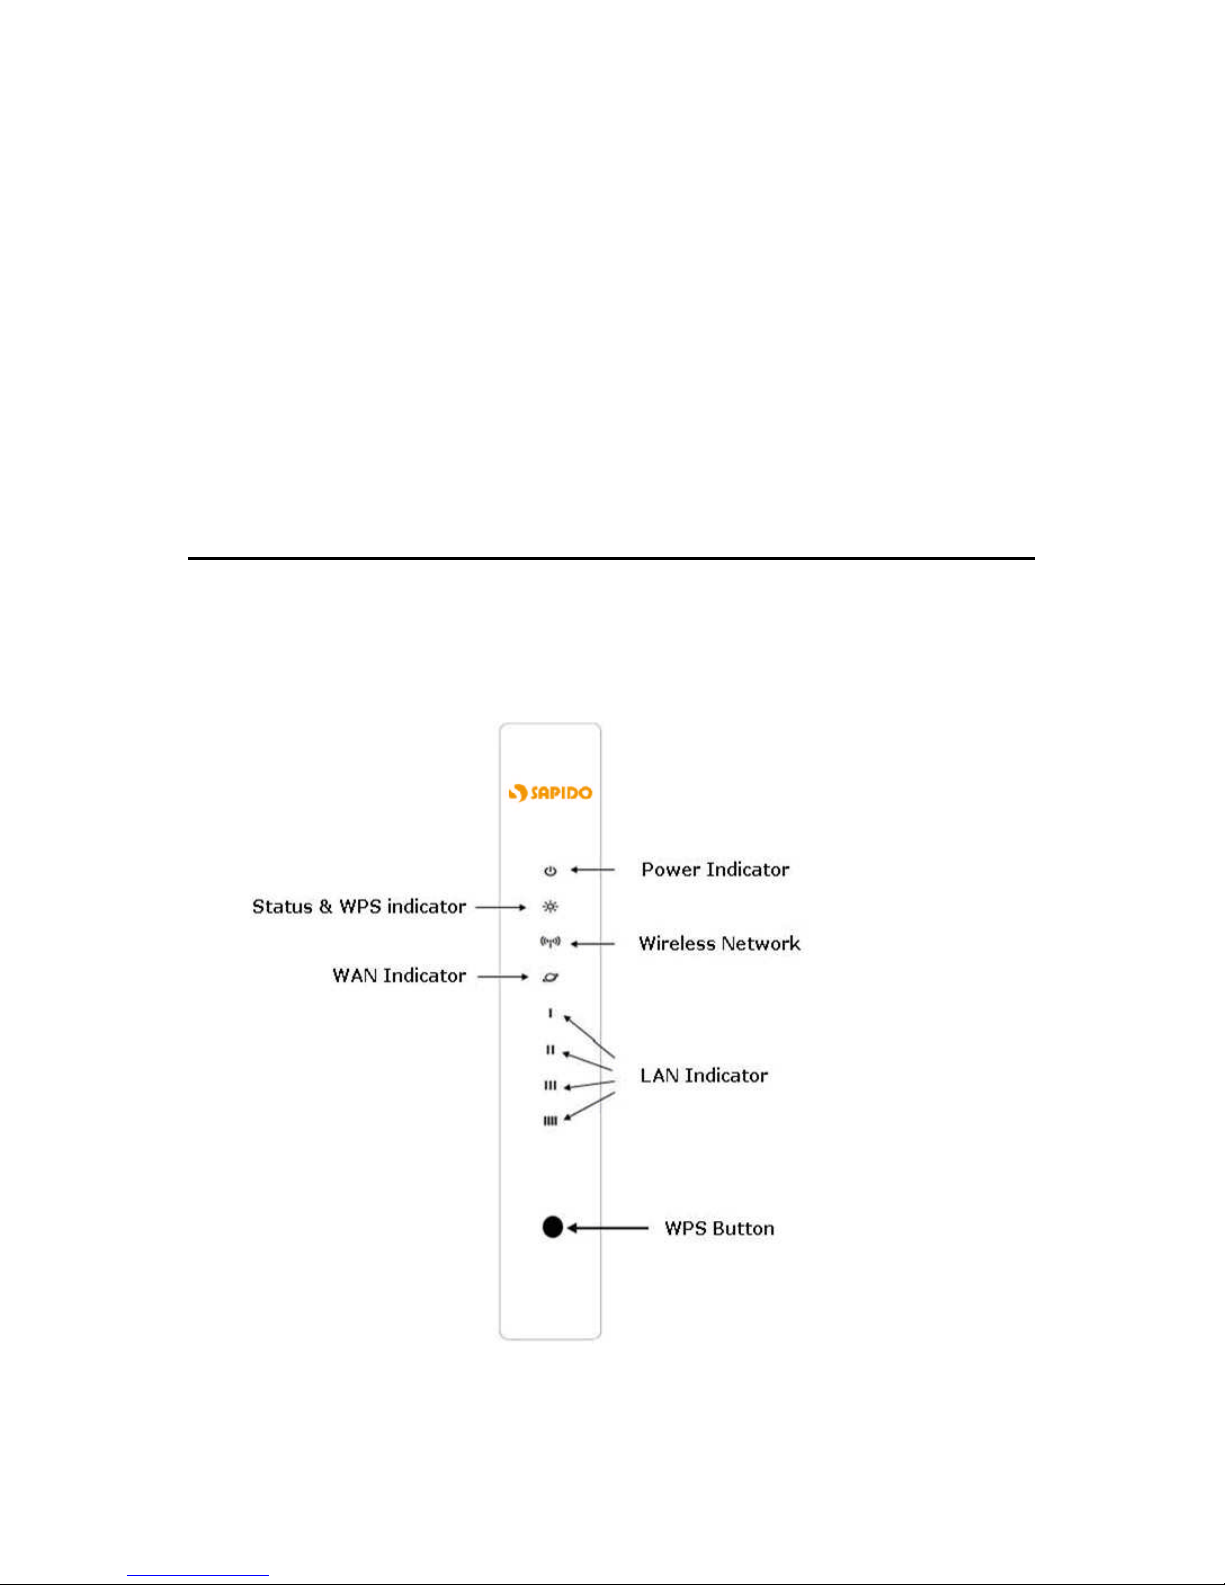
1.2 The LED label
The Front of the 3.5G Download Server Router:
You can use the status lights on the front of the wireless router to verify various
conditions:
Page 11

http://www.sapido.com.tw 11
User’s Manual V1.0
LED Function Color Status Description
On WLAN active
WLAN x 1
WLAN port activity Green
Blinking
30ms
WLAN data transmit/receive
On Connected at 100Mbps
Green
Blinking
30ms
100Mbps TX/RX Activity
On Connected at 10Mbps
LAN x 4
LAN port activity
Green
Blinking
120ms
10Mbps TX/RX Activity
On Connected at 100Mbps
Green
Blinking
30ms
100Mbps TX/RX Activity
On Connected at 10Mbps
WAN x 1
WAN port activity
Green
Blinking
120ms
10Mbps TX/RX Activity
Status &
WPS x 1
System status &
WPS start
Green
&
Orange
Blinking
120ms
Green : Reset / Firmware u
pdates
in progress
Orange : WPS function start
Power x 1
Power indication Green On
Power is being applied to this
product
Page 12
http://www.sapido.com.tw 12
User’s Manual V1.0
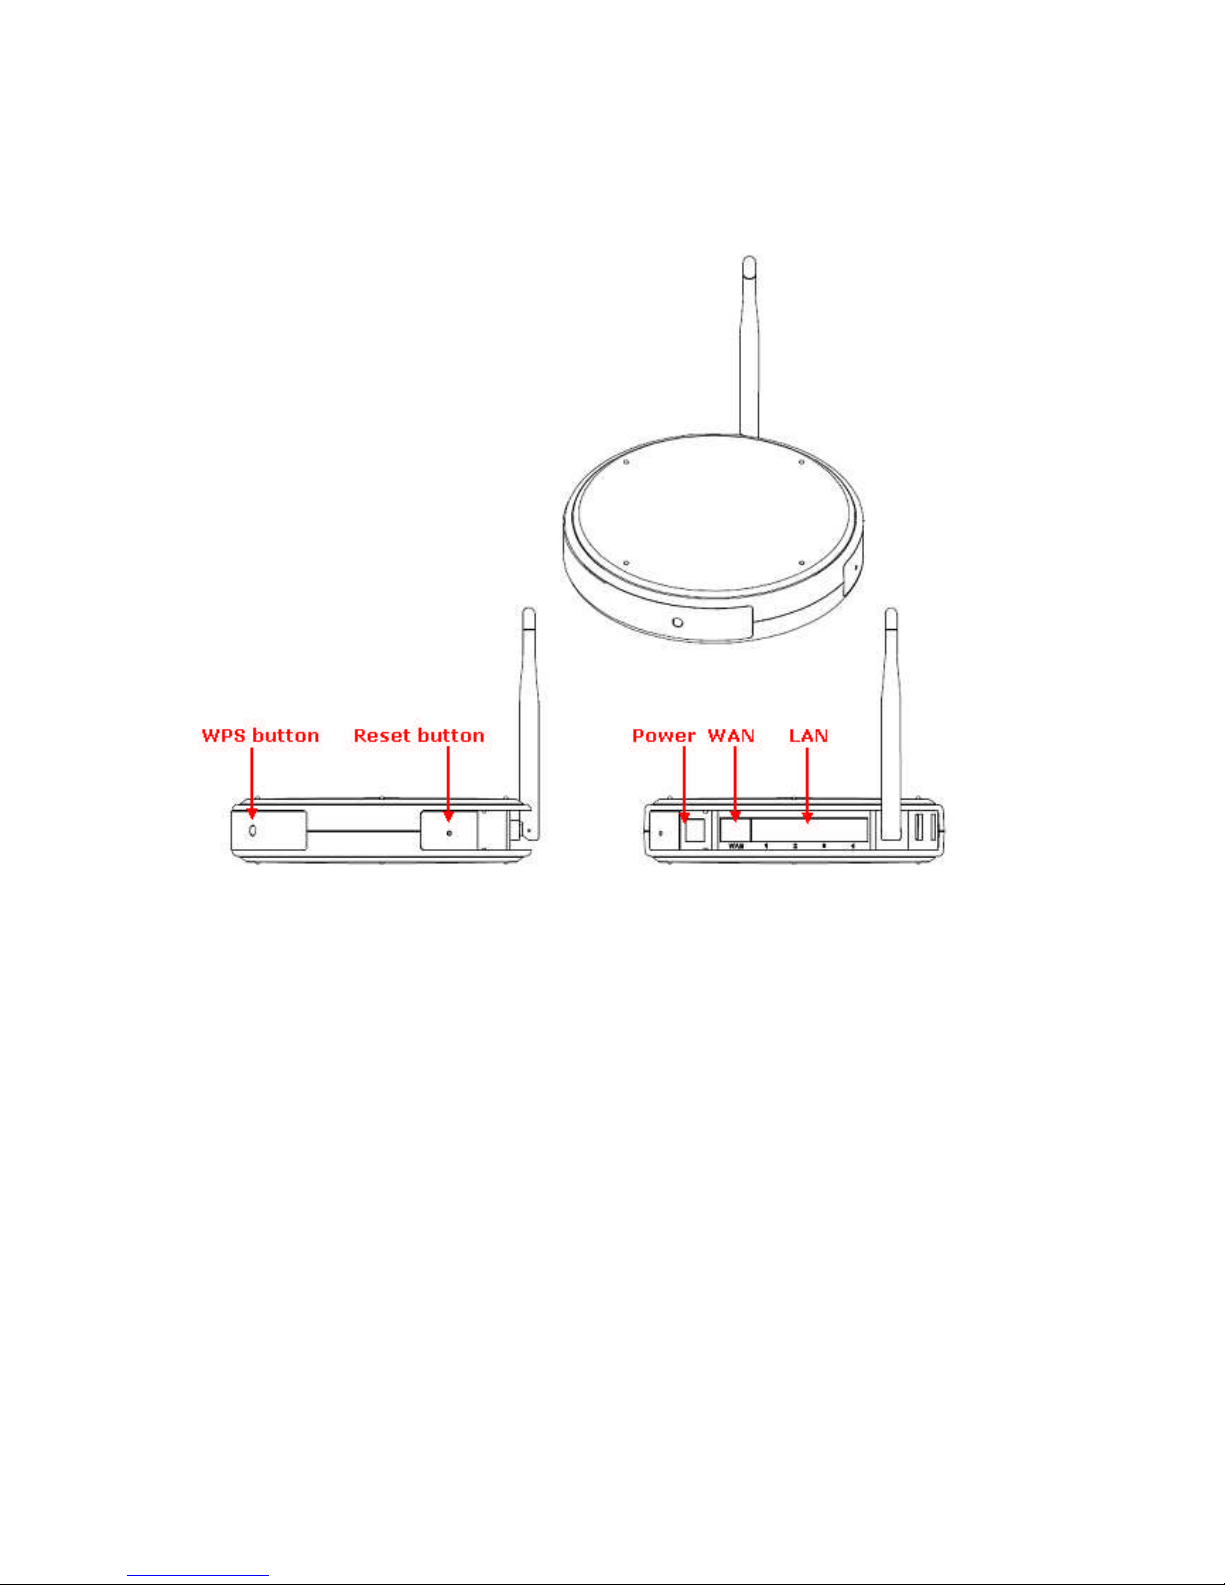
1.3 The Back of the 3.5G Download Server Router
The back of the 3.5G Download Server Router has the following port connections:
(1.) WPS button
Users can use WPS connection easily.
(2.) LAN port
LAN port is for connecting your PC, printer server, or switch, etc.
(3.) WAN port
WAN port is for connecting to an xDSL or CABLE modem.
(4.) Reset button
This button is for resetting 3.5G Download Server Router back to factory
default settings. When a user hold the reset button over 5 seconds,
everything is back to factory default settings; if user just hold for 1 seconds,
this machine will only reboot, not reset to factory default settings.
(5.) USB port
Users can connect with USB thumb drive or webcam.
Page 13

http://www.sapido.com.tw 13
User’s Manual V1.0
1.4 Hardware Specifications
The following table provides technical specifications for the 3.5G Download
Server Router:
Item Specification
Communication Interfaces
WAN Port
1 x 10/100 Mbps RJ45, with auto MDI/MDIX
LAN Port
4 x 10/100 Mbps RJ45, with auto MDI/MDIX
Wireless
IEEE 802.11n (Chipset onboard)
Others
Operating Temp. 0° to 40°C (32° to 10°F)
Storage Temp. -20° to 70°C (-4° to 158°F)
Operating
Humidity 10% to 85%
Non-Condensing
Operation Requirement
Storage Humidity 5% to 90%
Non-Condensing
Antenna
Internal X1, External X1
Dimensions
150mm(L) x 150mm(W) x 33mm(H)
Reboot button / Reset button –
hold for
1second to reboot, hold for 5 seconds is to
reset.
Button
WPS button –
When push the WPS button,
the system is entering the WPS connection
mode.
Power supply
Adapt AC 100 V ~ 240 V in
Page 14
http://www.sapido.com.tw 14
User’s Manual V1.0
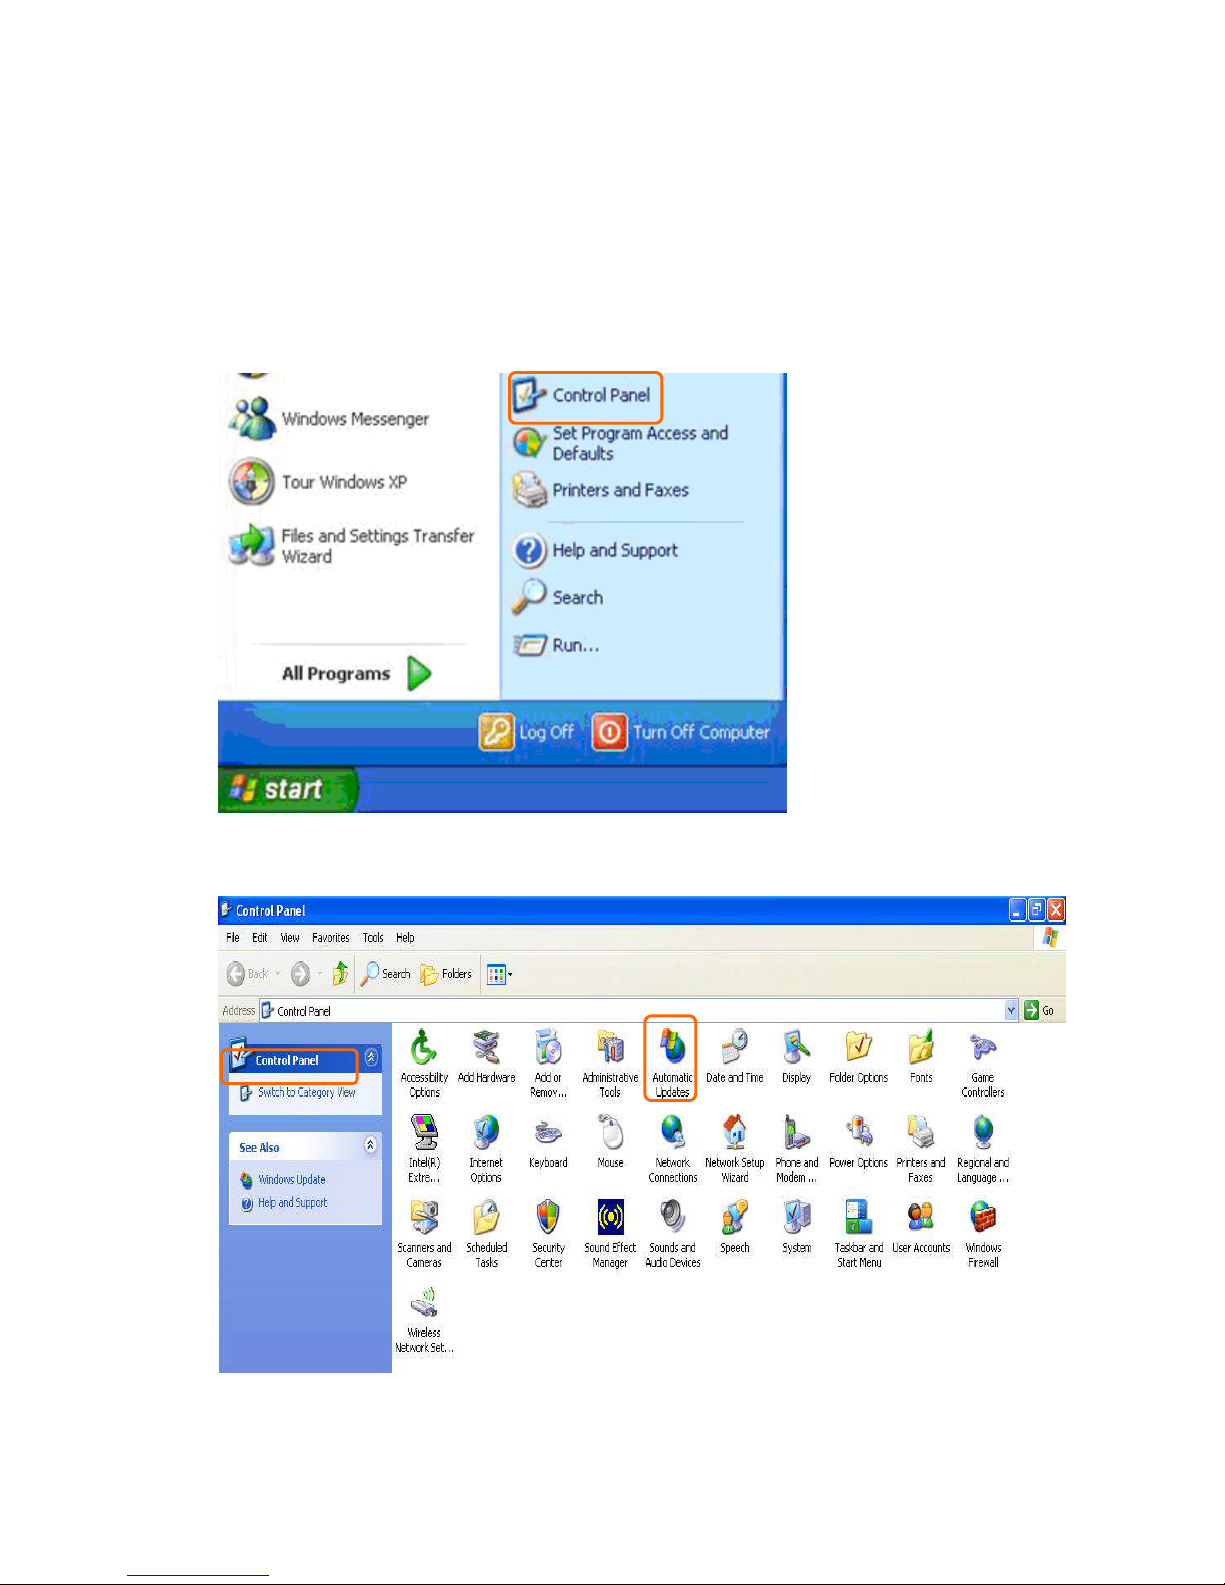
1.5 How to obtain IP address automatically under Windows
XP
Please follow the instructions to operate:
(1.) From the Start menu, select Settings, and then Control Panel.
(2.) Double-click Network Connections.
Page 15
http://www.sapido.com.tw 15
User’s Manual V1.0
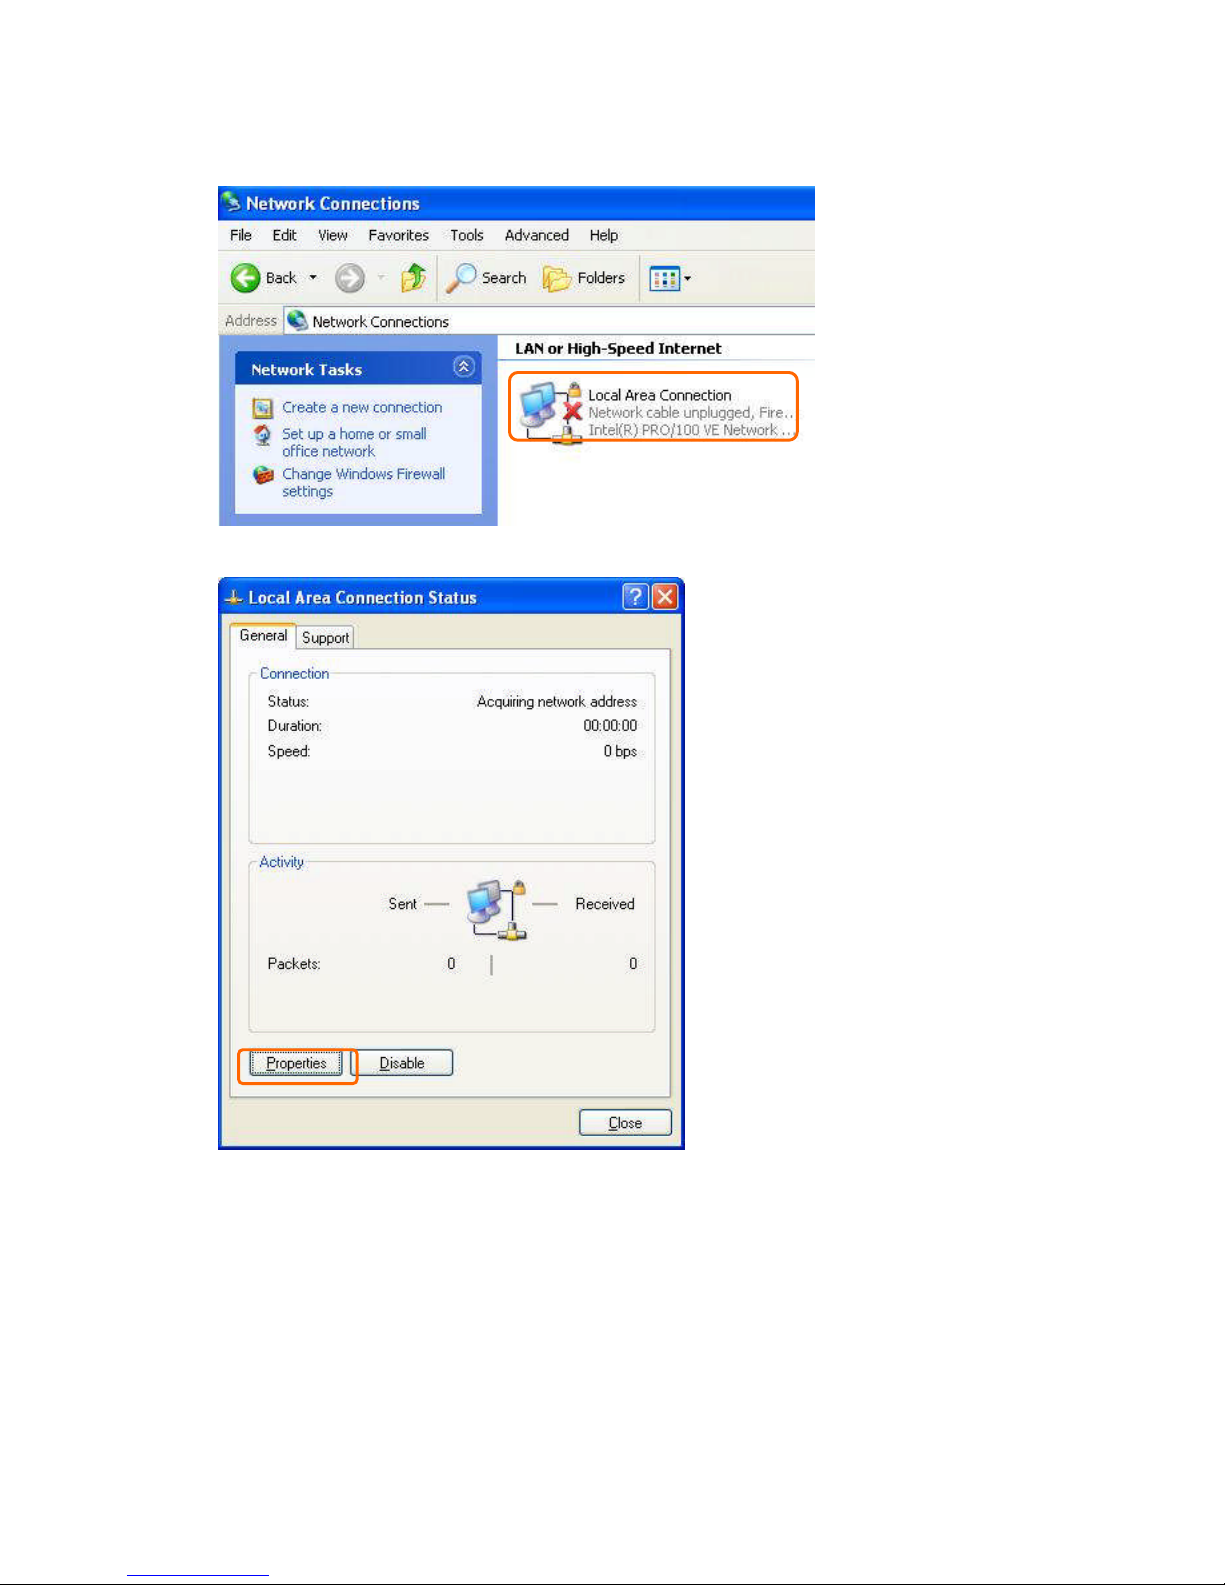
(3.) Double-click Local Area Connection.
(4.) Please click Properties
Page 16
http://www.sapido.com.tw 16
User’s Manual V1.0
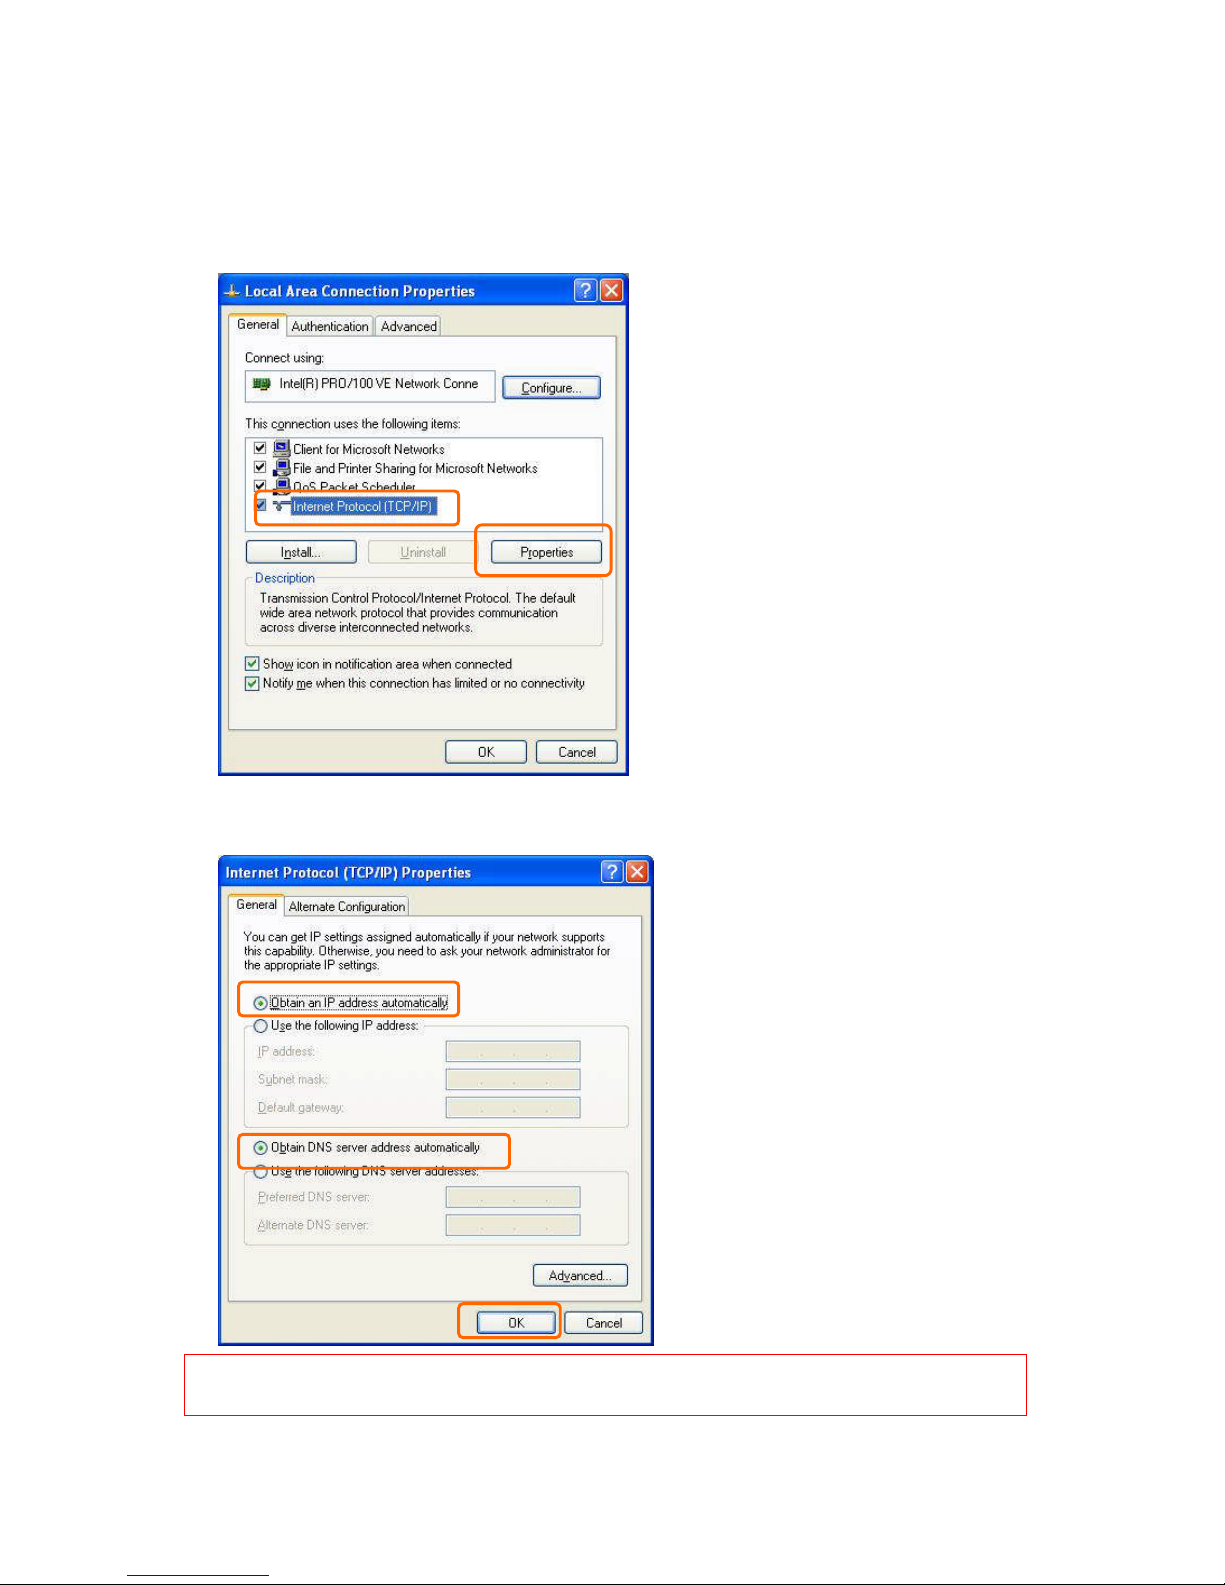
(5.) From the General tab, click Internet Protocol (TCP/IP), make sure it
is checked, and then click Properties.
(6.) Please select Obtain an IP address automatically and Obtain a DNS
server address automatically and then click OK.
Note:You must make sure that the IP address your computer obtained is from the N+ 3.5G
NES Server Router’s DHCP server.
Page 17
http://www.sapido.com.tw 17
User’s Manual V1.0
Chapter 2 Hardware Setup
2.1 Figures for Connecting Hardwares to N+ 3.5G NES Server
The N+ 3.5G NES Server is an easy to carry and wireless device for business
men. It can be used in conference room, hotel, even at hotspots. N+ 3.5G NES
Server is small and light, with various functions; change modes between router,
AP, and Wi-Fi AP mode under administrator interface. N+ 3.5G NES Server also
supports USB devices like webcam, USB thumb drive, printer, and 3.5G adapter.
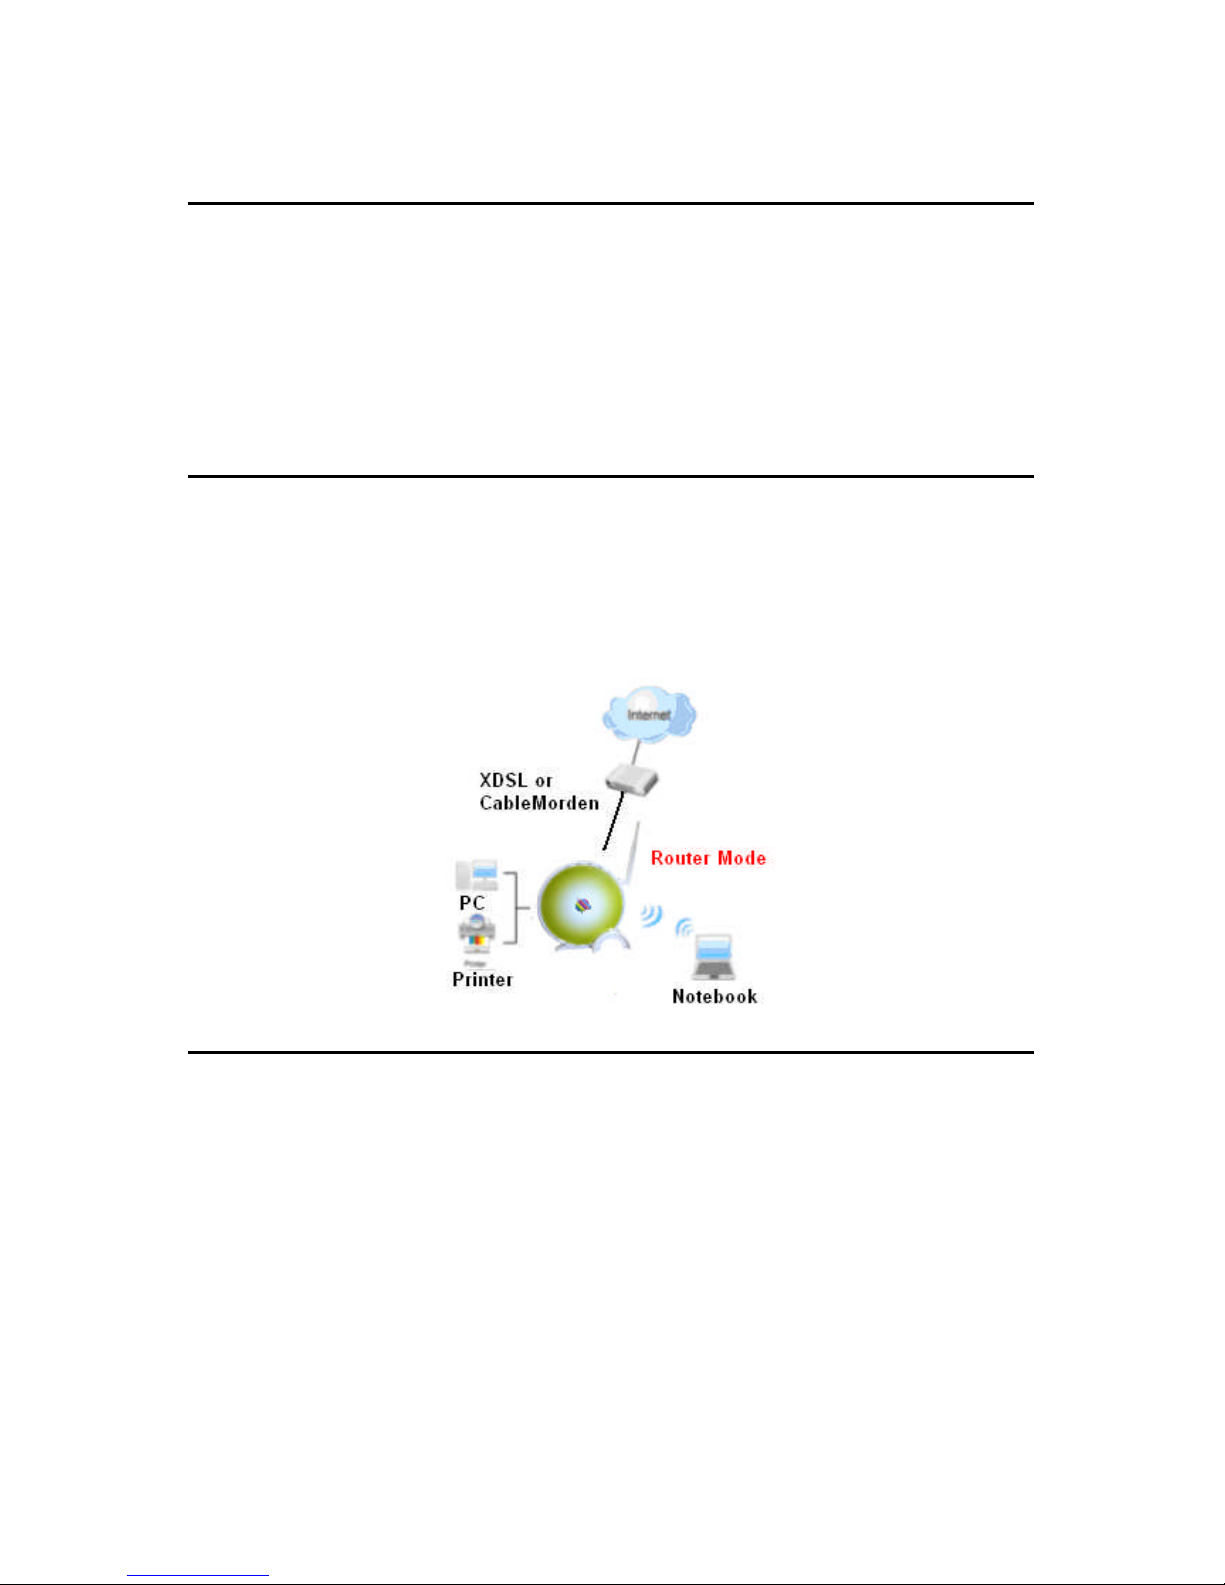
2.1.1 Hardware Connection for Router Mode
In router mode, administrator can manage the settings for WAN, LAN, Wireless
network, NTP, password, USB drives, user accounts, firewall, QoS, FTP server,
webcam, printer server, and SAMBA, etc.
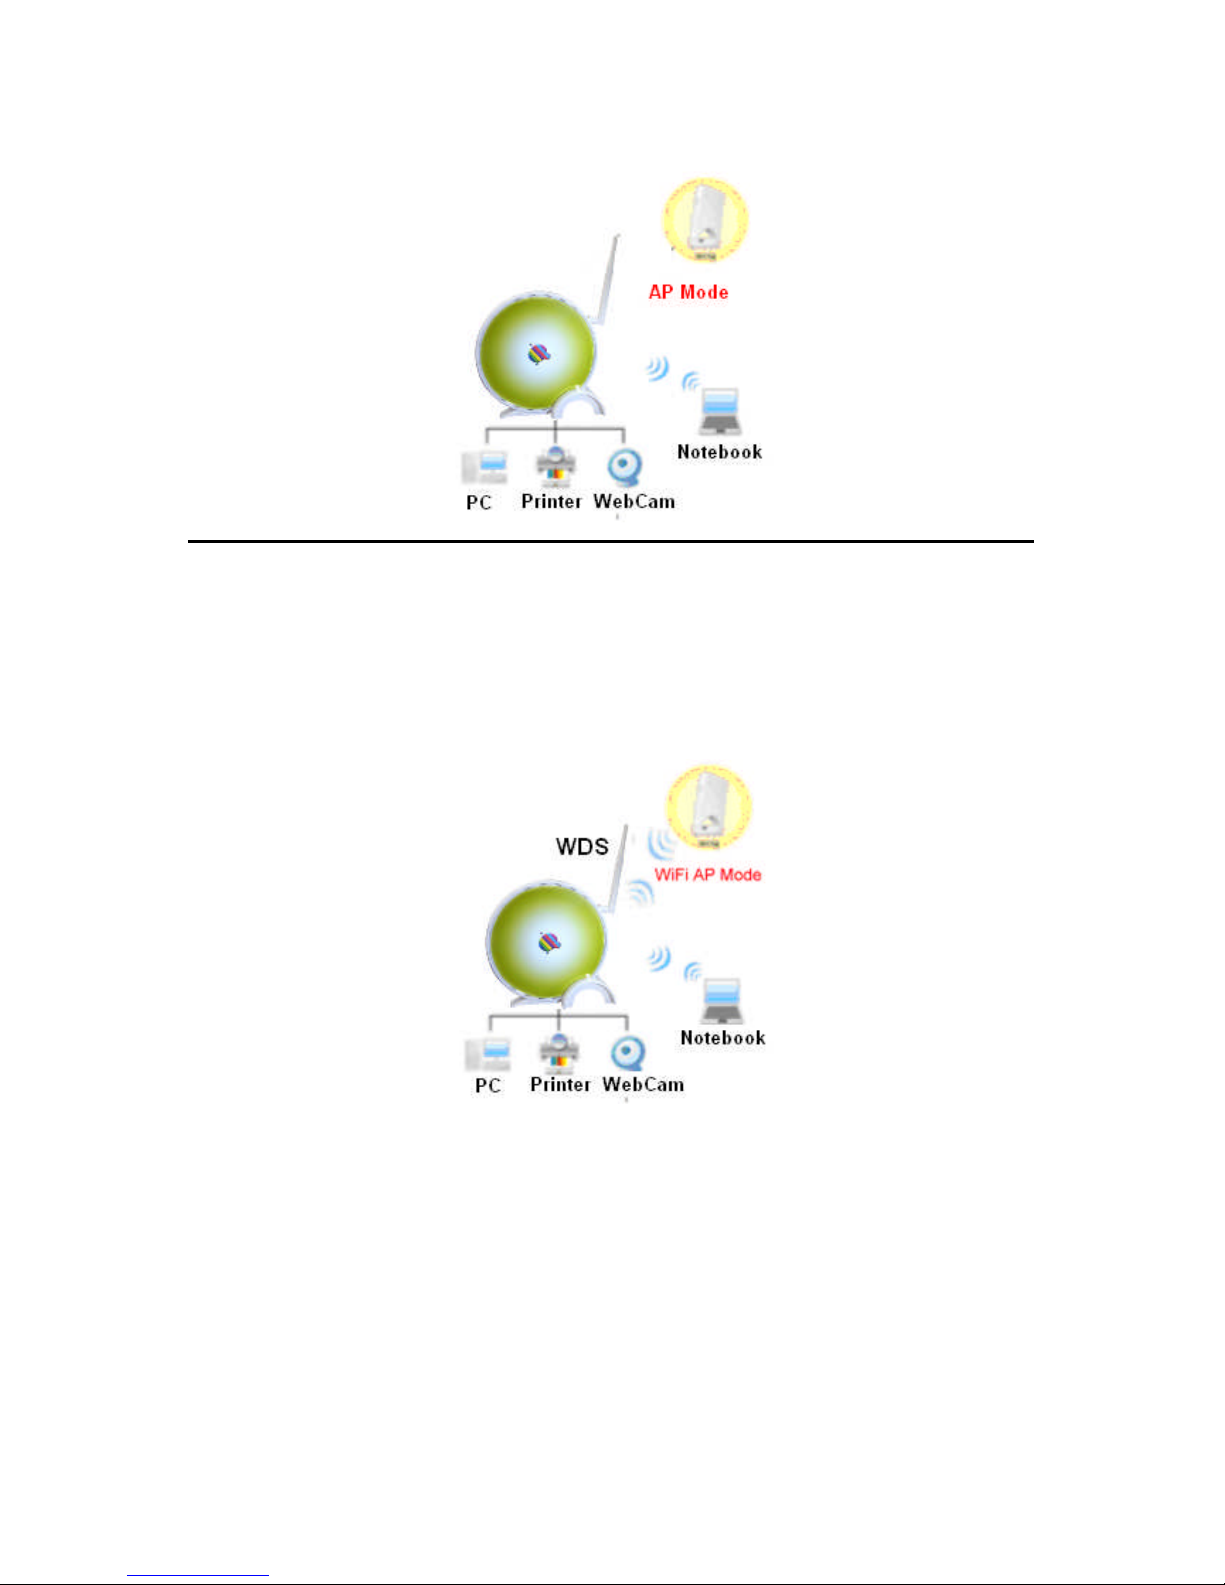
2.1.2 Hardware Connection for AP Mode
In AP mode, N+ 3.5G NES Server becomes a bridge to support 1 local area
network. Users can use wired way to connect to N+ 3.5G NES Server.
administrator can manage the settings for LAN, Wireless network, NTP, password,
USB drives, user accounts, FTP server, webcam, printer server, and SAMBA, etc.
Page 18
http://www.sapido.com.tw 18
User’s Manual V1.0
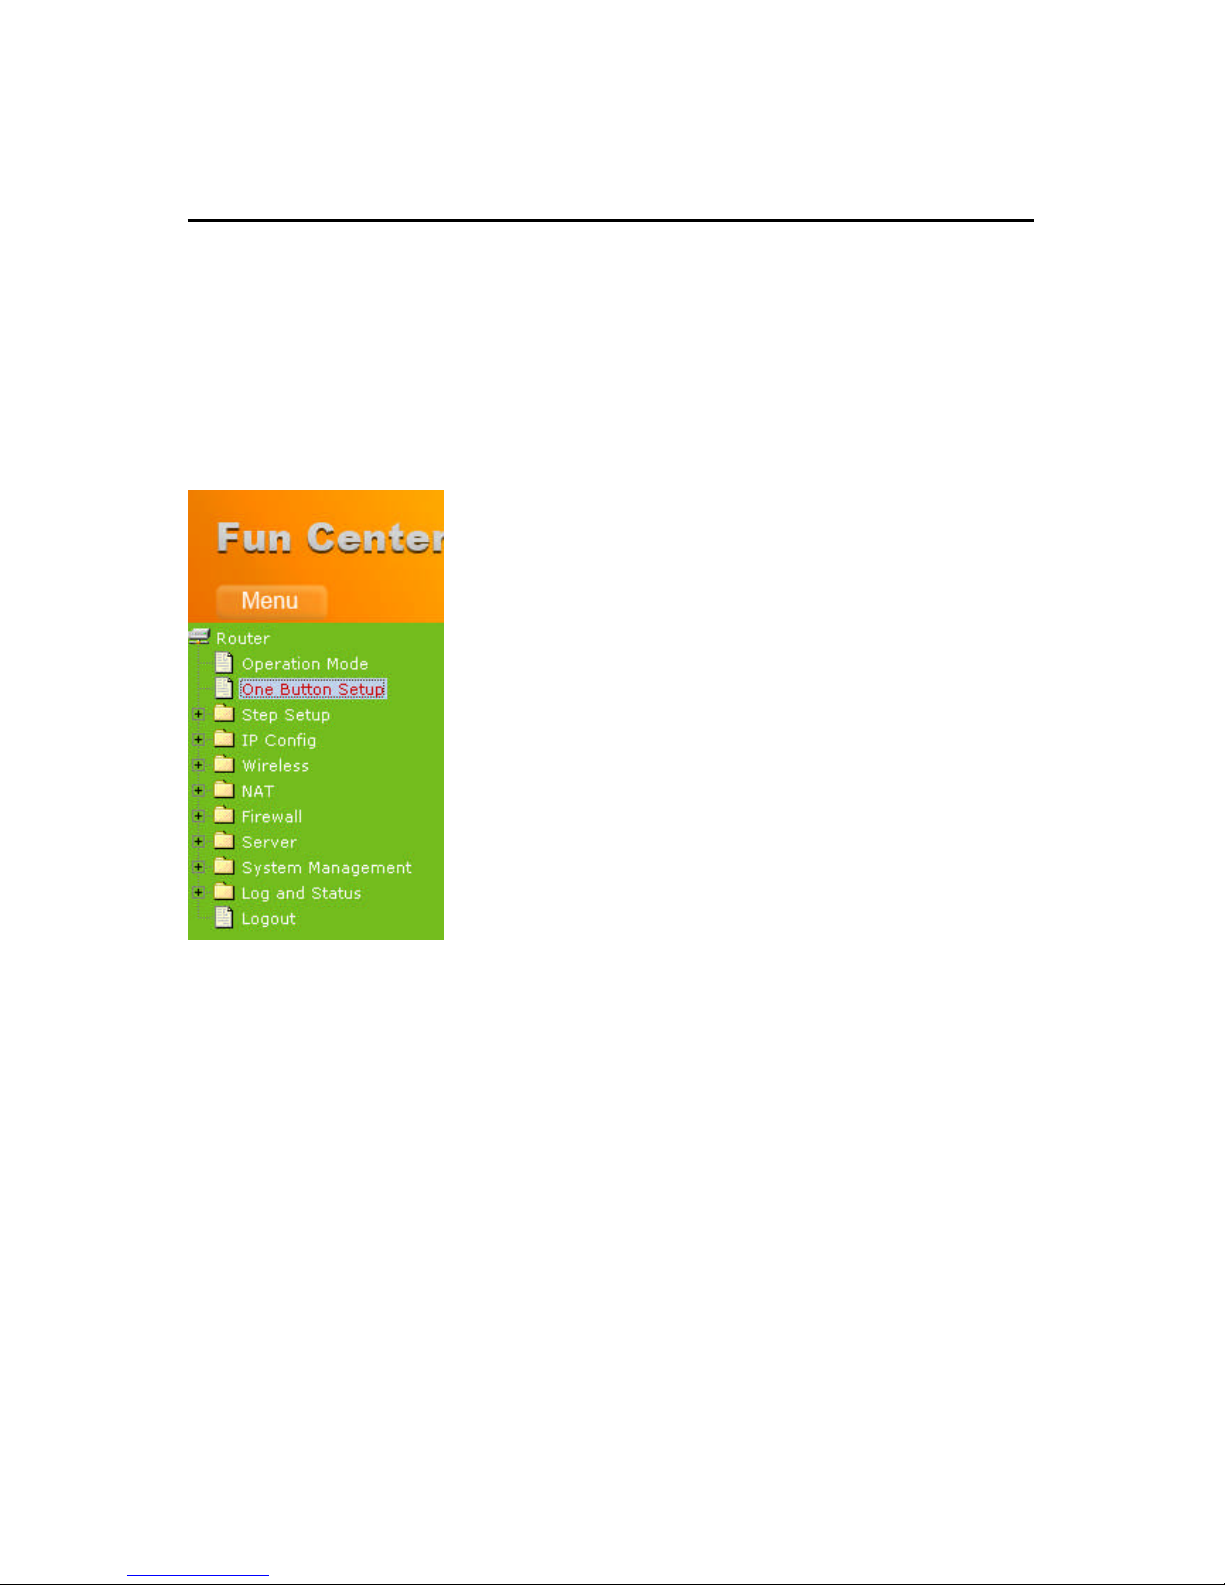
2.1.3 Hardware Connection for Wi-Fi AP Mode
In Wi-Fi AP mode, N+ 3.5G NES Server becomes a bridge to support 1 local area
network. Users can use wireless way to connect to N+ 3.5G NES Server .
administrator can manage the settings for LAN, Wireless network, NTP, password,
USB drives, user accounts, FTP server, webcam, printer server, and SAMBA, etc.
Page 19
http://www.sapido.com.tw 19
User’s Manual V1.0
Chapter 3 One Button Setup Configuration
N+ 3.5G NES Server provide One Button Setup function, users can
finish settings in a single page. After users switch modes and reboot the
machine, they will enter this page to finish configurations.
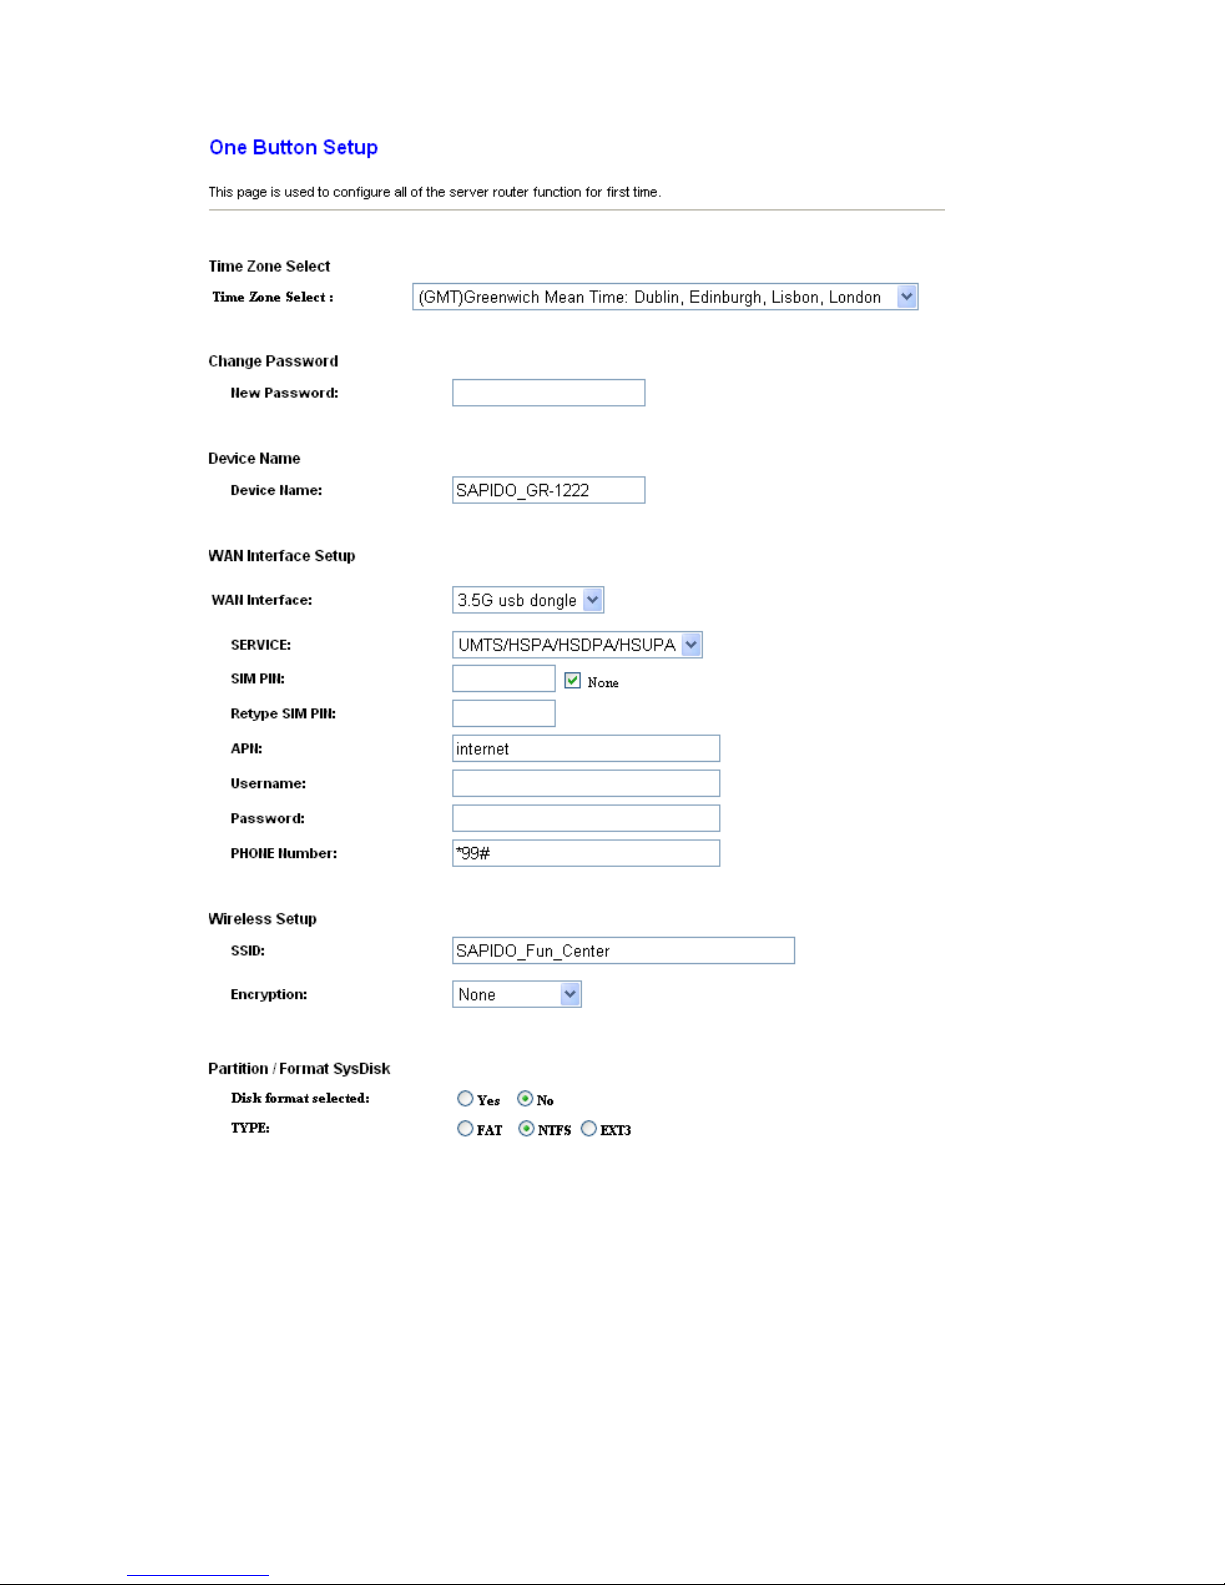
3.1 One Button Setup configuration for Router Mode
Please select One Button Setup in Router Mode.
Page 20
http://www.sapido.com.tw 20
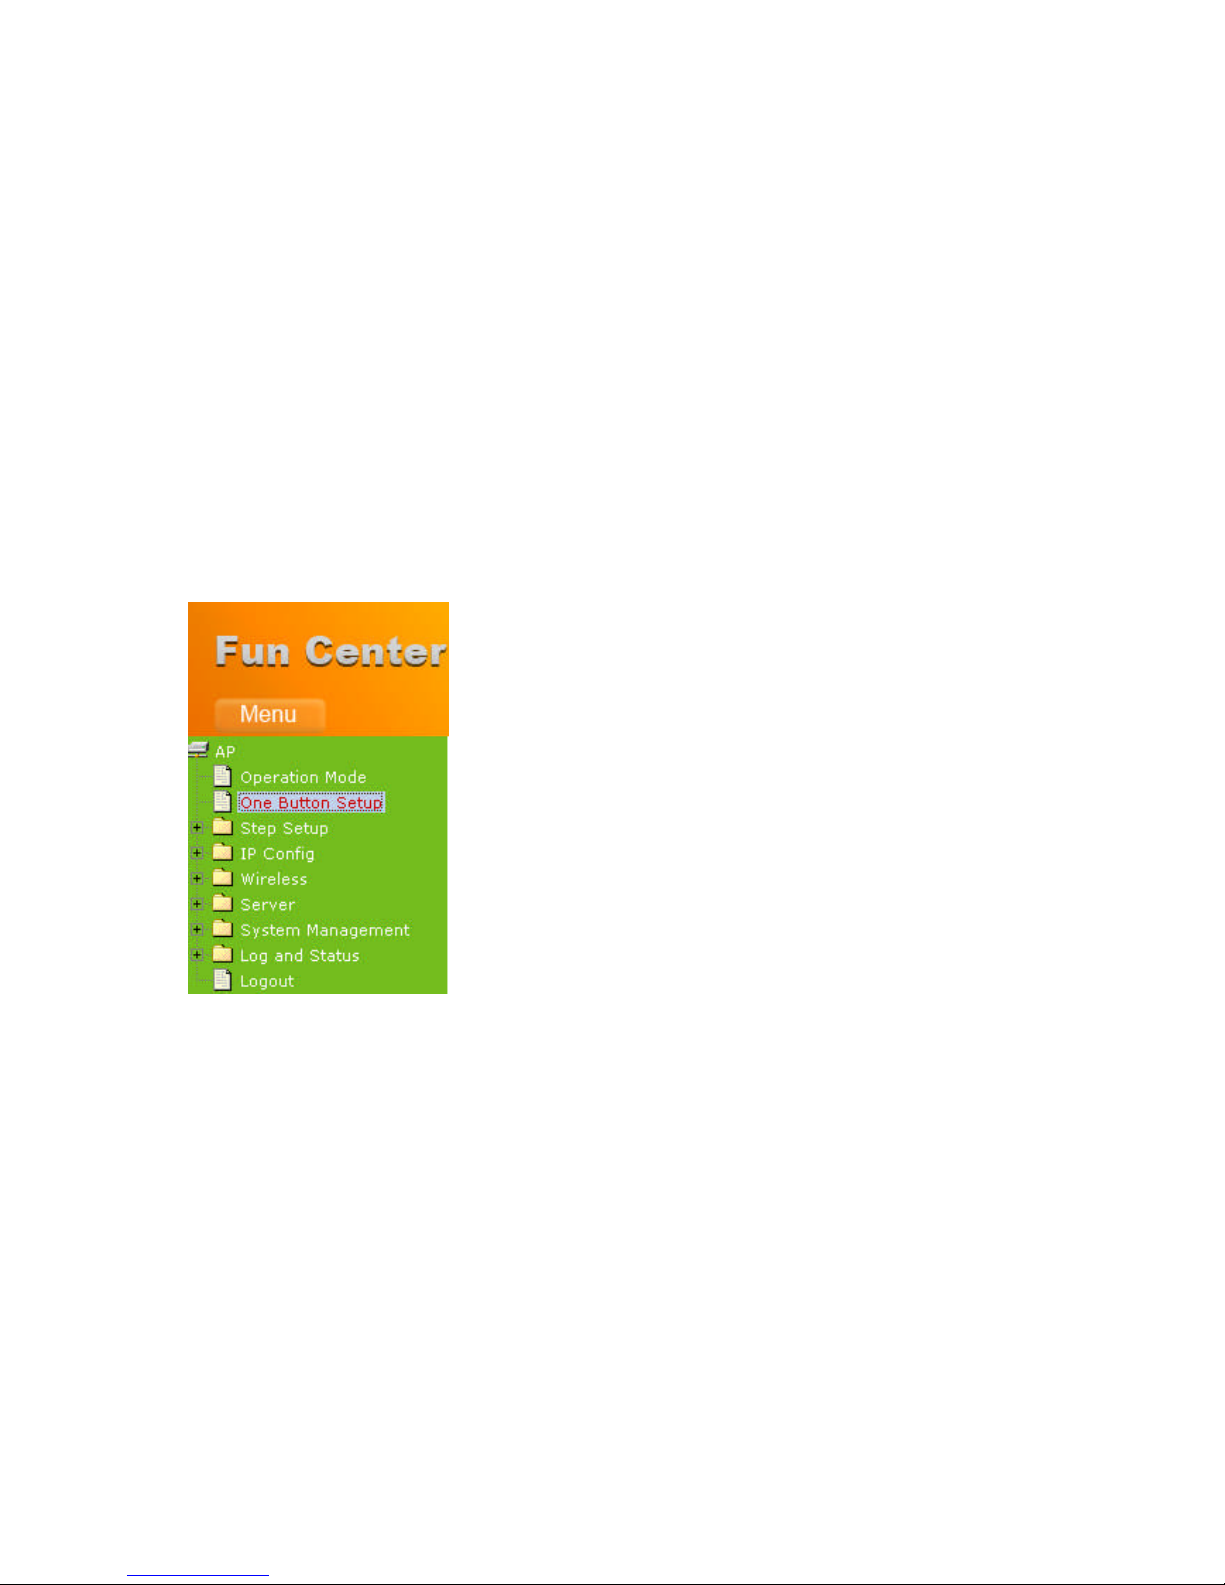
User’s Manual V1.0
1. Time Zone Select
Please select the time zone which you are at.
2. Change Password
Please enter the new password.
3. Device Name
Please enter the device name you want to assign to N+ 3.5G NES Server .
4. WAN Interface Setup
Please choose the interface type.
Page 21
http://www.sapido.com.tw 21
User’s Manual V1.0
5. WAN Type Setup
Please choose the access type.
6. Wireless Setup
You can assign the SSID and Encryption type.
7. Partition / Format SysDisk
Users can format or partition their USB drives.
8. User Account Management
Users can create user accounts and their privilege.
9. Finished
Please click finished button to complete the setting.
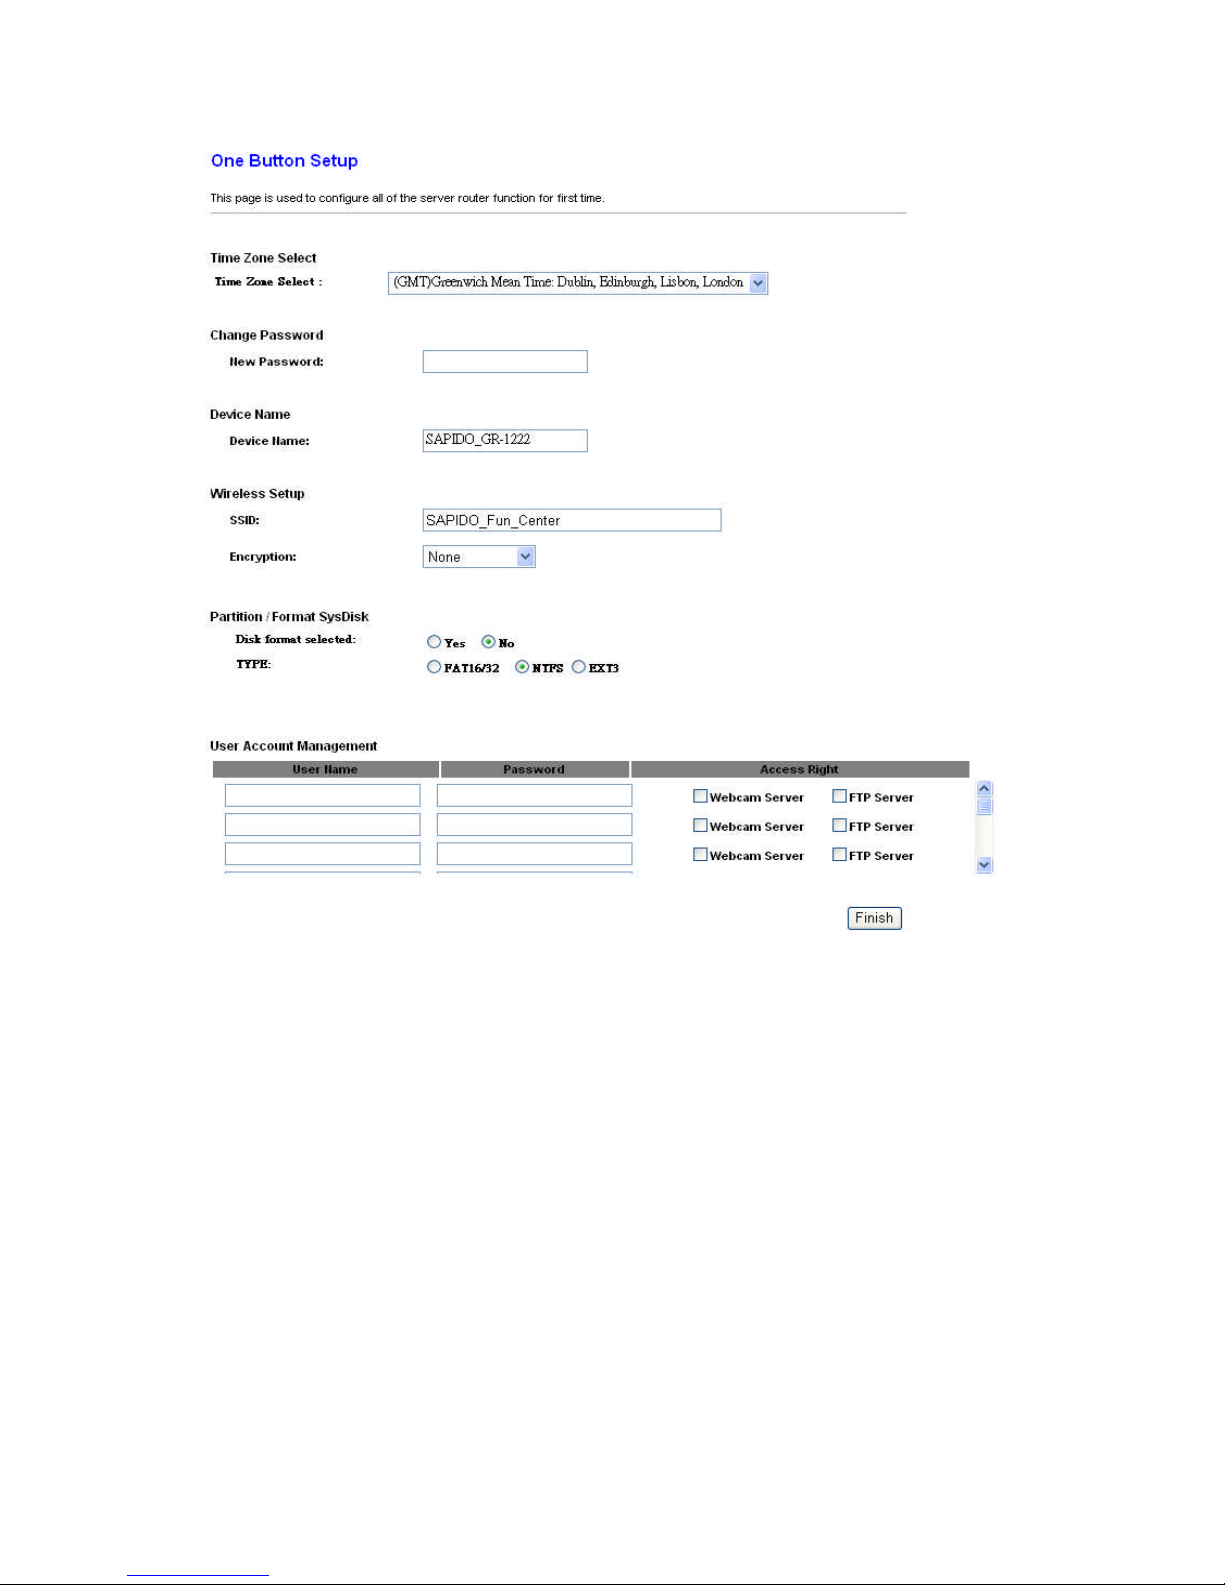
3.2 One Button Setup configuration for AP Mode
Please select One Button Setup in AP Mode.
Page 22
http://www.sapido.com.tw 22
User’s Manual V1.0
1. Time Zone Select
Please select the time zone which you are at.
2. Change Password
Please enter the new password.
3. Device Name
Please enter the device name you want to assign to N+ 3.5G NES Server .
4. Wireless Setup
You can assign the SSID and Encryption type.
5. Partition / Format SysDisk
Users can format or partition their USB drives.
6. User Account Management
Users can create user accounts and their privilege.
7. Finished
Please click finished button to complete the setting.
Page 23
http://www.sapido.com.tw 23
User’s Manual V1.0
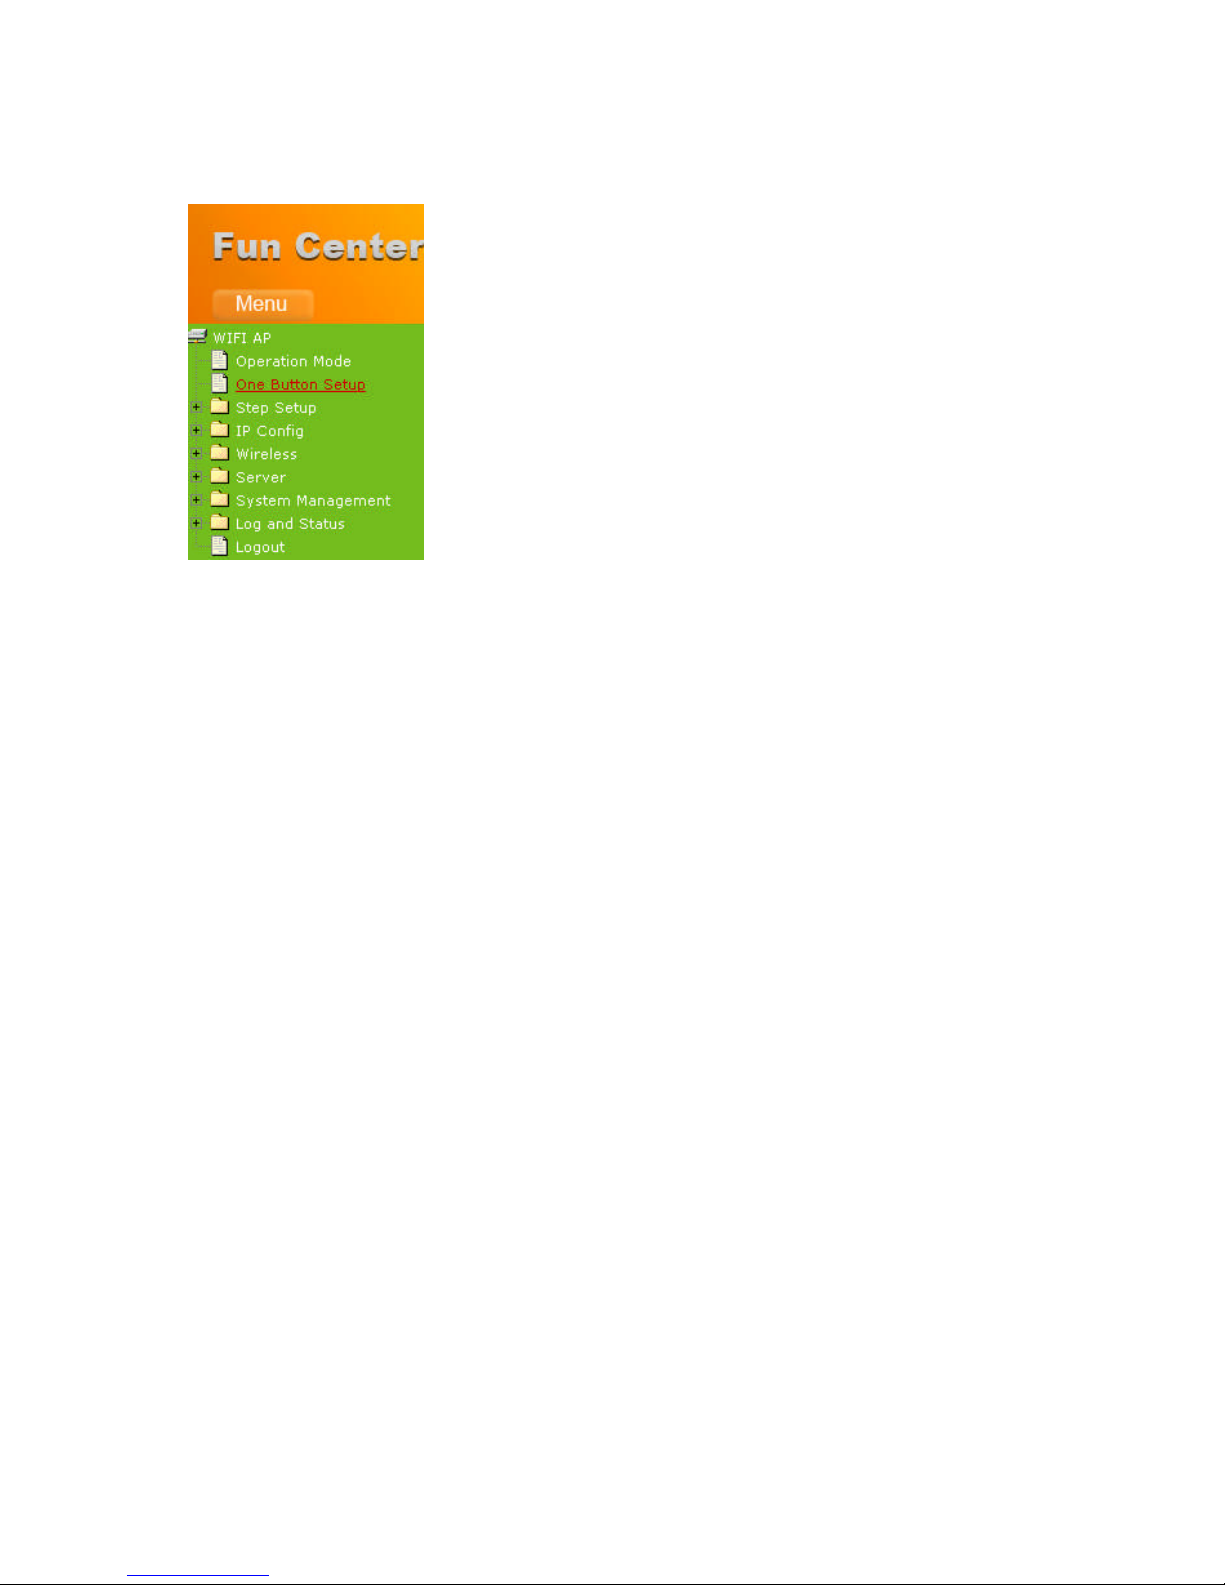
3.3 One Button Setup configuration for WiFi AP Mode
Please select One Button Setup in WiFi AP Mode.
Page 24
http://www.sapido.com.tw 24
User’s Manual V1.0
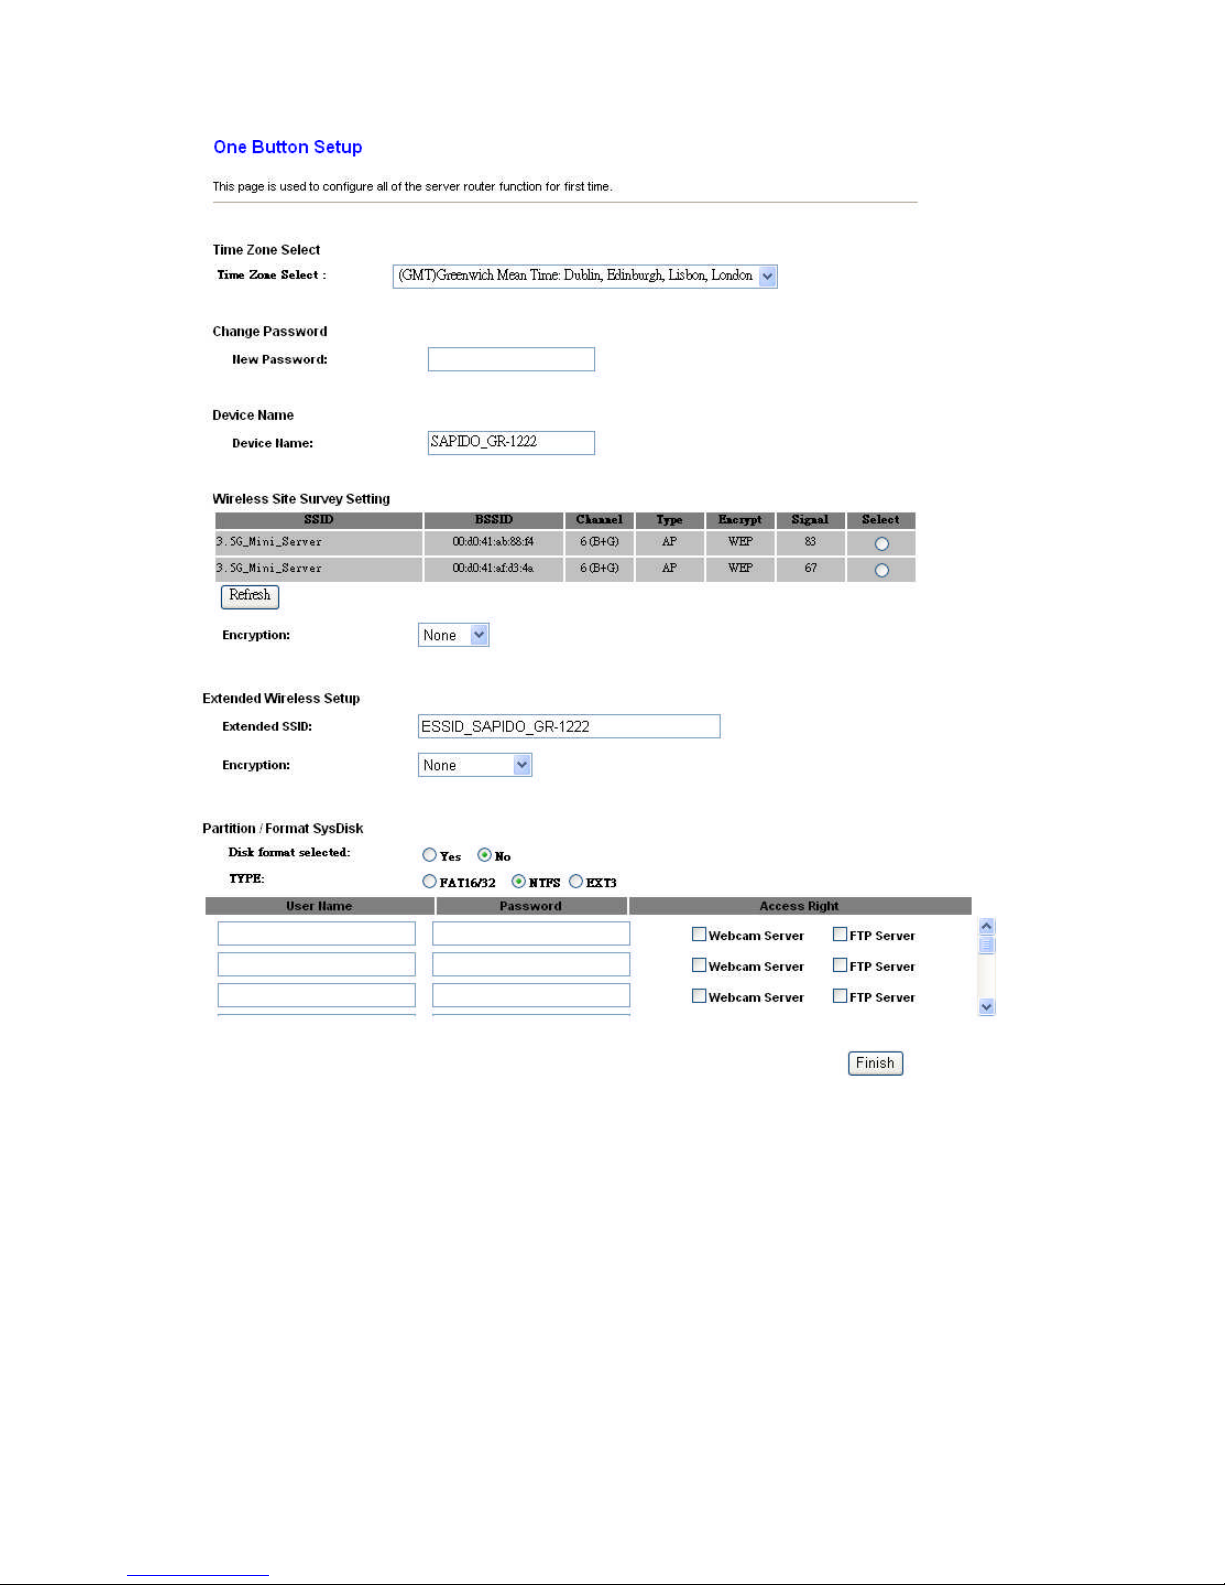
1. Time Zone Select
Please select the time zone which you are at.
2. Change Password
Please enter the new password.
3. Device Name
Please enter the device name you want to assign to N+ 3.5G NES Server .
4. Wireless Site Survey Setting
Please select wireless network you want to connect and the encryption type.
5. Extended Wireless Setup
You can assign the SSID and Encryption type.
Page 25

http://www.sapido.com.tw 25
User’s Manual V1.0
6. Partition / Format SysDisk
Users can format or partition their USB drives.
7. User Account Management
Users can create user accounts and their privilege.
8. Finished
Please click finished button to complete the setting.
Page 26
http://www.sapido.com.tw 26
User’s Manual V1.0
Chapter 4 Quick Setup for the 3.5G Download
Server Router
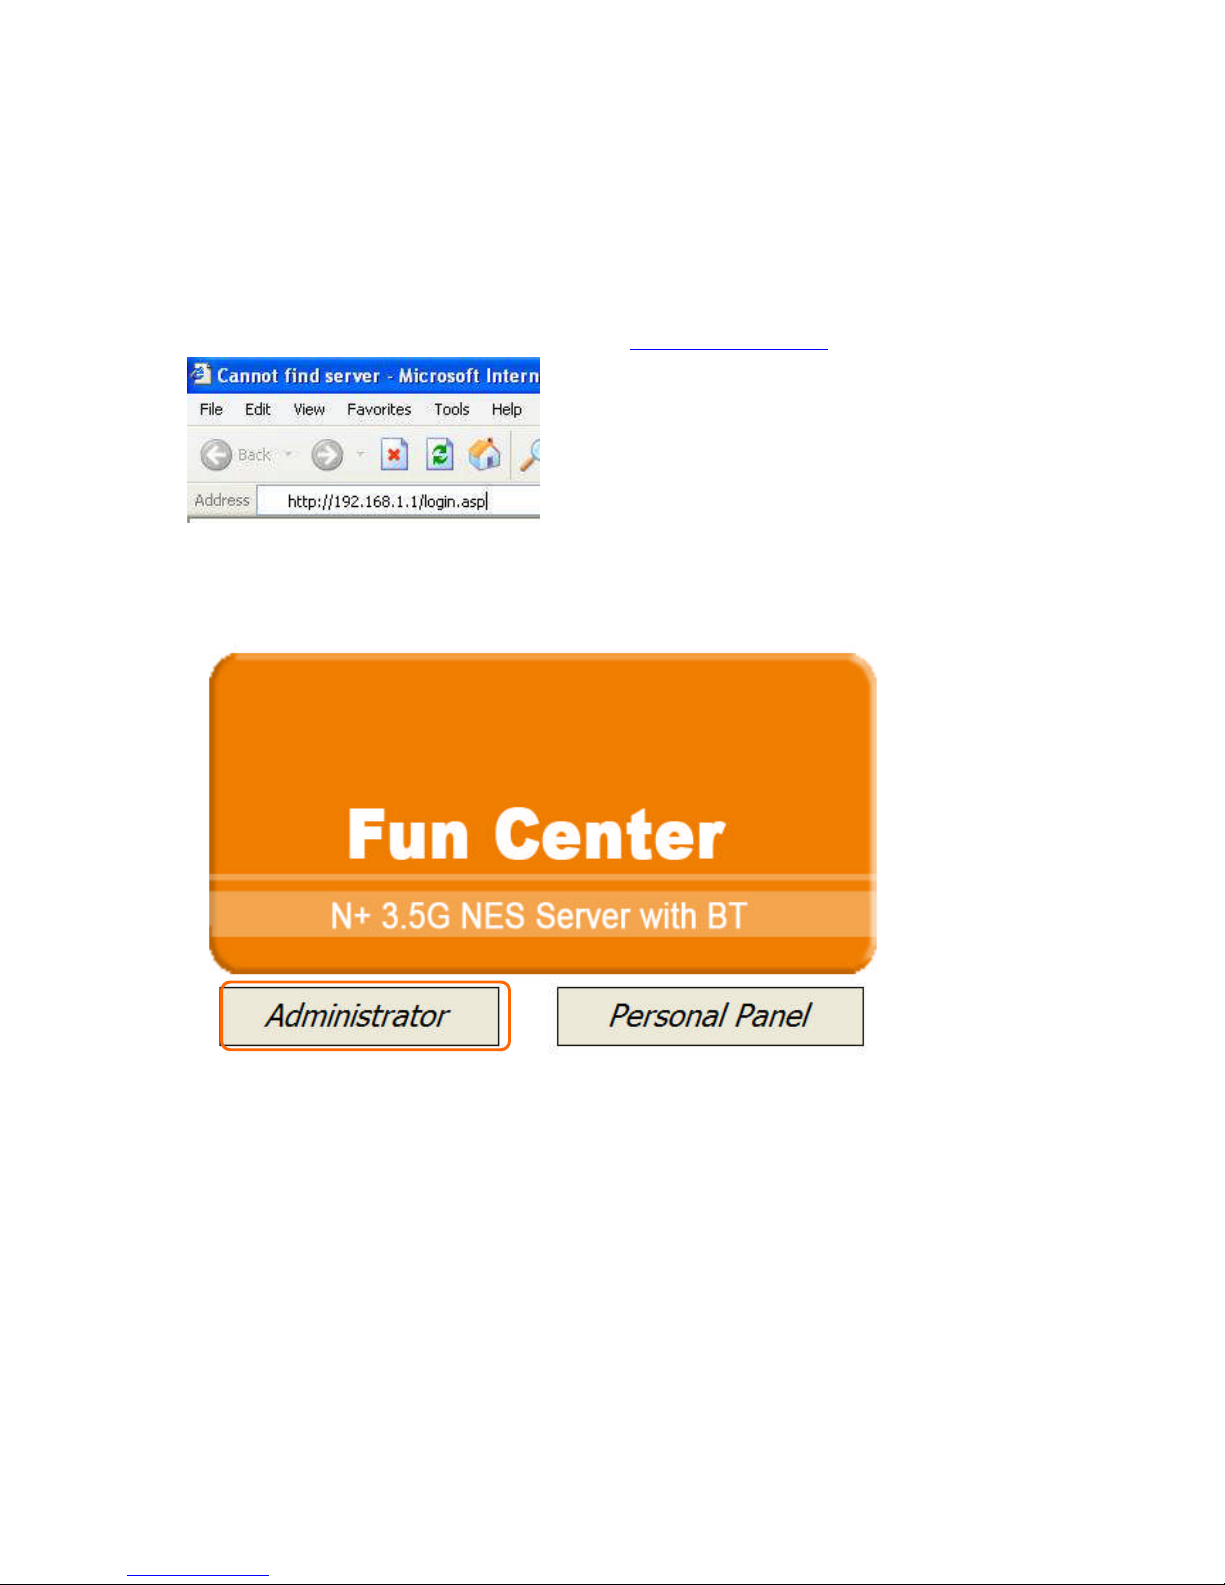
There are two ways to enter N+ 3.5G NES Server administration page:
1) Please open IE browser and then enter http://192.168.1.1.
Homepage
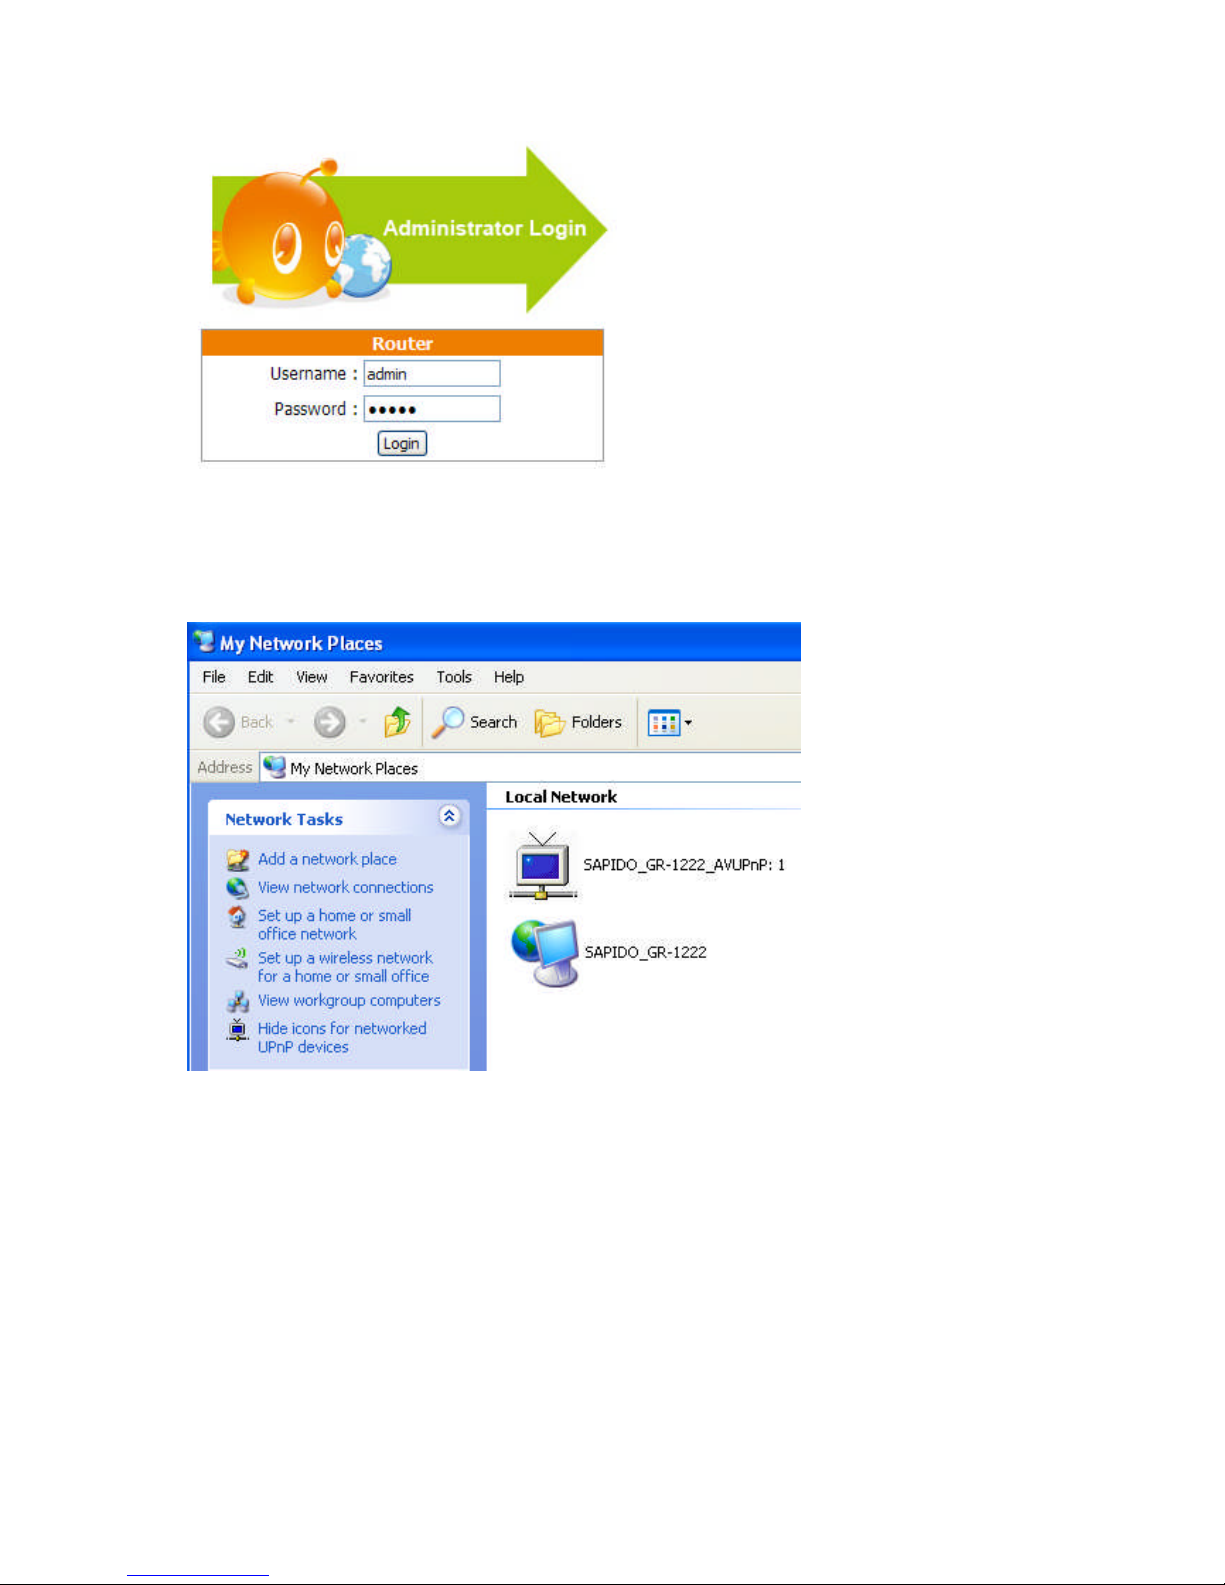
Please click on “Administrator”.
The login page will show up.
Page 27
http://www.sapido.com.tw 27
User’s Manual V1.0
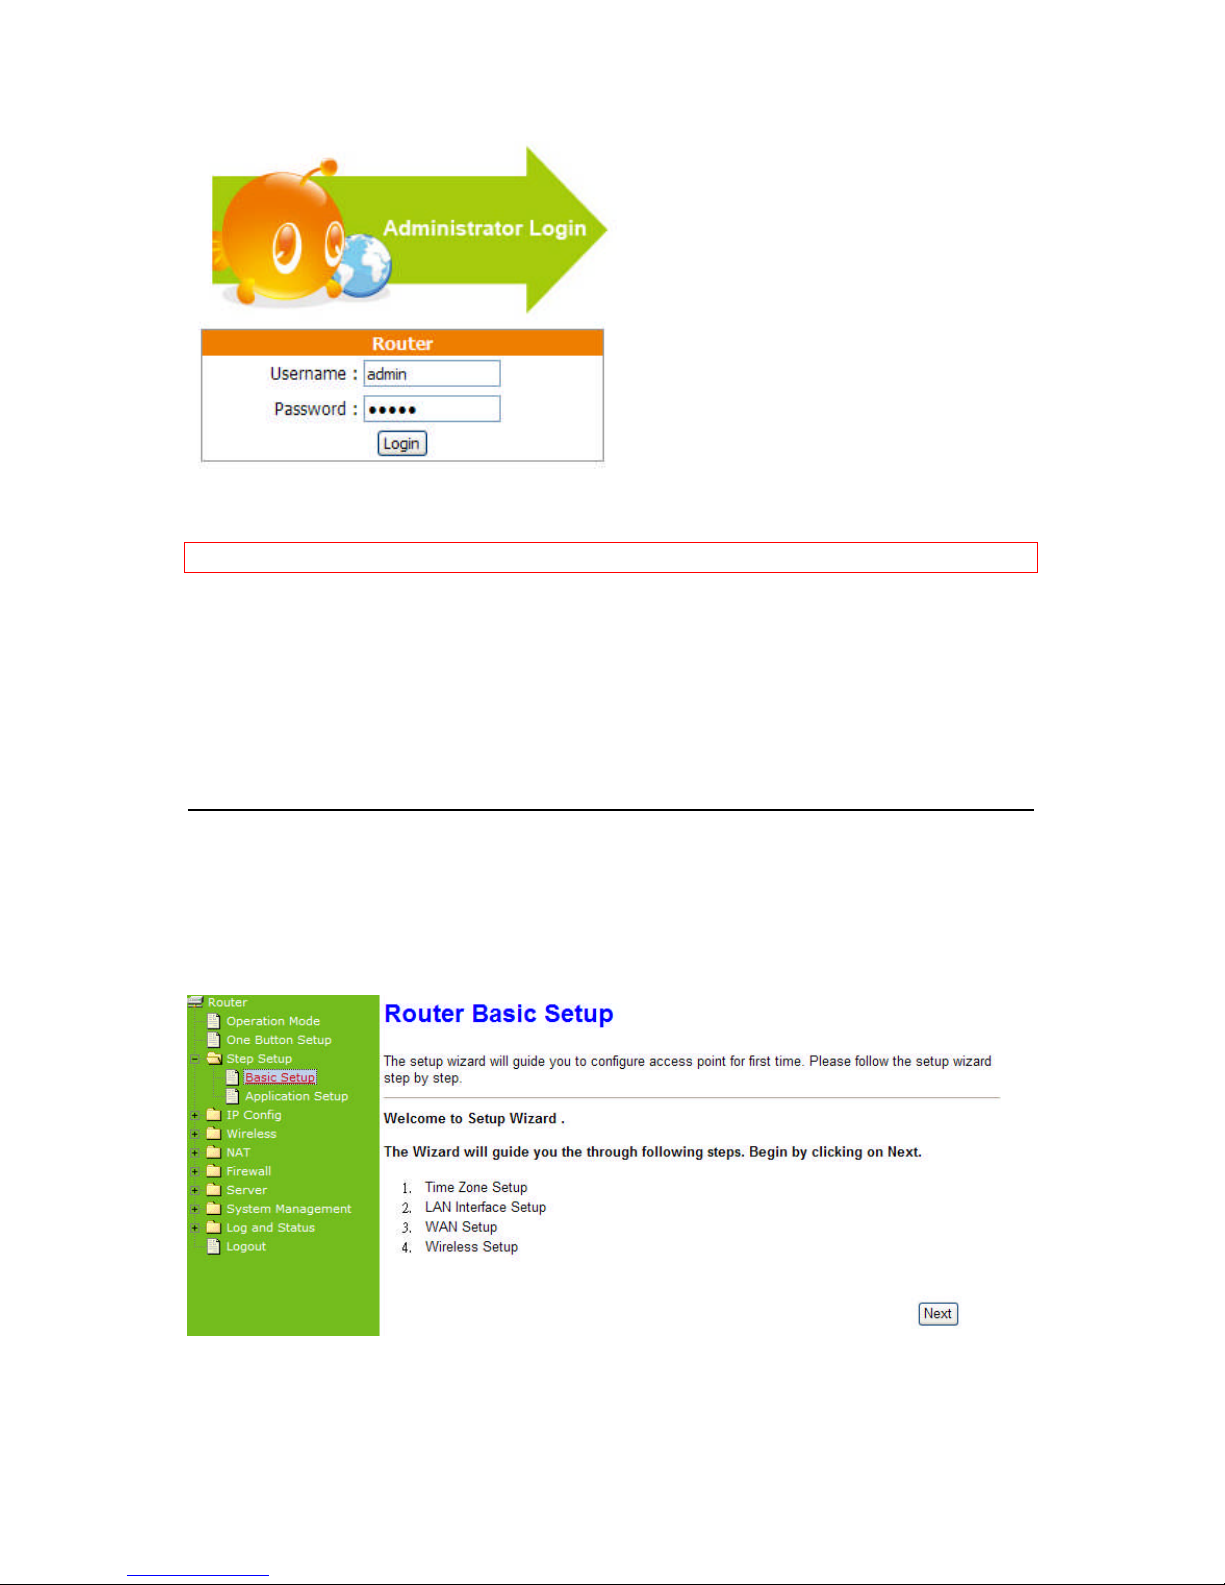
Enter username and password, both default are admin, then click login to enter
product main page.
2) The default UPnP of N+ 3.5G NES Server is ON. When users connect N+ 3.5G
NES Server to their PC, and icon will show up in the right-down corner.
Click the Internet Gateway Device to open the login page.
Page 28
http://www.sapido.com.tw 28
User’s Manual V1.0
4.1 Router Mode Configuration
Note:Quick Setup is not completed unless users finish all settings and click Finish button.
N+ 3.5G NES Server combines Router and AP to one, supports wire or wireless
connecting type with ISP. It also has NAT and DHCP functions to let multiple
computers using network at the same time. Wireless WAN supports Site Survey.
BR360 has WPS function for easy and secure establishment of wireless network.
4.2 Quick Setup for Router Mode
Click on Step Setup in the left screen of the main menu. Then you’ll see the Basic
and Application selecting screen appears and do the setting for each items.
Page 29
http://www.sapido.com.tw 29
User’s Manual V1.0
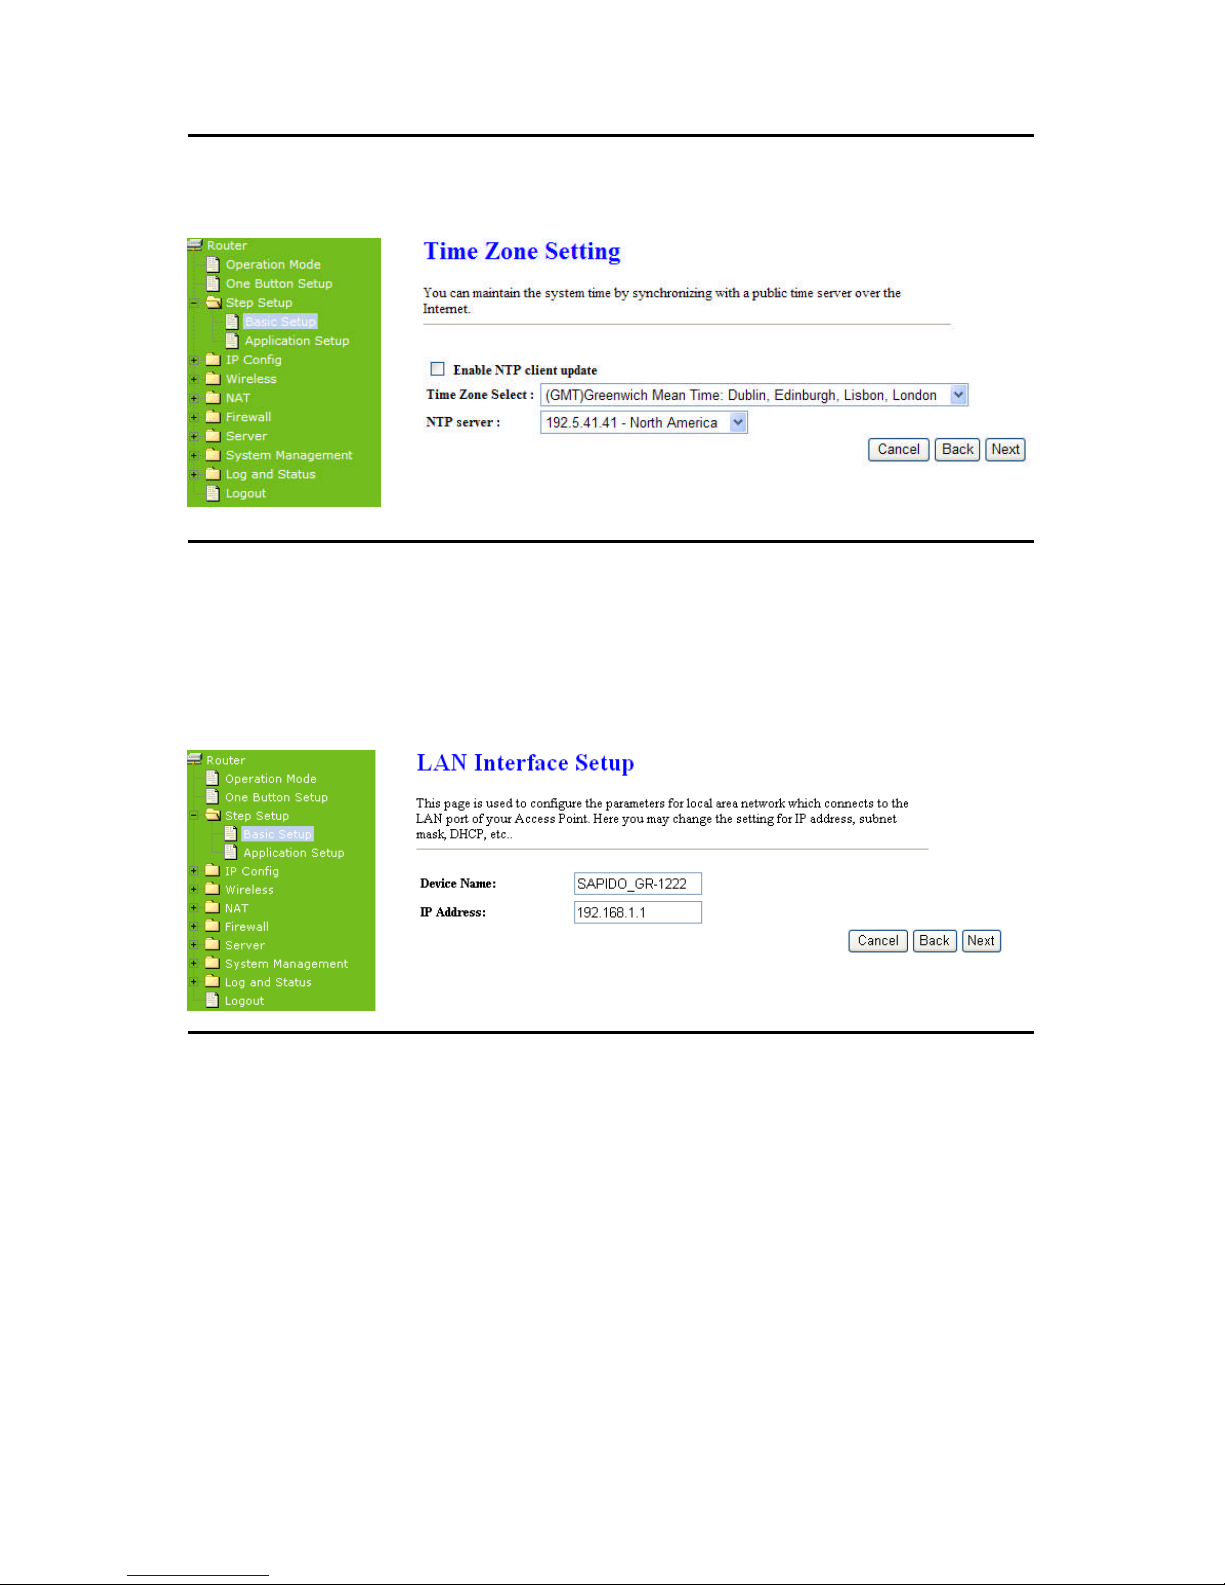
4.2.1 Time Zone Setup
You can select Enable NTP client update to maintain the system time.
4.2.2 LAN Interface Setup
It can let multiple local network computers connect to the Internet at the same
time. The default IP address is 192.168.1.1. Please click Next after finished
entering.
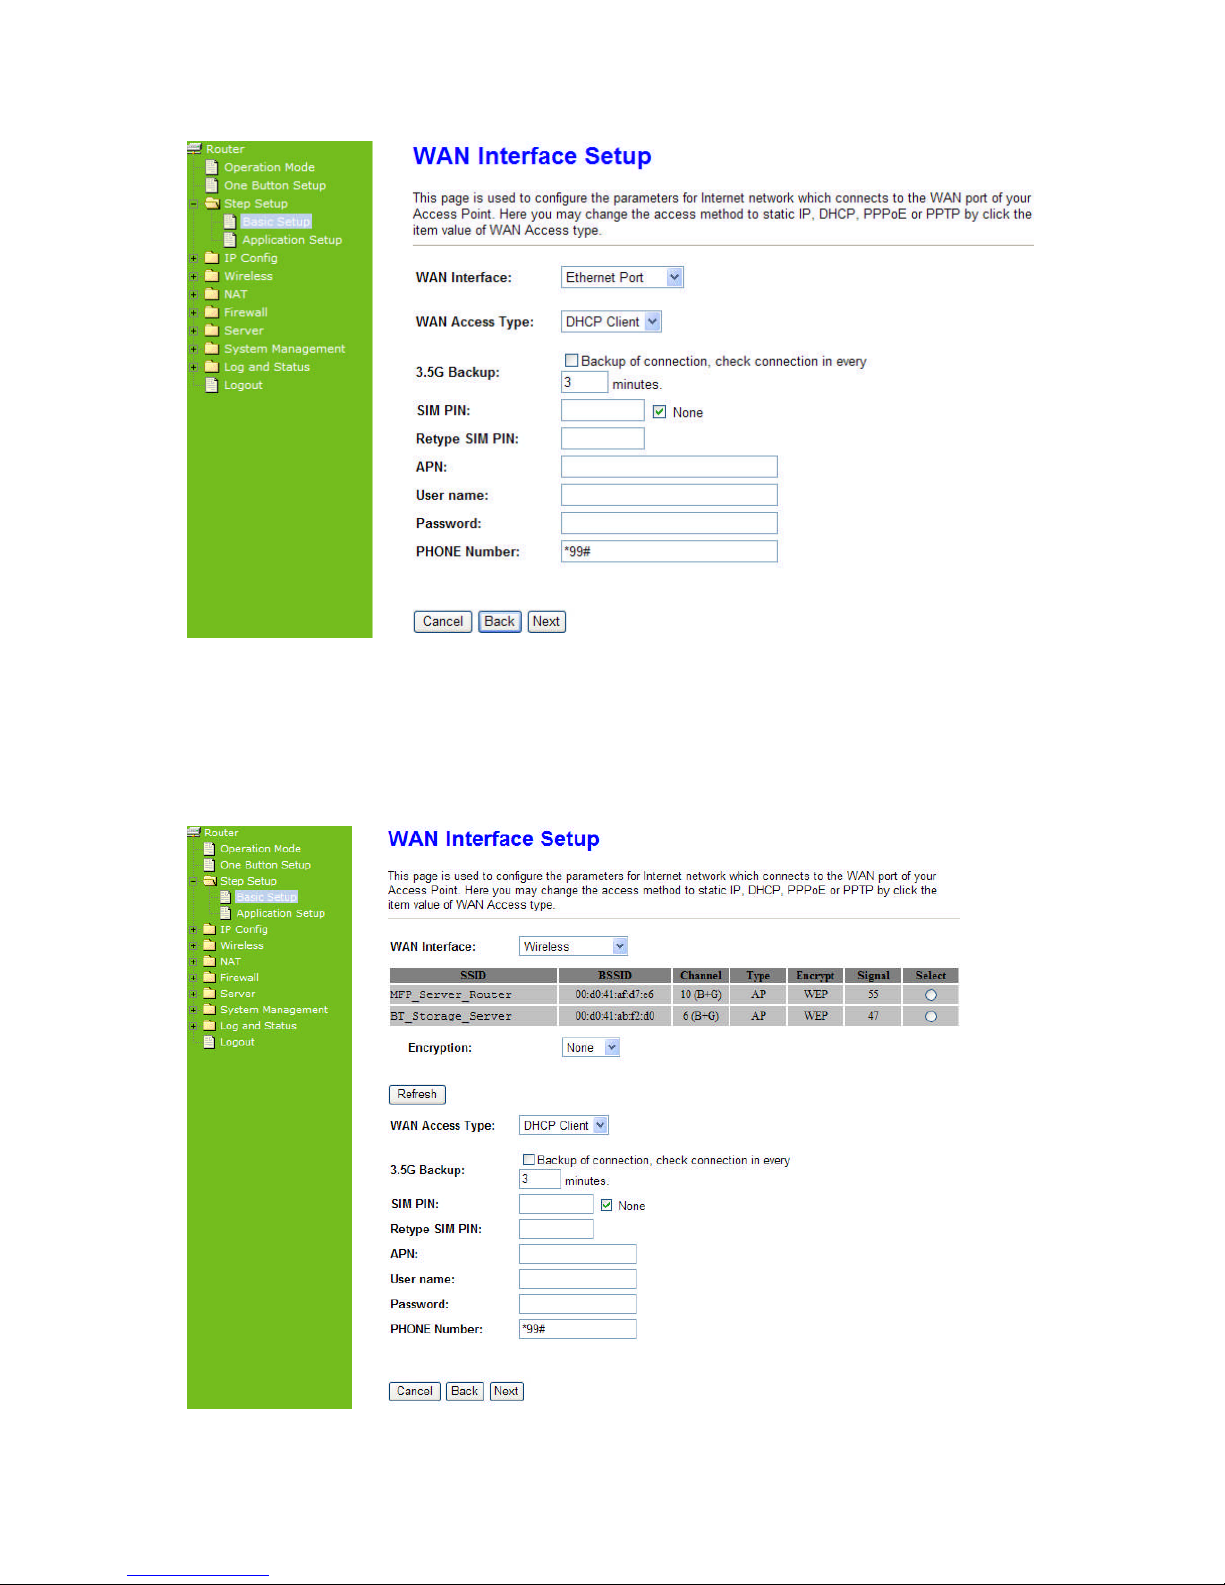
4.2.3 WAN Setup
3.5G Download Server Router supports three interfaces and four access types,
users can select the options in this page.
4.2.3.1 WAN Interface– Ethernet Port
If N+ 3.5G NES Server is connecting to the Internet through Ethernet cable,
please select Ethernet port.
Page 30
http://www.sapido.com.tw 30
User’s Manual V1.0
4.2.3.2 WAN Interface– Wireless
If N+ 3.5G NES Server is connecting to the Internet through wireless, please
select Wireless.
Page 31

http://www.sapido.com.tw 31
User’s Manual V1.0
The Wireless network which searched by N+ 3.5G NES Server will display on this
page. Users can select the desired wireless network and Encryption type to
connect.
4.2.3.3 WAN Access Type – Static IP
If your ISP provides static IP, and you do not need to enter username and password,
please select Static IP. Enter the information which ISP provides then click Next.
You can use the “3.5G Backup” to redundant.
Please enter the information
which ISP provides.
Users need to enter DNS
information, or they can’t
look up Domain name.
Page 32

http://www.sapido.com.tw 32
User’s Manual V1.0
4.2.3.4 WAN Access Type – Dynamic IP
Please select Dynamic IP to obtain IP address automatically from your ISP. You
can use the “3.5G Backup” to redundant.
Please click Next to enter the next page.
4.2.3.5 WAN Access Type – PPPoE
If your Internet service type is PPPoE, please select PPPoE. You must input
username and password which ISP provides. You can use the “3.5G Backup” to
redundant.
Page 33

http://www.sapido.com.tw 33
User’s Manual V1.0
Please click Next to enter the next page.
Please input the username
and password which ISP
provides.
Page 34

http://www.sapido.com.tw 34
User’s Manual V1.0
4.2.3.6 WAN Access Type – PPTP
If your Internet service type is PPTP, please select PPTP. You need to enter
username, password, IP address, Subnet Mask, and Server IP address. You can
use the “3.5G Backup” to redundant.
Please click Next to enter the next page.
All input fields are
required.
Page 35

http://www.sapido.com.tw 35
User’s Manual V1.0
4.2.4 3.5G Setup
If you use 3.5G connect to Internet, please choose “3.5G usb dongle”. 3.5G
connection (Connection Mode) means that users use 3.5G connect to network. The
Backup of Connection is not available at this time. If the device can not detect 3.5G
signal, it will search 3 / 2.75 / 2.5G signal, until there is no signal.
Page 36

http://www.sapido.com.tw 36
User’s Manual V1.0
4.2.5 Wireless Setup
The first step to setup wireless interface is to assign SSID, the default name is
3.5G_Server_Router. Please follow the instructions to setup.
4.2.6 Wireless Security Setup
The Encryption is a free choice option, it has two main types: WEP and WPA. If
you want to protect your transmitting data, you can select it base on the needs.
Please follow the instructions to complete wireless security setup.
a. Wireless Security Setup — WEP
Low level (64-bit) and
High level (128-bit)
10 characters or 26
characters.
Page 37

http://www.sapido.com.tw 37
User’s Manual V1.0
The options in Key Length column: 26 Hex characters (0~9, a~f, and A~F). It is
decided by the choice of WEP-64bits or WEP-128bits. E.g.: WEP-64bits key= 10
Hex characters (0~9, a~f, and A~F); WEP-128bits key= 26 Hex characters (0~9,
a~f, and A~F); the Key Setting is the password needs to be input after the
selections.
a. Encryption-WEP
(1.) Key Length: Activate WEP encryption to protect your information from stealing
by others. The 3.5G Download Server Router supports 64bits and 128bits.
(2.) Key Format: For 64bits WEP key format, it can include 5 ASCII characters or
10 Hex characters. For 128bits WEP key format, it can include 13 ASCII characters
or 26 Hex characters.
*Note: 128 bits – WEP encryption is very safe, but there are other encryptions
safer. Please to understand that all wireless devices must have the same WEP key
length and format.
b. Wireless Security Setup — WPA(WPA、WPA2 & WPA2 Mixed)
WPA (Wi-Fi Protected Access) is a system to protect wireless network security. To
prevent hackers, WPA uses TKIP or AES to change key frequently.
Passphrase:
The Pre-Shared Key format is ASCII Code, and the length is 8-63
bytes(at least 8 bytes)。
Hex:
Users can input 64 Hex bytes(0~9, a~f, or A~F)。
Please click “Finished” to finish the setup.
Plese select one.
Passphrase: the length
of the Key is 8-63 bytes.
Hex: the length of the
Key is 64 bytes.
Page 38

http://www.sapido.com.tw 38
User’s Manual V1.0
4.2.7 Quick Setup Complete
When you see this screen, it means the quick setup is completed.
The system will reboot automatically after users complete the quick setup, then
back to setup main page.
Application Setup Selection
Click “Application” button to begin setup including Folder Management Setup,
User Account Management Setup, FTP Server Setup, Printer Server Setup, Web
Camera Setup and Samba Server Setup.
4.2.8 Folder Management
Easy to check all the USB storage devices connected to your N+ 3.5G NES Server ,
view the entire data folder inside each storage devices, and you can do the disk
formatting via click on the button in this page.
Page 39

http://www.sapido.com.tw 39
User’s Manual V1.0
Please click on “Next” to continue.
4.2.9 Partition / Format SysDisk
Select the USB Disk and click on “OK” button for refresh all disks before you do disk
partition, and the “Unplug” button will appear. To partition/format the disk, please
select the disk and click on “Format” button. Moreover, if you want to view the
data inside the disk, please go to “4.2.11 FTP Sever Setup” to enable FTP server
and then click on “Disk Explorer” to view all disks folder inside the device.
4.2.10 User Account Management
Personal users can use each individual application such as My Status, My Webcam and My
Document. This section is to set the user’s right. Also, all the users right will be showed in
User Account List and can do the edit or delete by clicking the meaning
text.
Please click on “Next” to continue.
Page 40

http://www.sapido.com.tw 40
User’s Manual V1.0
4.2.11 FTP Server
4.2.12 N+ 3.5G NES Server can be the FTP Server provides users to transmit
files, also for the guest can download the files from assign website. Moreover,
by connecting USB HDD, USB Flash to the router, user can easily set up a FTP
Server to share or download files for local or remote users.
Please click on “Next” to continue.
4.2.13 Printer Server
N+ 3.5G NES Server supports printers. Printer Server will be shown as Enable,
therefore users can use Printer features from LAN. This function is disabled if there
is no printer connecting to N+ 3.5G NES Server .
Please click on “Next” to continue.
Page 41

http://www.sapido.com.tw 41
User’s Manual V1.0
4.2.14 Webcam Server
If you plan to use the N+ 3.5G NES Server as a Web Camera site, connect a
supported USB Web Camera to the USB port of the N+ 3.5G NES Server . To enable
the webcam server and access from WAN as demand, and the Image format is set
to 320X240.
Please click on “Next” to continue.
4.2.15 Samba Server
Support NetBIOS protocol, the consumer sharing file and printer which provides as
the My Network Places.
Please click on “Finish” to complete settings.
Page 42

http://www.sapido.com.tw 42
User’s Manual V1.0
4.3 AP Mode Configurations
Connect to AP or wired Internet, and then provides wired and wireless internet
bridge service for bottom level users. The AP mode doesn’t support NAT. The 3.5G
Download Server Router is simply using Ethernet port to connect to the upper level
device and receive the IP address from it. The 3.5G Download Server Router will
use the default IP address or is defined by users if the upper level device does not
give one.
4.4 Quick Setup for AP Mode
Please Click Next to enter the next page.
Page 43

http://www.sapido.com.tw 43
User’s Manual V1.0
4.4.1 Time Zone Setup
You can select Enable NTP client update to maintain the system time.
4.4.2 Wireless Setup
The first step to setup wireless interface is to assign SSID, the default name is
SAPIDO_Fun_Center. Please follow the instructions to setup.
4.4.3 Wireless Security Setup
The Encryption is a free choice option, it has two main types: WEP and WPA. If
you want to protect your transmitting data, you can select it base on the needs.
Please follow the instructions to complete wireless security setup.
a. Wireless Security Setup — WEP
Page 44

http://www.sapido.com.tw 44
User’s Manual V1.0
The options in Key Length column: 26 Hex characters (0~9, a~f, and A~F). It is
decided by the choice of WEP-64bits or WEP-128bits. E.g.: WEP-64bits key= 10
Hex characters (0~9, a~f, and A~F); WEP-128bits key= 26 Hex characters (0~9,
a~f, and A~F); the Key Setting is the password needs to be input after the
selections.
a. Encryption-WEP
(1.) Key Length: Activate WEP encryption to protect your information from stealing
by others. The 3.5G Download Server Router supports 64bits and 128bits.
(2.) Key Format: For 64bits WEP key format, it can include 5 ASCII characters or
10 Hex characters. For 128bits WEP key format, it can include 13 ASCII characters
or 26 Hex characters.
*Note: 128 bits – WEP encryption is very safe, but there are other encryptions
safer. Please to understand that all wireless devices must have the same WEP key
length and format.
b. Wireless Security Setup — WPA(WPA、WPA2 & WPA2 Mixed)
WPA (Wi-Fi Protected Access) is a system to protect wireless network security. To
prevent hackers, WPA uses TKIP or AES to change key frequently.
Passphrase:
The Pre-Shared Key format is ASCII Code, and the length is 8-63
bytes(at least 8 bytes)。
Hex:
10 characters or 26
characters.
Low level (64-bit) and
High level (128-bit)
Page 45

http://www.sapido.com.tw 45
User’s Manual V1.0
Users can input 64 Hex bytes(0~9, a~f, or A~F)。
Please click Finished to finish the setup.
4.4.4 Quick Setup Complete
When you see this screen, it means the quick setup is completed.
The DHCP is disabled in AP mode. Please setup the static IP address in LAN section
after the countdown is finished. The IP address must in the same class with the
default Gateway.
Passphrase: the length of
the Key is 8-63 bytes.
Hex: the length of the Key
is 64 bytes.
Page 46

http://www.sapido.com.tw 46
User’s Manual V1.0
1) Please open IE browser and then enter http://192.168.1.254. (It is the default
LAN IP address in AP mode.)
Page 47

http://www.sapido.com.tw 47
User’s Manual V1.0
Please Select Administrator Mode.
Enter username and password, both default are admin, then click login to enter
product main page.
2) The default UPnP of N+ 3.5G NES Server is ON. When users connect N+ 3.5G
NES Server to their PC, and icon will show up in the right-down corner.
Page 48

http://www.sapido.com.tw 48
User’s Manual V1.0
Click the Internet Gateway Device to open the login page.
Enter username and password, both default are admin, then click login to enter
product main page.
Application Setup Selection
Click “Application” button to begin setup including Folder Management Setup,
User Account Management Setup, FTP Server Setup, Printer Server Setup, Web
Camera Setup and Samba Server Setup.
4.4.5 Folder management
Easy to check all the USB storage devices connected to your N+ 3.5G NES Server ,
view the entire data folder inside each storage devices, and you can do the disk
formatting via click on the button in this page.
Please click on “Next” to continue.
Page 49

http://www.sapido.com.tw 49
User’s Manual V1.0
4.4.6 Partition / Format SysDisk
Select the USB Disk and click on “OK” button for refresh all disks before you do disk
partition, and the “Unplug” button will appear. To partition/format the disk, please
select the disk and click on “Disk format selected” button. Moreover, if you want to
view the data inside the disk, please go to “4.2.11 FTP Sever Setup” to enable FTP
server and then click on “Disk Explorer” to view all disks folder inside the device.
4.4.7 User Account Management
Personal users can use each individual application such as My Status, My Webcam
and My Document. This section is to set the user’s right. Also, all the users right will
be showed in User Account List and can do the edit or delete by clicking the
meaning text.
Please click on “Next” to continue.
Page 50

http://www.sapido.com.tw 50
User’s Manual V1.0
4.4.8 FTP Server
N+ 3.5G NES Server can be the FTP Server provides users to transmit files, also for
the guest can download the files from assign website. Moreover, by connecting
USB HDD, USB Flash to the router, user can easily set up a FTP Server to share or
download files for local or remote users.
Please click on “Next” to continue.
4.4.9 Printer Server
N+ 3.5G NES Server supports printers. Printer Server will be shown as Enable,
therefore users can use Printer features from LAN. This function is disabled if there
is no printer connecting to N+ 3.5G NES Server .
Page 51

http://www.sapido.com.tw 51
User’s Manual V1.0
Please click on “Next” to continue.
4.4.10 Web Camera
If you plan to use the N+ 3.5G NES Server as a Web Camera site, connect a
supported USB Web Camera to the USB port of the N+ 3.5G NES Server . To enable
the webcam server and access from WAN as demand, and the Image format is set
to 320X240.
Please click on “Next” to continue.
4.2.16 Samba Server
Support NetBIOS protocol, the consumer sharing file and printer which provides as
the My Network Places.
Please click on “Finish” to complete settings.
Page 52

http://www.sapido.com.tw 52
User’s Manual V1.0
4.5 WiFi AP Mode Configuration
Connect to AP or wired Internet by using wireless function, and then provides wired
and wireless internet bridge service for bottom level users. The AP mode doesn’t
support NAT. The 3.5G Download Server Router is simply using Ethernet port to
connect to the upper level device and receive the IP address from it. The 3.5G
Download Server Router will use the default IP address or is defined by users if the
upper level device does not give one.
4.6 Quick Setup for WiFi AP Mode
Please Click Next to enter the next page.
4.6.1 Time Zone Setup
You can select Enable NTP client update to maintain the system time.
Page 53

http://www.sapido.com.tw 53
User’s Manual V1.0
4.6.2 Wireless Site Survey And Security Setup
This function provides users to search the existing wireless network, AP, or
Wireless AP from ISP. You can select the service manually. After selecting the
designed AP, the device name will appear on Wireless Basic Setup page.
Please follow the instructions.
You can select the desired AP to connect and data encryption type. Click the
Refresh button will refresh the list.
Page 54

http://www.sapido.com.tw 54
User’s Manual V1.0
4.6.3 Wireless Security Setup
The Encryption is a free choice option, it has two main types: WEP and WPA. If
you want to protect your transmitting data, you can select it base on the needs.
Please follow the instructions to complete wireless security setup.
a. Wireless Security Setup — WEP
The options in Key Length column: 26 Hex characters (0~9, a~f, and A~F). It is
decided by the choice of WEP-64bits or WEP-128bits. E.g.: WEP-64bits key=
10 Hex characters (0~9, a~f, and A~F); WEP-128bits key= 26 Hex characters
(0~9, a~f, and A~F); the Key Setting is the password needs to be input after the
selections.
10 characters or 26
characters.
Low level (64-bit) and
High level (128-bit)
Page 55

http://www.sapido.com.tw 55
User’s Manual V1.0
b. Wireless Security Setup — WPA(WPA、WPA2 & WPA2 Mixed)
WPA (Wi-Fi Protected Access) is a system to protect wireless network security. To
prevent hackers, WPA uses TKIP or AES to change key frequently.
Passphrase:
The Pre-Shared Key format is ASCII Code, and the length is 8-63
bytes(at least 8 bytes)。
Hex:
Users can input 64 Hex bytes(0~9, a~f, or A~F)。
Please click “Finished” to finish the setup.
4.6.4 Quick Setup Complete
When you see this screen, it means the quick setup is almost completed.
When the countdown is down to 0, please enter http://192.168.1.254/ in address
field. (It is the default LAN IP address in WiFi AP mode.)。
Passphrase: the length of
the Key is 8-63 bytes.
Hex: the length of the Key
is 64 bytes.
Page 56

http://www.sapido.com.tw 56
User’s Manual V1.0
Please select “Administrator” to enter.
The login page will show up, please enter the username and password. The default
values for both are admin. Click Login to enter the main page.
Page 57

http://www.sapido.com.tw 57
User’s Manual V1.0
2) The default UPnP of N+ 3.5G NES Server is ON. When users connect N+ 3.5G
NES Server to their PC, and icon will show up in the right-down corner.
Click the Internet Gateway Device to open the login page.
Enter username and password, both default are admin, then click login to enter
product main page.
Application Setup Selection
Click “Application” button to begin setup including Folder Management Setup,
User Account Management Setup, FTP Server Setup, Printer Server Setup, Web
Camera Setup and Samba Server Setup.
Page 58

http://www.sapido.com.tw 58
User’s Manual V1.0
4.6.5 Folder Management
Easy to check all the USB storage devices connected to your N+ 3.5G NES Server ,
view the entire data folder inside each storage devices, and you can do the disk
formatting via click on the button in this page.
4.6.6 Partition / Format SysDisk
Select the USB Disk and click on “OK” button for refresh all disks before you do disk
partition, and the “Unplug” button will appear. To partition/format the disk, please
select the disk and click on “Disk format selected”button. Moreover, if you want to
view the data inside the disk, please go to “4.2.11 FTP Sever Setup” to enable FTP
Page 59

http://www.sapido.com.tw 59
User’s Manual V1.0
server and then click on “Disk Explorer” to view all disks folder inside the device.
4.6.7 User Account Management
Personal users can use each individual application such as My Status, My Webcam
and My Document. This section is to set the user’s right. Also, all the users right will
be showed in User Account List and can do the edit or delete by clicking the
meaning text.
4.6.8 FTP Server
N+ 3.5G NES Server can be the FTP Server provides users to transmit files, also for
the guest can download the files from assign website. Moreover, by connecting
USB HDD, USB Flash to the router, user can easily set up a FTP Server to share or
download files for local or remote users.
Page 60

http://www.sapido.com.tw 60
User’s Manual V1.0
4.6.9 Printer Server
N+ 3.5G NES Server supports printers. Printer Server will be shown as Enable,
therefore users can use Printer features from LAN. This function is disabled if there
is no printer connecting to N+ 3.5G NES Server .
Page 61

http://www.sapido.com.tw 61
User’s Manual V1.0
4.6.10 Web Camera
If you plan to use the N+ 3.5G NES Server as a Web Camera site, connect a
supported USB Web Camera to the USB port of the N+ 3.5G NES Server . To enable
the webcam server and access from WAN as demand, and the Image format is set
to 320X240.
4.6.11 Samba Server
Support NetBIOS protocol, the consumer sharing file and printer which provides as
the My Network Places.
Page 62

http://www.sapido.com.tw 62
User’s Manual V1.0
Chapter 5 Advanced Configuration for Router
Mode
5.1 IP Config
This section can let users add route rules of 3.5G Download Server Router; it
includes configuration of WAN, LAN, and DDNS.
5.1.1 WAN Interface Setup
Please select WAN Interface to configure, it includes 2 interface selections
(Ethernet and Wireless) and 4 access types (Static IP, Dynamic IP, PPPoE, and
PPTP); please follow the instructions to configure.
Page 63

http://www.sapido.com.tw 63
User’s Manual V1.0
5.1.1.1 WAN Interface – Ethernet Port
If your N+ 3.5G NES Server is connecting to the Internet through the Ethernet
cable, please select Ethernet port interface.
Page 64

http://www.sapido.com.tw 64
User’s Manual V1.0
5.1.1.2 WAN Interface – 3.5G
If you use 3.5G connect to Internet, please choose “3.5G usb dongle”. 3.5G
connection (Connection Mode) means that users use 3.5G connect to network. The
Backup of Connection is not available at this time. If the device can not detect 3.5G
signal, it will search 3 / 2.75 / 2.5G signal, until there is no signal.
Page 65

http://www.sapido.com.tw 65
User’s Manual V1.0
5.1.1.3 WAN Interface – Wireless
If your N+ 3.5G NES Server is connecting to the Internet through wireless,
please select Wireless interface.
The Wireless network which searched by N+ 3.5G NES Server will display on this
page. Users can select the desired wireless network and Encryption type to
connect.
Page 66

http://www.sapido.com.tw 66
User’s Manual V1.0
5.1.1.4 Static IP
If you applied for a Static IP connection type from ISP, please follow the steps to set up your
WAN connection.
1. IP Address
Please enter your IP address. If you don’t know the address, please contact
your ISP.
2. Subnet Mask
Please enter the Subnet Mask address; it should be 255.255.255.0 for the
most time.
3. Default Gateway
Please enter the Default Gateway address. If you don’t know the address,
please contact your ISP.
Page 67

http://www.sapido.com.tw 67
User’s Manual V1.0
4. MTU Size
The term Maximum transmission unit refers to the size (in bytes) of the
largest PDU that a given layer of a communications protocol can pass onwards.
Users can improve network efficiency by adjusting the value of MTU. Most of
OS will give users a default value which is fit for most of users. Users can
modify this value also. Please enter value, max number is 1500 bytes.
5. DNS
If ISP provides DNS information, please select Attain DNS automatically.
Or you should select Set DNS Manually, and then input the DNS address.
6. 3.5G Backup
Connection backup. If your WAN disconnects, it will connect to Internet by
3.5G. The system will check the connection once for every 30 seconds. Users
can setup the time for detecting. The range is 1-60 mins, and the default is 3
mins. When system detects disconnection, N+ 3.5G NES Server will
automatically connect by using 3.5G. If the signal of 3.5G is not detected, it
will search for 3/2.75/2.5G signals. Users shall manual turn off 3.5G
connection manually after the original connection is restored.
7. Clone MAC Address
If your ISP asks you to enter a specific MAC Address, please input the correct
info at the column.
8. Enable IGMP Proxy
The Internet Group Management Protocol (IGMP) is a communication
protocol used to manage the membership of Internet Protocol multicast
groups. IGMP is used by IP hosts and adjacent multicast routers to establish
multicast group memberships. You can choose to enable IGMP Proxy to
provide service.
9. Enable Ping Access on WAN
When users choice Enable Ping Access on WAN, it will make WAN IP
address response to any ping request from Internet users. It is a common way
for hacker to ping public WAN IP address, to see is there any WAN IP address
available.
10. Enable Web Server Access on WAN
This option is to enable Web Server Access function on WAN.
11. Apply Changes & Reset
Click on Apply Changes to save the setting data. Or you may click on Reset
to clear all the input data.
Page 68

http://www.sapido.com.tw 68
User’s Manual V1.0
5.1.1.5 Dynamic IP
If your WAN access type is DHCP Client, please complete the settings as following
instructions.
1. Host Name
Host name is optional for users. If your ISP requests users to input a specific
host name, please input it in this section.
2. MTU Size
The term Maximum transmission unit refers to the size (in bytes) of the
largest PDU that a given layer of a communications protocol can pass onwards.
Page 69

http://www.sapido.com.tw 69
User’s Manual V1.0
Users can improve network efficiency by adjusting the value of MTU. Most of OS
will give users a default value which is fit for most of users. Users can modify
this value also. Please enter value, max number is 1492 bytes.
3. DNS
If ISP provides DNS information, please select Attain DNS automatically. Or
you should select Set DNS Manually, and then input the DNS address.
4. 3.5G Backup
Connection backup. If your WAN disconnects, it will connect to Internet by
3.5G. The system will check the connection once for every 30 seconds. Users
can setup the time for detecting. The range is 1-60 mins, and the default is 3
mins. When system detects disconnection, N+ 3.5G NES Server will
automatically connect by using 3.5G. If the signal of 3.5G is not detected, it
will search for 3/2.75/2.5G signals. Users will turn off 3.5G connection
manually after the original connection is restored.
5. Clone MAC Address
If your ISP asks you to enter a specific MAC Address, please input the correct
info at the column.
6. Enable IGMP Proxy
The Internet Group Management Protocol (IGMP) is a communications
protocol used to manage the membership of Internet Protocol multicast groups.
IGMP is used by IP hosts and adjacent multicast routers to establish multicast
group memberships. You can choose to enable IGMP Proxy to provide service.
7. Enable Ping Access on WAN
When users enable Enable Ping Access on WAN, it will make WAN IP address
response to any ping request from Internet users. It is a common way for
hacker to ping public WAN IP address, to see is there any WAN IP address
available.
8. Enable Web Server Access on WAN
This option is to enable Web Server Access function on WAN.
9. Apply Changes & Reset
Click on Apply Changes to save the setting data. Or you may click on Reset to
clear all the input data.
Page 70

http://www.sapido.com.tw 70
User’s Manual V1.0
5.1.1.6 PPPoE
If your WAN access type is PPPoE, please complete the settings as following
instructions.
1. User Name
Please enter the username provided by your ISP. If you don’t have it, please
contact your ISP.
Page 71

http://www.sapido.com.tw 71
User’s Manual V1.0
2. Password
Please enter the password provided by your ISP. If you don’t have it, please
contact your ISP.
3. Service Name
Please enter the service name provided by your ISP. If you don’t have it,
please contact your ISP.
4. Connection Type
It has three types: Continuous, Connect on Demand, and Manual.
5. Idle Time
Users can input the max unused time here.
6. MTU Size
The term Maximum transmission unit refers to the size (in bytes) of the
largest PDU that a given layer of a communications protocol can pass onwards.
Users can improve network efficiency by adjusting the value of MTU. Most of
OS will give users a default value which is fit for most of users. Users can
modify this value also. Please enter value, max number is 1492 bytes.
7. DNS
If ISP provides DNS information, please select Attain DNS automatically.
Or you should select Set DNS Manually, and then input the DNS address.
8. 3.5G Backup
Connection backup. If your WAN disconnects, it will connect to Internet by
3.5G. The system will check the connection once for every 30 seconds. Users
can setup the time for detecting. The range is 1-60 mins, and the default is 3
mins. When system detects disconnection, N+ 3.5G NES Server will
automatically connect by using 3.5G. If the signal of 3.5G is not detected, it
will search for 3/2.75/2.5G signals. Users will turn off 3.5G connection
manually after the original connection is restored.
9. Clone MAC Address
If your ISP asks you to enter a specific MAC Address, please input the correct
info at the column.
10. Enable IGMP Proxy
The Internet Group Management Protocol (IGMP) is a communications
protocol used to manage the membership of Internet Protocol multicast
groups. IGMP is used by IP hosts and adjacent multicast routers to establish
multicast group memberships. You can choose to enable IGMP Proxy to
provide service.
11. Enable Ping Access on WAN
When users enable Enable Ping Access on WAN, it will make WAN IP
Page 72

http://www.sapido.com.tw 72
User’s Manual V1.0
address response to any ping request from Internet users. It is a common way
for hacker to ping public WAN IP address, to see is there any WAN IP address
available.
12. Enable Web Server Access on WAN
This option is to enable Web Server Access function on WAN.
13. Apply Changes & Reset
Click on Apply Changes to save the setting data. Or you may click on Reset
to clear all the input data.
Page 73

http://www.sapido.com.tw 73
User’s Manual V1.0
5.1.1.7 PPTP
If your WAN access type is PPTP, please complete the settings as following
instructions.
Page 74

http://www.sapido.com.tw 74
User’s Manual V1.0
1. IP Address
Please enter your IP address. If you don’t know the address, please contact
your ISP.
2. Subnet Mask
Please enter the Subnet Mask address; it should be 255.255.255.0 for the
most time.
3. Server IP Address
Please enter the server IP address. If you don’t know the address, please
contact your ISP.
4. User Name
Please enter the username provided by your ISP. If you don’t have it, please
contact your ISP.
5. Password
Please enter the password provided by your ISP. If you don’t have it, please
contact your ISP.
6. MTU Size
The term Maximum transmission unit refers to the size (in bytes) of the
largest PDU that a given layer of a communications protocol can pass onwards.
Users can improve network efficiency by adjusting the value of MTU. Most of
OS will give users a default value which is fit for most of users. Users can
modify this value also. Please enter value, max number is 1492 bytes.
7. Request MPPE Encryption
MPPE uses the RSA RC4 algorithm to provide data confidentiality. The length
of the session key to be used for initializing encryption tables can be
negotiated. MPPE currently supports 40-bit, 56-bit, and 128-bit session keys.
It can be changed frequently to protect network security. This function is
optional.
8. DNS
If ISP provides DNS information, please select Attain DNS automatically.
Or you should select Set DNS Manually, and then input the DNS address.
9. 3.5G Backup
Connection backup. If your WAN disconnects, it will connect to Internet by
3.5G. The system will check the connection once for every 30 seconds. Users
can setup the time for detecting. The range is 1-60 mins, and the default is 3
mins. When system detects disconnection, N+ 3.5G NES Server will
automatically connect by using 3.5G. If the signal of 3.5G is not detected, it
will search for 3/2.75/2.5G signals. Users will turn off 3.5G connection
manually after the original connection is restored.
Page 75

http://www.sapido.com.tw 75
User’s Manual V1.0
10. Clone MAC Address
If your ISP asks you to enter a specific MAC Address, please input the correct
info at the column.
11. Enable IGMP Proxy
The Internet Group Management Protocol (IGMP) is a communications
protocol used to manage the membership of Internet Protocol multicast
groups. IGMP is used by IP hosts and adjacent multicast routers to establish
multicast group memberships. You can choose to enable IGMP Proxy to
provide service.
12. Enable Ping Access on WAN
When users enable Enable Ping Access on WAN, it will make WAN IP
address response to any ping request from Internet users. It is a common way
for hacker to ping public WAN IP address, to see is there any WAN IP address
available.
13. Enable Web Server Access on WAN
This option is to enable Web Server Access function on WAN.
14. Apply Changes & Reset
Click on Apply Changes to save the setting data. Or you may click on Reset
to clear all the input data.
5.1.2 LAN Interface Setup
This page is used to configure for local area network which connects to the LAN port of your
Access Point. Here users may change the setting for IP address, Subnet Mask, DHCP, etc.
Page 76

http://www.sapido.com.tw 76
User’s Manual V1.0
1. IP Address
The default IP address is 192.168.1.1 (recommend).
2. Subnet Mask
Please enter the Subnet Mask address; it should be 255.255.255.0 for the
most time.
3. Default Gateway
Please enter the Default Gateway address. If you don’t know the address,
please contact your ISP.
4. DHCP
Users can choose to enable DHCP service or not. The DHCP server will give an
unused IP address to a computer which is requesting for one. That computer
must be a DHCP client, and then it can obtain an IP address automatically.
5. DHCP Client Range
The default value is 192.168.1.100 - 192.168.1.200. The DHCP server will
assign an IP to a computer from this range. The Show Client will display every
assigned IP address, MAC address, and expired time.
6. 802.1d Spanning Tree
IEEE 802.1d Spanning Tree Protocol (STP) is a link layer network protocol
that ensures a loop-free topology for any bridged LAN, This function is optional.
7. Clone MAC Address
If your ISP asks you to enter a specific MAC Address, please input the correct
info at the column.
8. Apply Changes & Reset
Click on Apply Changes to save the setting data. Or you may click on Reset
to clear all the input data.
Page 77

http://www.sapido.com.tw 77
User’s Manual V1.0
5.1.3 Dynamic DNS Setting
Dynamic DNS provides users with DNS service that automates the discovery and
registration of client's public IP addresses. The DDNS Providers in 3.5G Download
Server Router are DynDNS (http://www.dyndns.com), TZO
(http://www.dyndns.org), ChangeIP, Eurodns, OVH, NO-IP, ODS, Regfish.
Please enter Domain Name, User Name/Email, and Password/Key.
After entering, click on Apply Changes to save the setting data. Or you may
click on Reset to clear all the input data.
Please choose to enable it or not.
Please select Service Provider
for DDNS
Page 78

http://www.sapido.com.tw 78
User’s Manual V1.0
5.2 Wireless Setup
The category includes Basic Settings, Advanced Settings, Security, Access
Control, WDS settings, and WPS. Please read below for the setting instruction.
5.2.1 Wireless Basic Settings
The basic settings related to the wireless are specified as following.
Page 79

http://www.sapido.com.tw 79
User’s Manual V1.0
1. Disable Wireless LAN Interface
Turn off the wireless function.
2. Band
Please select the frequency. It has 6 options:
2.4 GHz (B/G/N/B+G/G+N/B+G+N).
3. Mode
Please select the mode. It has 3 modes to select:
(AP, WDS, AP+WDS).
Multiple APs can provide users another 4 different SSID for connection.
Users can add or limit the properties for each connection.
Page 80

http://www.sapido.com.tw 80
User’s Manual V1.0
(1.) Enable: please choose to enable it or not.
(2.) Band: please select the frequency.
(3.) SSID: please enter the SSID.
(4.) Data Rate: please select the data transmission rate.
(5.) Access: enable this function can let clients use 2 access types: a. LAN+WAN:
the client can access to the Internet and connect to 3.5G Download Server
Router’s GUI to setup. b. WAN: the client can only access to the Internet.
(6.) Active Client List: display the properties of the client which is connecting
successfully.
(7.) Apply Changes: Click on Apply Changes to save the setting data. Or
you may click on Reset to clear all the input data.
Take the client side of wireless network card as an example:
The Client can search for N+ 3.5G NES Server _AP1 (LAN+WAN) and
connect to it. If the client connects to it successfully, it will display message
to notify users.
Page 81

http://www.sapido.com.tw 81
User’s Manual V1.0
4. Network Type
Please select the network type, it has 2 options: Infrastructure or Ad hoc.
If the wireless mode is set to AP mode, this section is disabled.
5. SSID
Service Set identifier, the default SSID is SAPIDO_Fun_Center, users can
define to any.
6. Channel Width
Please select the channel width, it has 2 options: 20MHZ, and 40MHZ.
7. Control Sideband
Enable this function will control your router use lower or upper channel.
8. Channel Number
Please select the channel; it has Auto, 1, 2~11 options.
9. Broadcast SSID
User may choose to enable Broadcast SSID or not.
10. Data Rate
Please select the data transmission rate.
11. Associated Clients
Check the AP connectors and the Wireless connecting status.
Page 82

http://www.sapido.com.tw 82
User’s Manual V1.0
12. Enable Mac Clone (Single Ethernet Client)
Clone the MAC address for ISP to identify.
13. Enable Universal Repeater Mode (Acting as AP and Client
simultaneously)
Allow to equip with the wireless way conjunction upper level, provide the
bottom layer user link in wireless and wired way in the meantime. (The IP that
bottom layer obtains is from upper level.)
Ex: When users enable the Universal Repeater to connect to the upper level
device, please input the channel and SSID of the upper level device on
router’s GUI. Click on Apply Changes to save the settings. (The DHCP in
IP config needs to be disabled.)
-----------------------------------------------------------------------------------
----------------------------------------------------------------------------------
Users can go to the network Config section and check the information of
upper level in Wireless Repeater Interface Configuration.
Page 83

http://www.sapido.com.tw 83
User’s Manual V1.0
If the bottom layer device is trying to make a connection, users must input
the SSID of this router as a relay station. The IP that the bottom layer device
gets is from the upper level device.
14. SSID of Extended Interface
While linking the upper level device in wireless way, you can set SSID to give
the bottom layer user search.
15. Apply Changes & Reset
Click on Apply Changes to save the setting data. Or you may click on Reset
to clear all the input data.
Page 84

http://www.sapido.com.tw 84
User’s Manual V1.0
5.2.2 Wireless Advanced Settings
Please follow the instructions to configure the Wireless settings.
1. Fragment Threshold
To identify the maxima length of packet, the over length packet will be
fragmentized. The allowed range is 256-2346, and default length is 2346
2. RTS Threshold
This value should remain at its default setting of 2347. The range is 0~2347.
Should you encounter inconsistent data flow, only minor modifications are
recommended. If a network packet is smaller than the present RTS threshold
size, the RTS/CTS mechanism will not be enabled. The router sends Request
to Send (RTS) frames to a particular receiving station and negotiates the
sending of a data frame. After receiving an RTS, the wireless station responds
with a Clear to Send (CTS) frame to acknowledge the right to begin
transmission. Fill the range from 0 to 2347 into this blank.
3. Beacon Interval
Beacons are packets sent by an access point to synchronize a wireless
network. Specify a beacon interval value. The allowed setting range is
20-1024 ms.
Page 85

http://www.sapido.com.tw 85
User’s Manual V1.0
4. Preamble Type
PLCP is Physical layer convergence protocol and PPDU is PLCP protocol data
unit during transmission, the PSDU shall be appended to a PLCP preamble and
header to create the PPDU. It has 2 options: Long Preamble and Short
Preamble.
5. IAPP
Inter-Access Point Protocol is a recommendation that describes an optional
extension to IEEE 802.11 that provides wireless access-point communications
among multivendor systems.
6. Protection
Please select to enable wireless protection or not.
7. Aggregation
Enable this function will combine several packets to one and transmit it. It can
reduce the problem when mass packets are transmitting.
8. Short GI
Users can get better wireless transmission efficiency when they enable this
function.
9. RF Output Power
Users can adjust RF output power to get the best wireless network
environment. Users can choose from 100%, 70%, 50%, 35%, and 15%.
10. Apply Changes & Reset
Click on Apply Changes to save the setting data. Or you may click on Reset
to clear all the input data.
5.2.3 Wireless Security Setup
4 encryption types could be selected here, please follow below instructions for the
setting.
Page 86

http://www.sapido.com.tw 86
User’s Manual V1.0
1. Encryption – WEP
1.1 Set WEP Key
This section provides 64bit and 128bit WEP encryptions for wireless network.
Users can also choose ASCII and Hex shared Key format to protect data.
1.2 802.1x Authentication
It is a safety system by using authentication to protect your wireless network.
Please choose between WEP 64bits and WEP 128bits.
2. Encryption – WPA(WPA, WPA2, and WPA2 Mixed)
WPA Authentication Mode
2.1 Enterprise(RADIUS)
Please input the Port, IP Address, and Password of Authentication RADIUS
Server.
Page 87

http://www.sapido.com.tw 87
User’s Manual V1.0
2.2 Personal(Pre-Shared Key)
Pre-Shared Key type is ASCII Code; the length is between 8 to 63 characters.
If the key type is Hex, the key length is 64 characters.
3. Apply Changes & Reset
Click on Apply Changes to save the setting data. Or you may click on Reset
to clear all the input data.
Page 88

http://www.sapido.com.tw 88
User’s Manual V1.0
5.2.4 Wireless Access Control
The function of access control is to allow or deny users to access 3.5G Download
Server Router by according MAC address, it is optional. If you select Allowed
Listed, then only those clients whose MAC address is listed on access control can
connect to your base station. If you select Deny Listed, those clients whose MAC
address is listed on access control can’t connect to your base station.
Take the wireless card as the example.
(1.) We will use Deny Listed as an example. Please select Deny Listed in
Wireless Access Control Mode first, and then input the MAC address of
wireless card in MAC Address field. Click Apply Changes to save the setting
data.
Users can enable or
disable this function.
Page 89

http://www.sapido.com.tw 89
User’s Manual V1.0
(2.) You will find out that the MAC address appears on Current Access Control
List, it means the initiation is completed.
(3.) Please open wireless card UI and try to connect to this router. You will find
out that the connection request will be denied.
Page 90

http://www.sapido.com.tw 90
User’s Manual V1.0
Page 91

http://www.sapido.com.tw 91
User’s Manual V1.0
5.2.5 WDS Settings
Wireless basic settings must enable WDS first. This function can communicate with
other APs by adding MAC address into the same channel.
*The following figure is the explanation.
Internet
AP Router
WDS
AP Router
WDS
Wireless Connection
Wired Connection
*Please follow the instructions to setup the connection.
(1.) Please check the MAC address and Channel number of the upper level
device.
Page 92

http://www.sapido.com.tw 92
User’s Manual V1.0
(2.) Enter the Wireless Basic Settings page, select AP+WDS mode, and then
select the Channel Number. Click Apply Changes to save the setting
data.
(3.) Enter the WDS Settings page, select Enable WDS, and then input the MAC
address of the upper level device. Click Apply Changes to save the setting
data.
Page 93

http://www.sapido.com.tw 93
User’s Manual V1.0
(4.) When the time counts down to 0, you will see the MAC address of the upper
level device displaying on Current WDS AP List.
(5.) Head back to LAN Interface, disable DHCP option, and then click Apply
Changes to save the setting data.
Page 94

http://www.sapido.com.tw 94
User’s Manual V1.0
(6.) The MAC address of the upper level device is going to setup like the MAC
address of the router. Enter the upper level device’s WDS settings page,
and input router’s MAC address. Click Apply Changes to save the setting
data.
Please input the MAC address
of this router.
Page 95

http://www.sapido.com.tw 95
User’s Manual V1.0
(7.) After initiating the upper level device, please check Local Area Connections.
Click Supports to check out the IP address which is assigned by upper level
device.
(8.) You can input http://192.168.1.1 in IE browser to enter the GUI page of
upper level device and make sure the connection.
Page 96

http://www.sapido.com.tw 96
User’s Manual V1.0
5.2.6 WPS
Wi-Fi Protected Setup, it can simplify the procedures of wireless encryption
between N+ 3.5G NES Server and wireless network card. If the wireless
network card also supports WPS function, users can activate WPS
auto-encryption to speed up the procedures.
WPS supports 2 models: PIN (Personal Information Number) and PBC (Push
Button Configuration). These models are approved by the Wi-Fi Alliance.
PIN model, in which a PIN has to be taken either from a sticker label or from the
web interface of the WPS device. This PIN will then be entered in the AP or client
WPS device to connect.
PBC model, in which the user simply has to push a button, either an actual or a
virtual one, on both WPS devices to connect.
*The following figure is the display of the front of N+ 3.5G NES Server .
When users select a specific model on wireless base station, the clients can
connect to the base by selecting the same model.
The connection procedures of PIN and PBC are almost the same. The small
difference between those two is:
Users input the PIN of wireless card in the base station first; it will limit the range
of the clients. It is faster to establish a connection on PIN model.
On PBC model, users push the WPS button to activate the function, and then the
wireless client must push the WPS button in 2 mins to enter the network. The
client will search to see if there is any wireless base station which supports WPS
is activating. If the client finds a matching base, the connection will be
established. The speed of establishing a connection is slower than the PIN model
because of this extra step.
On the other hand, users need to input the information of the wireless card into
the register interface. It might lead to the failure of connection, if users make
mistakes on inputting. On PBC model, users only need to click the WPS button on
Page 97

http://www.sapido.com.tw 97
User’s Manual V1.0
both sides to make a connection. It is easier to operate.
This page supports Start PBC and Start PIN; please follow the instructions to
operate.
* Start PBC:
(1.) Please click Start PBC to connect to the wireless network card.
(2.) Open the configuration page of the wireless card which supports WPS. Click
the WiFi Protect Setup, and then click PBC to make a WPS connection with
AP from the WPS AP list (PBC-Scanning AP).
Page 98

http://www.sapido.com.tw 98
User’s Manual V1.0
(3.) When you see Network Address, it means the WPS connection between
wireless card and 3.5G Mobile Router is established.
* Start PIN:
(1.) Please open the configuration page of the wireless card, and write it down.
Page 99

http://www.sapido.com.tw 99
User’s Manual V1.0
(2.) Open the Wi-Fi Protected Setup configuration page of 3.5G Mobile Router,
input the PIN number from the wireless card then click Start PIN.
(3.) Open the configuration page of the wireless card which supports WPS. Click
the WPS, and then click PIN to make a WPS connection with AP from the WPS
AP list (PIN-Begin associating to WPS AP).
Page 100

http://www.sapido.com.tw 100
User’s Manual V1.0
(4.) When you see Network Address, it means the WPS connection between
wireless card and 3.5G Mobile Router is established.
5.3 NAT
5.3.1 Visual Server
Port forwarding service is to transfer packets from specific ports to corresponding
IP address on local area network.
 Loading...