

Page 1

http://www.sapido.com.tw 1
SadoGO Manual V1.0
Page 2

http://www.sapido.com.tw 2
SadoGO Manual V1.0
Index
CHAPTER1 SADOGO FOR GR-1102SETUP............................................................4
1.1 WHAT IS SADOGO ...............................................................................4
1.2 INSTALL SADOGO ...............................................................................4
1.3 USING THE SADOGO ............................................................................7
CHAPTER2 ROUTER MODE ..............................................................................9
2.1 ENTER SETUP PAGE.............................................................................9
2.2 ONE BUTTON SETUP ..........................................................................12
2.3 STEP SETUP ...................................................................................14
2.3.1 Change Password ..................................................................15
Click Next to go to the next page............................................................15
2.3.2 Time Zone Setup ....................................................................15
Click Next to go to the next page............................................................15
2.3.3 WAN Interface Setup ...............................................................16
2.3.4 LAN Setup ............................................................................24
2.3.5 Wireless SSID Setup ...............................................................24
2.3.6 Wireless Encryption Setup .......................................................25
2.3.7 DDNS Setup ..........................................................................29
2.3.8 Multiple AP Setup...................................................................30
2.3.9 USB Device – USB Device Search ..............................................31
2.3.10 USB Device - Server................................................................31
2.3.11 USB Device – FTP and Samba Server..........................................32
2.3.12 USB Device – Webcam Server ...................................................33
2.3.13 USB Device – Print Server ........................................................34
2.3.14 User Account Management.......................................................35
2.3.15 Finish ..................................................................................36
CHAPTER3 AP MODE ..................................................................................37
3.1 ENTER SETUP PAGE...........................................................................37
3.2 ONE BUTTON SETUP ..........................................................................39
3.3 STEP SETUP ...................................................................................41
3.3.1 Change Password ..................................................................42
3.3.2 Time Zone and Device Name Setup ............................................42
3.3.3 Wireless SSID Setup ...............................................................43
3.3.4 Wireless Encryption Setup .......................................................43
3.3.5 Multiple AP Setup...................................................................47
3.3.6 USB Device – USB Device Search ..............................................48
3.3.7 USB Device – Server ...............................................................48
3.3.8 USB Device – FTP and Samba Server..........................................49
Page 3

http://www.sapido.com.tw 3
SadoGO Manual V1.0
3.3.9 USB Device – Webcam Server ...................................................50
3.3.10 USB Device – Print Server ........................................................51
3.3.11 User Account Management.......................................................52
3.3.12 Finish ..................................................................................53
CHAPTER4 WI-FI AP MODE ...........................................................................54
4.1 ENTER SETUP PAGE...........................................................................54
4.2 ONE BUTTON SETUP ..........................................................................57
4.3 STEP SETUP ...................................................................................59
4.3.7 Change Password ..................................................................60
4.3.8 Time Zone and Device Name Setup ............................................60
4.3.9 Site Survey ...........................................................................61
4.3.10 Wireless Encryption Setup .......................................................62
4.3.11 USB Device – USB Device Search ..............................................65
4.3.12 USB Device - Server................................................................65
4.3.13 USB Device – FTP and Samba Server..........................................66
4.3.14 USB Device – Webcam Server ...................................................67
4.3.15 USB Device – Print Server ........................................................68
4.3.16 User Account Management.......................................................69
4.3.17 Finish ..................................................................................70
CHAPTER5 SERVER LOGIN ............................................................................72
5.1 SADOGO UTILITY ACCESS FROM WAN................................................72
5.2 ADMINISTRATOR LOGIN .......................................................................74
5.2.1 My FTP.................................................................................75
5.2.2 My Webcam Record ................................................................75
5.3 PERSON LOGIN ................................................................................78
5.3.1 My FTP.................................................................................79
5.3.2 Anonymous ..........................................................................79
5.3.3 Network Disk .........................................................................80
5.3.4 View Webcam ........................................................................81
5.3.5 My Webcam...........................................................................82
5.3.6 My Printer .............................................................................83
5.4 LOGOUT ........................................................................................84
Page 4
http://www.sapido.com.tw 4
SadoGO Manual V1.0
Chapter1SadoGo for GR-1102 Setup
1.1 What is SadoGo
A quick and easy install genie created by SAPIDO, SadoGO is the program which
offers you a super easy way to set up the internet connection and USB devices
1.2 Install SadoGo
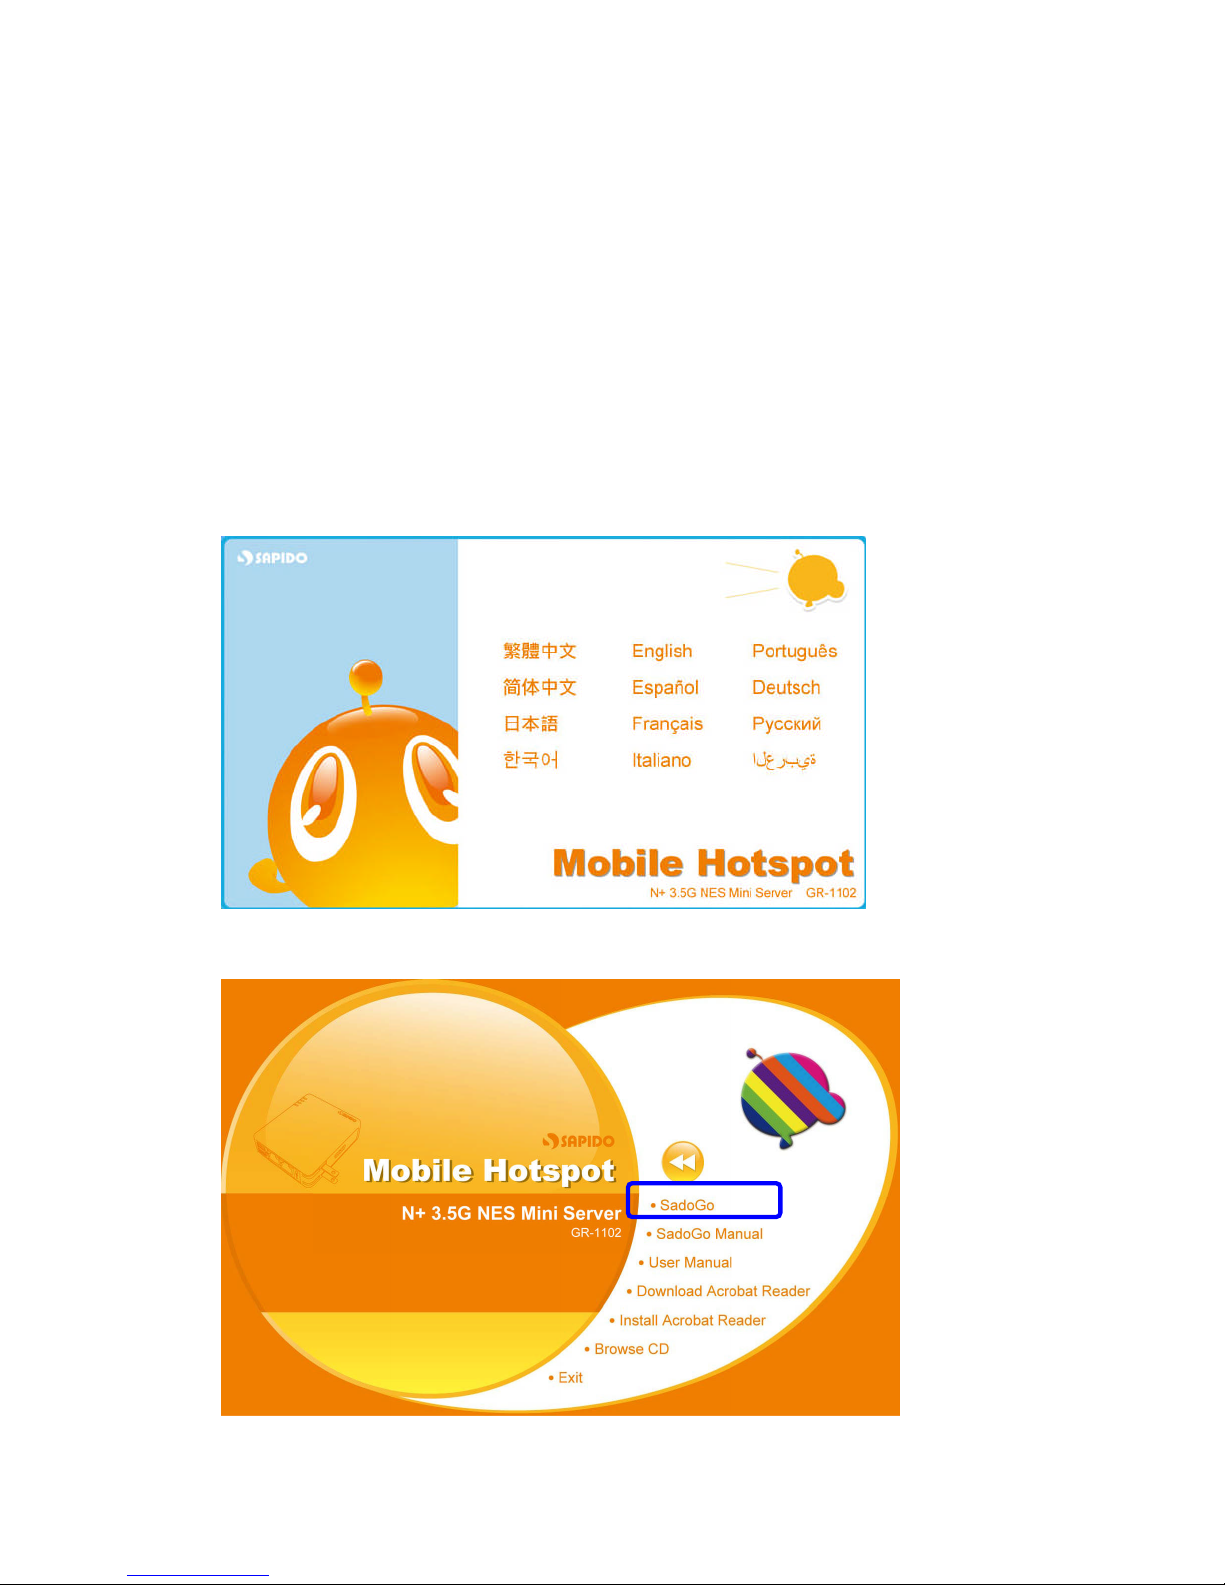
Step 1.
When installation CD-ROM starts, following language selection menu will appear
and please select the preferred Language to begin with.
Step 2.
To run the Setup Wizard, please select “SadoGo”on the main menu.
Page 5
http://www.sapido.com.tw 5
SadoGO Manual V1.0
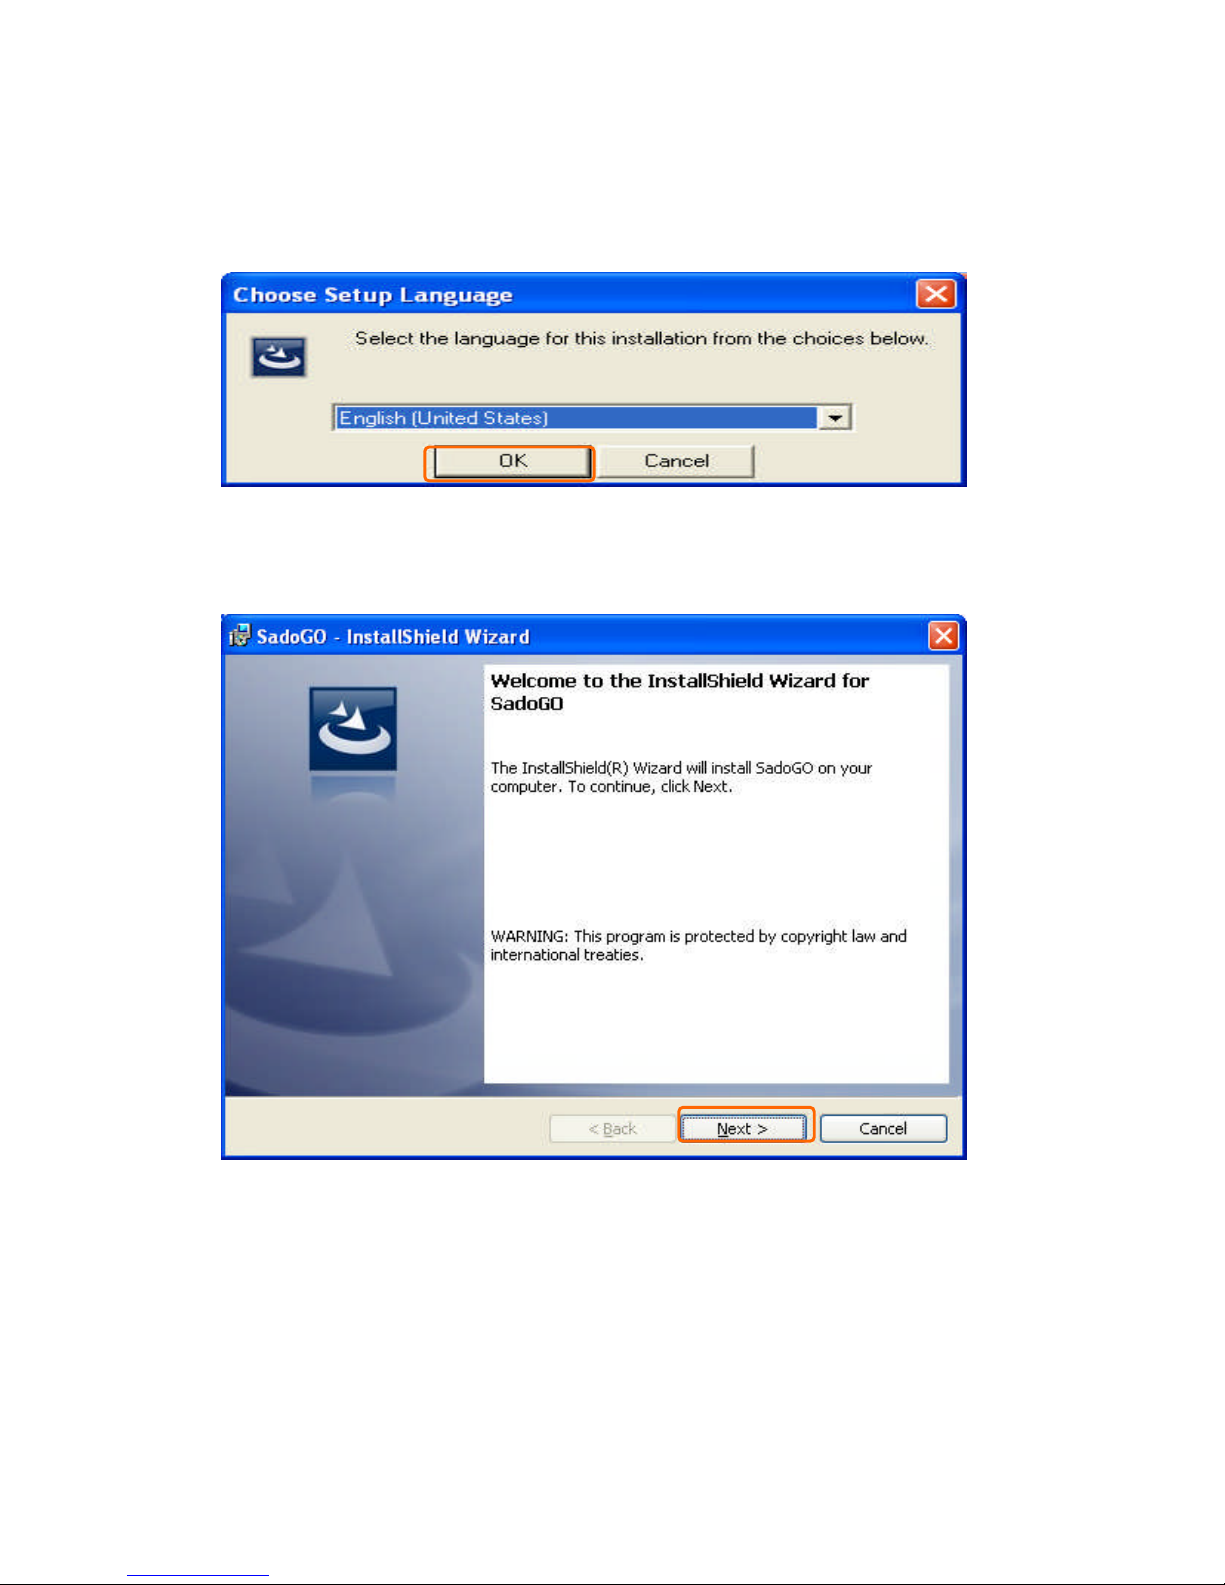
Step 3.
Please choose preferred Setup Language.
Step 4.
Please click “Next”button to proceed with Setup Wizard.
Page 6
http://www.sapido.com.tw 6
SadoGO Manual V1.0
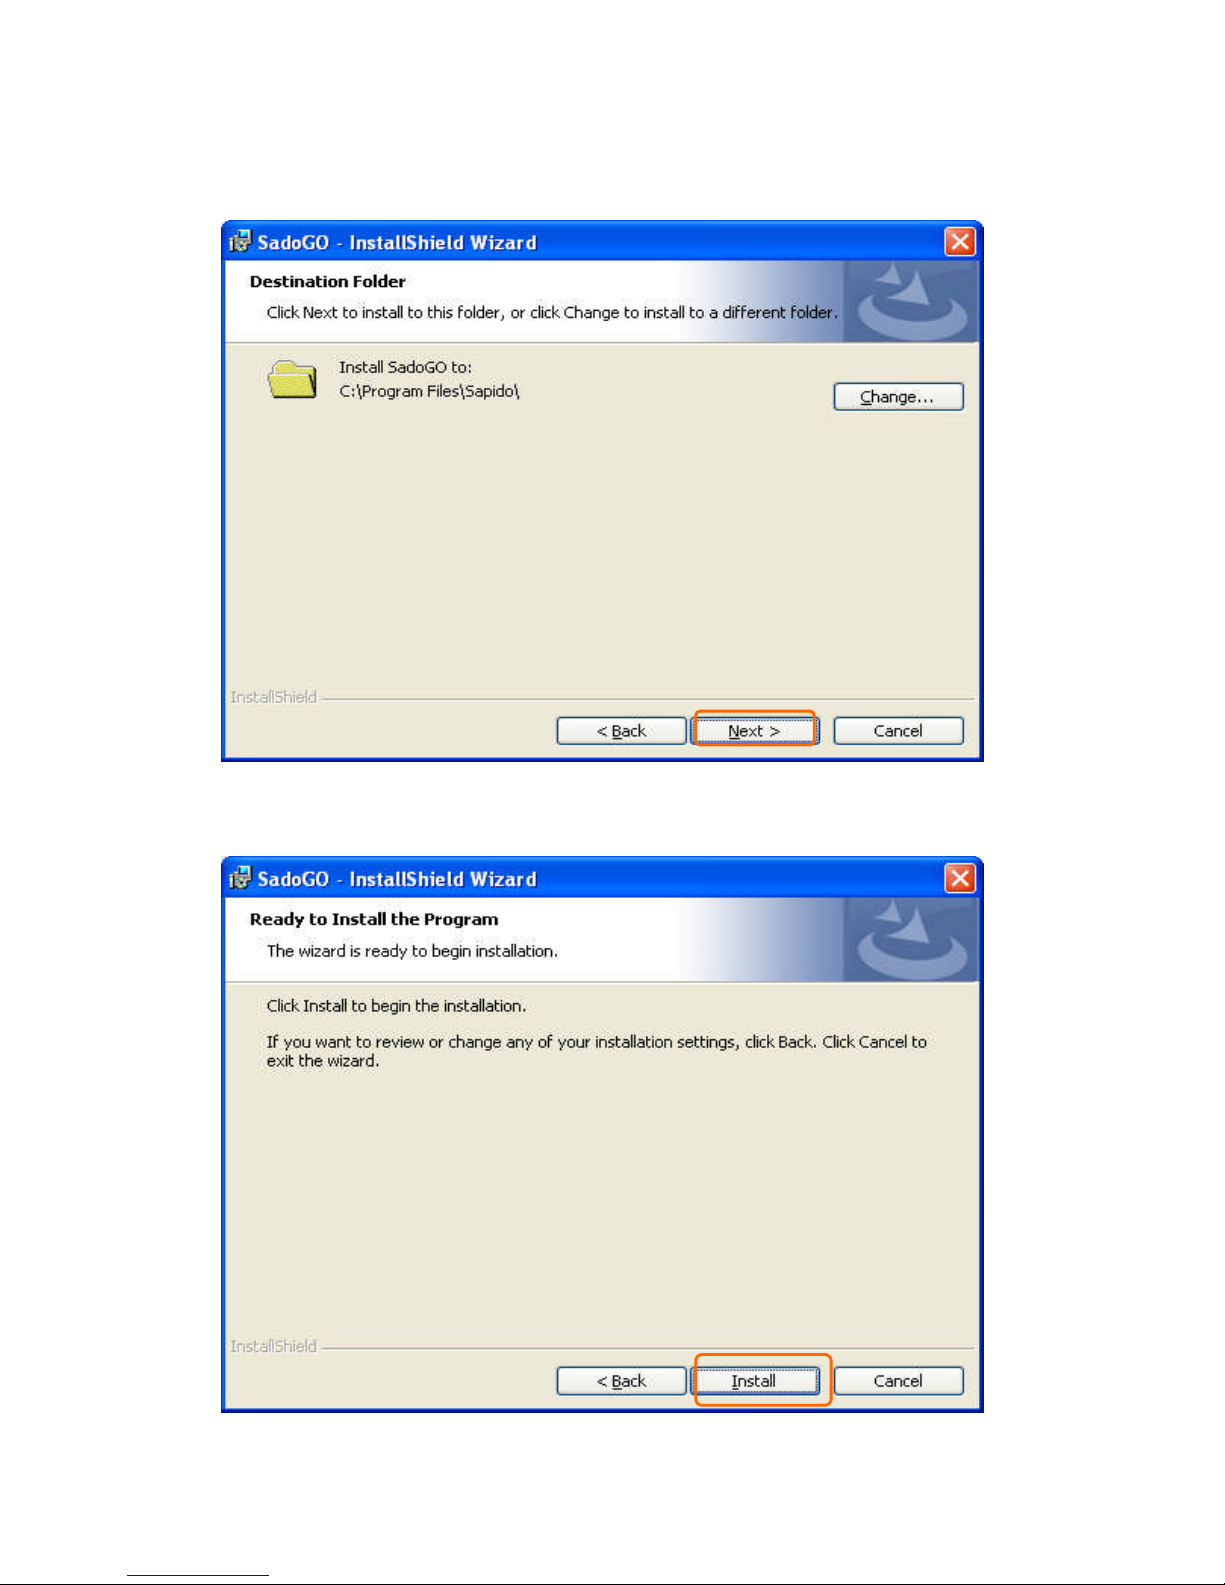
Step 5.
Please click “Next”button to continue Setup Wizard.
Step 6.
Please click “Install”button to run the installation.
Page 7
http://www.sapido.com.tw 7
SadoGO Manual V1.0
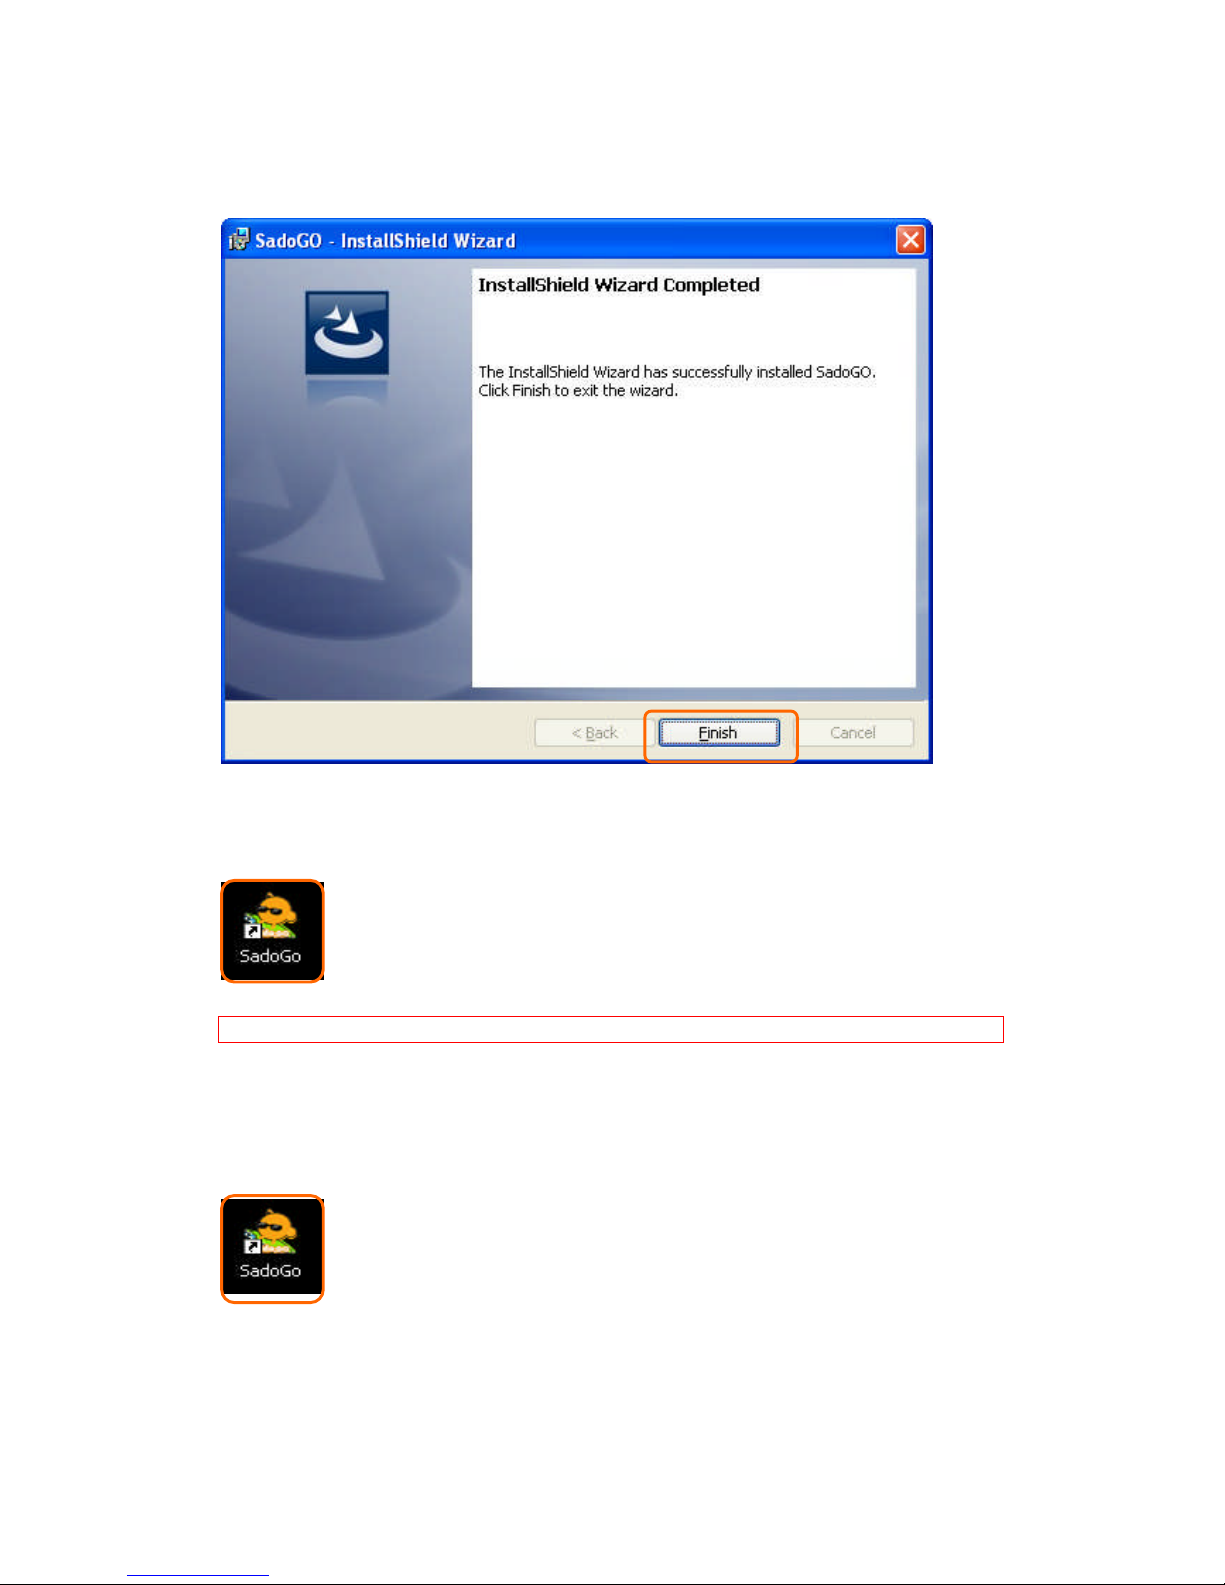
Step 7.
Please click “Finish”button to finalize the installation.
1. After installation, “SadoGo” icon will appear on desktop.
Note: You need to install Ver. 2.0 above .NET before install SadoGo.
1.3 Using the SadoGo
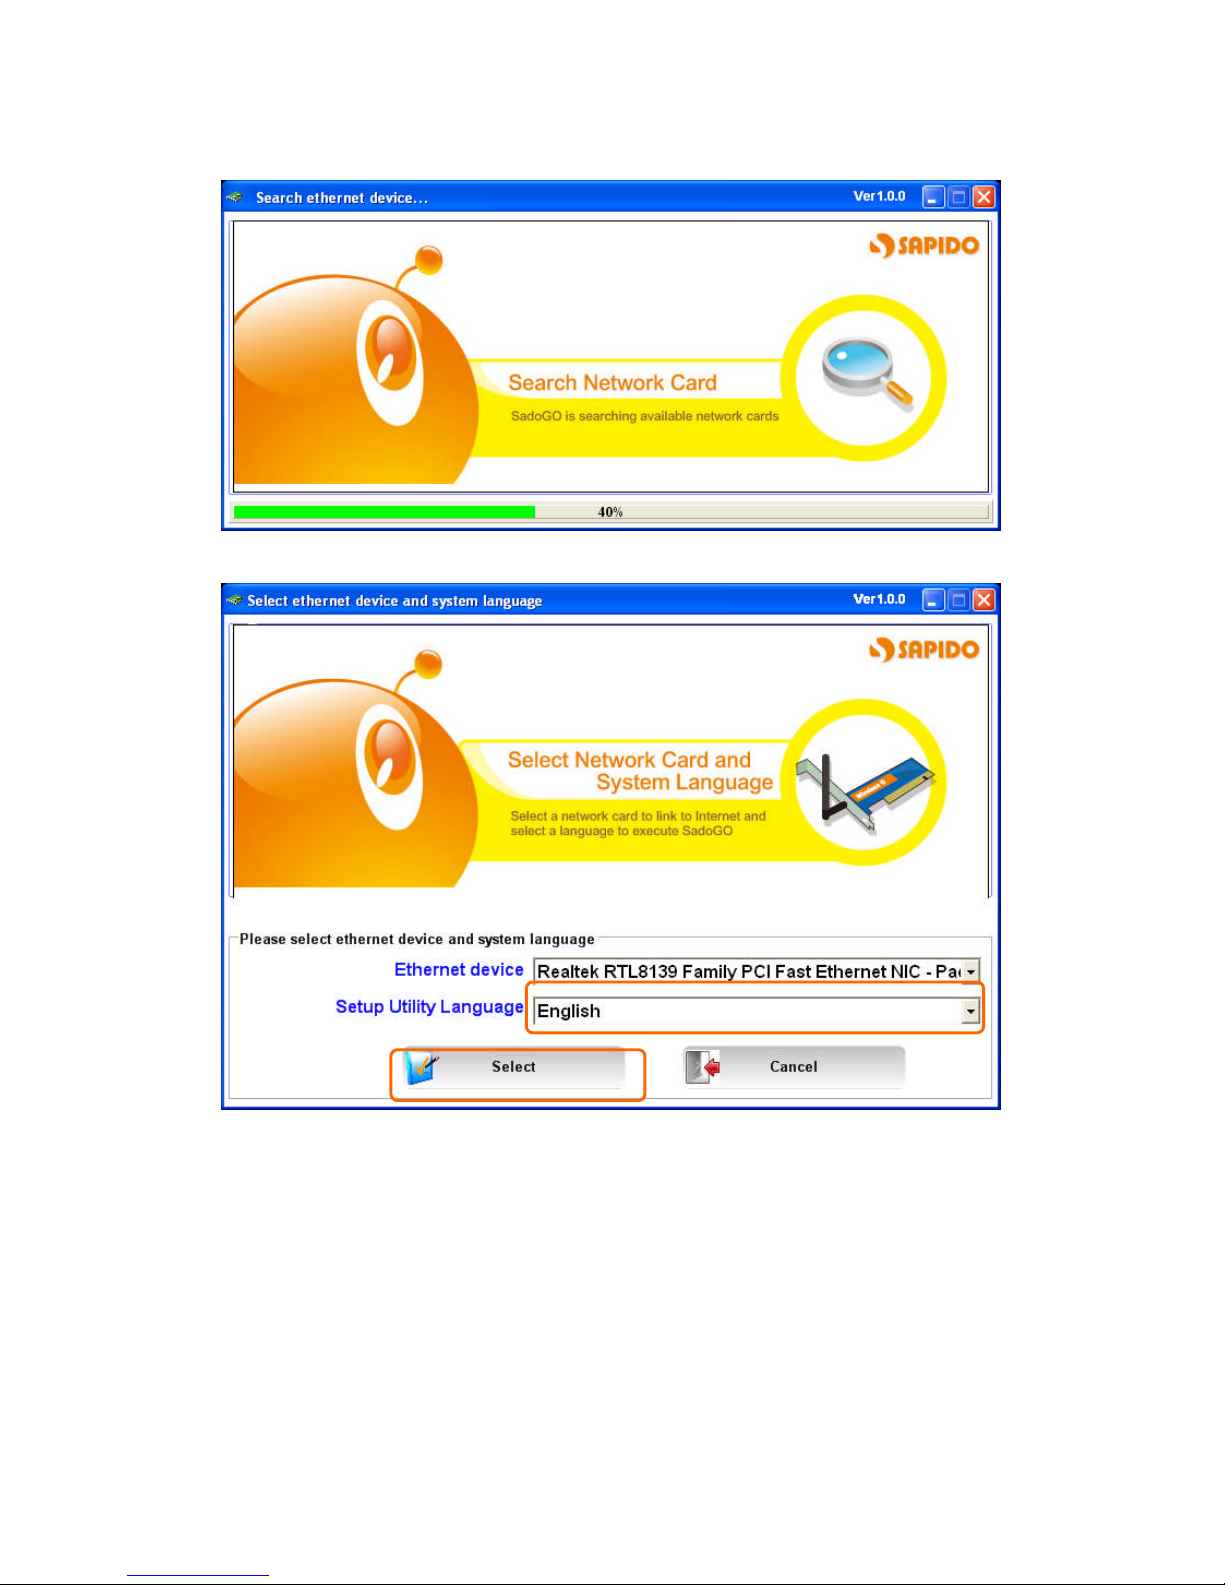
1. Please click “SadoGo”icon to make further setups.
Page 8
http://www.sapido.com.tw 8
SadoGO Manual V1.0
2. Please wait 10 seconds during Ethernet device search.
3. Please select correct Ethernet device and utility language.
Page 9
http://www.sapido.com.tw 9
SadoGO Manual V1.0
Chapter2Router Mode
GR-1102 combines Router and AP together, provides wired or wireless network
setup, also has NAT and DHCP functions. It can let multiple computers surfing the
internet at the same time.
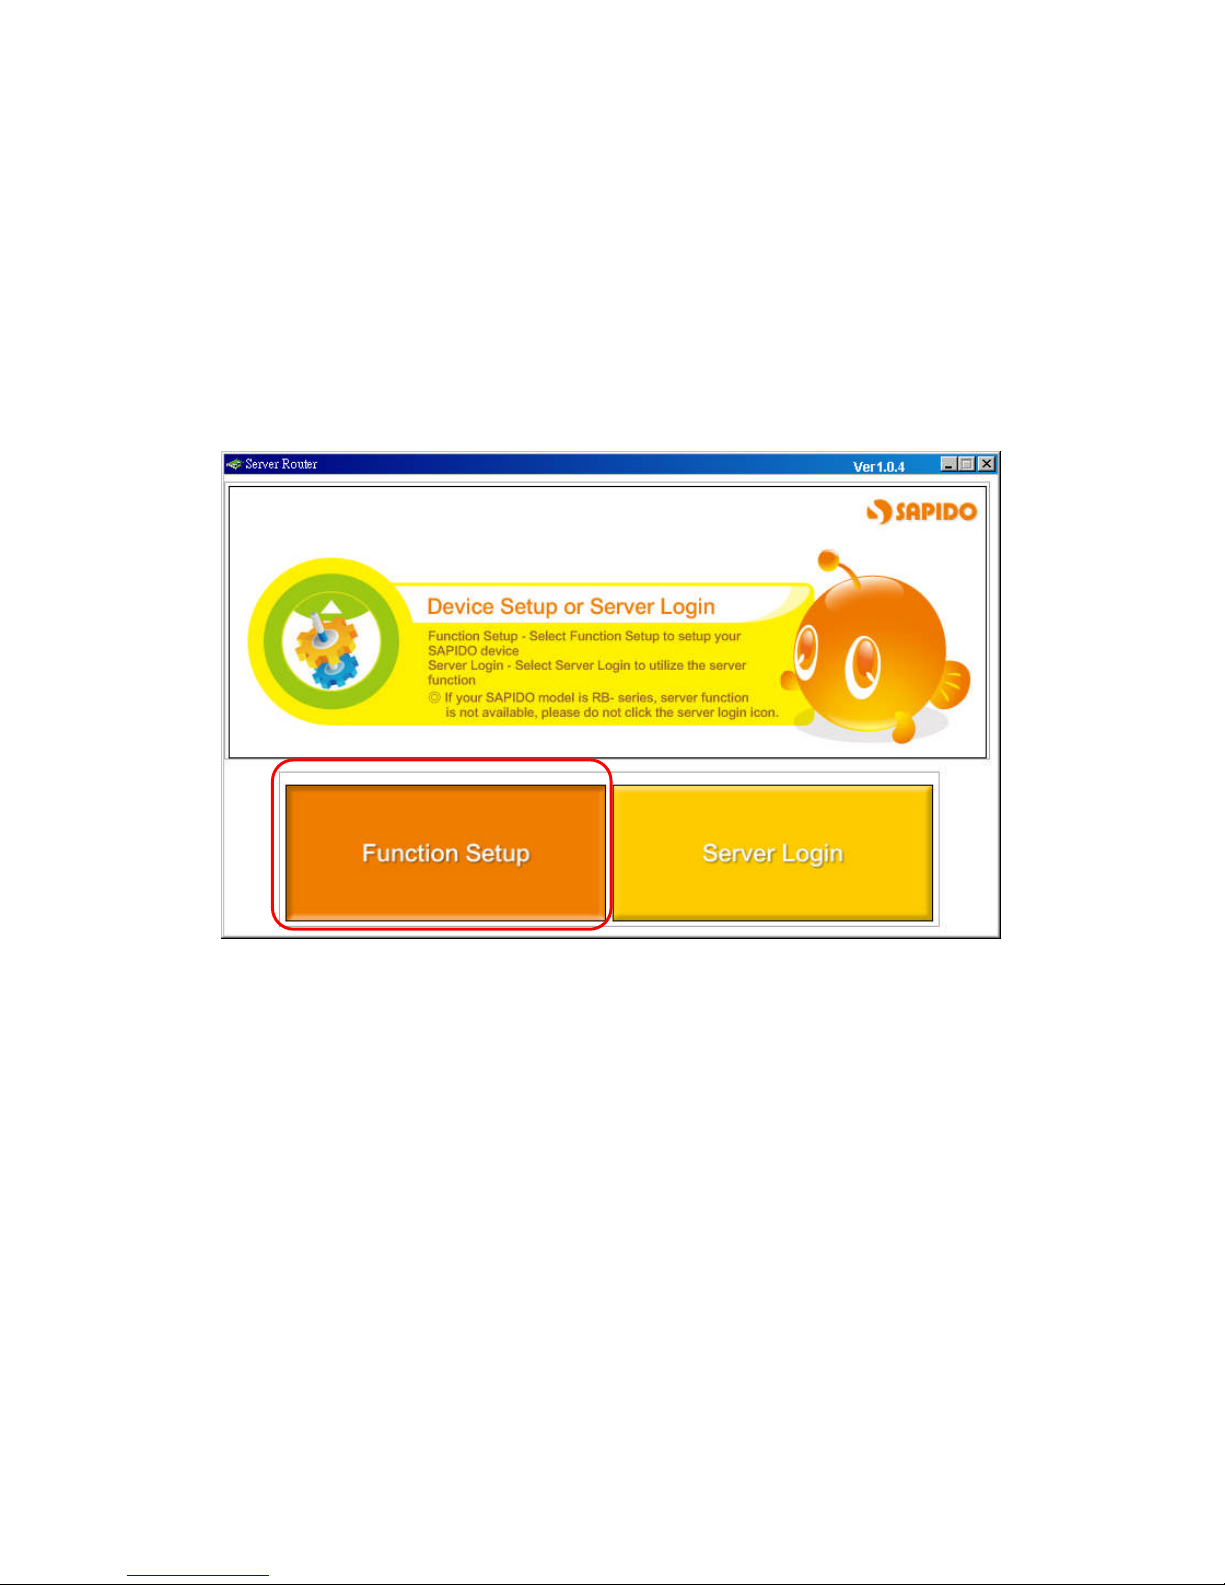
2.1 Enter Setup Page
On Main setup page, please select “Function Setup”to configure.
Page 10
http://www.sapido.com.tw 10
SadoGO Manual V1.0
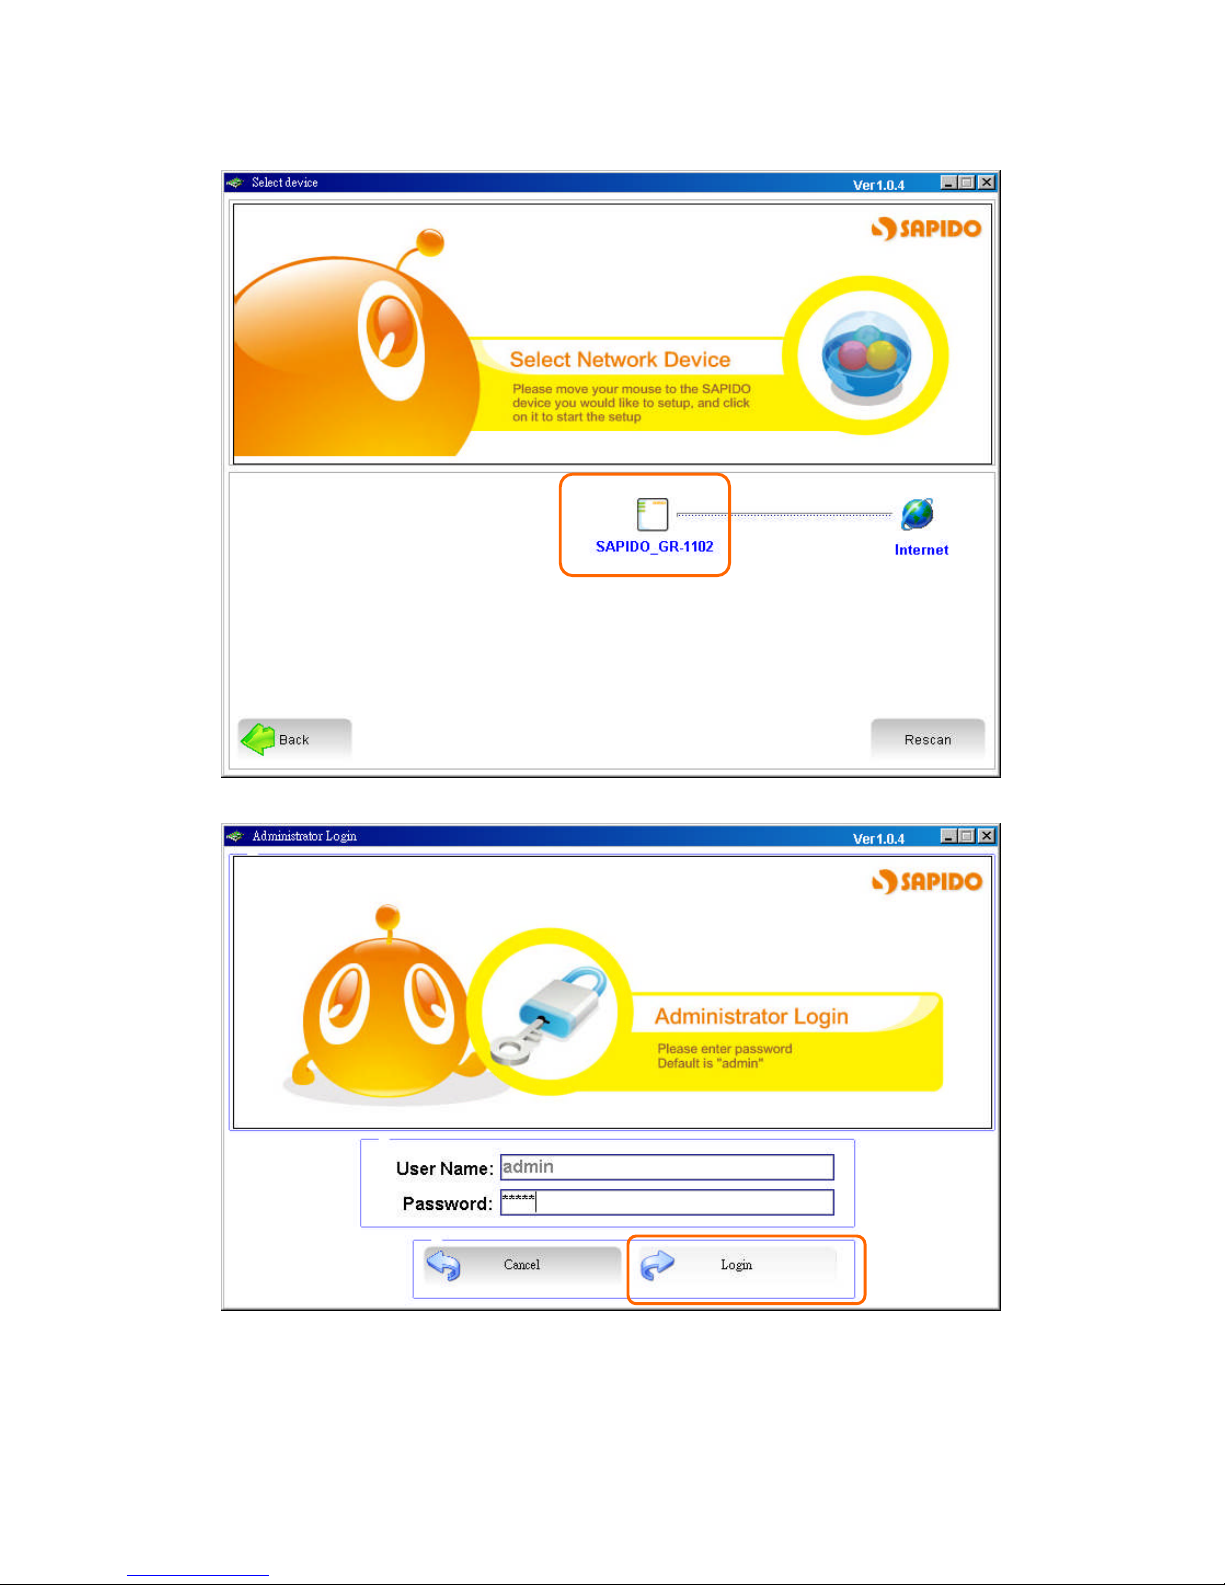
Double click the icon of GR-1102 to enter the next page.
The default User Name and Password are “admin”。
Page 11

http://www.sapido.com.tw 11
SadoGO Manual V1.0
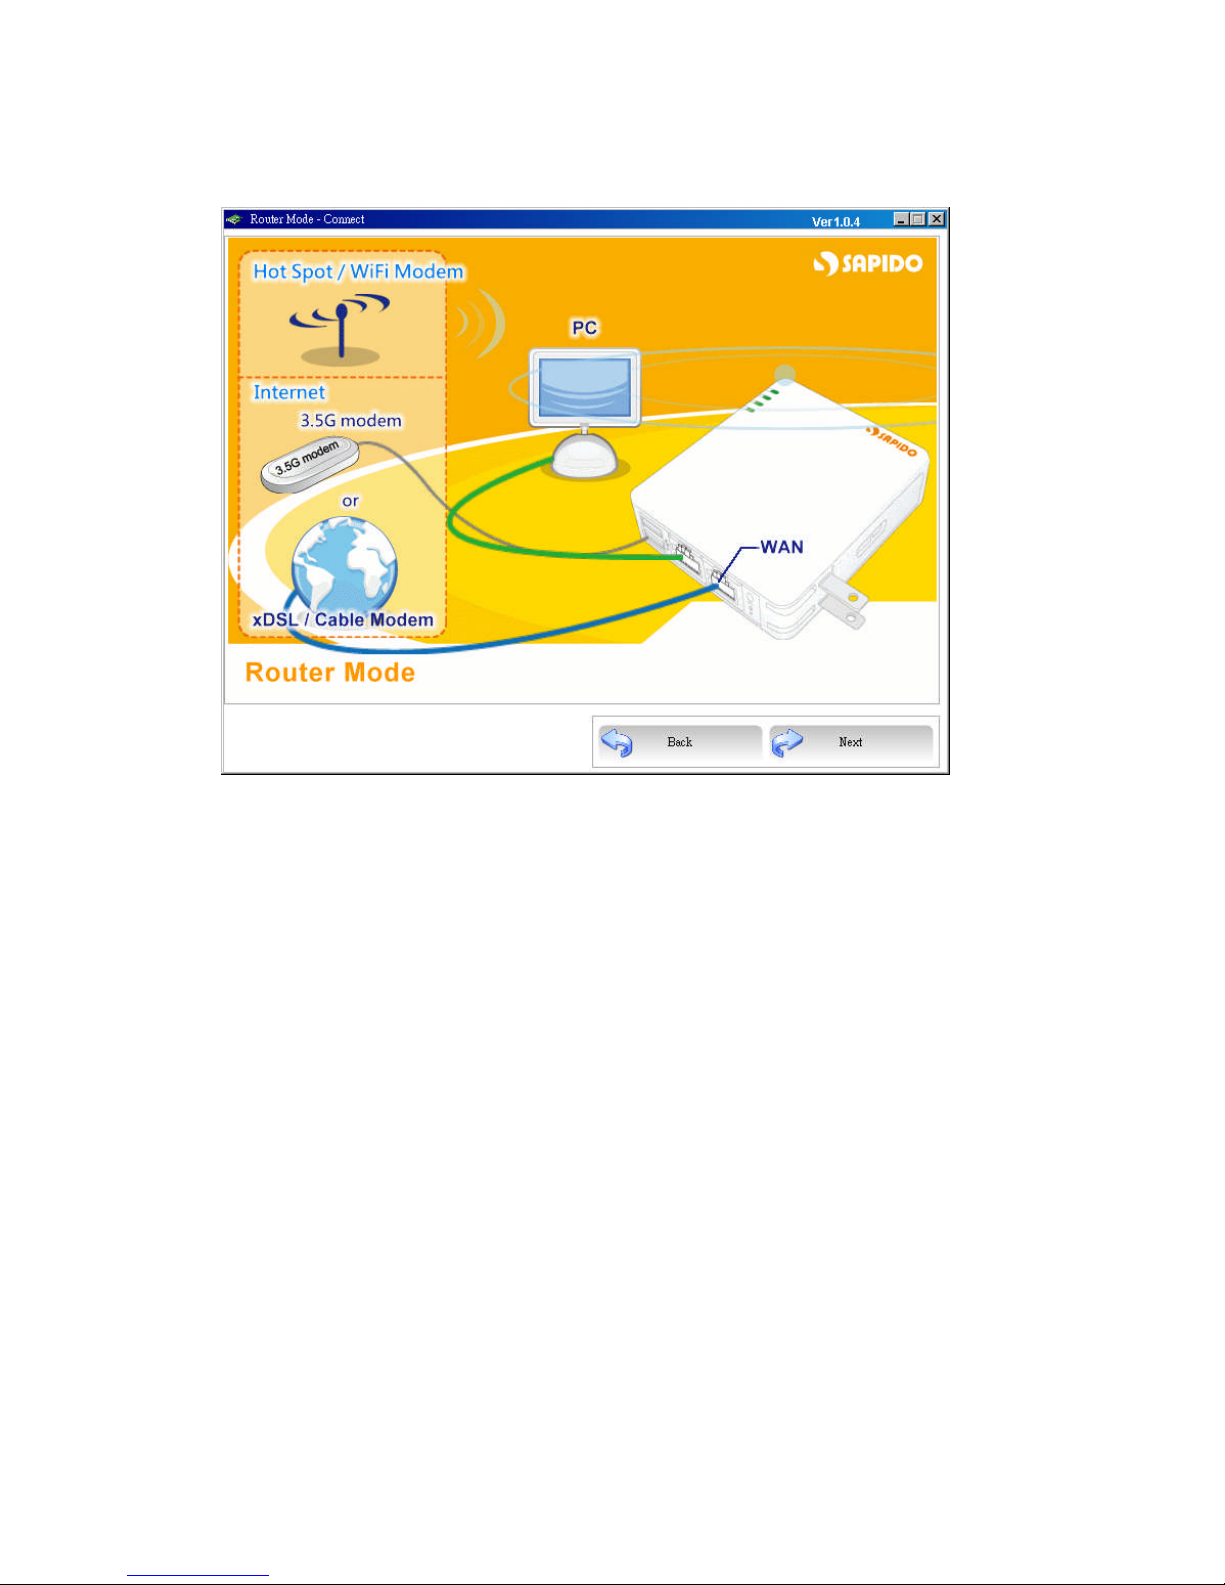
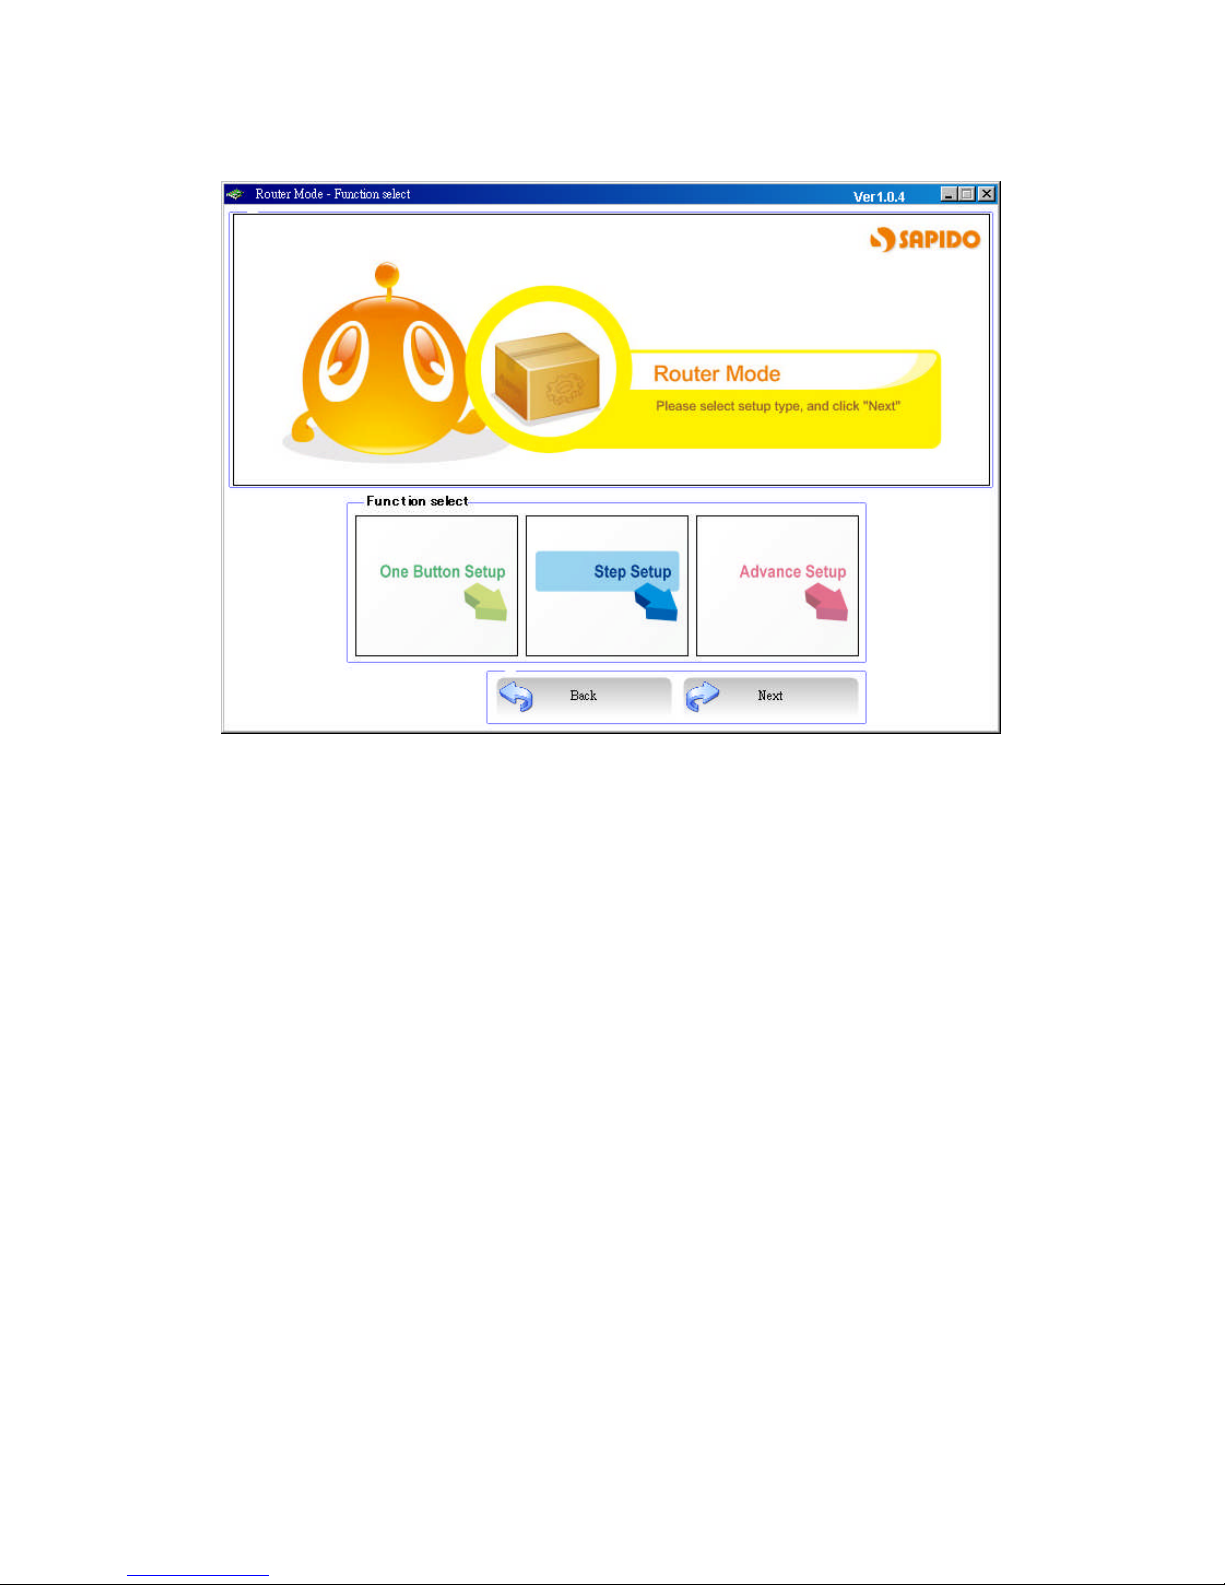
Please select one of three setup functions.
Please connect to internet wired or wirelessly then click “Next”.
Page 12
http://www.sapido.com.tw 12
SadoGO Manual V1.0
2.2 One Button Setup
Click the “Next”to enter the next page.
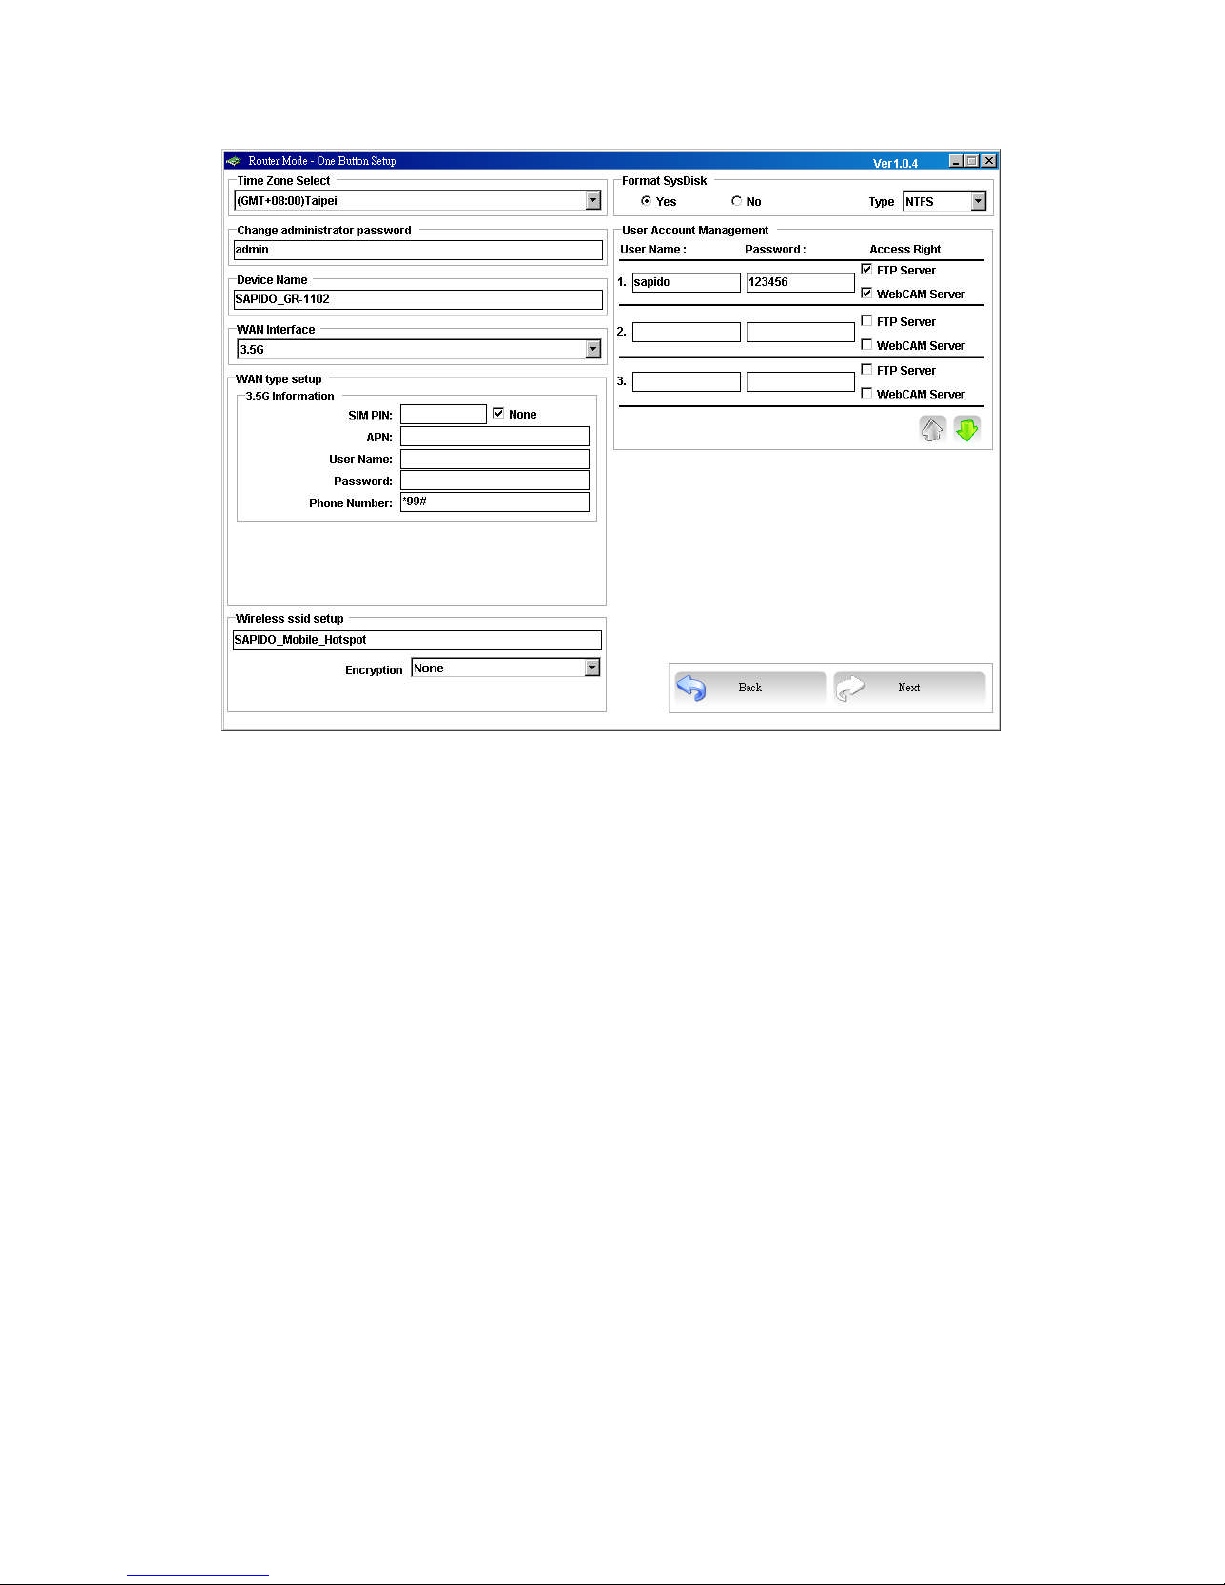
GR-1102 provides an unique One Button Setup page; user can easily finish settings
at once.
Page 13
http://www.sapido.com.tw 13
SadoGO Manual V1.0
1. Time Zone Select
Please select the desired time zone and NTP server.
2. Change Administrator Password
Users can change the password for admin login, the default is admin。
3. Device Name
Users can change the device name of GR-1102; the default is GR-1102.
4. WAN Interface
Please select the type of WAN.
5. Wireless SSID Setup
Users can define the SSID of GR-1102, the default value is
3.5G_Server_Router.
6. Format SysDisk
User can format the USB mass storage device to FAT16/32、NTFS、EXT3
formation.
7. User Account Management
Users can add new account/password and privileges.
Page 14
http://www.sapido.com.tw 14
SadoGO Manual V1.0
2.3 Step Setup
Please choose Step Setup to enter。
Page 15
http://www.sapido.com.tw 15
SadoGO Manual V1.0
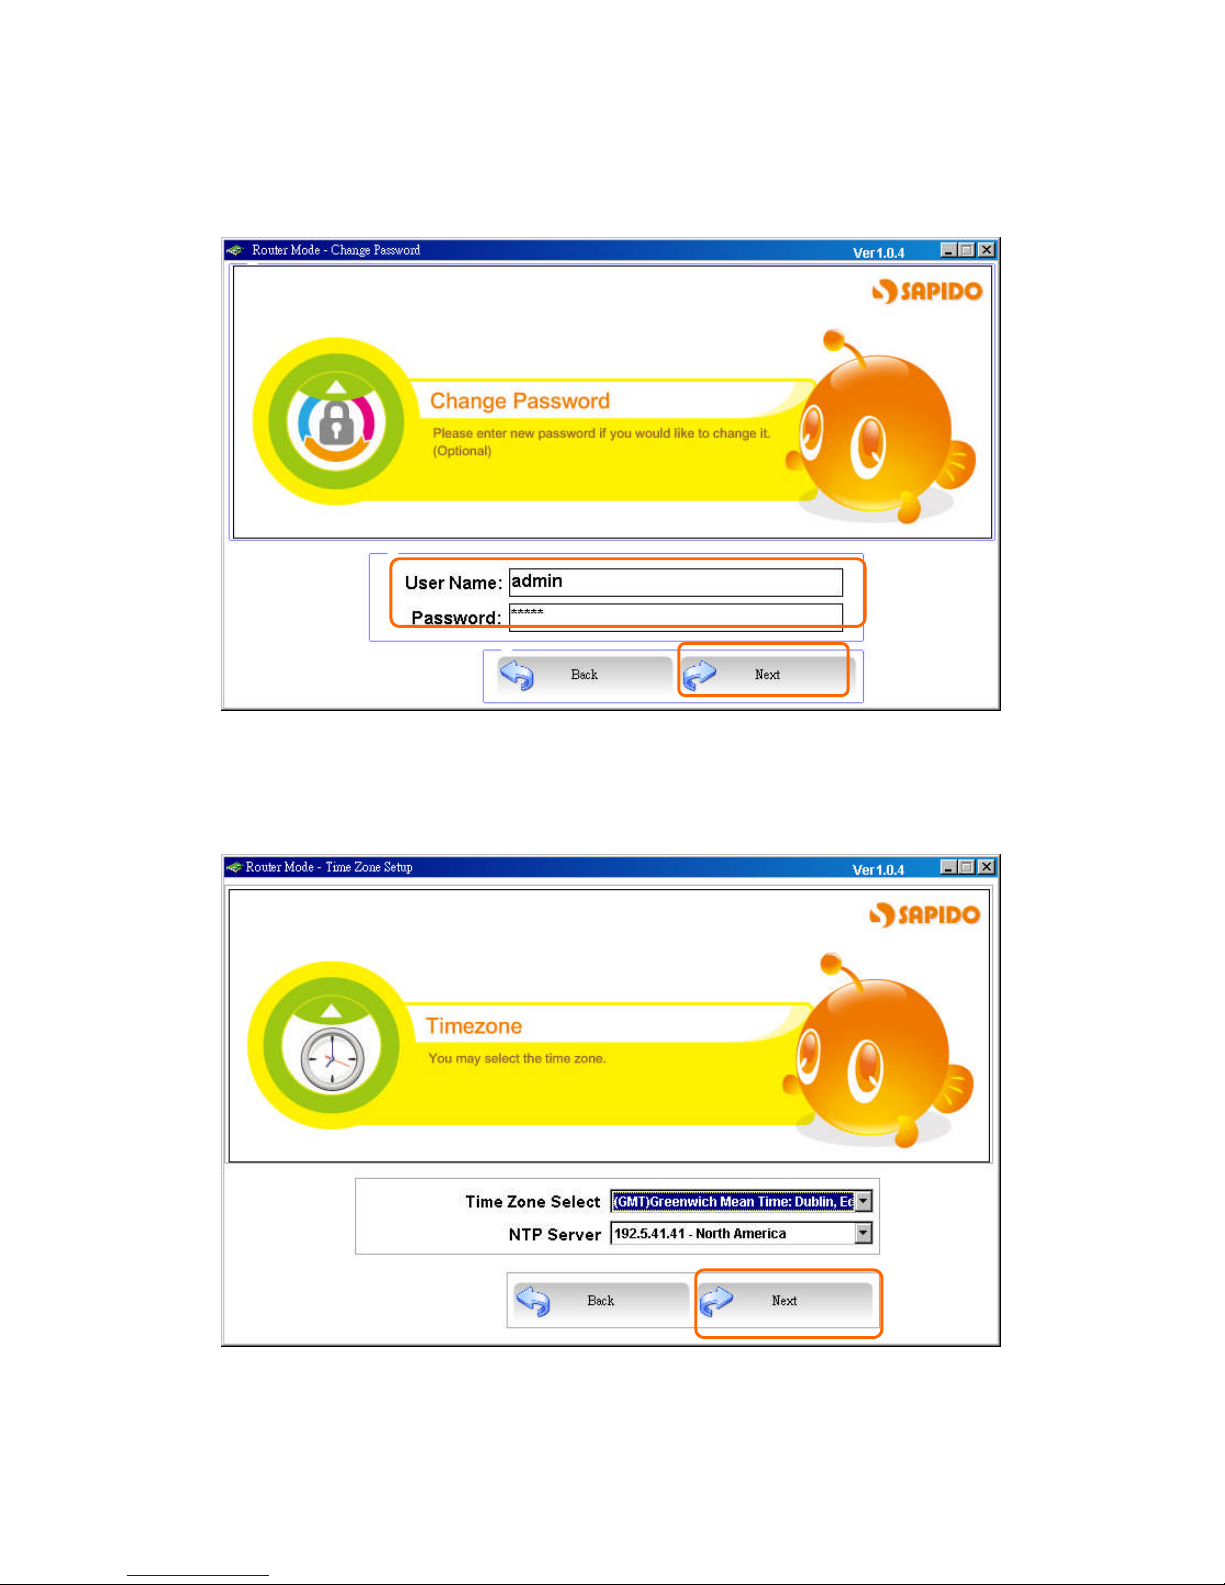
2.3.1 Change Password
Users can change the password, please enter the new password.
Click Next to go to the next page.
2.3.2 Time Zone Setup
Please select the desired time zone and NTP server.
Click Next to go to the next page.
Page 16
http://www.sapido.com.tw 16
SadoGO Manual V1.0
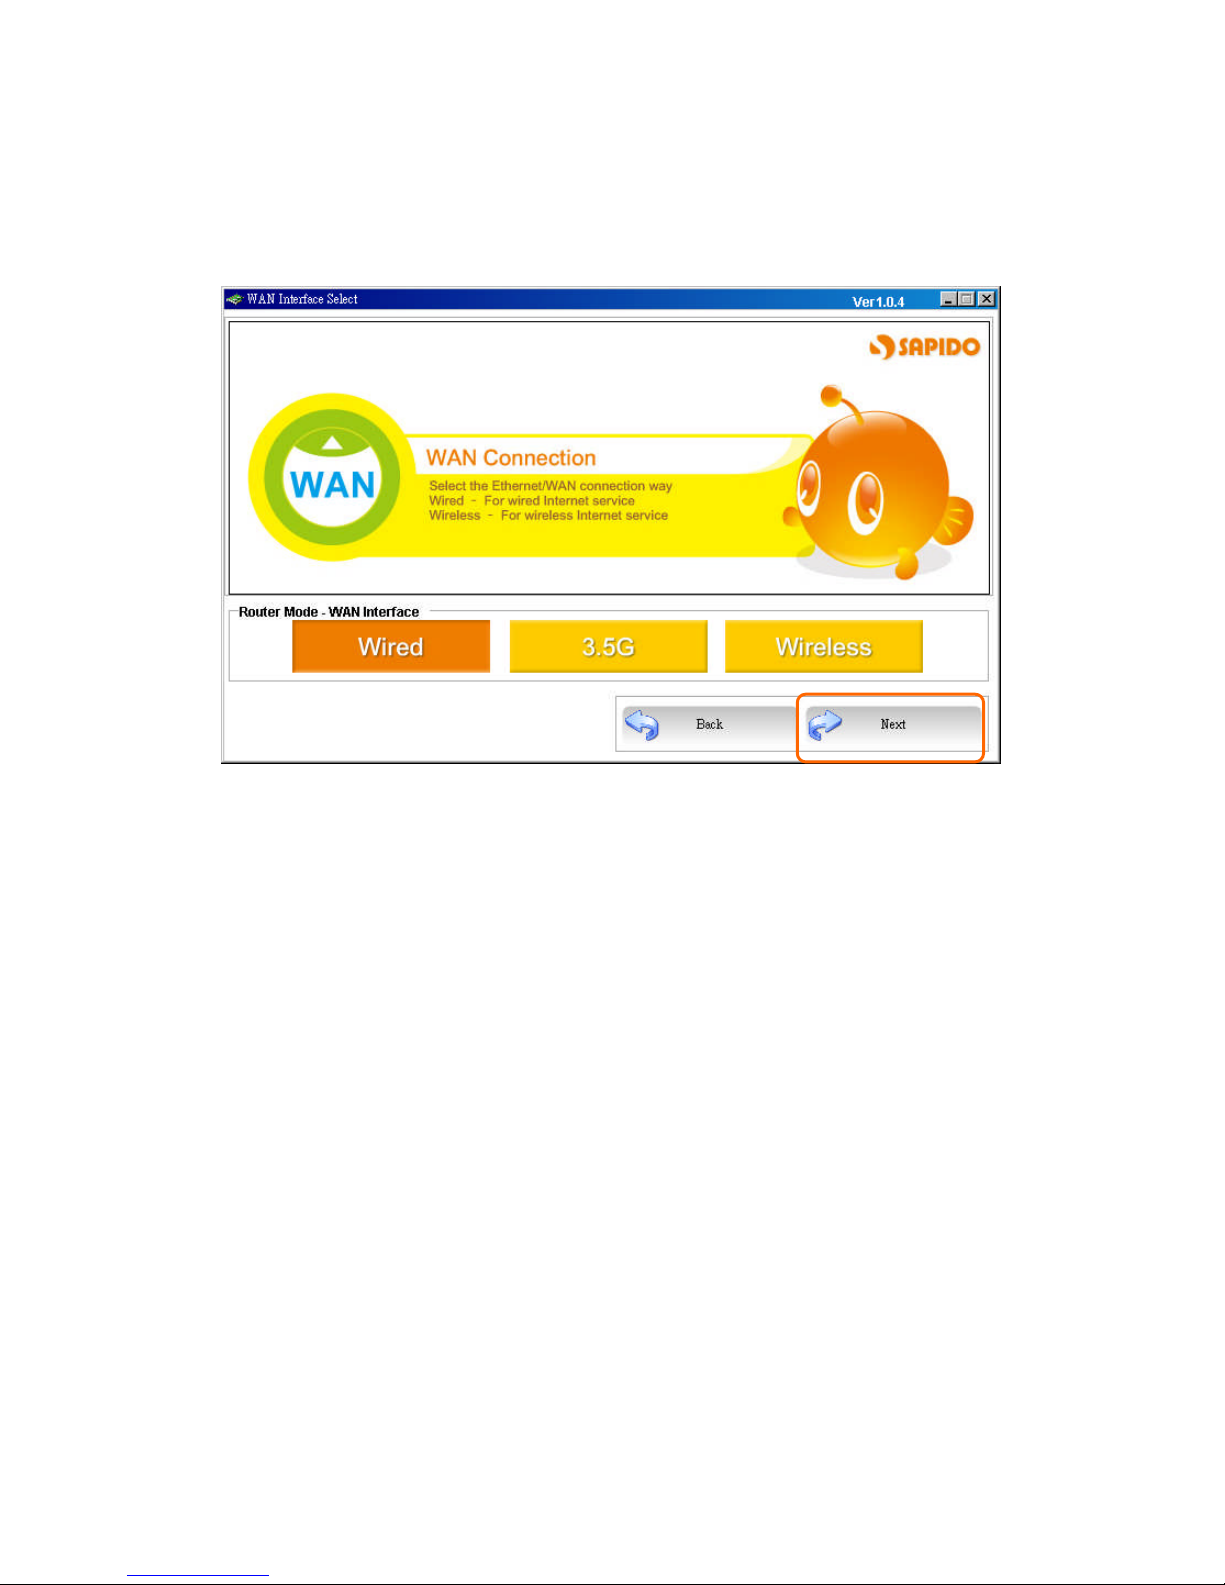
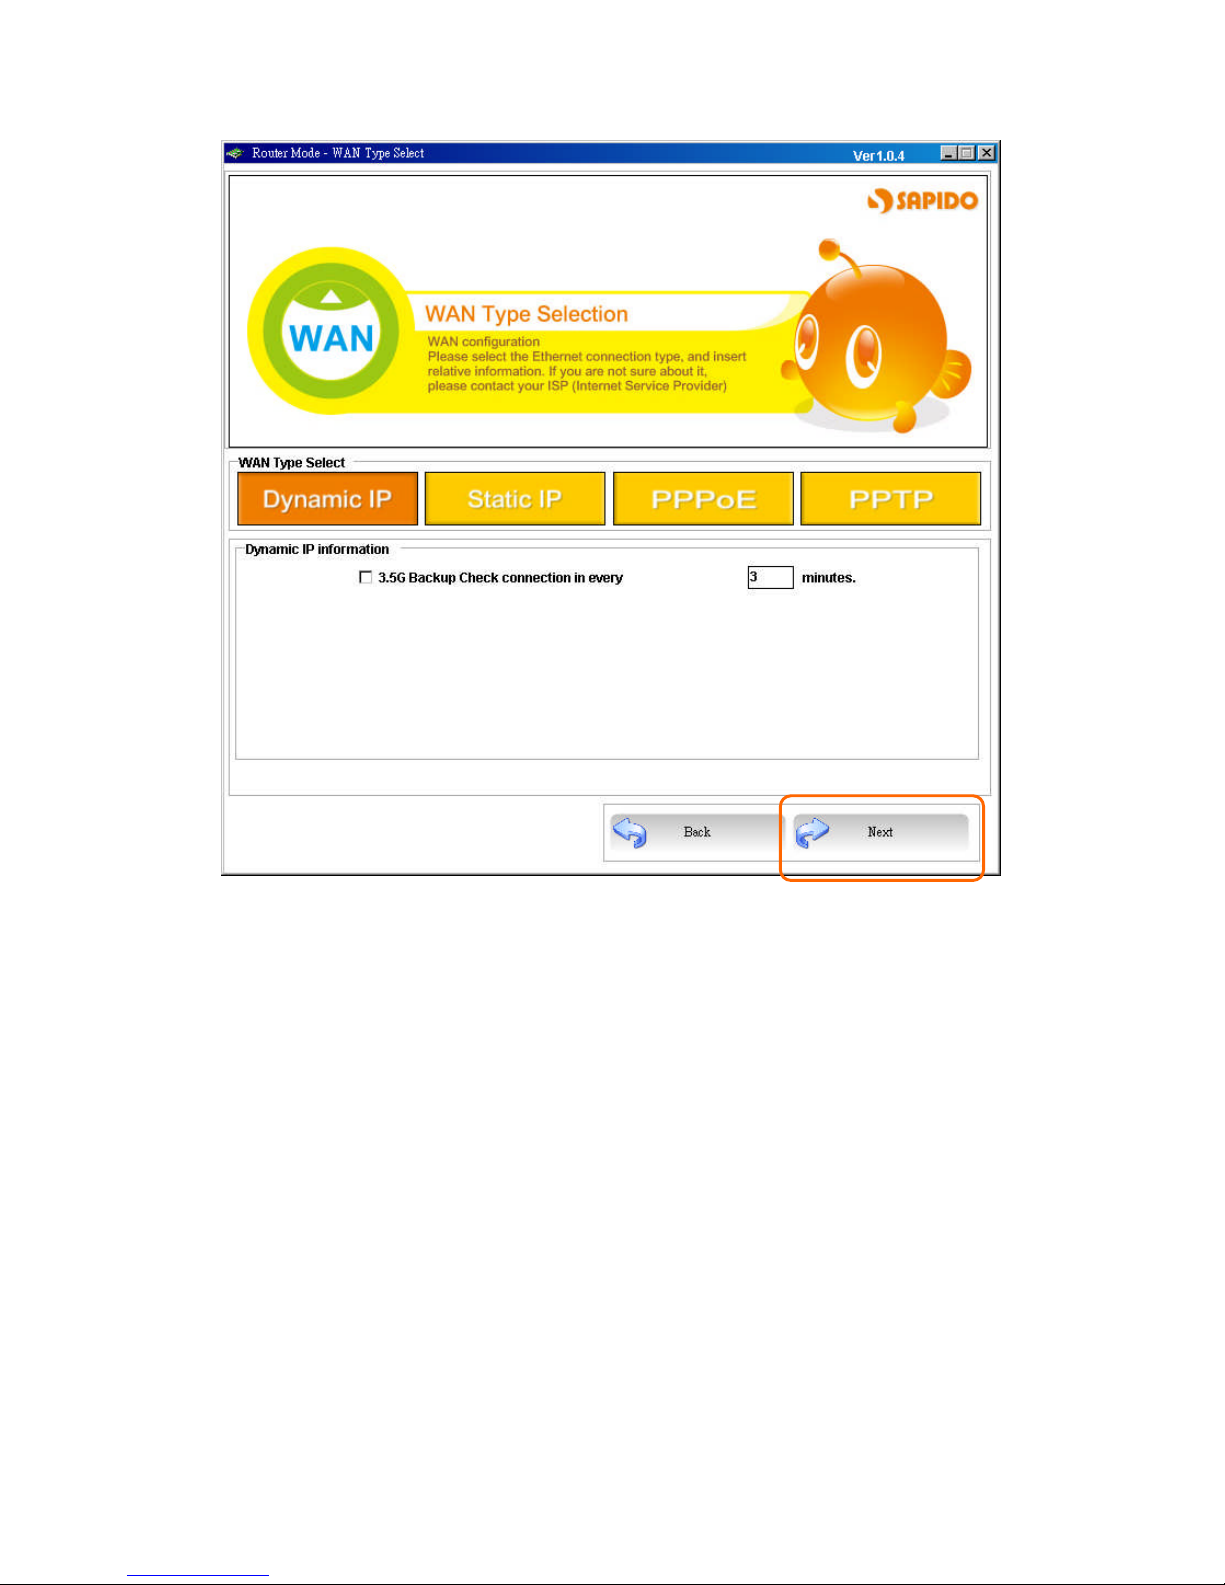
2.3.3 WAN Interface Setup
Router Mode supports 3 major WAN connecting types: Ethernet Port, 3.5G, and
Wireless.
Click Next to go to the next page.
Page 17
http://www.sapido.com.tw 17
SadoGO Manual V1.0
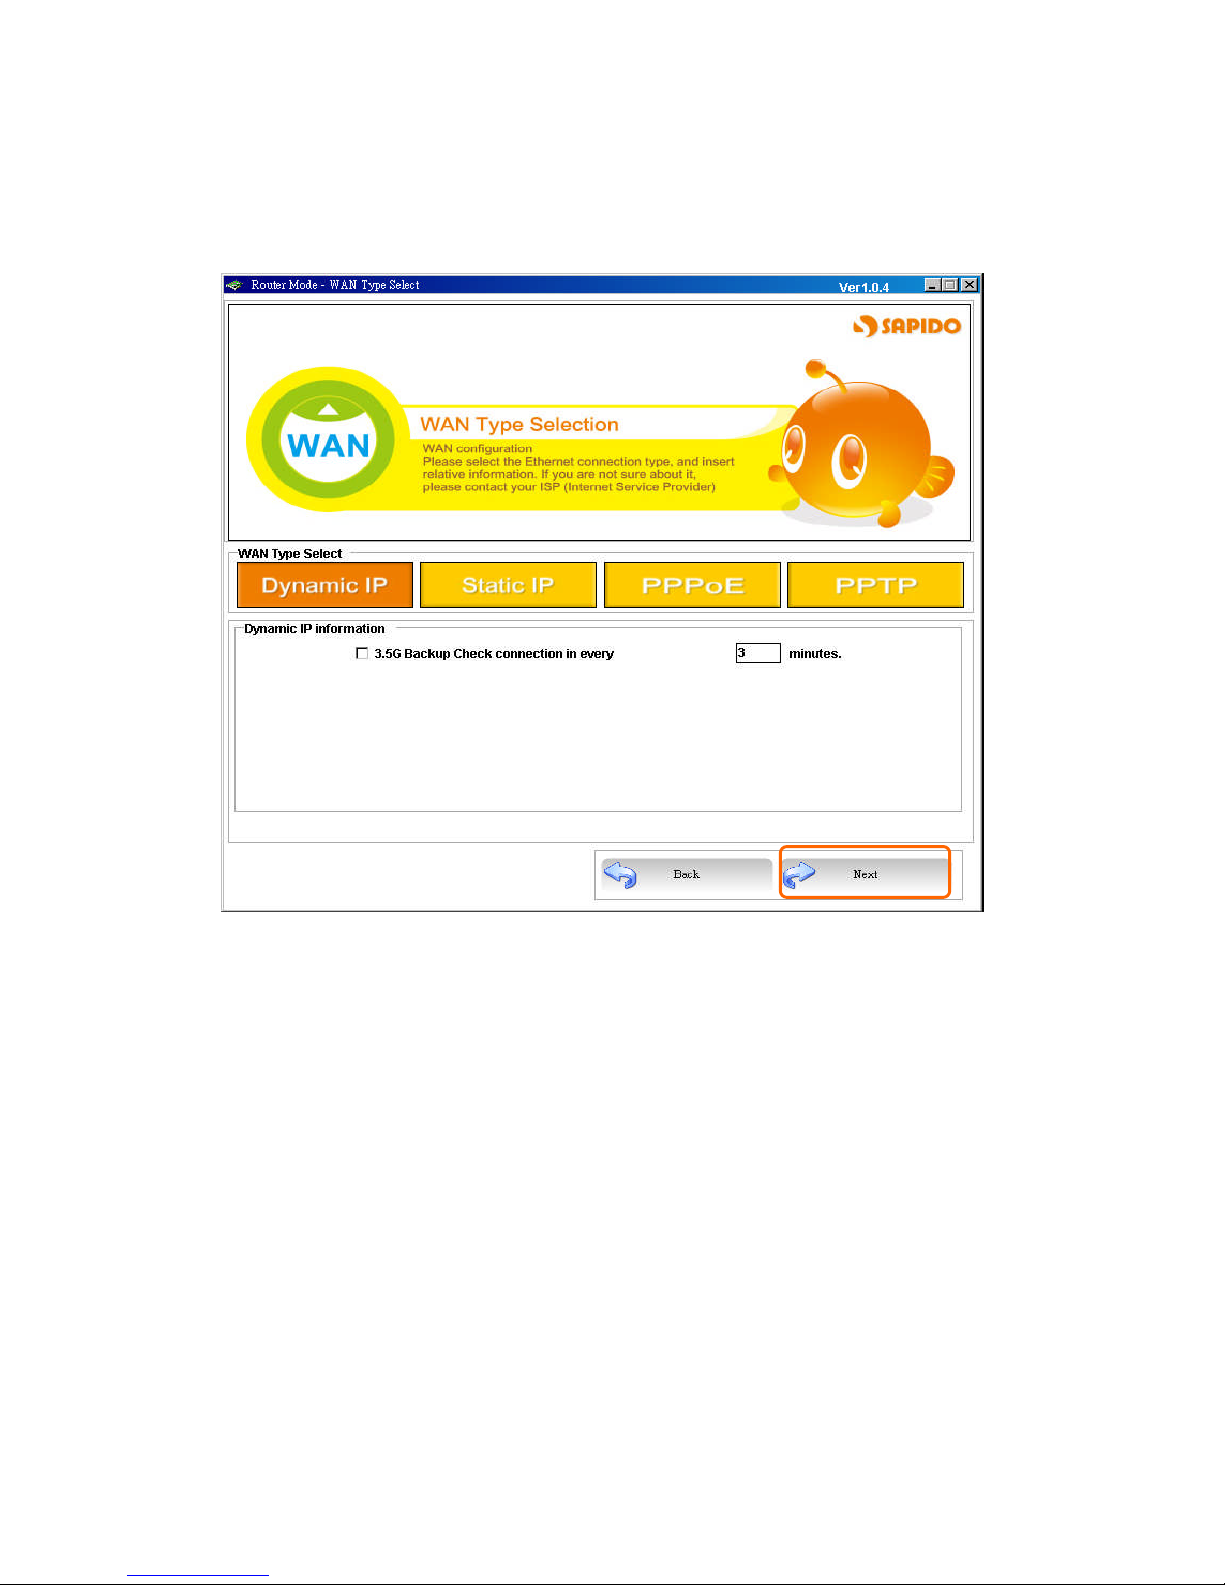
2.3.3.1 WAN – DHCP
If your Internet network is cable, please select DHCP to obtain IP address from your
ISP automatically.
Click Next to go to the next page.
Page 18
http://www.sapido.com.tw 18
SadoGO Manual V1.0
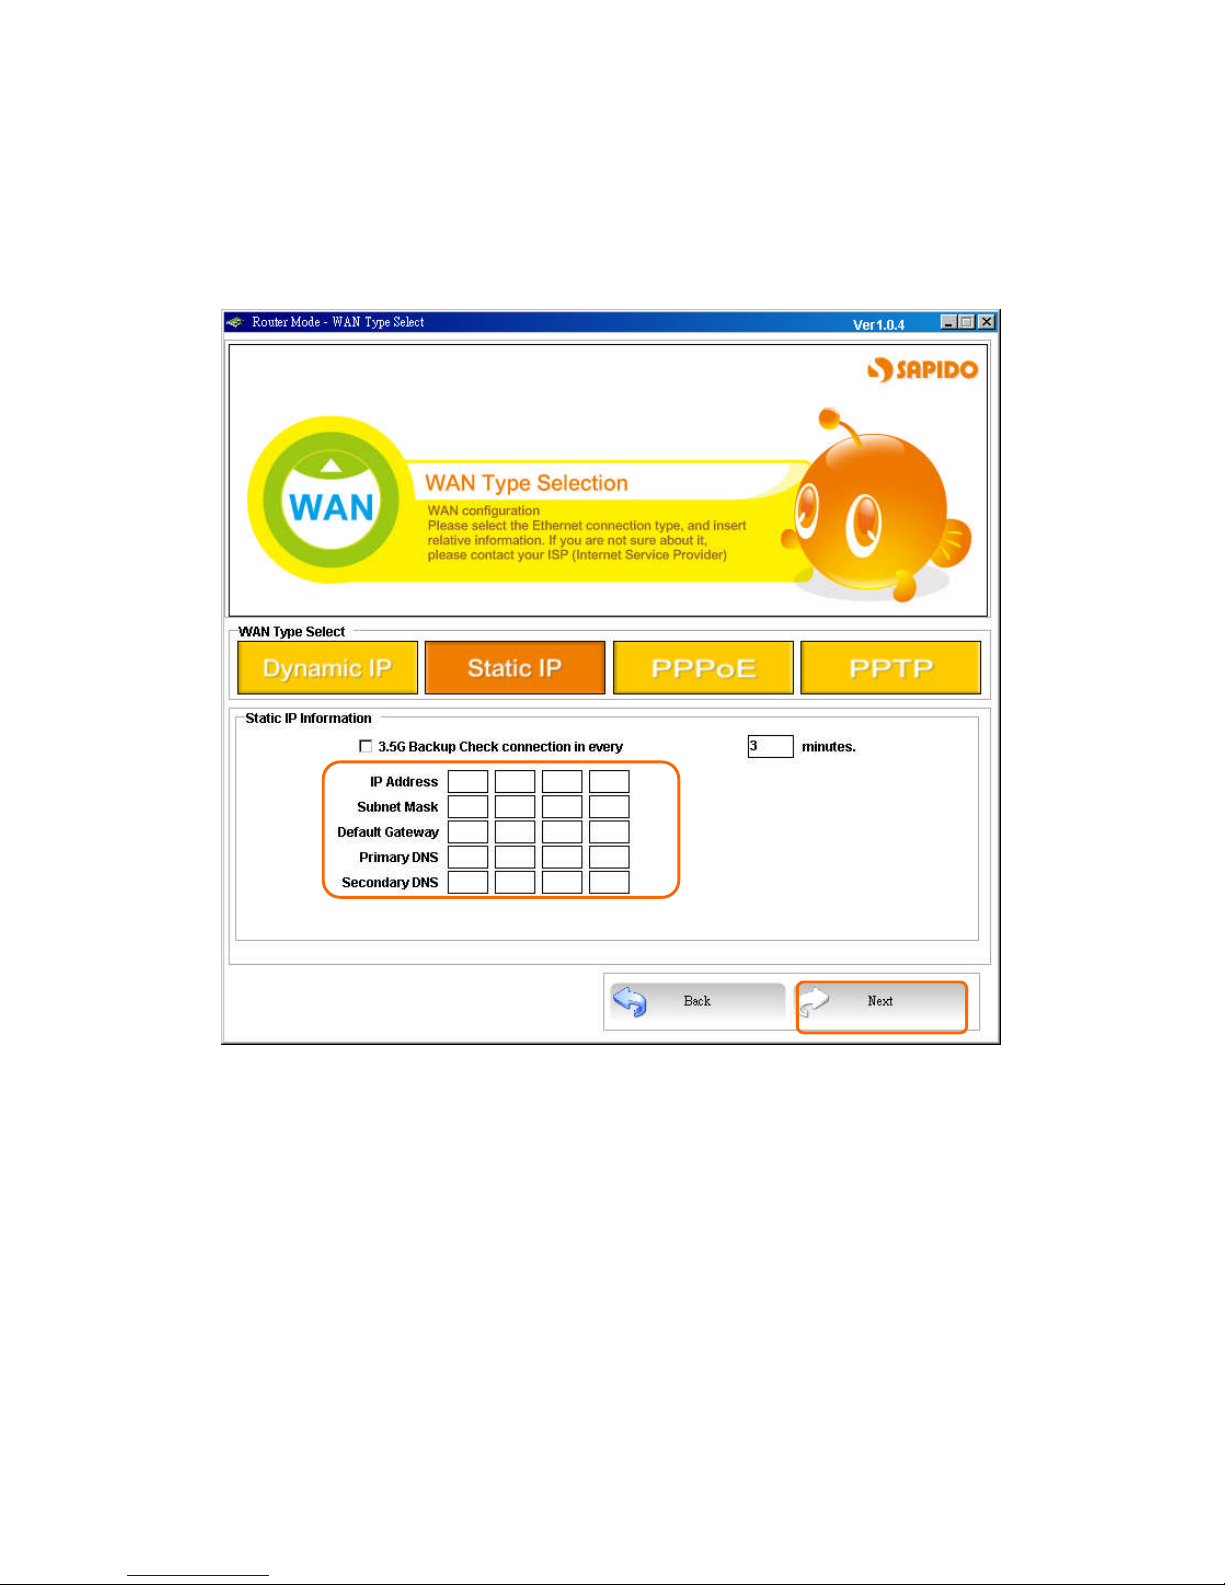
2.3.3.2 WAN – Static IP
If your ISP provides static IP without inputting account name and password, please
select Static IP. Please input information from your ISP.
Click Next to go to the next page.
Input information from your
ISP.
Page 19

http://www.sapido.com.tw 19
SadoGO Manual V1.0
2.3.3.3 WAN – PPPoE
If your Internet network is PPPoE dial u, please select PPPoE. You must input
account name and password from your ISP.
Click Next to go to the next page.
Please input user name
and password from your
ISP.
Page 20

http://www.sapido.com.tw 20
SadoGO Manual V1.0
2.3.3.4 WAN – PPTP
If your Internet network is PPTP, please select PPTP. Input account name, password,
PPTP server IP, local IP, DNS, and subnet mask from your ISP.
Click Next to go to the next page.
Page 21
http://www.sapido.com.tw 21
SadoGO Manual V1.0
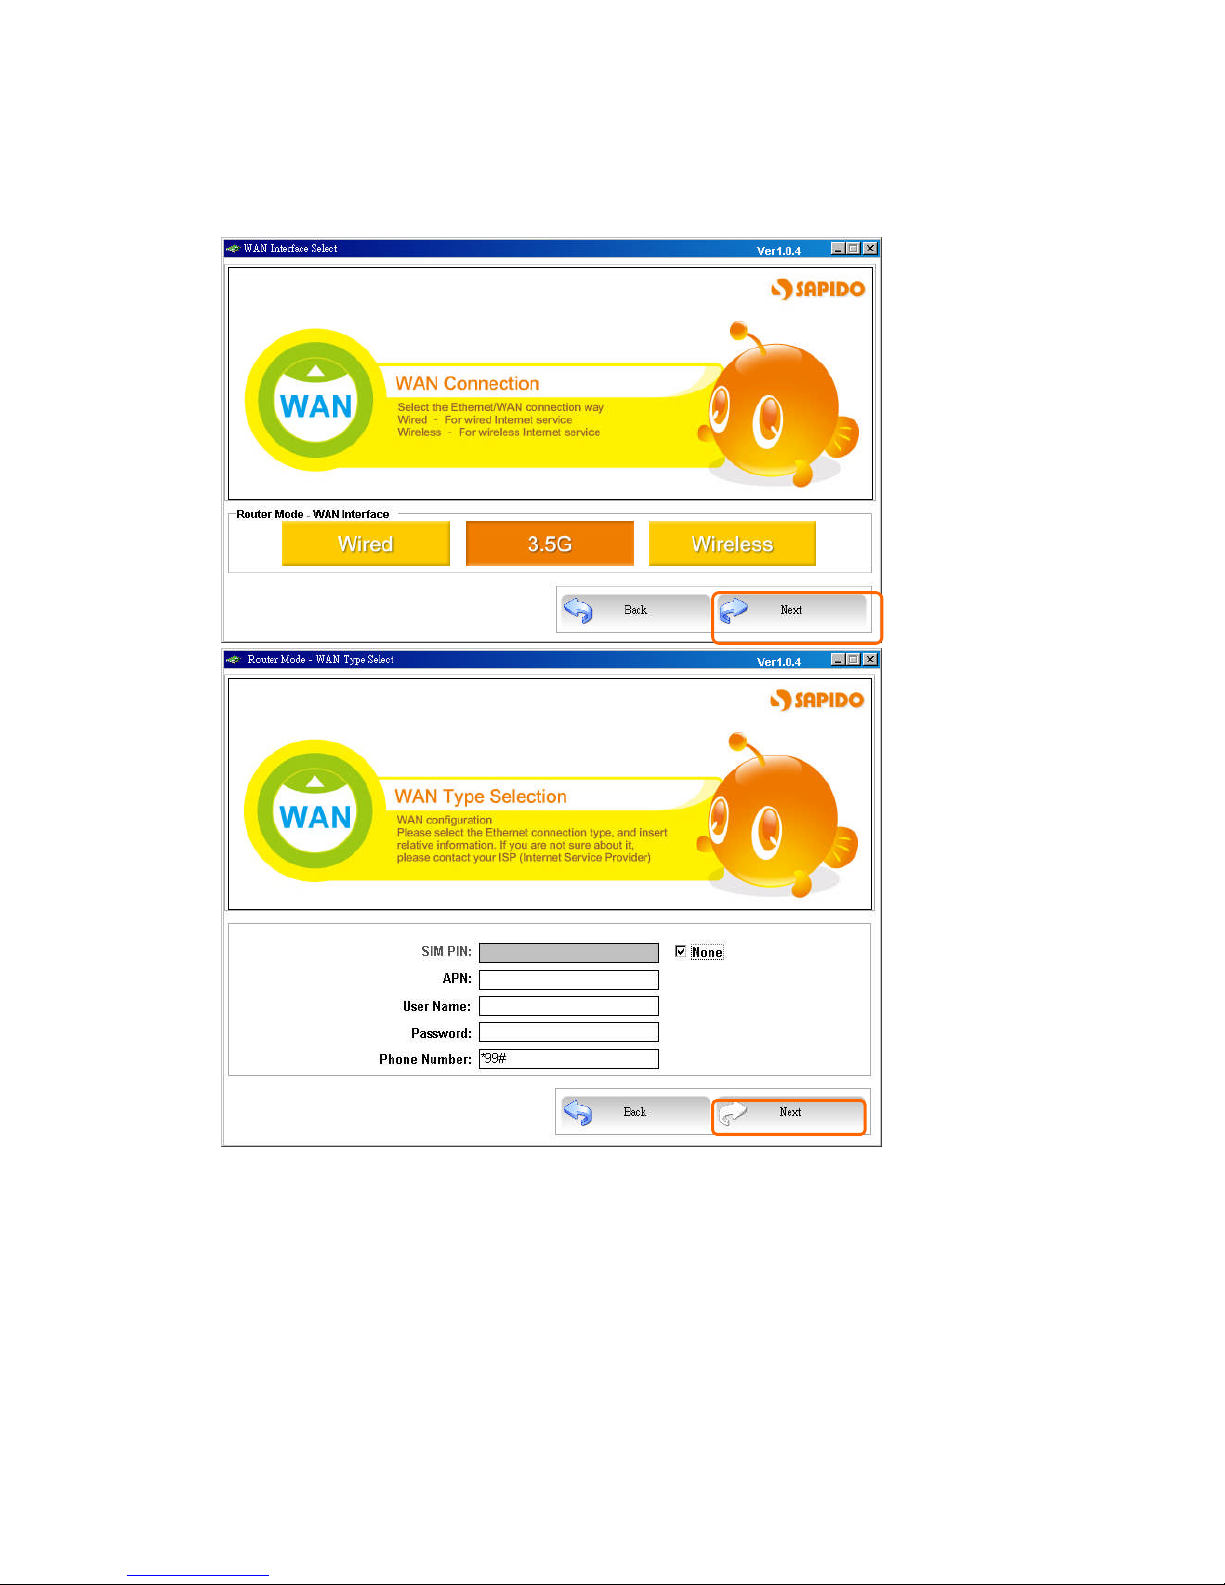
2.3.3.5 WAN – 3.5G
If you use 3.5G connect to Internet, please choose “3.5G USB Dongle”. 3.5G
connection (Connection Mode) means that users use 3.5G connect to network.
Enter relative information below:
SIM PIN: , if not, please choice “None”,
APN: internet
Phone Number: *99#
If you are not sure above information, please contact with local ISP.
Click Next to go to the next page.
Page 22
http://www.sapido.com.tw 22
SadoGO Manual V1.0
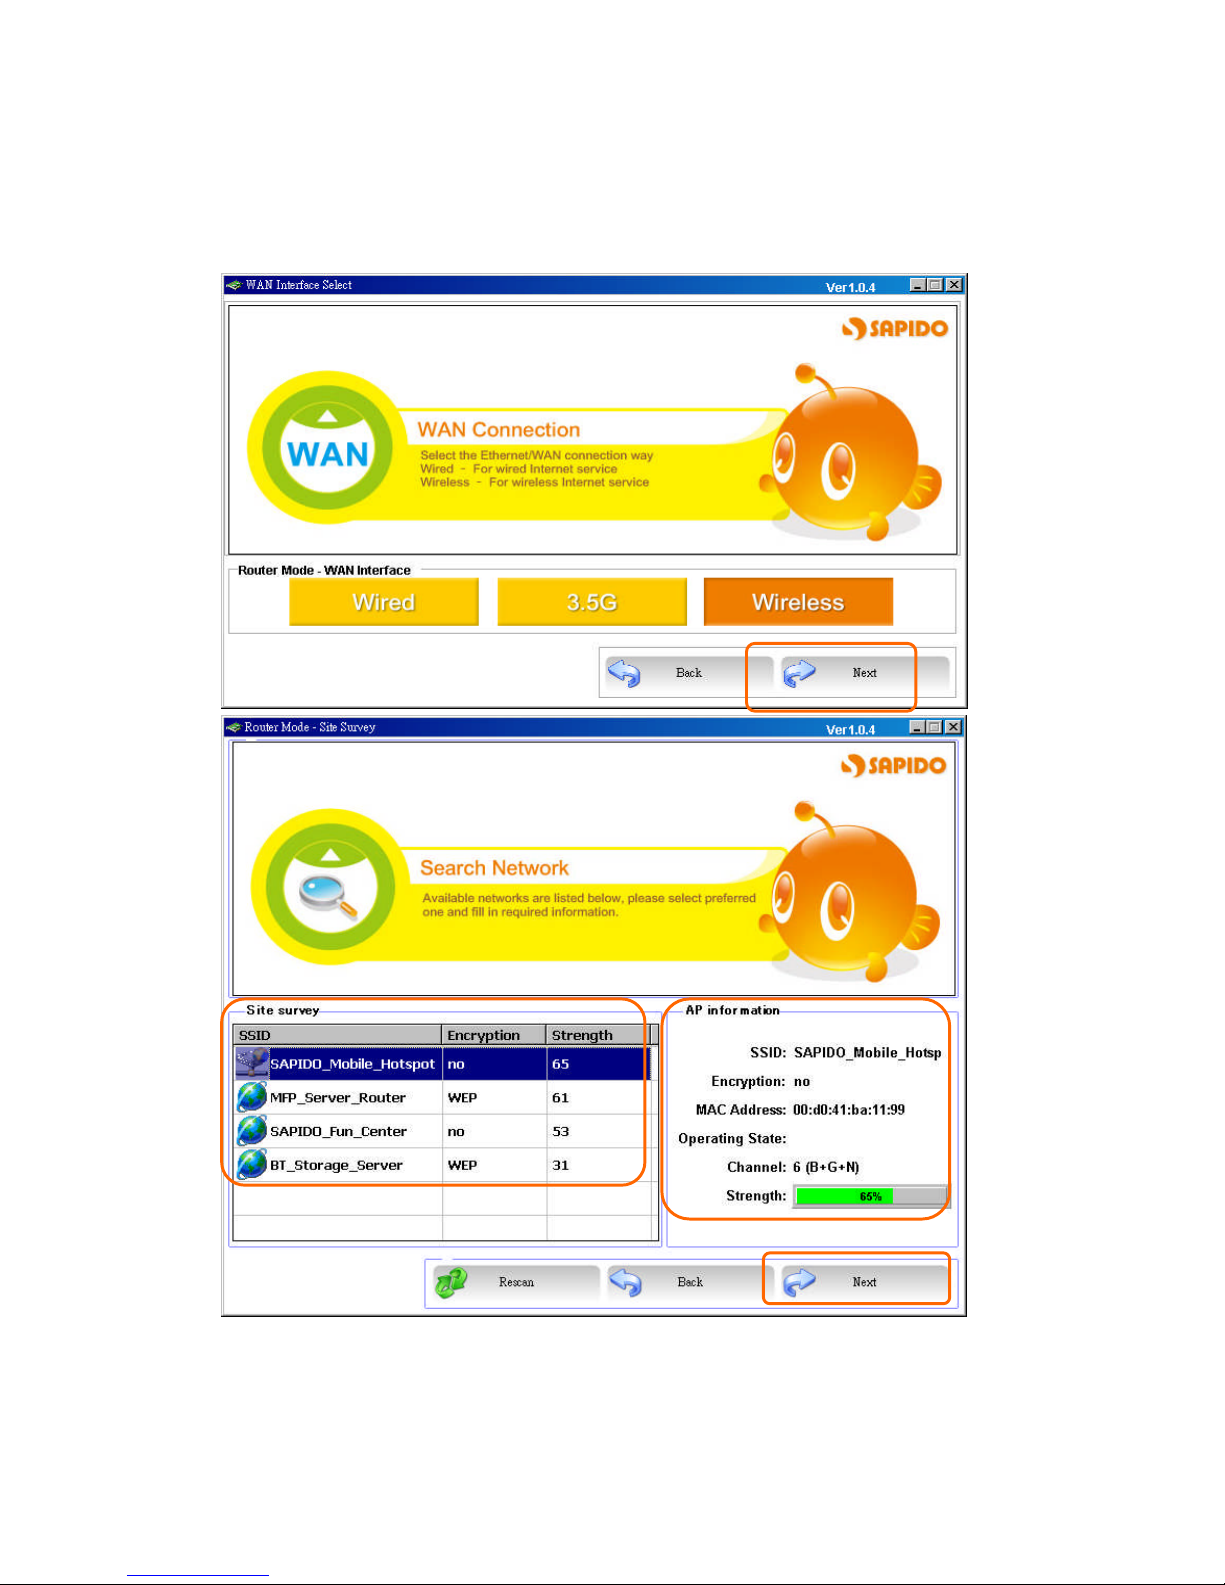
2.3.3.6 WAN – Wireless
GR-1102 can also find AP from Site Survey function. Please select AP you want to
connect to. Details of the chosen AP will be shown on the right panel.
Click Next to go to the next page.
Page 23
http://www.sapido.com.tw 23
SadoGO Manual V1.0
Users will input information about DHCP, STATIC IP, PPPoE, or PPTP on this page.
Please refer 2.3.3.1~2.3.3.4 and 2.3.5, 2.3.6 for details
Click Next to go to the next page.
Page 24
http://www.sapido.com.tw 24
SadoGO Manual V1.0
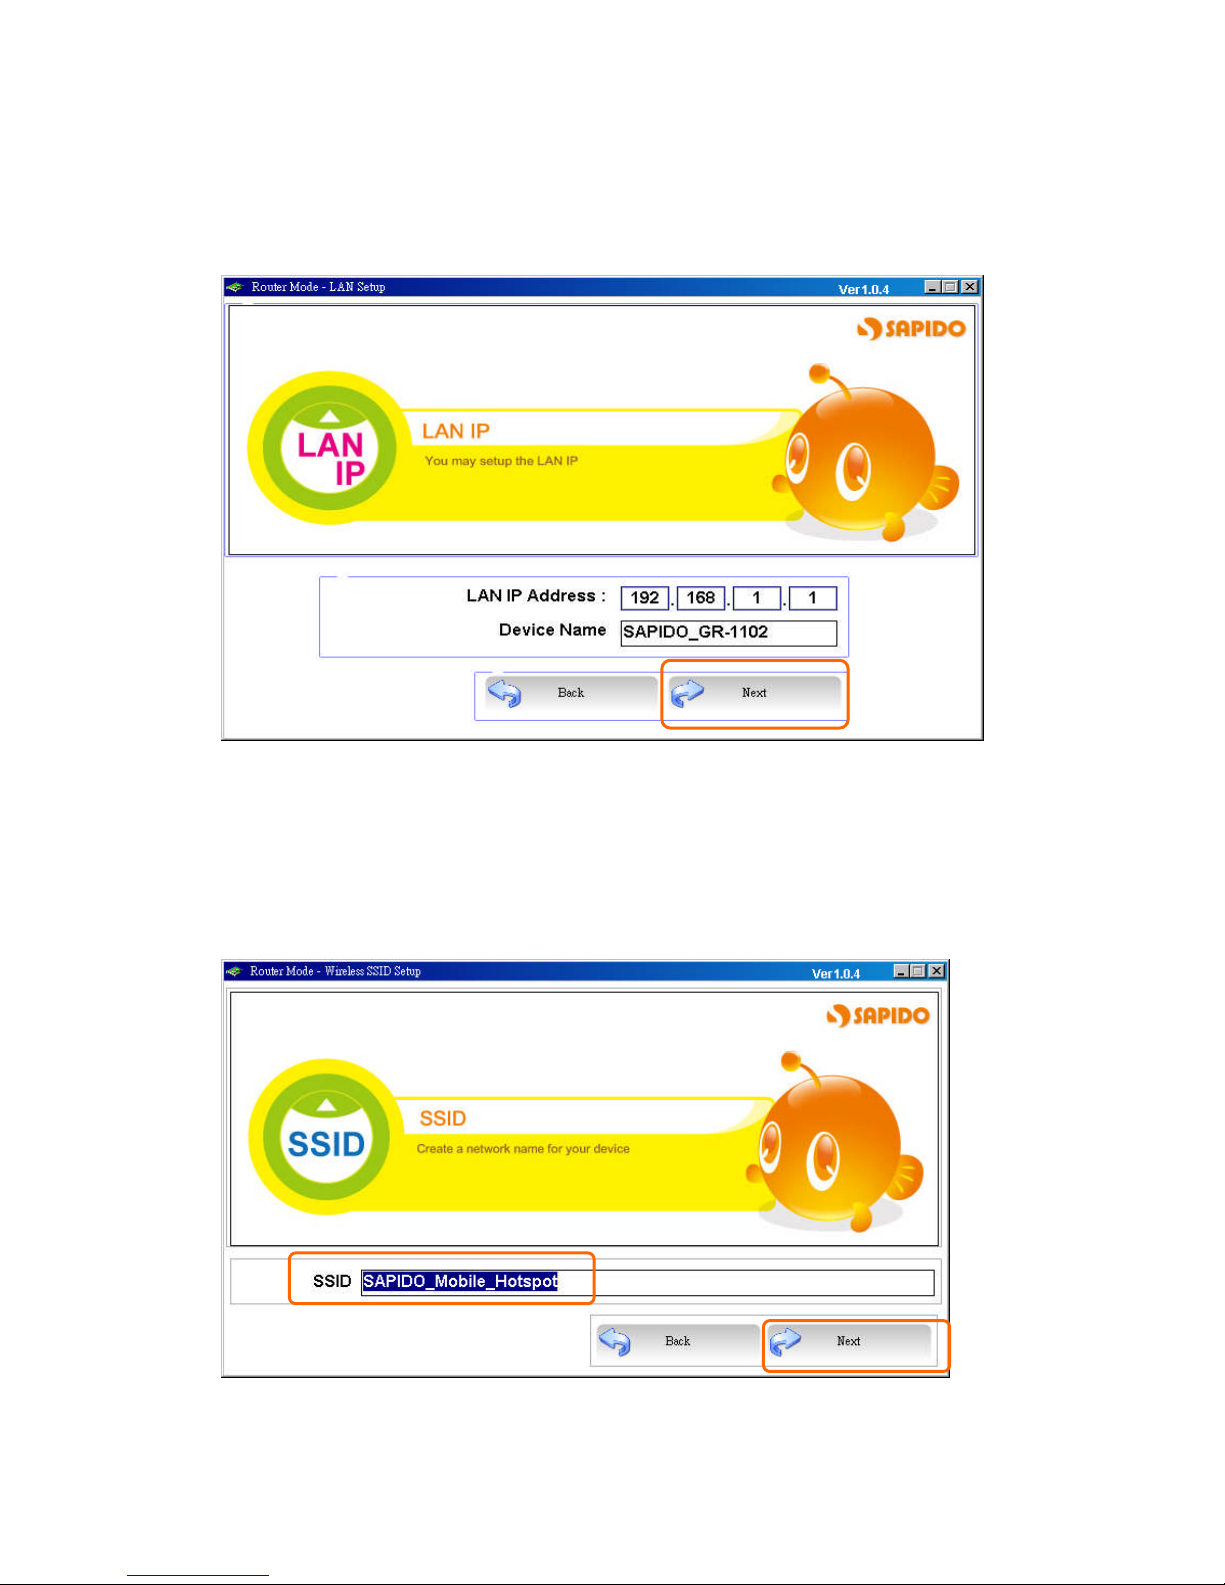
2.3.4 LAN Setup
Please input LAN IP address and device name, the default is 192.168.1.1 and
SAPIDO_GR-1102.
Click Next to go to the next page.
2.3.5 Wireless SSID Setup
The first step to setup wireless interface is to assign SSID, the default name is
SAPIDO_Mobile_Hotspot
Click Next to go to the next page.
Page 25
http://www.sapido.com.tw 25
SadoGO Manual V1.0
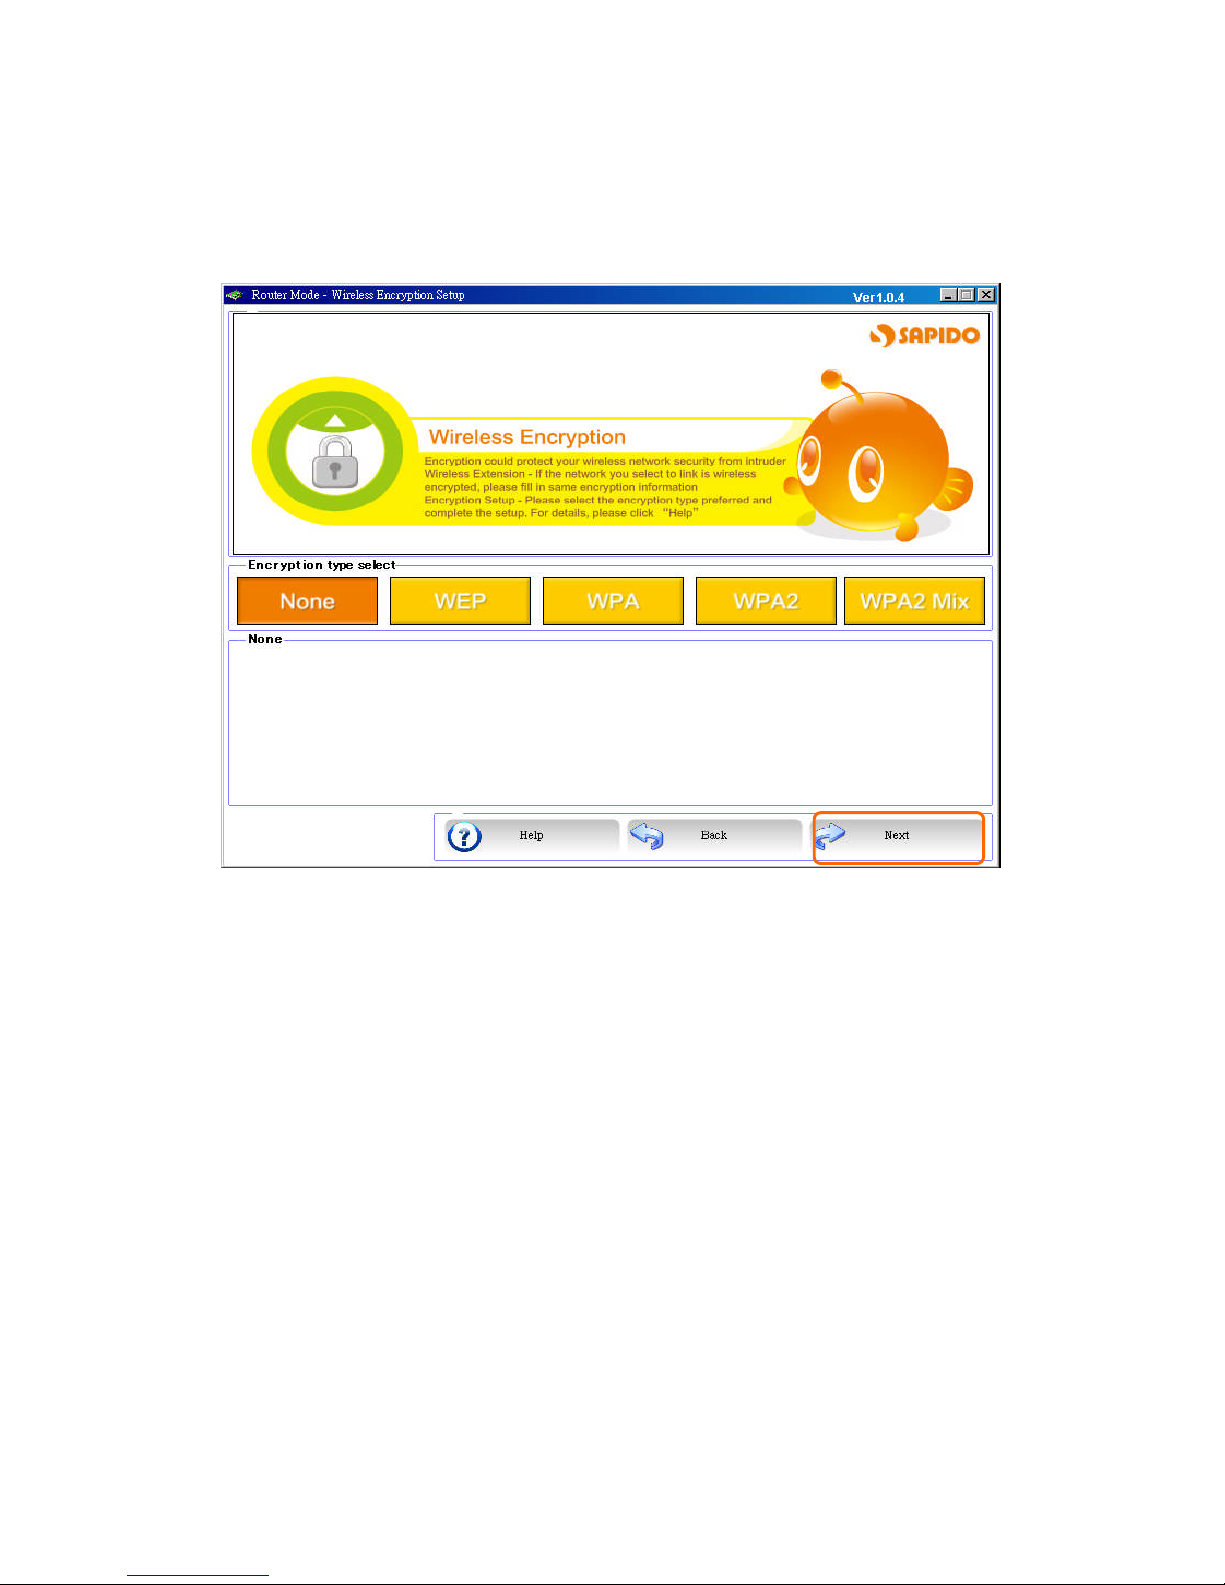
2.3.6 Wireless Encryption Setup
Please choose encryption type, it includes “WEP”, “WPA”, “WPA2” , and “WPA2
MIx”.
Click Next to go to the next page.
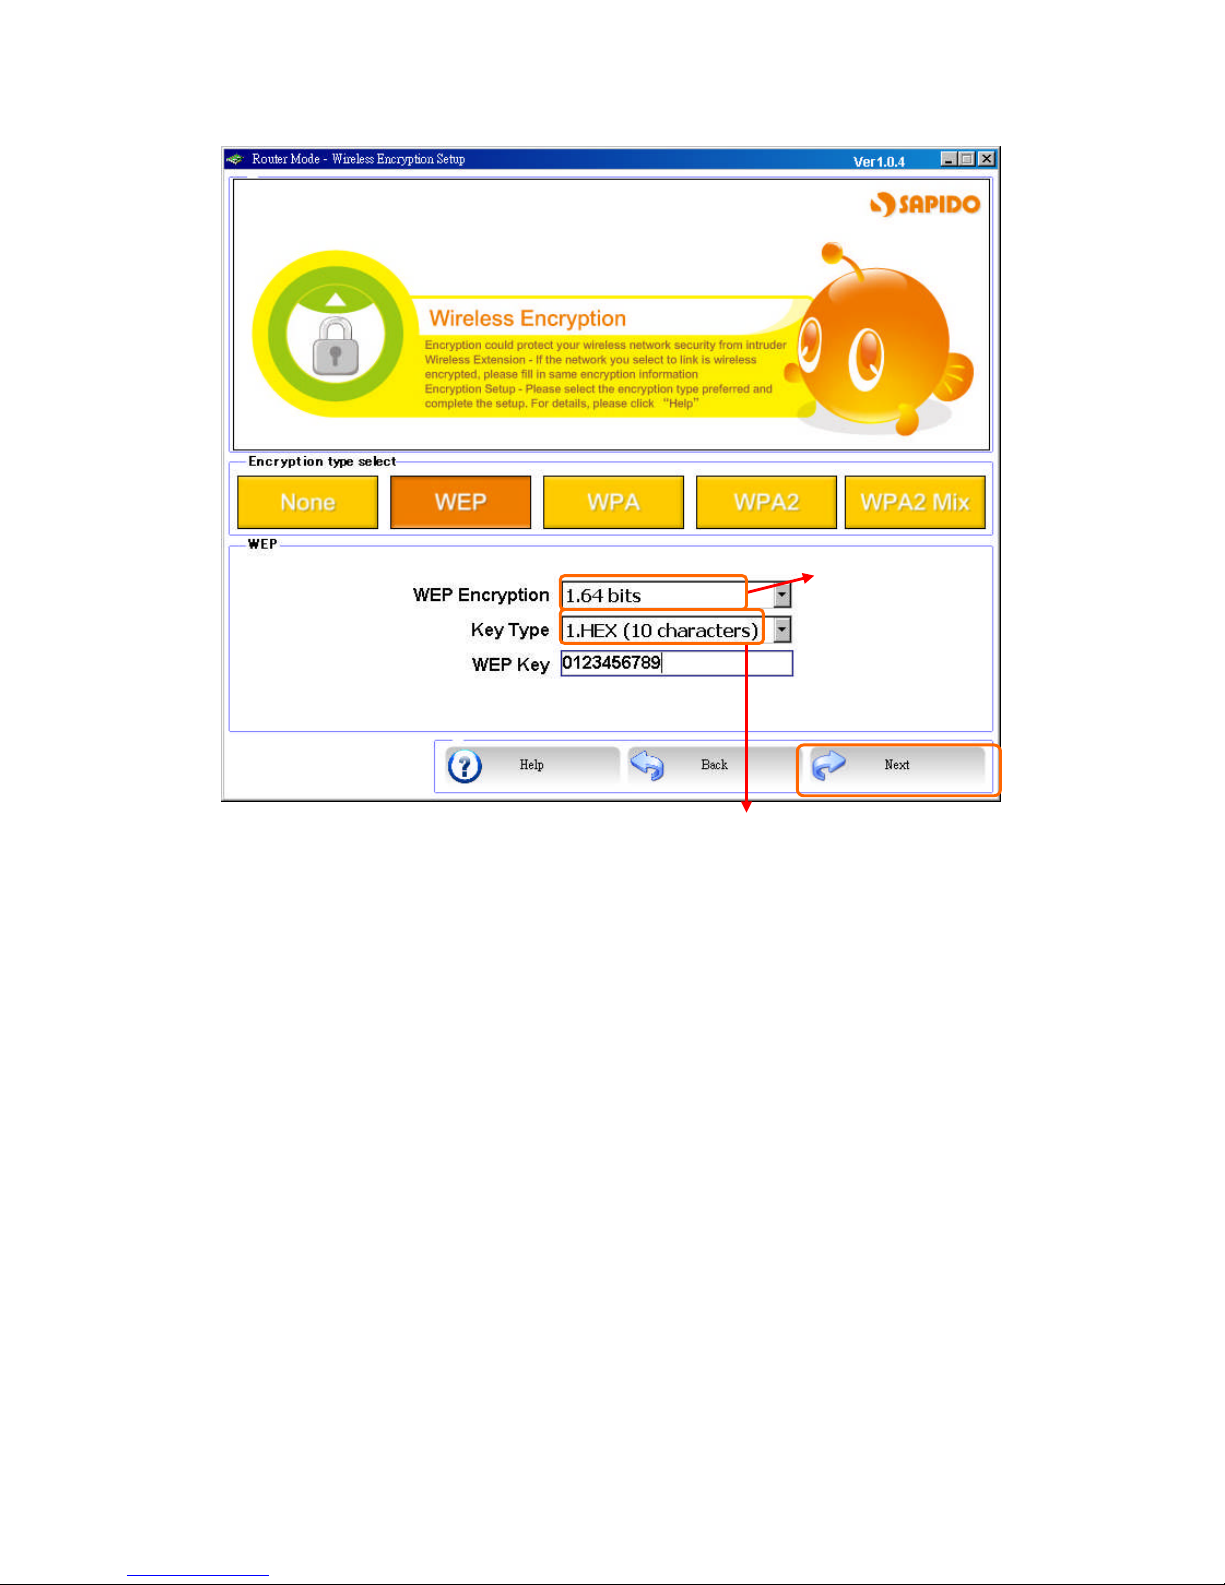
2.3.6.1 Wireless Encryption Setup - WEP
Provide wireless AP 64 bits and 128 bits WEP encryption, users can choose between
ASCII or HEX key formats.
Page 26
http://www.sapido.com.tw 26
SadoGO Manual V1.0
Click Next to go to the next page.
2.3.6.2 Wireless Encryption Setup – WPA, WPA2, and WPA2 Mix
WPA-PSK, users only need to input the correct password to get wireless access
privilege.
WPA and WPA2(TKIP)
Temporal Key Integrity Protocol(TKIP) uses server to generate 128 bit key
dynamically, the Key length is at least 8 characters.
WPA and WPA2(AES)
Low level(64bits)or high level
(128bits)
If choose 64bits, the length of
WEP Key is 10 characters(0~9,
a~f, and A~F);if it is 128bits, the
length is 26 characters.
If users use ASCII,they can input
8~63 ASCII characters.
Page 27

http://www.sapido.com.tw 27
SadoGO Manual V1.0
WPA will define the usage of AES, is a backup for WEP encryption. Because
going devices might not support AES through firmware upgrade, it is not
required for wireless adapters and AP.
Click Next to go to the next page.
Radius with 802.1x is based on 802.1x. it also supports WEP Encryption, WPA,
WPA-PSK, and 802.1x WPA network.
If users choose Radius with 802.1x, they must input Radius server IP address, port,
and password.
Page 28

http://www.sapido.com.tw 28
SadoGO Manual V1.0
Click Next to go to the next page.
Page 29

http://www.sapido.com.tw 29
SadoGO Manual V1.0
2.3.7 DDNS Setup
Dynamic DNS provides users with DNS service that automates the discovery and
registration of client's public IP addresses.
Please do enter “Domain Name”, “User Name/Email”& “Password/Key”.
Click Next to go to the next page.
Page 30

http://www.sapido.com.tw 30
SadoGO Manual V1.0
2.3.8 Multiple AP Setup
Multiple APs can provide users another 4 different SSID for connection. Users can
add or limit the properties for each connection.
1. Enable
Please choose to enable it or not.
2. Broadcast SSID
Please choose to broadcast SSID or not.
3. SSID
Please enter the SSID.
4. Data Rate
Please select the data transmission rate.。
5. Access
Enable this function can let clients use 2 access types: a. LAN+WAN:
the client can access to the Internet and connect to 3.5G server router’s
GUI to setup. b. WAN: the client can only access to the Internet.
6. Encryption
Please choose the encryption type.
Page 31

http://www.sapido.com.tw 31
SadoGO Manual V1.0
2.3.9 USB Device – USB Device Search
After searching the device, all USB devices will be displayed on this screen. If users
add any new USB device, please click Rescan button.
Click Next to go to the next page.
2.3.10 USB Device - Server
Utility will only display corresponded function icons base on USB devices.
Click Next to go to the next page.
Page 32

http://www.sapido.com.tw 32
SadoGO Manual V1.0
User can format the USB mass storage device to FAT16/32, NTFS, EXT3 formats.
2.3.11 USB Device – FTP and Samba Server
Users can enable the FTP and Samba servers.
Page 33

http://www.sapido.com.tw 33
SadoGO Manual V1.0
1. Enabled FTP Server
Choose to enable FTP Server.
2. Access from WAN
Choose to enable access from WAN.。
3. Enable Samba Server
Choose to enable Samba Server.
4. Workgroup Name
Please enter the Workgroup name.
5. Server Name
Please enter the server name.
Note:Server name accept numbers and characters.
Click Next to go to the next page.
2.3.12 USB Device – Webcam Server
Users can enable the Webcam servers.
This Page will show up only when USB WebCam is conneted with GR-1102.
1. Enabled Webcam Server
Choose to enable Webcam Server.
2. Access from WAN
Choose to enable access from WAN.。
Click Next to go to the next page.
Page 34

http://www.sapido.com.tw 34
SadoGO Manual V1.0
2.3.13 USB Device – Print Server
Users can enable the Printer servers.
This Page will show up only when Printer is conneted with GR-1102.
1. Enabled Print Server
Choose to enable Print Server.
2. Access from WAN
Choose to enable access from WAN.。
3. Printer Name
Please enter Printer name.
note:Please install the driver first.
Click Next to go to the next page.
Page 35

http://www.sapido.com.tw 35
SadoGO Manual V1.0
2.3.14 User Account Management
To add new user account, please input user name, password, and choose privilege,
then click Add.
The new account will be displayed on the list. If users want to delete the account, just
select the account and click Delete.
Page 36

http://www.sapido.com.tw 36
SadoGO Manual V1.0
2.3.15 Finish
Please wait the running bar to 100%, the system will reboot automatically.
The information will display like following figure. Please click “OK”to finish the setup.
Page 37

http://www.sapido.com.tw 37
SadoGO Manual V1.0
Chapter3AP Mode
Connect to AP or wired Internet, and then provides wired and wireless internet bridge
service for bottom level users. The AP mode doesn’t support NAT. The 3.5G server
router is simply using Ethernet port to connect to the upper level device and receive
the IP address from it. The 3.5G server router will use the default IP address or is
defined by users if the upper level device does not give one.
3.1 Enter Setup Page
On Main setup page, please select “Function Setup”to configure.
Double click the icon of GR-1102 to enter the next page.
The default User Name and Password are “admin”。
Page 38

http://www.sapido.com.tw 38
SadoGO Manual V1.0
Please select one of three setup functions.
Page 39

http://www.sapido.com.tw 39
SadoGO Manual V1.0
3.2 One Button Setup
GR-1102 provides an unique One Button Setup page, user can easily finish settings
at once.
Click Next to go to next page.
Page 40

http://www.sapido.com.tw 40
SadoGO Manual V1.0
1. Time Zone Select
Please select the desired time zone and NTP server.
2. Change Administrator Password
Users can change the password for admin login, the default is admin。
3. Device Name
Users can change the device name of GR-1102,
the default is SAPIDO_GR-1102.
4. Wireless SSID Setup
Users can define the SSID of GR-1102, the default value is
SAPIDO_Mobile_Hotspot.
5. Format SysDisk
User can format the USB mass storage device to FAT16/32、NTFS、EXT3
formation.
6. User Account Management
Users can add new account/password and privileges.
Page 41

http://www.sapido.com.tw 41
SadoGO Manual V1.0
3.3 Step Setup
Please choose Step Setup to enter。
Page 42

http://www.sapido.com.tw 42
SadoGO Manual V1.0
3.3.1 Change Password
Users can change the password, please enter the new password.
3.3.2 Time Zone and Device Name Setup
Please select the desired time zone and NTP server. Users can also input the
device name.
Page 43

http://www.sapido.com.tw 43
SadoGO Manual V1.0
3.3.3 Wireless SSID Setup
The first step to setup wireless interface is to assign SSID,
the default name is.SAPIDO_Mobile_Hotspot.
Click Next to go to the next page.
3.3.4 Wireless Encryption Setup
Please choose encryption type, it includes “WEP”, “WPA”, “WPA2” , and “WPA2
MIx”.
Click Next to go to the next page.
Page 44

http://www.sapido.com.tw 44
SadoGO Manual V1.0
3.3.4.1 Wireless Encryption Setup - WEP
Provide wireless AP 64 bits and 128 bits WEP encryption, users can choose between
ASCII or HEX key formats.
Click Next to go to the next page.
Low level(64bits)or high level
(128bits)
If choose 64bits, the length of
WEP Key is 10 characters(0~9,
a~f, and A~F);if it is 128bits, the
length is 26 characters.
If users use ASCII,they can input
8~63 ASCII characters.
Page 45

http://www.sapido.com.tw 45
SadoGO Manual V1.0
3.3.4.2 Wireless Encryption Setup – WPA, WPA2, and WPA2 Mix
WPA-PSK, users only need to input the correct password to get wireless access
privilege.
WPA and WPA2(TKIP)
Temporal Key Integrity Protocol(TKIP) uses server to generate 128 bit key
dynamically, the Key length is at least 8 characters.
WPA and WPA2(AES)
WPA will define the usage of AES, is a backup for WEP encryption. Because
going devices might not support AES through firmware upgrade, it is not
required for wireless adapters and AP.
Click Next to go to the next page.
Radius with 802.1x is based on 802.1x. it also supports WEP Encryption, WPA,
WPA-PSK, and 802.1x WPA network.
Page 46

http://www.sapido.com.tw 46
SadoGO Manual V1.0
If users choose Radius with 802.1x, they must input Radius server IP address, port,
and password.
Click Next to go to the next page.
Page 47

http://www.sapido.com.tw 47
SadoGO Manual V1.0
3.3.5 Multiple AP Setup
Multiple APs can provide users another 4 different SSID for connection. Users can
add or limit the properties for each connection.
1. Enable
Please choose to enable it or not.
2. Broadcast SSID
Please choose to broadcast SSID or not.
3. SSID
Please enter the SSID.
4. Data Rate
Please select the data transmission rate.。
5. Access
Enable this function can let clients use 2 access types: a. LAN+WAN:
the client can access to the Internet and connect to 3.5G server router’s
GUI to setup. b. WAN: the client can only access to the Internet.
6. Encryption
Please choose the encryption type.
Page 48

http://www.sapido.com.tw 48
SadoGO Manual V1.0
3.3.6 USB Device – USB Device Search
After searching the device, all USB devices will be displayed on this screen. If users
add any new USB device, please click Rescan button.
Click Next to go to the next page.
3.3.7 USB Device – Server
Utility will only display corresponded function icons base on USB devices.
Click Next to go to the next page.
Page 49

http://www.sapido.com.tw 49
SadoGO Manual V1.0
User can format the USB mass storage device to FAT16/32, NTFS, EXT3 formats.
3.3.8 USB Device – FTP and Samba Server
Users can enable the FTP and Samba servers. Click Next to go to the next page.
Page 50

http://www.sapido.com.tw 50
SadoGO Manual V1.0
1. Enabled FTP Server
Choose to enable FTP Server.
2. Access from WAN
Choose to enable access from WAN.。
3. Enable Samba Server
Choose to enable Samba Server.
4. Workgroup Name
Please enter the Workgroup name.
5. Server Name
Please enter the server name.
Note:Server name accept numbers and characters.
3.3.9 USB Device – Webcam Server
Users can enable the Webcam servers.
1. Enabled Webcam Server
Choose to enable Webcam Server.
2. Access from WAN
Choose to enable access from WAN.。
Click Next to go to the next page.
Page 51

http://www.sapido.com.tw 51
SadoGO Manual V1.0
3.3.10 USB Device – Print Server
Users can enable the Printer servers.
1. Enabled Print Server
Choose to enable Print Server.
2. Access from WAN
Choose to enable access from WAN.。
3. Printer Name
Please enter Printer name.
Click Next to go to the next page.
note:Please install the driver first.
Page 52

http://www.sapido.com.tw 52
SadoGO Manual V1.0
3.3.11 User Account Management
To add new user account, please input user name, password, and choose privilege,
then click Add.
The new account will be displayed on the list. If users want to delete the account, just
select the account and click Delete.
Page 53

http://www.sapido.com.tw 53
SadoGO Manual V1.0
3.3.12 Finish
Please wait the running bar to 100%, the system will reboot automatically.
The information will display like following figure. Please click “OK”to finish the setup.
Page 54

http://www.sapido.com.tw 54
SadoGO Manual V1.0
Chapter4 Wi-Fi AP Mode
Connect to AP or wired Internet by using wireless function, and then provides wired
and wireless internet bridge service for bottom level users. The AP mode doesn’t
support NAT. The 3.5G server router is simply using Ethernet port to connect to the
upper level device and receive the IP address from it. The 3.5G server router will use
the default IP address or is defined by users if the upper level device does not give
one.
4.1 Enter Setup Page
On Main setup page, please select “Function Setup”to configure.
Page 55

http://www.sapido.com.tw 55
SadoGO Manual V1.0
Double click the icon of GR-1102 to enter the next page.
The default User Name and Password are “admin”。
Page 56

http://www.sapido.com.tw 56
SadoGO Manual V1.0
Please select one of three setup functions.
Page 57

http://www.sapido.com.tw 57
SadoGO Manual V1.0
4.2 One Button Setup
GR-1102 provides an unique One Button Setup page, user can easily finish settings
at once.
Click Next to enter the next page.
Page 58

http://www.sapido.com.tw 58
SadoGO Manual V1.0
1. Time Zone Select
Please select the desired time zone and NTP server.
2. Change Administrator Password
Users can change the password for admin login, the default is admin。
3. Device Name
Users can change the device name of GR-1102, the default is GR-1102.
4. Site Survey
Please select the desired AP from the list.
5. Extend SSID
Users can define the SSID of GR-1102, the default value is ESSID_GR-1102.
6. Format SysDisk
User can format the USB mass storage device to FAT16/32、NTFS、EXT3
formation.
7. User Account Management
Users can add new account/password and privileges.
Page 59

http://www.sapido.com.tw 59
SadoGO Manual V1.0
4.3 Step Setup
Please choose Step Setup to enter。
Page 60

http://www.sapido.com.tw 60
SadoGO Manual V1.0
4.3.7 Change Password
Users can change the password, please enter the new password.
Click Next to go to the next page.
4.3.8 Time Zone and Device Name Setup
Please select the desired time zone and NTP server. Users can also input the
device name.
Click Next to go to the next page.
Page 61

http://www.sapido.com.tw 61
SadoGO Manual V1.0
4.3.9 Site Survey
This function provides users to search the existing wireless network, AP, or Wireless
AP from ISP. You can select the service manually.After selecting the designed AP, the
device name will appear on AP Information. Click Rescan to search new AP.
Click Next to go to the next page.
Page 62

http://www.sapido.com.tw 62
SadoGO Manual V1.0
4.3.10 Wireless Encryption Setup
The ISP SSID SAPIDO_Fun_Center is from 4.3.3. Please choose encryption type, it
includes “WEP”, “WPA”, “WPA2”, and “WPA2 MIx”.
Click Next to go to the next page.
Page 63

http://www.sapido.com.tw 63
SadoGO Manual V1.0
4.3.10.1 Wireless Encryption Setup - WEP
Provide wireless AP 64 bits and 128 bits WEP encryption, users can choose between
ASCII or HEX key formats.
Extended SSID is for lower device to recognize.
Click Next to go to the next page.
Low level(64bits)or high level
(128bits)
If choose 64bits, the length of WEP Key
is 10 characters(0~9, a~f, and A~F);
if it is 128bits, the length is 26
characters.
If users use ASCII,they can input 8~63
ASCII characters.
Page 64

http://www.sapido.com.tw 64
SadoGO Manual V1.0
4.3.10.2 Wireless Encryption Setup – WPA, WPA2, and WPA2 Mix
WPA-PSK, users only need to input the correct password to get wireless access
privilege.
WPA and WPA2(TKIP)
Temporal Key Integrity Protocol(TKIP) uses server to generate 128 bit key
dynamically, the Key length is at least 8 characters.
WPA and WPA2(AES)
WPA will define the usage of AES, is a backup for WEP encryption. Because
going devices might not support AES through firmware upgrade, it is not
required for wireless adapters and AP.
Click Next to go to the next page.
Page 65

http://www.sapido.com.tw 65
SadoGO Manual V1.0
4.3.11 USB Device – USB Device Search
After searching the device, all USB devices will be displayed on this screen. If users
add any new USB device, please click Rescan button.
Click Next to go to the next page.
4.3.12 USB Device - Server
Utility will only display corresponded function icons base on USB devices.
Click Next to go to the next page.
Page 66

http://www.sapido.com.tw 66
SadoGO Manual V1.0
User can format the USB mass storage device to FAT16/32, NTFS, EXT3 formats.
4.3.13 USB Device – FTP and Samba Server
Users can enable the FTP and Samba servers.
1. Enabled FTP Server
Choose to enable FTP Server.
2. Access from WAN
Choose to enable access from WAN.。
3. Enable Samba Server
Choose to enable Samba Server.
4. Workgroup Name
Please enter the Workgroup name.
5. Server Name
Please enter the server name.
Note:Server name accept numbers and characters.
Click Next to go to the next page.
Page 67

http://www.sapido.com.tw 67
SadoGO Manual V1.0
4.3.14 USB Device – Webcam Server
Users can enable the Webcam servers.
1. Enabled Webcam Server
Choose to enable Webcam Server.
2. Access from WAN
Choose to enable access from WAN.。
Click Next to go to the next page.
Page 68

http://www.sapido.com.tw 68
SadoGO Manual V1.0
4.3.15 USB Device – Print Server
Users can enable the Printer servers.
1. Enabled Print Server
Choose to enable Print Server.
2. Access from WAN
Choose to enable access from WAN.。
3. Printer Name
Please enter Printer name.
Click Next to go to the next page.
note:Please install the driver first.
Page 69

http://www.sapido.com.tw 69
SadoGO Manual V1.0
4.3.16 User Account Management
To add new user account, please input user name, password, and choose privilege,
then click Add.
The new account will be displayed on the list. If users want to delete the account, just
select the account and click Delete.
Page 70

http://www.sapido.com.tw 70
SadoGO Manual V1.0
4.3.17 Finish
Please wait the running bar to 100%, the system will reboot automatically.
The information will display like following figure. Please click “OK”to finish the setup.
Page 71

http://www.sapido.com.tw 71
SadoGO Manual V1.0
Page 72

http://www.sapido.com.tw 72
SadoGO Manual V1.0
Chapter5 Server Login
User can click Server Login to access server functions.
5.1 SadoGo Utility Access from WAN
1. Double click the icon of Internet to access from WAN.
Page 73

http://www.sapido.com.tw 73
SadoGO Manual V1.0
2. Please enter router’s IP address or domain name, user name, and
password.
3. It will display any privilege that user has.
Page 74

http://www.sapido.com.tw 74
SadoGO Manual V1.0
5.2 Administrator Login
Please enter administrator’s username and password. Click Login to proceed.
It will display any icon that administrator can use.
Page 75

http://www.sapido.com.tw 75
SadoGO Manual V1.0
5.2.1 My FTP
Click My FTP icon to enter.
It will prompt a window containing all FTP folders.
5.2.2 My Webcam Record
Click My Webcam Record icon to view webcam record information.
It will prompt following real-time image.
Click Enable Webcam record to activate webcam recording function. Click Disable
Page 76

http://www.sapido.com.tw 76
SadoGO Manual V1.0
Webcam record to disable it.
Click Advance Setup to setup recording time and storage path to USB HDD or
remote FTP.
Click OK after complete the setup.
Click Webcam Record Files will open the folder that contains image from webcam.
Page 77

http://www.sapido.com.tw 77
SadoGO Manual V1.0
Note:You need to download Java application to view the image.
Page 78

http://www.sapido.com.tw 78
SadoGO Manual V1.0
5.3 Person Login
To login personal account, please pull down the list from user name and enter the
password. Click Login to proceed.
It will display any icon that personal user can use.
Page 79

http://www.sapido.com.tw 79
SadoGO Manual V1.0
5.3.1 My FTP
Click My FTP icon to enter.
It will prompt your FTP folders.
5.3.2 Anonymous
Click Anonymous to view.
Page 80

http://www.sapido.com.tw 80
SadoGO Manual V1.0
An anonymous folder which administrator share files to other users will show up.
5.3.3 Network Disk
Click My Samba to enter.
Users can download or upload files to share.
Page 81

http://www.sapido.com.tw 81
SadoGO Manual V1.0
5.3.4 View Webcam
Click View Webcam to view the details of webcam.
A prompt window will display real-time image from 4 webcams at most.
Note:You need to download Java application to view the image.
Page 82

http://www.sapido.com.tw 82
SadoGO Manual V1.0
5.3.5 My Webcam
Click My Webcam to view webcam.
A prompt window will display real-time image.
Note:You need to download Java application to view the image.
Page 83

http://www.sapido.com.tw 83
SadoGO Manual V1.0
5.3.6 My Printer
Click My Printer to view details of printer.
Select the printer connecting to the router, click SET to proceed the printer setup.
A message will tell user that the setup is complete, click OK and you can use printer
to print.
Page 84

http://www.sapido.com.tw 84
SadoGO Manual V1.0
5.4 Logout
Please close the utility window to logout.。
 Loading...