

Page 1

Translation management tool
■ Business Objects XI 4.0
2010-10-09
Page 2

Copyright
© 2010 SAP AG. All rights reserved.SAP, R/3, SAP NetWeaver, Duet, PartnerEdge, ByDesign, SAP
Business ByDesign, and other SAP products and services mentioned herein as well as their respective
logos are trademarks or registered trademarks of SAP AG in Germany and other countries. Business
Objects and the Business Objects logo, BusinessObjects, Crystal Reports, Crystal Decisions, Web
Intelligence, Xcelsius, and other Business Objects products and services mentioned herein as well
as their respective logos are trademarks or registered trademarks of Business Objects S.A. in the
United States and in other countries. Business Objects is an SAP company.All other product and
service names mentioned are the trademarks of their respective companies. Data contained in this
document serves informational purposes only. National product specifications may vary.These materials
are subject to change without notice. These materials are provided by SAP AG and its affiliated
companies ("SAP Group") for informational purposes only, without representation or warranty of any
kind, and SAP Group shall not be liable for errors or omissions with respect to the materials. The
only warranties for SAP Group products and services are those that are set forth in the express
warranty statements accompanying such products and services, if any. Nothing herein should be
construed as constituting an additional warranty.
2010-10-09
Page 3

Contents
Introduction to the translation management tool....................................................................7Chapter 1
1.1
1.2
1.3
1.4
1.5
1.6
1.7
2.1
2.2
2.3
2.3.1
2.3.2
2.3.3
2.3.4
2.3.5
2.3.6
2.4
2.5
2.5.1
2.5.2
2.5.3
2.5.4
2.5.5
2.5.6
Introduction to the translation management tool.......................................................................7
Which resources can you translate?.........................................................................................8
About translating Interactive Analysis reports...........................................................................8
About translating universes from the universe design tool........................................................9
About translating universes from the information design tool..................................................10
Terminology used in the translation management tool............................................................10
About authentication and security..........................................................................................12
Getting started with the tool.................................................................................................15Chapter 2
To logon ................................................................................................................................15
To change your login password..............................................................................................15
About the translation management tool window.....................................................................16
About the Translation Editor view...........................................................................................17
About the Language Management view..................................................................................17
About the Text Editor view.....................................................................................................18
About the Filter view..............................................................................................................19
About the Cell Properties view...............................................................................................19
About the Help view...............................................................................................................20
Customizing the translation management tool window...........................................................20
Setting preferences................................................................................................................21
To set the product language...................................................................................................21
To set default folder locations................................................................................................22
To set the locale to add automatically.....................................................................................22
To set frequently used languages...........................................................................................22
To set Auto-fill options...........................................................................................................23
To set sample data for formats...............................................................................................23
3.1
3.2
3.3
Translation workflows...........................................................................................................25Chapter 3
About translation workflows...................................................................................................25
How translated locales are managed......................................................................................25
About security and translation rights......................................................................................26
2010-10-093
Page 4

Contents
3.4
3.5
3.5.1
3.5.2
3.6
3.6.1
3.6.2
3.7
4.1
4.2
4.3
4.4
4.5
4.6
5.1
5.2
5.3
5.4
5.5
5.6
About concurrent translation .................................................................................................27
About translating a resource from the CMS repository..........................................................28
To import content to translate from a resource in the CMS repository...................................28
About exporting the translations to the source resource in the CMS repository ....................29
About translating a local resource..........................................................................................29
To import content to translate from a local resource..............................................................30
To export translations to the locally stored resource..............................................................30
About the TMGR format.........................................................................................................30
Translating documents..........................................................................................................33Chapter 4
To add and remove languages in your document....................................................................33
To set the fallback language...................................................................................................33
To translate strings in the Translation Editor...........................................................................34
To translate strings in the Text Editor.....................................................................................35
To sort strings in the Translation Editor..................................................................................35
To search and replace strings in the Translation Editor...........................................................35
Setting Formats.....................................................................................................................37Chapter 5
To set default formats in the Translation Editor.......................................................................37
About the Format Editor.........................................................................................................37
To start the Format Editor......................................................................................................38
To start the Custom Format Editor.........................................................................................39
To create a custom format.....................................................................................................39
To delete a custom format.....................................................................................................40
6.1
6.2
6.3
6.4
6.5
7.1
7.2
7.3
7.4
7.5
Managing status....................................................................................................................43Chapter 6
Translation status...................................................................................................................43
About metadata translation history ........................................................................................45
To filter the List view by status...............................................................................................45
To change cell properties.......................................................................................................46
To change cell status.............................................................................................................46
Using XLIFF to exchange document translations..................................................................47Chapter 7
About XLIFF files....................................................................................................................47
Exporting and Importing XLIFF files.........................................................................................48
To export to XLIFF - select source..........................................................................................48
To export to XLIFF - select target...........................................................................................49
To import from XLIFF files......................................................................................................49
2010-10-094
Page 5

Contents
Reference..............................................................................................................................51Chapter 8
8.1
8.2
8.3
8.4
Index 67
List of locales and their dominant locales...............................................................................51
Number format tokens...........................................................................................................56
Date and time format tokens..................................................................................................58
Types of InfoObject supported by the translation management tool........................................62
More Information...................................................................................................................65Appendix A
2010-10-095
Page 6

Contents
2010-10-096
Page 7

Introduction to the translation management tool
Introduction to the translation management tool
1.1 Introduction to the translation management tool
The translation management tool provides a framework to support the localization requirements for
international deployments of BusinessObjects Enterprise.
Users can work in their respective languages with the following types of documents:
• Resources stored locally or in the repository: Interactive Analysis document, universe design tool
universe (.unv).
• Resources stored locally or in the Shared Projects folder (in the repository): the Business Layer and
Data Foundation for universes generated by the information design tool.
• Resources stored only in the repository: dashboards created by Dashboard Design and workspaces
created by BI workspace, Crystal Reports documents, and most InfoObjects.
For a multilingual audience, a universe or report designer can create one document and translate it in
multiple languages with the translation management tool instead of creating a universe or document
in each language.
The translations are saved in the universe and report documents, and displayed in the reader's language
at reporting time.
For importing from the repository the content to translate, the tool uses the Translation Server to
communicate with the other modules. Refer to the Administration Guide for more information about the
translation server. Content that is imported is stored locally in the TMGR format. The TMGR format file
is also used to manage the exchanges between the translation management tool and the translation
server.
Features of the tool include:
• Ability to translate metadata in most SAP BusinessObjects resources: universes, Interactive Analysis
reports and Crystal Reports documents...
• An interface designed for in-house translations.
• A format editor to easily define custom date, time, and number formats.
• Ability to manage approximately 130 locales.
• Enterprise deployment, with full integration with SAP BusinessObjects Enterprise including support
for all Central Management Server (CMS) authentication modes and a standalone mode.
• Mid Market (Small-scale) or Local deployment with no repository.
• Collaboration with external translators using XLIFF (XML Localization Interchange File Format) files.
This format is used by professional translators and is compatible with many translation tools.
• Ability to perform concurrent and offline translation.
2010-10-097
Page 8

Introduction to the translation management tool
• Support of the translation status throughout the translation process.
Note:
• The translation management tool runs on Windows platforms, though it can connect to Central
Management Server running on other platforms.
• The XLIFF standard used in this tool is not compatible with previous versions of the translation
management tool. In particular, it is not possible to read XLIFF files generated by previous versions
of Translation Manager.
Related Topics
• About translating Interactive Analysis reports
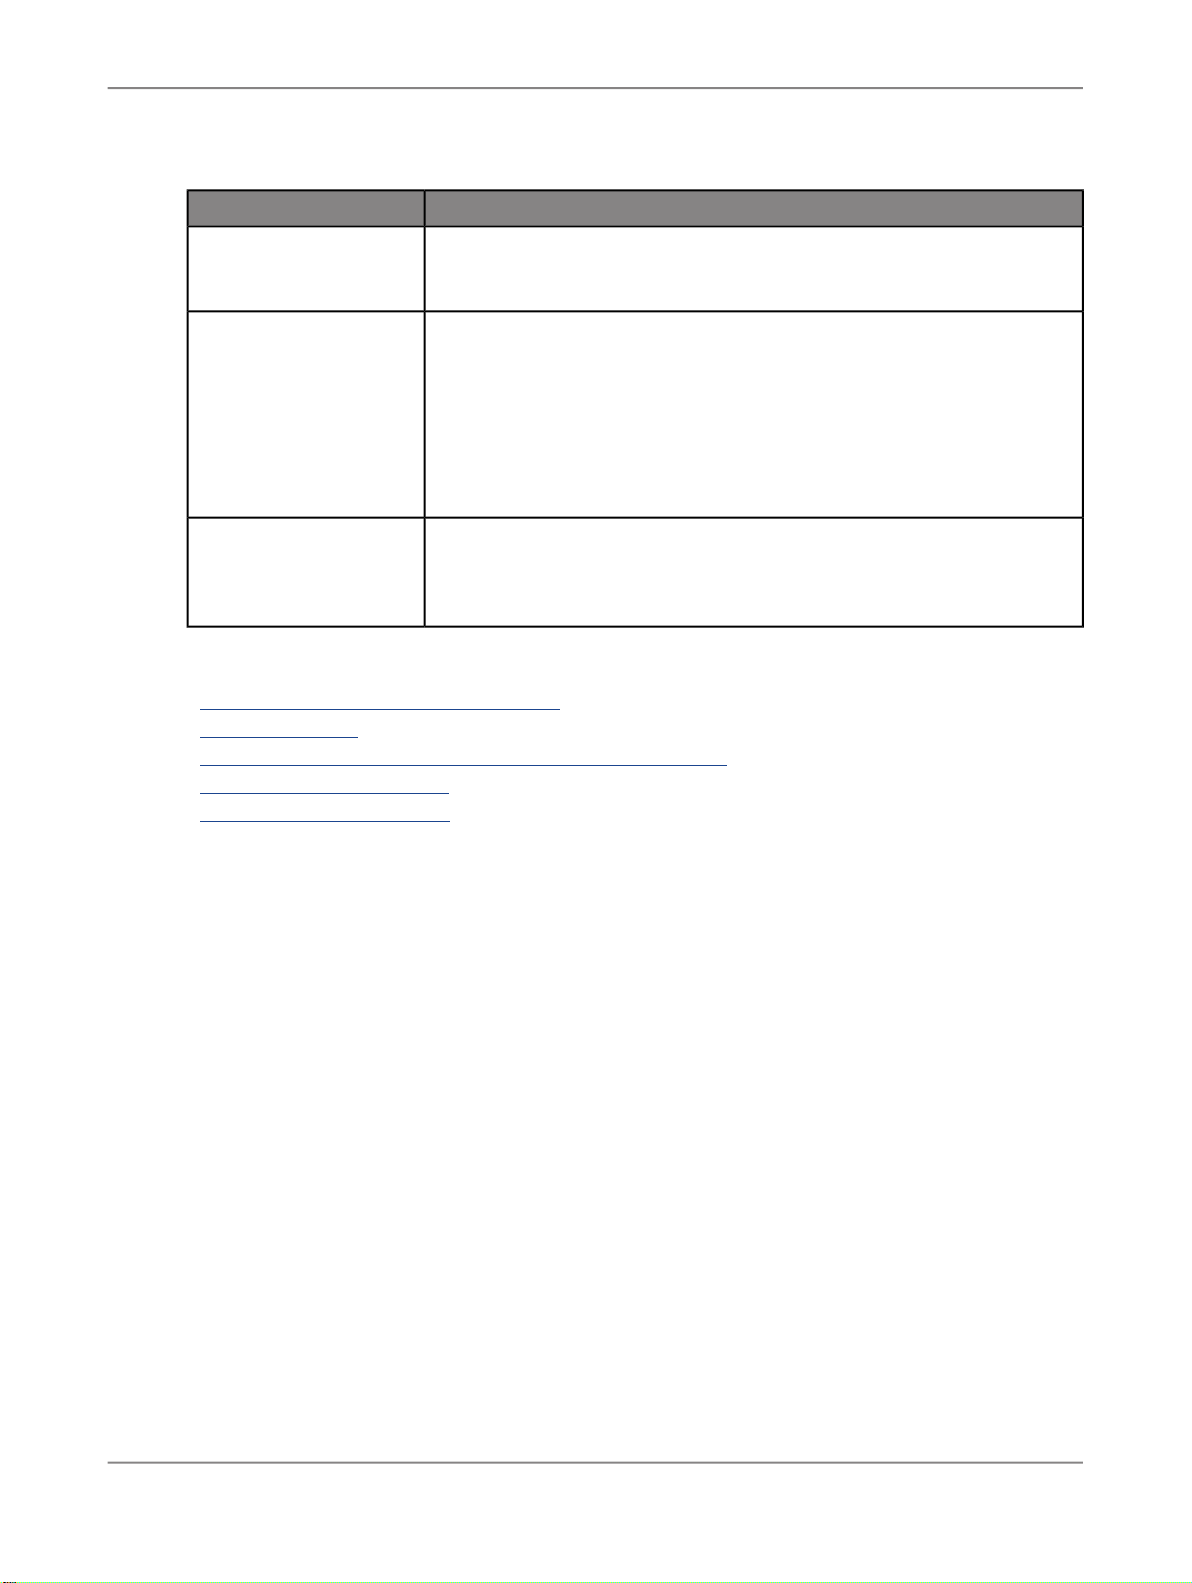
1.2 Which resources can you translate?
You can translate the following resources:
Table 1-1: Translatable resource types
Data Foundations or Business Layers created
with the information design tool
Dashboards created with Dashboard Design
documents
Workspaces created with BI workspace and most
InfoObjects
ActionResource type
Stored locally or in the CMS repositoryInteractive Analysis reports
Stored locally or in the CMS repositoryUniverses created by the universe design tool
Stored locally or in the Shared Projects folder of
the CMS repository
Stored in the CMS repositoryCrystal Reports documents
Stored in the CMS repository
Stored in the CMS repository
1.3 About translating Interactive Analysis reports
You can use the translation management tool to translate report metadata (.wid files) created with
Interactive Analysis or Web Intelligence XI 3.0 or later. This metadata includes:
2010-10-098
Page 9

Introduction to the translation management tool
• Report names
• Query names or data provider names
• Prompt texts
• Local variable names
• Alerter names and descriptions
• Content in an Interactive Analysis formula (for example in a table cell), an alerter message, or a
report variable (if requested using the GetLocalized function).
By default, the content of report formulas in Interactive Analysis reports is not translated. To make
strings in a report formula available for translation in the translation management tool, the report designer
must use the GetLocalized function when designing the report. For more info about the GetLocalized
function, see the
Analysis Guide
Using Functions, Formulas and Calculations in SAP BusinessObjects Interactive
.
Related Topics
• About translating universes from the information design tool
1.4 About translating universes from the universe design tool
You can translate
• The universe name and description
• Context names and descriptions
• Class names and descriptions
• Object names, descriptions and formats
• Filter names and descriptions
• Custom hierarchy names
• Prompt texts
• Input columns (identified as prompts in the translation management tool)
Derived universes
When you use the translation management tool to open a derived universe based on one or more core
universes, only the content of the derived universe needs to be translated. When a user reports in a
derived universe, the translations from the core universes and the derived universe are used. If the
derived universe contains objects that are located in a class folder of a core universe, these objects
are displayed in an unnamed folder.
When the reporting application displays the content for a derived universe, the translations available
include the languages defined for the derived universe as well as the languages defined for its core
universes. The application determines the Fallback language for a derived universe using the following
set of rules.
1.
If a Fallback language is defined for the derived universe, then the application uses this Fallback
language.
2010-10-099
Page 10

Introduction to the translation management tool
2.
If no Fallback language is defined for the derived universe, then the application looks in the core
universes for a Fallback language.
3.
If no Fallback language is defined for any core universe, the universe has no Fallback language.
1.5 About translating universes from the information design tool
Universes generated by the information design tool are not directly translated. Translation management
tool can independently translate the data foundations or business layers created by the information
design tool. These resources can be located on local information design tool projects or on shared
information design tool projects stored in the CMS repository.
Once these resources are translated, use the information design tool to republish the universe that will
contain these translations.
Related Topics
• Translation status
• Terminology used in the translation management tool
• About the Language Management view
• To set the fallback language
1.6 Terminology used in the translation management tool
2010-10-0910
Page 11

Introduction to the translation management tool
DescriptionTerm
Locale
Locale abbreviations
Dominant locale
A locale defines a language and a geographical area. A language can be
associated with several countries. For example, French (fr) is a language
spoken in France (FR), Belgium (BE), and Switzerland (CH). The locale
for the French spoken in Switzerland is French (Switzerland) or fr-CH.
A locale also defines the way data is sorted and how dates and numbers
are formatted.
Note:
In the translation management tool, the terms language and locale are
used interchangeably.
Locale abbreviations consist of the language abbreviation followed by the
country abbreviation.
The locale abbreviation appears differently depending on your operating
system or the application you are using. For example:
• Windows: French (France)
• Java: fr_FR
• Sun Solaris: fr_FR.ISO8859-1
• InfoView 6.5.1: French (France) [fr-FR]
The dominant locale is a pre-defined locale that is used as the substitution
language when no substitution language is defined for the document. One
dominant locale is defined for every language.
Product language
Preferred Viewing Locale
(PVL)
The product language is the language in which the application interface
appears.
The Preferred Viewing Locale is the user's preferred language for viewing
report and query objects in an application.
2010-10-0911
Page 12
Introduction to the translation management tool
DescriptionTerm
Source language
Each time you export a document to XLIFF (XML Localization Interchange
File Format), you define a source language that is identified as the source
language in the resulting XLIFF file.
Fallback locale
A fallback locale can be defined to display when viewing a translated document and no translation in the user's Preferred Viewing Locale (PVL) is
available.
Note:
Because you can define only one fallback locale in a document, in most
cases it is more flexible to leave the fallback locale undefined and rely on
the default substitution of the dominant locale.
Translation status
All strings in every language are associated with a translation status. The
status indicates if the string has been translated, reviewed, or changed.
The status also determines if the translation is ready to be displayed in
reports.
Related Topics
• List of locales and their dominant locales
• Translation status
• About translating universes from the information design tool
• To set the product language
• To set the fallback language
1.7 About authentication and security
The tool controls access using login information and application rights configured in the Central
Management Console (CMC).
You log into the translation management tool using one of the following login modes:
2010-10-0912
Page 13

Introduction to the translation management tool
DescriptionMode
Connected Mode
There are three authentication types: Enterprise, LDAP, and Windows AD.
These authentication types let you connect to the CMS repository, import from
and export documents to the CMS, and change your CMS login password.
You can also open and translate unsecured resources saved in a local directory.
Standalone Mode
No authentication is required to use the tool in standalone mode.
You can only translate unsecured resources saved in a local directory.
You cannot open documents imported from the CMS repository unless they are
unsecured and have been saved for all users.
To log into the translation management tool in connected or offline mode, you need the right "Log into
the Translation Manager and display it as an object in the CMC" granted for the translation management
tool.
Access to folders and objects in the Central Management Server (CMS) repository is controlled by
rights granted by the SAP BusinessObjects Enterprise administrator. To open documents and edit
translations, you must have the following rights:
• To open and edit translations in a universe, you must have the rights "View objects" and "Edit objects"
granted for a universe.
• To open and edit translations in an Interactive Analysis document, you must have the rights "View
objects", "Edit objects", and "Download files associated with the object" granted for the document.
• You also need the "View objects" right granted for the folders containing the universe and report
objects.
For more information on the description and definition of user rights, see the
Enterprise Administrator's Guide
.
Related Topics
• To logon
SAP BusinessObjects
2010-10-0913
Page 14

Introduction to the translation management tool
2010-10-0914
Page 15

Getting started with the tool
Getting started with the tool
2.1 To logon
To use the tool connected to the Central Management Server (CMS), you must have a user name,
password, and the appropriate rights set up by your administrator. No authentication is necessary to
use the translation management tool in standalone mode.
The translation management tool is automatically installed with SAP BusinessObjects Enterprise client
tools.
1.
Start the tool if it is not already started. From the Windows Start menu, select All programs > SAP
BusinessObjects XI 4.0 > SAP BusinessObjects Enterprise Client Tools > Translation
management tool.
The "User Identification" dialog box appears.
2.
In the Authentication box, select the authentication type. To use the tool in standalone mode, select
Standalone and click OK.
3.
For all other authentication types, enter or select in the System box, the system name where the
CMS is located.
For more information about authentication type, see the related topic.
4.
Enter your user name and password in the User Name and Password boxes.
5.
Click OK.
Note:
Once you are logged in, your CMS session information displays in the status bar in the lower right
corner of the translation management tool window. You can select the command Tools > Login As
to log in using a different user name or authentication type.
Related Topics
• About authentication and security
2.2 To change your login password
2010-10-0915
Page 16

Getting started with the tool
Once you are logged in and connected to the CMS, you can change your CMS login password within
the translation management tool.
1.
Select Tools > Change password.
The "Change Password" dialog box appears.
2.
Enter your old password in the Old Password box.
3.
Enter your new password in both the New password and Confirm new password boxes. The
entries must match exactly.
4.
Click OK.
Your new password is saved in the CMS.
2.3 About the translation management tool window
When the tool starts for the first time, the window displays the three most commonly used views: the
"Translation Editor", "Text Editor", and "Language Management" views.
You can customize the window to display other views when you need them: the Cell Properties, Filter,
and Help views.
The menu bar contains the command menus:
• File with commands to open, save, import, and export files.
• Edit with commonly used text editing commands.
• Tools with commands to re-enter login information and change password.
• Window with commands to open and close views and set application preferences.
• Help with commands to display the translation management tool help in a separate window, and to
open the Help view.
A toolbar below the menu bar contains icons:
• for command shortcuts that let you perform menu commands with a single click
• for commonly used text editing commands
• to display the different translation management tool views
The function of each icon displays as a tool tip when you hover the pointer over the icon.
A status indicator at the bottom of the translation management tool window shows the status of the
connection to the Central Management Server.
Related Topics
• Customizing the translation management tool window
2010-10-0916
Page 17

Getting started with the tool
2.3.1 About the Translation Editor view
The "Translation Editor" view lets you translate strings in a document. For information on the tasks you
can perform in the Translation Editor view, see the Related Topics below.
When you open a document, a new tab opens in the Translation Editor view. A table displays the
document object names in the left column, the original content in the next column, and the languages
to translate in subsequent columns.
You can view the table in two ways:
• The Category view displays by default and shows the document organized by the hierarchy structure.
• The List view displays the document as a flat list with no hierarchy information. The object names
and their icons appear in the left column. The List view lets you sort, find, replace, and filter strings.
For each object, the translation management tool displays the content that can be translated: either a
string (for example, a name, description, or prompt) or a format (a date or number).
You can edit the content of the cells to enter translations.
Note:
You cannot edit the cells in the Source language column.
The appearance of the cell content changes depending on the XLIFF translation status.
Properties are associated with the content in each cell. To see the properties of a cell, use the Cell
Properties view.
Related Topics
• To translate strings in the Translation Editor
• To sort strings in the Translation Editor
• To search and replace strings in the Translation Editor
• To set default formats in the Translation Editor
• To filter the List view by status
• Translation status
2.3.2 About the Language Management view
The Language Management view lets you add and manage the languages in your document. For
information on the tasks you can perform in the Language Management view, see the Related Topics.
2010-10-0917
Page 18

Getting started with the tool
The list of Available Languages on the left of the Language Management view displays all languages
supported by the tool and lets you select languages to add to your document. In the application
preferences, you can define frequently used languages so that they appear at the top of the list.
The Selected Languages table on the right lists the languages that you have selected for your document.
By default, a column for each selected language displays in the Translation Editor view.
The following information applies to each language that you add to the document:
DescriptionColumn
View
The View check box lets you select whether or not to display the language in a
column in the Translation Editor view.
Translated
The Translated column displays the percentage of the content that has been
translated (cells that have a status of NEEDS_REVIEW_TRANSLATION,
NEEDS_REVIEW_L10N, NEEDS_REVIEW_ADAPTATION, TRANSLATED,
SIGNED_OFF, or FINAL).
Visible
The Visible check box lets you define that the language is ready to be viewed in
reports. Before a language can be viewed, it must be exported back to the original
document.
Fallback
The Fallback option lets you define the language to display when a translation
is not available in the Preferred Viewing Language. You must set the language
to Visible before you can set it as the fallback language. You can define only one
substitution language in a document.
Related Topics
• To add and remove languages in your document
• To set the fallback language
• To set frequently used languages
• Terminology used in the translation management tool
2.3.3 About the Text Editor view
The "Text Editor" view lets you translate a string which is too long to be viewed in the "Translation
Editor" cell. The "Text Editor" view appears by default on the right in the translation management tool
window.
When you select a cell in the "Translation Editor" view:
• The content of the cell displays in the Translation box of the Text Editor view where you can edit
it.
Note:
You cannot edit the original content.
2010-10-0918
Page 19

Getting started with the tool
• The associated source language content displays in the Source box of the Text Editor view and
cannot be edited.
• For Interactive Analysis documents, comments for the translator appear in the Notes box. You
cannot edit the comments.
Related Topics
• To translate strings in the Text Editor
2.3.4 About the Filter view
The "Filter" view lets you filter the rows that display for a language in the "Translation Editor" list view.
For each language in the document (one language at a time), you can choose to display strings with
one status, all, or a combination of statuses.
When the "Filter" view is activated, the "Translation Editor" displays in list view.
Related Topics
• To filter the List view by status
• Translation status
2.3.5 About the Cell Properties view
The "Cell Properties" view displays the properties of a cell in the "Translation Editor" view, and lets you
change the status of a cell.
The "Cell Properties" view displays the following properties of the current cell in the "Translation Editor"
view:
DescriptionProperty
The contents of the cell: the text string or format definition.Name (Description, For-
mat)
Status
The XLIFF translation status of the selected cell. A drop-down list lets you
change the status.
Related Topics
• To change cell properties
The date and time the contents or status of the cell was last changed.Last Updated
2010-10-0919
Page 20

Getting started with the tool
• Translation status
2.3.6 About the Help view
To open the Help view and display help for a particular topic, press F1, or select Help > Related Topics.
The Help view lists a link to a topic most related to the current view or dialog box. The "Dynamic Help"
section lists links to other related topics, and the results of a search.
Using the icons at the bottom of the view, you can list all topics, search the help content, and bookmark
a topic for future reference.
2.4 Customizing the translation management tool window
You can customize how views display in the translation management tool window. The customization
applies every time you log into the translation management tool, regardless of your login information.
DescriptionAction
Open view
Close view
Move view
Detach view
Re-Attach view
Resize view
Related Topics
• About the translation management tool window
To open a view, select it from the Window menu, or click the icon on the translation
management tool toolbar.
To close a view, click the close button in the view title bar, or click the view icon
on the translation management tool toolbar.
To move a view within the translation management tool window, click in the view's
title bar, and drag the view to a new location.
To open a view in a new window, drag the view outside the translation management tool window, or right-click in the view's title bar and select Detached.
To move a detached view back into the translation management tool window,
right-click the view's title bar and deselect Detached.
To make a view larger or smaller, drag the edges of the view. To minimize and
maximize a view, use the icons in the upper right corner of the view.
2010-10-0920
Page 21

Getting started with the tool
2.5 Setting preferences
You can set preferences for:
• The product interface language when using the tool
• The default folders for documents and XLIFF files.
• The language to add automatically to a new resource to translate. This locale is added when the
strings to translate are retrieved from the resource in the translation management tool.
• The languages you use frequently in your document. These languages appear at the top of the list
of available languages in the Language Management view.
• The Auto-fill options define if a new locale must be added by copying the content of another locale.
• The date-time and number values to use when displaying format examples in the tool.
The preferences settings apply every time you start the tool, regardless of your login information.
Related Topics
• To set default folder locations
• To set frequently used languages
• To set the product language
• Terminology used in the translation management tool
2.5.1 To set the product language
Use this procedure to change the translation management tool interface language.
1.
Select Window > Preferences > Set Product Language.
2.
Select a language in the list of available Product Languages.
Note:
For a language to be in the list of available product languages, the language pack must be selected
when installing the translation management tool.
3.
Click Apply to apply the changes, or click OK to apply the changes and close the "Preferences"
dialog box.
Restart the translation management tool for the interface to display in the new language.
Related Topics
• Terminology used in the translation management tool
2010-10-0921
Page 22

Getting started with the tool
2.5.2 To set default folder locations
You can define the default file folders for two types of files:
• resource files
• XLIFF files
The translation management tool wizards use these default folders when saving files.
1.
Select Window > Preferences > Set Default Folders.
2.
To set a default folder for other documents, enter or browse to the folder in the Default User
Document Folder box.
3.
To set a default folder for XLIFF files, enter or browse to the folder in the Default XLIFF Folder box.
4.
Click Apply to apply the changes, or click OK to apply the changes and close the "Preferences"
dialog box.
2.5.3 To set the locale to add automatically
Use this procedure to automatically add a language in the list of locales to translate.
1.
Select Window > Preferences > Set Language Management Options
2.
Check the Automatically add a locale checkbox.
3.
In the list of available locales, select the locale to add.
The selected locale will be automatically added when the resources are opened.
4.
Click Apply to apply the changes, or click OK to apply the changes and close the "Preferences"
dialog.
2.5.4 To set frequently used languages
1.
Select Window > Preferences > Set Language Management Options.
2.
Select a language in the Available list and click the right arrow.
The language moves to the Frequently Used list. The languages in the Frequently Used list appear
at the top of the list of available languages in the Language Management view.
3.
When you have finished adding frequently-used languages, click Apply to apply the changes, or
click OK to apply the changes and close the "Preferences" dialog box.
2010-10-0922
Page 23

Getting started with the tool
Related Topics
• About the Language Management view
2.5.5 To set Auto-fill options
1.
Select Window > Preferences > Set Language Management Options
2.
Select Fill new column with text from Autofill source language if you want a new locale to be
automatically filled when it is added to the list of supported locales.
3.
Select the locale to add from the dropdown menu.
4.
Select Add blank column if you do not want the new locale to be initialized.
5.
When you have finished adding frequently-used languages, click Apply to apply the changes, or
click OK to apply the changes and close the "Preferences" dialog.
2.5.6 To set sample data for formats
1.
Select Window > Preferences > Set Sample Data for Formats.
2.
To define a particular date to use when displaying date-time formats:
a. Select Custom Date-Time.
b. In the Date box, select a date from the calendar.
c. In the Time box, select the hours, minutes, or seconds and then change the number by selecting
or typing the new number.
3.
To define a particular number to use when displaying numeric formats, enter the new number in the
sample number box.
4.
Click Apply to apply the changes, or click OK to apply the changes and close the "Preferences"
dialog box.
2010-10-0923
Page 24

Getting started with the tool
2010-10-0924
Page 25

Translation workflows
Translation workflows
3.1 About translation workflows
You can translate documents in the following ways:
• Translate internally (in-house) using the translation management tool to import content to translate
from a local resource or a resource saved in the repository.
• Translators can add their translation language, translate their strings, and export them back to the
original resource file. The translation is merged with the original file.
• Translators can save the translation metadata locally for offline work in a .tmgr file.
• Once you have extracted the strings to translate, you may also export them in an XLIFF format file
distributing the file for translation with any XLIFF-compliant translation tool (see Chapter 8).
Note:
You cannot translate documents within the repository. You must import the translatable content and
work on it.
Related Topics
• About translating a resource from the CMS repository
• About concurrent translation
3.2 How translated locales are managed
The translation management tool exports back only locales:
• That have been added by the translators with the translation management tool (the locale is added
to the resource)
• That have been modified by the translator with the translation management tool (the locale is updated
if there are no synchronization issues)
When the translation management tool retrieves translatable properties from a source, the source is
not locked. If the source changes during translation, when the tool exports the new translation to the
source, checks are performed to validate the synchronization/consistency between the source and the
translated document.
2010-10-0925
Page 26

Translation workflows
When inconsistencies are found, the tool proposes threee options:
• Update the content stored in the translation management tool with the source (recommended).
• Cancel the whole export. In this case, nothing is done. There is no change in the metadata opened
in the translation management tool, and no change in the source.
• Force the export of the translated strings.
Table 3-1: The different publication options
A translation unit
has been removed from the
source.
A new translation
unit has been
added into the
source and must
be translated.
A translation unit
has been modified in the source.
(An ongoing
translation might
be out of date).
One or more
translations of a
translation unit
has been
changed in the
source.
Removed translation units are also removed from the translation metadata in
the translation management tool.
The new units are added to the translation metadata in the translation management tool. Their status is NEW.
The modified translation unit is imported
with the NEEDS_REVIEW_TRANSLATION or NEEDS_REVIEW_LOCALISATION statuses.
Modified translations are imported in the
translation management tool with the
NEEDS_REVIEW_TRANSLATION or
NEEDS_REVIEW_LOCALISATION statuses.
CancelUpdateStatus
No change.
No change
No change
No change
Force locales publication
Removed translation
units are removed from
the translation metadata
in the translation management tool.
The new translatable
property is added, with
the NEW status, but no
translation is available.
Text source is updated
in the translation management tool but the
translation is published
anyway with the XLIFF
statuses coming from
the translation management tool.
Modified translations
are published in the resource with the XLIFF
statuses coming from
the translation management tool.
3.3 About security and translation rights
Translating objects published in the CMS repository implies that you have the granted authorizations
to do so. These authorizations are given through CMC rights that can be defined at the resource level
or translation management tool level.
2010-10-0926
Page 27

Translation workflows
To use the translation management tool, you must have the Log into translation management tool
right granted. To translate a specific resource, you need to have the following rights granted:
• Translate objects
• Edit objects
When the user has logged into the system, the translation management tool, the rights assigned to the
user define whether or not objects can be edited or translated.
Table 3-2: How edit rights are managed
At system level, in the CMS.
At translation management tool level, before opening an object
DescriptionLevel
The CMS prevents the translation management tool user
from updating any InfoObject multilingual information if
the Edit rights are not granted.
The translation management tool checks the effective
value of this right for the current user. If it is denied, then
a warning message is displayed. The object is opened.
The translator can open the source in the translation
management tool and edit it but it won't be able to save
it later.
At translation management tool level, before saving a new translation in a source
located in the CMS
3.4 About concurrent translation
Translating documents concurrently allows you gain time in the translation process. Different translators
can work in different locales at the same time. It is recommended that only one translator can work on
a specific locale. If two translators try to submit the same locale, the last translator changes may remove
the changes of the other translators. There are two ways you can translate documents:
• Translate internally (in-house) using the translation management tool to import a locally stored file
and add the locale to translate. Translate the content and export the file back to the source file. The
translation is merged with the original file.
• Translate externally by exporting the .tmgr file as an XLIFF format file distributing the file for translation
with any XLIFF-compliant translation tool.
The translation management tool checks the edit rights
of the current user. If the rights are denied, then an error
message is displayed and the translation is not saved.
This is situation for XLIFF import, XLIFF Bulk import or
when importing translation metadata into the source.
When translations are imported back into the original source, the translation management tool exports
back only locales:
2010-10-0927
Page 28

Translation workflows
• That have been added by the translators with the translation management tool (the locale is added
to the resource).
• That have been modified with the translator with the translation management tool (the locale is
updated if there are no synchronization issues).
Thus, strings to translate can be sent to different translators who can translate them in parallel. When
translators export back their translations in the original resource, their export does not overwrite
translations from other translators since they are supposed to work on different locales.
3.5 About translating a resource from the CMS repository
You can translate metadata (document content) and document names in the CMS. To translate a
resource that is stored in the repository:
• You must have the rights to access the repository.
• You must have the rights to translate the document, otherwise you cannot import the translation
back into the source document.
• You must import the resource to the translation management tool and save the .tmgr file locally.
• Export the translation back into the source document on the repository.
In addition to translating the content, you can translate filenames in the repository. Browse to the file
in the repository, click the file and select Add.
3.5.1 To import content to translate from a resource in the CMS repository
You can import all translatable content from the resource and open it locally. You can import a resource
and translate it before exporting it, or you can import a resource and save it for working locally. When
you use the translation management tool to open a resource in the repository, the user rights are verified
in order to check if the user has can edit or translate the document.
Translation metadata is retrieved from the selected object. The object is not actually saved in the file
system, it is not actually extracted from the repository. This prevents the import of the whole document,
when only a subset of the document content is needed for translation. Once this translation metadata
is available from the translation management tool, the translator can work on them.
Only required information is retrieved. The user can work on them or temporarily save the translation
metadata locally for offline work. When the translation is done, use the translation management tool to
export the translated content into the resource in the repository, after checking the user has the
appropriate application rights.
1.
Run the translation management tool using your SAP BusinessObjects credentials.
2.
In the File menu, select File > Import content to translate from > From the repository
3.
In the dialog box, navigate to and select the folder that contains the resources you want to translate.
2010-10-0928
Page 29

Translation workflows
The available documents display in the pane on the right.
4.
In the pane, select a resource and click Add.
The resource file name appears in the import pane below the Add button. You can add more
resources in the same way.
5.
To remove a resource from the list of resources to import, click the resource name and click Remove.
6.
If you want the imported files to replace existing local resources of the same name, select Overwrite
existing documents.
7.
Click Import.
If the import fails for a resource, a warning appears in the "Import status" column of the "Import"
pane. Succesfully imported documents are saved in the local default folder as defined in the
"Preferences" option. If all documents import successfully, the wizard closes.
8.
The translation management tool checks user's rights and raises a warning if the Edit objects or
Translate objects rights is not granted, otherwise the translation management tool retrieves the
translation metadata from the source (import translation metadata). Translation metadata is displayed
in the translation management tool.
9.
Add a locale to the document and save the translations locally.
The translated file is saved locally and can be reopened for editing. When you have finished translating
the file, export it back to the original resource in the repository.
3.5.2 About exporting the translations to the source resource in the CMS repository
Once the resource content has been translated in the needed locales, these translations must be
exported back to the resource in the repository so they can be available for users. The translations
must have been set to the NEEDS_REVIEW_TRANSLATION, NEEDS_REVIEW_L10N,
NEEDS_REVIEW_ADAPTATION, TRANSLATED, SIGNED_OFF, or FINAL status, and the locales
must be set to Visible.
To export translated content to the source resource:
• You must be connected to a CMS repository containing the resource.
• You must have the necessary security rights granted by the administrator.
The translated metadata must be assigned the status visible and exported to the repository so the
translations can be used in documents.
3.6 About translating a local resource
2010-10-0929
Page 30

Translation workflows
For resources that are saved for all users and stored locally, you can extract the metadata from the
local resources and translate the metadata. You can use the translation management tool to translate
resources located on a file system, but the tool can only translate unsecured resources.
The resources that can be translated are:
• Interactive Analysis reports
• Universes created by the universe design tool
• Data Foundations and Business Layers created by the information design tool
As for resources located in the CMS repository, to translate a local resource, you need to extract the
content to translate with the translation management tool and save the files locally and translate them
in the same way you translate local resources.
3.6.1 To import content to translate from a local resource
To import content to translate:
1.
Select File > Import content to translate from > From a local resource
2.
In the dialog box, navigate to, and select the folder that contains the document you want to import.
3.
Select the resource to translate and click OK.
When the strings have been imported you can add locales and translated the strings in these locales,
or you can export these strings to XLIFF for exernal translation.
3.6.2 To export translations to the locally stored resource
Once the resource content has been translated in the needed locales, these translations must be
exported back to the resource so they can be available for users. The translations must have been set
to the NEEDS_REVIEW_TRANSLATION, NEEDS_REVIEW_L10N, NEEDS_REVIEW_ADAPTATION,
TRANSLATED, SIGNED_OFF, or FINAL status. The locales must be set to Visible.
• Select File > Export translated content
Translated content is exported back to the local resource.
3.7 About the TMGR format
When you translate strings coming from a local resouorce or a resource saved in a CMS repository,
you may save your work locally in the translation management tool proprietary file format called TMGR
2010-10-0930
Page 31

Translation workflows
(the file is saved as <filename>.tmgr). This file contains all strings to translate, their current translations
in the different locales, and their statuses. You can open this file later and continue to work on it before
finally exporting the translations back to the resources.
Saving current translations can be useful for offline work where you can still work on translations of a
CMS repository resource without being connected to it. Just select File > Save to save the translations
locally. Once you have the translations, you can close the translation management tool. You can start
the tool at a later date and open the .tmgr files and continue translating the content.
2010-10-0931
Page 32

Translation workflows
2010-10-0932
Page 33

Translating documents
Translating documents
4.1 To add and remove languages in your document
Before you add a language, decide if you want to change the Autofill option or the autofill source
language.
1.
Import the content to translate from a resource.
2.
Open the Language Management view if it is not already open. Select Window > Language
Management View.
3.
To add a language, select the language in the Available Languages list and click the right arrow.
The language is added to the Selected Languages list. A new column for the language is added
to the Translation Editor view. If the Autofill option is turned on, the translation management tool fills
the column with content in the Autofill source language.
4.
To hide the column for the new language in the "Translation Editor" view, clear the View check box.
Note:
The language remains in the document even though it is not displayed.
5.
To remove a language from the document, select the language in the Selected Languages list and
click the left arrow.
The translation management tool asks you to confirm the remove action.
Caution:
When you remove a language, all translated content for the language is lost.
You can start translating the newly added language.
Related Topics
• About the Language Management view
4.2 To set the fallback language
For a description of fallback language, see the terminology topic in the related topics.
2010-10-0933
Page 34

Translating documents
1.
Open the Language Management view if it is not already open. Select Window > Language
Management View.
2.
In the Language Management view, select Visible for the language.
3.
Click the Fallback option for the language.
4.
Select File > Save.
Export the document to the repository for the language to be available to the query and reporting
applications as a fallback language.
Related Topics
• Terminology used in the translation management tool
4.3 To translate strings in the Translation Editor
You can translate short strings in the Translation Editor view. To translate longer strings, use the "Text
Editor" view.
Before you start translating, you must:
• Import the content to translate from a resource.
• Add at least one language to translate.
1.
In the "Translation Editor", in the column with the language to translate, click the cell containing the
content you want to translate.
If the language was added with the Autofill option on, the cell contains the Autofill source language
content. Otherwise the column is blank.
2.
Enter the translation by typing over the previous string.
When you click the cell, the content appears in the Text Editor view. Once you enter the translation,
the status of the cell is automatically set to TRANSLATED.
Note:
You cannot type into cells that contain date and numeric formats. To set a format, right click the cell
and select a default format, or use the Format Editor to create a custom format.
3.
To move to the next cell to translate, click the cell.
Tip:
While you are translating, in addition to the standard editing commands on the Edit menu, you can
press Escape to cancel the current translation and Ctrl + Z to undo the last translation.
4.
Select File > Save.
Related Topics
• To set default formats in the Translation Editor
• About the Translation Editor view
2010-10-0934
Page 35

Translating documents
• To translate strings in the Text Editor
• Translation status
4.4 To translate strings in the Text Editor
Use the "Text Editor" view to translate strings that are too long to translate in the Translation Editor cell.
1.
Import the content to translate from a resource.
2.
Open the Text Editor view if it is not already open. Select Window > Text Editor View.
3.
In the Translation Editor view, click the cell of the content you want to translate.
The source appears in the Source box of the Text Editor. This content cannot be edited.
Existing translated content appears in the Translation box.
4.
Edit the content in the Translation box.
Note:
You cannot edit original content.
5.
To apply what you have translated in the Translation Editor view, click Apply.
6.
To cancel the changes, click Reset.
7.
Select File > Save.
Related Topics
• About the Text Editor view
4.5 To sort strings in the Translation Editor
1.
Import the content to translate from a resource.
2.
Open the List view by clicking the tab on the left side of the Translation Editor view.
3.
Click the column header to sort the list by the strings in that column.
Change the sort from ascending to descending order by clicking the column header again.
4.6 To search and replace strings in the Translation Editor
1.
Import the content to translate from a resource.
2010-10-0935
Page 36

Translating documents
2.
Open the "List" view by clicking the tab on the left side of the Translation Editor view.
3.
Select Edit > Find/Replace.
4.
In the "Find and Replace" dialog box, enter the string to search for in the Find box.
Note:
The translation management tool searches starting from the selected cell in the List view.
5.
To search a selected section of the List view:
a. Click the row at the start of the section you want to search.
b. Hold down Shift and click the row at the end of the section.
The section is highlighted.
c. In the "Find and Replace" dialog box, select the Selected Lines option for the scope.
Note:
You can select the section before selecting Edit > Find/Replace and the Selected Lines option is
selected automatically.
6.
To change the direction of the search, select the Forward or Backward option.
7.
Select other options by selecting the appropriate check boxes:
DescriptionOption
Case-sensitive
The search finds only strings that match the string in the Find box, respecting
upper- and lower-case.
Whole Word
Wrap Search
The search finds only strings that match the entire string in the Find box.
The search continues searching from the beginning of the document when it
reaches the end.
Incremental
8.
Click Find (except if you have selected the Incremental option).
The search starts finding strings as you enter characters into the Find box.
The translation management tool highlights the cell where it finds the search string. The Replace
and Replace/Find buttons are available. If no string is found, these buttons are unavailable.
9.
When the translation management tool finds an instance of the string:
• To find the next instance, click Find.
• To replace the string, enter the replacement string in the Replace With box and click Replace,
or, to replace the string and find the next instance, click Replace/Find.
10.
When you are finished searching, click Close.
2010-10-0936
Page 37

Setting Formats
Setting Formats
5.1 To set default formats in the Translation Editor
Use the Translation Editor view to set the format of number and date-time values to default formats.
Note:
You can also use the Format Editor to select a default format. To define a custom format, you must use
the Format Editor.
1.
In the "Translation Editor", right-click the cell of either a number or a date-time format object.
A shortcut menu displays.
2.
From the shortcut menu, select the default format you want to use.
The new format appears in the cell.
Note:
The application uses the current system date and time and the numeric value 987,654,321 to display
format examples. In the application preferences, you can define your own number and date-time
values to use when displaying formats.
3.
Select File > Save to save the formats.
Related Topics
• To set sample data for formats
• About the Format Editor
5.2 About the Format Editor
The Format Editor lets you define the format used to display date-time and numeric values. You can
select default formats or define custom formats. For metadata objects in your document, you can define
a format for each locale. The formats are saved in the document as part of its localization.
The application uses the current system date and time and the numeric value 987,654,321 to display
formats. In the application preferences, you can define your own number and date-time values to use
when displaying formats.
2010-10-0937
Page 38

Setting Formats
Default Formats
Default formats are available based on Common Locale Data Repository (CLDR) recommendations,
managed by the UNICODE consortium. Microsoft standards, whenever they differ from the CLDR
recommendation, are followed. There are 15 default formats for date and time values, and four default
formats for numbers.
The Format Editor lists the default formats available for each category of data.
Custom Formats
If the default formats available do not meet your needs, you can create formats using the Custom Format
Editor.
You can delete a custom format even if it is used in the document. The next time you start the Format
Editor for an object using the deleted format, a custom format is automatically re-created.
A custom format consists of text and tokens. A token is a pre-formatted part of a number or date. For
example, Day: 1-31 is a token that displays the day part of the date as a number between 1 and 31.
For more information about tokens, see the related topics.
The Custom Format Editor lists the possible token categories. You define a format by typing text in the
Format Definition box, and dragging tokens from the Tokens box. Tokens appear in the format definition
with a rectangle border and a gray background. As you define the format, a preview shows the resulting
appearance.
You can define a display color for each custom format. When no color is defined, the client application
(for example, Interactive Analysis) manages the color to display.
In the Format for undefined values box, you can define text and a color to display if no value is returned
at reporting time. By default, in the case of an undefined value, no text is displayed.
When defining a numeric format, you can enter a different format to be displayed when the value is
negative or equal to zero. If you do not enter a format, the format defined for positive values is used.
Related Topics
• To start the Format Editor
• To start the Custom Format Editor
• To delete a custom format
• Date and time format tokens
• Number format tokens
• To set sample data for formats
5.3 To start the Format Editor
1.
In the "Translation Editor", right-click the cell of either a number or a date-time format object.
A shortcut menu displays.
2010-10-0938
Page 39

Setting Formats
2.
From the shortcut menu, select Other formats (Format Editor)....
Related Topics
• To create a custom format
• About the Format Editor
5.4 To start the Custom Format Editor
You can create a custom format from scratch, or use an existing format (default or custom) as the basis
for the new format.
1.
Start the "Format Editor" if it is not already open.
The possible format categories are listed in Format Categories.
2.
If more than one category of format is possible for the object, select a category in Format Categories.
The default formats and any previously-defined custom formats are listed in Available Formats.
3.
To create a format from scratch, open the "Custom Format Editor" by clicking Custom Format.
4.
To use a format as the basis for a new custom format, first select the format in the Available Formats
list, then open the "Custom Format Editor" by clicking Custom Format.
Related Topics
• To create a custom format
5.5 To create a custom format
1.
Start the "Custom Format Editor "if it is not already open.
2.
In the Tokens list, select a token category or an individual token, and add it to the Format Definition
box using one of these methods:
• Double-click the token or token category.
• Drag the token or token category to the Format Definition box.
Tip:
A description of each token appears as a tool tip when you place the cursor over the token in the
Tokens list. For more information on tokens, see the related topics.
3.
To select a different token in the category, click the arrow on the token just added to the Format
Definition box.
4.
Enter additional tokens in the same way. To add text to a definition, type directly in the Format
Definition box.
2010-10-0939
Page 40

Setting Formats
5.
6.
7.
8.
The custom format you have just defined appears in the Available Formats list in the "Format Editor"
dialog box. To use the format, select it and click OK.
Tip:
Edit the contents of the Format Definition box using the Copy (Ctrl + C), Paste (Ctrl + V), Cut (Ctrl
+ X), and Delete keys.
To set the color of the format definition, select the color from the list next to the format definition box.
An example of the appearance of the format displays in the Preview box.
For number formats, to define a format to display if the value is negative or zero, add tokens and
text in the Format for negative values and Format for values equal to zero definition boxes.
Note:
If you do not define these formats, the format defined in the Positive box displays for negative and
zero values.
For both date-time and number objects, to define text to display when the database returns no value,
enter text in the Format for undefined values box.
To save the format definition, click OK.
The "Custom Format Editor" dialog box closes.
Related Topics
• To start the Custom Format Editor
• Date and time format tokens
• Number format tokens
• About the Format Editor
5.6 To delete a custom format
1.
Start the "Format Editor" if it is not already open.
The possible format categories are listed in Format Categories.
2.
If more than one category of format is possible for the object, select a category in Format Categories.
The default formats and any previously-defined custom formats are listed in Available Formats.
3.
Select the custom format in the Available Formats list.
4.
To delete the format, click Delete.
The format is removed from the list.
5.
To confirm the deletion, click OK.
You can delete a custom format even if it is used elsewhere in the document. The next time you start
the Format Editor for an object using the deleted format, a custom format is automatically re-created.
2010-10-0940
Page 41

Setting Formats
Related Topics
• To start the Format Editor
2010-10-0941
Page 42

Setting Formats
2010-10-0942
Page 43

Managing status
Managing status
6.1 Translation status
A status is assigned to the content of each cell to be translated in every language. The translation
management tool uses the ten standard XML Localization Interchange File Format (XLIFF) statuses,
grouped into two categories.
DescriptionXLIFF statusCategory
Needs Translation
(This content
is not displayed to the
end-user)
NEW
NEEDS_TRANSLATION
NEEDS_ADAPTATION
NEEDS_L10N
Indicates that the content is new. For example,
content that was added to or edited in a previously
translated document.
Indicates that the content needs to be translated.
Indicates only non-textual information needs
adaptation.
Indicates text needs translation and non-textual
information needs adaptation.
2010-10-0943
Page 44

Managing status
DescriptionXLIFF statusCategory
Translation
Visible
(This content
can be displayed to the
end-user)
Note:
• In BI launch pad, users are able to see the translation in BI launch pad, even when the status of that
particular translation is "Needs Translation".
• Localization (L10N) refers to the translation of text and the adaptation of non-textual content (for
example, date formats).
NEEDS_REVIEW_ADAPTATION
NEEDS_REVIEW_ L10N
NEEDS_REVIEW_TRANSLATION
TRANSLATED
SIGNED_OFF
FINAL
Indicates only non-textual information needs review.
Indicates translation and adaptation of non-textual
content needs review.
Indicates that translated content needs to be reviewed.
Indicates that the content has been translated.
Indicates that changes are reviewed and approved.
Indicates the terminating state.
You can use some or all of these statuses, depending on your organization and process. The translation
management tool sets statuses automatically and changes the display in the editor at certain stages
in the translation process.
• When you add a language, the cells have a status in the "Needs Translation" category. The content
appears in blue italic font in the Translation Editor.
• Content that has been added to or edited in a previously translated document has an XLIFF status
of NEW. The content appears in blue italic font in bold.
• Once you have translated the content of a cell, the status automatically changes to TRANSLATED,
which is in the "Translation Visible" category. The content appears in black normal font.
• When you set a language to Ready for use and export the document to the Content Management
Server, strings with a status in the "Translation Visible" category are visible in the client query and
reporting tools.
Filtering cells displayed in the List view by status can help you manage the translation workflow.
Use the Cell Properties view to see the status of a cell.
For more information about XLIFF, see the XLIFF standards available on the OASIS Consortium web
site.
2010-10-0944
Page 45

Managing status
Related Topics
• To filter the List view by status
• To change cell status
• To change cell properties
• About the Cell Properties view
• OASIS Consortium at http://www.oasis-open.org/
6.2 About metadata translation history
The tool may save with the metadata the date that the metadata was last edited. This feature is supported
by
• Interactive Analysis documents (.wid)
• universe design tool universes (.unv)
• information design tool data foundation and business layers (.dfx and .blx)
Note:
This is not supported by Crystal Reports documents.
6.3 To filter the List view by status
1.
Import the content to translate from a resource.
2.
Open the List view by clicking the tab on the left side of the "Translation Editor" view.
3.
Open the Filter view if it is not already open. Select Window > Filter View.
4.
Select the language to filter in the list of languages.
5.
Select the category you want to filter on in the list of status categories.
6.
To filter on individual XLIFF statuses, select More... in the list of categories.
The list of all XLIFF statuses appears. Select the check boxes of the statuses you want to filter on.
The filter is applied to the display in the List view.
Related Topics
• Translation status
• About the Filter view
2010-10-0945
Page 46

Managing status
6.4 To change cell properties
1.
Import the content to translate from a resource.
2.
Select Windows > Cell Properties View to open the Cell Properties view.
3.
In the Translation Editor view, click the cell you want to change the status of.
The properties of the cell appear in the Cell Properties view.
4.
To change the XLIFF status, in the Cell Properties view, select the status in the list in the Value
column for the "Status" property.
Note:
To change the XLIFF status for a group of cells, use the "Change Status" dialog box.
5.
To change the approved status, select True or False in the list in the Value column for the "Approved"
property.
Note:
The translation management tool does not use the Approved property. Using the XLIFF translation
status is recommended.
6.
Select File > Save.
Related Topics
• To change cell status
• About the Cell Properties view
6.5 To change cell status
1.
Import the content to translate from a resource.
2.
In the Translation Editor view, click the row of the cell you want to change the status of.
3.
To select all cells in a section, click the first row in the section. Hold down Shift and click the row at
the end of the section.
4.
Right-click the selected row or section, and select Change Status.
5.
In the "Change Status" dialog box, select the language in the Language list.
6.
Select the new status in the Status box and click OK.
7.
Select File > Save.
Note:
You can also change the status of a cell in the Cell Properties view.
2010-10-0946
Page 47

Using XLIFF to exchange document translations
Using XLIFF to exchange document translations
7.1 About XLIFF files
The translation management tool creates an XLIFF file for each target language you select when you
export. You can select one source language and any number of alternate translation languages for
export.
Each XLIFF file is created with the source and target languages in the file name, for example: Docu
ment_name.unv_en_US_DE.xlf is a universe file for a US English file that will be translated into
German. For an Interactive Analysis document, the file format is:
Document_name.wid_en_US_DE.xlf.
The XLIFF file contains:
• Document information:
• Full document name, including the Central Management Server name
• Source locale
• Target locale
• Document type
• For each string:
• String identifier
• String in the source language
• String, translation status, and locale for each alternate translation language
• Notes for the translator
Note:
The translation management tool follows XLIFF specification version 1.2.
For more information about XLIFF file formats, see the XLIFF standards available on the OASIS
Consortium web site.
Related Topics
• OASIS Consortium at http://www.oasis-open.org/
2010-10-0947
Page 48

Using XLIFF to exchange document translations
7.2 Exporting and Importing XLIFF files
If you send translations to third-party translators or vendors, you can use XLIFF (XML Localization
Interchange File Format) files to exchange documents.
Use the following workflow with the translation management tool to outsource the translations of a
document using XLIFF files. See the related topics for more information on the steps in this workflow.
• Open or import the document from the Central Management Server (CMS).
• Export the document to XLIFF using the "Export to XLIFF" wizard.
• When you receive completed XLIFF files from the third-party, import them to the translation
management tool document using the "Import from XLIFF" wizard.
• You can use the translation management tool to display and edit the translations, manage status,
and import the document to the CMS.
Related Topics
• To export to XLIFF - select source
• To export to XLIFF - select target
• To import from XLIFF files
7.3 To export to XLIFF - select source
The document you want to export must be open in the Translation Editor view. Open the Export to
XLIFF wizard if it is not already open. Select File > Export to XLIFF file.
1.
Select the document you want to export in the document list.
Note:
You can only export one document at a time.
2.
Check the boxes next to the languages you want to export on the list of languages that are available
for the document. You can export one or more languages.
You can add other locales if they are not already in the .tmgr file.
Note:
You must export at least one language.
3.
Select the source option for one of the export languages.
The language you select is the source language in the XLIFF file. Any other languages exported
are included in the XLIFF file as alternate translations.
4.
If you export the original content, you must select the language of the original content in the list of
languages.
2010-10-0948
Page 49

Using XLIFF to exchange document translations
5.
Click Next to select the target languages and continue the export.
Related Topics
• To export to XLIFF - select target
• About XLIFF files
7.4 To export to XLIFF - select target
You have started the Export to XLIFF wizard and have selected the source languages. To continue
with the export:
1.
Select a target language in the Available Languages list and click the right arrow.
2.
Add more target languages in the same way.
The translation management tool creates an XLIFF file for each target language.
3.
To remove a target language, select it in the Selected Languages list and click the left arrow.
4.
The translation management tool creates the XLIFF files in the local default folder. To change the
folder, enter or browse to a new folder in the XLIFF file folder box.
5.
Click Finish.
Note:
The Finish button is unavailable if you have not completed the required information. Make sure you
selected at least one target language. Use the Back button, if necessary, and make sure you have
completed the steps in the "Export to XLIFF - select source" dialog box.
Note:
If you choose a target language that you have already translated or added to your document, the
third-party translator will see your translation and might modify it. This will result in a warning message
when you import the XLIFF file.
Related Topics
• To export to XLIFF - select source
• About XLIFF files
7.5 To import from XLIFF files
Open the "Import from XLIFF" wizard if it is not already open. Select File > Import from XLIFF file.
1.
Select the document to import the XLIFF files to.
2.
Enter or browse to the XLIFF folder where the translated XLIFF files are located.
2010-10-0949
Page 50

Using XLIFF to exchange document translations
All the XLIFF files in the folder are listed. If you want to filter by the same name as the document,
check Filter by document name.
3.
Check the boxes next to the XLIFF files you want to import.
The "Matching Status" column provides information about the XLIFF file you are about to import:
• A warning message appears if the language in the XLIFF file exists in the document. You can
proceed with the import, but any previous translations are overwritten.
• A message appears if the XLIFF file was not exported from the same document. You can proceed
with the import, but some content may be corrupted.
• The message "OK" appears if no problems are found when matching the document to the XLIFF
file.
4.
Click Finish.
The translated languages are added to the Translation Editor and the Language Management views.
Related Topics
• About XLIFF files
2010-10-0950
Page 51

Reference
Reference
8.1 List of locales and their dominant locales
Dominant LocaleLocale AbbreviationLocale
af_ZAaf_ZAAfrikaans (South Africa)
sq_ALsq_ALAlbanian (Albania)
ar_SAar_DZArabic (Algeria)
ar_SAar_BHArabic (Bahrain)
ar_SAar_EGArabic (Egypt)
ar_SAar_IQArabic (Iraq)
ar_SAar_JOArabic (Jordan)
ar_SAar_KWArabic (Kuwait)
ar_SAar_LBArabic (Lebanon)
ar_SAar_LYArabic (Libya)
ar_SAar_MAArabic (Morocco)
ar_SAar_OMArabic (Oman)
ar_SAar_QAArabic (Qatar)
ar_SAar_SAArabic (Saudi Arabia)
ar_SAar_SYArabic (Syria)
ar_SAar_TNArabic (Tunisia)
ar_SAar_AEArabic (United Arab Emirates)
ar_SAar_YEArabic (Yemen)
hy_AMhy_AMArmenian (Armenia)
2010-10-0951
Page 52

Reference
Dominant LocaleLocale AbbreviationLocale
az_AZaz_AZAzerbaijani (Azerbaijan)
eu_ESeu_ESBasque (Spain)
be_BYbe_BYBelarusian (Belarus)
bn_INbn_INBengali (India)
bs_BAbs_BABosnian (Bosnia and Herzegovina)
bg_BGbg_BGBulgarian (Bulgaria)
ca_ESca_ESCatalan (Spain)
zh_CNzh_CNChinese (China)
zh_TWzh_HKChinese (Hong Kong SAR China)
zh_TWzh_MOChinese (Macao SAR China)
zh_CNzh_SGChinese (Singapore)
zh_TWzh_TWChinese (Taiwan)
hr_HRhr_HRCroatian (Croatia)
cs_CZcs_CZCzech (Czech Republic)
da_DKda_DKDanish (Denmark)
nl_NLnl_BEDutch (Belgium)
nl_NLnl_NLDutch (Netherlands)
en_USen_AUEnglish (Australia)
en_USen_BZEnglish (Belize)
en_USen_CAEnglish (Canada)
en_USen_IEEnglish (Ireland)
en_USen_JMEnglish (Jamaica)
en_USen_NZEnglish (New Zealand)
en_USen_PHEnglish (Philippines)
en_USen_ZAEnglish (South Africa)
en_USen_TTEnglish (Trinidad and Tobago)
en_USen_VIEnglish (U.S. Virgin Islands)
2010-10-0952
Page 53

Reference
Dominant LocaleLocale AbbreviationLocale
en_USen_GBEnglish (United Kingdom)
en_USen_USEnglish (United States)
en_USen_ZWEnglish (Zimbabwe)
et_EEet_EEEstonian (Estonia)
fo_FOfo_FOFaroese (Faroe Islands)
fi_FIfi_FIFinnish (Finland)
fr_FRfr_BEFrench (Belgium)
fr_FRfr_CAFrench (Canada)
fr_FRfr_FRFrench (France)
fr_FRfr_LUFrench (Luxembourg)
fr_FRfr_MCFrench (Monaco)
fr_FRfr_CHFrench (Switzerland)
gl_ESgl_ESGalician (Spain)
ka_GEka_GEGeorgian (Georgia)
de_DEde_ATGerman (Austria)
de_DEde_DEGerman (Germany)
de_DEde_LIGerman (Liechtenstein)
de_DEde_LUGerman (Luxembourg)
de_DEde_CHGerman (Switzerland)
el_GRel_GRGreek (Greece)
gu_INgu_INGujarati (India)
he_ILhe_ILHebrew (Israel)
hi_INhi_INHindi (India)
hu_HUhu_HUHungarian (Hungary)
is_ISis_ISIcelandic (Iceland)
id_IDid_IDIndonesian (Indonesia)
it_ITit_ITItalian (Italy)
2010-10-0953
Page 54

Reference
Dominant LocaleLocale AbbreviationLocale
it_ITit_CHItalian (Switzerland)
ja_JPja_JPJapanese (Japan)
kn_INkn_INKannada (India)
kk_KZkk_KZKazakh (Kazakhstan)
kok_INkok_INKonkani (India)
ko_KRko_KRKorean (South Korea)
lv_LVlv_LVLatvian (Latvia)
lt_LTlt_LTLithuanian (Lithuania)
mk_MKmk_MKMacedonian (Macedonia)
ms_MYms_BNMalay (Brunei)
ms_MYms_MYMalay (Malaysia)
ml_INml_INMalayalam (India)
mt_MTmt_MTMaltese (Malta)
mr_INmr_INMarathi (India)
mn_MNmn_MNMongolian (Mongolia)
se_NOse_NONorthern Sami (Norway)
nb_NOnb_NONorwegian Bokmål (Norway)
nn_NOnn_NONorwegian Nynorsk (Norway)
fa_IRfa_IRPersian (Iran)
pl_PLpl_PLPolish (Poland)
pt_BRpt_BRPortuguese (Brazil)
pt_BRpt_PTPortuguese (Portugal)
pa_INpa_INPunjabi (India)
ro_ROro_RORomanian (Romania)
ru_RUru_RURussian (Russia)
sr_BAsr_BASerbian (Bosnia and Herzegovina)
sr_BAsr_CSSerbian (Serbia And Montenegro)
2010-10-0954
Page 55

Reference
Dominant LocaleLocale AbbreviationLocale
sk_SKsk_SKSlovak (Slovakia)
sk_SKsl_SISlovenian (Slovenia)
es_ESes_ARSpanish (Argentina)
es_ESes_BOSpanish (Bolivia)
es_ESes_CLSpanish (Chile)
es_ESes_COSpanish (Colombia)
es_ESes_CRSpanish (Costa Rica)
es_ESes_DOSpanish (Dominican Republic)
es_ESes_ECSpanish (Ecuador)
es_ESes_SVSpanish (El Salvador)
es_ESes_GTSpanish (Guatemala)
es_ESes_HNSpanish (Honduras)
es_ESes_MXSpanish (Mexico)
es_ESes_NISpanish (Nicaragua)
es_ESes_PASpanish (Panama)
es_ESes_PYSpanish (Paraguay)
es_ESes_PESpanish (Peru)
es_ESes_PRSpanish (Puerto Rico)
es_ESes_ESSpanish (Spain)
es_ESes_UYSpanish (Uruguay)
es_ESes_VESpanish (Venezuela)
sw_KEsw_KESwahili (Kenya)
sv_SEsv_FISwedish (Finland)
sv_SEsv_SESwedish (Sweden)
syr_SYsyr_SYSyriac (Syria)
ta_INta_INTamil (India)
te_INte_INTelugu (India)
2010-10-0955
Page 56

Reference
Dominant LocaleLocale AbbreviationLocale
th_THth_THThai (Thailand)
tn_ZAtn_ZATswana (South Africa)
tr_TRtr_TRTurkish (Turkey)
uk_UAuk_UAUkrainian (Ukraine)
uz_UZuz_UZUzbek (Uzbekistan)
vi_VNvi_VNVietnamese (Vietnam)
cy_GBcy_GBWelsh (United Kingdom)
xh_ZAxh_ZAXhosa (South Africa)
zu_ZAzu_ZAZulu (South Africa)
8.2 Number format tokens
Number format definitions
A number format definition is made of sections:
• the sign (optional)
• the integer value before the decimal separator
• a grouping separator, to be added in the integer value
• the decimal separator (optional)
• the decimal value after the decimal separator (optional)
• the exponential symbol followed by the exponential value (optional)
Two tokens are used to define the number of significant digits to display in the integer, decimal, and
exponential values. Each token in the format definition represents a digit to display:
• The mandatory digit token, 0, displays the digit if it is significant, otherwise displays a zero.
• The optional digit token, #, only displays the digit if it is significant.
When determining the significant digits, the integer value and exponential value are evaluated from
right to left, and the decimal value is evaluated from left to right. The last 0 or # token is mapped to the
remaining digits, if any.
Example: Number format display
This example shows how the value -1,234 is displayed using different formats defined in the Format
Editor.
2010-10-0956
Page 57

Reference
Preview display:Format defined with tokens:
-1234[Sign] [#]
(001234)[Neg. start] [0] [0] [0] [0] [0] [0] [Neg. end]
-1234.00[Sign always] [#] [Dec.Sep.] [0] [0]
-1.23E+003[Sign] [#] [Decimal separator] [0] [0] [E+] [0] [0] [0]
Revenue: -1234.00 €Revenue: [Sign always] [#] [Decimal separator ] [0] [0]
true[Boolean]
List of number format tokens
DescriptionTokenCategory
Signs
Digits
Separators
Sign
Sign always
Negative start
Negative end
#
0
Decimal separator
Grouping
E+
Negative sign if the value is negative. Nothing if the value is positive
or zero.
Negative sign if the value is negative. Positive sign if the value is
positive or zero.
Open parenthesis if the value is negative. Nothing if the value is
positive or zero.
Closing parenthesis if the value is negative. Nothing if the value is
positive or zero.
Optional digit. Displays digit only if significant.
Mandatory digit. Displays digit if significant, otherwise displays zero.
The symbol used to separate the integer and decimal parts of the
number. The symbol used is determined by the locale. The decimal
separator can be used only once in an expression.
By default, digits are grouped using the rule and the separator defined by the locale. The grouping symbol can be used only once in
an expression. It must appear before the decimal separator.
Exponent sign in upper case, always signed. Can be used only
once in an expression.
Exponents
E-
e+
e-
Exponent sign in upper case, signed only if the value is negative.
Can be used only once in an expression.
Exponent sign in lower case, always signed. Can be used only once
in an expression.
Exponent sign in lower case, signed only if the value is negative.
Can be used only once in an expression.
2010-10-0957
Page 58

Reference
DescriptionTokenCategory
Percent
Percent
Percent %
Boolean
Boolean
True
False
8.3 Date and time format tokens
Example: Date and time format display
This example shows how the date, Wednesday March 5th 2008, is displayed using different formats
defined in the Custom Format Editor.
The value multiplied by 100.
The value multiplied by 100 followed by the percent sign (%). Can
be used only once in an expression.
Localized value of true if the numerical value is not zero; localized
value of false if the numerical value is zero.
Always displays the localized value of true.
Always displays the localized value of false.
2010-10-0958
Page 59

Reference
0000-9999]
[Capitalized short month name]
Preview display:Format defined with tokens:
Wednesday, March 05 2008[Day name] , [Month name] [Day 01-31] [Year
03/05/2008[Month 01-12] / [Day 01-31] / [Year 0000-9999]
Wed 05 Mar[Capitalized short day name] [Day 01-31]
Wednesday, week 10[Day name], week [Week of year 01-53]
The current date is [Day name], [Month name]
[Day 01-31] [Year 0000-9999] . Day name is
[Upper case day name] . Month name is [Lower
case month name]. The year is [Year 00-99] .
List of date and time tokens
Day 01-31
Day 1-31
Day name
Short day name
Day of year 001-366
Day of year 01-366
Day
Day of year 1-366
The current date is Wednesday, March 05 2008.
Day Name is WEDNESDAY. Month name is
march. The year is 08.
DescriptionTokenCategory
Day in the month with two digits from 01 to 31.
Day in the month with one or two digits from 1 to
31.
Day name according to the locale, for example,
Monday.
Short day name with capitalization according to
the locale, for example, Mon.
Day in the year with three digits from 001 to 366.
Day in the year with two or three digits from 01 to
366.
Day in the year with one, two, or three digits from
1 to 366.
Day of week in month
Upper-case day name
Lower-case day name
Capitalized day name
Upper-case short day name
Lower-case short day name
Day of the week in the month according to the
locale, for example, 3 for the 3rd Monday of June.
Day name in upper case, for example, MONDAY.
Day name in lower case, for example, monday.
Capitalized day name, for example, Monday.
Short day name in upper case, for example, MON.
Short day name in lower case, for example, mon.
2010-10-0959
Page 60

Reference
DescriptionTokenCategory
Month
Capitalized short day name
Month 01-12
Month 1-12
Month name
Short month name
Upper-case month name
Lower-case month name
Capitalized month name
Upper-case short month name
Lower-case short month name
Capitalized short month name
Capitalized short day name, for example, Mon.
Month in the year with two digits from 01 to 12.
Month in the year with one or two digits from 1 to
12.
Month name with capitalization according to the
locale, for example, June.
Short month name with capitalization according
to the locale, for example, Jun.
Month name in upper case, for example, JUNE.
Month name in lower case, for example, june.
Capitalized month name, for example, June.
Short month name in upper case, for example
JUN.
Short month name in lower case, for example,
jun.
Capitalized short month name, for example, Jun.
Year and Era
Year 00-99
Year 0000-9999
Japanese Imperial period and year
Japanese Imperial period (English)
and year
Japanese Imperial year number 0199
Japanese Imperial year number 1-99
Japanese Imperial period
Japanese Imperial year
Era
Year with two digits from 00 to 99.
Year with four digits from 0000 to 9999.
Japanese Imperial period and year number, for
example, .
Japanese Imperial period (English abbreviated)
and year number, for example, H20.
Japanese Imperial year number with two digits.
Japanese Imperial year number with one or two
digits.
Japanese Imperial period.
Deprecated. Returns the same result as
Japanese Imperial year number 0-99 token.
Era abbreviation, for example, AD or BC.
2010-10-0960
Page 61

Reference
DescriptionTokenCategory
Week
Quarter and
Semester
Week of month
Week of year 01-53
Week of year 1-53
Year of week of year 0000
Year of week of year 00
Quarter number 1-4
Short quarter name
Quarter name
Semester 1-2
Hour 00-23
Hour 0-23
Week in the month with one digit from 1 to 6.
Week in the year (ISO week) with two digits from
01 to 53.
Week in the year (ISO week) with one or two
digits from 1 to 53.
ISO year number (consistent with ISO week) with
four digits from 0000 to 9999.
ISO year number (consistent with ISO week) with
two digits from 00 to 99.
Quarter number with one digit from 1 to 4.
Quarter short name from Q1 to Q4.
Quarter name from 1st quarter to 4th quarter.
Semester number from 1 to 2.
Hour in 24-hour format with two digits from 00 to
23.
Hour in 24-hour format with one or two digits from
0 to 23.
Hour
Minute
Hour 01-12
Hour 1-12
Hour 01-24
Hour 1-24
Hour 00-11
Hour 0-11
Minutes 00-59
Minutes 0-59
Hour in 12-hour format with two digits from 01 to
12.
Hour in 12-hour format with one or two digits from
1 to 12.
Hour in 24-hour format with two digits from 01 to
24.
Hour in 24-hour format with one or two digits from
1 to 24.
Hour in 12-hour format with two digits from 00 to
11.
Hour in 12-hour format with one or two digits from
0 to 11.
Minutes with two digits from 00 to 59.
Minutes with one or two digits from 0 to 59.
2010-10-0961
Page 62

Reference
DescriptionTokenCategory
Second and
sub-second
Time Zone
AM/PM
Seconds 00-59
Seconds 0-59
Milliseconds 000-999
Hundredths of a second 000-999
Tenths of a second 0-9
Time zone
AM/PM
Upper-case AM/PM
Lower-case am/pm
Capitalized Am/Pm
Seconds with two digits from 00 to 59.
Seconds with one or two digits from 0 to 59.
Milliseconds with three digits from 000 to 999.
Hundredths of a second with two digits from 00
to 99.
Tenths of a second with one digit from 1 to 9.
The offset from Coordinated Universal Time, for
example, GMT+00:00.
Morning/afternoon abbreviation, capitalized according to locale, for example, AM or PM. Recommended.
Morning/afternoon abbreviation in upper-case, for
example, AM or PM.
Morning/afternoon abbreviation in lower-case, for
example, am or pm.
Capitalized morning/afternoon abbreviation, for
example, Am or Pm. Not recommended.
Deprecated. This token was used as a date separator in Desktop Intelligence and is not recom-
Date separator
mended. Type the character you wish to use as
a date separator directly into the format description, or use a default format.
Separator
Deprecated. This token was used as a time separator in Desktop Intelligence and is not recom-
Time separator
mended. Type the character you wish to use as
a time separator directly into the format description, or use a default format.
8.4 Types of InfoObject supported by the translation management tool
You can translate either the description, or name and description of most types of InfoObjects. The tool
supports the following types of InfoObject:
2010-10-0962
Page 63

Reference
Translatable PropertiesObject Type
SI_NAME, SI_DESCRIPTIONAgnostic
SI_NAME, SI_DESCRIPTIONCalendar
SI_NAME, SI_DESCRIPTIONCategory
SI_NAME, SI_DESCRIPTIONCustomRole
SI_DESCRIPTIONEnterpriseNode
SI_NAME, SI_DESCRIPTIONEvent
SI_NAME, SI_DESCRIPTIONExcel
SI_DESCRIPTIONFavoritesFolder
SI_NAME, SI_DESCRIPTIONFolder
SI_NAME, SI_DESCRIPTIONHyperlink
SI_DESCRIPTIONInbox
SI_NAME, SI_DESCRIPTIONManifest
SI_NAME, SI_DESCRIPTIONObjectPackage
SI_NAME, SI_DESCRIPTIONPdf
SI_DESCRIPTIONPersonalCategory
SI_NAME, SI_DESCRIPTIONProfile
SI_NAME, SI_DESCRIPTIONProgram
SI_NAME, SI_DESCRIPTIONPublication
SI_NAME, SI_DESCRIPTIONQaaWS
SI_NAME, SI_DESCRIPTIONRemoteCluster
SI_NAME, SI_DESCRIPTIONReplication
SI_NAME, SI_DESCRIPTIONRtf
SI_NAME, SI_DESCRIPTIONServer
SI_NAME, SI_DESCRIPTIONServerGroup
SI_NAME, SI_DESCRIPTIONShortcut
SI_NAME, SI_DESCRIPTIONTxt
SI_DESCRIPTIONUser
2010-10-0963
Page 64

Reference
Translatable PropertiesObject Type
SI_NAME, SI_DESCRIPTIONUserGroup
SI_NAME, SI_DESCRIPTIONWord
SI_NAME, SI_DESCRIPTION, Universe contentUniverse (.unv)
Data Foundation
Business Layer
Interactive Analysis Doc
Web Intelligence Doc
Crystal Reports Doc
Xcelsius
Dashboard
SI_NAME, SI_DESCRIPTION, Data Foundation
content
SI_NAME, SI_DESCRIPTION, Business Layer
content
SI_NAME, SI_DESCRIPTION, interactive analysis
document content
SI_NAME, SI_DESCRIPTION, Web Intelligence
document content
SI_NAME, SI_DESCRIPTION, Crystal Report
document content
SI_NAME, SI_DESCRIPTION, Xcelsius document
itself
SI_NAME, SI_DESCRIPTION, some properties
saved in the InfoObject
2010-10-0964
Page 65

More Information
More Information
LocationInformation Resource
SAP BusinessObjects product information
SAP Help Portal
SAP Service Marketplace
http://www.sap.com
Navigate to http://help.sap.com/businessobjects and on the "SAP BusinessObjects Overview" side panel click All Products.
You can access the most up-to-date documentation covering all SAP
BusinessObjects products and their deployment at the SAP Help Portal.
You can download PDF versions or installable HTML libraries.
Certain guides are stored on the SAP Service Marketplace and are not
available from the SAP Help Portal. These guides are listed on the Help
Portal accompanied by a link to the SAP Service Marketplace. Customers
with a maintenance agreement have an authorized user ID to access
this site. To obtain an ID, contact your customer support representative.
http://service.sap.com/bosap-support > Documentation
• Installation guides: https://service.sap.com/bosap-instguides
• Release notes: http://service.sap.com/releasenotes
The SAP Service Marketplace stores certain installation guides, upgrade
and migration guides, deployment guides, release notes and Supported
Platforms documents. Customers with a maintenance agreement have
an authorized user ID to access this site. Contact your customer support
representative to obtain an ID. If you are redirected to the SAP Service
Marketplace from the SAP Help Portal, use the menu in the navigation
pane on the left to locate the category containing the documentation you
want to access.
Docupedia
Developer resources
https://cw.sdn.sap.com/cw/community/docupedia
Docupedia provides additional documentation resources, a collaborative
authoring environment, and an interactive feedback channel.
https://boc.sdn.sap.com/
https://www.sdn.sap.com/irj/sdn/businessobjects-sdklibrary
2010-10-0965
Page 66

More Information
LocationInformation Resource
SAP BusinessObjects articles on
the SAP Community Network
Notes
Forums on the SAP Community
Network
Training
Online customer support
https://www.sdn.sap.com/irj/boc/businessobjects-articles
These articles were formerly known as technical papers.
https://service.sap.com/notes
These notes were formerly known as Knowledge Base articles.
https://www.sdn.sap.com/irj/scn/forums
http://www.sap.com/services/education
From traditional classroom learning to targeted e-learning seminars, we
can offer a training package to suit your learning needs and preferred
learning style.
http://service.sap.com/bosap-support
The SAP Support Portal contains information about Customer Support
programs and services. It also has links to a wide range of technical information and downloads. Customers with a maintenance agreement
have an authorized user ID to access this site. To obtain an ID, contact
your customer support representative.
Consulting
http://www.sap.com/services/bysubject/businessobjectsconsulting
Consultants can accompany you from the initial analysis stage to the
delivery of your deployment project. Expertise is available in topics such
as relational and multidimensional databases, connectivity, database
design tools, and customized embedding technology.
2010-10-0966
Page 67

Index
A
access rights 12
adding a language 33
authentication
description 12
logging in 15
Autofill option
source language 10
C
Category view 17
Cell Properties view 19
changing
cell properties 46
password 15
status 46
CMS
access rights 12
connecting to 15
customizing
formats 37, 38
views 20
D
date-time format 37, 58
default
folders 22
formats 37
locale 10
deleting a language 33
derived universes 10
document, definition of 10
dominant locales 10, 51
E
editing
status 46
strings 34, 35
enterprise authentication 12
exporting
files to XLIFF 48
external translation 48
F
fallback language 10
Filter view 19
filtering strings by status 45
find/replace strings 35
Format Editor
description 37
using 37
formats
date-time tokens 58
number tokens 56
setting 37
frequently used languages
setting 22
H
Help view 20
I
importing
XLIFF 49
in-house translation 34
installing translation management tool
15
Interactive Analysis Intelligence reports
10
Interactive Analysis reports 8
interface, translation management tool
16
L
Language Management view 17
language terminology 10
LDAP authentication 12
List view 17
locale 10
logging into translation management
tool 15
login password 15
M
managing languages 17, 33
N
number format 37, 56
O
offline mode 12
original content language 10
P
password, changing 15
preferences
folders 22
frequently used languages 22
product language 21
setting 21
Preferred Viewing Language 10
product language
definition 10
setting 21
properties
changing 46
view 19
R
removing a language 33
rights 12
S
searching strings 35
sorting strings 35
source
XLIFF 48
source language 10
standalone mode 12
status
changing 46
filtering by 45
translation 43
substitution language
definition 10
display 10
setting 33
T
Text Editor view 18, 35
third-party translation 48
tokens 56, 58
2010-10-0967
Page 68

Index
translating
by a third party 48
strings 34, 35
translating
Interactive Analysis reports 8
Web Intelligence reports 8
Translation Editor view 17
translation status 43
U
universes 10
updating
cell properties 46
status 46
V
view customizing 20
views
Cell Properties 19
Filter 19
Help 20
Language Management 17
Text Editor 18
Translation Editor 17
W
Web Intelligence reports 8
window 16
Windows authentication 12
X
XLIFF
exporting files 48
file exchange 48
file structure 47
importing 49
status 43
target languages 49
2010-10-0968
 Loading...