

Page 1

Administrator's Guide
■ SAP BusinessObjects Information platform services 4.0
2010-12-02
Page 2

Copyright
© 2010 SAP AG. All rights reserved.SAP, R/3, SAP NetWeaver, Duet, PartnerEdge, ByDesign, SAP
Business ByDesign, and other SAP products and services mentioned herein as well as their respective
logos are trademarks or registered trademarks of SAP AG in Germany and other countries. Business
Objects and the Business Objects logo, BusinessObjects, Crystal Reports, Crystal Decisions, Web
Intelligence, Xcelsius, and other Business Objects products and services mentioned herein as well
as their respective logos are trademarks or registered trademarks of Business Objects S.A. in the
United States and in other countries. Business Objects is an SAP company.All other product and
service names mentioned are the trademarks of their respective companies. Data contained in this
document serves informational purposes only. National product specifications may vary.These materials
are subject to change without notice. These materials are provided by SAP AG and its affiliated
companies ("SAP Group") for informational purposes only, without representation or warranty of any
kind, and SAP Group shall not be liable for errors or omissions with respect to the materials. The
only warranties for SAP Group products and services are those that are set forth in the express
warranty statements accompanying such products and services, if any. Nothing herein should be
construed as constituting an additional warranty.
2010-12-02
Page 3

Contents
Getting Started......................................................................................................................13Chapter 1
1.1
1.1.1
1.1.2
1.1.3
1.2
1.2.1
1.2.2
1.2.3
2.1
2.1.1
2.1.2
2.1.3
2.1.4
2.1.5
2.1.6
2.1.7
2.1.8
2.1.9
2.1.10
2.1.11
2.2
2.3
2.3.1
2.3.2
2.3.3
2.3.4
2.4
2.4.1
2.4.2
Before you start.....................................................................................................................13
Key concepts.........................................................................................................................13
Key administrative tools.........................................................................................................15
Key tasks...............................................................................................................................16
About this help.......................................................................................................................18
Who should use this help?.....................................................................................................19
About Information platform services.......................................................................................19
Variables................................................................................................................................19
Architecture...........................................................................................................................21Chapter 2
Architecture overview............................................................................................................21
System overview....................................................................................................................21
Databases..............................................................................................................................22
Servers..................................................................................................................................23
Web application servers.........................................................................................................24
Language support..................................................................................................................25
Authentication and single sign-on...........................................................................................26
SAP integration......................................................................................................................28
Lifecycle management (LCM).................................................................................................29
Integrated version control.......................................................................................................29
Permanent data......................................................................................................................30
Upgrade path.........................................................................................................................30
Conceptual tiers.....................................................................................................................30
Services and servers..............................................................................................................31
Services.................................................................................................................................33
Service categories.................................................................................................................35
Server types..........................................................................................................................36
Server categories...................................................................................................................37
Client applications..................................................................................................................39
Central Configuration Manager (CCM)...................................................................................39
Upgrade management tool.....................................................................................................40
2010-12-023
Page 4

Contents
2.4.3
2.5
2.5.1
2.5.2
3.1
3.1.1
3.1.2
3.1.3
3.2
3.2.1
4.1
4.1.1
4.1.2
4.1.3
4.2
4.2.1
4.2.2
4.2.3
4.2.4
4.2.5
4.2.6
4.2.7
4.2.8
4.2.9
4.2.10
4.2.11
4.2.12
4.2.13
4.2.14
4.2.15
4.3
4.3.1
4.3.2
4.3.3
4.3.4
4.3.5
Web application clients..........................................................................................................40
Information Workflows...........................................................................................................41
Authentication........................................................................................................................41
Scheduling.............................................................................................................................43
Managing Licenses...............................................................................................................45Chapter 3
Managing License keys..........................................................................................................45
To view license information....................................................................................................45
To add a license key...............................................................................................................45
To view current account activity.............................................................................................46
Measuring licenses................................................................................................................46
To run a license audit.............................................................................................................47
Managing Users and Groups................................................................................................49Chapter 4
Account management overview..............................................................................................49
User management..................................................................................................................49
Group management...............................................................................................................51
Available authentication types ...............................................................................................52
Managing Enterprise and general accounts............................................................................54
To create a user account........................................................................................................54
To modify a user account.......................................................................................................55
To delete a user account........................................................................................................56
To create a new group...........................................................................................................56
To modify a group's properties...............................................................................................57
To view group members.........................................................................................................57
To add subgroups..................................................................................................................57
To specify group membership................................................................................................58
To delete a group...................................................................................................................58
To enable the Guest account.................................................................................................59
Adding users to groups..........................................................................................................59
Changing password settings..................................................................................................61
Granting access to users and groups.....................................................................................62
Controlling access to user inboxes.........................................................................................63
Configuring BI launch pad options..........................................................................................63
Managing aliases...................................................................................................................67
To create a user and add a third-party alias............................................................................67
To create a new alias for an existing user...............................................................................68
To assign an alias from another user......................................................................................68
To delete an alias...................................................................................................................69
To disable an alias..................................................................................................................69
2010-12-024
Page 5

Contents
Setting Rights........................................................................................................................71Chapter 5
5.1
5.1.1
5.1.2
5.1.3
5.1.4
5.1.5
5.2
5.2.1
5.2.2
5.2.3
5.2.4
5.2.5
5.3
5.3.1
5.3.2
5.3.3
5.3.4
5.3.5
5.3.6
5.3.7
5.3.8
5.4
5.4.1
5.5
5.5.1
5.5.2
5.6
How rights work in Information platform services...................................................................71
Access levels.........................................................................................................................71
Advanced rights settings........................................................................................................72
Inheritance.............................................................................................................................73
Type-specific rights................................................................................................................78
Determining effective rights...................................................................................................79
Managing security settings for objects in the CMC................................................................80
To view rights for a principal on an object...............................................................................81
To assign principals to an access control list for an object......................................................81
To modify security for a principal on an object........................................................................82
To set rights on a top-level folder in Information platform services.........................................82
Checking security settings for a principal...............................................................................83
Working with access levels....................................................................................................85
Choosing between View and View On Demand access levels...............................................87
To copy an existing access level............................................................................................88
To create a new access level.................................................................................................89
To rename an access level.....................................................................................................89
To delete an access level.......................................................................................................89
To modify rights in an access level.........................................................................................90
Tracing the relationship between access levels and objects...................................................91
Managing access levels across sites......................................................................................91
Breaking inheritance...............................................................................................................92
To disable inheritance.............................................................................................................93
Using rights to delegate administration...................................................................................94
Choosing between Modify the rights users have to objects options.......................................95
Owner rights..........................................................................................................................97
Summary of recommendations for rights administration.........................................................97
6.1
6.2
6.3
6.4
6.5
6.5.1
6.5.2
6.6
6.6.1
Securing Information platform services................................................................................99Chapter 6
Security overview ..................................................................................................................99
Disaster recovery planning.....................................................................................................99
General recommendations for securing your deployment.....................................................100
Configuring security for bundled third-party servers.............................................................101
Active trust relationship........................................................................................................101
Logon tokens.......................................................................................................................101
Ticket mechanism for distributed security.............................................................................102
Sessions and session tracking.............................................................................................102
CMS session tracking..........................................................................................................103
2010-12-025
Page 6

Contents
6.7
6.7.1
6.7.2
6.8
6.9
6.9.1
6.9.2
6.9.3
6.9.4
6.9.5
6.10
6.11
6.11.1
6.12
6.12.1
6.12.2
6.12.3
6.13
6.13.1
6.13.2
6.14
6.14.1
6.14.2
6.15
6.15.1
6.15.2
6.16
6.16.1
6.16.2
6.17
6.17.1
6.17.2
6.17.3
6.17.4
6.17.5
6.18
6.18.1
6.18.2
6.19
6.19.1
Environment protection........................................................................................................103
Web browser to web server.................................................................................................104
Web server to Information platform services........................................................................104
Auditing security configuration modifications........................................................................104
Auditing web activity............................................................................................................105
Protection against malicious logon attempts.........................................................................105
Password restrictions...........................................................................................................105
Logon restrictions................................................................................................................106
User restrictions..................................................................................................................106
Guest account restrictions...................................................................................................106
Processing extensions.........................................................................................................107
Overview of Information platform services data security.......................................................107
Data processing security modes..........................................................................................108
Cryptography in Information platform services......................................................................110
Working with cluster keys....................................................................................................110
Cryptographic Officers.........................................................................................................113
Managing cryptographic keys in the CMC............................................................................114
Configuring servers for SSL.................................................................................................118
Creating key and certificate files..........................................................................................119
Configuring the SSL protocol...............................................................................................121
Understanding communication between Information platform services components.............125
Overview of Information platform services servers and communication ports.......................125
Communication between Information platform services components ...................................128
Configuring SAP BusinessObjects Enterprise for firewalls...................................................135
To configure the system for firewalls....................................................................................135
Debugging a firewalled deployment......................................................................................138
Examples of typical firewall scenarios...................................................................................140
Example - Application tier deployed on a separate network..................................................140
Example - Thick client and database tier separated from Information platform services servers
by a firewall..........................................................................................................................142
Firewall settings for integrated ERP environments................................................................145
Specific firewall guidelines for SAP integration.....................................................................145
Firewall configuration for JD Edwards EnterpriseOne integration..........................................147
Specific firewall guidelines for Oracle EBS...........................................................................149
Firewall configuration for PeopleSoft Enterprise integration .................................................150
Firewall configuration for Siebel integration..........................................................................152
Information platform services and reverse proxy servers .....................................................153
Supported reverse proxy servers ........................................................................................154
Understanding how web applications are deployed .............................................................154
Configuring reverse proxy servers for Information platform services web applications..........154
Detailed instructions for configuring reverse proxy servers..................................................155
2010-12-026
Page 7

Contents
6.19.2
6.19.3
6.19.4
6.19.5
6.20
6.20.1
6.20.2
6.20.3
7.1
7.1.1
7.1.2
7.1.3
7.1.4
7.1.5
7.2
7.2.1
7.2.2
7.2.3
7.3
7.3.1
7.3.2
7.3.3
7.3.4
7.3.5
7.4
7.4.1
7.4.2
7.4.3
7.4.4
7.4.5
7.4.6
7.5
7.5.1
7.5.2
7.5.3
7.5.4
7.5.5
7.6
7.6.1
To configure the reverse proxy server..................................................................................155
To configure Apache 2.2 reverse proxy server for Information platform services .................156
To configure WebSEAL 6.0 reverse proxy server for Information platform services .............156
To configure Microsoft ISA 2006 for Information platform services .....................................157
Special configuration for Information platform services in reverse proxy deployments..........159
Enabling reverse proxy for Information platform services Web Services...............................159
Enabling the root path for session cookies for ISA 2006......................................................160
Enabling reverse proxy for SAP BusinessObjects Live Office...............................................161
Authentication.....................................................................................................................163Chapter 7
Enterprise authentication......................................................................................................163
Enterprise authentication overview.......................................................................................163
Enterprise authentication settings.........................................................................................163
To change Enterprise settings..............................................................................................165
Enabling Trusted Authentication...........................................................................................166
Configuring Trusted Authentication for the web application..................................................168
LDAP authentication............................................................................................................177
Using LDAP authentication..................................................................................................177
Configuring LDAP authentication..........................................................................................178
Mapping LDAP groups.........................................................................................................189
Windows AD authentication.................................................................................................194
Overview..............................................................................................................................194
Preparing for AD authentication (Kerberos)..........................................................................197
AD authentication single sign-on..........................................................................................207
Mapping AD groups and configuring AD authentication........................................................218
Troubleshooting Windows AD authentication.......................................................................223
SAP authentication...............................................................................................................225
Configuring SAP authentication ...........................................................................................225
Creating a user account for Information platform services....................................................226
Connecting to SAP entitlement systems..............................................................................227
Setting SAP Authentication options.....................................................................................229
Importing SAP roles.............................................................................................................234
Setting up single sign-on to the SAP system........................................................................236
PeopleSoft authentication....................................................................................................241
Overview..............................................................................................................................241
Enabling PeopleSoft Enterprise authentication......................................................................241
Mapping PeopleSoft roles to Information platform services..................................................242
Scheduling user updates......................................................................................................245
Using the PeopleSoft Security Bridge..................................................................................247
JD Edwards authentication...................................................................................................258
Overview..............................................................................................................................258
2010-12-027
Page 8

Contents
7.6.2
7.6.3
7.6.4
7.7
7.7.1
7.7.2
7.7.3
7.8
7.8.1
7.8.2
7.8.3
7.8.4
7.9
7.9.1
7.10
7.10.1
7.10.2
7.10.3
Enabling JD Edwards EnterpriseOne authentication..............................................................258
Mapping JD Edwards EnterpriseOne roles to Information platform services.........................259
Scheduling user updates......................................................................................................262
Siebel authentication............................................................................................................264
Enabling Siebel authentication..............................................................................................264
Mapping roles to Information platform services....................................................................265
Scheduling user updates......................................................................................................268
Oracle EBS authentication...................................................................................................270
Enabling Oracle EBS authentication......................................................................................270
Mapping Oracle E-Business Suite roles to Information platform services.............................271
Unmapping roles .................................................................................................................276
Customizing rights for mapped Oracle EBS groups and users .............................................277
Automated user updates......................................................................................................278
Scheduling user updates......................................................................................................278
Authentication options in Information platform services .......................................................280
Primary authentication..........................................................................................................281
Security plug-ins..................................................................................................................282
Single sign-on to Information platform services....................................................................283
Server Administration..........................................................................................................287Chapter 8
8.1
8.1.1
8.1.2
8.1.3
8.1.4
8.1.5
8.1.6
8.1.7
8.1.8
8.1.9
8.1.10
8.1.11
8.1.12
8.1.13
8.1.14
8.1.15
9.1
9.1.1
Server Administration...........................................................................................................287
Working with the Servers management area in the CMC.....................................................287
Managing servers by using scripts on Windows ..................................................................291
Managing servers on UNIX .................................................................................................291
Managing License keys........................................................................................................291
Measuring licenses..............................................................................................................293
Viewing and changing a server's status................................................................................294
Adding, cloning, or deleting servers......................................................................................299
Clustering Central Management Servers..............................................................................302
Managing server groups.......................................................................................................306
Assessing your system's performance.................................................................................310
Configuring server settings..................................................................................................313
Configuring server network settings.....................................................................................316
Managing Nodes..................................................................................................................324
Renaming a computer in an Information platform services deployment.................................344
Managing server and node placeholders..............................................................................345
Managing Web Application Container Servers (WACS).....................................................347Chapter 9
WACS.................................................................................................................................347
Web Application Container Server (WACS).........................................................................347
2010-12-028
Page 9

Contents
9.1.2
9.1.3
9.1.4
9.1.5
9.1.6
9.1.7
9.1.8
9.1.9
9.1.10
10.1
10.1.1
10.1.2
10.1.3
10.1.4
10.1.5
10.1.6
10.1.7
Adding or removing additional WACS to your deployment...................................................350
Adding or removing services to WACS................................................................................354
Configuring HTTPS/SSL......................................................................................................355
Supported authentication methods.......................................................................................359
Configuring AD Kerberos for WACS ...................................................................................359
Configuring AD Kerberos single sign-on ..............................................................................366
WACS and your IT environment...........................................................................................368
Troubleshooting...................................................................................................................371
WACS properties.................................................................................................................375
Backing up and Restoring...................................................................................................377Chapter 10
Backing up and restoring your system..................................................................................377
Backing up your entire system.............................................................................................378
Backing up server settings...................................................................................................378
Backing up Business Intelligence content.............................................................................381
Restoring your system.........................................................................................................381
Restoring lost or corrupt Information platform services files where a backup is available......385
Recreating a Information platform services system when files are lost.................................386
BackupCluster and RestoreCluster parameters...................................................................386
11.1
11.2
11.2.1
11.3
11.3.1
11.3.2
12.1
12.2
12.2.1
12.3
12.4
12.5
12.5.1
12.6
12.6.1
12.6.2
12.7
Lifecycle Management........................................................................................................391Chapter 11
Lifecycle management console............................................................................................391
Version Management System settings for Lifecycle management console...........................391
Version Management System settings for Lifecycle management console...........................391
BIAR Engine Command-Line Tool.........................................................................................392
Using a properties file .........................................................................................................395
To use the BIAR Engine Command-Line Tool.......................................................................399
Monitoring...........................................................................................................................401Chapter 12
About Monitoring.................................................................................................................401
Monitoring terms..................................................................................................................401
Architecture.........................................................................................................................402
Cluster support for monitoring server...................................................................................405
Metrics................................................................................................................................406
Configuration properties.......................................................................................................410
JMX end point URL..............................................................................................................413
Integrating with other applications........................................................................................414
Integrating the monitoring application with IBM Tivoli............................................................415
Integrating the monitoring application with SAP Solution Manager ......................................418
Creating Universe for Derby Database.................................................................................418
2010-12-029
Page 10

Contents
12.8
12.8.1
12.8.2
12.8.3
12.8.4
12.8.5
12.8.6
13.1
13.2
13.2.1
13.2.2
13.2.3
13.3
13.3.1
14.1
14.2
14.3
14.3.1
14.3.2
14.3.3
14.4
14.4.1
14.4.2
14.5
14.5.1
Troubleshooting...................................................................................................................419
Dashboard...........................................................................................................................419
Alerts...................................................................................................................................420
Watchlist..............................................................................................................................420
Probes.................................................................................................................................421
Metrics................................................................................................................................421
Graph...................................................................................................................................422
Auditing...............................................................................................................................423Chapter 13
Overview..............................................................................................................................423
CMC Auditing page.............................................................................................................429
Auditing Status....................................................................................................................429
Configuring Auditing events.................................................................................................431
Auditing Data Store configuration settings...........................................................................433
Audit events.........................................................................................................................434
Audit events and details.......................................................................................................441
Supportability......................................................................................................................457Chapter 14
Logging traces from components.........................................................................................457
Trace log levels....................................................................................................................457
Configuring tracing for servers.............................................................................................458
To set the server trace log level in the CMC........................................................................459
To set the trace log level for multiple servers managed in the CMC.....................................459
To configure server tracing through the BO_trace.ini file......................................................460
Configuring tracing for web applications...............................................................................463
To set the web application trace log level in the CMC..........................................................463
To manually modify tracing settings through the BO_trace.ini file.........................................464
Configuring tracing for Upgrade management tool...............................................................469
To configure tracing for Upgrade management tool..............................................................469
15.1
15.1.1
15.2
15.2.1
15.3
15.4
15.5
15.6
Command line administration.............................................................................................471Chapter 15
Command lines overview.....................................................................................................471
To view or modify a server's command line..........................................................................471
Standard options for all servers............................................................................................471
UNIX signal handling............................................................................................................472
Central Management Server................................................................................................472
Job Servers.........................................................................................................................475
Adaptive Processing Server.................................................................................................476
Input and Output File Repository Servers.............................................................................476
2010-12-0210
Page 11

Contents
Rights appendix...................................................................................................................479Chapter 16
16.1
16.1.1
16.1.2
16.1.3
16.1.4
16.1.5
16.1.6
16.2
16.3
17.1
17.1.1
17.1.2
18.1
18.1.1
18.1.2
18.1.3
18.1.4
18.1.5
18.1.6
Rights for specific object types............................................................................................479
Folder rights.........................................................................................................................479
Categories...........................................................................................................................479
Notes...................................................................................................................................480
Users and groups.................................................................................................................480
Access levels.......................................................................................................................481
Applications.........................................................................................................................482
About the rights appendix.....................................................................................................483
General rights......................................................................................................................484
Server properties appendix.................................................................................................487Chapter 17
About the server properties appendix...................................................................................487
Common Server Properties..................................................................................................487
Core Services Properties.....................................................................................................490
Server metrics.....................................................................................................................501Chapter 18
About the Server Metrics Appendix.....................................................................................501
Common Server Metrics .....................................................................................................501
Central Management Server Metrics...................................................................................504
File Repository Server Metrics.............................................................................................508
Adaptive Processing Server Metrics....................................................................................509
Web Application Container Server Metrics..........................................................................514
Adaptive Job Server Metrics................................................................................................515
Nodes and placeholders.....................................................................................................519Chapter 19
19.1
20.1
20.2
20.3
Index 541
Server and node placeholders..............................................................................................519
Auditing Database Schema Appendix.................................................................................529Chapter 20
Overview..............................................................................................................................529
Schema diagram..................................................................................................................529
Auditing Data Store Tables..................................................................................................530
2010-12-0211
Page 12

Contents
2010-12-0212
Page 13

Getting Started
Getting Started
1.1 Before you start
1.1.1 Key concepts
1.1.1.1 Services and servers
The following diagram shows a hypothetical installation of Information platform services.
Note:
The nodes, servers, and services shown are for illustrative purposes only. The number of hosts, nodes,
servers and services—as well as the type of servers, and services—will vary in real-world installations.
2010-12-0213
Page 14

Getting Started
Two hosts form the cluster named
• The host named
HostAlpha
ProductionBISystem
, with two hosts:
has Information platform services installed and is configured to have
two nodes:
•
NodeMercury
and publish reports, an Input File Repository Server (
input reports, and an Output File Repository Server (
: contains an Adaptive Job Server (
NodeMercury.AJS
NodeMercury.IFRS
NodeMercury.OFRS
report output.
•
NodeVenus
: contains an Adaptive Processing Server (
NodeVenus.APS
publishing, monitoring, and translation features, an Adaptive Processing Server (
with a service to provide client auditing, and a Central Management Server (
with a service to provide the CMS services.
• The host named
HostBeta
has Information platform services installed and is configured to have
three nodes:
•
NodeMars
: contains a Central Management Server (
NodeMars.CMS
the CMS services.
•
NodeJupiter
: contains a Interactive Analysis Processing Server (
with a service to provide Interactive Analysis reporting, and an Event Server
(
NodeJupiter.EventServer
) to provide report monitoring of files.
) with services to schedule
) with a service to store
) with a service to store
) with services to provide
NodeVenus.APS2
NodeVenus.CMS
) with a service to provide
NodeJupiter.InteractiveAnalysis
2010-12-0214
)
)
)
Page 15

Getting Started
•
NodeSaturn
client auditing.
: contains an Adaptive Processing Server (
NodeSaturn.APS
) with a service to provide
Information platform services uses the terms
running on an Information platform services machine.
A
service
space of its server under the process id of the parent container (server). For example, the SAP
BusinessObjects Interactive Analysis Scheduling and Publishing Service is a subsystem that runs within
the Adaptive Job Server.
The term
to as a
and Adaptive Processing Server are servers. A server runs under a specific operating system account
and has its own PID.
A
node
nodes can be on a single host.
Information platform services can be installed on a single machine, spread across different machines
on an intranet, or separated over a wide area network (WAN).
is a server subsystem that performs a specific function. The service runs within the memory
server
is used to describe an operating system level process (on some systems, this is referred
daemon
is a collection of Information platform services servers running on the same host. One or more
) hosting one or more services. For example, the Central Management Server (CMS)
1.1.2 Key administrative tools
server
and
service
to refer to the two types of software
1.1.2.1 Central Management Console (CMC)
The Central Management Console (CMC) is a web-based tool to perform administrative tasks, including
user, content, and server management. It also allows you to publish, organize, and configure security
settings. Because the CMC is a web-based application, you can perform all of these administrative
tasks through a web browser on any machine that can connect to the server.
All users can log on to the CMC to change their user preference settings. Only members of the
Administrators
Roles can also be assigned to the CMC to grant some users privileges to perform minor administrative
tasks
group can change management settings, unless explicitly granted the rights to do so.
2010-12-0215
Page 16

Getting Started
1.1.2.2 Central Configuration Manager (CCM)
The Central Configuration Manager (CCM) is a server troubleshooting and node configuration tool
provided in two forms. In a Microsoft Windows environment, the CCM allows you to manage local and
remote servers through its graphical user interface (GUI) or command line.
The CCM allows you to create and configure Server Intelligence Agent (SIA) nodes and start or stop
your web application server. On Windows, it also allows you to configure network parameters, such as
Secure Socket Layer (SSL) encryption. These parameters apply to all servers within a node.
Note:
Most server management tasks are now handled through the CMC, not through the CCM. The CCM
is now used for troubleshooting and node configuration.
1.1.2.3 Upgrade management tool
Upgrade management tool (formerly Import Wizard) is installed as a part of Information platform services,
and guides administrators through the process of importing users, groups, and folders from previous
versions of Information platform services. It also allows you to import and upgrade objects, events,
server groups, repository objects, and calendars.
For information on upgrading from a previous version of Information platform services, see the
platform services Upgrade Guide
1.1.3 Key tasks
Depending on your situation, you may want to focus on specific sections of this help, and there may
be other resources available for you. For each of the following situations, there is a list of suggested
tasks and reading topics.
Related Topics
• Planning or performing your first deployment
• Configuring your deployment
• Improving your system's performance
• Central Management Console (CMC)
Information
.
2010-12-0216
Page 17

Getting Started
1.1.3.1 Planning or performing your first deployment
If you are planning or performing your first deployment of Information platform services, it is recommended
that you perform the following tasks and read the corresponding sections:
• To get familiar with the Information platform services components, read “Architecture overview”.
• “Communication between Information platform services components”.
• “Security overview”.
• If you plan to use third-party authentication, read “Authentication”.
• For more information about installing this product, see the
Guide
.
• After you install, read “Server Administration”.
Related Topics
• Architecture overview
• Security overview
• Server Administration
Information platform services Installation
1.1.3.2 Configuring your deployment
If you have just completed your installation of Information platform services and need to perform initial
configuration tasks, such as firewall configuration and user management, it is recommended that you
read the following sections.
Related Topics
• Server Administration
• Security overview
• About Monitoring
1.1.3.3 Improving your system's performance
2010-12-0217
Page 18

Getting Started
If you want to assess your deployment's efficiency and fine-tune it in order to maximize resources, it is
recommended that you read the following sections:
• If you want to monitor your existing system, read “Monitoring”.
• For daily maintenance tasks and procedures for working with servers in the CMC, see “Server
Maintenance”.
Related Topics
• About Monitoring
• Server Administration
1.1.3.4 Working with objects in the CMC
If you are working with objects in the CMC, read the following sections:
• For information about setting up users and groups in the CMC, see “Account Management Overview”.
• To set security on objects, see “How rights work in Information platform services”.
• For general information about working with objects, see the
Related Topics
• Account management overview
• How rights work in Information platform services
1.2 About this help
This help provides you with information and procedures for deploying and configuring your Information
platform services system. Procedures are provided for common tasks. Conceptual information and
technical details are provided for all advanced topics.
For daily maintenance tasks and procedures for working with the CMC, see the
services Administrator's Guide
For information about installing this product, see the
Information platform services CMC Help
.
Information platform
.
Information platform services Installation Guide
.
2010-12-0218
Page 19

Getting Started
1.2.1 Who should use this help?
This help covers deployment and configuration tasks. We recommend consulting this guide if you are:
• planning your first deployment
• configuring your first deployment
• making significant changes to the architecture of an existing deployment
• improving your system's performance.
This help is intended for system administrators who are responsible for configuring, managing, and
maintaining an Information platform services installation. Familiarity with your operating system and
your network environment is beneficial, as is a general understanding of web application server
management and scripting technologies. However, to assist all levels of administrative experience, this
help aims to provide sufficient background and conceptual information to clarify all administrative tasks
and features.
1.2.2 About Information platform services
Information platform services is a flexible, scalable, and reliable solution for delivering powerful, interactive
reports to end users via any web application—intranet, extranet, Internet or corporate portal. Whether
it is used for distributing weekly sales reports, providing customers with personalized service offerings,
or integrating critical information into corporate portals, Information platform services delivers tangible
benefits that extend across and beyond the organization. As an integrated suite for reporting, analysis,
and information delivery, Information platform services provides a solution for increasing end-user
productivity and reducing administrative efforts.
1.2.3 Variables
The following variables are used throughout this guide.
2010-12-0219
Page 20

Getting Started
DescriptionVariable
<INSTALLDIR>
<PLAT
FORM64DIR>
<SCRIPTDIR>
The directory where Information platform services is installed.
On a Windows machine, the default directory is C:\Program Files (x86)\SAP
BusinessObjects\.
The name of your UNIX operating system. Acceptable values are:
• aix_rs6000_64
• linux_x64
• solaris_sparcv9
• hpux_ia64
The directory where scripts for administering Information platform services are
located.
On a Windows machine, the directory is <INSTALLDIR>\win64_x64\scripts.
On Unix machines, the directory is <INSTALLDIR>/<PLAT
FORM64DIR>/scripts.
2010-12-0220
Page 21

Architecture
Architecture
2.1 Architecture overview
This section outlines the overall platform architecture, system, and service components that make up
the Information platform services Business Intelligence (BI) platform. The information helps administrators
understand the system essentials and help to form a plan for the system deployment, management,
and maintenance.
Information platform services is designed for high performance across a broad spectrum of user and
deployment scenarios. For example, specialized platform services handle either on-demand data access
and report generation, or report scheduling based on times and events. You can offload processor
intensive scheduling and processing by creating dedicated servers to host specific services. The
architecture is designed to meet the needs of virtually any BI deployment, and is flexible enough to
grow from several users with a single tool, to tens of thousands of users with multiple tools and interfaces.
To provide flexibility, reliability, and scalability, Information platform services components can be installed
on one or across many machines. You can even install two different versions of Information platform
services simultaneously on the same computer, although this configuration is only recommended as
part of the upgrade process or testing purposes.
Server processes can be “vertically scaled” (where one computer runs several, or all, server-side
processes) to reduce cost, or “horizontally scaled” (where server processes are distributed between
two or more networked machines) to improve performance. It is also possible to run multiple, redundant,
versions of the same server process on more than one machine, so that processing can continue if the
primary process encounters a problem.
2.1.1 System overview
Information platform services is a Business Intelligence (BI) platform that provides enterprise level
analysis and reporting tools. Data can be analyzed from any of a large number of supported database
systems (including text or multi-dimensional OLAP systems) and BI reports can be published in many
different formats to many different publishing systems.
The following diagram illustrates how Information platform services fits in with your organization's
infrastructure.
2010-12-0221
Page 22

Architecture
Information platform services reports from a read-only connection to your organization's databases,
and uses its own databases for storing its configuration, auditing, and other operational information.
The BI reports created by the system can be sent to a variety of destinations, including file systems,
and email, or accessed through web sites or portals.
Information platform services is a self-contained system that can exist on a single machine (for example,
as a small development or pre-production test environment) or can be scaled up into a cluster of many
machines that run different components (for example, as a large-scale production environment).
2.1.2 Databases
Information platform services uses several different databases.
• Reporting database
This refers to your organization's information. It is the source information analyzed and reported on
by Information platform services. Most commonly, the information is stored within a relational
database, but it can also be contained within text files, Microsoft Office documents, or OLAP systems.
• CMS system database
The CMS system database is used to store Information platform services information, such as user,
server, folder, document, configuration, authorization, and authentication details. It is maintained by
the Central Management Server (CMS), and is sometimes referred to as the
system repository
.
• Auditing Data Store
2010-12-0222
Page 23

Architecture
The Auditing Data Store (ADS) is used to store information on trackable events that occur in
Information platform services. This information can be used to monitor the usage of system
components, user activity, or other aspects of day-to-day operation.
• Lifecycle Management database
The Lifecycle Management database tracks configuration and version information related to an
Information platform services installation, as well as updates.
• Monitoring database
Monitoring uses the Java Derby database to store system configuration and component information
for SAP supportability.
If you do not have a database server in place for use with the CMS system and Auditing Data Store
databases, the Information platform services installation program can install and configure one for you.
It is recommended that you evaluate your requirements against information from your database server
vendor to determine which supported database would best suit your organization's requirements.
2.1.3 Servers
Information platform services consists of collections of servers running on one or more hosts. Small
installations (such as test or development systems) can use a single host for a web application server,
database server, and all Information platform services servers.
Medium and large installations can have servers running on multiple hosts. For example, a web
application server host can be used in combination with an Information platform services server host.
This frees up resources on the Information platform services server host, allowing it to process more
information than if it also hosted the web application server.
Large installations can have several Information platform services server hosts working together in a
cluster. For example, if an organization has a large number of SAP Crystal Reports users, Crystal
Reports processing servers can be created on multiple Information platform services server hosts to
ensure that there are plenty of resources available to process requests from clients.
The advantages of having multiple servers include:
• Improved performance
Multiple Information platform services server hosts can process a queue of reporting information
faster than a single Information platform services server host.
• Load balancing
If a server is experiencing a higher load than the other servers in a cluster, the CMS automatically
sends new work to a server with better resources.
• Improved availability
If a server encounters an unexpected condition, the CMS automatically re-routes work to different
servers until the condition is corrected.
2010-12-0223
Page 24

Architecture
2.1.4 Web application servers
A web application server acts as the translation layer between a web browser or rich application, and
Information platform services. Web application servers running on Windows, Unix, and Linux are
supported.
The following web application servers are supported:
• JBoss
• Oracle Application Server
• SAP NetWeaver AS Java
• Tomcat
• WebLogic
• WebSphere
For a detailed list of supported web application servers, consult the
at: http://service.sap.com/bosap-support.
Supported Platforms Guide
available
If you do not have a web application server in place for use with Information platform services, the
installation program can install and configure a Tomcat 6 web application server for you. It is
recommended that you evaluate your requirements against information from your web application server
vendor to determine which supported web application server would best suit your organization's
requirements.
Note:
When configuring a production environment, it is recommended that the web application server is hosted
on a separate system. Running Information platform services and a web application server on the same
host in a production environment may decrease performance.
2.1.4.1 Web Application Container Service (WACS)
A web application server is required to host Information platform services web applications.
If you are an advanced Java web application server administrator with advanced administration needs,
use a supported Java web application server to host Information platform services web applications. If
you will be using a supported Windows operating system to host Information platform services, and
prefer a simple web application server installation process, or you do not have the resources to administer
a Java web application server, you can install the Web Application Container Service (WACS) when
installing Information platform services.
WACS is an Information platform services server that allows Information platform services web
applications, such as the Central Management Console (CMC) and Web Services, to run without the
need for a previously installed Java web application server.
2010-12-0224
Page 25

Architecture
Using WACS to provides a number of advantages:
• WACS requires a minimum effort to install, maintain, and configure. It is installed and configured by
the Information platform services installation program, and no additional steps are required to start
using it.
• WACS removes the need for Java application server administration and maintenance skills.
• WACS provides an administrative interface that is consistent with other Information platform services
servers.
• Like other Information platform services servers, WACS can be installed on a dedicated host.
Note:
There are some limitations to using WACS instead of a dedicated Java web applications server:
• WACS is only available on supported Windows operating systems.
• Custom web applications cannot be deployed to WACS, as it only supports the web applications
installed with Information platform services.
• WACS cannot be used with an Apache load balancer.
It is possible to use a dedicated web application server in addition to WACS. This allows your dedicated
web application server to host custom web applications, while the CMC and other Information platform
services web applications are hosted by WACS.
2.1.5 Language support
Information platform services products are translated into many different languages and supports data
in an even broader selection of languages.
Product interfaces are available in the following languages:
• Czech
• Simplified Chinese
• Traditional Chinese
• Danish
• Dutch
• English
• Finnish
• French
• German
• Italian
• Japanese
• Korean
• Norwegian Bokmal
• Polish
• Portuguese
• Russian
2010-12-0225
Page 26

Architecture
• Spanish
• Swedish
• Thai
In addition to supporting data in any of the languages available in the interface, the following character
sets are also supported:
• Greek
• Malaysian
• Hebrew
• Arabic
• Romanian
• Vietnamese
• Hungarian
• Turkish
• Hindi
2.1.6 Authentication and single sign-on
System security is managed by the Central Management Server (CMS), security plug-ins, and third-party
authentication tools, such as SiteMinder or Kerberos. These components authenticate users and
authorize user access for Information platform services, its folders, and other objects.
The following user authentication single sign-on security plug-ins are available:
• Enterprise (default), including Trusted Authentication support for third-party authentication.
• LDAP
• Windows Active Directory (AD)
When using an Enterprise Resource Planning (ERP) system, single sign-on is used to authenticate
user access to the ERP system so that reports can be against ERP data. The following user
authentication single sign-on for ERP systems are supported:
• SAP ERP and Business Warehouse (BW)
• Oracle E-Business Suite (EBS)
• Siebel Enterprise
• JD Edwards Enterprise One
• PeopleSoft Enterprise
2.1.6.1 Security plug-ins
2010-12-0226
Page 27

Architecture
Security plug-ins automate account creation and management by allowing you to map user accounts
and groups from third-party systems into Information platform services. You can map third-party user
accounts or groups to existing Enterprise user accounts or groups, or you can create new Enterprise
user accounts or groups that correspond to each mapped entry in the external system.
The security plug-ins dynamically maintain third-party user and group listings. So, once you map a
Lightweight Directory Access Protocol (LDAP) or Windows Active Directory (AD) group to Information
platform services, all users who belong to that group can log into Information platform services.
Subsequent changes to the third-party group memberships are automatically propagated.
Information platform services supports the following security plug-ins:
• Enterprise security plug-in
The Central Management Server (CMS) handles security information, such as user accounts, group
memberships, and object rights that define user and group privileges. This is known as Enterprise
authentication.
Enterprise authentication is always enabled; it cannot be disabled. Use the system default Enterprise
Authentication if you prefer to create distinct accounts and groups for use with Information platform
services, or if you have not already set up a hierarchy of users and groups on an LDAP or Windows
AD server.
Trusted Authentication is a component of Enterprise authentication that integrates with third-party
single sign-on solutions, including Java Authentication and Authorization Service (JAAS). Applications
that have established trust with the Central Management Server can use Trusted Authentication to
allow users to log on without providing their passwords.
• LDAP security plug-in
• Windows AD
Note:
Although a user can configure Windows AD authentication for Information platform services and
custom applications through the CMC, the CMC does not support Windows AD authentication with
NTLM. The only methods of authentication that the CMC support are Windows AD with Kerberos,
LDAP, Enterprise, and Trusted Authentication.
2.1.6.2 Enterprise Resource Planning (ERP) integration
An Enterprise Resource Planning (ERP) application supports the essential functions of an organization's
processes by collecting real-time information related to day-to-day operations. SAP BusinessObjects
Enterprise supports single sign-on and reporting from the following ERP systems:
• SAP ERP and Business Warehouse (BW)
Note:
SAP GUI must be installed before using OLAP Data Access (ODA), SAP BusinessObjects Advanced
Analysis (formerly Voyager), or BW connections.
2010-12-0227
Page 28

Architecture
• Siebel Enterprise
• Oracle E-Business Suite
• JD Edwards EnterpriseOne
• PeopleSoft Enterprise
Note:
• SAP ERP and BW support is installed by default. Use the Custom / Expand installation option to
deselect SAP integration support if you do not want support for SAP ERP or BW.
• Support for Siebel Enterprise, Oracle E-Business Suite, JD Edwards EnterpriseOne, or PeopleSoft
is not installed by default. Use the "Custom / Expand" installation option to select and install integration
for non-SAP ERP systems.
For detailed information on the specific versions supported by SAP BusinessObjects Enterprise, consult
the
Supported Platforms Guide
, available at service.sap.com/bosap-support.
To configure ERP integration, see the
2.1.7 SAP integration
Information platform services integrates with your existing SAP infrastructure with the following SAP
tools:
• SAP System Landscape Directory (SLD)
The system landscape directory of SAP NetWeaver is the central source of system landscape
information relevant for the management of your software life-cycle. By providing a directory
comprising information about all installable software available from SAP and automatically updated
data about systems already installed in a landscape, you get the foundation for tool support to plan
software life-cycle tasks in your system landscape.
The Information platform services installation program registers the vendor and product names and
versions with the SLD, as well as server and front-end component names, versions, and location.
• SAP Solution Manager
The SAP Solution Manager is a platform that provides the integrated content, tools, and methodologies
to implement, support, operate and monitor an organization's SAP and non-SAP solutions.
SAP BusinessObjects Enterprise Administrator Guide
.
Non-SAP software with an SAP-certified integration is entered into a central repository and transferred
automatically to your SAP System Landscape Directories (SLD). SAP customers can then easily
identify which version of third-party product integration has been certified by SAP within their SAP
system environment. This service provides additional awareness for third-party products besides
our online catalogs for third-party products.
SAP Solution Manager is available to SAP customers at no extra charge, and includes direct access
to SAP support and SAP product upgrade path information. For more information on SLD, see
2010-12-0228
Page 29

Architecture
“Registration of Information platform services in the System Landscape” in the
services Administrator Guide
• CTS Transport (CTS+)
The Change and Transport System (CTS) helps you to organize development projects in ABAP
Workbench and in Customizing, and then transport the changes between the SAP systems in your
system landscape. As well as ABAP objects, you can also transport Java objects (J2EE, JEE) and
SAP-specific non-ABAP technologies (such as Web Dynpro Java or SAP NetWeaver Portal) in your
landscape.
• Monitoring with CA Wily Introscope
CA Wily Introscope is a web application management product that delivers the ability to monitor and
diagnose performance problems that may occur within Java-based SAP modules in production,
including visibility into custom Java applications and connections to back-end systems. It allows you
to isolate performance bottlenecks in NetWeaver modules including individual Servlets, JSPs, EJBs,
JCO’s, Classes, Methods and more. It offers real-time, low-overhead monitoring, end-to-end
transaction visibility, historical data for analysis or capacity planning, customizable dashboards,
automated threshold alarms, and an open architecture to extend monitoring beyond NetWeaver
environments.
.
2.1.8 Lifecycle management (LCM)
Information platform
Lifecycle management (LCM) refers to a set of processes involved in managing an installation's product
information. It establishes procedures for governing the installation of Information platform services to
development, test, production, or maintenance environments.
Information platform services Lifecycle Manager is a web-based tool that enables you to move BI objects
from one system to another system, without affecting the dependencies of those objects. It also enables
you to manage different versions, manage dependencies, or roll back a promoted object to its previous
state.
The LCM tool is a plug-in for Information platform services. You can promote a BI object from one
system to another system only if the same version of the application is installed on both the source and
destination systems.
For more information, see the
Guide
.
Information platform services Lifecycle management console User's
2.1.9 Integrated version control
2010-12-0229
Page 30

Architecture
The files that make up SAP BusinessObjects Enterprise on a server system are now kept under version
control. The installation program will install and configure the Subversion version control system, or
you can enter details to use an existing Subversion or ClearCase version control system.
A version control system makes it possible to keep and restore different revisions of configuration and
other files, which means it is always possible to revert the system to a known state from any time in the
past.
2.1.10 Permanent data
The term "permanent data" refers to any piece of information considered important enough to be
migrated during a system upgrade. For example, the Central Management Server (CMS) stores
configuration information in the CMS database rather than the Windows registry or a configuration file.
All Information platform services products store permanent data in the CMS system database. This
allows data and configuration information to be easily migrated to a new version when you upgrade.
2.1.11 Upgrade path
It's possible to upgrade from a previous release of Information platform services, but you must first
install Information platform services 4.0, then migrate the settings and data from your existing system
with the Upgrade management tool.
For information on how to upgrade from a previous version, see the
Upgrade Guide
.
2.2 Conceptual tiers
Information platform services can be thought of as a series of conceptual tiers:
Information platform services
2010-12-0230
Page 31

Architecture
• Web tier
The Web Tier contains web applications deployed to a Java web application server. Web applications
provide Information platform services functionality to end users through a web browser. Examples
of web applications include the Central Management Console (CMC) administrative web interface
and BI launch pad.
The web tier also contains Web Services. Web Services provides Information platform services
functionality to software tools via the web application server, such session authentication, user
privilege management, scheduling, search, administration, reporting, and query management.
• Management tier
The management tier coordinates and controls all of the components that make up Information
platform services. It is comprised of the Central Management Server (CMS). The CMS provides
maintains security and configuration information, sends service requests to servers, manages
auditing, and maintains the CMS system database.
• Processing tier
The processing tier analyzes data and produces reports. This is the only tier that accesses the
databases that contain report data.
• Storage tier
The storage tier is responsible to handling files, such as documents and reports. The Input File
Repository Server manages files that contain information to be used in reports. The Output File
Repository Server manages reports created by the system. The storage tier also handles report
caching to save system resources when users access reports.
2.3 Services and servers
The following diagram shows a hypothetical installation of Information platform services.
2010-12-0231
Page 32
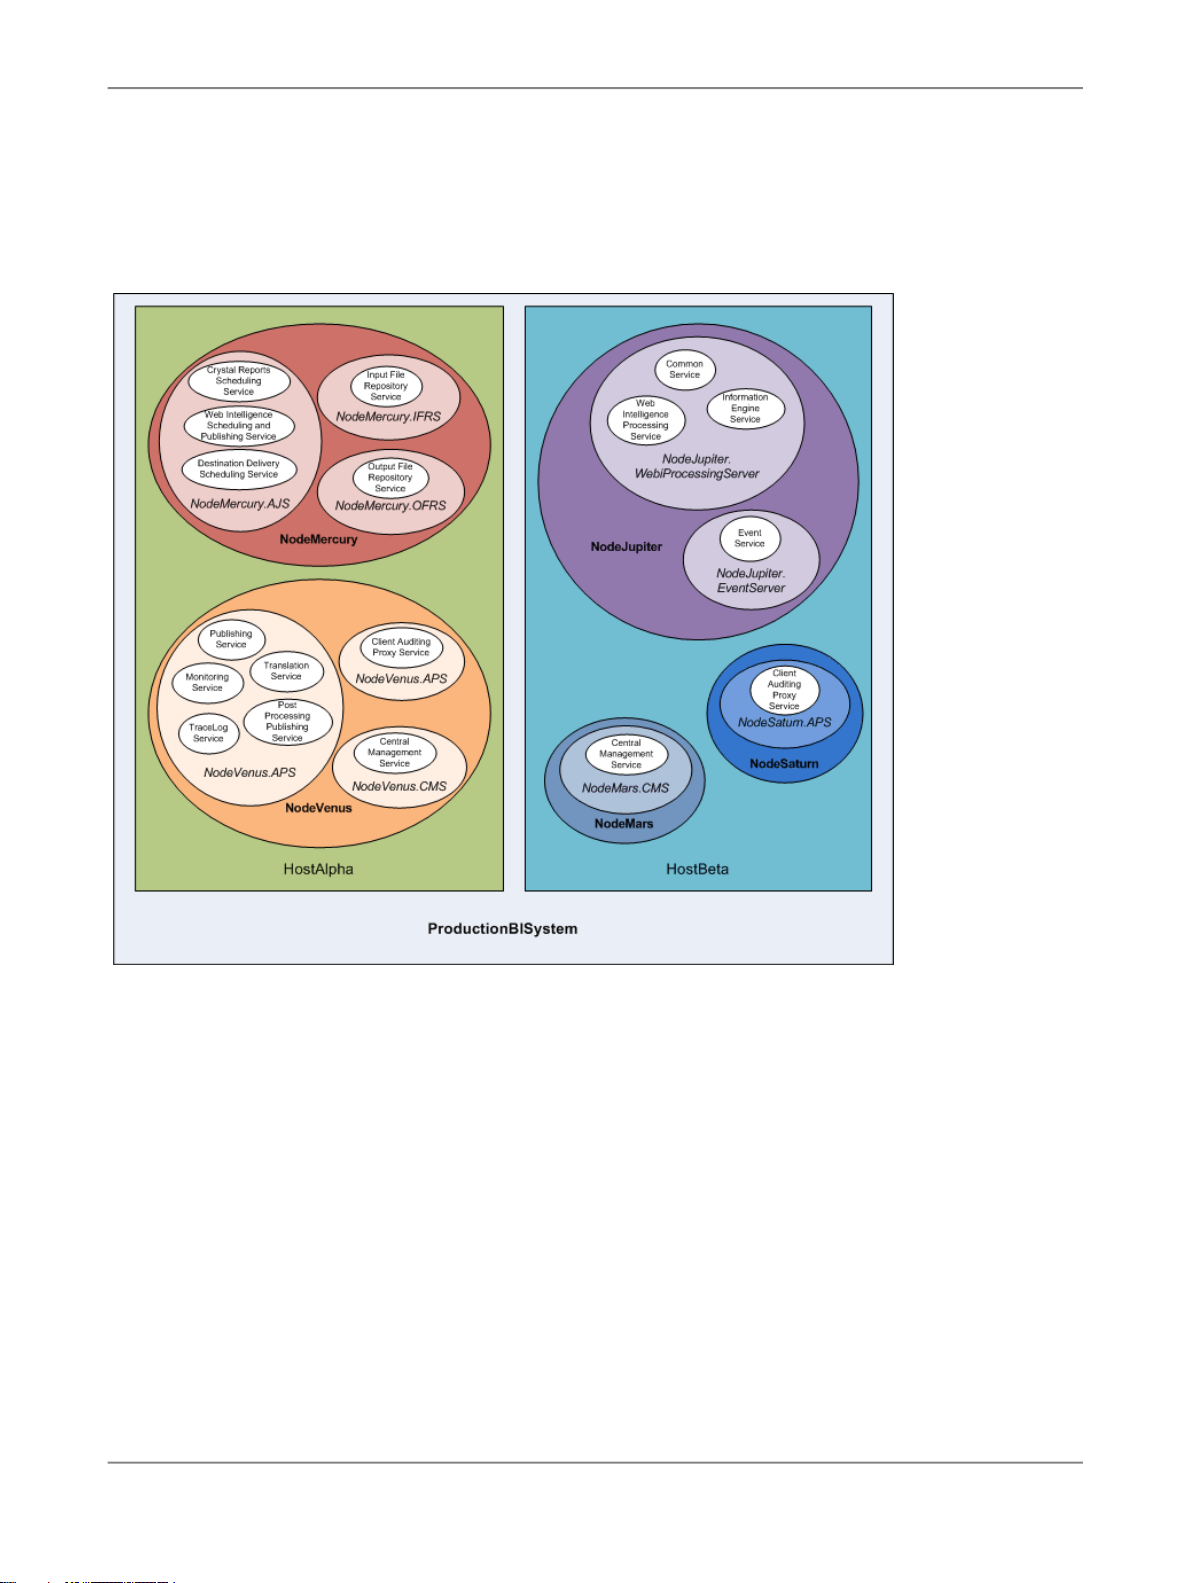
Architecture
Note:
The nodes, servers, and services shown are for illustrative purposes only. The number of hosts, nodes,
servers and services—as well as the type of servers, and services—will vary in real-world installations.
Two hosts form the cluster named
• The host named
HostAlpha
ProductionBISystem
, with two hosts:
has Information platform services installed and is configured to have
two nodes:
•
NodeMercury
and publish reports, an Input File Repository Server (
input reports, and an Output File Repository Server (
: contains an Adaptive Job Server (
NodeMercury.AJS
NodeMercury.IFRS
NodeMercury.OFRS
report output.
•
NodeVenus
: contains an Adaptive Processing Server (
NodeVenus.APS
publishing, monitoring, and translation features, an Adaptive Processing Server (
with a service to provide client auditing, and a Central Management Server (
with a service to provide the CMS services.
• The host named
HostBeta
has Information platform services installed and is configured to have
three nodes:
) with services to schedule
) with a service to store
) with a service to store
) with services to provide
NodeVenus.APS2
NodeVenus.CMS
2010-12-0232
)
)
Page 33

Architecture
•
NodeMars
the CMS services.
•
NodeJupiter
with a service to provide Interactive Analysis reporting, and an Event Server
(
NodeJupiter.EventServer
•
NodeSaturn
client auditing.
: contains a Central Management Server (
: contains a Interactive Analysis Processing Server (
) to provide report monitoring of files.
: contains an Adaptive Processing Server (
NodeMars.CMS
NodeSaturn.APS
NodeJupiter.InteractiveAnalysis
) with a service to provide
)
) with a service to provide
Information platform services uses the terms
running on an Information platform services machine.
A
service
space of its server under the process id of the parent container (server). For example, the SAP
BusinessObjects Interactive Analysis Scheduling and Publishing Service is a subsystem that runs within
the Adaptive Job Server.
The term
to as a
and Adaptive Processing Server are servers. A server runs under a specific operating system account
and has its own PID.
A
node
nodes can be on a single host.
Information platform services can be installed on a single machine, spread across different machines
on an intranet, or separated over a wide area network (WAN).
2.3.1 Services
The following table describes each of the services.
server
is a server subsystem that performs a specific function. The service runs within the memory
server
is used to describe an operating system level process (on some systems, this is referred
daemon
is a collection of Information platform services servers running on the same host. One or more
) hosting one or more services. For example, the Central Management Server (CMS)
and
service
to refer to the two types of software
Table 2-1: Services
Authentication Update
Scheduling Service
Web Application Service
Core Services
Adaptive Job ServerCore Services
Web Application Container Server
Service descriptionServer typeService CategoryService
Provides synchronization of updates for thirdparty security plug-ins.
Provides web applications for WACS: includes the Central
Management Console
(CMC).
2010-12-0233
Page 34

Architecture
Central Management
Service
Destination Delivery
Scheduling Service
Core Services
Core ServicesInput Filestore Service
Central Management
Server
Adaptive Job ServerCore Services
Input File Repository
Server
Service descriptionServer typeService CategoryService
Provides server, user,
session management,
and security (authorization and authentication)
management. At least
one Central Management Service must be
available in a cluster for
the cluster to operate.
Runs scheduled jobs
and publishes the results to a given output
location, such as the
file system, FTP, email,
or a user's inbox.
Maintains published report and program objects that can be used
in the generation of
new reports when an
input file is received.
Lifecycle Management
ClearCase Service
Lifecycle Management
Scheduling Service
Lifecycle Management
Service
Multi Dimensional
Analysis Service
Lifecycle Management
Services
Lifecycle Management
Services
Lifecycle Management
Services
Core ServicesMonitoring Service
Advanced Analysis
Services
Adaptive Processing
Server
Adaptive Job Server
Adaptive Processing
Server
Adaptive Processing
Server
Adaptive Processing
Server
Provides ClearCase
support for LCM.
Runs scheduled Lifecycle Management jobs.
Lifecycle Management
Core service.
Provides monitoring
functions.
Provides access to
multi-dimensional Online Analytical Processing (OLAP) data; converts the raw data into
XML, which can be
rendered into Excel,
PDF, or Advanced
Analysis (formerly Voyager) crosstabs and
charts.
2010-12-0234
Page 35
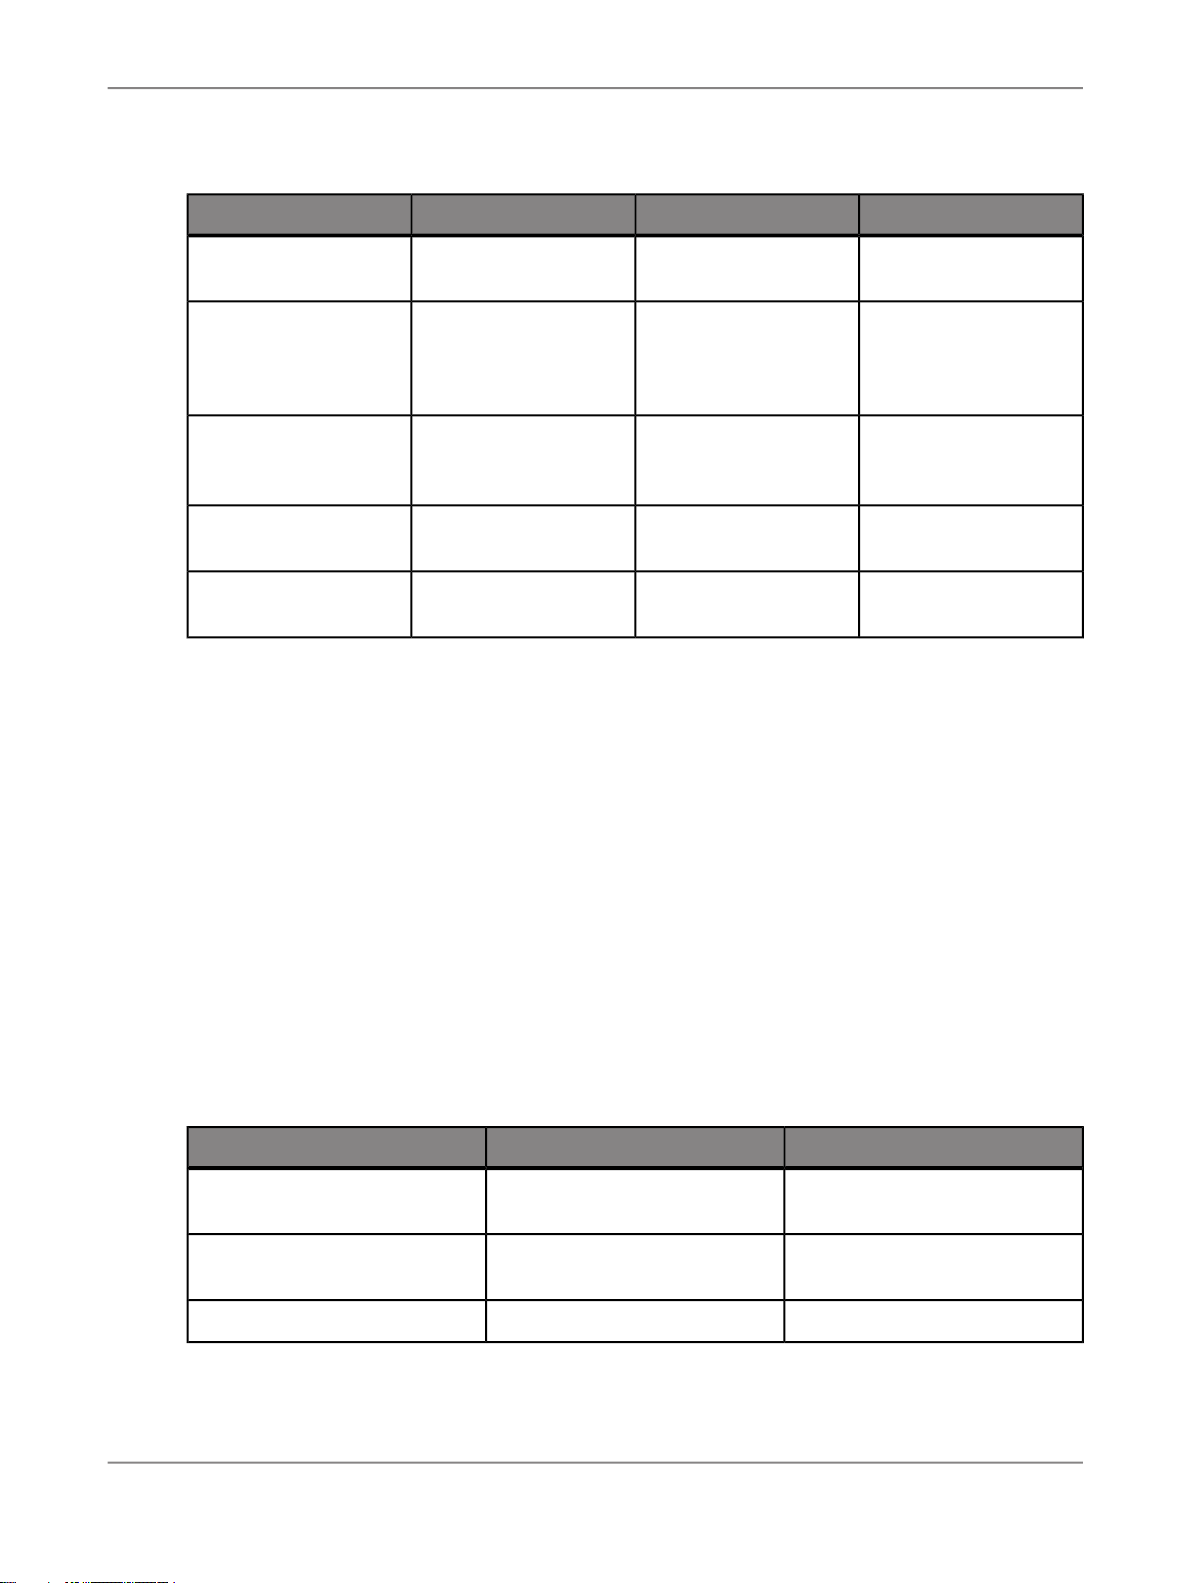
Architecture
Service descriptionServer typeService CategoryService
Output Filestore Service
Core Services
Output File Repository
Server
Maintains collection of
completed documents.
Provides scheduled
Probe Scheduling Service
Adaptive Job ServerCore Services
Probe jobs and publish-
es the results to a given
output location.
Program Scheduling
Service
Security Query
Scheduling Service
Adaptive Job ServerCore Services
Adaptive Job ServerCore Services
Core ServicesSecurity Token Service
Adaptive Processing
Server
Runs programs that
have been scheduled
to run at a given time.
Runs scheduled Securi-
ty Query jobs.
SAP Single Sign-On
support
Note:
New services or server types may be added in future maintenance releases of Information platform
services.
2.3.2 Service categories
The following table lists each of the servers, ordered by service category. For a description of each
service, see
Note:
New services or server types may be added in future maintenance releases of Information platform
services.
Table 2-2: Services, ordered by service category
Advanced Analysis Services
Core Services
Services
.
Server TypeServiceService category
Multi Dimensional Analysis Service
Authentication Update Scheduling Service
Adaptive Processing Server
Adaptive Job Server
Central Management ServerCentral Management ServiceCore Services
2010-12-0235
Page 36

Architecture
Server TypeServiceService category
Adaptive Processing ServerClient Auditing Proxy ServiceCore Services
Core Services
Core Services
Lifecycle Management Services
Lifecycle Management Services
Destination Delivery Scheduling
Service
Security Query Scheduling Service
LifeCycle Management
ClearCase Service
Lifecycle Management
Scheduling Service
Adaptive Job Server
Input File Repository ServerInput Filestore ServiceCore Services
Adaptive Processing ServerMonitoring ServiceCore Services
Output File Repository ServerOutput Filestore ServiceCore Services
Adaptive Job ServerProbe Scheduling ServiceCore Services
Adaptive Job ServerProgram Scheduling ServiceCore Services
Adaptive Job Server
Adaptive Processing ServerSecurity Token ServiceCore Services
Adaptive Processing Server
Adaptive Job Server
Adaptive Processing ServerLifecycle Management ServiceLifecycle Management Services
2.3.3 Server types
The following table lists each of the servers, ordered by server type. For a description of each service,
see
Services
Table 2-3: Servers, ordered by server type
Adaptive Job Server
Adaptive Job Server
.
Destination Delivery Scheduling
Service
Lifecycle Management
Scheduling Service
Service categoryServiceServer Type
Core Services
Lifecycle Management Services
Core ServicesProbe Scheduling ServiceAdaptive Job Server
2010-12-0236
Page 37

Architecture
Service categoryServiceServer Type
Core ServicesProgram Scheduling ServiceAdaptive Job Server
Adaptive Job Server
Adaptive Processing Server
Adaptive Processing Server
Web Application Container
Server
Security Query Scheduling Service
Lifecycle Management
ClearCase Service
Lifecycle Management Console
Service
Core Services
Core ServicesClient Auditing Proxy ServiceAdaptive Processing Server
Lifecycle Management Services
Lifecycle Management Services
Core ServicesSecurity Token ServiceAdaptive Processing Server
Core ServicesCentral Management ServiceCentral Management Server
Core ServicesDashboard Analytics ServiceDashboard Analytics Server
Core ServicesInput Filestore ServiceInput File Repository Server
Core ServicesOutput Filestore ServiceOutput File Repository Server
Core ServicesWeb Application Service
2.3.4 Server categories
Servers are collections of services running under a Server Intelligence Agent (SIA) on a host. The type
of server is denoted by the services running within it. Servers can be created in the Central Management
Console (CMC). The following table lists the different types of servers that can be created in the CMC.
2010-12-0237
Page 38

Architecture
DescriptionServer categories
Adaptive Job Server
Adaptive Processing
Server
General server that processes scheduled jobs. When you add a Job server
to the Information platform services system, you can configure the Job
server to process reports, documents, programs, or publications and send
the results to different destinations.
A generic server that hosts services responsible for processing requests
from a variety of sources.
Note:
The installation program installs one Adaptive Processing Server (APS) per
host system. Depending on the features that you've installed, this APS may
host a large number of services, such as the Monitoring Service, Lifecycle
Management Service, Multi-Dimensional Analysis Service (MDAS), Publishing Service, and others.
If you are installing a production environment, do not use the default APS.
Instead, it is highly recommended that once the installation process is
complete, you perform a system sizing to determine:
• The type and number of APS services.
• The distribution of services across multiple APS servers.
• The optimal number of APS servers. Multiple APS servers provide re-
dundancy, better performance, and higher reliability.
• The distribution of APS servers across multiple nodes.
Create new APS server instances as determined by the sizing process.
Central Management
Server (CMS)
For example, if the outcome of your sizing happens to suggest the creation
of one APS for each service category, then may end up creating eight APS
servers. One for each service category: Advanced Analysis Services,
Connectivity Services, Core Services, Crystal Reports Services, Dashboard
Design Services, Data Federation Services, Lifecycle Management Services,
and Interactive Analysis Services.
Maintains a database of information about your Information platform services
system (in the CMS system database) and audited user actions (in the
Auditing Data Store). All platform services are managed by the CMS. The
CMS also controls access to the system files where documents are stored,
and information on users, user groups, security levels (including authentication and authorization), and content.
2010-12-0238
Page 39

Architecture
DescriptionServer categories
File Repository Server
2.4 Client applications
You can interact with Information platform services using two different types of desktop applications:
• Desktop applications
These applications must be installed on a supported Microsoft Windows operating system, and can
process data and create reports locally.
Desktop clients allow you to offload some BI report processing onto individual client computers.
Most desktop applications directly access your organization's data through drivers installed on the
desktop, and communicate with your Information platform services deployment through CORBA or
encrypted CORBA SSL.
• Web applications
Responsible for the creation of file system objects, such as exported reports,
and imported files in non-native formats. An Input FRS stores report and
program objects that have been published to the system by administrators
or end users. An Output FRS stores all of the report instances generated
by the Job Server.
These applications are hosted by a web application server and can be accessed with a supported
web browser on Windows, Macintosh, Unix, and Linux operating systems.
This allows you to provide business intelligence (BI) access to large groups of users, without the
challenges of deploying desktop software products. Communication is conducted over HTTP, with
or without SSL encryption (HTTPS).
2.4.1 Central Configuration Manager (CCM)
The Central Configuration Manager (CCM) is a server troubleshooting and node configuration tool
provided in two forms. In a Microsoft Windows environment, the CCM allows you to manage local and
remote servers through its graphical user interface (GUI) or command line.
The CCM allows you to create and configure Server Intelligence Agent (SIA) nodes and start or stop
your web application server. On Windows, it also allows you to configure network parameters, such as
Secure Socket Layer (SSL) encryption. These parameters apply to all servers within a node.
2010-12-0239
Page 40

Architecture
Note:
Most server management tasks are now handled through the CMC, not through the CCM. The CCM
is now used for troubleshooting and node configuration.
2.4.2 Upgrade management tool
Upgrade management tool (formerly Import Wizard) is installed as a part of Information platform services,
and guides administrators through the process of importing users, groups, and folders from previous
versions of Information platform services. It also allows you to import and upgrade objects, events,
server groups, repository objects, and calendars.
For information on upgrading from a previous version of Information platform services, see the
platform services Upgrade Guide
2.4.3 Web application clients
Web application clients reside on a web application server, and are accessed on a client machine web
browser. Web applications are automatically deployed when you install Information platform services.
Web applications are easy for users to access from a web browser, and communication can be secured
with SSL encryption if you plan to allow users access from outside your organization's network.
Java web applications can also be reconfigured or deployed after the initial installation by using the
bundled WDeploy command-line tool, which allows you to deploy web applications to a web application
server in two ways:
1.
Standalone mode
All web application resources are deployed to a web application server that serves both dynamic
and static content. This arrangement is suitable for small installations.
2.
Split mode
The web application's static content (HTML, images, CSS) is deployed to a dedicated web server,
while dynamic content (JSPs) is deployed to a web application server. This arrangement is suitable
for larger installations that will benefit from the web application server being freed up from serving
static web content.
Information
.
For more information about WDeploy, see the
Guide
.
Information platform services Web Application Deployment
2010-12-0240
Page 41

Architecture
2.4.3.1 Central Management Console (CMC)
The Central Management Console (CMC) is a web-based tool to perform administrative tasks, including
user, content, and server management. It also allows you to publish, organize, and configure security
settings. Because the CMC is a web-based application, you can perform all of these administrative
tasks through a web browser on any machine that can connect to the server.
All users can log on to the CMC to change their user preference settings. Only members of the
Administrators
Roles can also be assigned to the CMC to grant some users privileges to perform minor administrative
tasks
group can change management settings, unless explicitly granted the rights to do so.
2.5 Information Workflows
When tasks are performed in Information platform services, such as logging in, scheduling a report, or
viewing a report, information flows through the system and the servers communicate with each other.
The following section describes some of the process flows as they would happen in the Information
platform services system.
2.5.1 Authentication
2.5.1.1 Logging on to Information platform services
This workflow describes a user logging on to Information platform services from a web browser.
1.
The browser sends the login request via the web server to the web application server.
2.
The web application server determines that the request is a logon request. The web application
server sends the username, password, and authentication type to the CMS for authentication.
3.
The CMS validates the username and password against the appropriate database (in this case,
Enterprise authentication is used, and user credentials are authenticated against the CMS system
database).
4.
Upon successful validation, the CMS creates a session for the user in memory.
2010-12-0241
Page 42

Architecture
5.
The CMS sends a response to the web application server to let it know that the validation was
successful. The web application server generates a logon token for the user session in memory.
For the rest of this session, the web application server uses the logon token to validate the user
against the CMS.
6.
The web application server generates an HTML page to send to the client. The web application
server sends the response back to the user's machine where it is rendered in the web client.
2.5.1.2 SIA start-up
A Server Intelligence Agent (SIA) can be configured to start automatically with the host operating system,
or can be started manually with Central Configuration Manager (CCM).
A SIA retrieves information about the servers it manages from a Central Management Server (CMS).
If the SIA uses a local CMS, and that CMS is not running, the SIA starts the CMS. If a SIA uses a remote
CMS, it attempts to connect to the CMS.
Once a SIA is started, the following sequence of events is performed.
1.
The SIA looks in its cache to locate a CMS.
a. If the SIA is configured to start a local CMS, and the CMS is not running, the SIA starts the CMS
and connects.
b. If the SIA is configured to use a running CMS (local or remote), it attempts to connect to the first
CMS in its cache. If the CMS is not currently available, it attempts to connect to the next CMS
in the cache. If none of the cached CMSs are available, the SIA waits for one to become available.
2.
The CMS confirms the SIA's identity to ensure that it is valid.
3.
Once the SIA has successfully connected to a CMS, it requests a list of servers to manage.
A SIA does not store information about the servers it manages. The configuration information that
dictates which server is managed by a SIA is stored in the CMS system database and is retrieved
from the CMS by the SIA when it starts.
4.
The CMS queries the CMS system database for a list of servers managed by the SIA. The
configuration for each server is also retrieved.
5.
The CMS returns the list of servers, and their configuration, to the SIA.
6.
For each server configured to start automatically, the SIA starts it with the appropriate configuration
and monitors its state. Each server started by the SIA is configured to use the same CMS used by
the SIA.
Any servers not configured to start automatically with the SIA will not start.
2.5.1.3 SIA shutdown
2010-12-0242
Page 43

Architecture
A Server Intelligence Agent (SIA) can be configured to stop automatically with the host operating system,
or can be stopped manually with the Central Configuration Manager (CCM).
When the SIA shuts down, the following steps are performed.
1.
The CMS tells the SIA to stop.
2.
The SIA tells the CMS that it is shutting down.
a. If the SIA is stopping because the host operating system is shutting down, the SIA requests its
servers to stop. Servers that do not stop within 25 seconds are forcefully terminated.
b. If the SIA is being stopped manually, it will wait for the managed server to finish processing
existing jobs. Managed servers will not accept any new jobs. Once all jobs are complete, the
servers stop. Once all servers have stopped, the SIA stops too.
Note:
During a force shutdown, the SIA tells all managed servers to stop immediately.
2.5.2 Scheduling
2.5.2.1 Scheduling an object
This workflow describes the process of a user scheduling an object to be run.
1.
The user schedules an object and the request is sent to the web server.
2.
The web server passes the object schedule request to the web application server.
3.
The web application server passes the request to the Central Management Server (CMS).
4.
The CMS determines if the user has the appropriate rights to schedule the object.
5.
If the user has the appropriate rights to schedule the object, the CMS commits the scheduled object
request to the CMS system database.
6.
When the scheduled time arrives, the CMS locates an available Program Job Server based on the
Maximum Jobs Allowed value configured on each Program Job Server.
7.
The CMS sends the job information to the Program Job Server.
8.
The Program Job Server communicates with the Input File Repository Server and requests the
program object.
9.
The Input File Repository Server returns the program object back to the Program Job Server.
10.
The Program Job Server launches the scheduled object.
11.
The Program Job Server updates the CMS periodically with the job status. At this time the status
reported is that the program is processing.
12.
The Program Job Server sends a log file to the Output File Repository Server.
2010-12-0243
Page 44

Architecture
13.
The Output File Repository Server notifies the Program Job Server that the object was scheduled
successfully by sending an object log file.
14.
The Program Job Server updates the CMS with the job status.
15.
The CMS updates the job status in its memory, and then writes the object instance information to
the CMS system database.
2.5.2.2 Scheduling an object to run now
This workflow describes the process of a user scheduling an object to be run immediately.
1.
The user schedules an object and the request is sent to the web server.
2.
The web server passes the object schedule request to the web application server.
3.
The web application server passes the request to the Central Management Server (CMS).
4.
The CMS determines if the user has the appropriate rights to schedule the object.
5.
If the user has the appropriate rights to schedule the object, the CMS commits the scheduled object
request to the CMS system database.
6.
When the scheduled time arrives, the CMS locates an available Program Job Server based on the
"Maximum Jobs Allowed" value configured on each Program Job Server.
7.
The CMS sends the job information to the Program Job Server.
8.
The Program Job Server communicates with the Input File Repository Server and requests the
program object.
9.
The Input File Repository Server returns the program object back to the Program Job Server.
10.
The Program Job Server launches the scheduled object.
11.
The Program Job Server updates the CMS periodically with the job status. At this time the status
reported is that the program is processing.
12.
The Program Job Server sends a log file to the Output File Repository Server.
13.
The Output File Repository Server notifies the Program Job Server that the object was scheduled
successfully by sending an object log file.
14.
The Program Job Server updates the CMS with the job status.
15.
The CMS updates the job status in its memory, and then writes the object instance information to
the CMS system database.
2010-12-0244
Page 45

Managing Licenses
Managing Licenses
3.1 Managing License keys
This section describes how to manage license keys for your Information platform services deployment.
Related Topics
• To add a license key
• To view license information
• To view current account activity
3.1.1 To view license information
The License Keys management area of the CMC identifies the number of role-based (BI Viewer and
BI Analyst), concurrent, named, and processor licenses that are associated with each key.
1.
Go to the License Keys management area of the CMC.
2.
Select a license key.
The details associated with the key appear in the License Key Information area. To purchase
additional license keys, contact your SAP sales representative.
Related Topics
• Managing License keys
• To add a license key
• To view license information
3.1.2 To add a license key
2010-12-0245
Page 46

Managing Licenses
If you are upgrading from a trial version of the product, be sure to delete the Evaluation key prior to
adding any new license keys or product activation keycodes.
1.
Go to the License Keys management area of the CMC.
2.
Type the key in the Add Key field.
3.
Click Add.
The key is added to the list.
Related Topics
• To add a license key
• To view current account activity
3.1.3 To view current account activity
1.
Go to the Settings management area of the CMC.
2.
Click View global system metrics.
This section displays current license usage, along with additional job metrics.
Related Topics
• Managing License keys
• To add a license key
• To view license information
3.2 Measuring licenses
The BusinessObjects License Measurement Tool (BOLMT) is a java command-line utility used to collect
and store Information platform services licensing data. The output XML document contains license
deployment measurements and is sent to SAP Global License Auditing Services (GLAS) for consolidation
as part of a license audit.
The system administrator installs and runs BOLMT for every Information platform services cluster
whenever a license audit is requested. BOLMT collects usage measurements on role-based, named,
and concurrent user licenses.
The administrator can specify a particular output directory for the XML document, and configure the
output document to not contain any information that may be used to identify system users.
2010-12-0246
Page 47

Managing Licenses
3.2.1 To run a license audit
To perform a license audit, you will need administrator rights and access to the directory containing the
BOLMT.jar file in the Information platform services installation.
1.
Open a command line console.
2.
Change directories to the directory containing the java executables for your Information platform
services installation
By default the file is installed in the following directory:[INSTALLDIR]\SAP BusinessObjects
Enterprise XI 4.0\java\lib
3.
Execute the BOLMT.jar.
The execution command is entered in the following format: -jar BOLMT.jar [options] <outputFile>
The table below summarizes the available options:
DescriptionOption
-c --cms
Specifies the name identifier and port number for the Central Management
Server (CMS). Specified as cmsname:port number. By default, the CMS
settings for the local host are used if this setting is not specified.
Specifies the administrator account password used to connect to the CMS.-p --password
-a--auth
Specifies the authentication method to connect user to the CMS. Default method
is Enterprise specified as secEnterprise.
-s--sanitize
Specifies that the output audit document should filter out any personal information that may be used to identify users.
Note:
The output file specification is always the last argument in the command line. It is an optional setting.
If no argument is specified, the output goes to the console's standard output. You can also pipe
output to script as a command line argument.
Example:
C:\Program Files (x86)\SAP
Business Objects\SAP BusinessObjects Enterprise XI 4.0\java\lib>"C:\Program Files
(x86)\SAP Business Objects\SAP BusinessObjects Enterprise XI 4.0\win64_x64\sapjvm\bin
\java.exe" -jar BOLMT.jar --cms=mycms:6400 -uAdministrator
-p=7juujg --auth=secEnterprise --sanitize audit.xml
2010-12-0247
Page 48

Managing Licenses
2010-12-0248
Page 49

Managing Users and Groups
Managing Users and Groups
4.1 Account management overview
Account management involves all of the tasks related to creating, mapping, changing, and organizing
user and group information. The "Users and Groups" management area of the Central Management
Console (CMC) provides a central place to perform these tasks.
After the user accounts and groups have been created, you can add objects and specify rights to them.
When the users log on, they can view the objects using BI launch pad or their custom web application.
4.1.1 User management
In the "Users and Groups" management area, you can specify everything required for a user to access
Information platform services. You can also view the two default user accounts summarized by the
“Default user accounts” table.
Table 4-1: Default user accounts
Administrator
Guest
SMAdmin
DescriptionAccount name
This user belongs to the Administrators and
Everyone groups. An administrator can perform
all tasks in all Information platform services applications (for example, the CMC, CCM, Publishing
Wizard, and BI launch pad).
This user belongs to the Everyone group. This
account is enabled by default, and is not assigned
a password by the system. If you assign it a
password, the single sign-on to BI launch pad will
be broken.
This is a read-only account used by SAP Solution
Manager to access Information platform services
components.
2010-12-0249
Page 50

Managing Users and Groups
4.1.1.1 Role-based licensing
Under the user-role based licensing scheme, there are two roles which can be assigned to Information
platform services users:
• BI Analyst
• BI Viewer
Each role is bundled with specific access levels to Information platform services applications. You
cannot modify or override the access level to either user role. User roles apply to new user accounts
created in Information platform services or existing users imported from third party directory services
such as Windows AD or LDAP.
Note:
User roles should not be confused with group membership. When you assign a user one of the two
available roles, the user is automatically assigned predefined rights to applications. To associate a user
with specific group access levels, you must add the user to the desired group.
Click License Key in the CMC for more information on your licensing scheme, or contact your SAP
Business Objects account manager for further information on access rights for each user role.
4.1.1.1.1 BI Analyst role
The BI Analyst role is designed for users who create content in the Information platform services system.
Users who edit or create reports, design and manage universes, or perform any administrative tasks
in the CMC should be assigned the BI Analyst role.
4.1.1.1.2 BI Viewer role
The BI Viewer role is designed primarily for content consumers. These users only view reports but do
not modify content.
Users assigned to the BI Viewer role will be prevented by the system from creating content, modifying
reports and performing general administrative tasks in the system. The BI Viewer role should not be
assigned to users who need to:
• Create reports
• Update or modify reports
• Perform administrative tasks using the CMC
Note:
BI Viewer users cannot access the CMC.
2010-12-0250
Page 51

Managing Users and Groups
4.1.2 Group management
Groups are collections of users who share the same account privileges; therefore, you may create
groups that are based on department, role, or location. Groups enable you to change the rights for
users in one place (a group) instead of modifying the rights for each user account individually. Also,
you can assign object rights to a group or groups.
In the "Users and Groups" area, you can create groups that give a number of people access to the
report or folder. This enables you to make changes in one place instead of modifying each user account
individually. You can also view the several default group accounts summarized by the “Default group
accounts” table.
To view available groups in the CMC, click Group List in the Tree panel. Alternatively, you can click
Group Hierarchy to display a hierarchal list of all available groups.
Table 4-2: Default group accounts
Administrators
QaaWS Group Designer
Report Conversion Tool Users
Translators
DescriptionAccount name
Members of this group can perform all tasks in all
of the Information platform services applications
(CMC, CCM, Publishing Wizard, and BI launch
pad). By default, the Administrators group contains only the Administrator user.
Each user is a member of the Everyone group.Everyone
Members of this group have access to Query as
a Web Service.
Members of this group have access to the Report
Conversion Tool application.
Members of this group have access to the
Translation Manager application.
2010-12-0251
Page 52
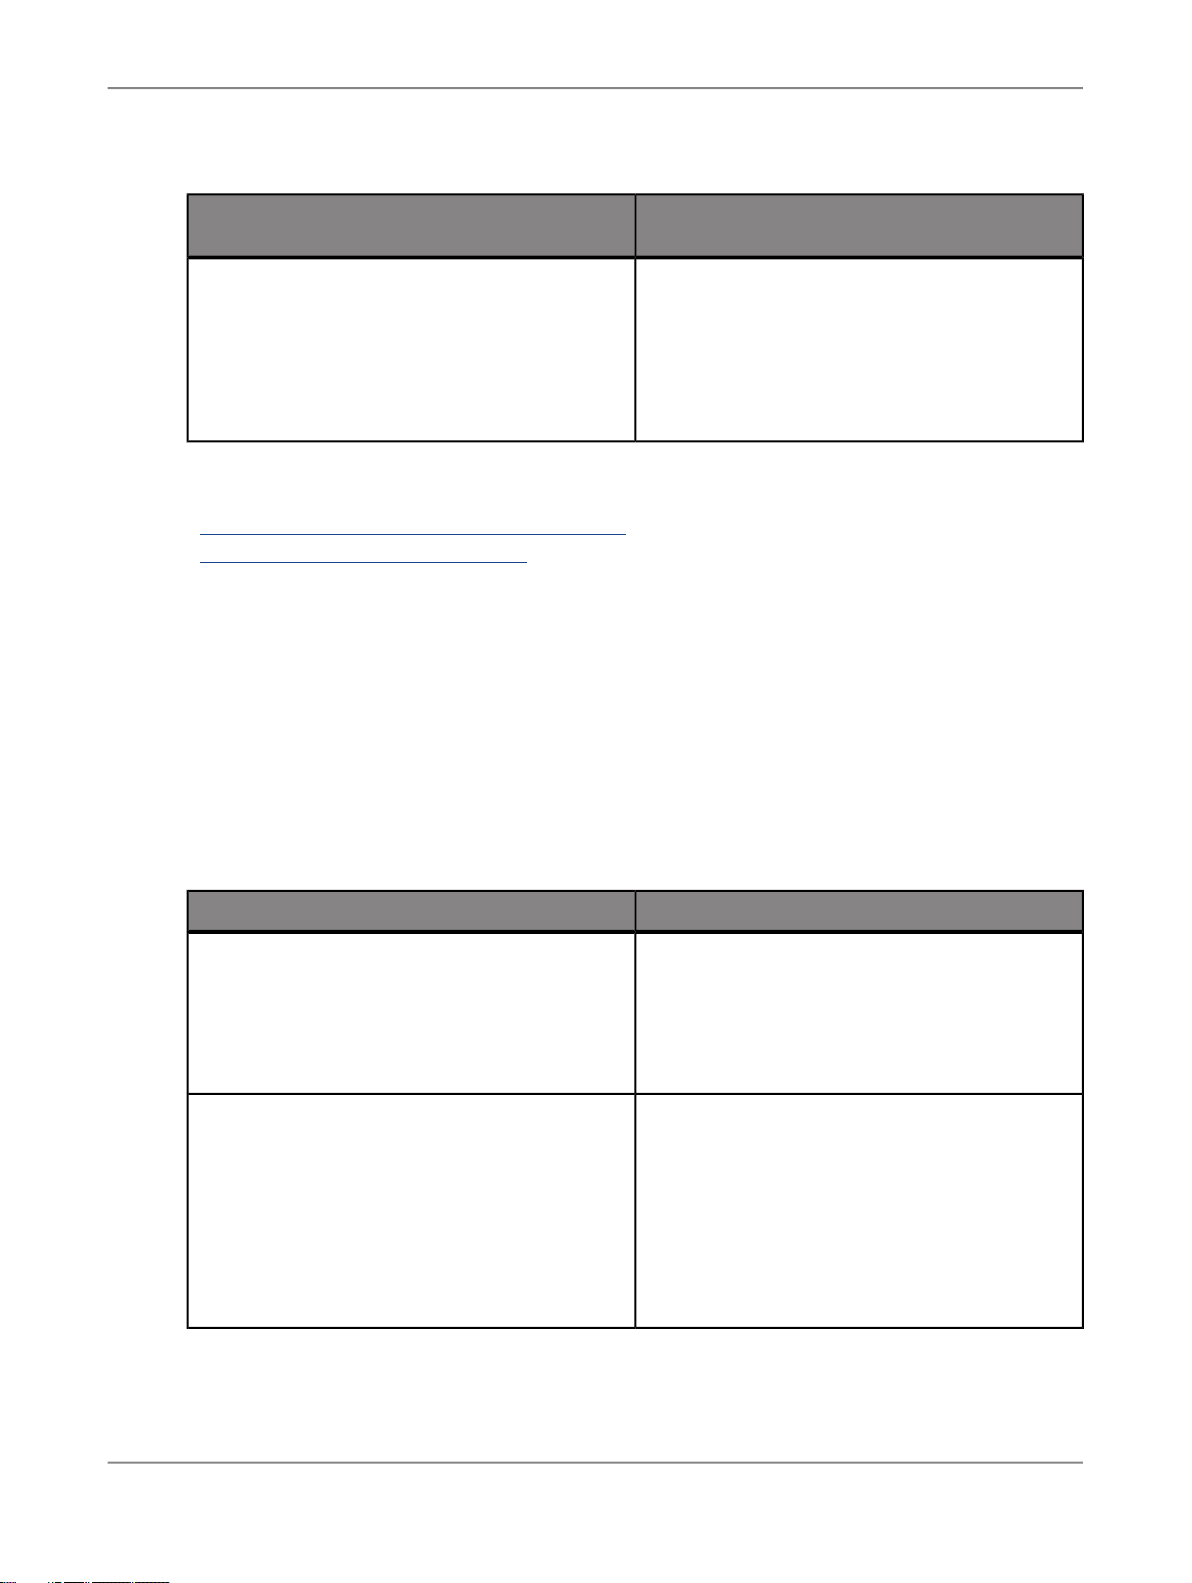
Managing Users and Groups
Universe Designer Users
Related Topics
• How rights work in Information platform services
• Granting access to users and groups
DescriptionAccount name
Users who belong to this group are granted access to the Universe Designer folder and the
Connections folder. They can control who has
access rights to the Designer application. You
must add users to this group as needed. By default, no user belongs to this group.
4.1.3 Available authentication types
Before setting up user accounts and groups within Information platform services, decide which type of
authentication you want to use. The “Authentication types” table summarizes the authentication options
which may be available to you, depending on the security tools your organization uses.
Table 4-3: Authentication types
Enterprise
LDAP
DescriptionAuthentication type
Use the system default Enterprise Authentication
if you prefer to create distinct accounts and
groups for use with Information platform services,
or if you have not already set up a hierarchy of
users and groups in an LDAP directory server, or
a Windows AD server.
If you set up an LDAP directory server, you can
use existing LDAP user accounts and groups in
Information platform services. When you map
LDAP accounts to Information platform services,
users are able to access Information platform
services applications with their LDAP user name
and password. This eliminates the need to recreate individual user and group accounts within Information platform services.
2010-12-0252
Page 53

Managing Users and Groups
Windows AD
SAP
Oracle EBS
DescriptionAuthentication type
You can use existing Windows AD user accounts
and groups in Information platform services. When
you map AD accounts to Information platform
services, users are able to log on to Information
platform services applications with their AD user
name and password. This eliminates the need to
recreate individual user and group accounts
within Information platform services.
You can map existing SAP roles into Information
platform services accounts. After you map SAP
roles, users are able to log on to Information
platform services applications with their SAP
credentials. This eliminates the need to recreate
individual user and group accounts within Information platform services.
You can map existing Oracle EBS roles into Information platform services accounts. After you map
Oracle EBS roles, users are able to log on to Information platform services applications with their
Oracle EBS credentials. This eliminates the need
to recreate individual user and group accounts
within Information platform services.
Siebel
PeopleSoft Enterprise
JD Edwards EnterpriseOne
You can map existing Siebel roles into Information
platform services accounts. After you map Siebel
roles, users are able to log on to Information
platform services applications with their Siebel
credentials. This eliminates the need to recreate
individual user and group accounts within Information platform services.
You can map existing PeopleSoft roles into Information platform services accounts. After you map
PeopleSoft roles, users are able to log on to Information platform services applications with their
PeopleSoft credentials. This eliminates the need
to recreate individual user and group accounts
within Information platform services.
You can map existing JD Edwards roles into Information platform services accounts. After you map
JD Edwards roles, users are able to log on to Information platform services applications with their
JD Edwards credentials. This eliminates the need
to recreate individual user and group accounts
within Information platform services.
2010-12-0253
Page 54

Managing Users and Groups
4.2 Managing Enterprise and general accounts
Since Enterprise authentication is the default authentication method for Information platform services,
it is automatically enabled when you first install the system. When you add and manage users and
groups, Information platform services maintains the user and group information within its database.
Note:
When a user logs off their web session on Information platform services by navigating to a
non-Information platform services page or closing their web browser, their Enterprise session is not
logged off and they still hold a license. The Enterprise session will time out after approximately 24 hours.
To end the user's Enterprise session and free the license for use by others, the user must log out of
Information platform services.
4.2.1 To create a user account
When you create a new user, you specify the user's properties and select the group or groups for the
user.
1.
Go to the "Users and Groups" management area of the CMC.
2.
Click Manage > New > New User.
The "New User" dialog box appears.
3.
To create an Enterprise user,
a. Select Enterprise from the Authentication Type list.
b. Type the account name, full name, email, and description information.
Tip:
Use the description area to include extra information about the user or account.
c. Specify the password information and settings.
4.
To create a user that will logon using a different authentication type, select the appropriate option
from the Authentication Type list, and type the account name.
5.
Specify how to designate the user account according to options stipulated by your Information
platform services license agreement.
If your license agreement is based on user roles, select one of the following options:
• BI Viewer: access to Information platform services applications for all accounts under the BI
Viewer role is defined in the license agreement. Users are restricted to access application
workflows that are defined for the BI Viewer role. Access rights are generally limited to viewing
business intelligence documents. This role is typically suitable for users who consume content
through Information platform services applications.
• BI Analyst: access to Information platform services applications for all accounts under the BI
Analyst role is defined in the license agreement. Users can access all applications workflows
2010-12-0254
Page 55

Managing Users and Groups
that are defined for the BI Analyst role. Access rights include viewing and modifying business
intelligence documents. This role is typically suitable for users who create and modify content
for Information platform services applications
If your license agreement is not based on user roles, specify a connection type for the user account.
• Choose Concurrent User if this user belongs to a license agreement that states the number of
users allowed to be connected at one time.
• Choose Named User if this user belongs to a license agreement that associates a specific user
with a license. Named user licenses are useful for people who require access to Information
platform services regardless of the number of other people who are currently connected.
6.
Click Create & Close.
The user is added to the system and is automatically added to the Everyone group. An inbox is
automatically created for the user, together with an Enterprise alias. You can now add the user to
a group or specify rights for the user.
Related Topics
• How rights work in Information platform services
• Role-based licensing
4.2.2 To modify a user account
Use this procedure to modify a user's properties or group membership.
Note:
The user will be affected if he or she is logged on when you are making the change.
1.
Go to the "Users and Groups" management area of the CMC.
2.
Select the user whose properties you want to change.
3.
Click Manage > Properties.
The "Properties" dialog box for the user appears.
4.
Modify the properties for the user.
In addition to all of the options that were available when you initially created the account, you now
can disable the account by selecting the Account is disabled check box.
Note:
Any changes you make to the user account do not appear until the next time the user logs on.
5.
Click Save & Close.
Related Topics
• To create a new alias for an existing user
2010-12-0255
Page 56

Managing Users and Groups
4.2.3 To delete a user account
Use this procedure to delete a user's account. The user might receive an error if they are logged on
when their account is deleted. When you delete a user account, the Favorites folder, personal categories,
and inbox for that user are deleted as well.
If you think the user might require access to the account again in the future, select the Account is
disabled check box in the "Properties" dialog box of the selected user instead of deleting the account.
Note:
Deleting a user account won't necessarily prevent the user from being able to log on to Information
platform services again. If the user account also exists in a third-party system, and if the account belongs
to a third-party group that is mapped to Information platform services, the user may still be able to log
on.
1.
Go to the "Users and Groups" management area of the CMC.
2.
Select the user you want to delete.
3.
Click Manage > Delete.
The delete confirmation dialog box appears.
4.
Click OK.
The user account is deleted.
Related Topics
• To modify a user account
• To disable an alias
4.2.4 To create a new group
1.
Go to the "Users and Groups" management area of the CMC.
2.
Click Manage > New > New Group.
The "Create New User Group" dialog box appears.
3.
Enter the group name and description.
4.
Click OK.
After creating a new group, you can add users, add subgroups, or specify group membership so that
the new group is actually a subgroup. Because subgroups provide you with additional levels of
organization, they are useful when you set object rights to control users' access to your Information
platform services content.
2010-12-0256
Page 57

Managing Users and Groups
4.2.5 To modify a group's properties
You can modify a group's properties by making changes to any of the settings.
Note:
The users who belong to the group will be affected by the modification the next time they log on.
1.
In the "Users and Groups" management area of the CMC, select the group.
2.
Click Manage > Properties.
The "Properties" dialog box appears.
3.
Modify the properties for the group.
Click the links from the navigation list to access different dialog boxes and modify different properties.
• If you want to change the title or description for the group, click Properties.
• If you want to modify the rights that principals have to the group, click User Security.
• If you want to modify profile values for group members, click Profile Values.
• If you want to add the group as a subgroup to another group, click Member Of.
4.
Click Save.
4.2.6 To view group members
You can use this procedure to view the users who belong to a specific group.
1.
Go to the "Users and Groups" management area of the CMC.
2.
Expand Group Hierarchy in the Tree panel.
3.
Select the group in the Tree panel.
Note:
It may take a few minutes for your list to display if you have a large number of users in the group or
if your group is mapped to a third-party directory.
The list of users who belong to the group is displayed.
4.2.7 To add subgroups
You can add a group to another group. When you do this, the group that you added becomes a subgroup.
2010-12-0257
Page 58

Managing Users and Groups
Note:
Adding a subgroup is similar to specifying group membership.
1.
In the "Users and Groups" management area of the CMC, select the group that you want to add as
a subgroup to another group.
2.
Click Actions > Join Group.
The "Join Group" dialog box appears.
3.
Move the group that you want to add the first group to from the Available Groups list to the
Destination Group(s) list.
4.
Click OK.
Related Topics
• To specify group membership
4.2.8 To specify group membership
You can make a group a member of another group. The group that becomes a member is referred to
as a subgroup. The group that you add the subgroup to is the parent group. A subgroup inherits the
rights of the parent group.
1.
In the "Users and Groups" management area of the CMC, click the group that you want to add to
another group.
2.
Click Actions > Member Of.
The "Member Of" dialog box appears.
3.
Click Join Group.
The "Join Group" dialog box appears.
4.
Move the group that you want to add the first group to from the Available Groups to the Destination
Group(s) list.
Any rights associated with the parent group will be inherited by the new group you have created.
5.
Click OK.
You return to the "Member Of" dialog box, and the parent group appears in the parent groups list.
4.2.9 To delete a group
You can delete a group when that group is no longer required. You cannot delete the default groups
Administrator and Everyone.
2010-12-0258
Page 59

Managing Users and Groups
Note:
• The users who belong to the deleted group will be affected by the change the next time they log on.
• The users who belong to the deleted group will lose any rights they inherited from the group.
To delete a third-party authentication group, such as the SAP BusinessObjects Windows AD Users
group, use the "Authentication" management area in CMC.
1.
Go to the "Users and Groups" management area of the CMC.
2.
Select the group you want to delete.
3.
Click Manage > Delete.
The delete confirmation dialog box appears.
4.
Click OK.
The group is deleted.
4.2.10 To enable the Guest account
The Guest account is disabled by default to ensure that no one can log on to Information platform
services with this account. This default setting also disables the anonymous single sign-on functionality
of Information platform services, so users will be unable to access BI launch pad without providing a
valid user name and password.
Perform this task if you want to enable the Guest account so that users do not require their own accounts
to access BI launch pad.
1.
Go to the "Users and Groups" management area of the CMC.
2.
Click User List in the Navigation panel.
3.
Select Guest.
4.
Click Manage > Properties.
The "Properties" dialog box appears.
5.
Clear the Account is disabled check box.
6.
Click Save & Close.
4.2.11 Adding users to groups
You can add users to groups in the following ways:
• Select the group, and then click Actions > Add Members to Group.
• Select the user, and then click Actions > Member Of.
• Select the user, and then click Actions > Join Group.
2010-12-0259
Page 60

Managing Users and Groups
The following procedures describe how to add users to groups using these methods.
Related Topics
• To specify group membership
4.2.11.1 To add a user to one or more groups
1.
Go to the "Users and Groups" management area of the CMC.
2.
Select the user that you want to add to a group.
3.
Click Actions > Join Group.
Note:
All Information platform services users of the system are part of the Everyone group.
The "Join Group" dialog box appears.
4.
Move the group that you want to add the user to from the Available Groups list to the Destination
Group(s) list.
Tip:
Use SHIFT + click or CTRL + click to select multiple groups.
5.
Click OK.
4.2.11.2 To add one or more users to a group
1.
In the "Users and Groups" management area of the CMC, select the group.
2.
Click Actions > Add Members to Group.
The "Add" dialog box appears.
3.
Click User list.
The Available users/groups list refreshes and displays all user accounts in the system.
4.
Move the user that you want to add to the group from the Available users/groups list to the Selected
users/groups list.
Tip:
• To select multiple users, use the SHIFT + click or CTRL + click combination.
• To search for a specific user, use the search field.
• If there are many users on your system, click the Previous and Next buttons to navigate through
the list of users.
5.
Click OK.
2010-12-0260
Page 61

Managing Users and Groups
4.2.12 Changing password settings
Within the CMC, you can change the password settings for a specific user or for all users in the system.
The various restrictions listed below apply only to Enterprise accounts—that is, the restrictions do not
apply to accounts that you have mapped to an external user database (LDAP or Windows AD). Generally,
however, your external system will enable you to place similar restrictions on the external accounts.
4.2.12.1 To change user password settings
1.
Go to the "Users and Groups" management area of the CMC.
2.
Select the user whose password settings you want to change.
3.
Click Manage > Properties.
The "Properties" dialog box appears.
4.
Select or clear the check box associated with the password setting you want to change.
The available options are:
• Password never expires
• User must change password at next logon
• User cannot change password
5.
Click Save & Close.
4.2.12.2 To change general password settings
1.
Go to the "Authentication" management area of the CMC.
2.
Double-click Enterprise.
The "Enterprise" dialog box appears.
3.
Select the check box for each password setting that you want to use, and provide a value if necessary.
The following table identifies the minimum and maximum values for each of the settings you can
configure.
2010-12-0261
Page 62

Managing Users and Groups
Table 4-4: Password settings
Recommended MaximumMinimumPassword setting
Enforce mixed-case passwords
Must contain at least N
Characters
Must change password every
N day(s)
Cannot reuse the N most recent password(s)
Must wait N minute(s) to
change password
Disable account after N
failed attempts to log on
Reset failed logon count after N minute(s)
N/AN/A
64 characters0 characters
100 days1 day
100 passwords1 password
100 minutes0 minutes
100 failed1 failed
100 minutes1 minute
Re-enable account after N
minute(s)
4.
Click Update.
4.2.13 Granting access to users and groups
You can grant users and groups administrative access to other users and groups. Administrative rights
include: viewing, editing, and deleting objects; viewing and deleting object instances; and pausing object
instances. For example, for troubleshooting and system maintenance, you may want to grant your IT
department access to edit and delete objects.
100 minutes0 minutes
2010-12-0262
Page 63

Managing Users and Groups
Related Topics
• To assign principals to an access control list for an object
4.2.14 Controlling access to user inboxes
When you add a user, the system automatically creates an inbox for that user. The inbox has the same
name as the user. By default, only the user and the administrator have the right to access a user's
inbox.
Related Topics
• Scheduling an object to run now
• Managing security settings for objects in the CMC
4.2.15 Configuring BI launch pad options
Administrators can configure the way users access the BI launch pad applications. By configuring
properties in the BOE.war file, you can specify what information is available on the user's logon screen.
You can also use the CMC to set BI launch pad preferences for specific groups.
4.2.15.1 Configuring the BI launch pad logon screen
By default, the BI launch pad logon screen prompts users for their user name and password. You can
also prompt them for the CMS name and the authentication type. To change this setting, you need to
edit the BI launch pad properties for the BOE.war file.
4.2.15.1.1 To configure the BI launch pad logon screen
To modify BI launch pad default settings, you need to set custom BI launch pad properties for the
BOE.war file. This file deployed on the machine hosting your web application server.
1.
Go to the following directory in your Information platform services installation:
<INSTALLDIR>\Information platform services __MINI-BOE-VERSION__\warfiles\we
bapps\BOE\WEB-INF\config\custom\
2010-12-0263
Page 64
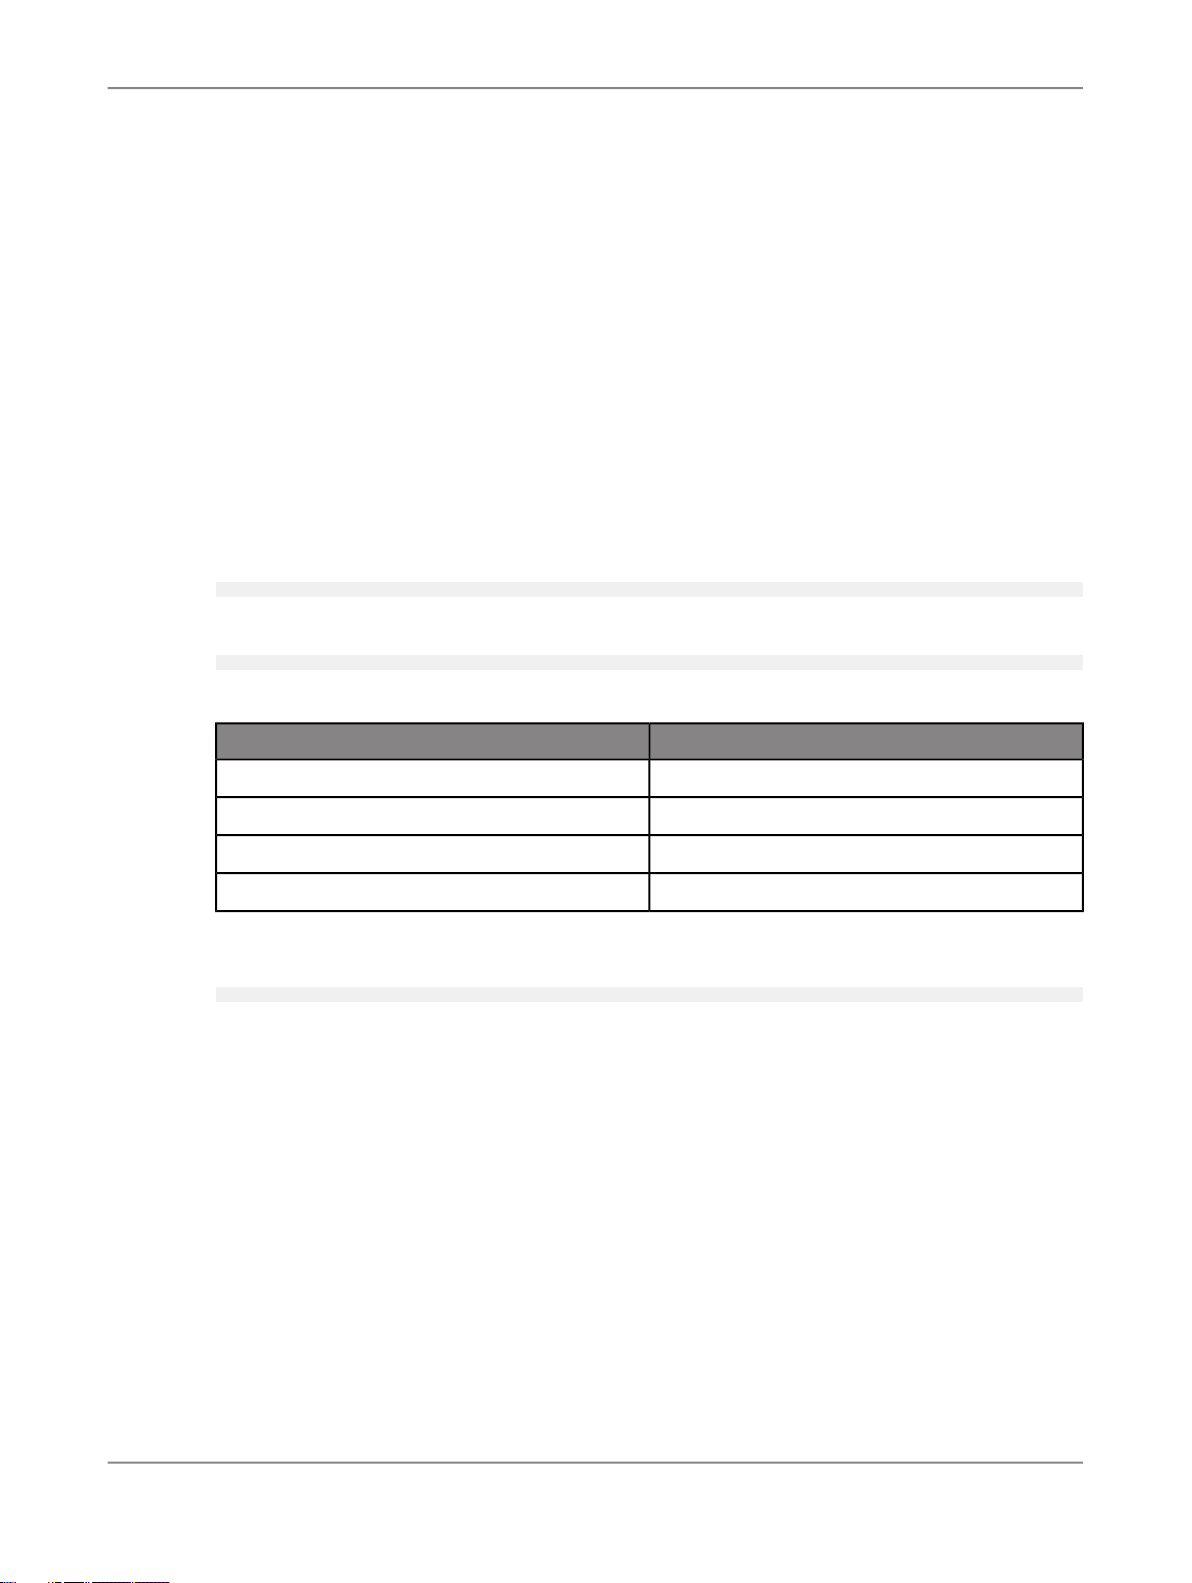
Managing Users and Groups
Note:
If you are using the Tomcat version installed with Information platform services, you can also access
the following directory: C:\Program Files (x86)\SAP BusinessObjects\Tomcat6\we
bapps\BOE\WEB-INF\config\custom
• If you are using any other supported web application server, consult the documentation for your
web application server to determine the appropriate path.
2.
Create a new file.
Note:
Use Notepad or any other text-editing utility.
3.
Save the file under the following name:
BIlaunchpad.properties
4.
To include the authentication options on the BI launch pad logon screen add the following:
authentication.visible=true
5.
To change the default authentication type add the following:
authentication.default=<authentication>
Replace <authentication> with any of the following options
<authentication> valueAuthentication Type
secEnterpriseEnterprise
secLDAPLDAP
secWinADWindows AD
secSAPR3SAP
6.
To prompt users for the CMS name on the BI launch pad logon screen :
cms.visible=true
7.
Save and close the file.
8.
Restart your web application server.
Use WDeploy to redeploy the BOE.war file on the web application server. For more information on
using WDeploy see
The Information platform services Web Application Deployment Guide
4.2.15.2 Configuring BI launch pad Preferences for groups
Administrators can set BI launch pad preferences for specific user groups. These preferences serve
as default BI launch pad preferences for all users in the group.
2010-12-0264
Page 65

Managing Users and Groups
Note:
If users have set their own preferences, any administrator-defined settings will not be reflected in their
view of BI launch pad. Users can always switch from their own preferences to the administrator-defined
preferences at any time and use the updated settings.
By default no BI launch pad preferences are set for any user groups. Administrators can specify
preferences for the following:
• Home tab
• Documents - start location
• Folders
• Categories
• Number of objects per page
• Columns displayed in the "Document" tab
• How to display documents in BI launch pad - through tabs or a new window
4.2.15.2.1 To set BI launch pad Preferences for a group
1.
Go to the "Users and Groups" management area of the CMC.
2.
Select the group from the Group List.
3.
Click Actions > BI launch pad Preferences
The "BI launch pad Preferences" dialog box appears
4.
Unselect No Preferences Defined.
5.
To set a user's initial view:
• To display the Home tab when the user first log on, click Home tab and choose one of the
following options:
DescriptionOption
Default Home tab
Displays the default Home tab provided with Information platform
services will be used.
Select Home tab
Displays a specific website as the home tab.
Click Browse Home tab. In the "Select a Custom Home tab"
window, select a repository object and click Open.
Note:
you can only select an object that has already been added to
the repository.
• To display the Documents tab when the user first log on, click Documents, and then specify
which drawer and node are open by default. You can select from the following
2010-12-0265
Page 66
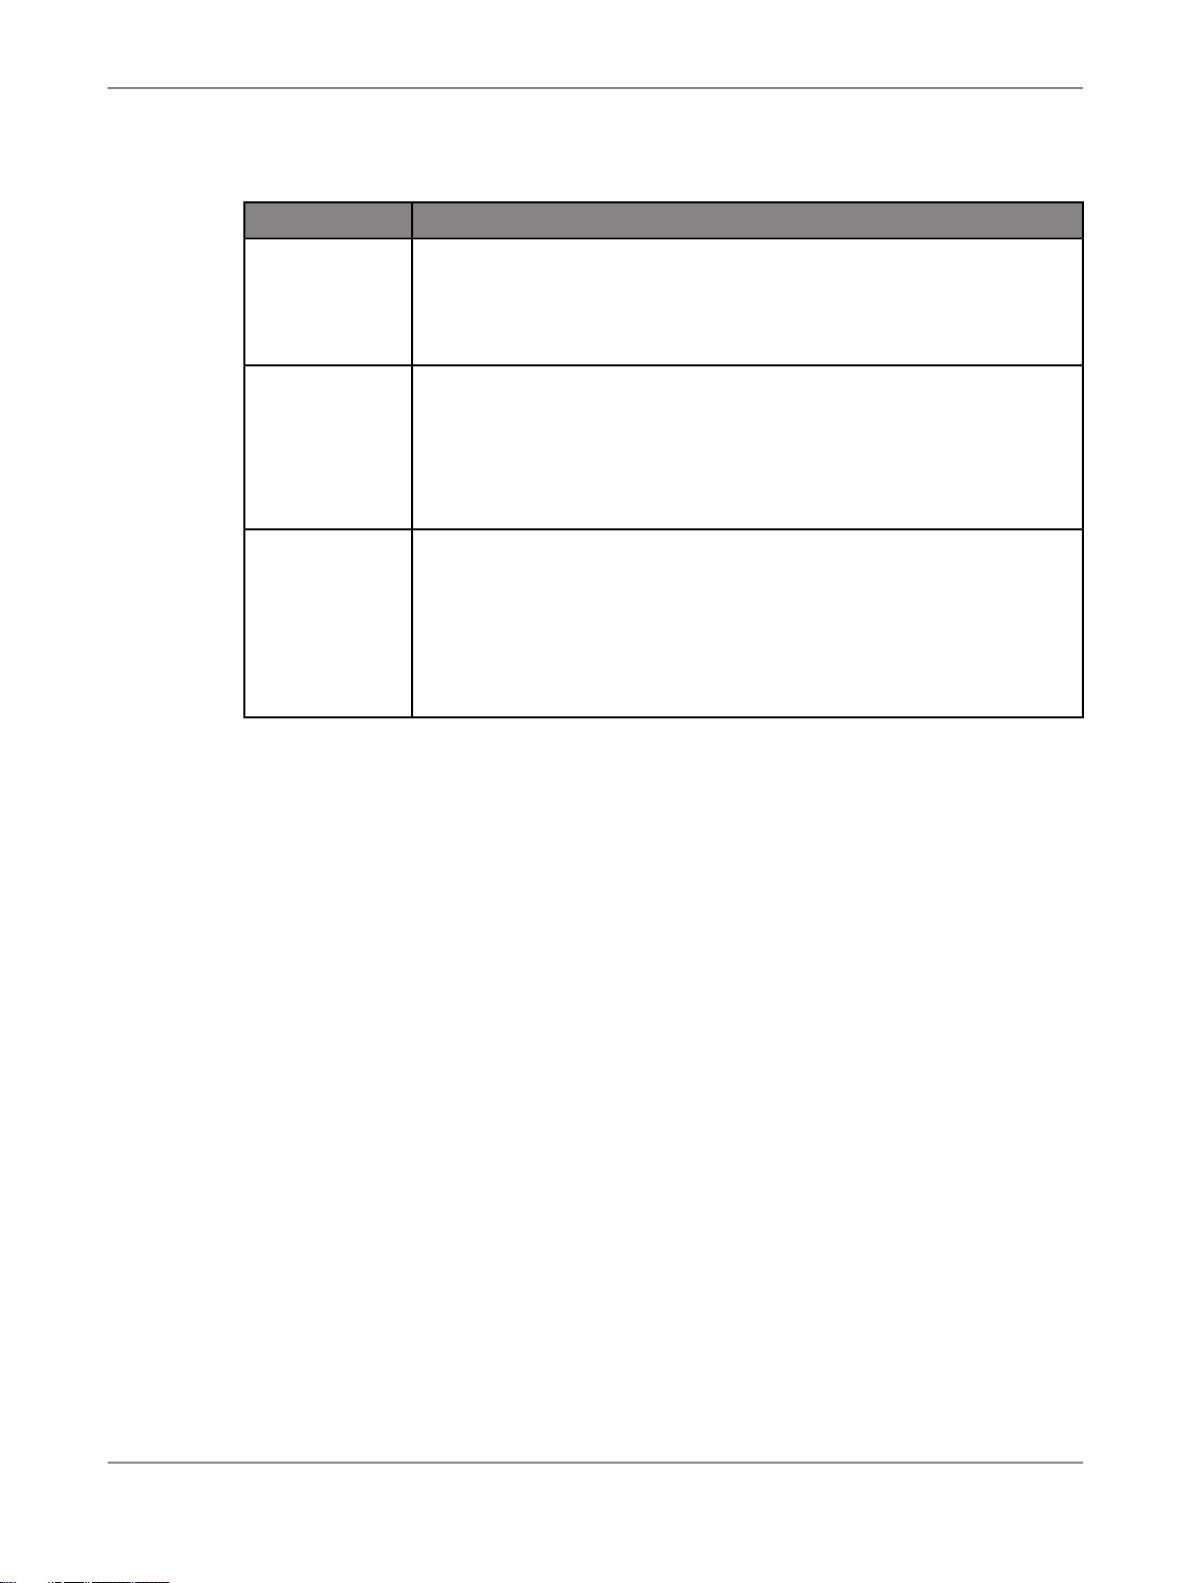
Managing Users and Groups
Node optionsDrawer
My Documents
Choose from one of the following to display in the Documents tab:
• My Favorites
• Personal Categories
• My Inbox
Folders
Choose from one of the following:
• Public Folders: this will display the public folders in the Documents tab
• Select Public folder
Click Browse Folder to select a specific public folder to display in the Documents tab.
Categories
Choose from one of the following:
• Corporate Categories: this will display the corporate categories in the
Documents tab
• Select Corporate Category
Click Browse Folder to select a specific corporate category to display in
the Documents tab.
For example, if you want the My Documents drawer to be open to the user's BI Inbox when they
first log on, click My Documents and click My Inbox.
6.
Under "Choose columns displayed in Documents tab", select the summary information that you want
to see for each object in the user's List panel:
• Type
• Last Run
• Instances
• Description
• Created By
• Created On
• Location (Categories)
• Received On (Inbox)
• From (Inbox)
7.
Under "Set document viewing location", choose how you want users to view their documents.
Users can open documents for viewing in new tabs within BI launch pad or in new web browser
windows.
8.
Enter a number in the Set the maximum number of items per page field to specify the maximum
number of objects displayed per page when a user views lists of objects.
9.
Click Save & Close.
The specified preferences will serve as defaults for users in the group you selected in Step 2. Users
will however be able to create their own BI launch pad preferences, if they have the right to set their
2010-12-0266
Page 67

Managing Users and Groups
preferences. If you do not want users to modify the preferences, you should not grant users the right
to set preferences.
4.3 Managing aliases
If a user has multiple accounts in Information platform services, you can link the accounts using the
Assign Alias feature. This is useful when a user has a third-party account that is mapped to Enterprise
and an Enterprise account.
By assigning an alias to the user, the user can log on using either a third-party user name and password
or an Enterprise user name and password. Thus, an alias enables a user to log on via more than one
authentication type.
In the CMC, the alias information is displayed at the bottom of the "Properties" dialog box for a user. A
user can have any combination of Information platform services, LDAP or Windows AD aliases.
4.3.1 To create a user and add a third-party alias
When you create a user and select an authentication type other than Enterprise, the system creates
the new user in Information platform services and creates a third-party alias for the user.
Note:
For the system to create the third-party alias, the following criteria must be met:
• The authentication tool needs to have been enabled in the CMC.
• The format of the account name must agree with the format required for the authentication type.
• The user account must exist in the third-party authentication tool, and it must belong to a group that
is already mapped to Information platform services.
1.
Go to the "Users and Groups" management area of the CMC.
2.
Click Manage > New > New User.
The "New User" dialog box appears.
3.
Select the authentication type for the user, for example, Windows AD.
4.
Type in the third-party account name for the user, for example, bsmith .
5.
Select the connection type for the user.
6.
Click Create & Close.
The user is added to Information platform services and is assigned an alias for the authentication
type you selected, for example, secWindowsAD:ENTERPRISE:bsmith. If required, you can add,
assign, and reassign aliases to users.
2010-12-0267
Page 68

Managing Users and Groups
4.3.2 To create a new alias for an existing user
You can create aliases for existing Information platform services users. The alias can be an Enterprise
alias, or an alias for a third-party authentication tool.
Note:
For the system to create the third-party alias, the following criteria must be met:
• The authentication tool needs to have been enabled in the CMC.
• The format of the account name must agree with the format required for the authentication type.
• The user account must exist in the third-party authentication tool, and it must belong to a group that
is mapped to Information platform services.
1.
Go to the "Users and Groups" management area of the CMC.
2.
Select the user that you want to add an alias to.
3.
Click Manage > Properties.
The "Properties" dialog box appears.
4.
Click New Alias.
5.
Select the authentication type.
6.
Type in the account name for the user.
7.
Click Update.
An alias is created for the user. When you view the user in the CMC, at least two aliases are shown,
the one that was already assigned to the user and the one you just created.
8.
Click Save & Close to exit the "Properties" dialog box.
4.3.3 To assign an alias from another user
When you assign an alias to a user, you move a third-party alias from another user to the user you are
currently viewing. You cannot assign or reassign Enterprise aliases.
Note:
If a user has only one alias and you assign that last alias to another user, the system will delete the
user account, and the Favorites folder, personal categories, and inbox for that account.
1.
Go to the "Users and Groups" management area of the CMC.
2.
Select the user you want to assign an alias to.
3.
Click Manage > Properties.
The "Properties" dialog box appears.
2010-12-0268
Page 69

Managing Users and Groups
4.
Click Assign Alias.
5.
Enter the user account that has the alias you want to assign, and click Find Now.
6.
Move the alias you want to assign from the Available aliases list to the Aliases to be added to
Username list.
Here Username represents the name of the user you are assigning an alias to.
Tip:
To select multiple aliases, use the SHIFT + click or CTRL + click combination.
7.
Click OK.
4.3.4 To delete an alias
When you delete an alias, the alias is removed from the system. If a user has only one alias and you
delete that alias, the system automatically deletes the user account and the Favorites folder, personal
categories, and inbox for that account.
Note:
Deleting a user's alias does not necessarily prevent the user from being able to log on to Information
platform services again. If the user account still exists in the third-party system, and if the account
belongs to a group that is mapped to Information platform services, then Information platform services
will still allow the user to log on. Whether the system creates a new user or assigns the alias to an
existing user, depends on which update options you have selected for the authentication tool in the
"Authentication" management area of CMC.
1.
Go to the "Users and Groups" management area of the CMC.
2.
Select the user whose alias you want to delete.
3.
Click Manage > Properties.
The "Properties" dialog box appears.
4.
Click the Delete Alias button next to the alias that you want to delete.
5.
If prompted for confirmation, click OK.
The alias is deleted.
6.
Click Save & Close to exit the "Properties" dialog box.
4.3.5 To disable an alias
You can prevent a user from logging on to Information platform services using a particular authentication
method by disabling the user's alias associated with that method. To prevent a user from accessing
Information platform services altogether, disable all aliases for that user.
2010-12-0269
Page 70

Managing Users and Groups
Note:
Deleting a user from the system does not necessarily prevent the user from being able to log on to
Information platform services again. If the user account still exists in the third-party system, and if the
account belongs to a group that is mapped to Information platform services, then the system will still
allow the user to log on. To ensure a user can no longer use one of his or her aliases to log on to
Information platform services, it is best to disable the alias.
1.
Go to the "Users and Groups" management area of the CMC.
2.
Select the user whose alias you want to disable.
3.
Click Manage > Properties.
The "Properties" dialog box appears.
4.
Clear the Enabled check box for the alias you want disable.
Repeat this step for each alias you want to disable.
5.
Click Save & Close.
The user can no longer log on using the type of authentication that you just disabled.
Related Topics
• To delete an alias
2010-12-0270
Page 71

Setting Rights
Setting Rights
5.1 How rights work in Information platform services
Rights are the base units for controlling user access to the objects, users, applications, servers, and
other features in Information platform services. They play an important role in securing the system by
specifying the individual actions that users can perform on objects. Besides allowing you to control
access to your Information platform services content, rights enable you to delegate user and group
management to different departments, and to provide your IT people with administrative access to
servers and server groups.
It is important to note that rights are set on objects such as reports and folders rather than on the
“principals” (the users and groups) who access them. For example, to give a manager access to a
particular folder, in the "Folders" area, you add the manager to the “access control list” (the list of
principals who have access to an object) for the folder. You cannot give the manager access by
configuring the manager's rights settings in the "Users and Groups" area. The rights settings for the
manager in the "Users and Groups" area are used to grant other principals (such as delegated
administrators) access to the manager as an object in the system. In this way, principals are themselves
like objects for others with greater rights to manage.
Each right on an object can be granted, denied, or unspecified. The Information platform services
security model is designed such that, if a right is left unspecified, the right is denied. Additionally, if
settings result in a right being both granted and denied to a user or group, the right is denied. This
“denial-based” design helps ensure that users and groups do not automatically acquire rights that are
not explicitly granted.
There is an important exception to this rule. If a right is explicitly set on a child object that contradicts
the rights inherited from the parent object, the right set on the child object overrides the inherited rights.
This exception applies to users who are members of groups as well. If a user is explicitly granted a right
that the user's group is denied, the right set on the user overrides the inherited rights.
5.1.1 Access levels
“Access levels” are groups of rights that users frequently need. They allow administrators to set common
security levels quickly and uniformly rather than requiring that individual rights be set one by one.
2010-12-0271
Page 72
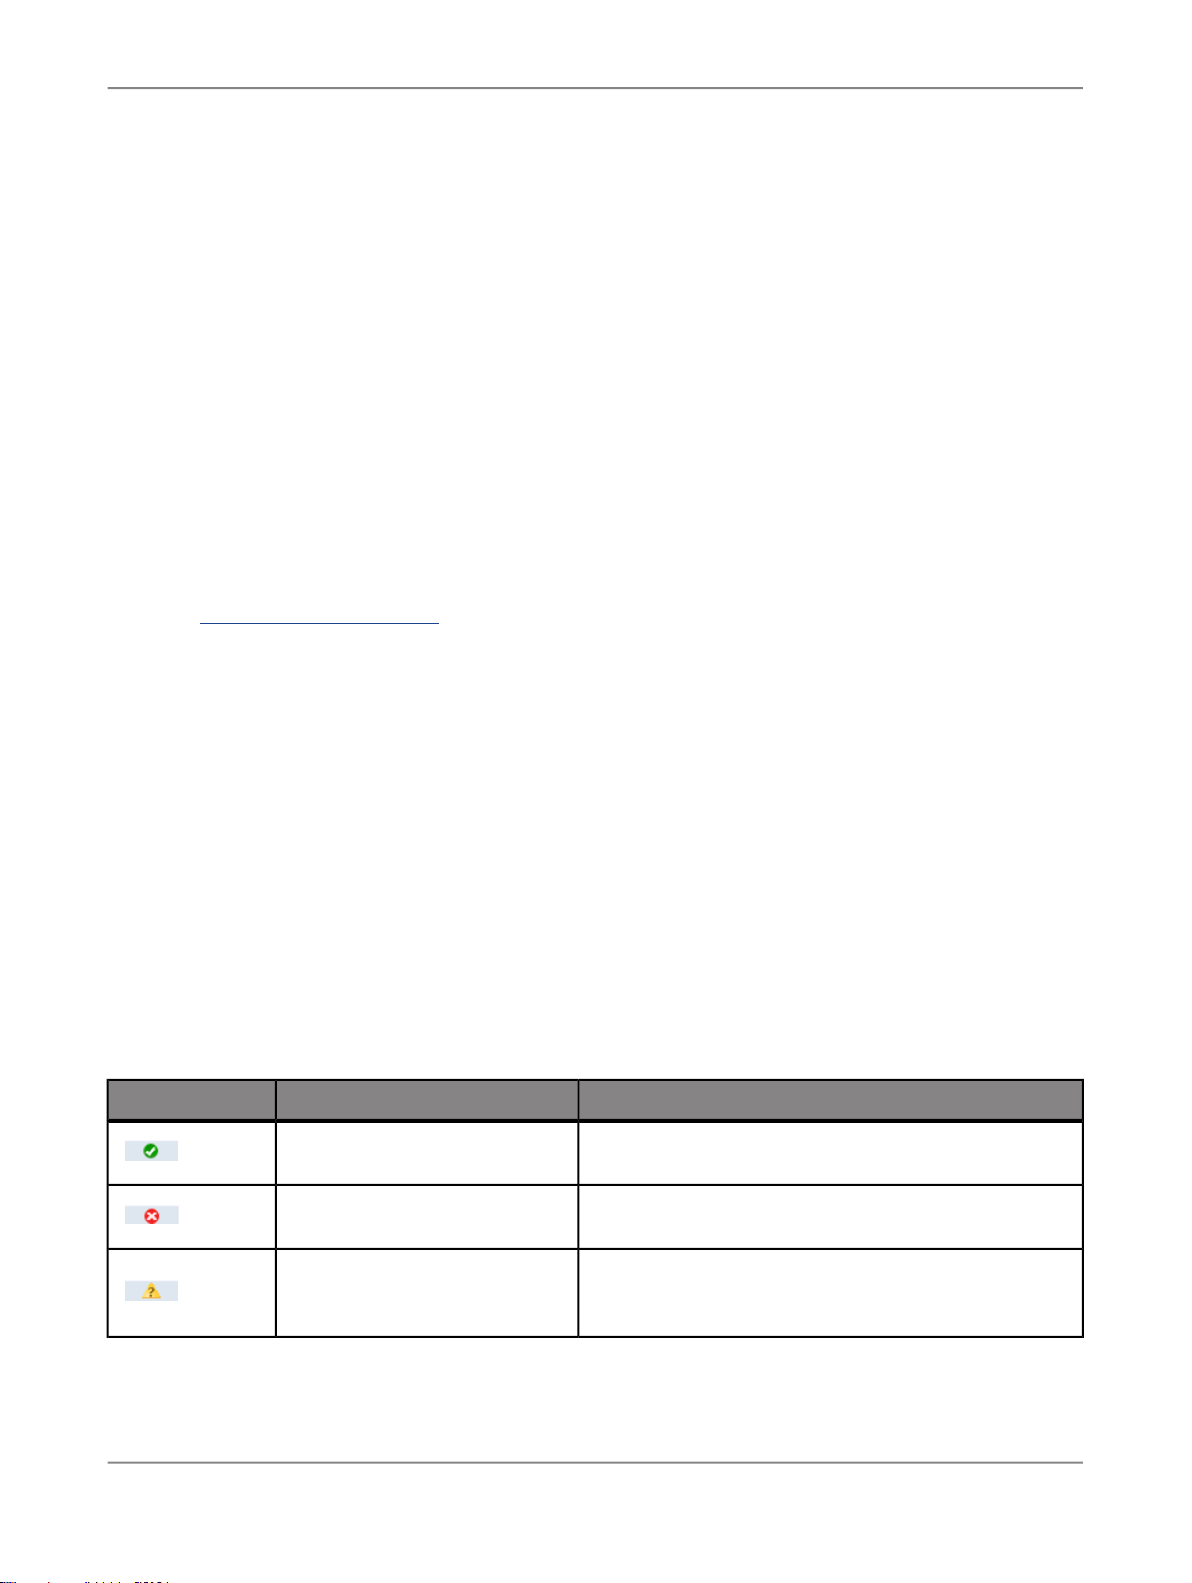
Setting Rights
Information platform services comes with several predefined access levels. These predefined access
levels are based on a model of increasing rights: Beginning with View and ending with Full Control,
each access level builds upon the rights granted by the previous level.
However, you can also create and customize your own access levels; this can greatly reduce
administrative and maintenance costs associated with security. Consider a situation in which an
administrator must manage two groups, sales managers and sales employees. Both groups need to
access five reports in the Information platform services system, but sales managers require more rights
than sales employees. The predefined access levels do not meet the needs of either group. Instead of
adding groups to each report as principals and modifying their rights in five different places, the
administrator can create two new access levels, Sales Managers and Sales Employees. The administrator
then adds both groups as principals to the reports and assigns the groups their respective access levels.
When rights need to be modified, the administrator can modify the access levels. Because the access
levels apply to both groups across all five reports, the rights those groups have to the reports are quickly
updated.
Related Topics
• Working with access levels
5.1.2 Advanced rights settings
To provide you with full control over object security, the CMC allows you to set “advanced rights”. These
advanced rights provide increased flexibility as you define security for objects at a granular level.
Use advanced rights settings, for instance, if you need to customize a principal's rights to a particular
object or set of objects. Most importantly, use advanced rights to explicitly deny a user or group any
right that should not be permitted to change when, in the future, you make changes to group memberships
or folder security levels.
The following table summarizes the options that you have when you set advanced rights.
Table 5-1: Rights options
Granted
Denied
Not Specified
DescriptionRights optionIcon
The right is granted to a principal.
The right is denied to a principal.
The right is unspecified for a principal. By default, rights
set to Not Specified are denied.
2010-12-0272
Page 73

Setting Rights
DescriptionRights optionIcon
Related Topics
• Type-specific rights
5.1.3 Inheritance
Rights are set on an object for a principal in order to control access to the object; however, it is impractical
to set the explicit value of every possible right for every principal on every object. Consider a system
with 100 rights, 1000 users, and 10,000 objects: to set rights explicitly on each object would require the
CMS store billions of rights in its memory, and, importantly, require that an administrator manually set
each one.
Inheritance patterns resolve this impracticality. With inheritance, the rights that users have to objects
in the system come from a combination of their memberships in different groups and subgroups and
from objects which have inherited rights from parent folders and subfolders. These users can inherit
rights as the result of group membership; subgroups can inherit rights from parent groups; and both
users and groups can inherit rights from parent folders.
Apply to Object
Apply to Sub Object
The right applies to the object. This option becomes
available when you click Granted or Denied.
The right applies to sub-objects. This option becomes
available when you click Granted or Denied.
By default, users or groups who have rights to a folder will inherit the same rights for any object that
are subsequently published to that folder. Consequently, the best strategy is to set the appropriate
rights for users and groups at the folder level first, then publish objects to that folder.
Information platform services recognizes two types of inheritance: group inheritance and folder
inheritance.
5.1.3.1 Group inheritance
Group inheritance allows principals to inherit rights as the result of group membership. Group inheritance
proves especially useful when you organize all of your users into groups that coincide with your
organization's current security conventions.
2010-12-0273
Page 74
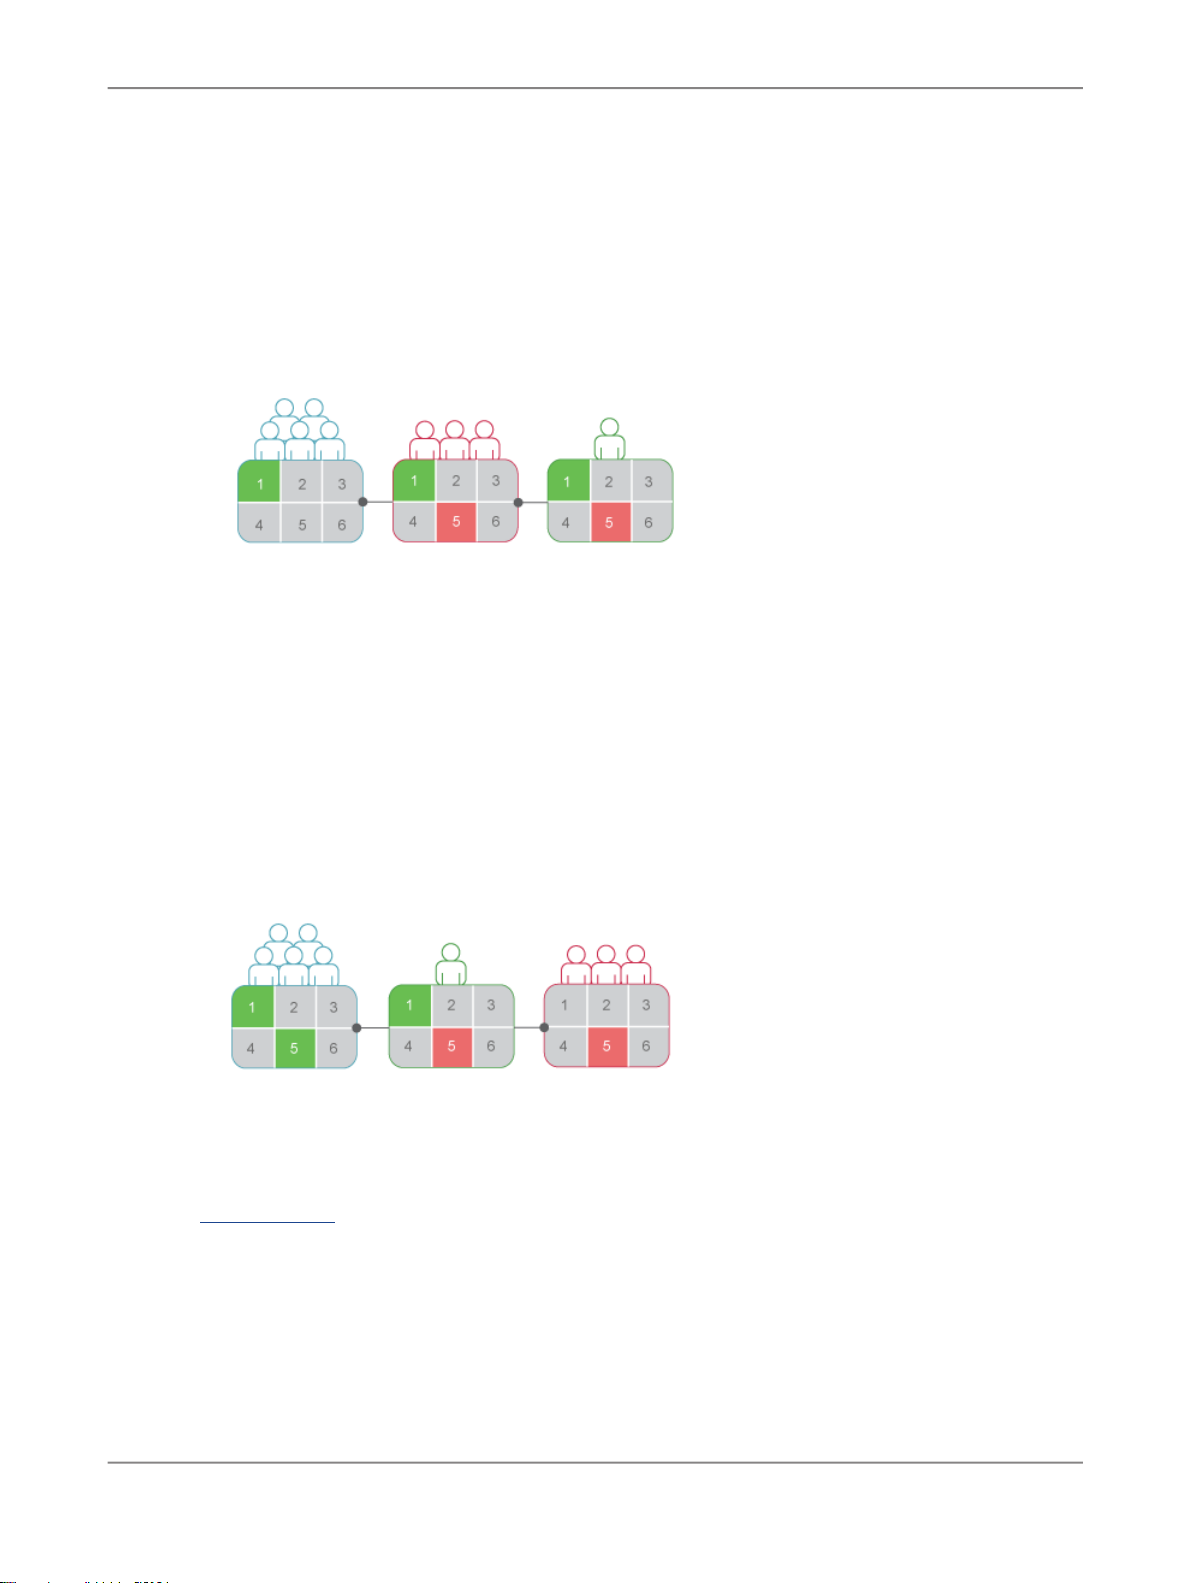
Setting Rights
In “Group inheritance example 1”, you can see how group inheritance works. Red Group is a subgroup
of Blue Group, so it inherits Blue Group's rights. In this case, it inherits right 1 as granted, and the rest
of the rights as unspecified. Every member of Red Group inherits these rights. In addition, any other
rights that are set on the subgroup are inherited by its members. In this example, Green User is a
member of Red Group, and thus inherits right 1 as granted, rights 2, 3, 4, and 6 as not specified, and
Right 5 as denied.
Figure 5-1: Group inheritance example 1
When group inheritance is enabled for a user who belongs to more than one group, the rights of all
parent groups are considered when the system checks credentials. The user is denied any right that
is explicitly denied in any parent group, and the user is denied any right that remains completely not
specified; thus, the user is granted only those rights that are granted in one or more groups (explicitly
or through access levels) and never explicitly denied.
In “Group inheritance example 2”, Green User is a member of two unrelated groups. From Blue Group,
he inherits rights 1 and 5 as "granted" and the rest as not specified; however, because Green User also
belongs to Red Group, and Red Group has been explicitly denied right 5, Green User's inheritance to
right 5 from Blue Group is overridden.
Figure 5-2: Group inheritance example 2
Related Topics
• Rights override
2010-12-0274
Page 75
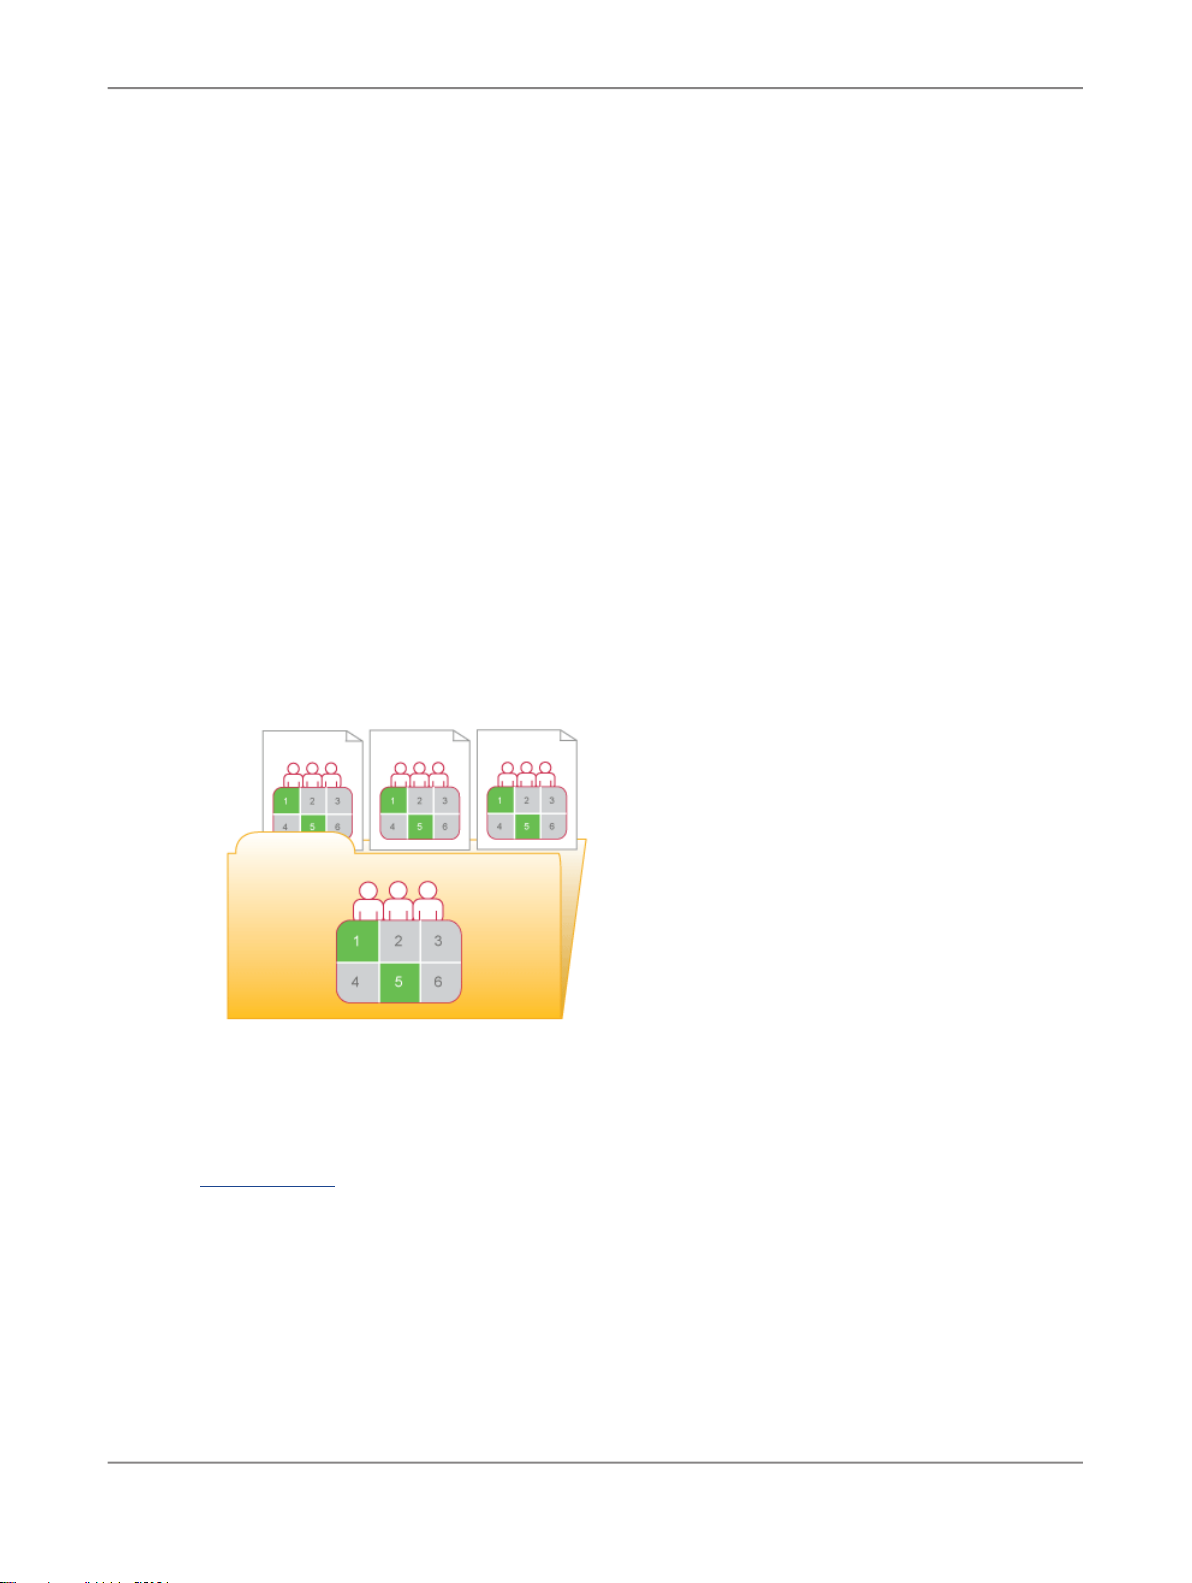
Setting Rights
5.1.3.2 Folder inheritance
Folder inheritance allows principals to inherit any rights that they have been granted on an object's
parent folder. Folder inheritance proves especially useful when you organize Information platform
services content into a folder hierarchy that reflects your organization's current security conventions.
For example, suppose that you create a folder called Sales Reports, and you provide your Sales group
with View On Demand access to this folder. By default, every user that has rights to the Sales Reports
folder will inherit the same rights to the reports that you subsequently publish to this folder. Consequently,
the Sales group will have View On Demand access to all of the reports, and you need set the object
rights only once, at the folder level.
In “Folder inheritance example”, rights have been set for Red Group on a folder. Rights 1 and 5 have
been granted, while the rest have been left unspecified. With folder inheritance enabled, members of
Red Group have rights on the object level identical to the rights of the group on the folder level. Rights
1 and 5 are inherited as granted, while the rest have been left unspecified.
Figure 5-3: Folder inheritance example
Related Topics
• Rights override
5.1.3.3 Rights override
2010-12-0275
Page 76

Setting Rights
“Rights override” is a rights behavior in which rights that are set on child objects override the rights set
on parent objects. Rights override occurs under the following circumstances:
• In general, the rights that are set on child objects override the corresponding rights that are set on
• In general, the rights that are set on subgroups or members of groups override the corresponding
You do not need to disable inheritance to set customized rights on an object. The child object inherits
the rights settings of the parent object except for the rights that are explicitly set on the child object.
Also, any changes to rights settings on the parent object apply to the child object.
“Rights override example 1” illustrates how rights override works on parent and child objects. Blue User
is denied the right to edit a folder's contents; the rights setting is inherited by the subfolder. However,
an administrator grants Blue User Edit rights to a document in the subfolder. The Edit right that Blue
User receives on the document overrides the inherited rights that come from the folder and subfolder.
parent objects.
rights that are set on groups.
Figure 5-4: Rights override example 1
“Rights override example 2” illustrates how rights override works on members and groups. Blue Group
is denied the right to edit a folder; Blue Subgroup inherits this rights setting. However, an administrator
grants Blue User, who is a member of Blue Group and Blue Subgroup, Edit rights on the folder. The
Edit rights that Blue User receives on the folder override the inherited rights that come from Blue Group
and Blue Subgroup.
2010-12-0276
Page 77

Setting Rights
Figure 5-5: Rights override example 2
“Complex rights override” illustrates a situation where the effects of rights override are less obvious.
Purple User is a member of subgroups 1A and 2A, which are in Groups 1 and 2, respectively. Groups
1 and 2 both have Edit rights on the folder. 1A inherits the Edit rights that Group 1 has, but an
administrator denies Edit rights to 2A. The rights settings on 2A override the rights settings on Group
2 because of rights override. Therefore, Purple User inherits contradictory rights settings from 1A and
2A. 1A and 2A do not have a parent-child relationship, so rights override does not occur; that is, one
sub-group's rights settings do not override another's because they have equal status. In the end, Purple
User is denied Edit rights because of the “denial-based” rights model in Information platform services.
Figure 5-6: Complex rights override
Rights override lets you make minor adjustments to the rights settings on a child object without discarding
all inherited rights settings. Consider a situation in which a sales manager needs to view confidential
reports in the Confidential folder. The sales manager is part of the Sales group, which is denied access
to the folder and its contents. The administrator grants the manager View rights on the Confidential
folder and continues to deny the Sales group access. In this case, the View rights granted to the sales
manager override the denied access that the manager inherits from membership in the Sales group.
5.1.3.4 Scope of rights
“Scope of rights” refers to the ability to control the extent of rights inheritance. To define the scope of
a right, you decide whether the right applies to the object, its sub-objects, or both. By default, the scope
of a right extends to both objects and sub-objects.
2010-12-0277
Page 78

Setting Rights
Scope of rights can be used to protect personal content in shared locations. Consider a situation in
which the finance department has a shared Expense Claims folder that contains Personal Expense
Claims subfolders for each employee. The employees want to be able to view the Expense Claims
folder and add objects to it, but they also want to protect the contents of their Personal Expense Claims
subfolders. The administrator grants all employees View and Add rights on the Expense Claims folder,
and limits the scope of these rights to the Expense Claims folder only. This means that the View and
Add rights do not apply to sub-objects in the Expense Claims folder. The administrator then grants
employees View and Add rights on their own Personal Expense Claims subfolders.
Scope of rights can also limit the effective rights that a delegated administrator has. For example, a
delegated administrator may have Securely Modify Rights and Edit rights on a folder, but the scope
of these rights is limited to the folder only and does not apply to its sub-objects. The delegated
administrator cannot grant these rights to another user on one of the folder's sub-objects.
5.1.4 Type-specific rights
“Type-specific rights” are rights that affect specific object types only, such as Crystal reports, folders,
or access levels. Type-specific rights consist of the following:
• General rights for the object type
These rights are identical to general global rights (for example, the right to add, delete, or edit an
object), but you set them on specific object types to override the general global rights settings.
• Specific rights for the object type
These rights are available for specific object types only. For example, the right to export a report's
data appears for Crystal reports but not for Word documents.
The diagram “Type-specific rights example” illustrates how type-specific rights work. Here right 3
represents the right to edit an object. Blue Group is denied Edit rights on the top-level folder and granted
Edit rights for Crystal reports in the folder and subfolder. These Edit rights are specific to Crystal reports
and override the rights settings on a general global level. As a result, members of Blue Group have
Edit rights for Crystal reports but not the XLF file in the subfolder.
2010-12-0278
Page 79

Setting Rights
Figure 5-7: Type-specific rights example
Type-specific rights are useful because they let you limit the rights of principals based on object type.
Consider a situation in which an administrator wants employees to be able to add objects to a folder
but not create subfolders. The administrator grants Add rights at the general global level for the folder,
and then denies Add rights for the folder object type.
Rights are divided into the following collections based on the object types they apply to:
• General
These rights affect all objects.
• Content
These rights are divided according to particular content object types. Examples of content object
types include Crystal reports, and Adobe Acrobat PDFs.
• Application
These rights are divided according to which Information platform services application they affect.
Examples of applications include the CMC and BI launch pad.
• System
These rights are divided according to which core system component they affect. Examples of core
system components include Calendars, Events, and Users and Groups.
Type-specific rights are in the Content, Application, and System collections. In each collection, they
are further divided into categories based on object type.
5.1.5 Determining effective rights
2010-12-0279
Page 80

Setting Rights
Keep these considerations in mind when you set rights on an object:
• Each access level grants some rights, denies some rights, and leaves the other rights unspecified.
• When you assign multiple access levels to a principal on an object, the principal has the combination
• Advanced rights can be combined with access levels to customize the rights settings for a principal
When a user is granted several access levels, the system aggregates the effective rights and denies
any unspecified rights by default.
of each access level's rights. The user in “Multiple access levels” is assigned two access levels.
One access level grants the user rights 3 and 4, while the other access level grants right 3 only. The
effective rights for the user are 3 and 4.
Figure 5-8: Multiple access levels
on an object. For example, if an advanced right and an access level are both assigned explicitly to
a principal on an object, and the advanced right contradicts a right in the access level, the advanced
right will override the right in the access level.
Advanced rights can override their identical counterparts in access levels only when they are set on
the same object for the same principal. For example, an advanced Add right set at the general global
level can override the general Add right setting in an access level; it cannot override a type-specific
Add right setting in an access level.
However, advanced rights do not always override access levels. For example, a principal is denied
an Edit right on a parent object. On the child object, the principal is assigned an access level that
grants him the Edit right. In the end, the principal has Edit rights on the child object because the
rights set on the child object override rights that are set on the parent object.
• Rights override makes it possible for rights set on a child object to override rights that are inherited
from the parent object.
5.2 Managing security settings for objects in the CMC
You can manage security settings for most objects in the CMC with the security options on the Manage
menu. These options let you assign principals to the access control list for an object, view the rights
that a principal has, and modify the rights that the principal has to an object.
The specific details of security management vary according to your security needs and the type of
object you are setting rights for. However, in general, the workflows for the following tasks are very
similar:
• Viewing rights for a principal on an object.
2010-12-0280
Page 81

Setting Rights
• Assigning principals to an access control list for an object, and specifying which rights and access
levels those principals have.
• Setting rights on a top-level folder in Information platform services.
5.2.1 To view rights for a principal on an object
In general, you follow this workflow to view rights for a principal on an object.
1.
Select the object for which you want to view security settings.
2.
Click Manage > User Security.
The "User Security" dialog box appears and displays the access control list for the object.
3.
Select a principal from the access control list, and click View Security
The "Permissions Explorer" launches and displays a list of effective rights for the principal on the
object. In addition, the "Permissions Explorer" lets you do the following:
• Browse for another principal whose rights you want to view.
• Filter the rights displayed according to these criteria:
• assigned rights
• granted rights
• unassigned rights
• from access level
• object type
• the name of the right
• Sort the list of rights displayed in ascending or descending order according to these criteria:
• collection
• type
• right name
• right status (granted, denied, or unspecified)
Additionally, you can click one of the links in the "Source" column to display the source of inherited
rights.
5.2.2 To assign principals to an access control list for an object
An access control list specifies the users that are granted or denied rights on an object. In general, you
follow this workflow to assign a principal to an access control list, and to specify the rights that the
principal has to the object.
1.
Select the object to which you want to add a principal.
2.
Click Manage > User Security.
2010-12-0281
Page 82

Setting Rights
3.
4.
5.
6.
7.
If necessary, you can also modify rights at a granular level to override certain rights in an access level.
Related Topics
• To modify security for a principal on an object
The "User Security" dialog box appears and displays the access control list.
Click Add Principals.
The "Add Principals" dialog box appears.
Move the users and groups you want to add as principals from the Available users/groups list to
the Selected users/groups list.
Click Add and Assign Security.
Select the access levels you want to grant the principal.
Choose whether to enable or disable folder or group inheritance.
5.2.3 To modify security for a principal on an object
In general, it is recommended that you use access levels to assign rights to a principal. However, you
may need to override certain granular rights in an access level sometimes. Advanced rights let you
customize the rights for a principal on top of the access levels the principal already has. In general, you
follow this workflow to assign advanced rights to a principal on an object.
1.
Assign the principal to the access control list for the object.
2.
When the principal has been added, go to Manage > User Security to display the access control
list for the object.
3.
Select the principal from the access control list, and click Assign Security.
The "Assign Security" dialog box appears.
4.
Click the Advanced tab.
5.
Click Add/Remove rights.
6.
Modify the rights for the principal.
All the available rights are summarized in the
Related Topics
• To assign principals to an access control list for an object
Rights Appendix
.
5.2.4 To set rights on a top-level folder in Information platform services
2010-12-0282
Page 83

Setting Rights
In general, you follow this workflow to set rights on a top-level folder in Information platform services.
Note:
For this release, principals require View rights on a container folder to be able to navigate in that folder
and view its sub-objects. This means that principals require View rights on the top-level folder to view
objects that are in folders. If you want to limit View rights for a principal, you can grant a principal View
rights on a specific folder and set the scope of rights to apply to that folder only.
1.
2.
3.
4.
Related Topics
• To assign principals to an access control list for an object
Go to the CMC area that has the top-level folder you want to set rights for.
Click Manage > Top-Level Security > All Objects.
Here Objects represents the contents of the top-level folder. If you are prompted for confirmation,
click OK.
The "User Security" dialog box appears and displays the access control list for the top-level folder.
Assign the principal to the access control list for the top-level folder.
If necessary, assign advanced rights to the principal.
5.2.5 Checking security settings for a principal
In some cases, you may want to know the objects to which a principal has been granted or denied
access. You can use a security query to do this. Security queries let you determine which objects a
principal has certain rights to and manage user rights. For each security query, you provide the following
information:
• Query principal
You specify the user or group that you want to run the security query for. You can specify one
principal for each security query.
• Query permission
You specify the right or rights you want to run the security query for, the status of these rights, and
the object type these rights are set on. For example, you can run a security query for all reports that
a principal can refresh, or for all reports that a principal cannot export.
• Query context
You specify the CMC areas that you want the security query to search. For each area, you can
choose whether to include sub-objects in the security query. A security query can have a maximum
of four areas.
When you run a security query, the results appear in the "Query Results" area in the Tree panel under
Security Queries. If you want to refine a security query, you can run a second query within the results
from the first query.
2010-12-0283
Page 84

Setting Rights
Security queries are useful because they allow you to see the objects that a principal has certain rights
to, and they provide the locations of these objects if you want to modify those rights. Consider a situation
in which a sales employee is promoted to sales manager. The sales manager needs Schedule rights
for Crystal reports that he only had View rights to previously, and these reports are in different folders.
In this case, the administrator runs a security query for the sales manager's right to view Crystal reports
in all folders and includes sub-objects in the query. After the security query runs, the administrator can
see all Crystal reports that the sales manager has View rights for in the "Query Results" area. Because
the Details panel displays the location of each Crystal report, the administrator can browse for each
report and modify the sales manager's rights on it.
5.2.5.1 To run a security query
1.
In the "Users and Groups" area, in the Details panel, select the user or group that you want to run
a security query for.
2.
Click Manage > Tools > Create Security Query.
The "Create Security Query" dialog box appears.
3.
Ensure that the principal in the Query Principal area is correct.
If you decide to run a security query for a different principal, you can click Browse to select another
principal. In the "Browse for Query Principal" dialog box, expand User List or Groups List to browse
for the principal, or search for the principal by name. When you are finished, click OK to return to
the "Create Security Query" dialog box.
4.
In the "Query Permission" area, specify the rights and the status of each right for which you want to
run the query..
2010-12-0284
Page 85

Setting Rights
5.
• If you want to run a query for specific rights that the principal has on objects, click Browse, set
the status of each right that you want to run the security query for, and click OK.
Tip:
You can delete specific rights from the query by clicking the delete button next to the right, or
delete all rights from the query by clicking the delete button in the header row.
• If you want to run a general security query, select the Do not query by permissions check box.
When you do this, Information platform services runs a general security query for all objects that
have the principal in their access control lists regardless of the permissions that the principal has
on the objects.
In the "Query Context" area, specify the CMC areas that you want to query.
a. Select a check box next to a list.
b. On the list, select a CMC area that you want to query.
If you want to query a more specific location within an area (for example, a particular folder under
Folders), click Browse to open the "Browse for Query Context" dialog box. In the details pane,
select the folder you want to query, and click OK. When you return to the Security Query dialog
box, the folder you specified appears in the box under the list.
c. Select Query sub object.
d. Repeat the steps above for each CMC area that you want to query.
Note:
You can query a maximum of four areas.
6.
Click OK.
The security query runs and you are taken to the "Query Results" area.
7.
To view the query results, in the Tree panel, expand Security Queries and click a query result.
Tip:
Query results are listed according to the names of principals.
The query results are displayed in the Details panel.
The "Query Results" area retains all security query results from a single user session until the user logs
off. If you want to run the query again but with new specifications, click Actions > Edit Query. You can
also rerun the exact same query by selecting the query and clicking Actions > Rerun Query. If you
want to keep your security query results, click Actions > Export to export your security query results
as a CSV file.
5.3 Working with access levels
You can do the following with access levels:
2010-12-0285
Page 86

Setting Rights
• Copy an existing access level, make changes to the copy, rename it, and save it as a new access
• Create, rename, and delete access levels.
• Modify the rights in an access level.
• Trace the relationship between access levels and other objects in the system.
• Replicate and manage access levels across sites.
• Use one of the predefined access levels in Information platform services to set rights quickly and
The following table summarizes the rights that each predefined access level contains.
Table 5-2: Predefined access levels
level.
uniformly for many principals.
View
If set on the folder level, a principal can view the folder, objects
within the folder, and each object's generated instances. If set
at the object level, a principal
can view the object, its history,
and its generated instances.
Rights involvedDescriptionAccess level
• View objects
• View document instances
Schedule
View On Demand
A principal can generate instances by scheduling an object
to run against a specified data
source once or on a recurring
basis. The principal can view,
delete, and pause the scheduling of instances that they own.
They can also schedule to different formats and destinations,
set parameters and database
logon information, choose
servers to process jobs, add
contents to the folder, and copy
the object or folder.
A principal can refresh data on
demand against a data source.
View access level rights, plus:
• Schedule the document to
run
• Define server groups to pro-
cess jobs
• Copy objects to another
folder
• Schedule to destinations
• Print the report's data
• Export the report's data
• Edit objects that the user
owns
• Delete instances that the us-
er owns
• Pause and resume docu-
ment instances that the user
owns
Schedule access level rights,
plus:
• Refresh the report's data
2010-12-0286
Page 87

Setting Rights
The following table summarizes the rights required to perform certain tasks on access levels.
Full Control
A principal has full administrative control of the object.
Rights requiredAccess level task
Rights involvedDescriptionAccess level
All available rights, including:
• Add objects to the folder
• Edit objects
• Modify rights users have to
objects
• Delete objects
• Delete instances
Create an access level
View granular rights in an access
level
Assign an access level to a principal on an object
Modify an access level
Delete an access level
Clone an access level
• Add right on the Access Levels top-level folder
• View right on the access level
• View right on the access level
• Use the Access Level for Security Assignment right on the
access level
• Modify Rights right on the object, or Securely Modify Rights
right on the object and the principal
Note:
Users who have the Securely Modify Rights right and want to
assign an access level to a principal must have that same access
level assigned to themselves.
• View and Edit rights on the access level
• View and Delete rights on the access level
• View right on the access level
• Copy right on the access level
• Add right on the Access Levels top-level folder
5.3.1 Choosing between View and View On Demand access levels
When reporting over the web, the choice to use live or saved data is one of the most important decisions
you'll make. Whichever choice you make, however, Information platform services displays the first page
as quickly as possible, so you can see your report while the rest of the data is being processed. This
2010-12-0287
Page 88

Setting Rights
section explains the difference between two predefined access levels that you can use to make this
choice.
View On Demand access level
On-demand reporting gives users real-time access to live data, straight from the database server. Use
live data to keep users up-to-date on constantly changing data, so they can access information that's
accurate to the second. For instance, if the managers of a large distribution center need to keep track
of inventory shipped on a continual basis, then live reporting is the way to give them the information
they need.
Before providing live data for all your reports, however, consider whether or not you want all of your
users hitting the database server on a continual basis. If the data isn't rapidly or constantly changing,
then all those requests to the database do little more than increase network traffic and consume server
resources. In such cases, you may prefer to schedule reports on a recurrent basis so that users can
always view recent data (report instances) without hitting the database server.
Users require View On Demand access to refresh reports against the database.
View access level
To reduce the amount of network traffic and the number of hits on your database servers, you can
schedule reports to be run at specified times. When the report has been run, users can view that report
instance as needed, without triggering additional hits on the database.
Report instances are useful for dealing with data that isn't continually updated. When users navigate
through report instances, and drill down for details on columns or charts, they don't access the database
server directly; instead, they access the saved data. Consequently, reports with saved data not only
minimize data transfer over the network, but also lighten the database server's workload.
For example, if your sales database is updated once a day, you can run the report on a similar schedule.
Sales representatives then always have access to current sales data, but they are not hitting the
database every time they open a report.
Users require only View access to display report instances.
5.3.2 To copy an existing access level
This is the best way to create an access level if you want an access level that differs slightly from one
of the existing access levels.
1.
Go to the "Access Levels" area.
2.
In the Details panel, select an access level.
Tip:
Select an access level that contains rights that are similar to what you want for your access level.
3.
Click Organize > Copy.
A copy of the access level you selected appears in the Details panel.
2010-12-0288
Page 89

Setting Rights
5.3.3 To create a new access level
This is the best way to create an access level if you want an access level that differs greatly from one
of the existing access levels.
1.
Go to the "Access Levels" area.
2.
Click Manage > New > Create Access Level.
The "Create New Access Level" dialog box appears.
3.
Enter a title and description for your new access level, and then click OK.
You return to the "Access Levels" area, and the new access level appears in the Details panel.
5.3.4 To rename an access level
1.
In the "Access Levels" area, in the Details panel, select the access level that you want to rename.
2.
Click Manage > Properties.
The "Properties" dialog box appears.
3.
In the Title field, enter a new name for your access level, and then click Save & Close.
You return to the "Access Levels" area.
5.3.5 To delete an access level
1.
In the "Access Levels" area, in the Details panel, select the access level that you want to delete.
2.
Click Manage > Delete Access Level.
Note:
You cannot delete predefined access levels.
A dialog box appears with information about the objects that this access level affects. If you do not
want to delete the access level, click Cancel to exit the dialog box.
3.
Click Delete.
The access level is deleted, and you return to the "Access Levels" area.
2010-12-0289
Page 90

Setting Rights
5.3.6 To modify rights in an access level
To set rights for an access level, you first set general global rights that apply to all objects regardless
of type, and then you specify when you want to override the general settings based on the specific
object type.
1.
In the Access Levels area, in the Details panel, select the access level that you want to modify the
rights for.
2.
Click Actions > Included Rights.
The Included Rights dialog box appears and displays a list of effective rights.
3.
Click Add/Remove Rights.
The Included Rights dialog box displays the rights collections for the access level in the navigation
list. The General Global Rights section is expanded by default.
4.
Set your general global rights.
Each right can have a status of Granted, Denied, or Not Specified. You can also choose whether
to apply that right to the object only, to apply it to sub-objects only, or both.
5.
To set type-specific rights for the access level, in the navigation list, click the rights collection, and
then click the sub-collection that applies to the object type you want to set the rights for.
6.
When you have finished, click OK.
You return to the list of effective rights.
Related Topics
• Managing security settings for objects in the CMC
2010-12-0290
Page 91

Setting Rights
• Type-specific rights
5.3.7 Tracing the relationship between access levels and objects
Before you modify or delete an access level, it is important to confirm that any changes you make to
the access level will not impact objects in the CMC negatively. You can do this by running a relationship
query on the access level.
Relationship queries are useful for rights management because they allow you to see objects impacted
by an access level in one convenient location. Consider a situation in which a company restructures
its organization and merges two departments, Department A and Department B, into Department C.
The administrator decides to delete the access levels for Department A and Department B because
these departments no longer exist. The administrator runs relationship queries for both access levels
before deleting them. In the "Query Results" area, the administrator can see the objects that will be
affected if the administrator deletes the access levels. The Details panel also shows the administrator
the location of the objects in the CMC if the rights on the objects must be modified before the access
levels are deleted.
Note:
• To view the list of affected objects, you must have View rights on those objects.
• Relationship query results for an access level only yield objects on which the access level is explicitly
assigned. If an object uses an access level because of inheritance settings, that object does not
appear in the query results.
5.3.8 Managing access levels across sites
Access levels are one of the objects that you can replicate from an Origin site to Destination sites. You
can choose to replicate access levels if they appear in a replication object's access control list. For
example, if a principal is granted access level A on a Crystal report and the Crystal report is replicated
across sites, access level A is also replicated.
Note:
If an access level with the same name exists in the Destination site, the access level replication will
fail. You or the Destination site administrator must rename one of the access levels before replication.
After you replicate an access level across sites, keep the administration considerations in this section
in mind.
2010-12-0291
Page 92

Setting Rights
Modifying replicated access levels in the Origin site
If a replicated access level is modified in the Origin site, the access level in the Destination site will be
updated the next time the replication is scheduled to run. In two-way replication scenarios, if you modify
a replicated access level in the Destination site, the access level in the Origin site changes.
Note:
Ensure that changes to an access level in one site do not affect objects in other sites negatively. Consult
your site administrators and advise them to run relationship queries for the replicated access level
before you make any changes.
Modifying replicated access levels in the Destination site
Note:
This applies to one-way replication only.
Any changes to replicated access levels made in a Destination site are not reflected in the Origin site.
For example, a Destination site administrator can grant the right to schedule Crystal reports in the
replicated access level even though this right was denied in the Origin site. As a result, although the
access level names and replicated object names remain the same, the effective rights that principals
have on objects may differ from Destination site to Destination site.
If the replicated access level differs between the Origin and Destination sites, the difference in effective
rights will be detected the next time a Replication Job is scheduled to run. You can force the Origin site
access level to override the Destination site access level, or allow the Destination site access level to
remain intact. However, if you do not force the Origin site access level to override the Destination site
access level, any objects pending Replication that use that access level will fail to replicate.
To restrict users from modifying replicated access levels in the Destination site, you can add Destination
site users to the access level as principals, and grant those users View rights only. This means that
Destination site users can view the access level but are unable to modify its rights settings or assign it
to other users.
Related Topics
• Tracing the relationship between access levels and objects
5.4 Breaking inheritance
Inheritance lets you manage your security settings without setting rights for each individual object.
However, in some cases, you may not want rights to be inherited. For example, you may want to
customize rights for each object. You can disable inheritance for a principal in an object's access control
list. When you do this, you can choose whether to disable group inheritance, folder inheritance, or both.
Note:
When inheritance is broken, it is broken for all rights; it is not possible to turn off inheritance for some
rights but not for others.
2010-12-0292
Page 93

Setting Rights
In the diagram “Breaking inheritance”, group and folder inheritance are initially in effect. Red User
inherits rights 1 and 5 as granted, rights 2, 3, and 4 as unspecified, and right 6 as explicitly denied.
These rights, set on the folder level for the group, mean that Red User, and every other member of the
group, has these rights on the folder's objects, A and B. When inheritance is broken on the folder level,
Red User's set of rights to the objects in that folder is cleared until an administrator assigns new rights
to him.
Figure 5-9: Breaking inheritance
5.4.1 To disable inheritance
This procedure lets you disable group or folder inheritance, or both, for a principal on an object's access
control list.
1.
Select the object that you want to disable inheritance for.
2.
Click Manage > User Security.
The "User Security" dialog box appears.
3.
Select the principal that you want to disable inheritance for, and click Assign Security.
The "Assign Security" dialog box appears.
2010-12-0293
Page 94

Setting Rights
4.
Configure your inheritance settings.
• If you want to disable group inheritance (the rights that the principal inherits from group
membership), clear the Inherit From Parent Group check box.
• If you want to disable folder inheritance (the rights settings that the object inherits from the folder),
clear the Inherit From Parent Folder check box.
5.
Click OK.
5.5 Using rights to delegate administration
Besides allowing you to control access to objects and settings, rights allow you to divide administrative
tasks between functional groups within your organization. For example, you may want people from
different departments to manage their own Information platform services users and groups. Or you may
have one administrator who handles high-level management of Information platform services, but you
want all server management to be handled by people in your IT department.
Assuming that your group structure and folder structure align with your delegated-administration security
structure, you should grant your delegated administrator rights to entire user groups, but grant the
delegated administrator less than full rights on the users he controls. For example, you might not want
the delegated administrator to edit user attributes or reassign them to different groups.
The “Rights for delegated administrators” table summarizes the rights required for delegated
administrators to perform common actions.
Table 5-3: Rights for delegated administrators
Action for delegated administrator
Create new users
Create new groups
Delete any controlled groups, as well as individual
users in those groups
Delete only users that the delegated administrator
creates
Rights required by the delegated administrator
Add right on the top-level Users folder
Add right on the top-level User Groups folder
Delete right on relevant groups
Owner Delete right on the top-level Users folder
Delete only users and groups that the delegated
administrator creates
Owner Delete right on the top-level User Groups
folder
2010-12-0294
Page 95

Setting Rights
Action for delegated administrator
Manipulate only users that the delegated creates
(including adding those users to those groups)
Manipulate only groups that the delegated administrator creates (including adding users to those
groups)
Modify passwords for users in their controlled
groups
Modify passwords only for principals the delegated administrator creates
Modify user names, description, other attributes,
and reassign users to different groups
Rights required by the delegated administrator
Owner Edit and Owner Securely Modify Rights
right on the top-level Users folder
Owner Edit and Owner Securely Modify Rights
on the top-level User Groups folder
Edit Password right on relevant groups
Owner Edit Password right on top-level Users
folder, or on relevant groups
Note:
Setting the Owner Edit Password right on a
group takes effect on a user only when you add
the user to the relevant group.
Edit right on relevant groups
Owner Edit right on top-level Users folder, or on
relevant groups
Modify user names, description, other attributes,
and reassign users to different groups, but only
for users that the delegated administrator creates
Note:
Setting the Owner Edit right on relevant groups
takes effect on a user only when you add the user
to the relevant group.
5.5.1 Choosing between “Modify the rights users have to objects” options
When you set up delegated administration, give your delegated administrator rights on the principals
he will control. You may want to give her all rights (Full Control); however, it is good practice to use
advanced rights settings to withhold the Modify Rights right and give your delegated administrator the
Securely Modify Rights right instead. You may also give your administrator the Securely Modify
2010-12-0295
Page 96

Setting Rights
Rights Inheritance Settings right instead of the Modify Rights Inheritance Settings right. The
differences between these rights are summarized below.
Modify the rights users have to objects
This right allows a user to modify any right for any user on that object. For example, if user A has the
rights View objects and Modify the rights users have to object on an object, user A can then change
the rights for that object so he or any other user has full control of this object.
Securely modify the rights users have to objects
This right allows a user to grant, deny, or revert to unspecified only the rights he is already granted. For
example, if user A has View and Securely modify the rights users have to objects rights, user A
can not give herself any more rights and can grant or deny to other users only these two rights (View
and Securely Modify Rights). Additionally, user A can change only the rights for users on objects for
which he has the Securely Modify Rights right.
These are all the conditions that must exist for user A to modify the rights for user B on object O:
• User A has the Securely Modify Rights right on object O.
• Each right or access level that user A is changing for user B is granted to A.
• User A has the Securely Modify Rights right on user B.
• If an access level is being assigned, User A has Assign Access Level right on the access level
that is changing for user B.
Scope of rights can further limit the effective rights that a delegated administrator can assign. For
example, a delegated administrator may have Securely Modify Rights and Edit rights on a folder, but
the scope of these rights is limited to the folder only and does not apply to its sub-objects. Effectively,
the delegated administrator can grant the Edit right on the folder (but not on its sub-objects) only, and
with an “Apply to objects” scope only. On the other hand, if the delegated administrator is granted the
Edit right on a folder with a scope of “Apply to sub-objects” only, she can grant other principals the
Edit right with both scopes on the folder's sub-objects, but on the folder itself, she can only grant the
Edit right with an “Apply to sub-objects” scope.
In addition, the delegated administrator will be restricted from modifying rights on those groups for other
principals that she doesn't have the Securely Modify Rights right on. This is useful, for example, if you
have two delegated administrators responsible for granting rights to different user groups for the same
folder, but you don't want one delegated administrator to be able to deny access to the groups controlled
by the other delegated administrator. The Securely Modify Rights right ensures this, since delegated
administrators generally won't have the Securely Modify Rights right on each other.
Securely modify rights inheritance settings
This right allows a delegated administrator to modify inheritance settings for other principals on the
objects that the delegated administrator has access to. To successfully modify the inheritance settings
of other principals, a delegated administrator must have this right on the object and on the user accounts
for the principals.
2010-12-0296
Page 97

Setting Rights
5.5.2 Owner rights
Owner rights are rights that apply only to the owner of the object on which rights are being checked. In
Information platform services, the owner of an object is the principal who created the object; if that
principal is ever deleted from the system, ownership reverts to the Administrator.
Owner rights are useful in managing owner-based security. For example, you may want to create an
folder or hierarchy of folders in which various users can create and view documents, but can only modify
or delete their own documents. In addition, owner rights are useful for allowing users to manipulate
instances of reports they create, but not others' instances. In the case of the scheduling access level,
this permits users to edit, delete, pause and reschedule only their own instances.
Owner rights work similarly to their corresponding regular rights. However, owner rights are effective
only when the principal has been granted owner rights but regular rights are denied or not specified.
5.6 Summary of recommendations for rights administration
Keep these considerations in mind for rights administration:
• Use access levels wherever possible. These predefined sets of rights simplify administration by
grouping together rights associated with common user needs.
• Set rights and access levels on top-level folders. Enabling inheritance will allow these rights to be
passed down through the system with minimal administrative intervention.
• Avoid breaking inheritance whenever possible. By doing so, you can reduce the amount of time it
takes to secure the content that you have added to Information platform services.
• Set appropriate rights for users and groups at the folder level, then publish objects to that folder. By
default, users or groups who have rights to a folder will inherit the same rights for any object that
you subsequently publish to that folder.
• Organize users into user groups, assign access levels and rights to the entire group, and assign
access levels and rights to specific members when necessary.
• Create individual administrator accounts for each administrator in the system and add them to the
Administrators group to improve accountability for system changes.
• By default, the Everyone group is granted very limited rights to top-level folders in Information
platform services. After installation, it is recommended that you review the rights of Everyone group
members and assign security accordingly.
2010-12-0297
Page 98

Setting Rights
2010-12-0298
Page 99

Securing Information platform services
Securing Information platform services
6.1 Security overview
This section details the ways in which Information platform services addresses enterprise security
concerns, thereby providing administrators and system architects with answers to typical questions
regarding security.
The Information platform services architecture addresses the many security concerns that affect today's
businesses and organizations. The current release supports features such as distributed security, single
sign-on, resource access security, granular object rights, and third-party authentication in order to
protect against unauthorized access.
Because Information platform services provides the framework for an increasing number of components
from the Enterprise family of SAP BusinessObjects products, this section details the security features
and related functionality to show how the framework itself enforces and maintains security. As such,
this section does not provide explicit procedural details; instead, it focuses on conceptual information
and provides links to key procedures.
After a brief introduction to security concepts for the system, details are provided for the following topics:
• How to use encryption and data processing security modes to protect data.
• How to set up the Secure Sockets Layer for Information platform services deployments.
• Guidelines for setting up and maintaining firewalls for Information platform services.
• Configuring reverse proxy servers.
6.2 Disaster recovery planning
Certain steps must be taken to protect your organization's investment in Information platform services
to ensure maximum continuity of function lines of business in the event of a disaster. This section
provides guidelines for drafting a disaster recovery plan for your organization.
General guidelines
• Perform regular system backups and send copies of some of the backup media offsite if necessary.
• Safely store all software media.
• Safely store all license documentation.
2010-12-0299
Page 100

Securing Information platform services
Specific guidelines
There are three system resources that require specific attention in terms of disaster recovery planning:
• Content in the file repository servers: this includes proprietary content such as reports. You should
regularly backup this content - in the event of a disaster there is no way to regenerate such content
without a regular backup process in place.
• The system database used by the CMS: this resource contains all the crucial metadata for your
deployment such as user information, reports and other sensitive information that is particular to
your organization.
• Database information key file (.dbinfo file): this resource contains the master key to the system
database. If for some reason this key is not available, you will not be able to access the system
database. It is highly recommended after deploying Information platform services you store the
password for this resource in a safe and known location. Without the password you will not be able
to regenerate the file and therefore lose access to the system database.
6.3 General recommendations for securing your deployment
The following are recommended guidelines for securing your Information platform services deployments.
• Use firewalls to protect the communication between the CMS and other system components. If
possible, always hide your CMS behind the firewall. At the very least, ensure that the system database
is safely behind the firewall.
• Add additional encryption to the File Repository Servers. Once the system is up and running,
proprietary content will be stored in these servers. Add additional encryption through the OS or use
a third party tool.
• Deploy a reverse proxy server in front of the web application servers in order to hide them behind
a single IP address. This configuration routes all Internet traffic that is addressed to private web
application servers through the reverse proxy server, therefore hiding private IP addresses.
• Strictly enforce corporate password policies. Ensure that user passwords are routinely changed.
• If you have opted to install the system database and web application server provided with Information
platform services, you should access the relevant documentation to ensure these components are
deployed with adequate security configurations.
• Use the Secure Sockets Layer (SSL) protocol for all network communication between clients and
servers in your deployment.
• Access to the Central Management Console (CMC) should be restricted to local access only. For
information on deployment options for the CMC see the
Application Deployment Guide
.
SAP BusinessObjectes Enterprise Web
Related Topics
• Configuring the SSL protocol
• Password restrictions
• Configuring security for bundled third-party servers
2010-12-02100
 Loading...