


Query as a Web Service
BusinessObjects Enterprise XI 3.0
windows

Copyright
© 2008 Business Objects, an SAP company. All rights reserved. Business Objects
owns the following U.S. patents, which may cover products that are offered and
licensed by Business Objects: 5,295,243; 5,339,390; 5,555,403; 5,590,250;
5,619,632; 5,632,009; 5,857,205; 5,880,742; 5,883,635; 6,085,202; 6,108,698;
6,247,008; 6,289,352; 6,300,957; 6,377,259; 6,490,593; 6,578,027; 6,581,068;
6,628,312; 6,654,761; 6,768,986; 6,772,409; 6,831,668; 6,882,998; 6,892,189;
6,901,555; 7,089,238; 7,107,266; 7,139,766; 7,178,099; 7,181,435; 7,181,440;
7,194,465; 7,222,130; 7,299,419; 7,320,122 and 7,356,779. Business Objects and
its logos, BusinessObjects, Business Objects Crystal Vision, Business Process
On Demand, BusinessQuery, Cartesis, Crystal Analysis, Crystal Applications,
Crystal Decisions, Crystal Enterprise, Crystal Insider, Crystal Reports, Crystal
Vision, Desktop Intelligence, Inxight and its logos , LinguistX, Star Tree, Table
Lens, ThingFinder, Timewall, Let There Be Light, Metify, NSite, Rapid Marts,
RapidMarts, the Spectrum Design, Web Intelligence, Workmail and Xcelsius are
trademarks or registered trademarks in the United States and/or other countries
of Business Objects and/or affiliated companies. SAP is the trademark or registered
trademark of SAP AG in Germany and in several other countries. All other names
mentioned herein may be trademarks of their respective owners.
Third-party
Contributors
Business Objects products in this release may contain redistributions of software
licensed from third-party contributors. Some of these individual components may
also be available under alternative licenses. A partial listing of third-party
contributors that have requested or permitted acknowledgments, as well as required
notices, can be found at: http://www.businessobjects.com/thirdparty
2008-09-03

Contents
Introduction to Query as a Web Service 7Chapter 1
What is Query as a Web Service?...............................................................8
How is Query as a Web Service used as a business solution?...................8
Server and client component architecture of Query as a Web Service.......9
Installing Query as a Web Service 11Chapter 2
Installation pre-requisites for Query as a Web Service.............................12
To install and validate Query as a Web Service........................................12
Troubleshooting Query as a Web Service installation...............................15
Starting Query as a Web Service 19Chapter 3
Startup pre-requisites for Query as a Web Server.....................................20
How to start Query as a Web Service........................................................20
How to manage Hosts...............................................................................23
Query Catalog page...................................................................................25
Ensure the CMS starts up before Tomcat............................................15
Changing the default CMS...................................................................15
Activating web service traces...............................................................16
Optimizing CMS availability..................................................................17
To start Query as a Web Service for the first time................................20
To start Query as a Web Service..........................................................21
To log in with different login credentials................................................23
To add a new Host................................................................................24
To edit a Host.......................................................................................24
Query as a Web Service 3

Contents
Creating a new query to publish as a web service 27Chapter 4
Create and publish a new query as a web service....................................28
How to create a new query using the Publish as a Web Service wizard....28
To start the Publish as a Web Service wizard......................................29
To set query name and description properties.....................................29
To select a universe for a query...........................................................32
To define a query..................................................................................32
To preview and publish a query............................................................35
How to create a new query by duplicating a published query...................36
To duplicate a existing published query...............................................36
Managing queries as web services 37Chapter 5
To create folders in the Query Catalog......................................................38
To edit a query as a web service...............................................................38
To rename a query.....................................................................................38
To delete a query as a web service...........................................................39
To copy and paste a query as a web service.............................................39
To view query properties............................................................................39
To view available query web service instances ........................................40
How to deploy queries to another web server...........................................41
To deploy to another server using the Query as a Web Service client
tool........................................................................................................41
To deploy Query as a Web Service from Import Wizard .....................42
To deploy Query as a Web Service from a BIAR file............................43
To deploy to another server using the Query as a Web Service client
tool.............................................................................................................44
To deploy to another server using the Query as a Web Service client
tool........................................................................................................44
To deploy Query as a Web Service from Import Wizard .....................45
To deploy Query as a Web Service from a BIAR file............................46
4 Query as a Web Service

Contents
To deploy Query as a Web Service from Import Wizard ...........................47
To deploy to another server using the Query as a Web Service client
tool........................................................................................................48
To deploy Query as a Web Service from Import Wizard .....................49
To deploy Query as a Web Service from a BIAR file............................49
To deploy Query as a Web Service from a BIAR file.................................50
To deploy to another server using the Query as a Web Service client
tool........................................................................................................51
To deploy Query as a Web Service from Import Wizard .....................52
To deploy Query as a Web Service from a BIAR file............................53
Deploying Query as a Web Server over multiple web servers..................54
To configure Query as a Web Service Client to connect to a reverse proxy
web server............................................................................................54
Consuming queries as web services with different applications 55Chapter 6
Consuming a query as a web service using WSDL...................................56
Consuming a query as a web service in Crystal Xcelsius.........................56
Cross-domain issue..............................................................................57
To select the web service.....................................................................58
Input messages....................................................................................58
Output messages.................................................................................58
Authentication in Xcelsius....................................................................59
Consuming a Query as a Web Service in Crystal Reports........................59
Consuming a Query as a Web Service in Microsoft Office InfoPath.........60
Query as a Web Service Best Practices and Limitations 63Chapter 7
Best Practices using Query as a Web Service..........................................64
Limitations using Query as a Web Service................................................64
Query as a Web Service 5

Contents
Get More Help 65Appendix A
Index 69
6 Query as a Web Service
Introduction to Query as a Web Service
1

Introduction to Query as a Web Service
1
What is Query as a Web Service?
What is Query as a Web Service?
Query as a Web Service is a Business Objects application that allows
business users to quickly create queries and publish them as web services.
A query as a web service is a SQL statement that has been built on a
BusinessObjects universe and published as a web service to a host server
housing web services.
The query as a web service is available to any application that uses web
services, and allows users to access data returned by the query from within
the application. It allows Business Intelligence (BI) information to be securely
delivered to any application that can consume web services.
Query as a Web Service has a client component that you use to create
queries from universes, and a server-side web service that allows developers
to create web services from specific Business Objects queries.
How is Query as a Web Service used as a business solution?
Query as a Web Service allows BI content to be delivered to any user
interface that can process Web Services. It allows business users define
their own query from a universe, and then publish that query as a standalone
web service.
Query as a Web Service can be used to provide new client solutions for a
business. For example, Crystal Xcelsius uses Query as a Web Service to
aggregate multiple disparate data sources into a trusted BI view.
Query as a Web Service also enables a range of client-side solutions in tools
such as:
• Microsoft Office, Excel, and InfoPath
• SAP NetWeaver
• OpenOffice
• Business rules and process management applications
• Enterprise Service Bus platforms
8 Query as a Web Service

Introduction to Query as a Web Service
Server and client component architecture of Query as a Web Service
Note:
Business Objects provides a wide range of Web Services for developers.
Developers use these Web Services in IDEs with languages such as C# and
Java. For more information, go to:
http://diamond.businessobjects.com
Server and client component architecture
of Query as a Web Service
Query as a Web Service is designed to work on top of any Windows
application the same way as other web services.
Query as a Web Service is based on the W3C web service specifications
SOAP, WSDL, and XML. It has two main components:
• Server component
The server component (included in BusinessObjects XI R3) stores the
Query as a Web Service catalog and hosts the published Web Services.
1
• Client tool
This is where business users create and publish queries as web services.
You can install the client tool on several machines that can then access
and share the same Query as a Web Service catalog stored on the server.
Note:
In this guide, the name Query as a Web Service is used to mean the
client. When information is given that refers to the server component, it
is referred to as the server component of Query as a Web Service .
The client communicates with the server components using Web Services.
Query as a Web Service 9

Introduction to Query as a Web Service
1
Server and client component architecture of Query as a Web Service
10 Query as a Web Service

Installing Query as a Web Service
2

Installing Query as a Web Service
2
Installation pre-requisites for Query as a Web Service
Installation pre-requisites for Query as a
Web Service
Before you install Query as a Web Service, you should read the Terms of
Use agreement and conditions and ensure you have met the following
installation pre-requisites:
The following must be installed on the server:
• BusinessObjects XI Release 3 Enterprise Edition
• Web Services
• Tomcat or another supported Web Application and JDK
For an updated list of supported Web Applications and versions, see:
http://support.businessobjects.com/supported_platforms/
The following must be installed on the client before you install Query as a
Web Service :
• .NET 2.0 framework. This is required for the Query as a Web Service
client used to build and publish queries.
You can download the .NET 2.0 framework here:
http://www.microsoft.com/downloads/details.aspx?Fami
lyID=0856eacb-4362-4b0d-8edd-aab15c5e04f5&Display
Lang=en&displaylang=en
The client platform must be supported for use with BusinessObjects XI
Release 3. For an updated list of supported versions, see:
http://support.businessobjects.com/supported_platforms/
To install and validate Query as a Web Service
The server component of Query as a Web Service installs automatically as
part of BusinessObjects Enterprise XI 3.0 with Web Intelligence.
12 Query as a Web Service
Installing Query as a Web Service
To install and validate Query as a Web Service
You must then install the Query as a Web Service client on every machine
that will access the server through web services.
You must have a separate license for Query as a Web Service client. It is
not covered by the general license for BusinessObjects XI 3.0.
1. Navigate to the Add-Ons\Query as a Web Service folder on the
BusinessObjects Enterprise collaterals CD or locate the Query as a Web
Service setup.exe file on your network.
2. Double-click setup.exe to launch the Query as a Web Service Wizard.
3. Follow the on-screen instructions in the Query as a Web Service
Installation Wizard to complete the installation procedure.
You are ready to validate your installation.
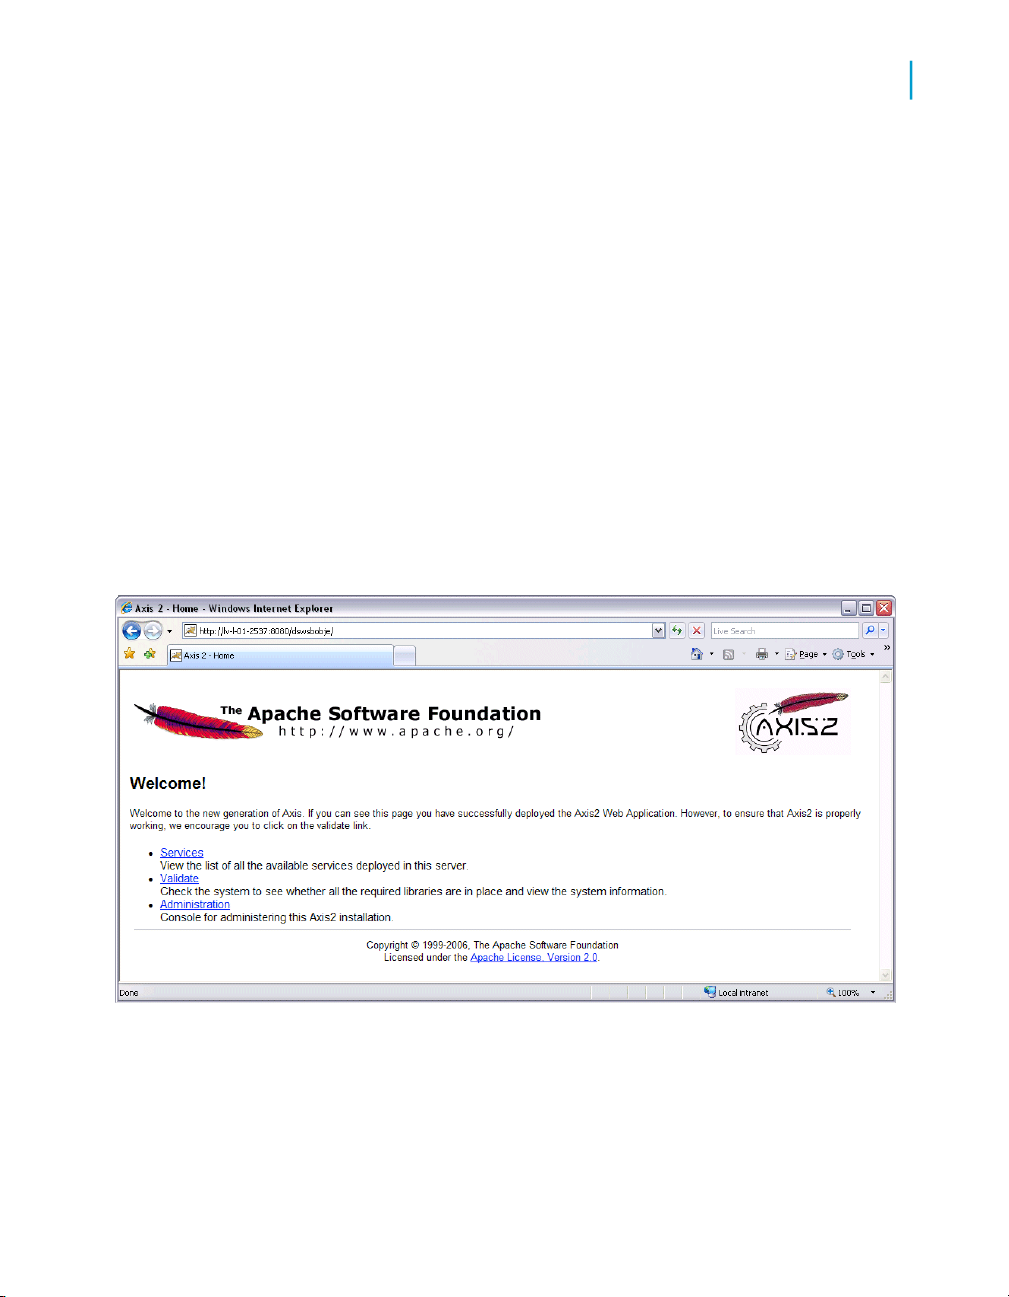
4. To validate the installation, open a browser and type the following URL
http://[server]:[port]/dswsbobje, where [server] corresponds to
your web server address and [port] corresponds to the port where you
set up in your web server. The default used by Tomcat is 8080. dswsbobje
is the default name of the Web Service provider web application.
2
5. Click the Validate link button to get a status of the installation.
6. Browse down to make sure Query as a Web Service is installed. You will
see Found resource:/managequeryasaservice.wsd
Query as a Web Service 13
Installing Query as a Web Service
2
To install and validate Query as a Web Service
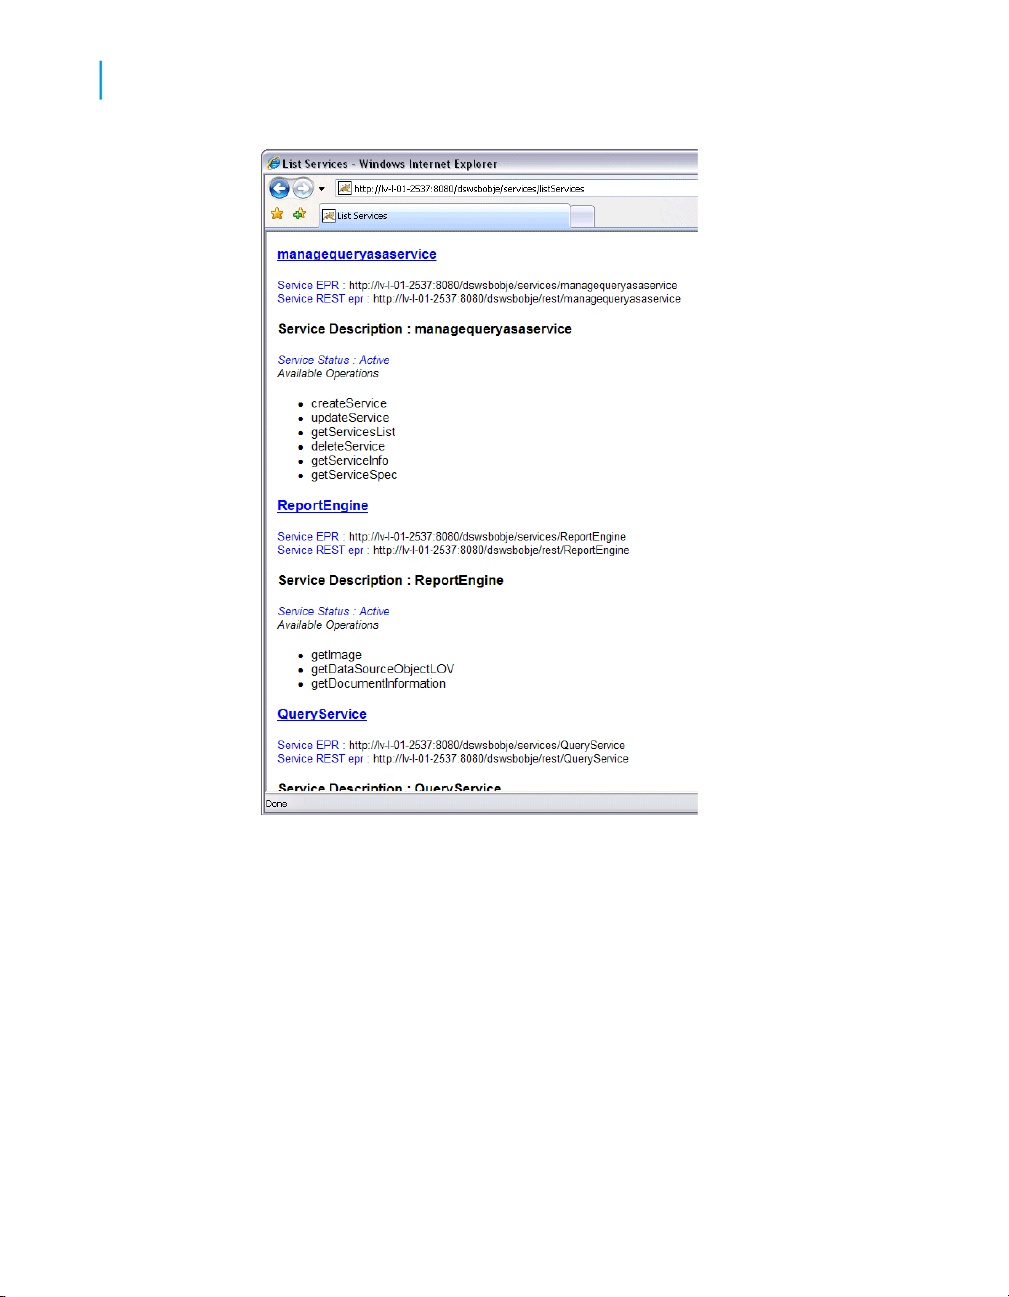
7. In your browser, type the following URL: http://[server]:[port]/dsws
bobje/qaawsservices, where [server] corresponds to your server
address and [port] corresponds to the port where you set up your web
server.
Your browser page appears and contains the title "Available QaaWS
services". This page contains a list of the Query as a Web Service that
have already been created on this system.
14 Query as a Web Service

Installing Query as a Web Service
Troubleshooting Query as a Web Service installation
Troubleshooting Query as a Web Service
installation
This section contains information to help you trouble shoot potential
installation problems. Refer to the linked topics at the end of the section for
information concerning each of the following issues:
• Ensure CMS starts before Tomcat.
• Change the default CMS.
• Activate web service traces.
• Optimize CMS availability.
Ensure the CMS starts up before Tomcat
Ensure that the CMS is launched before Tomcat.
During launch of Tomcat, in the initialization of the Servlet, QaaWS cache
reads the definition of the QaaWS in the repository to build its cache, so you
must ensure that the CMS is launched before Tomcat.
2
If you launch the CMS automatically using the NT Services, you do not need
to do this manually.
Changing the default CMS
By default, the Web Services connects to the local machine name CMS. If
you want to change to a dedicated CMS, you must change the domain
property in the dsws.properties file.
If you use a CMS port number different from the default (6400), and you do
not change the domain property in the dsws.properties file, you receive an
error message "Server not found or server may be down (FWM01003)".
The solution is to specify the new port in the dsws.properties file (located
under <INSTALLPATH>\warfiles\WebApps\dswsbobje\WEB-NF\classes\)
with domain attribute value (domain=CMSserverName:port).
Query as a Web Service 15
Installing Query as a Web Service
2
Troubleshooting Query as a Web Service installation
This information complements what is available in the Central Management
System documentation.
To set a new default CMS for Query as a Web Service
1. Stop Tomcat.
2. Open the installation path folder of BusinessObjects Enterprise XI Release
3: [InstallationPath]\warfiles\webapps\dswsbobje\WEB-
INF\classes
3. Open the file dsws.properties and locate: domain=
4. Enter your CMS name.
5. Close and save the dsws.properties file.
6. Start Tomcat.
Activating web service traces
If there is configuration issue, the Business Objects Administrator may be
required to set up traces to allow better troubleshooting.
Business Objects strongly recommends using traces only for troubleshooting
purposes in test environments.
To activate web service traces
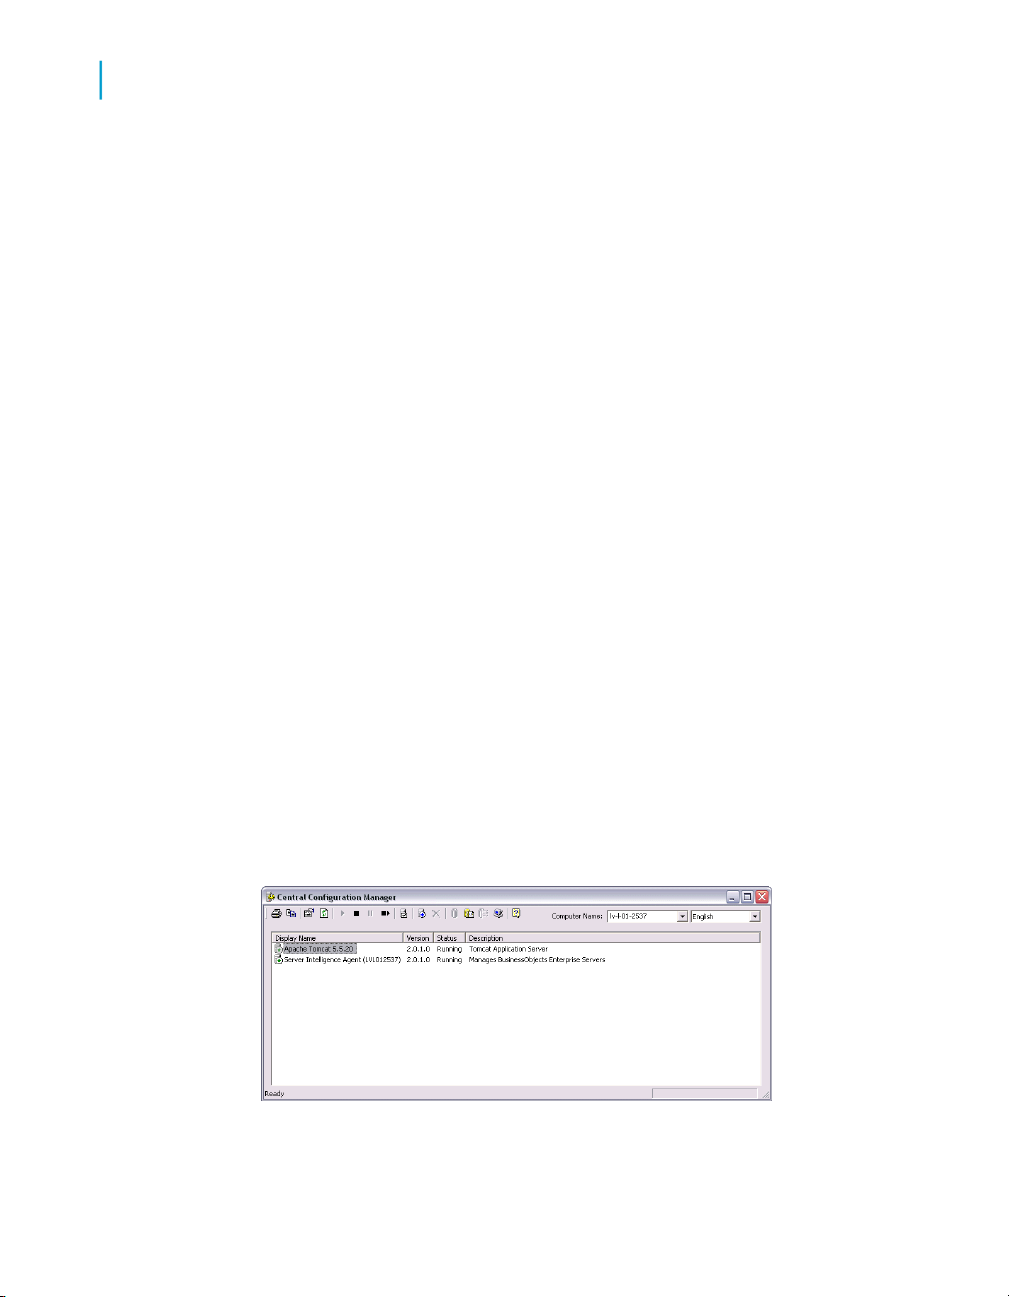
1. In the Central Configuration Manager (CCM), stop "Apache Tomcat 5.5.20"
service.
16 Query as a Web Service

Installing Query as a Web Service
Troubleshooting Query as a Web Service installation
2. Change the trace level.
By default Query as a Web Service only traces errors. You may be
requested to provide additional traces for customer assurance.
3. Edit log4j.properties located in [installationpath]\dswsbob
je\WEB-INF\classes\
4. Type the following in the properties file:log4j.logger.com.businessob
jects=DEBUG, BO1
5. Change the trace location.
By default, it traces in the output console output. If you want to trace a
file, comment the ConsoleAppender and uncomment the RollingFileAp
pender. If Tomcat is set as a service, you will trace in dswsbobje.log
found under the file pathC:\WINDOWS\system32.: # console appender
# log4j.appender.BO1=org.apache.log4j.ConsoleAppender #
log4j.appender.AXIS1=org.apache.log4j.ConsoleAppender
#rolling file appender log4j.appen
der.BO1=org.apache.log4j.RollingFileAppender log4j.appen
der.BO1.File=dswsbobje.log log4j.appender.BO1.Append=false
log4j.appender.BO1.MaxBackupIndex=5 log4j.appender.BO1.Max
FileSize=10
2
6. In the CCM, start "Apache Tomcat 5.5.20" service.
Optimizing CMS availability
The CMS can have only one single CMS system database. The connection
with CMS system database can be lost for the following reasons:
• The database is down.
• A network outage between CMS and CMS System database.
• A software or hardware failure of CMS machine or application.
In any of these cases, deploying two CMS decreases the probability that
both CMS will be unable to communicate with the CMS system database
that is on the CMS machine.
However, if the CMS system database is down then all CMS will be unable
to process incoming requests without errors, regardless of whether there are
a single CMS or multiple CMSs in the cluster.
Query as a Web Service 17

Installing Query as a Web Service
2
Troubleshooting Query as a Web Service installation
You can limit the risk by employing the fault tolerance solutions provided by
the database vendor. Each database vendor provides fault tolerance solutions
to minimize the risk of the database being unavailable. One fault tolerance
option may be to set up a secondary mirror database that runs on a secondary
server. For example, if the first database is out the tns.ora file is
automatically updated to point to the secondary database server. Since
available fault tolerance measures are database-specific, see the
documentation for your specific database vendor for more information on
fault tolerance measures.
Note:
If the feature is available and enabled, even if the system database
connection is lost, the CMS automatically re-establishes the database
connection without administrator intervention.
18 Query as a Web Service

Starting Query as a Web Service
3
Starting Query as a Web Service
3
Startup pre-requisites for Query as a Web Server
Startup pre-requisites for Query as a Web
Server
Ensure that the following pre-requisites are completed before you start Query
as a Web Service:
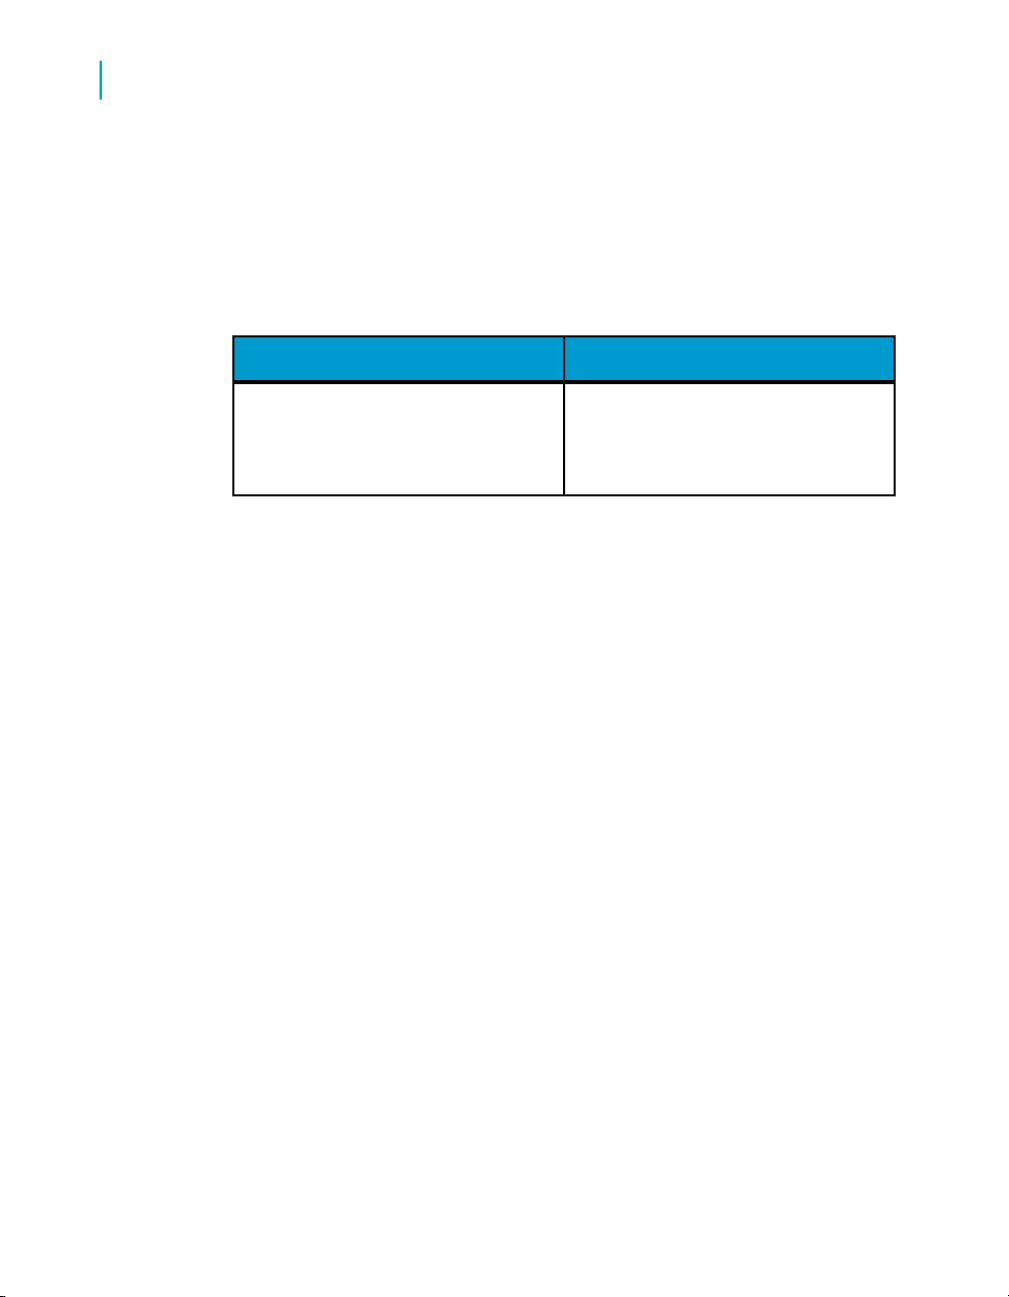
DescriptionStartup pre-requisites
You define user group membership in
User logged in as Administrator or defined in QaaWS Group Designer.
the Central Management Console. If
you need to be added to this user
group, see your administrator.
How to start Query as a Web Service
Query as a Web Service is used with a Central Management System (CMS).
The CMS contains the server component that stores the Query as a Web
Service catalog and hosts the published Web Services.
When you start Query as a Web Service for the first time, you must define
the host server before starting.
Each successive time you start Query as a Web Service you select an
available host server, then log into the CMS.
Once you are logged in, the Query as a Web Service startup Query Catalog
page appears. From this page you can start the query creation and publication
wizard to publish a new query and edit existing published queries.
To start Query as a Web Service for the first time
When you start Query as a Web Service for the first time, you must define
a host server in the CMS where the web services are installed. Once you
have defined a host server, this host is automatically available the next time
you start Query as a Web Service. You can define multiple host servers, but
you can only connect to one at a time.
20 Query as a Web Service

Starting Query as a Web Service
How to start Query as a Web Service
1. Start Query as a Web Service.
The "Manage Hosts" dialog box appears. This dialog box lists available
host servers, and allows you to add new servers and edit existing ones.
The first time you start Query as a Web Service the list is empty. You
must firstly define a host server.
2. Click Add.
The "Edit a Host" dialog box appears. This box contains the parameters
that you define to create a new host server. See the section in Related
Topics for a description of each parameter.
3. Enter the required information in the "Edit a Host" dialog box.
4. Click OK.
The "Manage Hosts" dialog box appears. The new host is now listed.
5. Select the new host and click Close.
The "Select your credentials" login box appears. The new host information
is available.
6. Enter your password, then click OK.
The Query as a Web Service client start up page appears.
3
To start Query as a Web Service
Before you start Query as a Web Service, ensure that you have met the
following pre-requisites. See the Related Topics for more information.
• Your user name must be in the user group QaaWS Group Designer, or
you must be logged in as Administrator.
• You have defined a server host to store the query web service. You do
this when you start Query as a Web Service for the first time, or at any
other time by adding a host in the "Edit a Host" dialog box.
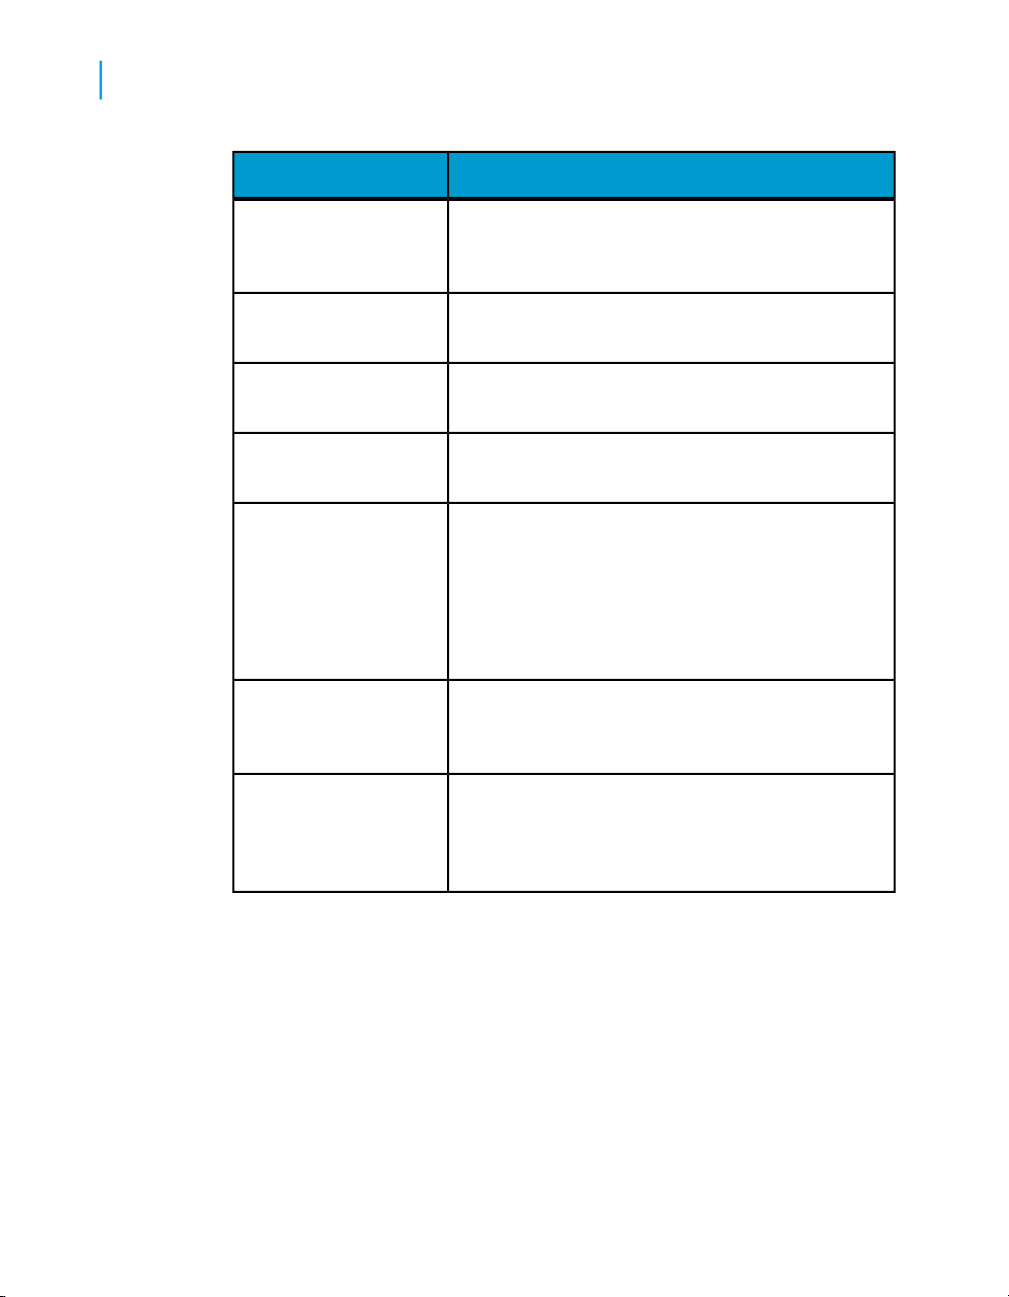
You start Query as a Web Service by selecting a host server and entering
login information in the login box. You have the following login fields:
Query as a Web Service 21
Starting Query as a Web Service
3
How to start Query as a Web Service
Host
DescriptionLogin information
Server in CMS that stores the query webservices.
You must define a host server before you can create
a query.
System
User
Password
Authentification
Enable Windows Active
Directory Single Sign In
Interface Locale
Central Management Server (CMS) that houses the
host server.
User name. It must be a member of the QaaWS
Group Designer user group, or an Administrator.
User password. This is assigned to you by your administrator.
Type of authentification service required to access
the CMS. This information is provided by your administrator. The following protocols are available:
• Enterprise
• LDAP
• Windows AD
Select if Single Sign In is supported by the Authentification protocol. This option is only available for Windows AD.
Language used for the user interface. You can select
a language available from the drop down list. This
list contains installed languages supported by the
Business Objects XI Enterprise Suite.
1. In the Windows Start menu, point to Programs > Business Objects XI
Release 3 > BusinessObjects Enterprise > Query As A Web Service
The login box appears.
2. Select a host server name from the Host drop down list.
3. Enter your System, User Name, and password information.
4. Click Options.
The login box displays Authentication, Single Sign On, and Interface Local
options.
22 Query as a Web Service

Starting Query as a Web Service
5. Select login information.
6. Click OK.
The Query Catalog page appears. You can create, publish, and manage
queries as web services from this page.
To log in with different login credentials
You can log in to Query as a Web Service as a new user without quitting the
application.
• SelectTools > Log in as
The login box appears. Enter the new user information and click OK.
How to manage Hosts
A Host is the server component in the CMS that stores the Query as a Web
Service catalog and stores the published Web Services. You create a Host
when you start Query as a Web Service for the first time. You can add a
Host to the CMS and configure the connection parameters for existing hosts
from the "Manage Hosts" dialog box.
How to manage Hosts
3
You access the "Manage Hosts" dialog box from from the Tools menu, or
from the login box when you log into Query as a Web Service .
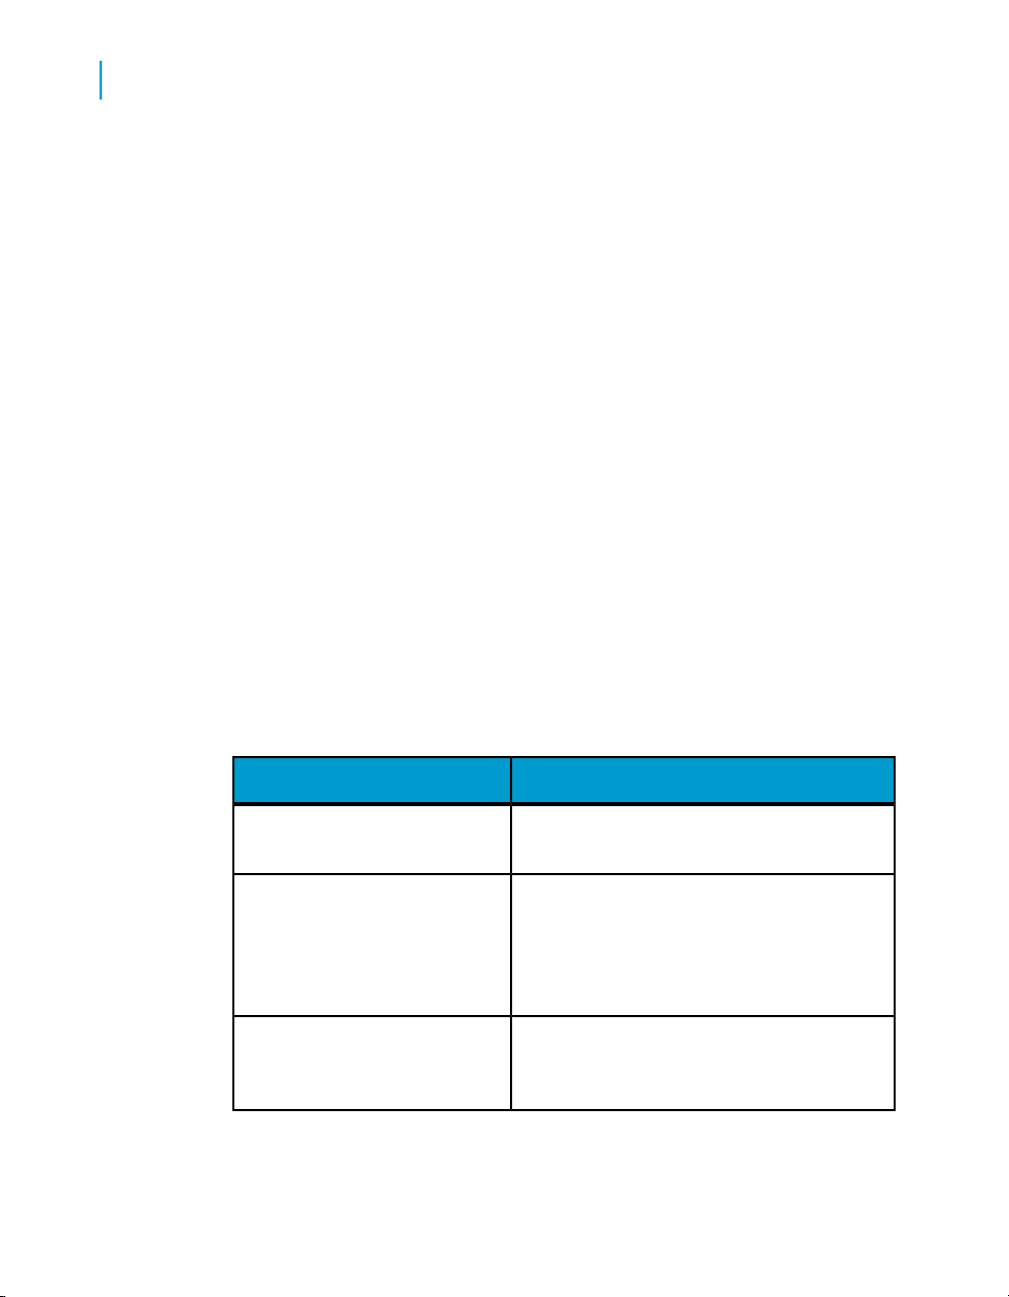
The "Manage Hosts" dialog box lists Host servers. You have the following
Host administration options:
DescriptionManage Host option
Click to define a new Host.Add
Edit
Delete
Select a Host name in the list, and click
to edit Host definition.
Select a Host name and click to remove the Host from the list.
Click to clear all Hosts in the list.Clear
Query as a Web Service 23
Starting Query as a Web Service
3
How to manage Hosts
To add a new Host
You add a new Host from the "Manage Hosts" dialog box.
1. Select Tools > Manage Hosts.
The "Manage Hosts" dialog box appears.
Note:
You can also access the "Manage Hosts" dialog box from the login box
when you log in to Query as a Web Service.
2. Click the Add button.
The "Edit a Host" dialog box appears.
3. Enter information for the Host parameters and click OK.
The Host is added to the list in the "Manage Hosts" dialog box.
4. Click Close.
To edit a Host
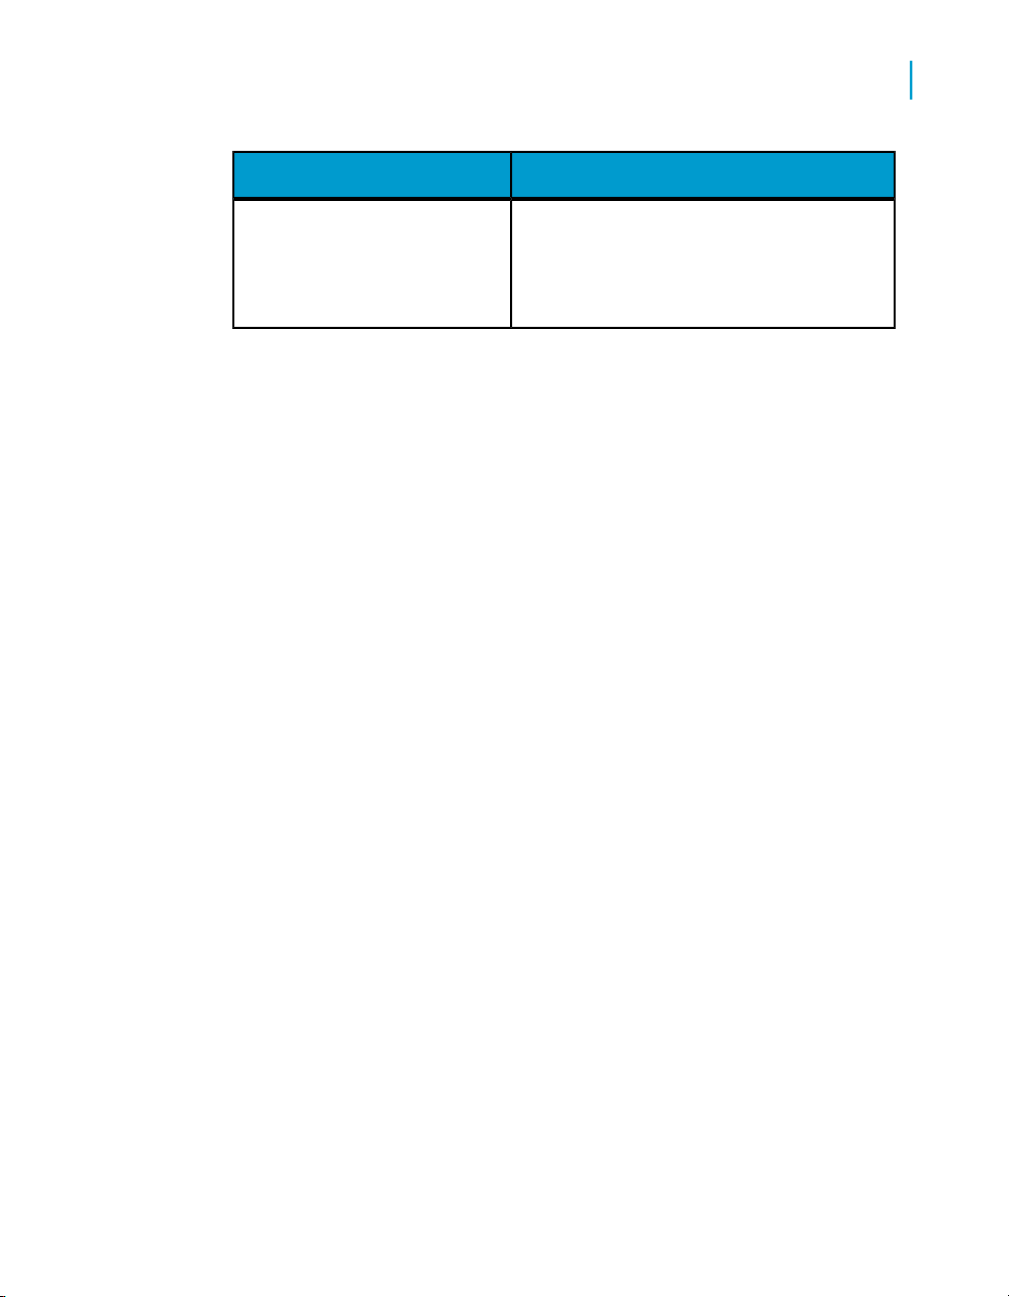
You edit a Host definition from the "Edit a Host" dialog box. You can edit the
following Host parameters:
Name
URL
CMS
24 Query as a Web Service
DescriptionEdit Host parameters
Name of the Host server. This is the name
that appears in the Host field in the login box.
The URL address of the Host server. A default
URL for the Host is automatically entered.
You can edit the URL if required. You should
verify that the port address in the URL is correct.
Name of the CMS that houses the Host. This
is the name that appears in the System field
in the login box.
Starting Query as a Web Service
Query Catalog page
DescriptionEdit Host parameters
3
• User
• Authentification
• Enable Windows Active
Directory Single Sign In
1. Select Tools > Manage Hosts.
The "Manage Hosts" dialog box appears.
Note:
You can also access the "Manage Hosts" dialog box from the login box
when you log in to Query as a Web Service.
2. Click a Host in the list.
3. Click the Edit button.
The "Edit a Host" dialog box appears. It contains the parameters that can
be editied for the Host.
4. Enter or modify one of more values.
5. Click OK then click Close.
The login box appears. The modifications to the Host apply immediately.
These parameters are described in the section "To Start Query as a Web Service" in
Related Topics.
Query Catalog page
The Query Catalog page appears when you start up Query as a Web Server.
It lists the queries published to the Host server, and the universe used by
each query. For each selected query in the list, the name, universe name,
description, and URL address for WSDL description of the selected query
are listed in the information pane to the right.
From the Query Catalog page, you can create and publish new queries, and
manage published queries already published to the host server.
You can perform the following actions from the Query Catalog page:
Query as a Web Service 25

Starting Query as a Web Service
3
Query Catalog page
Query
Available actionsMenu
• Create a new query and create folders in the catalog list
to store and organize queries.
• Edit the definition of a query.
• Duplicate a query to use as the template for a new query.
• Delete, rename, and refresh queries in the list.
• Deploy a query to another host server.
Edit
Tools
The standard Windows editing actions Cut, Copy, and Paste
are available.
• Access the "Manage Hosts" dialog box to add, edit, and
delete host servers.
• Log out and log in as a different user, or to a different host
without quitting the application.
• Access the advanced parameters dialog box to set web
based URL, session time out limits, and authentification
mode for the query.
26 Query as a Web Service

Creating a new query to publish as a web service
4

Creating a new query to publish as a web service
4
Create and publish a new query as a web service
Create and publish a new query as a web
service
You can create a new query to publish as a web service in two ways:
• Use the "Publish as a Web Service Wizard" to define a query from scratch.
• Duplicate an existing query to use as a definition template, and modify
its definition to create a new query.
How to create a new query using the Publish as a Web Service wizard
You use the "Publish as a Web Service Wizard" to create a new query to
publish as a web service.
If you want to use an existing query as a template, see the section about
duplicating a published query in Related Topics.
You create and publish a query by following the workflow described here.
Refer to the topics and the end of the page to link directly to the Help page
that corresponds to the wizard step. Each Help page fully describes the
properties that you set on the current wizard page.
Table 4-1: Query creation and publish workflow using the wizard
Start the "Publish as a Web Service
Wizard"
Set name and description for the new
query.
Set advanced properties
28 Query as a Web Service
DescriptionQuery creation and publish workflow
You start the wizard from the Query
Catalog page. This is the page that
appears when you login to a Host.
You enter name and comments for the
query.
You can set parameters for reverse
proxy use, session timeout constraints,
and authentication type.

Creating a new query to publish as a web service
How to create a new query using the Publish as a Web Service wizard
Choose a universe as the data source
for the query.
Build the query using a Query Panel.
4
DescriptionQuery creation and publish workflow
You select the universe that contains
the objects to be used in the query. The
universe is the data source for the
query.
You build the query using a Query
Panel to combine dimensions and
measures, and set conditions for the
query.
Preview and publish the new query as
a web service.
You preview the SQL for the query, and
publish the query as a web service to
the Host server.
To start the Publish as a Web Service wizard
You use the "Publish as a Web Service Wizard" to create and publish a new
query. You start the wizard from the Query Catalog page. There is a Help
page for each successive page in the wizard.
1. Start Query as a Web Service.
The Query Catalog page appears. It lists the current query webservices
stored in the Host server.
2. Select Query > NewQuery.
The "Publish as a Web Service Wizard" opens to the "Description" page.
You can enter name, description, and advanced parameter information
on this page.
To set query name and description properties
On the "Description" page of the "Publish as a Web Service Wizard" you
specify a name and description for the new query to publish as a web service.
1. Enter a name and description for the query.
2. Do one of the following:
Query as a Web Service 29

Creating a new query to publish as a web service
4
How to create a new query using the Publish as a Web Service wizard
If you want to set parameters for reverse proxy use, session timeout
•
constraints, or authentication type, then click the Advanced
parameters button.
• If you do not want to set advanced parameters, then click Next.
Depending on your choice, either the dialog box for advanced parameters
or the next page in the wizard "Select a Universe"page appears.
To set web service advanced parameters
You can set parameters from the"Advanced Parameters" dialog box for the
following:
• Reverse proxy use using a web service base URL
• Session timeout constraints
• Authentication mode used for web service consumers. This setting only
applies to the web service when it is consumed.
Each of these options is described in the topics listed at the end of the section.
1. Click the Advanced button on the "Description "page of the "Publish as
a Web Service Wizard".
The Advanced Parameters dialog box appears.
2. Do one of the following:
• Edit or type a new web service base URL .
• Type or use the up and down arrows to enter a new value for session
timeout constraint.
• Select an authentification mode from the drop down list box.
3. Click OK.
The Description page appears. You continue the definition of the query
from this page.
Web service base URL
Reverse proxy is a network address translation of a machine from a URL in
a given network to a URL in another network, usually an external network
like the public internet.
A server called myserver.company.com within a company network could be
called: www.mycompany.com in the external network.
30 Query as a Web Service

To support such a deployment, you must set up a Web Services base URL.
The base URL contains the external URL from which you want your Web
Service to be accessible, for example www.mycompany.com/dswsbobje/.
Session timeout
To improve the performance of Query as a Web Service, particularly the
cascading call scenario, the user's connection to the server is cached by the
web service provider. You can configure session time-out (in seconds) for
each Query as a Web Service connection. The default is 60 seconds.
For example, if a given user login calls service 1 and then under 60 seconds
calls service 2 with the same login (identical username and password), the
server reuses the same connection and reinitializes the session time-out.
Authentification mode
Authentication mode is the type of directory against which the
BusinessObjects XI platform validates the login.
Examples include Enterprise, LDAP, Windows AD, and SAP.
You can set the authentication mode so that it will be defined according to
the service, or by the consumer:
Creating a new query to publish as a web service
How to create a new query using the Publish as a Web Service wizard
4
• Service
You, as administrator, select the authentication directory; all users
subsequently accessing the service authenticate on this directory (except
for the sessionID option).
All authentication directories supported by the server are available for
selection in the Authentication Mode drop-down list.
• Consumer defined
The consumer of the query selects the authentication mode as an input
parameter called authenticationType.
Query as a Web Service 31

Creating a new query to publish as a web service
4
How to create a new query using the Publish as a Web Service wizard
To select a universe for a query
The "Select a universe" page of the "Publish as a Web Service Wizard" lists
the universes available to the CMS. You select the universe to be used as
the data source for the query.
1. Click a universe in the list.
A description of the selected universe appears in the description box.
2. Click Next.
The "Query"page of the wizard appears.
To define a query
The "Query" page of the "Publish as a Web Service Wizard" allows you to
use a query panel to define a query based on a universe. The query panel
is based on the "Web Intelligence HTML Query Panel". The query panel is
described briefly in this section with instructions to build a query, however,
the query panel is fully documented in the guide Building queries with Web
Intelligence Query - HTML. You should refer to this guide in the
documentation for this release for more information.
The query panel contains the following zones:
Universe pane
Result objects pane
32 Query as a Web Service
Pane to the left of the query panel that contains
the classes, dimensions, and measures in the
universe organized in a tree structure. These
objects map to SQL structures in the database.
You build your query using these objects.
You drag the objects for your query into this
pane. You can apply a sort to data for each object by right clicking an object and selecting the
type of sort.

Creating a new query to publish as a web service
How to create a new query using the Publish as a Web Service wizard
You drag objects to define a filter to restrict the
Filter objects pane
1. In the "Universe" pane, do one of the following:
• Double click objects for the query.
• Select and drag objects over to the "Result objects" pane.
The query objects are alligned in the "Result objects" pane. You can
change the order of an object in the query by selecting and dragging it to
the desired position. You can remove any object by selecting it and
dragging it back into the "Universe" pane.
2. If you want to create a filter, double click or drag a filter object over to the
"Filter objects"pane.
The object is automatically associated with a drop down list for operators,
a text box for a constant, and a drop down list for a list of values or prompt.
data returned for the query. You can select operators from a list, apply a filter using a constant,
list of values, or define a prompt for user input.
4
3. Select an operator and select the required filter from the drop down lists.
Each of the available filters are described in Related Topics.
4. Click OK.
The "Preview"page of the wizard appears.
To set query constraints
You can set constraints to optimize query performance. You can set the
following constraints:
Duplicate rows
DescriptionConstraint
When selected, allows duplicate rows to
be returned. By default, the query does not
return duplicate rows.
Query as a Web Service 33

Creating a new query to publish as a web service
4
How to create a new query using the Publish as a Web Service wizard
DescriptionConstraint
Maximum time allowed for data fetch. The
Max. fetched time
Max. rows fetched
Sample result set
1. From the query panel, click the options icon at the top left of the page.
A dialog box with query constraint options appears.
default value "-1" indicates that this option
is deactivated, and the value set in the
universe connection parameters applies.
Maximum number of rows to be fetched by
a query. The default value "-1" indicates
that this option is deactivated, and the value set in the universe connection parameters applies.
The number of rows you want to return for
a sample result set before running the
query.
2. Set constaint values where required.
3. Click OK.
To define query sort order
You can define sorts for each object in the universe. You can also define a
sort priority for an object.
1. From the query panel, click the Manage Sorts icon above the "Universe"
pane.
A dialog box with sorting options appears.
2. Expand folders in the "Available objects" pane and select an object.
3. Double click the object, or click the arrow to place the object in the "Query
Sorts" pane.
4. Select the object in the "Query Sorts" pane and click either Ascending
or Descending .
5. If required, select an object and click the Move up or Move Down buttons.
6. Click OK.
34 Query as a Web Service

How to create a new query using the Publish as a Web Service wizard
To define lists of values
You define a list of values by selecting the object in the Query page, then
defining the list of values on a list of values page.
1. From the Query page, drag an object into the Filter objects pane.
A text box flanked by two drop down list filters appears.
2. Select In List from the drop down list to the left of the text box, then select
List of Values from the drop down list to the right of the text box.
The List of Values dialog box appears.
3. Double click on each value in the list pane that you want to appear in the
list of values. The value appears in the Selected Values pane.
4. Click OK.
The values appear in the text box.
To define prompts
Creating a new query to publish as a web service
4
You define a prompt by selecting the object in the Query page, then opening
a prompt page to define the prompt.
1. From the Query page, drag a prompt object to the Filter objects pane.
A text box flanked by two drop down list filters appears
2. Select Prompt from the drop down list to the right of the text box.
A prompt icon appears.
3. Click the prompt icon.
A define a prompt box appears. Type the text that you want to display for
the prompt, and select the options that apply to the prompt.
4. Click OK.
To preview and publish a query
The "Preview" page of the "Publish as a Web Service Wizard" allows you to
preview the objects in the query and the result table. once you are satisfied
with the preview, you can publish the query as a web service to the host
server.
Query as a Web Service 35

Creating a new query to publish as a web service
4
How to create a new query by duplicating a published query
1. Verify that universe, the objects, and the result of the query are correct.
2. Click Publish.
The query is published to the host server as a web service. It is listed in
the Query Catalog page.
How to create a new query by duplicating
a published query
You can create a new query to publish by duplicating a published query, and
using it as a template to build a new query. Once the query is duplicated,
the "Publish as a Web Service Wizard" starts automatically and you modify
the definition in the same way as creating a new query with the wizard.
You need to have the appropriate user permissions to copy a query in a
folder and add a new query to another folder.
To duplicate a existing published query
You duplicate a query to create a new query definition as follows:
1. Do one of the following:
• Select a query listed in the Query Catalog page and select Query >
Duplicate.
• Right click a query in the Query Catalog page list and select "Duplicate"
from the list.
The "Publish as a Web Service Wizard" starts.
2. Follow the wizard to rename and modify the query definition.
36 Query as a Web Service

Managing queries as web services
5

Managing queries as web services
5
To create folders in the Query Catalog
To create folders in the Query Catalog
You can create folders in the Query Catalog page to organize queries in the
list.
• From the Query Catalog page, do one of the following:
• Click the root folder and selectQuery > New Folder.
• Right click the root folder and select "New Folder"from the list.
A new folder is created in the list. You can create folders within any folder
in the list.
To edit a query as a web service
You can modify the definition of a query that has been published as a web
service at any time. Editing a query web service can change the associated
"WSDL", and can break the link that is used by other users to communicate
with the web service.
Business Objects recommends that you notify users of any changes you
make.
1. From the Query Catalog page, select the query that you want to edit.
2. Do one of the following:
• Select Query > Edit.
• Double click a query.
• Right click a query and select "Edit" from the catalog list.
The "Publish as a Web Service Wizard" starts.
3. Follow the wizard to edit the query and then republish the query.
To rename a query
You can rename a query in the Query Catalog. The new name applies
immediately. You do not have to republish the query to apply the new name,
as the web service is identified in the CMS by a unique identifier (CUID)
instead of the query name as in previous releases.
1. From the Query Catalog page, do one of the following:
• Double click a query in the list.
38 Query as a Web Service

Managing queries as web services
To delete a query as a web service
• Select a query in the list, and SelectQuery > Rename
The query is highlighted.
2. Type a new name.
The new name applies immediately.
To delete a query as a web service
You can delete a query from the Query Catalog list.
• Do one of the following:
• Select a query listed in the Query Catalog page and select Edit >
Delete.
• Right click a query in the Query Catalog list and select "Delete" from
the list.
The query is removed from the Host.
To copy and paste a query as a web
5
service
You can copy a query and past queries between folders in the Query Catalog.
Ensure that you have the appropriate user permissions to perform the copy
operation.
1. Do one of the following:
• Select a query in the Query Catalog list and select Edit > Copy.
• Right click a query in the Query Catalog list and select "Copy" from
the right click list.
2. Click where you want to paste the query copy, and either select Edit >
Paste or right click and select "Paste" from the list.
The copied query appears in the Query Catalog list.
To view query properties
You can view query properties from the Query Catalog page.
1. In the Query Catalog page, select a query in the list. If necessary, open
folders to browse to the query.
Query as a Web Service 39

Managing queries as web services
5
To view available query web service instances
The properties display on the right side of the query list.
2. Click the URL.
The link to the query description is displayed in a web browser.WSDL
definition opens in your web browser.
3. Click the WSDL link in the web page to see the WSDL.
To view available query web service
instances
You can view in a web browser, available instances of Query as a Web
Server.
• Open a web browser, and go to the following URL:dswsbobje
http://<name of server>:<Tomcat port number>/dswsbobje/
qaawsservices
40 Query as a Web Service

Managing queries as web services
How to deploy queries to another web server
How to deploy queries to another web
server
This section explains how to deploy to another server. You do this by copying
a Query as a Web Service definition from one server to another. For example,
you can move a query definition from a development server to a test or
production server.
To deploy to another server, you have a choice of the following methods:
• Query as a Web Service
An advantage of this method is that the query will automatically point to
the web server on the new system.
• Import Wizard
• BIAR file
Note:
Before starting, make sure the universe and users are the same on both
machines. Use the Import Wizard or BIAR files to import universes and users.
It is important to have the same CUID during Import Wizard operations.
5
To deploy to another server using the Query as a Web Service client tool
Using Query as a Web Service client, you can deploy queries to another
server once, using the same service name.
You can use the Deploy to another server option between two servers that
have the same version of Query as a Web Service installed. It is not possible
to migrate queries from one version to another using this option.
1. In the Query Catalog, select the Query as a Web Service whose definition
you want to copy.
2. Click Deploy to another server.
The Select Your Credentials dialog box appears.
3. Complete the information for the system on which you want to deploy the
Web Services, and then click OK.
Query as a Web Service 41

Managing queries as web services
5
How to deploy queries to another web server
The Query as a Web Service appears in the Publish Query as a Web
Service Wizard.
4. Publish the Query as a Web Service to the new system.
Deploying a Query as a Web Service definition to another server automatically
changes the WSDL location and the services execution location.
Note:
You can customize this service-based URL using the wizard. You can also
make it dynamic in an Xcelsius project by using the Input Values text box of
the Web Services Connectivity. Using this functionality, you can switch a
dashboard from development to production by simply changing the URL.
You cannot deploy the same query Service Name more than once to the
same server.
To deploy Query as a Web Service from Import Wizard
To deploy using the Import Wizard, import the Query as a Web Service
definition from the source server to the destination server.
1. Launch the Import Wizard on the source server.
2. After logging in to the source CMS, select the target file to which you will
export the definitions.
3. In the Select objects to import pane of the Import Wizard dialog box,
select Import folders and objects then select Import application folders
and objects.
4. In the Select application folders and objects pane of the Import Wizard
dialog box, expand the QaaWS Folderthen the Query as a Web Service
definitions or Service Names you want.
5. Continue through the remaining steps of the Import Wizard by clicking
Next.
6. Open the Import Wizard on the destination server.
7. In the Source Environment dialog box, select the source file to which you
exported the definitions.
8. Log into the destination CMS.
42 Query as a Web Service

Managing queries as web services
How to deploy queries to another web server
9. In the Select objects to import pane of the Import Wizard dialog box,
select Import folders and objects then select Import application folders
and objects.
10. In the Select application folders and objects pane of the Import Wizard
dialog box, select the Query as a Web Service definitions you want.
11. Continue through the remaining steps of the Import Wizard by clicking
Next.
12. After importing, point the newly-deployed query definition to the web
server on the destination system.
To deploy Query as a Web Service from a BIAR file
Make sure the Import Wizard is installed on both the source and destination
server.
1. Open the Import Wizard on the source server.
2. After logging in to the source CMS, select the target BIAR file to which
you will export the definitions.
3. In the Select objects to import pane of the Import Wizard dialog box,
select Import folders and objects then select Import application folders
and objects.
4. In the Select application folders and objects pane of the Import Wizard
dialog box, expand the QaaWS Folderthen the Query as a Web Service
definitions or Service Names you want.
5. Continue through the remaining steps of the Import Wizard.
6. Open the Import Wizard on the destination server.
7. In the Source Environment dialog box, select the BIAR file to which you
exported the definitions.
8. Log into the destination CMS.
9. In the Select Objects to Import dialog box, select Import folders and
objects > Import application folders and objects.
10. In the Select Application Folders and Objects dialog box, select the Query
as a Web Service definitions you want.
11. Continue through the remaining steps of the Import Wizard.
12. After importing, point the newly-deployed query definition to the web
server on the destination system.
5
Query as a Web Service 43

Managing queries as web services
5
To deploy to another server using the Query as a Web Service client tool
To deploy to another server using the Query as a Web Service client tool
Using Query as a Web Service client, you can deploy queries to another
server once, using the same service name.
You can use the Deploy to another server option between two servers that
have the same version of Query as a Web Service installed. It is not possible
to migrate queries from one version to another using this option.
1. In the Query Catalog, select the Query as a Web Service whose definition
you want to copy.
2. Click Deploy to another server.
The Select Your Credentials dialog box appears.
3. Complete the information for the system on which you want to deploy the
Web Services, and then click OK.
The Query as a Web Service appears in the Publish Query as a Web
Service Wizard.
4. Publish the Query as a Web Service to the new system.
Deploying a Query as a Web Service definition to another server automatically
changes the WSDL location and the services execution location.
Note:
You can customize this service-based URL using the wizard. You can also
make it dynamic in an Xcelsius project by using the Input Values text box of
the Web Services Connectivity. Using this functionality, you can switch a
dashboard from development to production by simply changing the URL.
You cannot deploy the same query Service Name more than once to the
same server.
To deploy to another server using the Query as a Web
Service client tool
Using Query as a Web Service client, you can deploy queries to another
server once, using the same service name.
44 Query as a Web Service

Managing queries as web services
To deploy to another server using the Query as a Web Service client tool
You can use the Deploy to another server option between two servers that
have the same version of Query as a Web Service installed. It is not possible
to migrate queries from one version to another using this option.
1. In the Query Catalog, select the Query as a Web Service whose definition
you want to copy.
2. Click Deploy to another server.
The Select Your Credentials dialog box appears.
3. Complete the information for the system on which you want to deploy the
Web Services, and then click OK.
The Query as a Web Service appears in the Publish Query as a Web
Service Wizard.
4. Publish the Query as a Web Service to the new system.
Deploying a Query as a Web Service definition to another server automatically
changes the WSDL location and the services execution location.
Note:
You can customize this service-based URL using the wizard. You can also
make it dynamic in an Xcelsius project by using the Input Values text box of
the Web Services Connectivity. Using this functionality, you can switch a
dashboard from development to production by simply changing the URL.
5
You cannot deploy the same query Service Name more than once to the
same server.
To deploy Query as a Web Service from Import Wizard
To deploy using the Import Wizard, import the Query as a Web Service
definition from the source server to the destination server.
1. Launch the Import Wizard on the source server.
2. After logging in to the source CMS, select the target file to which you will
export the definitions.
3. In the Select objects to import pane of the Import Wizard dialog box,
select Import folders and objects then select Import application folders
and objects.
Query as a Web Service 45

Managing queries as web services
5
To deploy to another server using the Query as a Web Service client tool
4. In the Select application folders and objects pane of the Import Wizard
dialog box, expand the QaaWS Folderthen the Query as a Web Service
definitions or Service Names you want.
5. Continue through the remaining steps of the Import Wizard by clicking
Next.
6. Open the Import Wizard on the destination server.
7. In the Source Environment dialog box, select the source file to which you
exported the definitions.
8. Log into the destination CMS.
9. In the Select objects to import pane of the Import Wizard dialog box,
select Import folders and objects then select Import application folders
and objects.
10. In the Select application folders and objects pane of the Import Wizard
dialog box, select the Query as a Web Service definitions you want.
11. Continue through the remaining steps of the Import Wizard by clicking
Next.
12. After importing, point the newly-deployed query definition to the web
server on the destination system.
To deploy Query as a Web Service from a BIAR file
Make sure the Import Wizard is installed on both the source and destination
server.
1. Open the Import Wizard on the source server.
2. After logging in to the source CMS, select the target BIAR file to which
you will export the definitions.
3. In the Select objects to import pane of the Import Wizard dialog box,
select Import folders and objects then select Import application folders
and objects.
4. In the Select application folders and objects pane of the Import Wizard
dialog box, expand the QaaWS Folderthen the Query as a Web Service
definitions or Service Names you want.
5. Continue through the remaining steps of the Import Wizard.
6. Open the Import Wizard on the destination server.
7. In the Source Environment dialog box, select the BIAR file to which you
exported the definitions.
46 Query as a Web Service

Managing queries as web services
To deploy Query as a Web Service from Import Wizard
8. Log into the destination CMS.
9. In the Select Objects to Import dialog box, select Import folders and
objects > Import application folders and objects.
10. In the Select Application Folders and Objects dialog box, select the Query
as a Web Service definitions you want.
11. Continue through the remaining steps of the Import Wizard.
12. After importing, point the newly-deployed query definition to the web
server on the destination system.
To deploy Query as a Web Service from
Import Wizard
To deploy using the Import Wizard, import the Query as a Web Service
definition from the source server to the destination server.
1. Launch the Import Wizard on the source server.
2. After logging in to the source CMS, select the target file to which you will
export the definitions.
3. In the Select objects to import pane of the Import Wizard dialog box,
select Import folders and objects then select Import application folders
and objects.
4. In the Select application folders and objects pane of the Import Wizard
dialog box, expand the QaaWS Folderthen the Query as a Web Service
definitions or Service Names you want.
5. Continue through the remaining steps of the Import Wizard by clicking
Next.
6. Open the Import Wizard on the destination server.
7. In the Source Environment dialog box, select the source file to which you
exported the definitions.
8. Log into the destination CMS.
9. In the Select objects to import pane of the Import Wizard dialog box,
select Import folders and objects then select Import application folders
and objects.
10. In the Select application folders and objects pane of the Import Wizard
dialog box, select the Query as a Web Service definitions you want.
11. Continue through the remaining steps of the Import Wizard by clicking
Next.
5
Query as a Web Service 47

Managing queries as web services
5
To deploy Query as a Web Service from Import Wizard
12. After importing, point the newly-deployed query definition to the web
server on the destination system.
To deploy to another server using the Query as a Web Service client tool
Using Query as a Web Service client, you can deploy queries to another
server once, using the same service name.
You can use the Deploy to another server option between two servers that
have the same version of Query as a Web Service installed. It is not possible
to migrate queries from one version to another using this option.
1. In the Query Catalog, select the Query as a Web Service whose definition
you want to copy.
2. Click Deploy to another server.
The Select Your Credentials dialog box appears.
3. Complete the information for the system on which you want to deploy the
Web Services, and then click OK.
The Query as a Web Service appears in the Publish Query as a Web
Service Wizard.
4. Publish the Query as a Web Service to the new system.
Deploying a Query as a Web Service definition to another server automatically
changes the WSDL location and the services execution location.
Note:
You can customize this service-based URL using the wizard. You can also
make it dynamic in an Xcelsius project by using the Input Values text box of
the Web Services Connectivity. Using this functionality, you can switch a
dashboard from development to production by simply changing the URL.
You cannot deploy the same query Service Name more than once to the
same server.
48 Query as a Web Service

Managing queries as web services
To deploy Query as a Web Service from Import Wizard
To deploy Query as a Web Service from Import
Wizard
To deploy using the Import Wizard, import the Query as a Web Service
definition from the source server to the destination server.
1. Launch the Import Wizard on the source server.
2. After logging in to the source CMS, select the target file to which you will
export the definitions.
3. In the Select objects to import pane of the Import Wizard dialog box,
select Import folders and objects then select Import application folders
and objects.
4. In the Select application folders and objects pane of the Import Wizard
dialog box, expand the QaaWS Folderthen the Query as a Web Service
definitions or Service Names you want.
5. Continue through the remaining steps of the Import Wizard by clicking
Next.
6. Open the Import Wizard on the destination server.
7. In the Source Environment dialog box, select the source file to which you
exported the definitions.
8. Log into the destination CMS.
9. In the Select objects to import pane of the Import Wizard dialog box,
select Import folders and objects then select Import application folders
and objects.
10. In the Select application folders and objects pane of the Import Wizard
dialog box, select the Query as a Web Service definitions you want.
11. Continue through the remaining steps of the Import Wizard by clicking
Next.
12. After importing, point the newly-deployed query definition to the web
server on the destination system.
5
To deploy Query as a Web Service from a BIAR file
Make sure the Import Wizard is installed on both the source and destination
server.
1. Open the Import Wizard on the source server.
Query as a Web Service 49

Managing queries as web services
5
To deploy Query as a Web Service from a BIAR file
2. After logging in to the source CMS, select the target BIAR file to which
you will export the definitions.
3. In the Select objects to import pane of the Import Wizard dialog box,
select Import folders and objects then select Import application folders
and objects.
4. In the Select application folders and objects pane of the Import Wizard
dialog box, expand the QaaWS Folderthen the Query as a Web Service
definitions or Service Names you want.
5. Continue through the remaining steps of the Import Wizard.
6. Open the Import Wizard on the destination server.
7. In the Source Environment dialog box, select the BIAR file to which you
exported the definitions.
8. Log into the destination CMS.
9. In the Select Objects to Import dialog box, select Import folders and
objects > Import application folders and objects.
10. In the Select Application Folders and Objects dialog box, select the Query
as a Web Service definitions you want.
11. Continue through the remaining steps of the Import Wizard.
12. After importing, point the newly-deployed query definition to the web
server on the destination system.
To deploy Query as a Web Service from
a BIAR file
Make sure the Import Wizard is installed on both the source and destination
server.
1. Open the Import Wizard on the source server.
2. After logging in to the source CMS, select the target BIAR file to which
you will export the definitions.
3. In the Select objects to import pane of the Import Wizard dialog box,
select Import folders and objects then select Import application folders
and objects.
4. In the Select application folders and objects pane of the Import Wizard
dialog box, expand the QaaWS Folderthen the Query as a Web Service
definitions or Service Names you want.
5. Continue through the remaining steps of the Import Wizard.
50 Query as a Web Service

Managing queries as web services
To deploy Query as a Web Service from a BIAR file
6. Open the Import Wizard on the destination server.
7. In the Source Environment dialog box, select the BIAR file to which you
exported the definitions.
8. Log into the destination CMS.
9. In the Select Objects to Import dialog box, select Import folders and
objects > Import application folders and objects.
10. In the Select Application Folders and Objects dialog box, select the Query
as a Web Service definitions you want.
11. Continue through the remaining steps of the Import Wizard.
12. After importing, point the newly-deployed query definition to the web
server on the destination system.
To deploy to another server using the Query as a Web Service client tool
Using Query as a Web Service client, you can deploy queries to another
server once, using the same service name.
5
You can use the Deploy to another server option between two servers that
have the same version of Query as a Web Service installed. It is not possible
to migrate queries from one version to another using this option.
1. In the Query Catalog, select the Query as a Web Service whose definition
you want to copy.
2. Click Deploy to another server.
The Select Your Credentials dialog box appears.
3. Complete the information for the system on which you want to deploy the
Web Services, and then click OK.
The Query as a Web Service appears in the Publish Query as a Web
Service Wizard.
4. Publish the Query as a Web Service to the new system.
Deploying a Query as a Web Service definition to another server automatically
changes the WSDL location and the services execution location.
Note:
You can customize this service-based URL using the wizard. You can also
make it dynamic in an Xcelsius project by using the Input Values text box of
Query as a Web Service 51

Managing queries as web services
5
To deploy Query as a Web Service from a BIAR file
the Web Services Connectivity. Using this functionality, you can switch a
dashboard from development to production by simply changing the URL.
You cannot deploy the same query Service Name more than once to the
same server.
To deploy Query as a Web Service from Import Wizard
To deploy using the Import Wizard, import the Query as a Web Service
definition from the source server to the destination server.
1. Launch the Import Wizard on the source server.
2. After logging in to the source CMS, select the target file to which you will
export the definitions.
3. In the Select objects to import pane of the Import Wizard dialog box,
select Import folders and objects then select Import application folders
and objects.
4. In the Select application folders and objects pane of the Import Wizard
dialog box, expand the QaaWS Folderthen the Query as a Web Service
definitions or Service Names you want.
5. Continue through the remaining steps of the Import Wizard by clicking
Next.
6. Open the Import Wizard on the destination server.
7. In the Source Environment dialog box, select the source file to which you
exported the definitions.
8. Log into the destination CMS.
9. In the Select objects to import pane of the Import Wizard dialog box,
select Import folders and objects then select Import application folders
and objects.
10. In the Select application folders and objects pane of the Import Wizard
dialog box, select the Query as a Web Service definitions you want.
11. Continue through the remaining steps of the Import Wizard by clicking
Next.
12. After importing, point the newly-deployed query definition to the web
server on the destination system.
52 Query as a Web Service

Managing queries as web services
To deploy Query as a Web Service from a BIAR file
To deploy Query as a Web Service from a BIAR file
Make sure the Import Wizard is installed on both the source and destination
server.
1. Open the Import Wizard on the source server.
2. After logging in to the source CMS, select the target BIAR file to which
you will export the definitions.
3. In the Select objects to import pane of the Import Wizard dialog box,
select Import folders and objects then select Import application folders
and objects.
4. In the Select application folders and objects pane of the Import Wizard
dialog box, expand the QaaWS Folderthen the Query as a Web Service
definitions or Service Names you want.
5. Continue through the remaining steps of the Import Wizard.
6. Open the Import Wizard on the destination server.
7. In the Source Environment dialog box, select the BIAR file to which you
exported the definitions.
8. Log into the destination CMS.
9. In the Select Objects to Import dialog box, select Import folders and
objects > Import application folders and objects.
10. In the Select Application Folders and Objects dialog box, select the Query
as a Web Service definitions you want.
11. Continue through the remaining steps of the Import Wizard.
12. After importing, point the newly-deployed query definition to the web
server on the destination system.
5
Query as a Web Service 53
Managing queries as web services
5
Deploying Query as a Web Server over multiple web servers
Deploying Query as a Web Server over
multiple web servers
To configure Query as a Web Service Client to connect to a reverse proxy web server
Reverse proxy is a network address translation of a machine from a URL in
a given network to a URL in another external network. Since Query as a
Web Service client binds to the Report Engine, Query and BICatalog Web
Service you must specify the external URL of the Web Services
wsresource4=QueryService|query web service alone|http://[myserv
er.mycompany.com]/dswsbobje/services/query
1. Locate the dsws.properties file.
This file is located in dswsbobje web application.
2. Update the following properties:
wsresource1
wsresource2
wsresource4
54 Query as a Web Service
Property valueProperty name
ReportEngine|reportengine web ser
vicealone|http://[myserver.mycompany.com]
/dswsbobje/services/reportengine
BICatalog|bicatalog web service
alone|[myserver.mycompany.com] dswsbob
je/services/bicatalog
QueryService|query web service
alone|http:// [myserver.mycompa
ny.com]/dswsbobje/services/query

Consuming queries as web services with different applications
6

Consuming queries as web services with different applications
6
Consuming a query as a web service using WSDL
Consuming a query as a web service
using WSDL
WSDL is an XML-based description of how to communicate using the web
service; that is, the protocol bindings and message formats required to interact
with the Web Services listed in its directory.
The supported operations and messages are described on a high level and
then bound to a concrete network protocol and message format. WSDL is
often used in combination with SOAP and XML schema to provide Web
Services via the Internet.
A client program connecting to a web service can read the WSDL to
determine what functions are available on the server.
To find the WSDL for a Query as a Web Service, select it in the Query
Catalog.
Consuming a query as a web service in Crystal Xcelsius
To consume a query as a web service inside Crystal Xcelsius, use the Web
Service Connector.
Note:
The information on consuming queries as web services in Crystal Xcelsius
applies to the version prior to Xcelsius 8. Using web services and descriptions
of the Query as a Web Service API are described in the updated online
version of this documentation.
The Web Service Connector component allows a Flash document created
in Xcelsius to communicate with Query as a Web Service through SOAP,
using point and click. The Xcelsius Flash document is self-contained and
communicates with the web service to display data visually. The only
prerequisite is that there be a SOAP-based web service available to the
Flash document.
The Web Service Connector component, when activated, creates a
SOAP-based message (basically an XML document) and sends it to the web
56 Query as a Web Service

service. The web service responds with a SOAP-based message of its own.
The Web Service Connector component then sends this data to all the other
components, resulting in a live visual representation of your data.
There are many public web services available, and many different toolkits
and packages for SOAP-based web services. To use public web services
and packages that already have a web service on top, you only need a WSDL
document for the web service. For Query as a Web Service , you can find
the WSDL in the properties of each web service by selecting it in the Query
Catalog page.
See the Crystal Xcelsius User Guides for more information.
Cross-domain issue
After downloading the Xcelsius widget from the web, you may encounter
difficulty retrieving data with Query as a Web Service if the Flash and the
client tool come from different web domains.
This occurs for security reasons related to Macromedia Flash. The Flash
displayed in a browser is not permitted to access data residing outside the
web domain from which the Flash file format (SWF) originated.
Consuming queries as web services with different applications
Consuming a query as a web service in Crystal Xcelsius
6
The solution depends on whether your Xcelsius server and the Query as a
Web Service client tool are on the same or different machines.
Same machine
Open the Optional Parameters dialog box from the Advanced parameters
button and modify the Web Service Base URL so that it matches the web
domain from which you downloaded Xcelsius.
Different machines
For instructions, go to:
http://www.adobe.com/cfusion/knowledgebase/index.cfm?id=tn_14213
Query as a Web Service 57

Consuming queries as web services with different applications
6
Consuming a query as a web service in Crystal Xcelsius
To select the web service
Selecting the web service involves pointing the Web Service Connector
component to the WSDL document.
1. When working on an Excel spreadsheet, double-click the Web Service
Connector component to open the Properties panel.
2. Click Select Web Service.
The Select Web Service dialog box appears.
3. In the WSDL URL box, type or paste the location of the WSDL document.
4. Click Submit.
If there was an error, the WSDL document may not be fully validated or
it may not meet requirements of the Web Service Connector component.
5. In the Methods list, select the method you want to bind with.
For a given web service, you can bind to only one method per component.
6. Click OK.
The input and output messages are now available for you to tie to your
data.
Input messages
For input messages, only elements can be tied to data.
Use the "-" button to remove folders and elements. This prevents the folder
or field from being sent in the message.
The "+" button can be used to add a folder or a repeating element.
Output messages
For output messages, both elements and folders can be tied to data.
58 Query as a Web Service

Consuming queries as web services with different applications
Selecting a folder displays the number of columns in that folder. When you
tie this to data, each element in the folder is assigned to a column in the
order the elements appear.
Selecting fewer columns limits the data that is bound to the number of
columns that you select. Selecting additional columns inserts blank columns.
If an element is repeating underneath the folder, only the first element will
be mapped to the column. The folders underneath the selected folder cannot
be mapped.
Use the "-" button to remove unnecessary elements. This contracts the view
of the tree and may reduce processing time in the Flash document.
Authentication in Xcelsius
Xcelsius provides an authentication mechanism that enables you to avoid
logging into InfoView twice with the same session ID.
Keep in mind the following rules if you customize authentication:
• An existing session ID is used only if the user name and password are
blank (if they are not hard coded or not passed as input values captured
by a dialog). This occurs when Query as a Web Service is running in
InfoView or Dashboard Manager.
Consuming a Query as a Web Service in Crystal Reports
6
• If the user name and password are not blank, then use these values to
authenticate the user. No session is created. This is the most scalable
scenario and is the preferred option for large-scale usage.
• If there is no pre-existing session (and username and password are blank),
Xcelsius displays the standard security dialog, in which a session is
created. This occurs when Xcelsius designers do not build their own
security dialog.
Consuming a Query as a Web Service in
Crystal Reports
This section explains how Crystal Reports can consume Query as a Web
Service as a data source.
Query as a Web Service 59

Consuming queries as web services with different applications
6
Consuming a Query as a Web Service in Microsoft Office InfoPath
1. In the Crystal Reports Standard Report Creation Wizard, on the Data
page, create a new XML connection.
2. In the XML Type and Location page of the XML dialog box, select Use
Web Server Data Source, and then click Next.
The Web Services Location page appears.
3. In the HTTP WSDL URL field, type the WSDL of the selected Query as
a Web Service.
The Authentication page appears.
4. Set Basic authentication (if you haven't already), and then click Next.
The Web Service, Port, and Method page appears.
5. Complete the information, and then click Finish.
The Enter Values dialog box appears.
6. Set the Web Services parameters with login, password, and prompts,
and then click OK.
The Data page of the Standard Report Creation Wizard re-appears.
7. Select one of the following options and click Next.
• runQueryAsServiceResponse
• runQueryAsServicetable
• runQueryAsServicerow
The Fields page appears.
8. Select the field to build your query on, and then click Next.
A report is created.
9. Refresh the report.
The correct parameters are shown in the report.
Consuming a Query as a Web Service in
Microsoft Office InfoPath
This section explains how Microsoft Office InfoPath can consume Query as
a Web Service as a data source.
60 Query as a Web Service

Consuming queries as web services with different applications
Consuming a Query as a Web Service in Microsoft Office InfoPath
1. In InfoPath, access the Design a Form task list.
2. Click New From Data Connection.
The Data Connection Wizard appears.
3. Select Web Service, and then click Next.
4. Select Receive and Submit Data, and then click Next.
5. Type or browse for the WSDL file, and then click Next.
6. Select the web service operation, and then click Next.
7. Enter a name for the data connection, and then click Next.
8. Type or browse for the web service you want users to submit their forms
to, and then click Next.
The Parameters page appears.
6
9. For each parameter, select Entire Form, and then click Next.
10. Type a name for the data connection submitting data, and then click Next.
The data form appears on the left, and the data source on the right.
Query as a Web Service 61

Consuming queries as web services with different applications
6
Consuming a Query as a Web Service in Microsoft Office InfoPath
11. Build the form, and then click Run Query.
62 Query as a Web Service

Query as a Web Service Best Practices and Limitations
7

Query as a Web Service Best Practices and Limitations
7
Best Practices using Query as a Web Service
Best Practices using Query as a Web
Service
More tips for creating Query as a Web Service
The documentation for Query as a Web Service is updated regularly. To
view the most up-to-date source, go to the online documentation library and
use the Search field to find the latest Query as a Web Service best practices.
http://support.businessobjects.com/documentation/product_guides/
Limitations using Query as a Web Service
You may encounter certain limitations when using Query as a Web Service.
These can occur when creating a query, or at run-time.
Limitations when creating a query
• Multi-cubes cannot be used
• Combined queries and subqueries cannot be used
• IndexAware prompts are not implemented
Also, keep in mind that the name of the Web Service and its metadata are
encoded to support various programming languages (such as C#, Java, C++,
VB, Flash).
Limitations at query run-time
• Object restrictions cannot be used
64 Query as a Web Service
Get More Help
A

A
Get More Help
Online documentation library
Business Objects offers a full documentation set covering all products and
their deployment. The online documentation library has the most up-to-date
version of the Business Objects product documentation. You can browse
the library contents, do full-text searches, read guides on line, and download
PDF versions. The library is updated regularly with new content as it becomes
available.
To access the online documentation library, visit http://help.sap.com/ and
click Business Objects at the top of the page.
Additional developer resources
https://boc.sdn.sap.com/developer/library/
Online customer support
The Business Objects Customer Support web site contains information about
Customer Support programs and services. It also has links to a wide range
of technical information including knowledgebase articles, downloads, and
support forums.
http://www.businessobjects.com/support/
Looking for the best deployment solution for your company?
Business Objects consultants can accompany you from the initial analysis
stage to the delivery of your deployment project. Expertise is available in
relational and multidimensional databases, in connectivities, database design
tools, customized embedding technology, and more.
For more information, contact your local sales office, or contact us at:
http://www.businessobjects.com/services/consulting/
Looking for training options?
From traditional classroom learning to targeted e-learning seminars, we can
offer a training package to suit your learning needs and preferred learning
style. Find more information on the Business Objects Education web site:
http://www.businessobjects.com/services/training
66 Query as a Web Service

Get More Help
Send us your feedback
Do you have a suggestion on how we can improve our documentation? Is
there something you particularly like or have found useful? Drop us a line,
and we will do our best to ensure that your suggestion is included in the next
release of our documentation:
mailto:documentation@businessobjects.com
Note:
If your issue concerns a Business Objects product and not the documentation,
please contact our Customer Support experts. For information about
Customer Support visit: http://www.businessobjects.com/support/.
Business Objects product information
For information about the full range of Business Objects products, visit:
http://www.businessobjects.com.
A
Query as a Web Service 67

A
Get More Help
68 Query as a Web Service

Index
A
architecture
understanding 9
C
O
online documentation
accessing 64
overview 8
CMS database
preventing failures 17
configuring
reverse proxy 54
copying
how to 39
D
deleting
queries 39
deploying
webservices to another server, publishing
webservices to another server 41, 44,
48, 51
documentation
accessing online library 64
L
launching 21
logging in 20
Q
queries
copying 39
deleting 39
Query as a Web Service
understanding 8
R
reverse proxy
configuring 54
S
starting 21
first time 20
T
tips
using Query as a Web Service 64
troubleshooting
fault tolerance options 17
Query as a Web Service 69

Index
70 Query as a Web Service
 Loading...