

Page 1

BusinessObjects Enterprise XI 3.1
Import Wizard Guide
BusinessObjects Enterprise XI 3.1
Page 2

Copyright
© 2008 Business Objects, an SAP company. All rights reserved. Business Objects
owns the following U.S. patents, which may cover products that are offered and
licensed by Business Objects: 5,295,243; 5,339,390; 5,555,403; 5,590,250;
5,619,632; 5,632,009; 5,857,205; 5,880,742; 5,883,635; 6,085,202; 6,108,698;
6,247,008; 6,289,352; 6,300,957; 6,377,259; 6,490,593; 6,578,027; 6,581,068;
6,628,312; 6,654,761; 6,768,986; 6,772,409; 6,831,668; 6,882,998; 6,892,189;
6,901,555; 7,089,238; 7,107,266; 7,139,766; 7,178,099; 7,181,435; 7,181,440;
7,194,465; 7,222,130; 7,299,419; 7,320,122 and 7,356,779. Business Objects and
its logos, BusinessObjects, Business Objects Crystal Vision, Business Process
On Demand, BusinessQuery, Cartesis, Crystal Analysis, Crystal Applications,
Crystal Decisions, Crystal Enterprise, Crystal Insider, Crystal Reports, Crystal
Vision, Desktop Intelligence, Inxight and its logos , LinguistX, Star Tree, Table
Lens, ThingFinder, Timewall, Let There Be Light, Metify, NSite, Rapid Marts,
RapidMarts, the Spectrum Design, Web Intelligence, Workmail and Xcelsius are
trademarks or registered trademarks in the United States and/or other countries
of Business Objects and/or affiliated companies. SAP is the trademark or registered
trademark of SAP AG in Germany and in several other countries. All other names
mentioned herein may be trademarks of their respective owners.
Third-party
Contributors
Business Objects products in this release may contain redistributions of software
licensed from third-party contributors. Some of these individual components may
also be available under alternative licenses. A partial listing of third-party
contributors that have requested or permitted acknowledgments, as well as required
notices, can be found at: http://www.businessobjects.com/thirdparty
2008-09-03
Page 3

Contents
Getting Started 7Chapter 1
Import Wizard concepts 11Chapter 2
Importing objects.......................................................................................12
Security migration overview.......................................................................13
Delegated administration...........................................................................14
Life cycle management..............................................................................15
Chapter 3
Importing information From Crystal Enterprise or BusinessObjects
Enterprise 17
What kinds of objects can be imported?....................................................18
Importing users and groups.......................................................................19
Importing folders........................................................................................20
Importing report objects.............................................................................21
Importing rights..........................................................................................22
Importing events, servers, and server groups...........................................22
Importing Information From BusinessObjects 5.x or 6.x 25Chapter 4
Before importing from BusinessObjects Enterprise 5.x/6.x.......................26
Ensure that you have appropriate rights..............................................26
To map the Import Wizard to Inbox and personal files.........................26
Export locally stored objects.................................................................27
Back up your source repository............................................................27
Importing objects from BusinessObjects Enterprise 5.x/6.x......................27
What kinds of objects can be imported?..............................................27
Security migration options....................................................................28
BusinessObjects Enterprise XI 3.1 Import Wizard Guide 3
Page 4

Contents
BusinessObjects documents................................................................30
Folders, domains, and categories........................................................32
Connections.........................................................................................33
Universes and universe connections...................................................35
Application Foundation objects............................................................37
Third-party documents.........................................................................37
Using the Import Wizard 39Chapter 5
Specifying the source environment...........................................................40
To specify BusinessObjects 5 or 6 as a source environment...............41
To specify an Application Foundation source.......................................42
To specify Crystal Enterprise 9 as a source environment....................42
To specify Crystal Enterprise 10 as a source environment..................43
To specify BusinessObjects Enterprise XI or XI Release 2 as a source
environment..........................................................................................43
To specify a BusinessObjects Enterprise XI 3.x source environment...44
To specify a Business Intelligence Archive Resource file as a source
environment..........................................................................................44
To specify a Text file as a source environment.....................................45
Specifying the destination environment.....................................................45
To set the destination environment......................................................47
Selecting objects to import.........................................................................47
Selecting an import scenario.....................................................................48
To select an import scenario when importing from BusinessObjects or XI
3.x.........................................................................................................49
To select an import scenario when importing from other versions.......53
Selecting incremental import options.........................................................56
Selecting security migration options .........................................................58
Selecting specific objects to import...........................................................59
To select users and groups..................................................................59
To select group import options.............................................................60
4 BusinessObjects Enterprise XI 3.1 Import Wizard Guide
Page 5

Contents
To populate database credentials for users.........................................60
To select access levels.........................................................................61
To select categories..............................................................................61
To select folders and objects................................................................62
To select application folders and objects..............................................62
To select import options for universes and connections.......................62
To select universe folders and universes.............................................64
To select import repository objects options..........................................65
To select import options for publications..............................................65
To select remote connections and replication jobs...............................66
To select personal documents and inbox documents..........................66
To select Broadcast Agent Publisher External Users and Groups.......66
To select Broadcast Agent Publisher Publications...............................67
To select Broadcast Agent Publisher Profiles......................................67
To select domains and documents.......................................................67
To select locales and platform options ................................................68
Finalizing the Import..................................................................................69
Free disk space warning......................................................................69
Preparing for import..............................................................................69
Completing the import..........................................................................69
Updating imported events..........................................................................71
Using text files with the Import Wizard 73Chapter 6
Text file format...........................................................................................74
Importing users, groups and profiles.........................................................74
Example Group record...............................................................................76
Importing data source credentials.............................................................77
Backing up and restoring server configuration settings 79Chapter 7
To back up server configuration settings to a BIAR file.............................81
BusinessObjects Enterprise XI 3.1 Import Wizard Guide 5
Page 6

Contents
To restore server configuration settings.....................................................81
Restoring server configuration scenarios.............................................83
To import nodes from one cluster to another ............................................93
Life Cycle Management 95Chapter 8
Promoting report objects............................................................................98
To promote report objects with existing universes.............................100
To promote report objects with new business views..........................101
To promote report objects with existing business views.....................102
Promoting universes and universe connections .....................................103
To promote universes and universe connections...............................103
Promoting users, groups, and object rights.............................................104
To promote new users and existing groups........................................105
To promote new groups with existing users.......................................106
To promote new object rights for existing users and groups..............107
Get More Help 109Appendix A
Index 113
6 BusinessObjects Enterprise XI 3.1 Import Wizard Guide
Page 7

Getting Started
1
Page 8

Getting Started
1
The Import Wizard provides a series of screens that guide you through the
process of importing and exporting Business Intelligence content such as
user accounts, groups, folders, reports, universes, security, servers, and
other objects. Various dialog boxes may appear depending on the source
environment and the types of information that you choose to import.
You can use the Import Wizard to import content from BusinessObjects,
Crystal Enterprise, or BusinessObjects Enterprise into your current
BusinessObjects Enterprise deployment. You can also export content from
a BusinessObjects Enterprise XI 3.x deployment to a Business Intelligence
Archive Resource (BIAR) file, or import content from a BIAR file to your
BusinessObjects Enterprise XI 3.x deployment.
You can choose to merge the contents of the source repository into the
destination repository, or you can update the destination with the contents
of the source CMS. You may also choose to import from or export to BIAR
(Business Intelligence Archive Resource) files.
You can also use the Import Wizard to back up XI 3.x server configuration
settings to a BIAR file, and restore server settings from an XI 3.x BIAR file
to an XI 3.x deployment.
Note:
Business Objects does not support moving Business Intelligence (BI) content
from a recent version of BusinessObjects Enteprise to an earlier version of
the same release using BIAR files, the Import Wizard, or any other Business
Objects Life Cycle Management (LCM) Tool. For example, reports,
documents, and any other content from a BusinessObjects Enterprise XI
Release 2 SP3 system cannot be moved to a BusinessObjects Enterprise
XI Release 2 SP2 environment.
Before starting this procedure, ensure that you have the Administrator account
credentials for both the source and the destination environments. You can
use a Delegated Administrator account for an XI 3.x source or destination
environment.
The overall process is divided into the following general procedures:
1. Specifying the source environment.
2. Specifying the destination environment.
3. Selecting the types of objects to import.
4. Selecting an Import Scenario, which determines whether to merge or
update the objects that you import.
8 BusinessObjects Enterprise XI 3.1 Import Wizard Guide
Page 9

5. Selecting the specific objects to import.
Getting Started
1
BusinessObjects Enterprise XI 3.1 Import Wizard Guide 9
Page 10

Getting Started
1
10 BusinessObjects Enterprise XI 3.1 Import Wizard Guide
Page 11
Import Wizard concepts
2
Page 12

Import Wizard concepts
2
Importing objects
Importing objects
When importing objects from a BusinessObjects 5.x, 6.x, Crystal Enterprise
10, or Business Objects XI, XI Release 2, or XI 3.x source environment, you
can specify what you want the Import Wizard to do when it finds objects on
the source and destination environments with the same name and path or
the same CUID.
Note:
When you are importing objects from Crystal Enterprise 9, the Import Wizard
uses the objects' CUID to identify matching object. It automatically renames
any source object that already exists on the destination environment, by
appending a number to the end of the name.
Importing objects from BusinessObjects 5.x, 6.x, or XI 3.x
When you are importing from a BusinessObjects 5.x or 6.x environment, or
from an XI 3.x source environment, you can choose to match objects by
name and path or by CUID. When you choose to match objects by CUID,
and the Import Wizard finds a matching object, you choose one of the
following:
• Update the destination object, and in case of a name conflict, rename the
object.
• Update the destination object, and in case of a name conflict, do not
import the object.
• Do not import the object.
When you choose to match objects by name and path, and the Import Wizard
finds a matching object, you can choose one of the following:
• Keep the destination object and import a renamed copy of the object.
• Update the destination object.
• Do not import the object.
Importing objects from other versions
When you are importing objects from Crystal Enterprise 10, Business Objects
XI, or XI Release 2, you can merge the source system with the destination
system, or update the destination system.
12 BusinessObjects Enterprise XI 3.1 Import Wizard Guide
Page 13

Import Wizard concepts
Security migration overview
When you merge the environments, the Import Wizard uses the name and
path of the source objects to determine whether those objects already exist
on the environment. The Wizard adds all of the selected objects from the
source to the destination CMS without overwriting objects in the destination
environment. All of the objects in the destination environment are preserved.
When you update the destination environment, objects in the source are
added to the destination CMS. If a source object has the same unique
identifier as an object in the destination environment, the destination object
is overwritten. If you do not want the Import Wizard to overwrite objects on
the destination on the "Incremental import" screen, you can choose to not
overwrite existing objects, rights, groups, and group memberships. In this
case, the objects that already exist on the destination are not overwritten by
the selected source objects.
If you are updating the destination environment and the Import Wizard finds
an object on the destination with the same name and path as an object that
you are importing but a different CUID, you have the option to Automatically
rename objects if an object with the same title already exists in the
destination folder. If you choose this option, the Import Wizard renames
the source object and imports it. If you don't choose this option, the Wizard
does not import the source object.
2
Incremental import options
If you are updating objects that already exist on the destination environment,
you can choose appropriate incremental import options. These provide you
with options to overwrite or not overwrite objects, universes, universe
connections, user and group membership, and object rights. For example,
even though you choose to update and overwrite report objects, you can
decide to not overwrite the universes and universe connections that your
reports use.
Related Topics
• Selecting an import scenario on page 48
• Selecting incremental import options on page 56
Security migration overview
When you use the Import Wizard, you can import content with or without
security rights. Which of these you choose will depend on several factors. If
you have a large or complex system you should consider migrating content
BusinessObjects Enterprise XI 3.1 Import Wizard Guide 13
Page 14

Import Wizard concepts
2
Delegated administration
without security, and then rebuilding security later using the higher degree
of control available in the new environment.
You can import objects without security by importing them without any users
or groups.
If you are importing content from a BusinessObjects 5.x or 6.x system, and
you want to import both objects and users/groups, you can still import the
objects without their rights. To do this, on the "Security Migration Options"
screen, select No, don't migrate security.
If you are importing content from a Crystal Enterprise or BusinessObjects
Enterprise system, and you are importing users or groups, any rights that
do not already exist on the XI 3.x system will be imported. The "Import
Scenarios" and "Incremental Import" screens provide you with options to
overwrite rights that already exist on the destination, or to leave those rights
untouched.
The import process allows you to choose whether to migrate rights exactly
as they are or to allow additional rights to be added after importing.
Delegated administration
You can use delegated administration to divide administrative tasks between
functional groups within your organization. For example, you may want people
from different departments to manage their own users and groups.
When you use the Import Wizard, you can log into a source and destination
environment for the import with an administrative account. You can also let
delegated administrators that have less than full administrative access to log
into XI 3.x source and destination environments and import only those users
and objects that they have access to.
If delegated administrators are importing objects from an XI 3.x system, they
require the View and Copy right on those objects. To import users, they
require the Modify User Password right.
If delegated administrators are importing objects that don't already exist on
the destination, they require the View, Copy, and Add rights on the folder or
area on the destination that the objects belong to. For example, if a delegated
administrator is importing Report A into Folder A on the destination, the
administrator requires View, Copy, and Add rights on Folder A.
14 BusinessObjects Enterprise XI 3.1 Import Wizard Guide
Page 15

If delegated administrators are importing objects that already exist on the
destination, they require the View, Edit, Copy, and Modify Rights rights on
the objects. For example, if a delegated administrator is importing Report A
, and that report already exists on the destination, the administrator requires
the View , Edit, Copy, and Modify Rights rights on Report A on the destination.
If delegated administrators are importing users, they require the Modify User
Password for those users, whether the users already exist on the destination
or not.
For more information on delegated administration, refer to the
BusinessObjects Enterprise Administrator's Guide.
Life cycle management
In addition to importing objects from previous versions to XI 3.x, the Import
Wizard also enables you to manage the life cycle of a deployment by moving
assets from one XI 3.x deployment to another XI 3.x deployment. This allows
you to modify and enhance reports and other objects on, for example, a
Development or Test environment, and then promote those objects to a
Production environment.
Import Wizard concepts
Life cycle management
2
The “Life Cycle Management Scenarios” chapter of this guide presents
scenarios that demonstrate how the Import Wizard can be used to promote
new and existing objects to a Production environment.
Related Topics
• Life Cycle Management on page 95
BusinessObjects Enterprise XI 3.1 Import Wizard Guide 15
Page 16

Import Wizard concepts
Life cycle management
2
16 BusinessObjects Enterprise XI 3.1 Import Wizard Guide
Page 17

Importing information From Crystal Enterprise or BusinessObjects Enterprise
3
Page 18

Importing information From Crystal Enterprise or BusinessObjects Enterprise
3
What kinds of objects can be imported?
The following sections describe importing objects from a Crystal Enterprise
or BusinessObjects Enterprise system to a BusinessObjects Enterprise XI
3.x system.
What kinds of objects can be imported?
The following types of objects can be imported from a Crystal Enterprise or
BusinessObjects Enterprise XI, XI Release 2, and XI 3.x source environment:
• Users and user groups
• Folders and objects
• Discussions
• Universes and connections
• Inbox, personal, and corporate documents
• Third-party ("agnostic") documents (such as .pdf, .ppt, .doc, .xls, .txt, .rtf)
• Personal and corporate categories
• Calendars
• Events
• Server Groups
• Servers
The following object types can be imported from a BusinessObjects Enterprise
XI 3.x source environment.
• Server intelligence objects
• Access levels
• Remote connections
• Replication jobs
Note:
• If you are importing unmanaged objects from Crystal Enterprise 9, you
must first upgrade the objects to an intermediate version and then import
the objects into XI 3.x.
18 BusinessObjects Enterprise XI 3.1 Import Wizard Guide
Page 19

Importing information From Crystal Enterprise or BusinessObjects Enterprise
You can use the Import Wizard to import managed objects from Crystal
Enterprise 9.
• The Import Wizard does not import Olapi reports (.car files) from Crystal
Enterprise 10.
Importing users and groups
The Import Wizard imports users and groups and their hierarchical
relationships. If you import a group that already exists on the destination
environment, you can choose to merge the groups that exist on both the
source and destination environments, or overwrite the destination group's
membership with the source group's membership.
If you merge source and destination groups, the Import Wizard updates the
destination's membership by adding the users who were members of the
group in the source environment. These additional users are added to
BusinessObjects Enterprise if their accounts do not exist already.
When you overwrite the destination's group membership with the source's
group membership, the Import Wizard replaces the destination group with
the source group. This means that if the destination group before the import
has members that don't exist on the source group, those members are lost
during the import.
Importing users and groups
3
To merge source and destination user groups, on the "Incremental import"
screen, ensure that you clear the Overwrite group and user membership
checkbox. To replace destination groups with source groups, ensure that
you select Overwrite group and user membership.
User licensing can affect the behavior of the Import Wizard. If the source
environment uses Concurrent licensing, the wizard imports all users as
Concurrent Users. However, if the source environment uses Named User
licensing, the wizard first checks the number of Named User license keys in
the destination environment. If there are enough Named User licenses in
the destination environment, the wizard imports all users as Named Users.
If there are not enough Named User licenses in the destination environment,
the wizard imports all users as Concurrent Users. For more information about
licensing, see the BusinessObjects Enterprise Administrator's Guide.
Note:
BusinessObjects Enterprise XI does not include a New Sign-Up feature.
However, if your Crystal Enterprise source environment includes users that
BusinessObjects Enterprise XI 3.1 Import Wizard Guide 19
Page 20

Importing information From Crystal Enterprise or BusinessObjects Enterprise
3
Importing folders
belong to the New Sign-Up group, the group is migrated to the destination
BusinessObjects Enterprise XI environment.
Aliases
If a user in the destination system has an alias that is identical to a user who
is being imported, the destination user keeps all aliases, and the imported
user loses that particular alias.
Windows AD
When importing users that employ Windows Active Directory authentication,
ensure that the administrative credentials are the same on both the source
and destination systems. Active Directory authentication must also be enabled
on the destination system.
LDAP
When importing users that employ LDAP authentication, the Host list and
Base LDAP name need to be the same on both the source and destination
systems. LDAP authentication must also be enabled on the destination
system.
Related Topics
• Importing objects on page 12
• Selecting an import scenario on page 48
• Selecting incremental import options on page 56
Importing folders
Folders are imported, whether or not they exist already in the destination
environment. To ensure that existing folders are not overwritten, make sure
you choose to rename the folders on the "Import scenarios" screen
If you are importing from Crystal Enterprise 10, or BusinessObjects Enterprise
XI or XI Release 2, and are matching objects by name and path, you can
choose the Automatically rename top-level folders that match top-level
folders on the destination system option on the "Import scenario" screen
to rename the source folders when you import them. If you don't select this
option, and the Import Wizard finds folders on the destination with the same
name and path, the Import Wizard doesn't import the source folders.
20 BusinessObjects Enterprise XI 3.1 Import Wizard Guide
Page 21

Importing information From Crystal Enterprise or BusinessObjects Enterprise
If you are matching objects by CUID, you can choose Automatically rename
objects if an object with that title already exists in the destination folder.
If you do not choose this option, the Import Wizard does not import the folder.
If you are importing from BusinessObjects Enterprise XI 3.x, are matching
by name and path, and do not want to overwrite existing folders, on the
"Import scenarios" screen select either Keep the destination object and
import a renamed copy of the object or Do not import the object.
If you choose to rename folders, the Import Wizard appends a number to
the end of any duplicated folder names to indicate the number of copies. For
example, if you import a folder called Sales Reports when a folder called
Sales Reports already exists, then the imported folder is added to
BusinessObjects Enterprise with the name Sales Reports(2).
Related Topics
• Importing objects on page 12
• Selecting an import scenario on page 48
Importing report objects
Importing report objects
3
The Import Wizard can import report objects, the report instances for each
report object, and the scheduling patterns that you have set up in the source
environment.
Supported reports are imported with their parent folders. If you do not want
to overwrite existing folders on the destination, on the "Import scenarios"
screen, ensure that you either choose to rename the folders from the source,
or choose to not import folders. If you choose to rename the source folders,
the Import Wizard appends a number to the end of any duplicated folder
names to indicate the number of copies.
When you import content from one deployment to another, you can ensure
that a particular user account retains ownership of its objects and scheduled
instances by importing the user along with the content. If you don't import
the user account, the ownership properties of its objects and instances are
reset to your current administrative account.
In the SDK, ownership is reflected by an object's SI_OWNERID property and
by a scheduled instances's SI_SUBMITTERID properties.
BusinessObjects Enterprise XI 3.1 Import Wizard Guide 21
Page 22

Importing information From Crystal Enterprise or BusinessObjects Enterprise
3
Importing rights
Related Topics
• Importing objects on page 12
• Selecting an import scenario on page 48
Importing rights
When you import folders and reports from one BusinessObjects Enterprise
system to another, the associated object rights are imported for every user
or group who is imported at the same time. If the user or group is not imported
at the same time, or if the user or group does not already exist on the
destination environment, the object rights are discarded.
If you do import the appropriate user or group, and the user or group already
exists by name in the destination environment, then the corresponding object
rights are imported and applied to the existing user or group.
If you are importing from a Crystal Enterprise 10 or BusinessObjects
Enterprise XI, XI Release 2, or XI 3.x source environment, you have the
additional option of not overwriting existing object rights on the destination
environment. To do this, on the "Incremental import" screen, ensure that you
clear the Overwrite object rights checkbox.
Related Topics
• Importing objects on page 12
• Selecting an import scenario on page 48
• Selecting incremental import options on page 56
Importing events, servers, and server groups
When you use the Import Wizard to import information from a Crystal
Enterprise 9 or later system, you have the additional option to import events,
servers, and server groups from the source environment.
The Import Wizard lets you import servers and server groups. If you choose
to import a server group without importing the servers in the group, the Import
Wizard does not import the servers. You can also manually add servers to
the imported group in the Central Management Console (CMC).
22 BusinessObjects Enterprise XI 3.1 Import Wizard Guide
Page 23

Importing information From Crystal Enterprise or BusinessObjects Enterprise
Importing events, servers, and server groups
For more information see the BusinessObjects Enterprise Administrator's
Guide.
Note:
• When importing report objects associated with a server group, if the server
group exists on the destination system, the report objects are added to
the existing group and the source system's server group is not imported.
• If you have jobs scheduled or pending on a server or server group that
you are importing, you might notice odd behavior on the destination system
with the individual jobs involved until they run or time out.
Objects that have server group restrictions lose the restrictions if the objects
are imported and the server group is not. For example, if a report is scheduled
to run only under server group A and that server group is not imported, the
report loses that restriction and will run under any server group. You need
to import the server group at the same time as the objects that use it to keep
the relationship between them.
The same logic applies for events: if an object is set up to wait for an event
or to trigger an event, you need to import the event at the same time as the
object. Otherwise, the object is imported without the dependency and no
longer waits for, or triggers, the event.
3
Note:
• If Event A is being imported from the source system but there is already
an Event A on the destination system, and it is a different type (for
example, a File event instead of a Custom event), the wizard removes
the dependency on Event A from the object when it is imported.
• Events are based on Event Servers. Because servers are not imported
from previous versions of BusinessObjects Enterprise, if you are importing
events, you must run an EventUpdater script to associate the events
with new event servers after you complete the import process. For more
information, see Updating imported events on page 71.
After you use the Import Wizard to import events to a destination environment,
you must run the EventUpdater script to associate the imported events with
the destniation Central Management Server (CMS).
Related Topics
• Backing up and restoring server configuration settings on page 79
• Updating imported events on page 71
BusinessObjects Enterprise XI 3.1 Import Wizard Guide 23
Page 24

Importing information From Crystal Enterprise or BusinessObjects Enterprise
Importing events, servers, and server groups
3
24 BusinessObjects Enterprise XI 3.1 Import Wizard Guide
Page 25

Importing Information From BusinessObjects 5.x or 6.x
4
Page 26

Importing Information From BusinessObjects 5.x or 6.x
4
Before importing from BusinessObjects Enterprise 5.x/6.x
The following sections describe importing objects from a BusinesObjects 5.x
or 6.x system to a BusinessObjects Enterprise XI 3.x system. For more
information, see the BusinessObjects 5/6 to XI 3.1 Migration Guide.
Before importing from BusinessObjects
Enterprise 5.x/6.x
Ensure that you have appropriate rights
Make sure you have the following rights:
• In version 6.x, you must have a General Supervisor profile.
• In XI 3.1, you must belong to the Administrator group in the CMS.
• To import any resource into the CMS, you must have the rights needed
to add objects to the destination folder to which the resource is assigned.
To map the Import Wizard to Inbox and personal files
On the Import Wizard machine, map the drives to the source environment
directories containing the deployment's .key files, personal documents,
categories, and users' Inboxes:
• $INSTALLDIR\locData for access to 5.1.x .key files
• $WISTORAGEDIR\user if you are importing personal documents and
categories
• $WISTORAGEDIR\mail if you are importing the read content of users'
Inbox folders
• $INSTALLDIR\nodes\<nodename>\<clustername>\locdata for access to
6.x .key files
• $INSTALLDIR\nodes\<nodename>\<clustername>\storage\user if you
are importing personal documents and categories
26 BusinessObjects Enterprise XI 3.1 Import Wizard Guide
Page 27

Importing Information From BusinessObjects 5.x or 6.x
Importing objects from BusinessObjects Enterprise 5.x/6.x
• $INSTALLDIR\nodes\<nodename>\<clustername>\storage\mail if you
are importing the read content of users' Inbox folders
Export locally stored objects
Objects that you are planning to import to the destination environment using
the Import Wizard must reside in the version 6.x repository.
If objects are stored locally on users' computers, you must make sure the
users export the objects to the repository before you begin the import.
Tip:
Create a specific category to store local content.
Back up your source repository
Business Objects strongly recommends backing up your 6.x source repository
before beginning the migration.
4
In addition, it is good practice to run the Import Wizard on a copy of the
source repository, and not on the production version. If you follow this
practice, make sure that you point all the domains to the copied repository,
so that the domains are no longer associated with the original (production)
repository.
Importing objects from BusinessObjects
Enterprise 5.x/6.x
What kinds of objects can be imported?
The following types of objects can be imported from BusinessObjects 5.x
and 6.x using the Import Wizard:
• Users and user groups
• Universes and connections
BusinessObjects Enterprise XI 3.1 Import Wizard Guide 27
Page 28

Importing Information From BusinessObjects 5.x or 6.x
4
Importing objects from BusinessObjects Enterprise 5.x/6.x
• Stored procedures
• Inbox, personal, and corporate documents
• Third-party ("agnostic") documents (such as .pdf, .ppt, .doc, .xls, .txt, .rtf)
• Personal and corporate categories
• Broadcast Agent Scheduler tasks that are supported in XI 3.x
• Application Foundation 6.x objects
• Third-party documents used by Application Foundation objects (includes
.svg, .xml, .swf, .csv, .gif, .jpg, .bmp, and .png)
• Broadcast Agent Publisher publications, profiles and external users
Potential limitations
In the current version, the Import Wizard does not import:
• Business Objects Services Administrator settings
• Administration Console settings
• Web Intelligence OLAP
• Custom applications and interfaces created using the SDK
• Broadcast Agent Scheduler tasks that are not supported in XI 3.1
• BusinessObjects Auditor
• InfoView personal settings
• some user settings, such as timestamps
• BusinessQuery
Security migration options
Security in XI 3.1 contains greater complexity and finer-grained control
compared to previous versions. Because of this, for large or complex
deployments we recommend that you migrate your BI content without
migrating its security, and then rebuild security in the new environment.
28 BusinessObjects Enterprise XI 3.1 Import Wizard Guide
Page 29
You can import objects without security simply by importing them without
any users or groups.
If you want to import both objects and principals at one time, however, you
can still import the objects without their rights by choosing the appropriate
option in the Import Wizard's Security Migration Options dialog box.
When you select users/groups to be imported, rights may be imported as
well:
• If you have selected objects as well, users' rights on these objects will be
imported.
• Rights on applications, such as InfoView and Web Intelligence are always
imported.
To give you more flexibility in how these rights are migrated, the Import
Wizard provides three security migration options which allow you to import
objects either with their rights or without them; if you import security, it
also allows you to restrict user rights.
Object rights migration
Importing Information From BusinessObjects 5.x or 6.x
Importing objects from BusinessObjects Enterprise 5.x/6.x
4
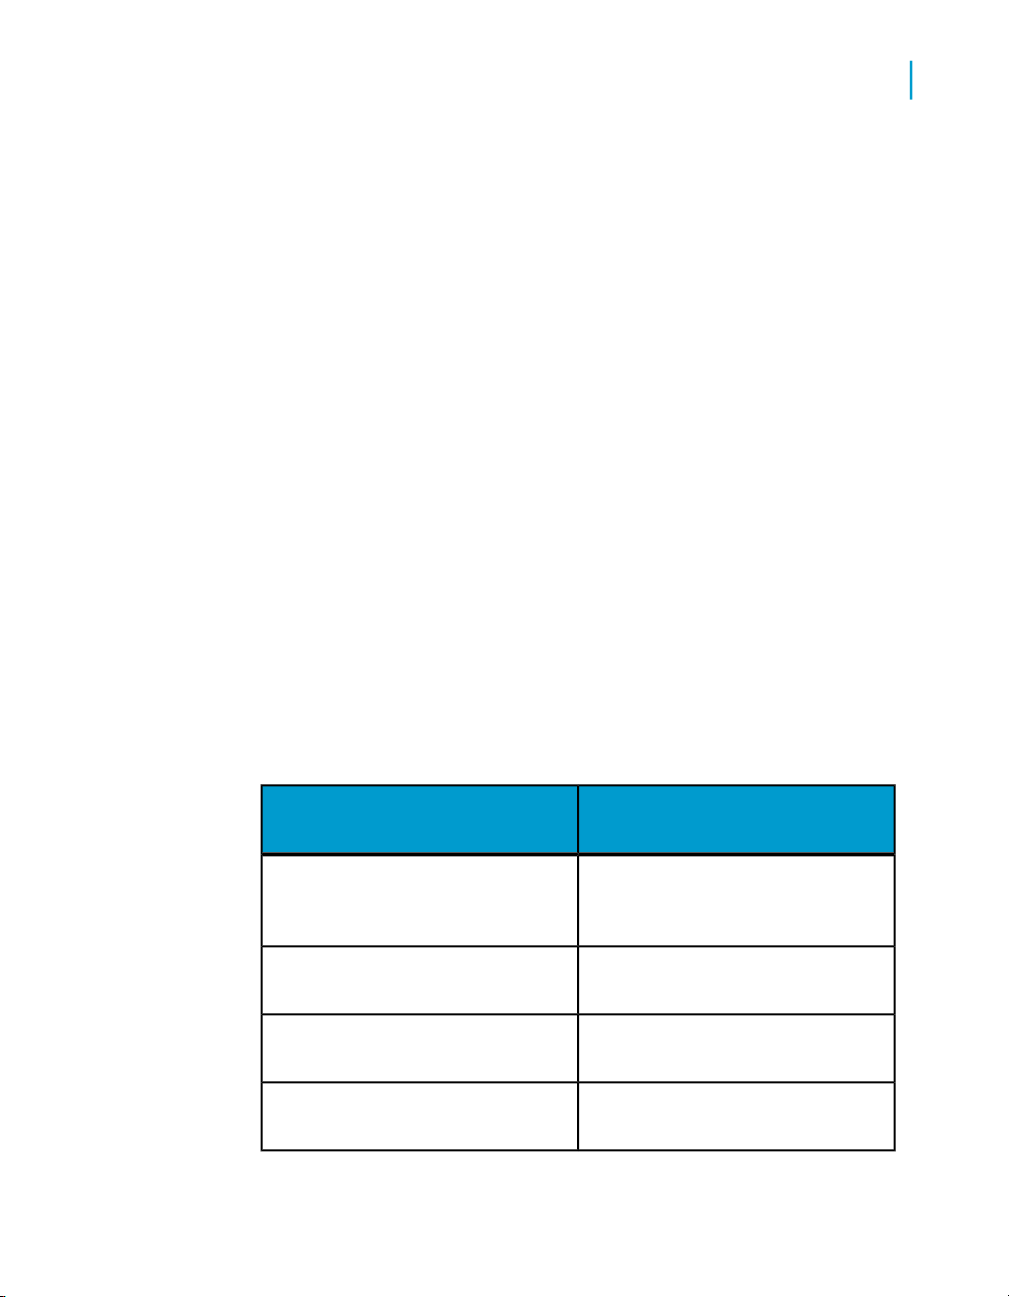
The Import Wizard presents the following options for importing object rights:
• The first option imports the objects' content and rights, in order to
reproduce the source security model. It also sets additional rights in the
destination CMS pertaining to the imported objects:
ValueObject
Performance Management folder
(top level) access level
BusinessObjects Enterprise XI 3.1 Import Wizard Guide 29
No Access
Not specifiedAll Desktop Intelligence rights
Not specifiedAll Web Intelligence rights
Not specifiedAll Designer rights
Page 30

Importing Information From BusinessObjects 5.x or 6.x
4
Importing objects from BusinessObjects Enterprise 5.x/6.x
As these rights are set for the Everyone group, they apply to all users,
unless they are explicitly assigned another value. To give them access,
administrators must use the CMC to explicitly grant the proper users the
appropriate rights.
This is the most secure option, selected by default.
• The second option imports the objects' contents and rights, in order to
reproduce the source security model, but does not set the restrictions in
the target CMS that it sets in the first option.
Default settings are set in the Everyone group for some rights, and apply
to all users. As these default values may be different from the version 6.x
defaults, this may allow migrated users to have more rights than they had
in the source environment.
If you want to avoid this, use the first option or do not migrate security
and recreate it in the new environment.
In both cases, the Import Wizard sets the access level for the Everyone group
to No Access for all imported domain folders. This restricts access for all
users for whom no default rights are given.
After the import, you must use the CMC to explicitly give access to users
and groups for specific folders. If you give access to a domain folder to the
Everyone group, all users will have access to this folder and be able to see
all documents in it.
Before doing this, make sure you have thoroughly reviewed the security
using the CMC.
BusinessObjects documents
When you import a 5.x/6.x BusinessObjects (.rep) document to XI 3.1, the
following occur:
• universe ID pointer is updated so that it references a universe in the CMS.
• an InfoObject is created in the CMS for this document and for the saving
of this document
• properties are updated and displayed in the CMC
30 BusinessObjects Enterprise XI 3.1 Import Wizard Guide
Page 31

Limitations
Importing Information From BusinessObjects 5.x or 6.x
Importing objects from BusinessObjects Enterprise 5.x/6.x
BusinessObjects template (.ret) documents do not contain cubes or a
connection to a universe. Therefore, all that occurs is:
• the locale of the document is updated
• an InfoObject is created in the CMS
To convert migrated 5.x/6.x .rep documents to .wid format, you can use the
Report Conversion Tool, delivered with the XI 3.1 suite. See the Report
Conversion Tool Guide for more information.
If you migrate security during the import of BusinessObjects documents,
version 5.x/6.x security commands are converted to XI 3.1 application-level
and document-level rights. Some commands have been eliminated and
others renamed.
The Administrators group in XI 3.1 has Full-Control access to documents.
The Everyone group has View access.
Keep in mind the following limitations when you import BusinessObjects
documents:
• XI 3.1 can read BusinessObjects 5.x/6.x .rep documents, but after you
save these documents in XI 3.1, they cannot be accessed by a 5.x/6.x
version of the software.
4
• BusinessObjects 5.x/6.x cannot open XI 3.1 Desktop Intelligence
documents.
• OLAP data providers are not supported in XI 3.1.
BusinessObjects 5.x/6.x documents based on an OLAP data provider
are view-only in XI 3.1.
• There is no document password protection, on the server side, in XI 3.1.
• XI 3.1 Desktop Intelligence cannot access a version 5.x/6.x repository.
BusinessObjects SDK
The platform-related portion of the BusinessObjects SDK has evolved, which
means that code developed for 5.1/6.x requires updates for platform
interactions (authentication, send document, receive document).
BusinessObjects Enterprise XI 3.1 Import Wizard Guide 31
Page 32

Importing Information From BusinessObjects 5.x or 6.x
4
Importing objects from BusinessObjects Enterprise 5.x/6.x
Send to Users and Send to Broadcast Agent Server are not available in XI
3.1. Instead, you need to use the Platform COM SDK.
The server-side report engine is not multi-document. This means that add-ins
is not loaded on the server. For example, for a document based on a custom
data provider (DPVBAInterface) implemented in an add-in, refresh will fail.
Calculator changes
XI 3.1 uses a different report engine than BusinessObjects 5.x/6.x. Therefore,
there are differences in the way the calculator is handled.
Because of this, there may be issues with BusinessObjects documents after
they are imported to XI 3.1.
Folders, domains, and categories
In the 5x/6x repository, it is not possible to set keywords and descriptions
for folders. In the XI 3.1 CMS, this is possible.
In XI 3.1 , in upgrade mode, when a domain is re-imported, if the user has
set keywords and descriptions for the folder created from the domain, they
are removed. Because they do not exist in 5.x/6.x, the update removes them
in XI 3.1. If you re-import a domain from 5.x/6.x, the keywords and
descriptions are kept.
You select the domains and documents you want to import into XI 3.1. When
you select a document, the document's domain is also imported. Documents
and universes cannot be imported without importing the domain.
Version 5.x/6.x document and universe domains are saved as sub-folders
in the Public Folder of the CMS of XI 3.1. Objects corresponding to the
universes and documents contained in the domains are imported to these
folders.
If you have chosen to import security, access rights are preserved. User and
group access to the folders are equivalent to the rights they had on the
version 5.x/6.x domains.
XI 3.1 preserves the hierarchy of subcategories. Corporate (or administrative)
categories are imported as categories under the Categories folder. For each
32 BusinessObjects Enterprise XI 3.1 Import Wizard Guide
Page 33

imported user, selected personal categories are imported to a new subfolder
(named after the user) under the Personal Categories folder.
You can select individual Corporate categories and import Web Intelligence
documents grouped by Corporate category. Personal categories, however,
can be imported only as part of the batch import.
Connections
When you import version 5.x/6.x universes, the associated connections are
imported automatically and are converted into connection objects.
Make sure that the Import Wizard can access the 5.x/6.x database the same
way that version 5.x/6.x accesses it. You may need to install database drivers
or configure connection settings on the machine.
For example, if you import SQL Server connection objects from a 5.x/6.x
source environment, you must configure the connections on the destination
machine via the Control Panel before you import the connection objects. You
must use the same name and settings as the connection used on the source
machine when you created the domain key.
Importing Information From BusinessObjects 5.x or 6.x
Importing objects from BusinessObjects Enterprise 5.x/6.x
4
BOUSER/BOPASS
In version 5.x/6.x, users could use @Variable('BOUSER') and
@Variable('BOPASS') in the connection information for the universe. The
variables were replaced at runtime with the user's enterprise username and
password, and used to log on to the database.
For security reasons, however, XI 3.1 does not permit the retrieval of user
passwords. Therefore, universe connections that previously used the
BOUSER and BOPASS variables must now use database credentials
(DBUSER and DBPASS). Those database credentials can be populated by
the Import Wizard and later edited in the CMC, on the Properties tab for each
user account.
When migrating, the Import Wizard:
• replaces BOUSER and BOPASS with DBUSER and DBPASS in universes
• proposes automatically populating these variables for users to migrate
BusinessObjects Enterprise XI 3.1 Import Wizard Guide 33
Page 34

Importing Information From BusinessObjects 5.x or 6.x
4
Importing objects from BusinessObjects Enterprise 5.x/6.x
You can, however, re-synchronize if users change their passwords.
Synchronizing enterprise and database credentials
There are three ways to synchronize enterprise and database credentials in
the XI 3.1 system. You can:
• choose the Import Wizard option that batch imports user names and
passwords from version 5.x/6.x to auto-populate database credentials in
XI 3.1.
• run a batch upload of a user's file.
User names and passwords are loaded from a file, stored and used as
database credentials.
• create a custom application using Enterprise SDK to set DBUSER and
DBPASS information.
Access restrictions
In a 5.x/6.x system, access restrictions (object restrictions, table mapping,
and row restrictions) are defined with the Supervisor application and
associated with users and groups. A user who belongs to multiple groups is
said to have multiple user instances (one instance per group).
Note:
Universe overloads in version 5.x/6.x are called access restrictions in XI 3.1.
They are managed in Designer.
The Import Wizard enables you to import all access restrictions that are
associated with the imported universes for any of the selected users and
groups being imported. If no principal users or groups are selected for import,
no access restrictions are imported and none are created.
The imported access restrictions are converted into objects. They remain
connected to the universes to which they were connected in the source
environment. The Import Wizard may create additional access restrictions
in the destination environment in order to preserve the restrictions for all
imported users.
Connections for access restrictions are not migrated automatically. You must
manually migrate these connections.
34 BusinessObjects Enterprise XI 3.1 Import Wizard Guide
Page 35

Access restrictions are migrated using both object names and object IDs to
identify universe components.
Access restriction aggregation
In both 5.x/6.x and XI 3.1 there are two types of access restrictions: exclusive
and non-exclusive. Row restrictions are combined using the AND operator,
while object restrictions and compatible table mappings are aggregated.
Exclusive access restrictions require a different mechanism. The Import
Wizard deduces a global ordering of groups for each universe, based on the
access restrictions prior to migration. For a given user, the Wizard considers
the set of parent groups of that user and, in that set, the group with the highest
priority determines which restriction set gets applied to that particular user.
Access restriction collapsing
Sometimes the global group ordering that is deduced during migration cannot
account for all of the individual user priority settings in 5.x/6.x. In this case,
access restrictions will be collapsed, meaning that the effective 5.x/6.x access
restriction will be copied onto the user, which always has highest priority.
Importing Information From BusinessObjects 5.x or 6.x
Importing objects from BusinessObjects Enterprise 5.x/6.x
4
This means that there might be more access restrictions in the destination
than in the source environment.
Universes and universe connections
The Import Wizard imports universes from a 5.x/6.x deployment into an XI
3.1 deployment. During this process, the relationship between universes,
connections, and Desktop Intelligence/Web Intelligence documents is
maintained.
IDs of the documents, universes, and connections are converted to cluster
unique identifiers (CUIDs). The identifier distinguishes these objects from
objects imported later from the source environment.
When you import a universe:
• the Import Wizard imports any associated connection objects
BusinessObjects Enterprise XI 3.1 Import Wizard Guide 35
Page 36

Importing Information From BusinessObjects 5.x or 6.x
4
Importing objects from BusinessObjects Enterprise 5.x/6.x
• the connection is saved in the FRS and an InfoObject is created in the
CMS
• the universe and its linked documents are copied into the FRS
• universe overloads defined in 5.1/6.x, if migrated, are mapped to access
restrictions in XI 3.1 ).
• ACEs are created to migrate universe-related security commands
• the locale is preserved
The Import Wizard has three modes for importing universes:
What it doesMode
Import all universes and all connection
objects
Import all universes and only connection objects used by these universes
Import the universes and connections
that the selected Web Intelligence and
BusinessObjects documents use directly
When you select a Web Intelligence or BusinessObjects document to import,
the Import Wizard automatically selects the associated universes for import.
Note:
The Import Wizard also imports any universes with the same name that exist
in other domains.
BusinessObjects documents may have been created outside the repository,
using a "short name"; that is, a reference to a universe stored on a local
machine. If the universe has a short name, its linked documents may not be
imported if more than one universe is found in the CMS with the same short
name.
Imports all universes and all connection
objects. You cannot select individual
universes or connections.
Imports all universes, and only connection objects used by those universes.
Imports all universes and connections
used by the selected documents. This
option also enables you to select additional universes to import, even if they
are not used by any document.
Universe domains are converted into subfolders under the Universe folder.
Each universe folder is named after the corresponding version 5.x/6.x
36 BusinessObjects Enterprise XI 3.1 Import Wizard Guide
Page 37

Importing Information From BusinessObjects 5.x or 6.x
Importing objects from BusinessObjects Enterprise 5.x/6.x
universe domain. When you import a universe from a domain, it is placed in
the corresponding domain folder.
If the universe is a derived universe, then all relevant core universes and
their connections are also imported.
Note:
Designer 5.x/6.x cannot open universes created with Designer XI 3.1.
Related Topics
• Access restrictions on page 34
Application Foundation objects
If you have Application Foundation 6.1.b or later, you can use the Import
Wizard to import dashboards, analytics, and schedules into the CMS of XI
3.1.
Note:
Application Foundation is called Dashboards & Analytics in BusinessObjects
XI 3.1.
4
The Performance Manager repository structure in XI 3.1 is similar to that of
Application Foundation. There is no significant change in the architecture.
Third-party documents
BusinessObjects Enterprise 5.x/6.x supports third-party (also known as
"agnostic") documents. The Import Wizard imports these documents into XI
3.1 if the format is supported. Formats supported in XI 3.1 include Adobe
Acrobat PDF; Microsoft Power Point, Word, RTF, and Excel; and *.txt
documents.
For the most up-to-date list of supported formats for third-party documents,
see the list of supported platforms.
BusinessObjects Enterprise XI 3.1 Import Wizard Guide 37
Page 38

Importing Information From BusinessObjects 5.x or 6.x
Importing objects from BusinessObjects Enterprise 5.x/6.x
4
38 BusinessObjects Enterprise XI 3.1 Import Wizard Guide
Page 39

Using the Import Wizard
5
Page 40

Using the Import Wizard
5
Specifying the source environment
The Import Wizard provides a series of screens that guide you through the
process of importing and exporting Business Intelligence content such as
user accounts, groups, folders, reports, universes, security, servers, and
other objects. Various dialog boxes may appear depending on the source
environment and the types of information that you choose to import.
The overall process is divided into the following general procedures:
1. Specifying the source environment.
2. Specifying the destination environmnent.
3. Selecting the types of objects to import.
4. Selecting an Import Scenario, which determines whether to merge or
update the objects that you import.
5. Selecting the specific objects to import.
Note:
The process of importing users, groups and profiles from a text file is a less
complex task. Both the format for the text file and the procedure are outlined
in Using text files with the Import Wizard on page 73.
Related Topics
• Specifying the source environment on page 40
• Specifying the destination environment on page 45
• Selecting objects to import on page 47
• Selecting an import scenario on page 48
Specifying the source environment
The first step in importing content is to specify a source environment.
40 BusinessObjects Enterprise XI 3.1 Import Wizard Guide
Page 41

Using the Import Wizard
Specifying the source environment
5
You can use any of the following as a source:
To specify BusinessObjects 5 or 6 as a source environment
1. Choose BusinessObjects 5 or BusinessObjects 6 from the Source
list.
2. Type a User Name and Password that provide you with administrative
rights to the source environment.
3. In the Domain Key File field, browse to .key file you created for the
repository in your source environment.
4. If you selected 6.x as the source environment and you want to import
Application Foundation objects using the Import Wizard, select the Import
Application Foundation Contents check box.
BusinessObjects Enterprise XI 3.1 Import Wizard Guide 41
Page 42

Using the Import Wizard
5
Specifying the source environment
You can import Application Foundation objects only if you selected
BusinessObjects Enterprise 6.x (or XI) in the Source list.
5. Click Next.
A warning appears that summarizes the items that can be imported.
6. Click Next.
To specify an Application Foundation source
If you chose to import Application Foundation content from a BusinessObjects
6.x source environment, the "Specify Application Foundation source" screen
appears.
1. To select dashboard files, browse to the location of the conf folder.
2. To specify an Application Foundation source repository:
• Select Use config file in the config folder to populate database
fields, or
• Manually enter or select the information required for each of the
following fields:
• Source database
• Database Engine
• Network layer or Server name
• User name
• Password
3. Click Next to continue.
To specify Crystal Enterprise 9 as a source environment
1. Choose Crystal Enterprise 9 from the Source list.
2. Enter the name of the source APS in the APS Name field.
3. Type a User Name and Password that provide you with administrative
rights to the source environment.
4. Click Next.
The "Destination environment" screen appears.
42 BusinessObjects Enterprise XI 3.1 Import Wizard Guide
Page 43

Using the Import Wizard
Specifying the source environment
Related Topics
• Specifying the destination environment on page 45
To specify Crystal Enterprise 10 as a source environment
1. Choose Crystal Enterprise 10 from the Source list.
2. Enter the name of the source CMS in the CMS Name field.
3. Type a User Name and Password that provide you with administrative
rights to the source environment.
4. Click Next.
The "Destination environment" screen appears.
Related Topics
• Specifying the destination environment on page 45
5
To specify BusinessObjects Enterprise XI or XI Release 2 as a source environment
1. Choose BusinessObjects Enterprise XI or BusinessObjects Enterprise
XI Release 2 from the Source list.
2. Enter the name of the source CMS in the CMS Name field.
3. Type a User Name and Password that provide you with administrative
rights to the source environment.
4. Click Next.
The "Destination environment" screen appears.
Related Topics
• Specifying the destination environment on page 45
BusinessObjects Enterprise XI 3.1 Import Wizard Guide 43
Page 44

Using the Import Wizard
5
Specifying the source environment
To specify a BusinessObjects Enterprise XI 3.x source environment
1. Choose BusinessObjects Enterprise XI 3.x from the Source list.
2. Enter the name of the source CMS in the CMS Name field.
3. Type a User Name and Password that provide you with administrative
rights to the source environment.
4. Select the Authentication method for the Administrator account from the
Authentication field.
5. Click Next.
The "Destination environment" screen appears.
Related Topics
• Specifying the destination environment on page 45
To specify a Business Intelligence Archive Resource file as a source environment
1. Choose Business Intelligence Archive Resource (BIAR) File from the
Source list.
2. Browse to the location of the file in the BIAR file field.
Note:
If you export content to a BIAR file, and you've selected more content
than will fit in a single file, the Import Wizard exports the content to multiple
BIAR files. To import content that is stored in these files, it is only
necessary to select the head BIAR file. The Import Wizard automatically
imports the content from the other files.
3. Click Next
The "Destination environment" screen appears.
Related Topics
• Specifying the destination environment on page 45
44 BusinessObjects Enterprise XI 3.1 Import Wizard Guide
Page 45

Using the Import Wizard
Specifying the destination environment
To specify a Text file as a source environment
1. Choose Text File from the Source list.
2. Browse to the location of the file in the Text file field, and then click Next.
The "Destination environment" screen appears.
Related Topics
• Specifying the destination environment on page 45
• Using text files with the Import Wizard on page 73
Specifying the destination environment
After you have specified your source environment you must specify a
destination environment.
5
BusinessObjects Enterprise XI 3.1 Import Wizard Guide 45
Page 46

Using the Import Wizard
5
Specifying the destination environment
There are two choices of destination environments for BusinessObjects
Enterprise XI 3.x:
1. BusinessObjects Enterprise XI 3.x - your content will be placed into the
CMS system database and/or the File Repository Server (FRS) file system
according to the objects you select.
2. Business Intelligence Archive Resource (BIAR) File - your content will be
placed in a compressed file for backup or importing into a different
deployment.
Note:
• The BIAR file destination is only available if your source environment
is XI 3.x or higher.
• The BIAR file destination is not available if your source is also a BIAR
file.
46 BusinessObjects Enterprise XI 3.1 Import Wizard Guide
Page 47

• If the content that you choose to export is too large for a single BIAR
file, the content is exported to multiple BIAR files. The Import Wizard
puts the files into the same directory.
To set the destination environment
Select the destination environment to which the wizard will export content.
You can choose between:
• BusinessObjects Enterprise XI 3.x
• Business Intelligence Archive Resource (BIAR) File
1. If you chose to export to a BusinessObjects Enterprise XI 3.x CMS system
repository:
a. Type the name of the destination environment's Central Management
Server in the CMS Name field.
b. Enter a User Name and Password of an Enterprise account that
provides you with administrative rights to the BusinessObjects
Enterprise system.
c. Select the Authentication method for the administrator account from
the Authentication list.
Using the Import Wizard
Selecting objects to import
5
2. If you chose to export to a Business Intelligence Archive Resource (BIAR)
File:
a. Specify the name and location where you want the BIAR file to be
stored.
3. Click Next to continue.
The "Select Objects to Import" screen appears.
Selecting objects to import
The "Select objects to import" screen displays a list of objects that you may
select from the source environment to import to the destination environment.
The options that appear depend on the source environment and its version.
Once you have selected the objects that you want to import, click Next to
continue.
BusinessObjects Enterprise XI 3.1 Import Wizard Guide 47
Page 48

Using the Import Wizard
5
Selecting an import scenario
Note:
• Server groups are imported without their member servers. After the import
is complete, you need to manually add the desired servers to the imported
server groups.
If you do not manually add the servers, the server groups are not valid,
and you will not be able to run any reports that depend on the server
groups.
• If you import documents without importing any related universes, and
those universes don't already exist on the destination environment, the
imported documents lose the relationship with their universes.
• If you import objects that have rights attached to them, and you want to
import object rights for the objects, you must either import the users and
groups for whom the rights are set, or ensure that the users and groups
already exist on the destination environment.
• If you are importing root level objects from BuinessObjects Enterprise XI
Release 2, BusinessObjects Enterprise XI 3.x, or from and XI 3.x BIAR
file, you can also import the rights that have been explicitly specified on
the root level folders. To do this, on the "Import users and user groups"
screen, select Import root folder rights.
• If you import reports that use repository objects, and you do not also
import those repository objects, those repository objects must already
exist on the destination environment.
• If you want to import universe overloads, you must ensure that you also
import the appropriate users, groups, and universes.
• If you want to back up your server configuration settings to a BIAR file so
that you can restore them later, select Export server configuration.
Selecting an import scenario
After choosing which objects you want to import, the "Import scenarios"
screen appears. This screen allows you to select an appropriate import
scenario. These scenario options provide the opportunities to add, overwrite,
or reject objects that may have the same Name or CUID (unique cluster
identification) in the destination CMS system database.
The specific scenarios that are available to you depends on the source
environment that you selected for the import.
48 BusinessObjects Enterprise XI 3.1 Import Wizard Guide
Page 49

Using the Import Wizard
Selecting an import scenario
To select an import scenario when importing from BusinessObjects or XI 3.x
5
When you are importing an object from BusinessObjects 5.x/6.x,
BusinessObjects Enterprise XI 3.x, or from an XI 3.x BIAR file to an XI 3.x
destination environment, you have two options to identify the object and
determine if the object already exists on the destination environment:
1. Use the source object's unique identifier (CUID).
2. Use the source object's name and path.
You must decide how you would like the Import Wizard to handle scenarios
where the objects already exist on the destination environment.
BusinessObjects Enterprise XI 3.1 Import Wizard Guide 49
Page 50

Using the Import Wizard
5
Selecting an import scenario
The following table describes the options that are available to you if are
matching by CUID, and the Import Wizard finds existing objects on the
destination.
Table 5-1: Option 1. If the Import Wizard detects an object in the destination with the same
unique identifier:
DescriptionAction
If the Import Wizard finds an object
in the destination environment with
the same CUID, it updates the destination's object.
Update the destination object. In
case of name conflict, rename it.
If the Import Wizard does not find an
object in the destination environment
with the same CUID, but it finds an
object with the same name, it imports
the object from the source environment and then renames that object.
If the Import Wizard finds an object
in the destination environment with
the same CUID, it updates the desti-
Update the destination object. In
case of name conflict, do not import
it.
Do not import the object.
50 BusinessObjects Enterprise XI 3.1 Import Wizard Guide
nation's object.
If the Import Wizard finds an object
on the destination environment with
the same name but different CUID,
it does not import the object from the
source environment.
If Import Wizard finds an object on
the destination environment with the
same CUID, it does not import the
object.
Page 51

Using the Import Wizard
Selecting an import scenario
The following table describes the options that are available to you if you are
matching by name and path, and the Import Wizard finds existing objects on
the source environment.
Table 5-2: Option 2. If the Import Wizard detects an object in the destination with the same
name and path:
DescriptionAction
If Import Wizard finds that an object
already exists on the destination en-
vironment with the same name and
Keep the destination object and import a renamed copy of the object.
Update the destination object.
path, it imports the source's object
and renames it. After the import, both
the destination's original and the
source's versions are on the destina-
tion.
If Import Wizard finds that an object
already exists on the destination en-
vironment with the same name and
path, it updates the destination envi-
ronment's version with the source's.
5
If Import Wizard finds that an object
already exists on the destination enDo not import the object.
Note:
• Matching objects by name and path is only supported for the following
object types:
• Folders and objects under public folders and personal folders
• Corporate Categories
• Personal Categories
• Universes, Overloads and Connections
BusinessObjects Enterprise XI 3.1 Import Wizard Guide 51
vironment with the same name and
path, it does not import the source's
version.
Page 52

Using the Import Wizard
5
Selecting an import scenario
• Dashboards
• Profiles
• Schedules
All other object types will use the matching by unique identifier scheme.
• Matching objects by name and path is not an option when importing
content from a BIAR file. When you import from BIAR files, objects will
be matched by CUID.
• If you choose update objects on the destination, whether you are matching
objects by CUID or name and path, you can choose incremental import
options on the next screen. These options allow you to specify which
types of objects that you want the Import Wizard to overwrite, and which
types of objects you want to leave untouched.
After selecting the appropriate import scenario, click Next to continue.
52 BusinessObjects Enterprise XI 3.1 Import Wizard Guide
Page 53

Using the Import Wizard
Selecting an import scenario
To select an import scenario when importing from other versions
5
When you are importing content from Crystal Enterprise 10, or
BusinessObjects Enterprise XI, you can either merge the source and
destination environments, or you can update the destination environment
without merging.
Note:
When you are importing content from Crystal Enterprise 9, the Import Wizard
only matches by CUID. If the Import Wizard finds an object on the destination
with the same CUID as on the source environment, it automatically imports
the source object and renames it.
BusinessObjects Enterprise XI 3.1 Import Wizard Guide 53
Page 54

Using the Import Wizard
5
Selecting an import scenario
I want to merge the source system
into the destination system
Automatically rename top-level folders that match top-level folders on
the destination system.
DescriptionAction
The Import Wizard uses the object's
name and path to determine if the
source object already exists on the
destination system. The Wizard adds
all the selected objects from the
source to the destination without
overwriting objects on the destination
environment. All of the objects on the
destination environment are preserved.
If the Import Wizard finds top-level
folders with the same name and path
on both the source and destination
environments, the Wizard renames
and imports the source folders.
If you do not choose this option, the
Import Wizard does not update
matching top-level folders.
The Import Wizard uses an object's
CUID to determine if the source object already exists on the destination
environment. All of the selected obI want to update the destination system by using the source system as
a reference.
54 BusinessObjects Enterprise XI 3.1 Import Wizard Guide
jects from the source are added to
the destination, but if the source ob-
ject has the same CUID as an object
on the destination, and you choose
to overwrite objects on the" Incremen-
tal import" screen, the destination
object is overwritten.
Page 55

Using the Import Wizard
Selecting an import scenario
DescriptionAction
The Import Wizard renames objects
from the source that have the same
Automatically rename objects if an
object with that title already exists in
the destination folder.
Note:
• If you choose to update the destination system by CUID, you can choose
incremental import options on the next screen. These options allow you
to specify which types of objects that you want the Import Wizard to
overwrite, and which types of objects you want to leave untouched.
• When CUIDs are changed, links between documents, rules, and other
objects that refer to each other using CUIDs may be impacted. If you
import objects with links to other objects, the safest option for migration
is the second option (Updating the destination environment).
name and path but a different CUID.
If you do not choose this option, the
Import Wizard does not import the
object.
5
1. Select the type of import scenario you want.
Note:
Repository objects used by Business views are always imported in Update
mode, even when the Merge option is selected.
2. Decide if you want the documents or folders to be renamed during the
import.
• If you want the Import Wizard to automatically rename a folder or
object that already exists in the destination environment, select the
check box.
• If you don't want automatic renaming, ensure that the check box is
clear.
3. Click Next to continue.
Related Topics
• Selecting incremental import options on page 56
BusinessObjects Enterprise XI 3.1 Import Wizard Guide 55
Page 56

Using the Import Wizard
5
Selecting incremental import options
Selecting incremental import options
if you are updating objects that already exist on the destination environment,
the "Incremental import" screen appears. This screen prompts you to specify
what type of objects and rights to want to overwrite on the destination
environment with the objects from the source environment, when there is a
match found. These options are safeguards that will override what you
selected on the "Import Scenarios" screen.
For example, if you chose to overwrite objects on the destination environment,
but do not want to overwrite universe objects, you can chose to not overwrite
universes by ensuring the Overwrite universe contents is not selected.
This screen allows you the following options:
56 BusinessObjects Enterprise XI 3.1 Import Wizard Guide
Page 57

Overwrite object contents
Overwrite universe contents
Overwrite connection contents
Using the Import Wizard
Selecting incremental import options
DescriptionOption
If the Import Wizard finds a matching
object on the destination environment, it overwrites the object. An object refers to any type of object except universes, universe connections,
and groups.
If the Import Wizard finds a matching
universe on the destination, it overwrites the universe.
If the Import Wizard finds a matching
universe connection on the destination, it overwrites the connection.
5
Overwrite group and user membership
BusinessObjects Enterprise XI 3.1 Import Wizard Guide 57
If the Import Wizard finds matching
groups on the destination, it replaces
the group membership information
on the destination with the group
membership information of the
source.
If you do not choose to overwrite
group membership, the Import Wizard adds new members and leaves
existing members untouched.
Page 58

Using the Import Wizard
5
Selecting security migration options
Overwrite object rights
DescriptionOption
If the Import Wizard finds a matching
object on the destination environment, and the users or groups that
the object's rights pertain to are either
on the destination or are being imported, the wizard overwrites any existing
rights on the object for those users
or groups.
If you do not select to overwrite object rights, the Import Wizard adds
any new rights to the object that
aren't already specified on it. It does
not add or modify any existing rights
on the object.
1. Select the appropriate import options.
2. Click Next to continue.
Selecting security migration options
When you are importing from BusinessObjects 5.x or 6.x, the "Security
migration options" screen appears. This allows you to choose if you want
the security on the objects to be imported. There are three options available:
• Yes, migrate security on imported objects and secure the destination
system. This is the most secure option.
• Yes, migrate security on imported objects. Users in the destination system
may receive more rights than in the source.
• No, don't migrate security. Select this option only if you intend to rebuild
security from scratch.
1. Select a security migration option.
2. Click Next to continue.
58 BusinessObjects Enterprise XI 3.1 Import Wizard Guide
Page 59

Using the Import Wizard
Selecting specific objects to import
Selecting specific objects to import
This procedure assumes you have already specified the source and
destination environment and selected the type of objects to import. It also
assumes you have chosen an import scenario and the appropriate
incremental import options. If you have not already started the Import Wizard,
see Specifying the source environment on page 40, Specifying the
destination environment on page 45 and Selecting objects to import on
page 47. For further information about import scenarios, see Selecting an
import scenario on page 48. For further information about incremental imports,
see Selecting incremental import options on page 56
After you choose an import scenario and incremental import options, you
are prompted to choose the specific objects you want to import. You can
import all of the objects or select individual objects.
To select users and groups
5
If you chose to import users and groups, the "Users and Groups" screen
appears.
1. Select the users or groups you want to import.
If you want to select groups without selecting users, hold SHIFT and click
the groups. You should select this option when you are importing groups
from one environment to another where the groups are the same but the
users are different. This option lets you maintain the rights set at the group
level, without having to import users.
You may also select the following check boxes:
• Show groups hierarchically
• Select groups that contain selected users
• Import BCA Publisher profiles for selected users and groups
2. Click Next to continue.
BusinessObjects Enterprise XI 3.1 Import Wizard Guide 59
Page 60

Using the Import Wizard
5
Selecting specific objects to import
To select group import options
The "Import Groups Options" screen appears if you are importing users and
groups from BusinessObjects 5.x or 6.x.
1. Select if you want group mappings from LDAP and Active Directory to be
migrated to XI 3.x.
Note:
• If the "Import Groups Option" screen appears, the 6.x source and the
XI 3.x destination environments are configured for LDAP or Active
Directory. You need to have the same LDAP or Active Directory
configuration on the source and destination.
• For information about setting alias creation and assignment for LDAP
and Active Directory users, see the BusinessObjects Enterprise
Administrator's Guide.
2. Click Next.
To populate database credentials for users
If you are importing users and groups from a BusinessObjects 5.x or 6.x
environment, the "Populate database credentials for users" screen appears.
Database credentials are used in universe connections associated with
BusinessObjects user accounts.
Universe connections that previously used the BOUSER and BOPASS variables
associated with the BusinessObjects user name and password must now
use database credentials (DBUSER and DBPASS). Those database credentials
can be populated by the Import Wizard and later edited in the Central
Management Console (CMC) on the properties tab for each user account.
Click Next to continue.
1. Chose to either:
• Populate database credentials with user name and password, which
is the recommended procedure.
• Leave database credentials empty at this time.
2. Click Next to continue.
60 BusinessObjects Enterprise XI 3.1 Import Wizard Guide
Page 61

For detailed information on the import of database credentials, see the
BusinessObjects 5/6 to XI 3.1 Migration Guide.
To select access levels
If you are importing Access Levels, the "Access Levels" screen appears.
Note:
If you import a user and an object, the Import Wizard also imports the rights
of that object. If the object's rights are based on an access level, and that
level is not imported and does not exist on the destination, the Import Wizard
gives the individual rights specified in the level on the object for the user.
1. Select the access levels that you want to import.
The default access levels are:
• Full Control.
• No access.
• Schedule.
• View .
• View on demand.
Using the Import Wizard
Selecting specific objects to import
5
If you have created any additional access levels, they also appear on the
list.
2. Click Next to continue.
To select categories
If you are importing categories, the "Categories" screen appears.
1. Select the categories that you want to import.
For large document domains, you can import incrementally, and import
documents one category at a time.
2. To import all the objects associated with the category, select the Import
all objects that belong to the selected categories check box.
3. Click Next to continue .
BusinessObjects Enterprise XI 3.1 Import Wizard Guide 61
Page 62

Using the Import Wizard
5
Selecting specific objects to import
To select folders and objects
If you chose to import folders and objects, the "Select Folders and Objects"
screen appears.
1. Select the folders and reports that you want to import.
You can also choose to Import all instances of each selected object.
2. Click Next to continue.
To select application folders and objects
If you are importing application folders and objects, the "Select application
folders and objects" screen appears.
1. Select the application folders and objects that you want to import.
2. Click Next to continue.
Note:
If the selected folders and objects exist on the destination system, they will
be updated using the source system as a reference.
To select import options for universes and connections
If you chose to import universes, the "Import options for universes and
connections" screen appears.
62 BusinessObjects Enterprise XI 3.1 Import Wizard Guide
Page 63

Using the Import Wizard
Selecting specific objects to import
5
This screen allows you to select one of three options:
• Import all universes and all connection objects.
• Import all universes and only connection objects used by these universes.
• Import the universes and connections that the selected Web Intelligence
and Desktop Intelligence documents use directly.
Note:
If you select the third option, you can select additional universes to import
on the next screen.
1. Select an import option for the universes and their connections.
2. To import universe overloads, select Keep universe overloads for
imported users and groups.
If you are importing universe overloads, you must also select the users,
groups, and universes during previous steps in the Import Wizard. You
must also select Overwrite object contents on the "Incremental Import"
BusinessObjects Enterprise XI 3.1 Import Wizard Guide 63
Page 64

Using the Import Wizard
5
Selecting specific objects to import
screen. If you did not select those options, click Back until you get to the
appropriate screen, and make the required selections.
Note:
If you choose to import users and groups, universe overloads, and other
objects, and do not want to overwrite all of the object rights for the users
and groups and objects that you've selected, either:
• Ensure that you've only selected the universes that you want to import,
and then import the other objects in another import process.
• Delete the universe overload on the destination environment, and then
clear the Overwrite object contents and Overwrite object rights
options on the "Incremental Import" screen. In this case, the Import
Wizard only imports the universe overloads that don't already exist on
the destination environment.
3. Click Next to continue.
To select universe folders and universes
The "Universe folder and universes" screen appears if you are importing
universes, and if you selected Import the universes and connections that
the selected Web Intelligence and Desktop Intelligence documents use
directly on the"Import options for universes and connections" screen .
1. Select the universe folders and universes that you want to import.
If you've selected a source environment other than BusinessObjects 5.x
or 6.x, the universes that are linked to specific documents cannot be
cleared from the list. You can select additional universes that are not used
by any imported document. If no universe is found, the associated
documents will not be imported and a warning message appears. If this
occurs, link the documents to a universe, republish them to the repository,
and retry the import.
2. Click Next to continue.
Note:
When you import a universe, its connection objects are imported
automatically. Before you can import connection objects from
BusinessObjects 5.x/6.x, ensure that the Import Wizard can access the
database the same way that the source environment accesses it. This may
64 BusinessObjects Enterprise XI 3.1 Import Wizard Guide
Page 65

Using the Import Wizard
Selecting specific objects to import
involve installing database drivers or configuring connection settings on the
machine.
For example, if you import SQL Server connection objects from a
BusinessObjects 6.x source environment, you must configure the connections
on the destination machine via the ODBC Data Source Administrator settings
in the Windows Start Menu Control Panel before you import the connection
objects. You must use the exact same name and settings as the connection
used on the source machine when you created the domain key.
To select import repository objects options
If you chose to import reports that use repository objects, the "Import
repository objects options" screen appears. This allows you to select one of
three options:
• Import all repository objects.
• Import only repository objects that the selected reports use directly.
Warning: This may affect business view object integrity.
5
• Import repository objects that the selected reports use directly, as well
as any other repository objects they depend on.
1. Select one of the three options.
2. Click Next to continue.
To select import options for publications
The "Import options for publications "screen appears if you are importing
profiles or publications.
1. Select one of the following options for importing profiles:
• Import all profiles.
• Import profiles used by selected publications.
2. Select one of the following options for importing publication recipients:
• Import recipients used by selected publications.
• Do not import recipients.
3. Click Next to continue.
BusinessObjects Enterprise XI 3.1 Import Wizard Guide 65
Page 66

Using the Import Wizard
5
Selecting specific objects to import
To select remote connections and replication jobs
If you chose to import remote connections and replication jobs, the "Remote
Connections and Replication Jobs" screen appears.
1. Select the remote connections and replication jobs that you want to import.
2. Click Next to continue.
To select personal documents and inbox documents
If you chose to import personal documents or inbox documents from
BusinessObjects 5.x or 6.x, the "Personal documents and inbox documents"
screen appears.
Note:
If you are importing from Crystal Enterprise or any version of BusinessObjects
Enterprise XI, the Import Wizard always imports the personal documents,
inbox documents, and favorite folders for all selected users.
1. To import inbox documents, you can
• Import unread inbox documents.
• Import read documents from the location that you specify.
• Import inbox documents received after the date that you specify.
2. To import personal documents, you can
• Import personal documents from the location that you specify.
• Import personal documents that were modified or created after the
date that you specify.
3. Click Next to continue.
To select Broadcast Agent Publisher External Users and Groups
If you chose to import Broadcast Agent Publisher external users and groups
from a "BusinessObjects 5.x" or 6.x source environment, the "Broadcast
Agent Publisher External Users and Groups" screen appears.
1. Select the external users and groups that you want to import.
66 BusinessObjects Enterprise XI 3.1 Import Wizard Guide
Page 67

Using the Import Wizard
Selecting specific objects to import
To select groups without selecting the users in those groups, hold SHIFT
, and select the groups.
You can also choose to Select groups that contain selected users and
Import BCA Publisher Profiles for selected users and groups
2. Click Next to continue.
To select Broadcast Agent Publisher Publications
If you chose to import Broadcast Agent Publisher Publications from a
"BusinessObjects 5.x" or 6.x source environment, the "Broadcast Agent
Publisher Publications" screen appears.
1. Select the Broadcast Agent Publisher publications you want to import.
You can also choose to Automatically import associated schedules
and Automatically import BCA Publisher profiles for selected
publications.
2. Click Next to continue.
5
To select Broadcast Agent Publisher Profiles
If you are importing Broadcast Agent Publisher Profiles from a
"BusinessObjects 5.x" or 6.x source environment, the "Broadcast Agent
Publisher Profiles" screen appears.
1. Select the profiles that you want to import.
2. Click Next to continue.
To select domains and documents
The "Domains and Documents" screen appears if you chose to import any
of the following document types from a BusinessObjects 5.x or 6.x source
environment:
• Web Intelligence
• Desktop Intelligence (BusinessObjects)
• Performance Management (Application Foundation)
• Analytics (Performance Management) (6.x only)
BusinessObjects Enterprise XI 3.1 Import Wizard Guide 67
Page 68

Using the Import Wizard
5
Selecting specific objects to import
• Third-party
The list contains a separate branch for each domain. Domains that cannot
be opened are greyed out. If you previously chose to import all the documents
of a given category, they are preselected and cannot be cleared.
1. Select the domains and documents you want to import .
2. Click Next to continue.
To select locales and platform options
The "Select Locales and Platform options" screen appears when you are
importing Web Intelligence 2.x or BusinessObjects documents from a
BusinessObjects 5.x or 6.x source environment.
Note:
The Import Wizard converts Web Intelligence 2.x documents (.wqy) into the
.wid format before importing them.
In a BusinessObjects 5.x/6.x repository, some Web Intelligence 2.x (.wqy)
documents and BusinessObjects documents may not store their locales. In
order to set locales in these documents when they are saved in the CMS
(after conversion to .wid), the default locales provided by the user are added
to the documents.
1. Select the default locale of the documents to import.
2. Select the default locale of the platform used to create documents to
import.
If they are not already saved in the documents, these locales will be saved
during the import.
3. Click Next to continue.
68 BusinessObjects Enterprise XI 3.1 Import Wizard Guide
Page 69

Finalizing the Import
Free disk space warning
If your destination environment does not contain enough disk space to contain
all of the objects that you want to import, the free disk space warning for
temporary folder notice is displayed.
The Import Wizard copies the objects that you select to your destination
environment's temporary directory, as specified in the Temp environment
variable.
If the free disk space warning appears, and there is not enough room in the
destination environments Temp directory:
1. Click Back to return to the previous dialog box.
2. Either free up additional disk space on the destination environment or
specify a new location for the temporary directory by modifying the Temp
variable on the destination environment.
3. On the dialog box, click Next.
Using the Import Wizard
Finalizing the Import
5
Preparing for import
After you select the import options, the "Ready to import" dialog box appears.
This dialog box displays a list of all of the objects that you selected.
1. Review the list to verify that it contains everything that you selected.
If you want to make any changes to the list, click Back until you get to
the appropriate dialog box.
2. Click Finish to begin importing objects to the destination environment.
The "Import Progress" dialog box appears. It shows the progress of the
import and a summary of the events taking place.
Completing the import
The "Import Summary" window appears when the Import Wizard is finished.
The window displays a the results of the import.
BusinessObjects Enterprise XI 3.1 Import Wizard Guide 69
Page 70

Using the Import Wizard
5
Finalizing the Import
1. To view the details of the import, click View Detail Log.
The "Detail Log" dialog box appears
This dialog box lists all the objects the Import Wizard has migrated and
their status, as well as any errors that may have occurred. You can sort
the entries according to any column, by clicking the column's heading.
For more details on a given item, select it from the list.
The details are displayed at the bottom of the dialog box.
Note:
The information that appears in the Detail Log is also written to a log file.
The log file starts with the name ImportWiz, and is located in the
C:\Program Files\Business Objects\BusinessObjects Enterprise
12.0\Logging\ directory by default.
The log file includes a system-generated ID number, a title that describes
the imported information, and a field that describes the action and the
reason why it was taken.
A version of the log file in .CSV format is also written, in the same directory.
70 BusinessObjects Enterprise XI 3.1 Import Wizard Guide
Page 71

2. Click Done.
If you are importing objects any source environment other than
BusinessObjects Enterprise XI 3.x or an XI 3.x BIAR file, the Import Wizard
displays a dialog box informing you that it will run a rights verification tool.
This tool looks for child objects on the destination that have rights explicitly
granted on them that their parent object does not have. If it finds any such
objects, the Import Wizard removes the rights on the child.
The details of any rights that have been removed on objects during the
import process appear in a .CSV file, located in the C:\Program
Files\Business Objects\BusinessObjects Enterprise
12.0\Logging\ directory by default.
3. If the dialog box appears, click OK to start the tool.
The Import Wizard adjusts the rights on imported child objects.
Updating imported events
After you import events to a destination Central Management Server (CMS),
you must run the EventUpdater script. This script updates the imported events
by associating them with the BusinessObjects Enterprise XI 3.x event servers
that they are to run on.
Using the Import Wizard
Updating imported events
5
If you do not run this script, you must manually re-associate the events with
event servers, by navigating to every imported event and associating it with
an event server.
If you are importing events from more than one event server, you must run
the script once for each event server that you are importing the events from.
On a Windows computer, the script is called EventUpdater.bat, and is
located in the c:\Program Files\Business Objects\BusinessObjects
Enterprise 12.0\win32_x86\scripts\ folder by default.
On a UNIX computer, the script is called EventUpdater.sh, and is located
in the ./bobje/ directory.
The following table describes the parameters for the script.
BusinessObjects Enterprise XI 3.1 Import Wizard Guide 71
Page 72

Using the Import Wizard
5
Updating imported events
DescriptionParameter
-olde
ventserver
-new
eventserv
er
-user
-password
-authenti
cation
The friendly name of the event server on the system that the
event was exported from.
The name of the event server on the XI 3.x system that you
want to associate the event with.
The name of any CMS on the XI 3.x destination system.-cms
The username for a BusinessObjects Enterprise administrator
account.
The password for the BusinessObjects Enterprise administrator
account.
The authentication method. The accepted values are secEnter
prise, secWinAd, and secLdap.
1. Locate the appropriate script, depending on your platform.
2. Run the script with the necessary parameters.
• On Windows, run
c:\Program Files\Business Objects\BusinessObjects Enter
prise 12.0\win32_x86\scripts\eventupdater.bat" -olde
ventserver <old event server friendly name> -neweventserv
er <new event server name> [-cms <cms>] [-user <username>]
[-password <password>] [-authentication secAuthType]
• On UNIX, run
./bobje/eventupdater.sh -oldeventserver <old event
server friendly name> -neweventserver <new event server
name> [-cms <cms>] [-user <username>] [-password <pass
word>] [-authentication secAuthType]
72 BusinessObjects Enterprise XI 3.1 Import Wizard Guide
Page 73

Using text files with the Import Wizard
6
Page 74

Using text files with the Import Wizard
6
Text file format
The Import Wizard can import any of the following from text files:
• Users
• Groups
• Profiles
• Data source credentials
A combination of users, groups and profiles can be in one file, but data source
credential must be in a separate text file.
Text file format
All text import file data must be in the comma-separated value (CSV) file
format. The CSV format stipulates the following:
• The comma (,) is the default separator.
• The default delimiter is double quotes (").
• The fields that contain a separator must begin and end with a delimiter.
For example, if you wanted the value Smith, John in a field, you would
enter "Smith, John".
• The fields that contain a delimiter, must begin and end with a delimiter
and use two delimiters where one is required.
For example, if you wanted the value "quotes", you would enter
"""quotes""", if your delimiter was double quotes. If your delimiter was a
single quote ('), and you wanted the value dog's, you would enter 'dog''s'.
Note:
The default delimiter and the default separator can be changed on the "Select
options for file import" dialog box.
Importing users, groups and profiles
The Import Wizard can import users, groups and profiles from text files. Files
used to import users, groups or profiles must be structured as follows:
• Each row in the text file defines 1 record.
74 BusinessObjects Enterprise XI 3.1 Import Wizard Guide
Page 75

Using text files with the Import Wizard
Importing users, groups and profiles
• Each record consists of 6 fields.
• Each field must have separator between it and the next field.
• Each field, can potentially be blank except for field 1.
One single record can define either a group or a user or a group, a user and
a profile. Text files must be saved in UTF-8 format.
Note:
• The default separator is a comma but this can be changed on the Select
options for file import dialog box.
• If a character in the any field of the record is the same as the character
used for a separator it must be delimit. The default delimiter character is
a double quote.
User record Format
Contents of fieldField Number
6
Group nameField 1
User NameField 2
Full name of userField 3
Email address of userField 4
Profile name for user.Field 5
Profile value for user.Field 6
Note:
Profile values must be enclosed in quotes. See Text file format on page 74
for information on using delimiter.
BusinessObjects Enterprise XI 3.1 Import Wizard Guide 75
Page 76

Using text files with the Import Wizard
6
Example Group record
Example user record
Sales,Psanders,Paula Sanderson,psanders@Acme.com,Manager,West
Region
The previous record would create an account name or username of
"psanders" in BusinessObjects Enterprise. The name Paula Sanderson, and
the e-mail address of psanders@Acme.com would be associated with this
account name. The username "psanders" would be member of the group
"Sales". The username psanders and would be assigned the profile "Manager"
with the profile value of "West Region".
Group Record Format
Contents of fieldField Number
Group nameField 1
NullField 2
Note:
Profile values must be enclosed in quotes. See Text file format on page 74
for information on using delimiter.
Example Group record
Best,,Group for sales people,,Sales,General
76 BusinessObjects Enterprise XI 3.1 Import Wizard Guide
Description of group.Field 3
Field is ignored.Field 4
Profile name for group.Field 5
Profile value for group.Field 6
Page 77

Using text files with the Import Wizard
Importing data source credentials
The previous record would create the "Best" group, with description of "Group
for sales". The profile Sales would be assigned the profile value "General".
Importing data source credentials
The Import Wizard can import data source credentials from text files. These
are the database credentials used for Business Object Universes. Files used
to import secondary database credentials must be structured as follows:
• Each row in the text file defines 1 record.
• Each record consists of 3 fields.
• Each field must have separator between it and the next field.
• Each database username must be associated with a Enterprise username
that already exists.
Contents of fieldField Number
6
Existing usernameField 1
Database UsernameField 2
Database passwordField 3
Example database credential
Psanders,dbuser,Dbpasw0rd
The previous example create the account name "dbuser" and the password
"Dbpasw0rd" associated with Enterprise user Psanders. The option "Enable
Data Source Credentials for Business Object Universes" would also be
selected for username Psanders.
BusinessObjects Enterprise XI 3.1 Import Wizard Guide 77
Page 78

Using text files with the Import Wizard
Importing data source credentials
6
78 BusinessObjects Enterprise XI 3.1 Import Wizard Guide
Page 79

Backing up and restoring server configuration settings
7
Page 80

Backing up and restoring server configuration settings
7
To back up server configuration settings to a BIAR file
The Import Wizard lets you to back up your server configuration settings to
a BIAR file, and then use that BIAR to restore those settings at a later date.
Server groups are objects that group related servers together. If you are
restoring servers and you are not restoring their related server groups, and
the destination system does not contain the same server groups (matched
by CUID), you lose the relationship between the server group and the
exported server. When you re-import the server, you need to either manually
add the server to the desired server groups or create new server groups.
You can set up reports to run on particular server groups. If you are exporting
reports and the related server groups are not imported, and do not already
exist on the destination, the reports lose their relationship to the server group.
If you want the report to use particular server group, and that group does
not exist on the destination, you need to manually configure the server groups.
Similarly, if you are importing servers, server groups, or reports without
importing the users that have rights on those objects, and those users do
not already exist on the destination environment, the rights on those objects
are dropped. You may have security settings on those objects that are not
correctly set.
Note:
• The Import Wizard supports the backing up and restoring of entire
deployments, including all of the servers and nodes in the deployments.
• The Import Wizard Command Line Tool does not support the importing
and exporting of server configuration settings.
• If your destination deployment already has servers with the same server
identifier as the servers in your BIAR file, then those servers may fail to
import. If the import process fails, determine which servers on the
destination system have conflicting server identifiers. You can see the
server list by viewing the Import Wizard's Detail Log, or by opening the
log file ImportWiz.log.
If there are servers that conflict because they have the same server
identifiers, use the CMC to delete those servers from the destination
deployment, and repeat the server import process.
By default, ImportWiz.log is located in C:\Program Files\Business
Objects\BusinessObjects Enterprise 12.0\Logging\
80 BusinessObjects Enterprise XI 3.1 Import Wizard Guide
Page 81

Backing up and restoring server configuration settings
To back up server configuration settings to a BIAR file
To back up server configuration settings
to a BIAR file
1. Specify the BusinessObjects Enterprise XI 3.x system as the source
environment.
2. Specify Business Intelligence Archive Resource (BIAR) File as the
destination environment.
3. On the "Select objects to import" screen, select Export server
configuration, and click Next until the "Ready to Import" screen appears.
4. On the "Ready to Import" screen, click Finish to start the import.
The "Import Progress" screen appears. After the import is complete, the
dialog box displays a summary of the import.
5. Click Done to close the Import Wizard.
All of the servers in your BusinessObjects Enterprise deployment are backed
up on the BIAR file.
7
To restore server configuration settings
Before you restore the server configuration settings from a BIAR file, you
should first backup your existing configuration. Once you restore the
configuration settings, the only way to revert back to the state before the
restore is by importing the settings from the second BIAR file.
It is recommended that when you add or delete a BusinessObjects Enterprise
server from a BusinessObjects Enterprise cluster, you export the server
configuration settings for the entire cluster to a BIAR file. This prevents a
situation where the cluster contains more servers than the BIAR file that you
are importing from does, so that you do not have to manually delete the
servers before restoring your server configuration settings from the BIAR
file.
Note:
• If you've created additional servers or nodes after you backed up your
configuration settings, and use the Import Wizard to restore the
configuration settings, the Import Wizard doesn't update or delete these
servers or nodes. However if such servers used configuration templates
then they can become reconfigured. This is because during restore
process the configuration templates are updated, affecting the server's
BusinessObjects Enterprise XI 3.1 Import Wizard Guide 81
Page 82

Backing up and restoring server configuration settings
7
To restore server configuration settings
configuration. If you want to get your system to the same server
configuration state as it was at the time of the backup, and your
BusinessObjects Enterprise deployment has more servers than the BIAR
file that you are restoring from does, you may want to delete the servers
through the CMC before you restore. If you delete servers from your
BusinessObjects Enterprise deployment, you must ensure that the
deployment has at least one CMS to run the Import Wizard.
• Do not restore server configuration settings from a Windows deployment
to a UNIX deployment or from a UNIX deployment on a Windows
deployment. Always restore server configuration settings from a Windows
deployment to a Windows deployment and from Unix deployment to Unix
deployment.
1. Specify the BIAR file that contains the server configuration settings that
you want to import as the source environment.
2. Specify your BusinessObjects Enterprise XI 3.x system as the destination
environment.
3. On the "Select objects to import" screen, select Restore Full Cluster
Server Configuration, and click Next.
Note:
If you select Import node(s) from a different cluster, you can't select
Restore Full Cluster Server Configuration .
4. On the "Import Scenarios" screen, specify what you want the Import
Wizard to do if it finds an object with the same unique identifier on the
destination environment.
Note:
When you are importing objects from a BIAR file, the option to match
objects by name and path is not available.
The options that you can select are:
• Update the destination object, in case of name conflict, rename
it.
Use this option when you want to restore all server objects that are in
a BIAR file to a deployment. If the deployment already has other
servers with the same names, then some of the updated servers may
be renamed.
If a server in the BIAR files has a unique identifier that matches a
server's unique identifier on the deployment, then the server on the
82 BusinessObjects Enterprise XI 3.1 Import Wizard Guide
Page 83

Backing up and restoring server configuration settings
To restore server configuration settings
deployment will be overwritten with the configuration settings of the
server located in the BIAR file.
If, during the import process, the Import Wizard discovers that the
deployment already has another server with the same name as the
server from the BIAR file, the Import Wizard imports the server and
renames it. The server's new name will be server name as it appears
in the BIAR file, appended with a number in brackets.
• Update the destination object, in case of name conflict, do not
rename it.
Use this option when you want to restore all server objects from the
BIAR file to a deployment, except the servers with different unique
identifiers but with the same names.
• Do not import the object
Use this option if you do not want servers on deployment to be
overwritten with settings from the BIAR file. This will cause only servers
not existing on your deployment (but existing in the BIAR file) to be
restored.
7
See Restoring server configuration scenarios on page 83 for examples
that describe how server configuration settings can be restored from BIAR
files.
5. On the "Incremental import" screen, select whether you want to overwrite
object contents or overwrite right contents.
6. Click Next until the "Ready to Import" screen appears.
7. On the "Ready to Import" screen, click Finish.
The "Import Progress" screen appears. After the import is complete, the
screen displays a summary of the import.
8. Click Done to close the Import Wizard.
Restoring server configuration scenarios
This section describes scenarios for using the Import Wizard to restore server
configuration settings from a BIAR file, and illustrates how selecting different
import scenarios affects how server settings are imported.
BusinessObjects Enterprise XI 3.1 Import Wizard Guide 83
Page 84

Backing up and restoring server configuration settings
7
To restore server configuration settings
For all of the scenarios, the initial configuration is described in the following
tables.
Table 7-1: Initial Server Configuration Settings on the Deployment
Server Name
When you export these settings to a BIAR file, the file contains the same
server settings.
Table 7-2: Initial Server Configuration Settings in the BIAR file
Server Name
Unique
Identifier
Unique
Identifier
ValueProperty
6401Request Port1mynode.cms
2Maximum Idle Time2mynode.eventserver
ValueProperty
6401Request Port1mynode.cms
2Maximum Idle Time2mynode.eventserver
All of the following scenarios assume that we are importing the server
configuration settings from this BIAR file.
Suppose that you modify the server configuration settings on the deployment
so that the deployment now has the configuration settings described in the
following table.
84 BusinessObjects Enterprise XI 3.1 Import Wizard Guide
Page 85

Backing up and restoring server configuration settings
To restore server configuration settings
Table 7-3: New Server Configuration Settings on the Deployment
7
Scenario 1
Server Name
The following two scenarios describe how the options on the "Import scenario"
screen affect the process of restoring server configuration settings from the
BIAR file.
This scenario describes what the Import Wizard does when, on the Import
scenario screen, you select Use the object's unique identifier to determine
whether it already exists in the destination system, and then select one
of the following options.
• Update the destination object. In case of name conflict, rename it,
or
• Update the destination object. In case of name conflict, do not import
it.
Unique
Identifier
ValueProperty
6402Request Port1mynode.cms
3Maximum Idle Time2mynode.eventserver
The deployment's initial configuration settings are described in the following
table.
Table 7-4: Initial Server Configuration Settings on the Deployment
Server Name
Unique
Identifier
BusinessObjects Enterprise XI 3.1 Import Wizard Guide 85
ValueProperty
6402Request Port1mynode.cms
Page 86

Backing up and restoring server configuration settings
7
To restore server configuration settings
Server Name
When you import the servers from the BIAR file, the Import Wizard finds
servers in the BIAR file and on the deployment with matching unique
identifiers. The Import Wizard overwrites the values on the deployment with
the values from the BIAR file. In other words, the deployment's original
settings are restored.
The server configuration settings on the deployment after this workflow are
described in the following table.
Table 7-5: New Server Configuration Settings on the Deployment
Server Name
Unique
Identifier
Unique
Identifier
ValueProperty
3Maximum Idle Time2mynode.eventserver
ValueProperty
6401Request Port1mynode.cms
Scenario 2
This example explains what happens when, on the Import scenario screen,
you select the Use the object's unique identifier to determine whether
it already exists in the destination system. and Do not import the object
options.
The deployment's initial configuration settings are described in the following
table.
86 BusinessObjects Enterprise XI 3.1 Import Wizard Guide
2Maximum Idle Time2mynode.eventserver
Page 87

Backing up and restoring server configuration settings
To restore server configuration settings
Table 7-6: Initial Server Configuration Settings on the Deployment
7
Scenario 3
Server Name
When you match by unique identifier and choose the Do not import the
object option, the Import Wizard finds servers with the matching unique
identifiers, and does not import the server configuration settings. The servers
on the deployment are not updated.
The following examples show what happens when you modify the server
configuration settings on the deployment, and then try to restore the settings
from the BIAR file that you imported the settings to. Suppose that you make
the following three changes on the deployment.
• Rename the mynode.cms server to mynode.primarycms.
Unique
Identifier
ValueProperty
6402Request Port1mynode.cms
3Maximum Idle Time2mynode.eventserver
• Add a new server, called mynode.cms, with the Request Port property
set to 6404.
When a new server is added, it is automatically assigned a new unique
identifier.
• Delete the event server.
The following table describes the server settings on the destination
deployment after these modifications.
BusinessObjects Enterprise XI 3.1 Import Wizard Guide 87
Page 88

Backing up and restoring server configuration settings
7
To restore server configuration settings
Table 7-7: Server Configuration Settings on the Destination Deployment
Scenario 3.1
Server Name
When you restore the server configuration settings from the BIAR file, the
particular settings that are imported to the deployment depends on the options
that you select on the "Import scenarios" screen.
Suppose that you use the Import Wizard to restore the server configuration
settings from the BIAR file, and that on the Import scenarios screen, you
select Use the object's unique identifier to determine whether it already
exists in the destination system and Update the destination object, in
case of name conflict, rename it.
Use this option when you want to restore all servers from a BIAR file to a
deployment.
The deployment's initial configuration settings are described in the following
table.
Unique
Identifier
ValueProperty
6402Request Port1mynode.primarycms
6404Request Port3mynode.cms
Table 7-8: Initial Server Configuration Settings on the Deployment
Server Name
88 BusinessObjects Enterprise XI 3.1 Import Wizard Guide
Unique
Identifier
ValueProperty
6402Request Port1mynode.primarycms
6404Request Port3mynode.cms
Page 89

Backing up and restoring server configuration settings
To restore server configuration settings
When you match by unique identifier and choose the Update the destination
object, in case of name conflict, rename it option, the Import Wizard finds
that the unique identifier for mynode.cms from BIAR is 1, and that the unique
identifier of the mynode.primarycms server on the deployment is also 1.
However, when it detects that the deployment already has another server
with mynode.cms name, it renames the restored server.
Furthermore, because the mynode.cms server doesn't exist in the BIAR file,
that server is not updated during the import process.
This results in the deployment described in the following table.
Table 7-9: Server Configuration Settings on the Deployment
7
Scenario 3.2
Server Name
Suppose that you use the Import Wizard to restore the server configuration
settings from the BIAR file, and that on the Import scenarios screen, you
select Use the object's unique identifier to determine whether it already
exists in the destination system and Update the destination object, in
case of name conflict, do not import it.
Unique
Identifier
2mynode.eventserver
Maximum Idle
Time
6401Request Port1mynode.cms(2)
2
6404Request Port3mynode.cms
ResultValueProperty
This server is
restored with
a new name.
This server is
restored.
This server is
not updated,
because it
does not exist
in the BIAR
file.
BusinessObjects Enterprise XI 3.1 Import Wizard Guide 89
Page 90

Backing up and restoring server configuration settings
7
To restore server configuration settings
Use this option when you want to restore all server objects from a BIAR file
to a deployment, except servers with different unique identifiers but with the
same name.
The deployment's initial configuration settings are described in the following
table.
Table 7-10: Initial Server Configuration Settings on the Deployment
Server Name
When you match by unique identifier and choose the Update the destination
object, in case of name conflict, do not import it option, the Import Wizard
does not import the server settings from the BIAR file for mynode.cms, even
though the unique identifiers of mynode.cms (in the BIAR file) and
mynode.primarycms (on the deployment) are the same. This is because the
Import Wizard detects a server on the destination with the same name, and
does not import the server.
The results in the deployment are described in the following table.
Table 7-11: Server Configuration Settings on the Deployment
Server Name
Unique
Identifier
Unique
Identifier
ValueProperty
6402Request Port1mynode.primarycms
6404Request Port3mynode.cms
ResultValueProperty
2mynode.eventserver
90 BusinessObjects Enterprise XI 3.1 Import Wizard Guide
Maximum Idle
Time
6402Request Port1mynode.primarycms
2
This server is
not updated.
This server is
restored.
Page 91

Backing up and restoring server configuration settings
To restore server configuration settings
7
Scenario 3.3
Server Name
Suppose that you use the Import Wizard to restore the server configuration
settings from the BIAR file, and that on the Import scenarios screen, you
select Use the object's unique identifier to determine whether it already
exists in the destination system and Do not import the object on the
"Import scenario" screen.
Use this option when you do not want the servers on a deployment to be
overwritten by servers from a BIAR file. This option only restores servers
that do not exist on the deployment, but that are in the BIAR file.
The deployment's initial configuration settings are described in the following
table.
Unique
Identifier
6404Request Port3mynode.cms
ResultValueProperty
This server is
not updated,
because it
does not exist
in the BIAR
file.
Table 7-12: Initial Server Configuration Settings on the Deployment
Server Name
When you match by unique identifier and choose the Do not import the
object option, the Import Wizard does not import the server settings from
BusinessObjects Enterprise XI 3.1 Import Wizard Guide 91
Unique
Identifier
ValueProperty
6402Request Port1mynode.primarycms
6404Request Port3mynode.cms
Page 92

Backing up and restoring server configuration settings
7
To restore server configuration settings
the BIAR file for mynode.cms, even though the unique identifiers of
mynode.cms (on the BIAR file) and mynode.primarycms (on the destination
environment) match. This is because you've selected to not import objects
where the source and destination environments have the same unique
identifier.
The results in the deployment are described in the following table.
Table 7-13: Server Configuration Settings on the Deployment
Server Name
Unique
Identifier
2mynode.eventserver
Maximum Idle
Time
ResultValueProperty
This server is
not updated,
because
you've cho-
6402Request Port1mynode.primarycms
2
6404Request Port3mynode.cms
sen not to
overwrite existing servers
on the deployment.
This server is
restored.
This server is
not updated,
because it
does not exist
in the BIAR
file.
92 BusinessObjects Enterprise XI 3.1 Import Wizard Guide
Page 93

Backing up and restoring server configuration settings
To import nodes from one cluster to another
To import nodes from one cluster to
another
There are a number of situations that may require you to re-point existing
nodes to different clusters. For example, if you want to add a node to a
Production deployment, and want to make the change as smooth as possible,
you may want to create the node on a Test deployment, and then re-point it
to the Production deployment. Direct migration of nodes between deployments
is not supported in BusinessObjects Enterprise XI 3.x, in favor of a more
secure method involving import and export of server configuration settings.
In BusinessObjects Enterprise XI 3.x, server configuration information is
stored in the CMS database, so instead of moving the node between
deployments, you import the server configuration settings from one
deployment to the other. You need to first import the node's configuration
information to the destination node. You can then re-point the node (Server
Intelligence Agent) to the destination cluster.
Note:
If you are importing nodes from one cluster to another, the Import Wizard
does not import configuration templates from BIAR files.
7
To re-point a node on a Test deployment so that the node joins the cluster
on the Production deployment:
1. On the Test deployment, start the Import Wizard and export the server
configuration settings to a BIAR file. For information on importing nodes
to a BIAR file, see To back up server configuration settings to a BIAR file.
2. On the Test deployment, stop the Server Intelligence Agent .
3. On the Production deployment , use the Import Wizard to import the node
from the BIAR file.
a. Start the Import Wizard.
b. Select the BIAR file that contains the node as the source environment.
c. On the "Select objects to import" screen, select Import node(s) from
a different cluster , and click Next.
d. On the "Import scenario" screen, select what you want the Import
Wizard to do if it finds any objects on the destination environment with
the same unique identifier.
e. On the "Incremental import" screen, select whether you want the Import
Wizard to overwrite any objects or object rights that already exist on
the destination environment.
BusinessObjects Enterprise XI 3.1 Import Wizard Guide 93
Page 94

Backing up and restoring server configuration settings
7
To import nodes from one cluster to another
f. On the "Nodes" screen, select the node that you want to import, and
click Next.
g. On the "Ready to Import" screen, click Finish.
h. On the "Import Progress" screen, click Done.
4. If you are not re-pointing all of the nodes that are on the Test deployment,
then reconfigure the Test deployment's node that you are re-pointing:
• If you are re-pointing a node on a Windows deployment, follow these
steps.
a. On the Test deployment, start the CCM.
b. Right-click the node that you imported to the Production environment,
and select Properties > Startup.
A list of local and remote CMS Servers is displayed.
c. Click Remove, to remove the link to the CMSs that you are not
re-pointing.
d. Click OK.
• If you are re-pointing a node on a UNIX deployment, run the server
config.sh script to remove the link to the CMSs that you are not
re-pointing.
5. If the node that you've imported contains a CMS:
• On Windows, perform the following steps.
a. On the Test deployment, start the CCM.
b. Right-click the Server Intelligence Agent for the node that you are
re-pointing, and select Properties > Configuration.
c. Click Select a Data Source.
d. Type the DSN for the Production database, and click OK.
• On Unix, run the cmsdbsetup.sh script to change the node's data
source to the Production database.
6. On the Test deployment, start the re-pointed Server Intelligence Agent.
Related Topics
• To back up server configuration settings to a BIAR file on page 81
94 BusinessObjects Enterprise XI 3.1 Import Wizard Guide
Page 95

Life Cycle Management
8
Page 96

Life Cycle Management
8
Promoting report objects
Many deployments of BusinessObjects Enterprise contain different stages
such as a Development, QA, and Production within the same version. Reports
and other Business Intelligence objects often require modification or
enhancement as a result of changing information needs. Administrators must
control how objects are promoted through these stages, whether the objects
are completely new or whether they overwrite or update objects that already
exist in the destination environment. This is referred to as Life Cycle
Management.
An important consideration in Life Cycle Management within the same
version, is how the objects will exist in the new environment. Will the promoted
objects be completely new objects in the new environment, or will the
promoted objects overwrite similarly named objects in the new environment,
or will the promoted objects simply update existing objects in the new
environment?
In BusinessObjects Enterprise XI 3.x there are new import scenario options,
and a feature called Incremental importing, which greatly enhance the
administrators choices for content promotion.
Import scenarios
When using the Import Wizard to promote an object from one
BusinessObjects Enterprise XI 3.x deployment to another, the wizard allows
you use either the objects CUID or its name and path to determine whether
the object already exists on the destination environment. It also lets you
specify what you want the wizard to do when it finds that an object already
exists on the destination environment.
When you are matching objects by CUID, and the Import Wizard finds a
matching object on the destination environment, you have three options:
• Update the destination. In case of name conflict, rename the object.
If the Import Wizard finds an object in the destination environment with
the same CUID, it updates the destination's object.
If the Import Wizard does not find an object in the destination environment
with the same CUID, but it finds an object with the same name, it imports
the object from the source environment and then renames that object.
• Update the object. In case of name conflict, do not import it.
If the Import Wizard finds an object in the destination environment with
the same CUID, it updates the destination's object.
96 BusinessObjects Enterprise XI 3.1 Import Wizard Guide
Page 97

Life Cycle Management
Promoting report objects
If the Import Wizard finds an object on the destination environment with
the same name but different CUID, it does not import the object from the
source environment.
• Do not import the object.
If Import Wizard finds an object on the destination environment with the
same CUID, it does not import the object.
If the Import Wizard does not find an object with matching CUID, it imports
the source object.
When you are matching objects by name and path, and the Import Wizard
finds a matching object on the destination environment, you have three
options:
• Keep the destination object and import a renamed copy of the object.
If Import Wizard finds that an object already exists on the destination
environment with the same name and path, it imports the source's object
and renames it.
• Update the destination object
8
If Import Wizard finds that an object already exists on the destination
environment with the same name and path, it updates the destination
environment's version with the source's.
• Do not import the object
If Import Wizard finds that an object already exists on the destination
environment with the same name and path, it does not import the source's
version.
• Matching objects by name and path is only supported for the following
object types:
• Folders and objects under public folders and personal folders
• Corporate Categories
• Personal Categories
• Universes, Overloads and Connections
• Dashboards
All other object types will use the matching by unique identifier scheme.
BusinessObjects Enterprise XI 3.1 Import Wizard Guide 97
Page 98

Life Cycle Management
8
Promoting report objects
• Matching objects by name and path is not an option when importing
content from a BIAR file. When you import from BIAR files, objects will
be matched by CUID.
Incremental imports
By default, the Import Wizard automatically imports dependent objects. For
example, when you import report objects, the Import Wizard will also import
the universes and universe connections that the reports use.
The Incremental import screen allows you to import objects without overwriting
dependent objects that already exist on the destination environment. If you
want to import report objects without importing a universe or connection that
would overwrite a universe or connection on the destination environment,
you can specify this on the Incremental import screen.
The Incremental screen gives you the following options:
• Overwrite object contents
• Overwrite universe contents
• Overwrite connection contents
• Overwrite group and user membership
• Overwrite object rights
Note:
Business Objects does not support moving Business Intelligence (BI) content
from a recent version of BusinessObjects Enteprise to an earlier version of
the same release using BIAR files, the Import Wizard, or any other Business
Objects Life Cycle Management (LCM) Tool. For example, reports,
documents, and any other content from a BusinessObjects Enterprise XI
Release 2 SP3 system cannot be moved to a BusinessObjects Enterprise
XI Release 2 SP2 environment.
Promoting report objects
This section describes scenarios for promoting Crystal Report, Web
Intelligence, and Desktop Intelligence report objects, and there related
universe and universes connection objects, from one BusinessObjects
Enterprise XI 3.x deployment to another XI 3.x deployment by using the
Import Wizard.
98 BusinessObjects Enterprise XI 3.1 Import Wizard Guide
Page 99

Life Cycle Management
Promoting report objects
When you use the Import Wizard to import report objects, the wizard
automatically imports any universe and universe connections that the reports
are dependent on. If you want to import a report object from one environment
that uses universes or connections, those universes or connections already
exist on the destination environment, and you do not want to overwrite those
objects on the destination environment, you must ensure that you chose to
not overwrite those objects on the Incremental import screen.
Note:
• If you import a reports without import dependent universes, and those
universes do not already exist on the destination environment, the reports
will lose the relationship with the universes and will not run properly on
the destination environment.
• If you import a report that has rights set on it for users and groups, and
you want to import the object rights on the report, you must either import
those users and groups or ensure that the users and groups already exist
on the destination environment.
• If you are importing a report that relies on a server group or an event that
already exists on the destination, do not overwrite the server group or
event. On the "Select objects to import" screen, do not select the server
group or event.
• If you're importing server groups or events, the Import Wizard does not
allow you to import specific objects. You must import all events or server
groups, or none of them. If you've modified an event or server group on
the source environment, and only want to import that one object, delete
the object from the destination environment, and then ensure that you
clear the Overwrite object contents on the "Incremental import" screen.
This ensures that the modified server group or event is the only one that
is imported.
8
If you're importing a modified report that uses a modified event or server
group, perform the import in two steps. Delete the event or server group
from the destination environment and then import the modified object,
making sure that you do not overwrite any objects on the destination
environment. Then import the report object, ensuring that you select
"Overwrite object contents" on the "Incremental import" screen.
BusinessObjects Enterprise XI 3.1 Import Wizard Guide 99
Page 100

Life Cycle Management
8
Promoting report objects
To promote report objects with existing universes
This scenario describes promoting Crystal Report, Desktop Intelligence, or
Web Intelligence report objects from one BusinessObjects Enterprise XI 3.x
deployment to another XI 3.x deployment, where the report objects use
universe and universe connection objects that already exist on the destination
environment.
1. Start the Import Wizard, and specify your source and destination
environments.
2. On the "Select objects to import" screen, select Import folders and
objects, and click Next.
3. On the "Import Scenarios" screen, select whether you want to use the
objects' CUID or name and path to determine whether the objects already
exist on the destination environment, and what you want the Import Wizard
to do if it finds matching objects, and click Next.
If you are promoting a updated version of a report that already exists on
the destination environment, select Use the object's unique identifier
to determine whether it already exists in the destination system, and
Update the destination object. In case of name conflict, rename it.
4. On the "Incremental import" screen:
a. Select Overwrite object contents.
b. To ensure that you don't overwrite universe and universes connection
objects on the destination environment, clear the Overwrite universe
contents and Overwrite connection contents checkboxes.
c. If the Overwrite group and user membership or Overwrite object
rights checkboxes appear on the screen, ensure that they are cleared.
d. Click Next to continue.
5. On the "Folders and objects" screen, select the reports that you want to
import.
6. Complete the import process.
The Import Wizard imports the report objects that you select to the destination
environment. Because you don't choose to overwrite universe and universe
connection objects, the Import Wizard does not touch those objects on the
destination environment. The relationship between the report objects and
the universes is maintained.
100 BusinessObjects Enterprise XI 3.1 Import Wizard Guide
 Loading...