

Page 1

Using Business Views
BusinessObjects Enterprise XI 3.1
Page 2

Copyright
© 2008 Business Objects, an SAP company. All rights reserved. Business Objects
owns the following U.S. patents, which may cover products that are offered and
licensed by Business Objects: 5,295,243; 5,339,390; 5,555,403; 5,590,250;
5,619,632; 5,632,009; 5,857,205; 5,880,742; 5,883,635; 6,085,202; 6,108,698;
6,247,008; 6,289,352; 6,300,957; 6,377,259; 6,490,593; 6,578,027; 6,581,068;
6,628,312; 6,654,761; 6,768,986; 6,772,409; 6,831,668; 6,882,998; 6,892,189;
6,901,555; 7,089,238; 7,107,266; 7,139,766; 7,178,099; 7,181,435; 7,181,440;
7,194,465; 7,222,130; 7,299,419; 7,320,122 and 7,356,779. Business Objects and
its logos, BusinessObjects, Business Objects Crystal Vision, Business Process
On Demand, BusinessQuery, Cartesis, Crystal Analysis, Crystal Applications,
Crystal Decisions, Crystal Enterprise, Crystal Insider, Crystal Reports, Crystal
Vision, Desktop Intelligence, Inxight and its logos , LinguistX, Star Tree, Table
Lens, ThingFinder, Timewall, Let There Be Light, Metify, NSite, Rapid Marts,
RapidMarts, the Spectrum Design, Web Intelligence, Workmail and Xcelsius are
trademarks or registered trademarks in the United States and/or other countries
of Business Objects and/or affiliated companies. SAP is the trademark or registered
trademark of SAP AG in Germany and in several other countries. All other names
mentioned herein may be trademarks of their respective owners.
Third-party
Contributors
Business Objects products in this release may contain redistributions of software
licensed from third-party contributors. Some of these individual components may
also be available under alternative licenses. A partial listing of third-party
contributors that have requested or permitted acknowledgments, as well as required
notices, can be found at: http://www.businessobjects.com/thirdparty
2008-09-17
Page 3

Contents
Introduction to Business Views 11Chapter 1
About this documentation..........................................................................12
Business Views Architecture 15Chapter 2
Business Views overview..........................................................................16
Architecture overview and diagram...........................................................17
Client tier....................................................................................................19
Business tier..............................................................................................20
Data tier.....................................................................................................23
Information flow.........................................................................................23
Architectural workflow................................................................................31
What is Business Views?.....................................................................12
Who should read this guide..................................................................12
Business View Manager.......................................................................20
Business Views objects........................................................................21
Data Connection...................................................................................21
Dynamic Data Connection....................................................................21
Data Foundation...................................................................................22
Business Element.................................................................................22
Business View......................................................................................22
Usage scenario....................................................................................24
Data Connection layer..........................................................................25
Data Foundation layer..........................................................................28
Business Element layer........................................................................30
Business View layer.............................................................................31
Using Business Views 3
Page 4

Contents
Quick Start: Creating a Business View 35Chapter 3
Quick Start overview..................................................................................36
Before you begin........................................................................................36
Sample data - Xtreme.mdb..................................................................37
Conventions.........................................................................................38
Tutorial scenario...................................................................................38
What is a Business View?....................................................................39
Logging on to the Business View Manager..........................................40
Creating and configuring a Data Connection.............................................41
Creating a Data Connection.................................................................42
Setting a Data Connection password...................................................45
Saving and naming a Data Connection................................................46
Modifying the properties of a Data Connection....................................47
Exercise: Creating two more Data Connections..................................49
Creating and configuring Dynamic Data Connections...............................50
Creating a Dynamic Data Connection..................................................50
Adding a Data Connection to a Dynamic Data Connection.................52
Sorting Data Connections....................................................................53
Saving and naming a Dynamic Data Connection.................................53
Creating and configuring a Data Foundation.............................................54
Creating a Data Foundation.................................................................55
Linking tables.......................................................................................57
Inserting a formula................................................................................58
Inserting an SQL expression................................................................61
Inserting a parameter...........................................................................64
Inserting a Business Filter....................................................................66
Creating and configuring Business Elements............................................68
Creating a Business Element...............................................................68
Exercise: Creating additional Business Elements................................70
Creating and configuring a Business View................................................72
4 Using Business Views
Page 5

Contents
To create a Business View...................................................................72
Using the Business View Manager 75Chapter 4
Business View Manager overview.............................................................76
Working with the Business View Manager.................................................76
Logging on to the Business View Manager..........................................77
Navigating the Welcome to Business View Manager dialog box.........78
Navigating within the Business View Manager.....................................80
Saving an object within the Business View Manager...........................81
Exporting and importing Business Views...................................................82
To export Business Views....................................................................82
To import Business Views....................................................................84
Using the Repository Explorer...................................................................85
Accessing the BusinessObjects Enterprise Repository.......................86
Adding folders to the repository............................................................88
Renaming folders in the repository......................................................89
Deleting items from the repository........................................................89
Installing sample repository objects.....................................................90
BusinessObjects Enterprise Repository security model............................92
Applying security settings to folders in the BusinessObjects Enterprise
Repository............................................................................................93
Viewing folder rights.............................................................................95
Creating a list of values.............................................................................95
To create a list of values.......................................................................95
To schedule a list of values..................................................................99
Changing the Business Views Used by a List of Values..........................100
To change Business Views.................................................................101
Creating Data Connections 105Chapter 5
Data Connections overview.....................................................................106
Using Business Views 5
Page 6

Contents
Working with Data Connections...............................................................106
Data sources......................................................................................106
Creating a new Data Connection.......................................................107
Setting the Data Connection password..............................................109
Testing and verifying data connectivity and object dependency........112
Showing dependent and referenced objects......................................112
Modifying a Data Connection.............................................................113
Saving a Data Connection..................................................................116
Editing rights for a Data Connection..................................................116
Creating Dynamic Data Connections 119Chapter 6
Dynamic Data Connections overview......................................................120
Why use a Dynamic Data Connection?.............................................120
Working with Dynamic Data Connections................................................121
Creating a new Dynamic Data Connection........................................121
Verifying object dependency..............................................................122
Showing dependent and referenced objects......................................123
Modifying a Dynamic Data Connection..............................................123
Saving a Dynamic Data Connection..................................................128
Editing rights for a Dynamic Data Connection...................................129
Managing Data Foundations 133Chapter 7
Data Foundations overview.....................................................................134
Working with Data Foundations...............................................................134
Creating a new Data Foundation.......................................................135
Verifying object dependency and verifying databases.......................137
Showing dependent and referenced objects......................................137
Modifying a Data Foundation.............................................................138
Linking tables.....................................................................................139
Inserting data tables...........................................................................150
6 Using Business Views
Page 7

Contents
Setting the Database Explorer Options..............................................155
Inserting a formula..............................................................................157
Inserting an SQL expression..............................................................167
Inserting a parameter.........................................................................172
Inserting a filter...................................................................................178
Importing a custom function...............................................................183
Using the Referenced Data Connections window..............................186
Using the Property Browser...............................................................187
Using the Object Explorer..................................................................188
Saving a Data Foundation..................................................................189
Editing rights for a Data Foundation...................................................190
Managing Business Elements 193Chapter 8
Business Elements overview...................................................................194
Working with Business Elements.............................................................195
Creating a new Business Element.....................................................195
Verifying object dependency..............................................................196
Showing dependent and referenced objects......................................196
Modifying a Business Element...........................................................196
Setting and resetting the field structure..............................................197
Inserting a Business Field..................................................................198
Inserting a filter...................................................................................199
Inserting a parameter.........................................................................203
Using the Referenced Data Foundation window................................206
Using the Property Browser...............................................................206
Using the Object Explorer..................................................................208
Saving a Business Element................................................................208
Editing rights for a Business Element................................................209
Using the Business Element Wizard.......................................................211
Creating a new Business Element.....................................................211
Using Business Views 7
Page 8

Contents
Dynamic Prompts and Cascading Lists of Values 215Chapter 9
Parameters and prompts.........................................................................216
Dynamic prompts overview......................................................................216
Supported components............................................................................217
Understanding lists of values...................................................................218
Lists of values and prompt groups...........................................................219
List-of-values types............................................................................220
Determining which list-of-values type to use......................................221
Using Separate Value and Description Fields....................................222
Null Handling......................................................................................223
Using dynamic prompts and cascading lists of values in Business Elements
and Data Foundations.............................................................................223
Using Business View Manager to manage prompting repository objects.224
Managing lists of values in Business View Manager.........................224
Managing security for lists of values..................................................228
Scheduling lists of values in Business View Manager.......................229
Managing prompt groups in Business View Manager........................231
Best practices for prompting....................................................................233
Converting unmanaged reports to managed reports...............................234
Deploying managed reports with dynamic prompts.................................235
Managing Business Views 237Chapter 10
Business Views overview........................................................................238
Working with Business Views..................................................................238
Creating a new Business View...........................................................238
Importing and exporting Business Views...........................................239
Showing dependent and referenced objects......................................239
Modifying a Business View.................................................................239
Overriding the linking in a Data Foundation.......................................242
8 Using Business Views
Page 9

Contents
Saving a Business View.....................................................................249
Editing rights for a Business View......................................................250
Business Views Security Concepts 255Chapter 11
Security overview.....................................................................................256
Business Views object rights overview....................................................256
Using the Edit Rights dialog box..............................................................257
Applying security settings...................................................................258
Adding a group or user.......................................................................261
Object and folder rights............................................................................261
Viewing Business Views object rights................................................262
Using inheritance to your advantage..................................................263
Security deployment................................................................................264
Security considerations............................................................................267
Root folder..........................................................................................267
Reports based on Business Views.....................................................268
Importing and exporting Business Views...........................................268
User Scenarios 271Chapter 12
User scenarios overview..........................................................................272
Data integration.......................................................................................273
Simplifying existing infrastructure through data abstraction...............273
Multiple data sources...............................................................................274
Reporting off multiple data sources....................................................274
Specifying locale: a global, multi-lingual deployment.........................275
Security applications................................................................................275
Applying row security.........................................................................276
Applying column security....................................................................276
Setting object security........................................................................276
Using Business Views 9
Page 10

Contents
Get More Help 279Appendix A
Index 283
10 Using Business Views
Page 11

Introduction to Business Views
1
Page 12

Introduction to Business Views
1
About this documentation
About this documentation
This help provides you with information and procedures that cover a wide
range of administrative tasks. Procedures are provided for common tasks,
including the use of the Business View Manager. Conceptual information
and technical details are provided for all advanced topics such as the
Business Views architecture, and security and deployment recommendations.
What is Business Views?
Business Views is a flexible and reliable multi-tier system that enables
companies to build detailed and specific Business Views objects that help
report designers and end users access the information they require.
Using Business Views, you can integrate data from disparate sources. You
can also bring together data from multiple data collection platforms and
application boundaries so that the differences in data resolution, coverage,
and structure between collection methods are eliminated.
Business Views includes the Business View Manager, a thick-client
application. This designer enables administrators to create and modify
Business Views objects:
• Data Connections
• Dynamic Data Connections
• Data Foundations
• Business Elements
• Business Views
Who should read this guide
This help is intended for system administrators who are responsible for
configuring, managing, and maintaining a Business Views installation.
Familiarity with your operating system and your network environment is
certainly beneficial, as is a general understanding of web server management,
scripting technologies, and general security concepts. However, in catering
12 Using Business Views
Page 13

Introduction to Business Views
About this documentation
to all levels of administrative experience, this guide aims to provide sufficient
background and conceptual information to clarify all administrative tasks and
features.
Business Views administrators should also be familiar with BusinessObjects
Enterprise, as Business Views is integrated with and is a part of
BusinessObjects Enterprise. For more information about BusinessObjects
Enterprise, consult the BusinessObjects Enterprise Getting Started Guide,
the BusinessObjects Enterprise Installation Guide, the BusinessObjects
Enterprise User's Guide, and the BusinessObjects Enterprise Administrator's
Guide. Online versions of these guides are included in the doc directory of
your product distribution.
Working and conceptual knowledge of Crystal Reports and general reporting
concepts will also be beneficial; for more information on Crystal Reports,
see the Crystal Reports User's Guide.
1
Using Business Views 13
Page 14

Introduction to Business Views
About this documentation
1
14 Using Business Views
Page 15

Business Views Architecture
2
Page 16

Business Views Architecture
2
Business Views overview
This section provides a detailed overview of Business Views and its
architecture, and it describes the different objects that you can create and
modify using the Business View Manager.
Business Views overview
Business Views is a multi-tier system that enables companies to build
comprehensive and specific Business Views objects that help report designers
and end users access the information they require.
Business Views are useful as companies engage in data management to
collect and organize operational data into databases. Companies often use
data integration technology to build data warehouses or data marts to cleanse,
aggregate, and store data for analytic use. However, data warehouses must
serve the lowest common denominator and can—but often do not—provide
the various views and granularity that different business units require in order
to understand and analyze their businesses. In addition, these warehouses
may not provide the level of detail necessary for some analytic operations.
Using Business Views, you can integrate data from disparate sources. You
can bring together data from multiple data collection platforms across
application boundaries so that the differences in data resolution, coverage,
and structure between collection methods are eliminated.
In addition, Business Views enables you to add the necessary business
context to these data islands as you link them into a single organized
Business View for your organization. This view is more than just an integrated
network of data. It can include consistent definitions of corporate hierarchy
or customer information, and provide a variety of detailed or summarized
viewpoints for the various information consumers in your business.
Administrators use the Business View Manager—a thick-client designer,
which runs as a Microsoft Windows application. This designer provides a
wide range of capabilities for creating Data Connections, Dynamic Data
Connections, Data Foundations, Business Elements, and Business Views.
The Business View Manager enables you to design relational views of
information. This designer also enables you to set detailed column and
row-level security for various objects in your report.
Note:
Business Views objects consists of Data Connections, Dynamic Data
Connections, Data Foundations, Business Elements, and Business Views.
16 Using Business Views
Page 17

Business Views Architecture
Architecture overview and diagram
Business Views supports the transition from one view to another at runtime,
thereby enabling powerful analytics and rich information presentation through
a broad range of BusinessObjects Enterprise client tools. The Business View
Manager is designed to help organizations consolidate data by dynamically
mapping back-end data into Business Views. These Business Views can
then be secured at a granular level by administrators and used as the basis
for reporting, analysis, and information delivery processes. This flexible
approach enables organizations to use the data repository of their
choice—including multiple repositories—for their views and to leverage all
of these Business Views objects within their BusinessObjects Enterprise
environment.
Note:
• Business Views is intended for administrators who are familiar with
BusinessObjects Enterprise. For more information on BusinessObjects
Enterprise, see the BusinessObjects Enterprise Administrator's Guide.
• Business Views is similar in concept to Crystal Dictionary files and Info
Views, but provides numerous additional features and is designed to
integrate seamlessly with BusinessObjects Enterprise.
2
Architecture overview and diagram
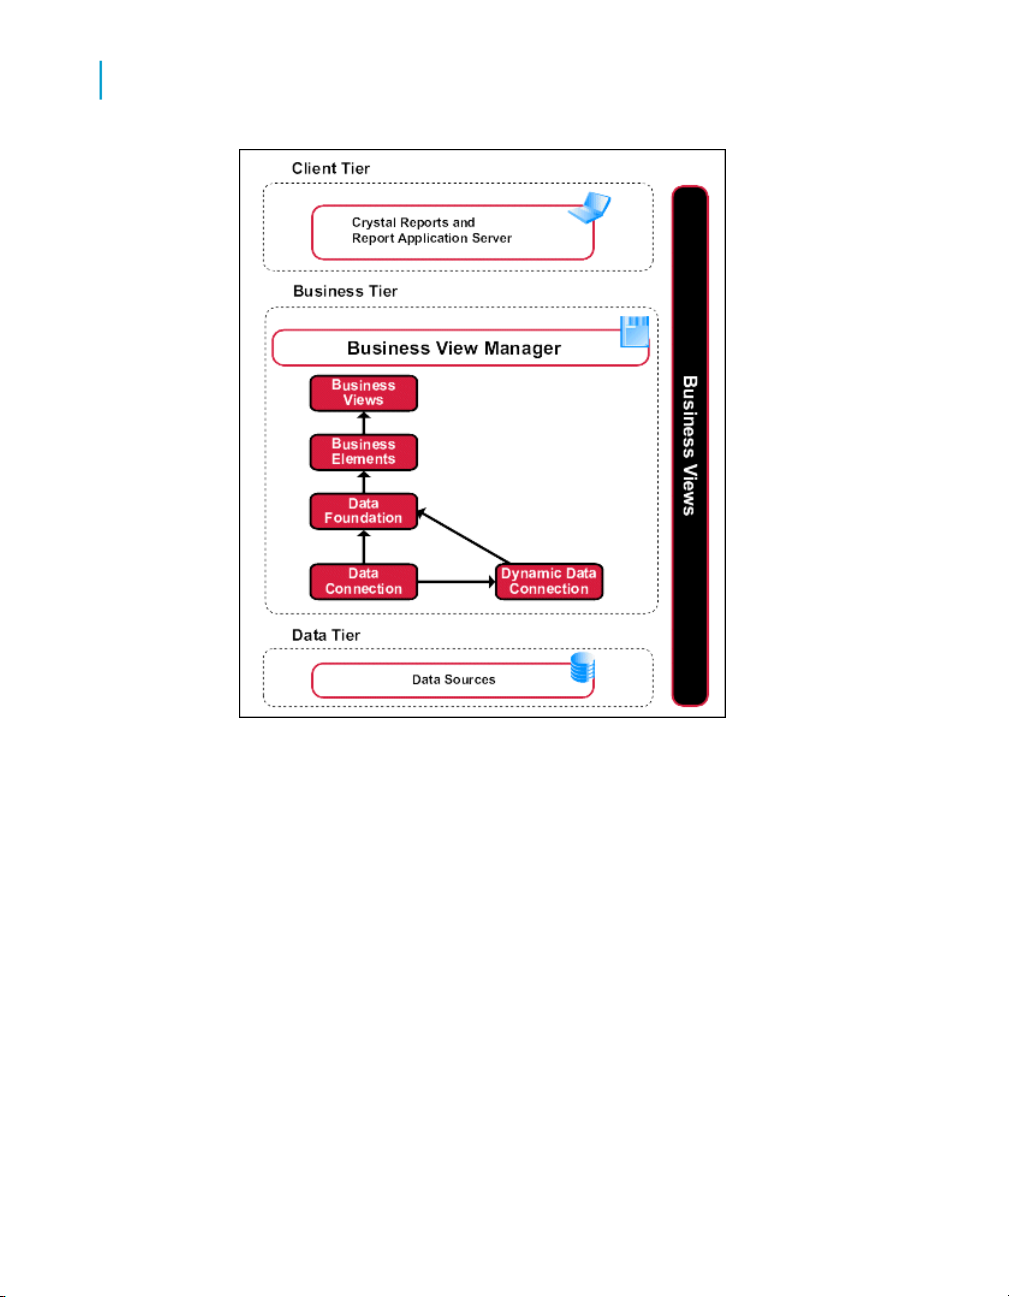
Business Views is a multi-tier system. The following diagram illustrates how
each of the various components fits within this system.
Using Business Views 17
Page 18
Business Views Architecture
2
Architecture overview and diagram
Business Views is comprised of three tiers: the client tier, the business tier,
and the data tier.
•
Client tier on page 19
The client tier consists of any Business Objects client application that
accesses the Business Views that are stored and organized in the
business tier.
•
Business tier on page 20
Business Views objects—a collection that includes Data Connections,
Dynamic Data Connections, Data Foundations, Business Elements, and
Business Views—are a part of this tier. Using the Business View Manager,
you specify the settings and conditions for the various objects so that the
client tier has access only to specific information from the data tier.
•
Data tier on page 23
18 Using Business Views
Page 19
The data tier consists of data sources, such as multiple databases on
different machines that provide the data for the business tier.
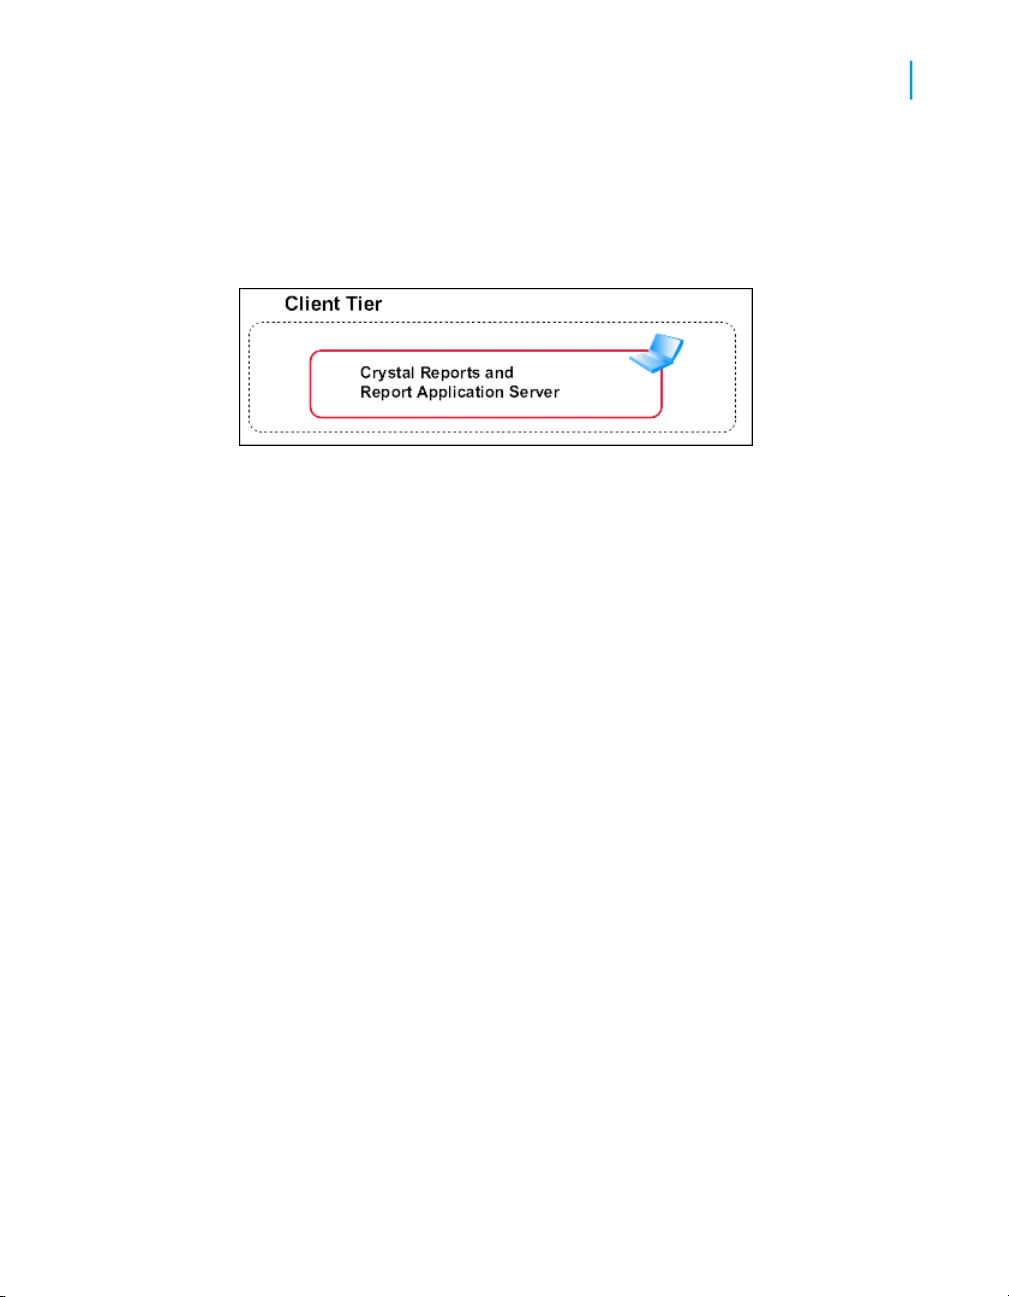
Client tier
The client tier includes Business Objects applications (such as Crystal
Reports and the Report Application Server) that access the Business Views
that are stored and organized in the business tier. Business Views
administrators control and define security and access to specific objects
within the various Business Views.
Report designers using Crystal Reports see only the tables and fields that
they have access to, as defined within the specific Business View. For
example, a report designer in the company's sales department can access
only regional sales data, and thus, design a report with sales-specific
information, even though the data store also contains employee-specific
information. Thus, depending on how the report is created and designed, a
manager running the same report (or another report) has access to the
Business Views Architecture
Client tier
2
Using Business Views 19
Page 20

Business Views Architecture
2
Business tier
additional information on employees within the company. All of the security
and access information is handled by the Business View Manager.
Business tier
The business tier is the primary tier of the Business Views system.
Administrators access this tier through the Business View Manager; they
use this designer to create and modify Data Connections, Dynamic Data
Connections, Data Foundations, Business Elements, and Business Views.
Business View Manager
The Business View Manager enables you to create and modify Business
Views and the various objects that make up these Business Views. The
administrator uses this designer to specify different Data Connections, to set
security, and to control access to the data found within the different data
sources in the data tier. This thick-client designer is the only part of Business
Views that administrators interact with directly. End users access the data
specified within the Business View Manager through their Business Objects
client application, such as Crystal Reports (via the BusinessObjects Enterprise
Repository) or through the Report Application Server.
20 Using Business Views
Page 21

Business Views objects
Business Views objects include the following: Data Connections, Dynamic
Data Connections, Data Foundations, Business Elements, and Business
Views.
Data Connection
Data Connections specify and define the data sources for a Business View;
they define how these data sources are made available to users. Thus, a
Data Connection is a connection object, and an administrator can apply
security to this object. Each Data Connection contains information that
describes the physical data source, such as the server and data being
accessed, the logon credentials, and the type of server being accessed.
Dynamic Data Connection
Business Views Architecture
Business tier
2
A Dynamic Data Connection is a collection of pointers to various Data
Connections. An administrator or user is able to select which Data Connection
to use through a parameter.
A typical scenario involves the migration of data from a development system
to a test system, and finally, to a production system. In this scenario, a report
is run against a development system, and then, when the data is migrated
to a test system, the same report is run against the test system's data. The
only change required is that the Dynamic Data Connection's settings must
be updated so that it points to the test system's Data Connection. Finally,
when the test system's data is migrated to the production system, the same
report can again be run against the production system.
Note:
When users refresh reports that are based on a Dynamic Data Connection,
they are prompted to specify which of the available Data Connections to use.
Using Business Views 21
Page 22

Business Views Architecture
2
Business tier
Data Foundation
A Data Foundation consists of collections of tables and fields. Default table
joins are defined at this level. Administrators can secure Data Foundations
using the standard BusinessObjects Enterprise security model, which includes
View and Edit rights. The primary use of Data Foundations is for data
abstraction: administrators control which tables and fields users can or cannot
access when these users are designing or viewing a report.
Business Element
A Business Element is roughly equivalent to an OLAP dimension or logical
view; that is, this object is a logically related collection of data fields that are
based on a Data Foundation. These fields can be organized into a hierarchical
structure within the Business Element. The most common example is a
hierarchical structure that contains the following fields: Country, State or
Province, and City. Business Fields in Business Elements can be aliased to
support data abstraction and to facilitate report design. Administrators can
secure Business Elements through the standard View and Edit rights.
Business View
A Business View is a logical collection of Business Elements. Users see
Business Views as abstract database connections, and the contained
Business Elements as virtual tables that, in turn, contain Business Fields.
Administrators can secure Business Views through the standard View and
Edit rights.
A Business View consists of the following objects:
• One or more Data Connections
• One optional Dynamic Data Connection
• One Data Foundation
• One or more Business Elements
22 Using Business Views
Page 23
Note:
End users can access Business Views through applications such as Crystal
Reports and the Report Application Server.
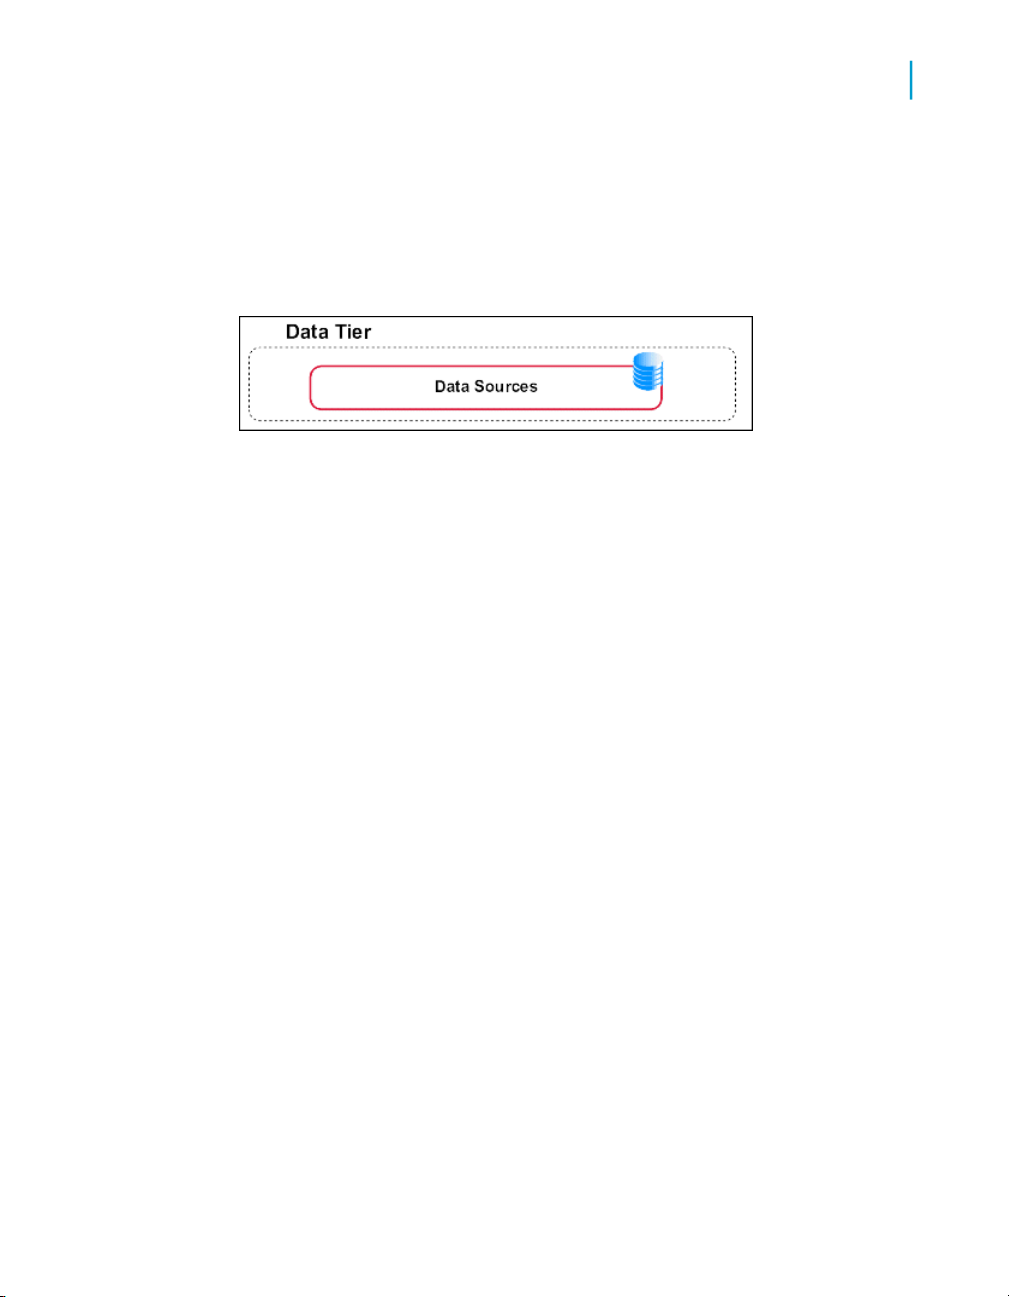
Data tier
The data tier consists of multiple databases that contain the data used in the
different views and objects, which are used in reports. Business Views
supports a wide range of corporate databases. See the release.html file
included with your product distribution for a complete list of tested database
software and version requirements.
Information flow
Business Views Architecture
Data tier
2
This section describes a typical Business Views usage scenario. It
demonstrates how report-processing is performed and how security access
is defined and applied for the data in a report.
When creating Business Views, it is important to understand how each of
the component objects relates to one another. The objects that make up a
Business View are:
• Data Connections
• Dynamic Data Connections
• Data Foundations
• Business Elements
A Business View requires at least one of each type of object, except for
Dynamic Data Connections, which are optional.
The objects that make up a Business View build on each other in a
hierarchical fashion. You must first create a Data Connection or Dynamic
Data Connection before you can create a Data Foundation. Then, after you
have a Data Foundation, you can create a Business Element. After you finish
Using Business Views 23
Page 24

Business Views Architecture
2
Information flow
Usage scenario
creating a Business Element, you can then create a Business View—a view
that report designers have access to.
Ultimately, the Business View Manager allows administrators to integrate
complex and disparate data sources seamlessly, effectively removing data
silos in an organization. That is, using the Business View Manager,
administrators can take data from several different sources and abstract it
so that report designers see a single, unified, and logically organized data
source.
This section employs a hypothetical usage scenario to illustrate how the
Business View Manager can be used to create Business Views from which
to base a report.
In this scenario, a company has its data stored in three different databases.
Its personnel data is stored in a Microsoft SQL Server. Its product information
is stored in a DB2. Its sales data is stored in three different ORACLE
databases: one for development, one for testing, and one for production.
The report designers want to create reports that show the performance of
Sales representatives, including personnel information and product data.
Users must be able to run reports based on any of the three ORACLE sales
databases. Additionally, the company wants to specialize the reports for
different regions. The East, Central, and West sales managers each want
to receive the same reports, but want to see data from only their regions. All
of the managers also have unique terminology preferences, and want their
reports to reflect these preferences. To incorporate the different data sources
and the three different sales region preferences, three different Business
Views must be created.
24 Using Business Views
Page 25

Business Views Architecture
Information flow
2
Data Connection layer
The Data Connection layer is composed of one or more Data Connections.
Dynamic Data Connections can also be part of the Data Connection layer,
but are not integral to the creation of a Business View.
Data Connections
The first step in the process of building a Business View is to specify data
sources for the Business View by creating Data Connections. Each Data
Connection object connects to a single data source, such as a database, a
data mart, a spreadsheet, and so on. In this scenario you will create five
different data connections, one for each data storage system.
Because all objects in a Business View are located inside the
BusinessObjects Enterprise Repository, BusinessObjects Enterprise security
applies to the objects. Consequently, as a connection property, you can set
which BusinessObjects Enterprise groups have access to a data source
Using Business Views 25
Page 26

Business Views Architecture
2
Information flow
through a specific Data Connection. (Users in the groups you specify are
considered authenticated users.) For example, you may want only report
designers and managers at a certain level to have Data Access rights to the
Data Connection for the SQL Server database. Report designers must have
access to the Data Connection in order to be able to create reports based
on it. In this case, you can create two groups in BusinessObjects Enterprise,
one for report designers and one for managers, and grant only those two
groups Data Access rights for the Data Connection in the Business View
Manager. Note that by default the BusinessObjects Enterprise
"Administrators" and "Everyone" groups have full rights to each object you
create in the Business View Manager.
• For details about creating groups in BusinessObjects Enterprise, refer to
the BusinessObjects Enterprise Administrator's Guide.
• For information on setting rights in the Business View Manager, see
Business Views Security Concepts on page 255.
When you add a Data Connection, you can choose to store a user name
and password for the Data Connection to use when accessing the data
source. These credentials are stored in the BusinessObjects Enterprise
Repository and are used each time an authenticated user is designing or
viewing a report based on a Business View that uses that Data Connection.
If you prefer to have users log on to data sources individually, do not store
a user name and password in the BusinessObjects Enterprise Repository.
In the Property Browser for each Data Connection, you can change the name
of the Data Connection. Taking the time to name each Data Connection
properly can greatly enhance usability because Data Connection names are
directly visible to report designers and end-users when reporting off a
Business View that uses a Dynamic Data Connection. Report designers and
end-users will be prompted to choose between the different Data
Connections.
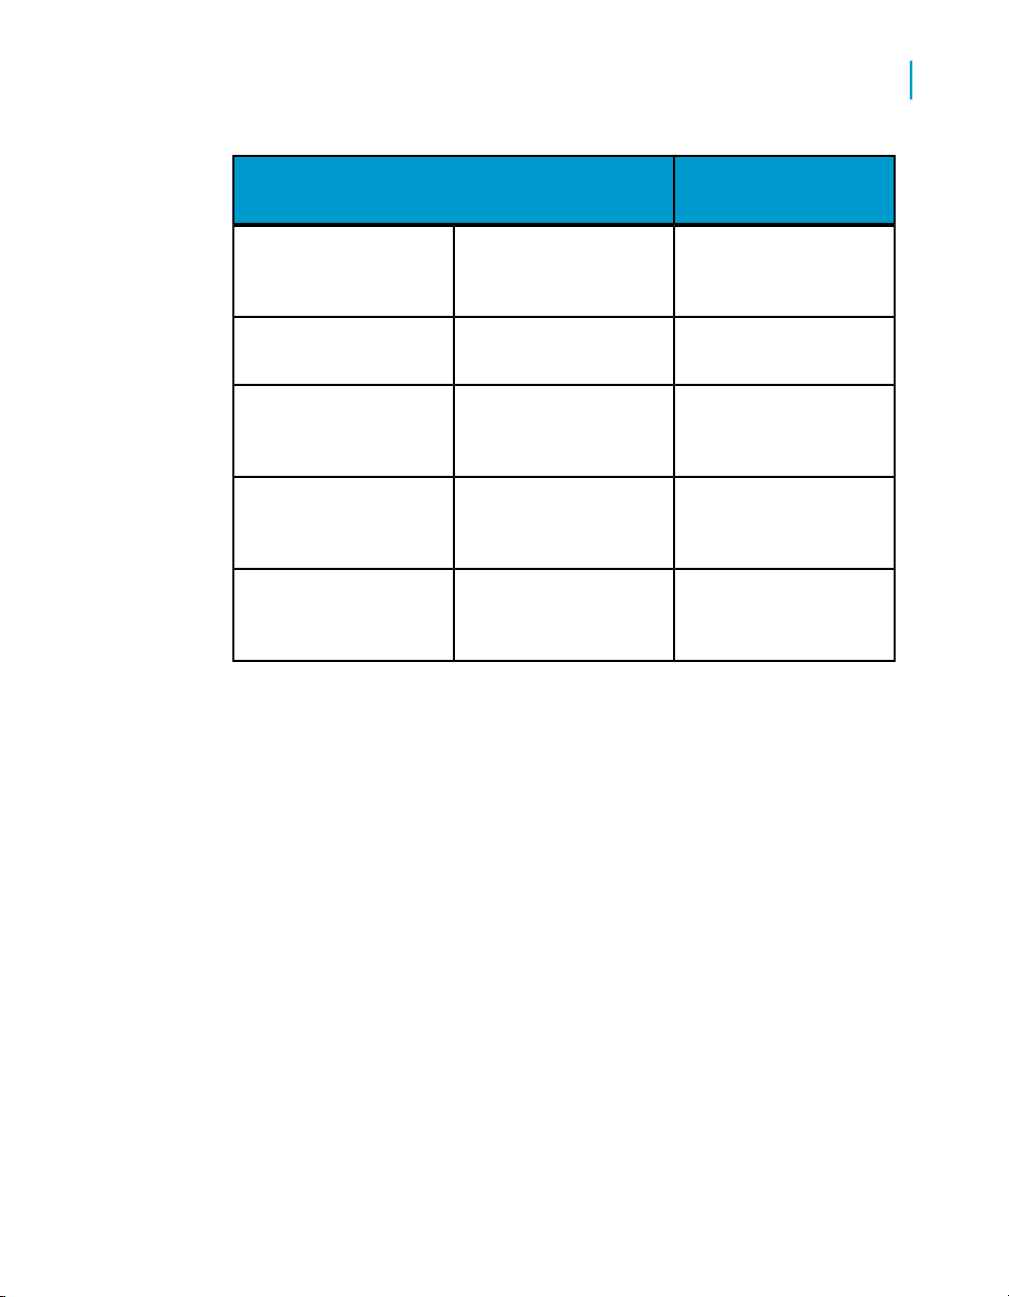
By default, at the time of creation, Data Connections are named Data
Connection1, Data Connection2, Data Connection3, and so on. As in the
usage scenario, you would name each Data Connection descriptively:
26 Using Business Views
Page 27
Business Views Architecture
Information flow
NameData Connection
2
1
3
4
5
Dynamic Data Connections
Once you have created two or more Data Connections, you can choose to
create Dynamic Data Connections. These are pointers that allow
administrators and/or users to choose between different data sources in the
form of Data Connections. Note that each of the data sources that a Dynamic
Data Connection points to must have similar schemas. Any tables, fields,
stored procedures, stored procedure parameters, and other objects that are
in the data sources must have identical structures, names, and content types.
Personnel data in SQL
Server
Sales data in ORACLE
(development database)
Sales data in ORACLE
(testing database)
Sales data in ORACLE
(production database)
Personnel
Product InfoProduct data in DB22
Sales Development
Sales Testing
Sales Production
When a Business View designer creates a Data Foundation that is based
on a Dynamic Data Connection, this user is prompted to specify which Data
Connection to use. Similarly, when a user refreshes a report based on a
Dynamic Data Connection, that user is prompted to specify which Data
Connection to use.
In the usage scenario, you would create one Dynamic Data Connection
composed of the three ORACLE sales databases: Sales Development, Sales
Using Business Views 27
Page 28

Business Views Architecture
2
Information flow
Testing, and Sales Production. A typical name for such a Dynamic Data
Connection would be Dynamic Sales.
Data Foundation layer
After you have created the Data Connection layer (using Data Connections
and possibly using Dynamic Data Connections), the next step is to create a
Data Foundation. A Data Foundation is a component used for data access
management, where you collect a list of data fields to be made available for
use as Business Fields in Business Elements. A Data Foundation is an
abstraction layer into which you can insert and join several types of objects
(from different Data Connections):
• Table objects
• Data tables
• Views
• Stored procedures
• SQL command objects
• Formulas
• SQL expressions
• Filters
• Parameters
• Custom Functions
Note that views, stored procedures, and SQL command objects all appear
as tables once you add them to the Data Foundation.
When you create a Data Foundation, you need to specify your data source,
whether it be one or more Data Connections, or one or more Dynamic Data
Connections. You can have any number or combination of Data Connections
and Dynamic Data Connections for your Data Foundation. In the case of the
usage scenario, the Data Foundation would be composed of two Data
Connections—Personnel and Product Info—and one Dynamic Data
Connection—Dynamic Sales.
28 Using Business Views
Page 29

The items you choose to include in the Data Foundation determine what
fields will later be available for report designers to use when creating reports.
That is, you, the administrator, can control which tables and columns users
can or cannot access.
Using formulas and SQL expressions
At the Data Foundation level, you can use formulas to create data fields that
will then be available to users working at the Business Element level (a
Business Element is a collection of fields that are based on a Data
Foundation). For example, the existing Data from the Sales Data Connection
may list an employee's sales quota and actual sales, but not the percentage
of the sales quota that employee reached. In this case, you could write a
formula that calculates this percentage. Later, at the Business Element layer,
you could make this field available to report designers, but choose to keep
the sales quota and actual sales fields hidden. This is a simple example of
how you can use the Business View Manager to abstract and control user
access to data.
SQL expressions are similar to formulas, but they are written in Structured
Query Language (SQL). They are useful in optimizing report performance
because the tasks they execute are always performed on the database server
(as opposed to formulas, which are typically executed on the local machine).
Business Views Architecture
Information flow
2
Using filters
Filters provide row-level security for Business Views. You create your own
filters to apply to your Data Foundation. These filters allow you to reference
fields, formulas, SQL expressions, parameters, and other filters. You can
use Boolean operators to create Business Filters that restrict access to certain
information for specific users or groups. After you create a Business Filter,
you can also assign to which user or group you want to apply this filter.
Using parameters
Parameters prompt the user of a report to enter information. Think of a
parameter as a question that the user needs to answer before the report is
generated from the Business View information. The information users
enter—or the way they respond—determines what appears in the report.
Using Business Views 29
Page 30

Business Views Architecture
2
Information flow
For example, in a report used by salespeople, there might be a parameter
that asks the user to choose a region. The report would return the results
for the specific region chosen by the user, instead of returning the results
for all of the regions.
Using custom functions
Custom functions are procedures you create in Crystal Reports to evaluate,
to make calculations on, or to transform data. When you use a custom
function in a formula, all of the operations in its definition are performed
without the need to specify them individually in the formula itself. Thus, a
custom function provides a way for you to share and reuse formula logic and
makes it easier and less time-consuming for you and your users to create
different Business Views objects and reports.
You create custom functions using Crystal Reports and then save them in
the repository. In the Business View Manager, you reference custom
functions, and then include them in your formulas.
Note:
A custom function cannot be placed directly into a Business Element; it must
be used as a part of a formula at the Data Foundation level.
Business Element layer
A Business Element is an object that allows you to shape your data fields
from a Data Foundation into components that make sense from a business
perspective. It is important to understand that the organization of Business
Fields in Business Elements does not need to reflect the shape of the
underlying tables in the Data Foundation.
Whereas the Data Foundation layer is focused on the physical layout of the
data sources, the Business Element layer allows you to create a hierarchical
information landscape. You can reorganize the tables, fields, formulas, and
SQL expressions from the Data Foundation into a logical view with multiple
levels. A common example of a Business Element is a hierarchical structure
that contains the following fields: Country, State or Province, and City.
When you insert data fields from the tables, formulas, and SQL expressions
that you created in a Data Foundation into a Business Element, each of the
30 Using Business Views
Page 31

items that you add appears as a Business Field. Using the Field Structure
tab, you can restructure these Business Fields into a hierarchy.
In a Business Element, you can also create an alias for, and add a description
to each of the Business Fields. As in the example, if the three sales managers
for the East, Central, and West regions wanted to see similar reports but
with different terminology for some of the fields, you could create three
different Business Elements, each with the same structure and fields, but
with different aliases for the field names.
You can set rights for each Business Element so that certain groups and
users do or do not have View rights for the object. Users who do not have
View rights for that Business Element will not be able to create reports based
on it. Column-level security can also be applied to Business Fields. If
column-level security is applied, specified column contents are converted to
null values during execution.
Business View layer
Once you have created one or more Business Elements, you can create a
Business View. A Business View is a logical collection of Business Elements.
Users see Business Views as an abstract database connection, and the
contained Business Elements as virtual tables that contain Business Fields.
End users access Business Views through the Ad Hoc application (or other
applications designed using the Report Application Server SDK) and client
applications such as Crystal Reports. Administrators can secure Business
Views through the standard View and Edit rights.
Business Views Architecture
Architectural workflow
2
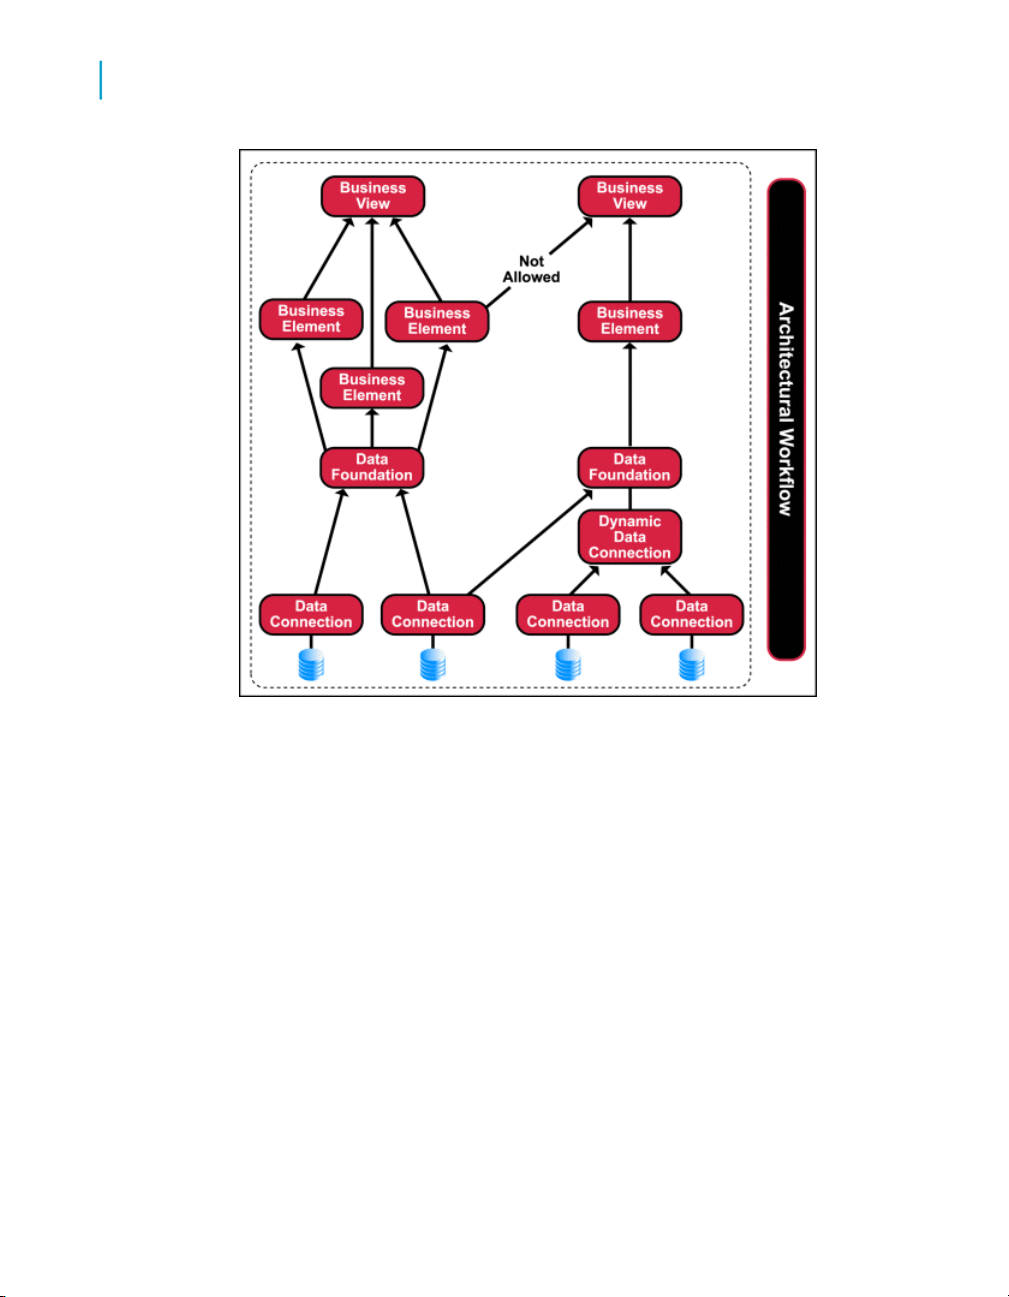
Architectural workflow
While the necessary, ordered structure of the Business Views objects allows
for flexibility in the access, integration, and organization of data from different
sources, there are limitations set by the relationships among these various
components.
Using Business Views 31
Page 32
Business Views Architecture
2
Architectural workflow
A Data Connection, once made, accesses and carries information specific
to the data source to which it is linked. To access information from another
data source, you must create another Data Connection or modify the existing
one.
As an alternative, however, you can also make use of a Dynamic Data
Connection, a collection of pointers to any number of individual Data
Connections.
Depending on the user's needs, a Dynamic Data Connection may be
preferable to using a single Data Connection.
Companies run the same reports based on data from different sources.
Rather than recreating separate reports for each source, a Dynamic Data
Connection allows you to point to a different Data Connection, obtain the
information, and generate the same report based on the data from that
source.
Once a connection is made, you then manage the information in a Data
Foundation, an abstraction layer where the different objects (tables, fields,
32 Using Business Views
Page 33

Business Views Architecture
Architectural workflow
and so on) obtained from a data source can be added or joined. The items
that you choose to include in a Data Foundation and the relationships you
specify between these items determine what fields will later be available for
report designers to use when creating reports.
You construct Business Elements from the various objects (tables,
parameters, filters, and so on) situated in a Data Foundation. Because the
information in a Business Element is defined by the information contained
within a Data Foundation, it is important to remember that Business Elements
are Foundation-specific. That is, you cannot create a Business Element with
information derived from more than one Data Foundation. This constraint
stems from the nature of the relationship between the Business Element and
the Data Foundation. At the Data Foundation level, users acquire and set
specifications to the information from a data source. At the Business Element
level, users take this information and arrange it into a structure that makes
sense from a business perspective (often involving hierarchical levels and
landscapes of data). In effect, the information in a Business Element is
dependent on the information controlled by its parent Data Foundation.
Once you have created one or more Business Elements, you create a
Business View. A Business View is a collection of Business Elements; it
provides the highest level of data abstraction for end users. Users see
Business Views as an abstract database connection, and the Business
Elements contained within as virtual tables.
2
You can have a number of Business Elements that can be included in a
single Business View. Similarly, you can have numerous Business Views
that are based on a single Business Element. The only restriction between
the components is from the relationship between the Business Element and
the Data Foundation. Since Business Elements contain information provided
by the parent Data Foundation, Business Views can include only Business
Elements which stem from one Data Foundation. That is, a Business View
cannot be composed of Business Elements that come from different Data
Foundations.
Using Business Views 33
Page 34

Business Views Architecture
Architectural workflow
2
34 Using Business Views
Page 35

Quick Start: Creating a Business View
3
Page 36

Quick Start: Creating a Business View
3
Quick Start overview
This section contains a number of tutorials designed to teach new users how
to create a Business View. The tutorials guide you through several basic
steps to create a Business View using the Business View Manager.
Quick Start overview
Using Business Views, you can integrate data from disparate sources. You
can bring together data from multiple data collection platforms across
applications, to eliminate differences in data resolution, coverage, and
structure between collection methods.
Administrators use the Business View Manager, a thick-client designer. This
designer is a Microsoft Windows application that provides features, which
enable you to design relational views of information. This designer also
enables you to set detailed column and row-level security for various objects
in your report.
This section contains a number of tutorials designed to teach new users how
to create a Business View. Employing data from the Xtreme Sample Database
(shipped with the product), the tutorials guide you through several basic
steps to create a Business View using the Business View Manager:
•
Before you begin on page 36
•
Creating and configuring a Data Connection on page 41
•
Creating and configuring Dynamic Data Connections on page 50
•
Creating and configuring a Data Foundation on page 54
•
Creating and configuring Business Elements on page 68
•
Creating and configuring a Business View on page 72
Before you begin
This section describes the sample data and conventions used in the tutorials
and the tutorial scenario. It explains what a Business View is and how to log
on to the Business View Manager. To avoid confusion, it is best to follow this
guide step-by-step without skipping over any sections.
36 Using Business Views
Page 37

Sample data - Xtreme.mdb
Business Views comes with Xtreme.mdb, a sample Microsoft Access
database that you can use when learning how to operate the Business View
Manager. All of the necessary drivers are included in the installation of
Business Views.
Xtreme.mdb is a database that contains data for Xtreme Mountain Bikes, a
fictitious manufacturer of mountain bikes and accessories.
The database includes these tables:
• Credit
Information from customer credit memos, such as credit authorization
IDs and amounts.
• Customer
Data for the customers served by the company.
• Employee
Quick Start: Creating a Business View
Before you begin
3
Company-oriented data for the employees of Xtreme Mountain Bikes.
• Employee Addresses
Personal data for Xtreme Mountain Bikes employees.
• Financials
Financial data for Xtreme Mountain Bikes.
• Orders
Identity and tracking data for orders.
• Orders Detail
Line item data for orders.
• Product
Descriptive data for Xtreme Mountain Bikes products.
• Product Type
Using Business Views 37
Page 38

Quick Start: Creating a Business View
3
Before you begin
Category data for Xtreme Mountain Bikes products, including product
pictures.
• Purchases
Identity and tracking data for product purchases.
• Supplier
Data for suppliers who serve Xtreme Mountain Bikes.
• Xtreme Info
Company data for the Xtreme Mountain Bikes company, including the
company logo.
Xtreme.mdb also includes:
• List Totals (a Select query)
• Top Customers (a Select query)
Conventions
This section is organized into a number of tutorials and exercises. To create
the sample Business View described in this section, you must complete each
of the tutorials and exercises in succession.
Note:
This tutorial was designed using Microsoft Windows 2000. If you are using
a different platform, the screen shots may vary slightly.
Tutorial scenario
Your corporation uses a development, test, and production system model
for housing its data. The data is initially stored on a development system,
and then later migrated to a test system. After extensive testing, the data in
the test system is ready to be used in the production system.
In this tutorial you will create these objects:
• Three Data Connections:
• Xtreme Development
38 Using Business Views
Page 39

• Xtreme QA
• Xtreme Production
• One Dynamic Data Connection:
• Xtreme Dynamic Connection
• One Data Foundation:
• Xtreme Foundation
• Six Business Elements:
• Customer
• Employee
• Orders
• Orders Detail
• Product
• Supplier
Quick Start: Creating a Business View
Before you begin
3
• One Business View:
• Xtreme Business View
What is a Business View?
A Business View is a hierarchical collection of several objects:
• Data Connections
• Dynamic Data Connections
• Data Foundations
• Business Elements
When you create Business Views, it is important to understand how the
component objects relate to one another. Each object must be created in a
specific order. For example, you must first create a Data Connection or
Dynamic Data Connection before you can create a Data Foundation. Then,
after you have a Data Foundation, you can create a Business Element. After
Using Business Views 39
Page 40
Quick Start: Creating a Business View
3
Before you begin
you finish creating a Business Element, you can then create a Business
View.
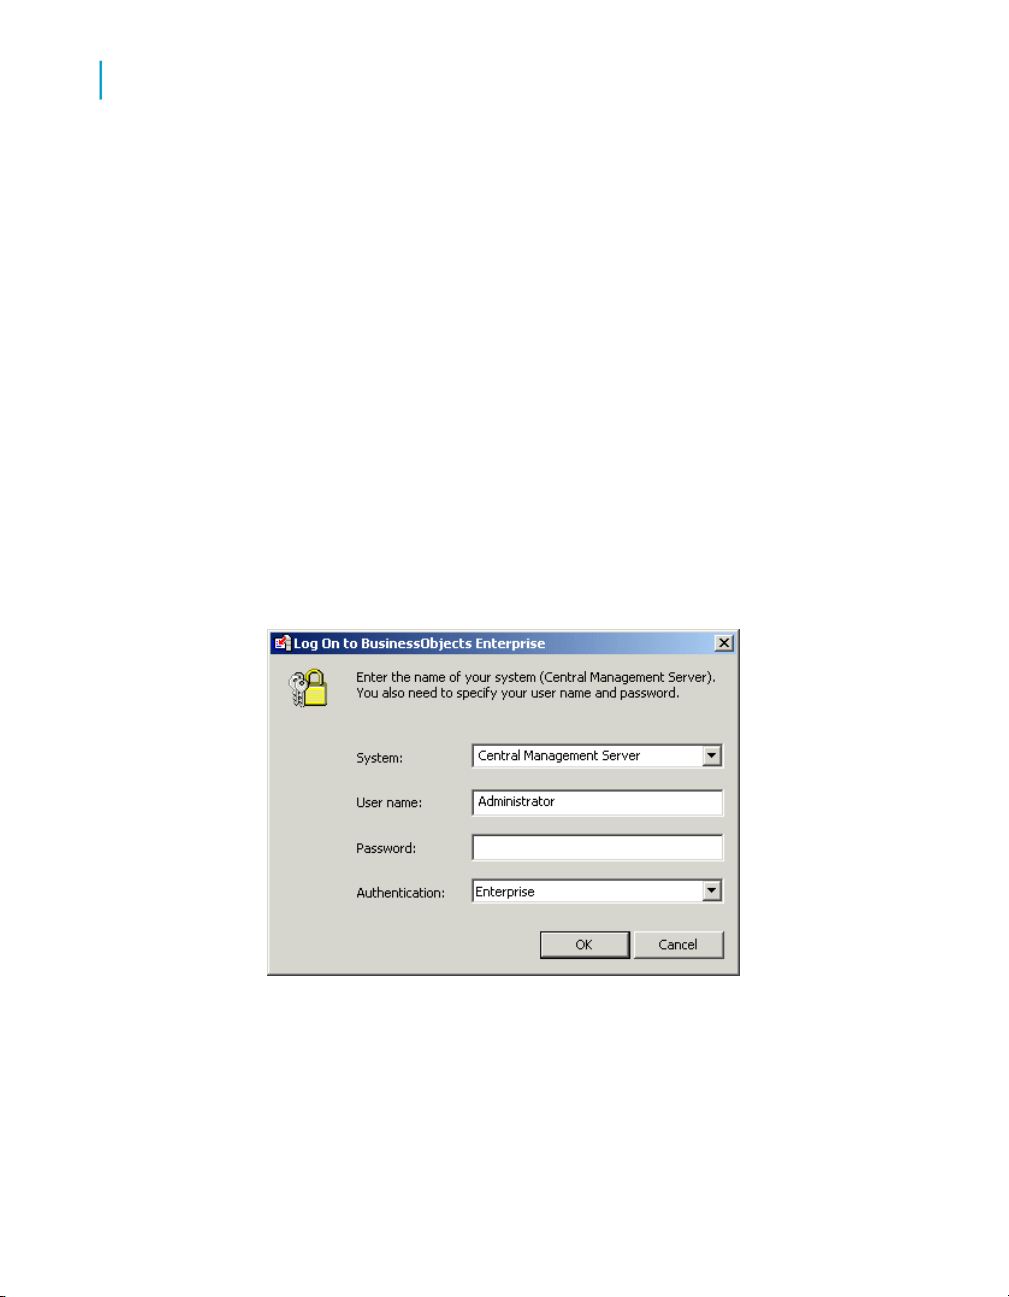
Logging on to the Business View Manager
Every time you use the Business View Manager, you need to log on with the
proper credentials. To log on to the Business View Manager, you must provide
a Central Management Server (CMS) name, a User name, and Password
for the appropriate CMS.
In this tutorial you will log on to the Business View Manager.
To log on to the Business View Manager
1. In Windows, click Start > Programs > BusinessObjects XI >
BusinessObjects Enterprise > Business View Manager.
The "Log On to BusinessObjects Enterprise" dialog box appears.
2. Select the type of authentication in the Authentication list.
3. In the System list, select or type the appropriate CMS name.
Note:
• If BusinessObjects Enterprise is installed on your local machine, the
name of your CMS is the same as your machine name.
40 Using Business Views
Page 41
Quick Start: Creating a Business View
Creating and configuring a Data Connection
• If BusinessObjects Enterprise is not installed locally, provide the name
of the machine where the CMS is installed.
4. Type your User name and Password.
Note:
If BusinessObjects Enterprise is installed on your local machine, the
default User name is administrator, without a password.
5. Click OK.
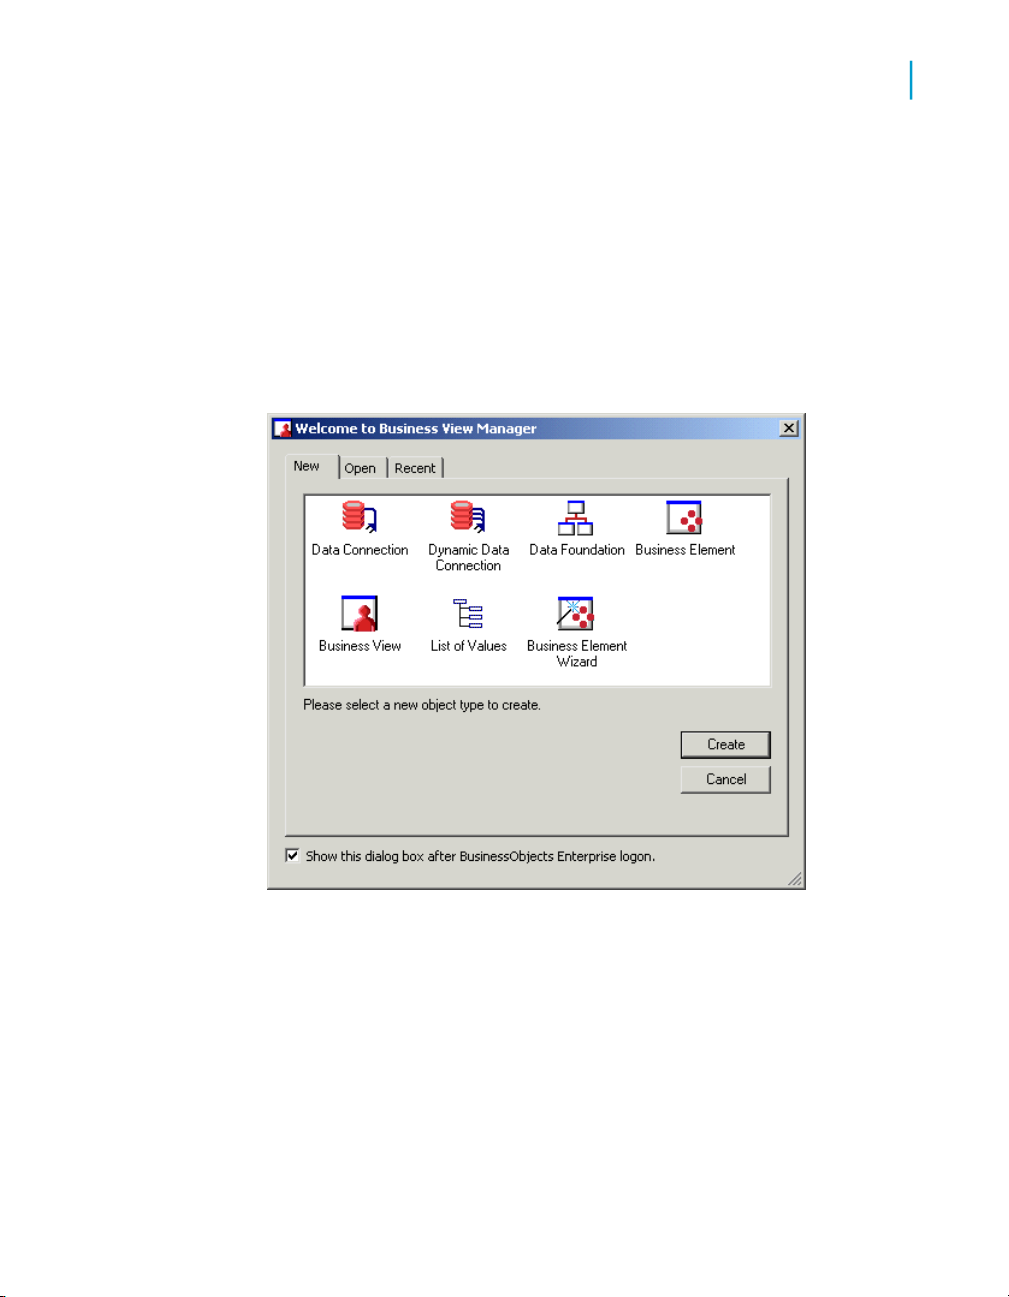
The "Welcome to Business View Manager" dialog box appears.
3
Creating and configuring a Data
Connection
In the tutorials and exercise in this section, you will complete these tasks:
• Create three different Data Connections to the Xtreme Sample Database.
• Set passwords for each Data Connection.
Using Business Views 41
Page 42

Quick Start: Creating a Business View
3
Creating and configuring a Data Connection
• Save and name each Data Connection.
• Modify the properties of each Data Connection.
Creating a Data Connection
To connect to a data source, you must create a Data Connection.
To create a Data Connection
1. Open a new Data Connection through one of the following ways:
• If the "Welcome to Business View Manager" dialog box is open, click
Data Connection, and then click Create.
• On the File menu, select New, and then click Data Connection.
The "Choose a Data Source" dialog box appears.
2. Select ODBC (RDO) as the connection type, by double-clicking the ODBC
(RDO) folder.
42 Using Business Views
Page 43
Quick Start: Creating a Business View
Creating and configuring a Data Connection
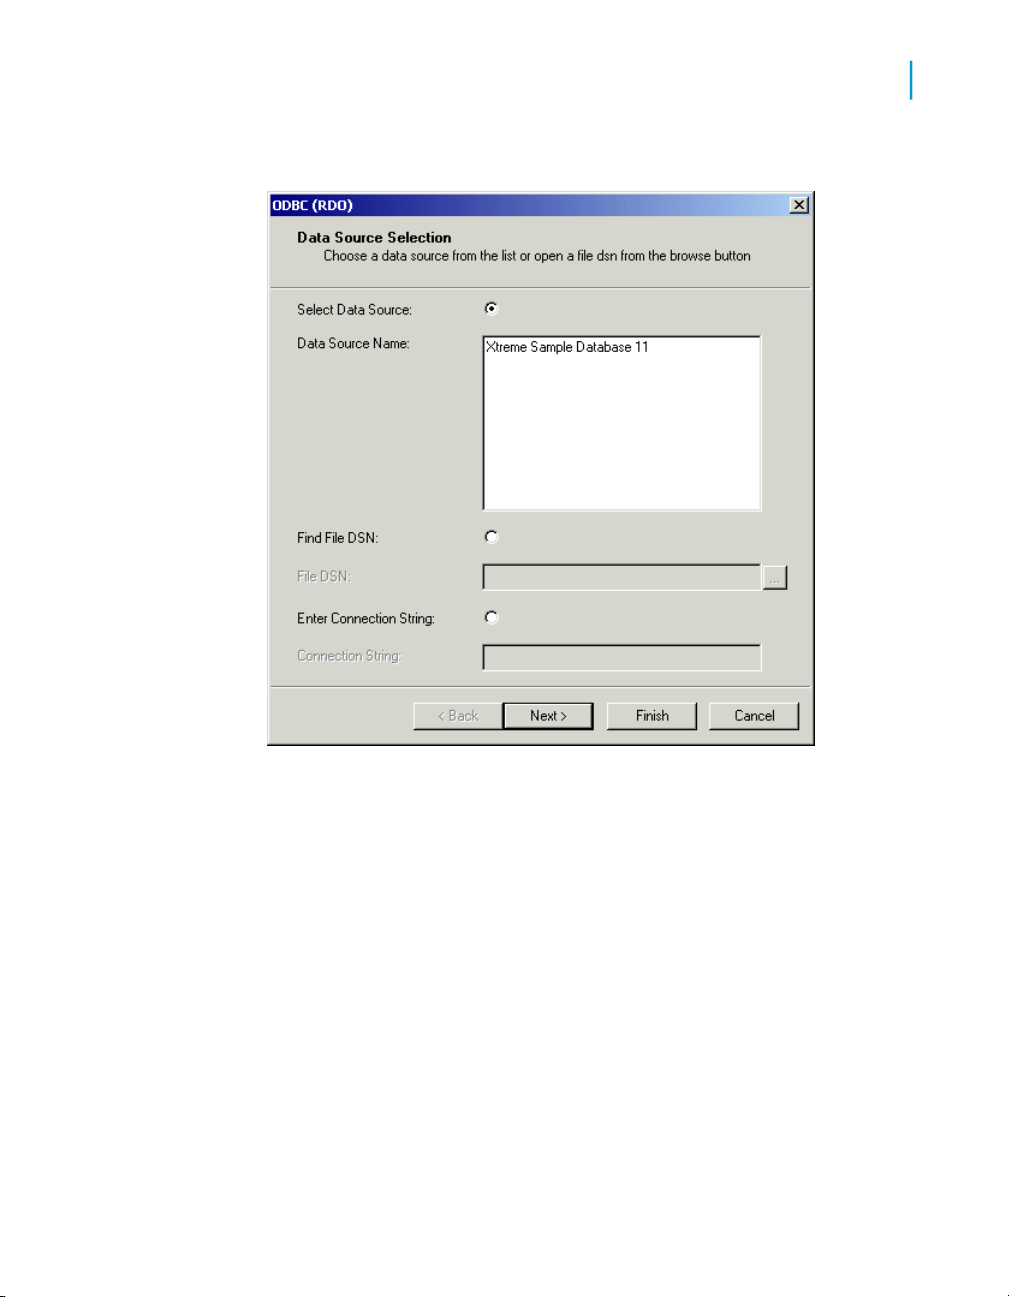
The "Data Source Selection" dialog box appears.
3
3. In the Data Source Name list, select Xtreme Sample Database XI.
4. Click Next.
The "Connection Information" dialog box appears.
Using Business Views 43
Page 44

Quick Start: Creating a Business View
3
Creating and configuring a Data Connection
5. In the "Connection Information" dialog box, you can specify the credentials
that you want to use to log on to the data source.
In this case, the Xtreme Sample Database XI does not require logon
credentials, so leave the fields blank.
6. Click Finish.
You return to the "Choose a Data Source" dialog box.
7. Ensure that Xtreme Sample Database XI is selected, and then click OK.
The "Set Data Connection Password" dialog box appears.
44 Using Business Views
Page 45

Quick Start: Creating a Business View
Creating and configuring a Data Connection
3
Setting a Data Connection password
When you add a Data Connection, you can choose to store a user name
and password. The Data Connection uses this information to access the
data source. These credentials are stored in the BusinessObjects Enterprise
Repository. They are used each time an authenticated user designs or views
a report that is based off a Business View that uses that Data Connection.
If you choose to store data source logon credentials in the repository, you
should set the Runtime Prompt Mode to Never prompt, so that authenticated
users will not be asked to specify credentials.
If you prefer to have users log on to data sources individually, do not store
a user name and password in the repository. Also, set the Runtime Prompt
Mode to Always prompt, so that users are asked to specify credentials each
time they design or run a report off a Business View that uses that Data
Connection.
In this tutorial, you store a blank user name and password for the Data
Connection object, and set the Runtime Prompt Mode to Never prompt, so
that users are not asked to specify logon credentials.
Using Business Views 45
Page 46

Quick Start: Creating a Business View
3
Creating and configuring a Data Connection
To set the Data Connection password
1. In the "Set Data Connection Password" dialog box, leave each of the
User Name, Password, and Confirm password fields blank.
2. In the Runtime Prompt Mode list, select Never prompt.
Note:
When you store logon credentials for the Data Connection object, always
select Never prompt as your Runtime Prompt Mode.
Tip:
Select the "Use Single Sign On when viewing" check box to enable Single
Sign On for the Data Connection. For information about the Single Sign
On feature, see Single Sign On on page 110.
3. Click OK.
Saving and naming a Data Connection
You must save a Data Connection object before you can use it to create
other objects, such as Dynamic Data Connections and Data Foundations. It
46 Using Business Views
Page 47

is important to choose a descriptive name for your Data Connection because
this name is visible to users who design and view reports based on any
Business View that uses the Data Connection.
In this tutorial, you will create a new folder called Tutorial, into which you will
save the Data Connection object as Xtreme Development.
To save and name a Data Connection
1. On the File menu, click Save.
Tip:
You can also click the Save button on the toolbar or press CTRL+S.
The "Save As" dialog box appears.
Quick Start: Creating a Business View
Creating and configuring a Data Connection
3
2. In the Object Name field, type Xtreme Development.
3.
4. Click the Tutorial folder to select it, and then click Save.
Click the Insert a new folder button, and then name the new folder
Tutorial.
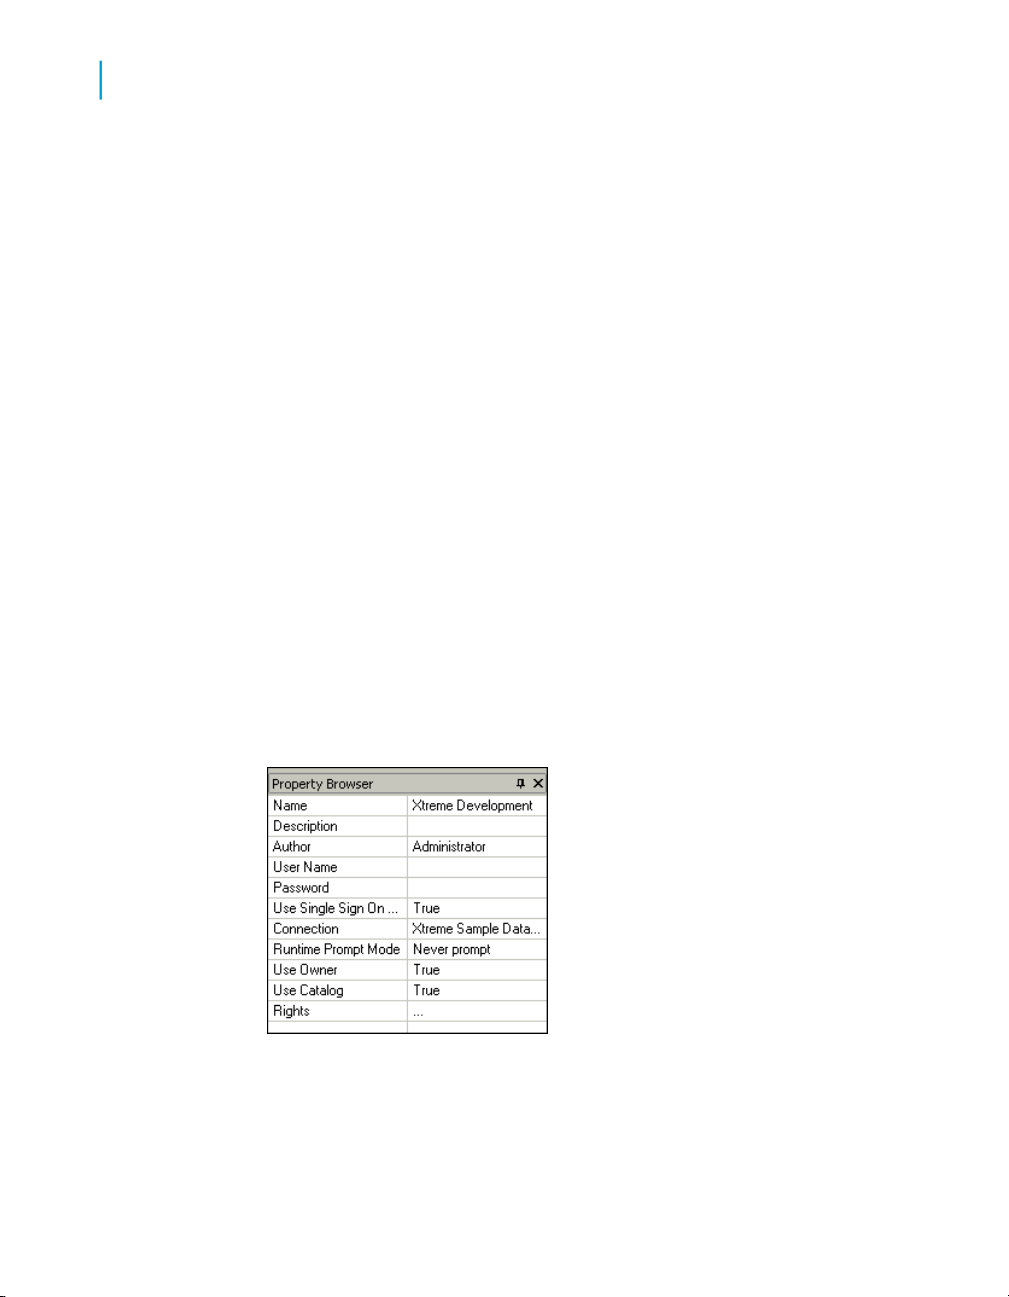
Modifying the properties of a Data Connection
The Property Browser in the Business View Manager can be used to modify
several properties of a Data Connection:
• Name
• Description
Using Business Views 47
Page 48
Quick Start: Creating a Business View
3
Creating and configuring a Data Connection
• Author
• User Name
• Password
• Use Single Sign On when viewing
• Connection
• Runtime Prompt Mode
• Use Owner
• Use Catalog
• Rights
Note:
For complete descriptions of each of these properties, see Modifying a Data
Connection on page 113.
In this tutorial, you will use the Property Browser to provide a description for
the Data Connection.
To add a description using the Property Browser
1. If the Property Browser is not visible, on the View menu, click
PropertyBrowser.
2. In the Property Browser, click the cell next to the Description field and
type Development Environment.
The description of the Data Connection is now Development Environment.
48 Using Business Views
Page 49
Quick Start: Creating a Business View
Creating and configuring a Data Connection
3. On the File menu, click Save.
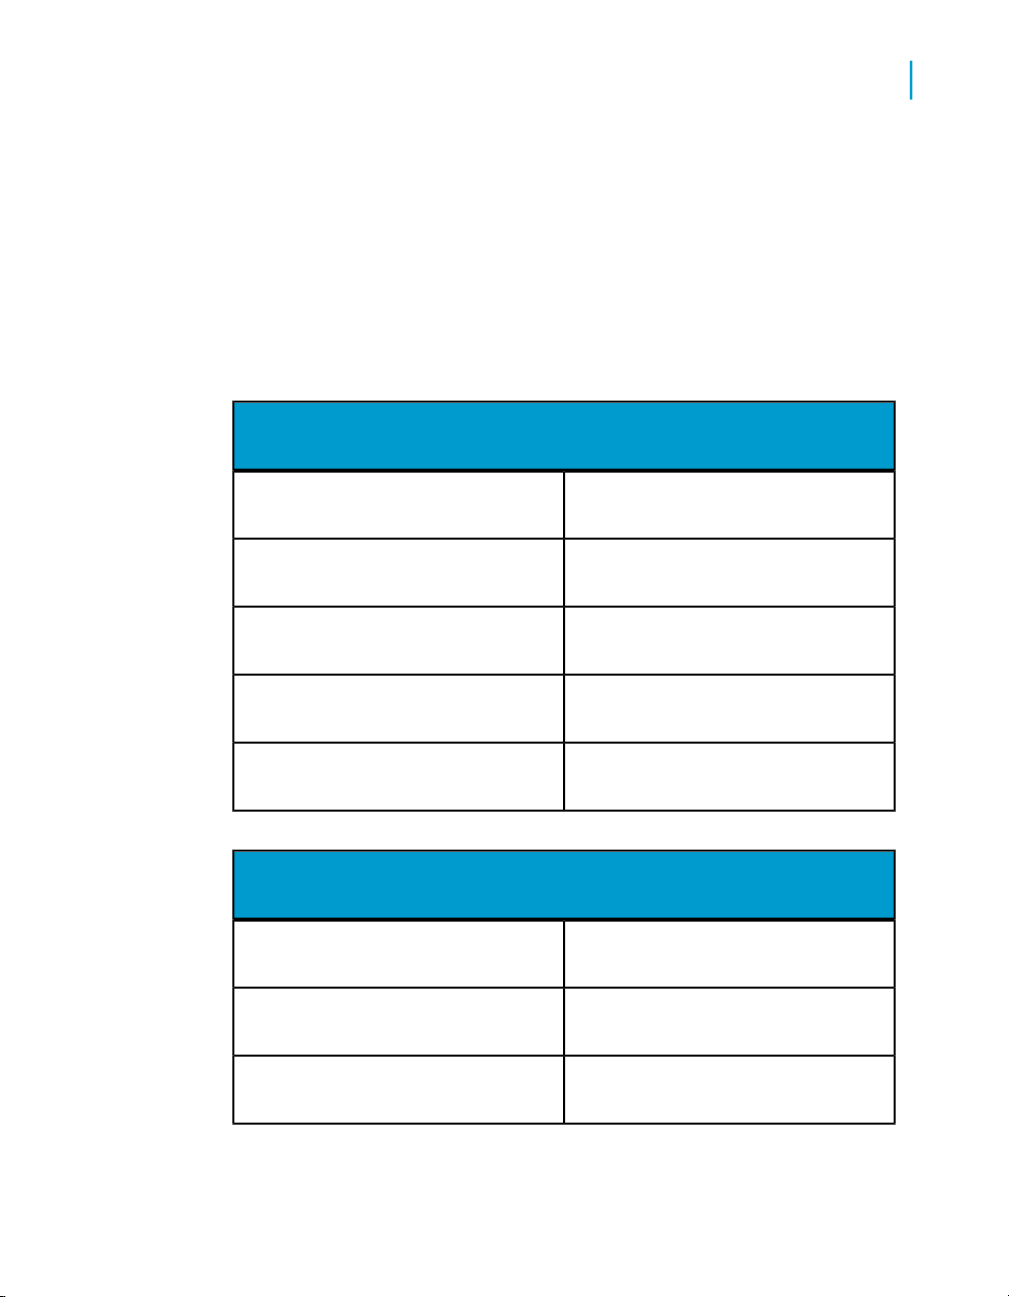
Exercise: Creating two more Data Connections
You now have one Data Connection object that has been named and saved.
Using the same procedures (as described in Creating and configuring a Data
Connection on page 41), create and save two additional Data Connections
in the Tutorial folder with these configurations:
Data Connection2
Xtreme QAName
QA Test EnvironmentDescription
User Name
3
Password
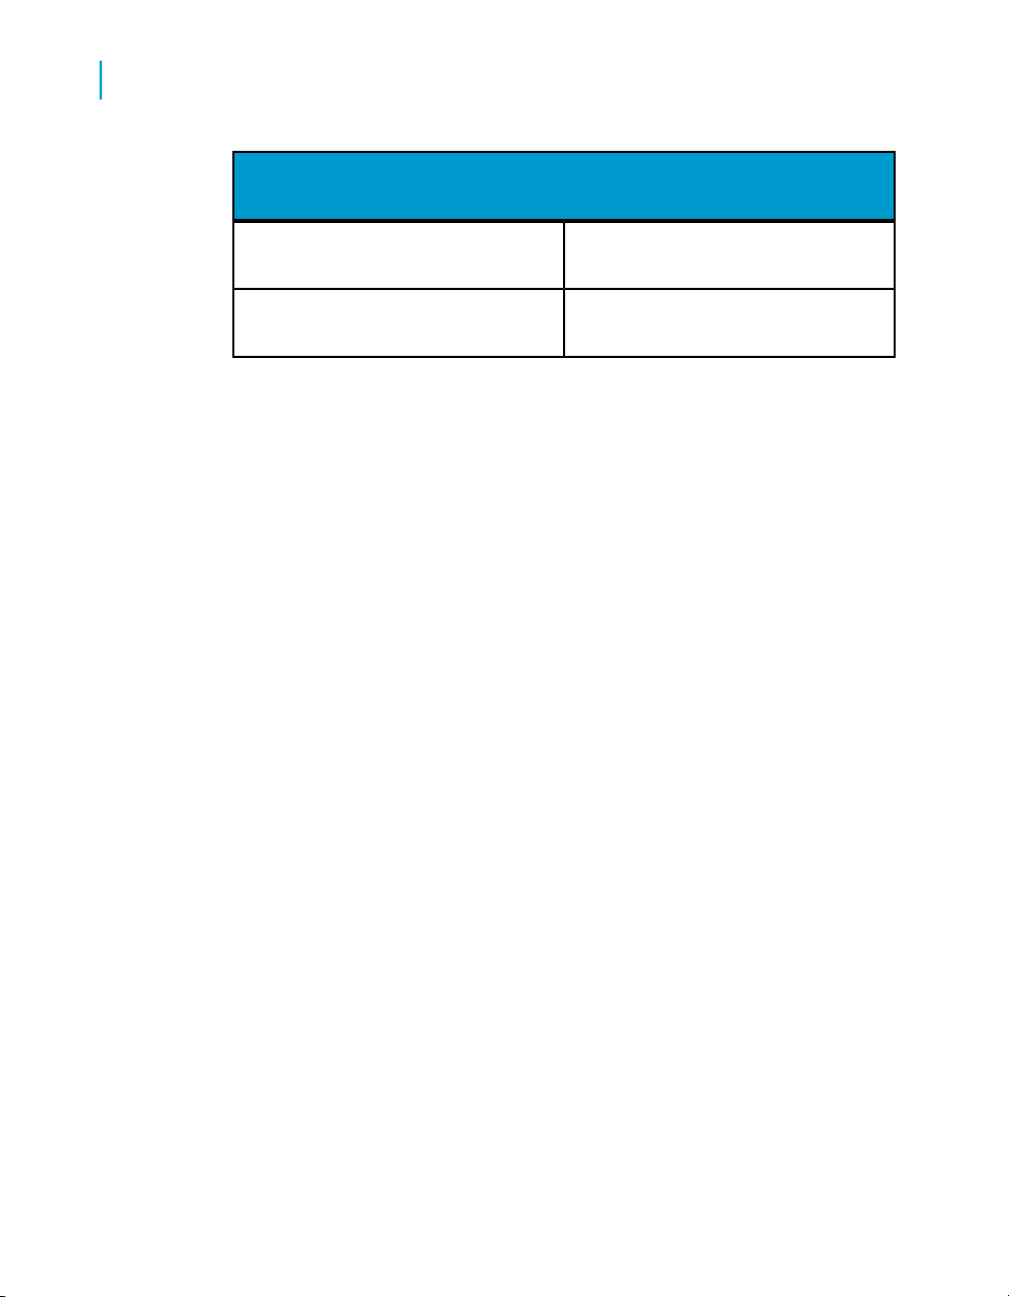
Data Connection3
User Name
Never promptRuntime Prompt Mode
Xtreme ProductionName
Production EnvironmentDescription
Using Business Views 49
Page 50
Quick Start: Creating a Business View
3
Creating and configuring Dynamic Data Connections
Data Connection3
Password
Never promptRuntime Prompt Mode
Creating and configuring Dynamic Data
Connections
After creating multiple Data Connections, you can create a Dynamic Data
Connection. A Dynamic Data Connection is a collection of pointers to different
Data Connections.
When users refresh a report that is based on a Dynamic Data Connection,
they are prompted to specify which Data Connection to use, whether it be
the connection information for the development data, the test data, or the
production data. As long as the database schema is the same for all three
databases, administrators can easily ensure that reports point to and use
the proper data source as required.
In the tutorials and exercise in this section, you will complete these tasks:
• Create a Dynamic Data Connection.
• Add a Data Connection to an existing Dynamic Data Connection.
• Sort Data Connections in the Dynamic Data Connections window.
Creating a Dynamic Data Connection
In this tutorial, you will create one Dynamic Data Connection based on two
of the Data Connections that you created in Creating and configuring a Data
Connection on page 41.
50 Using Business Views
Page 51
Creating and configuring Dynamic Data Connections
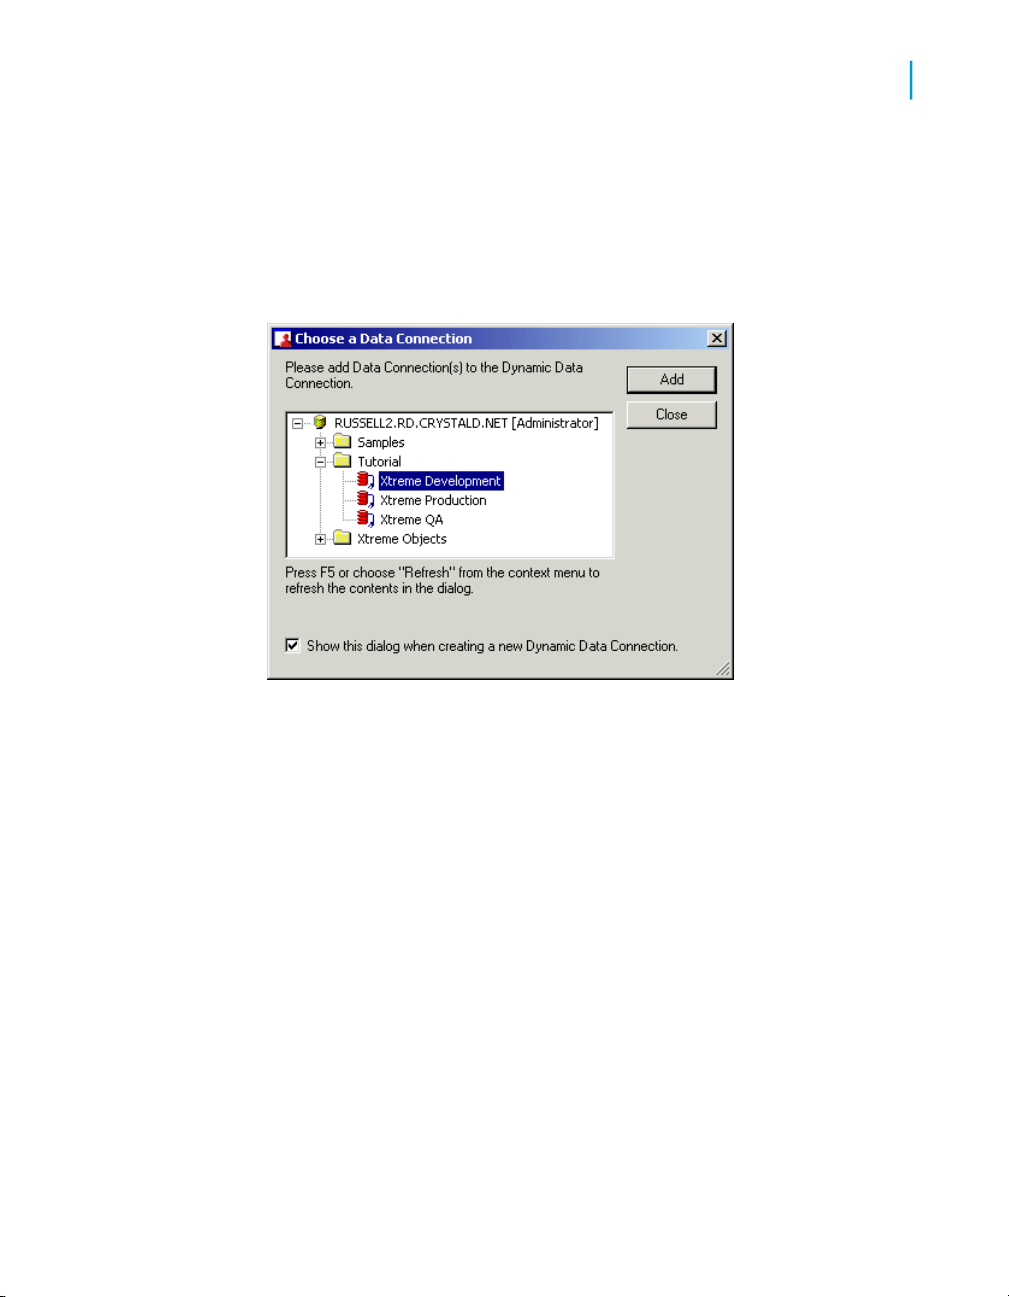
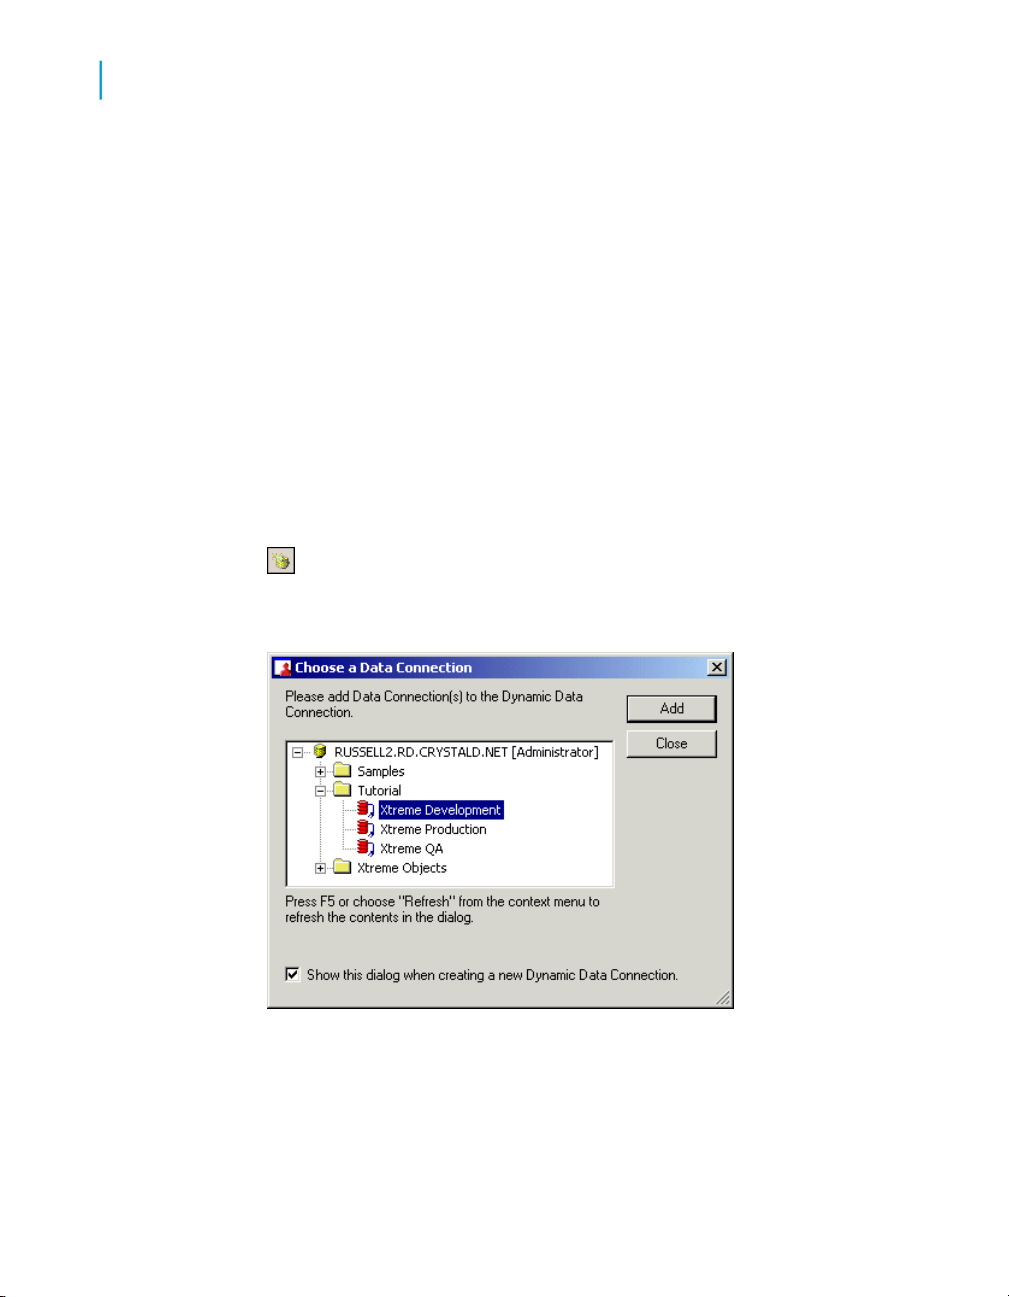
To create a Dynamic Data Connection
1. On the File menu, select New, and then select Dynamic Data
Connection.
The "Choose a Data Connection" dialog box appears.
Quick Start: Creating a Business View
3
2. Expand the Tutorial folder to show the available Data Connections.
3. Select the Xtreme Development Data Connection.
4. Click Add.
Note:
Only Data Connections that do not always prompt for a user to log on to
a data source can be used for a Dynamic Data Connection. You will
receive an error message if you attempt to add a Data Connection that
always prompts a user to log on.
5. Select and add the Xtreme Production Data Connection.
6. Click Close.
Using Business Views 51
Page 52
Quick Start: Creating a Business View
3
Creating and configuring Dynamic Data Connections
Adding a Data Connection to a Dynamic Data Connection
In the main window of a Dynamic Data Connection, you can add new Data
Connections or delete existing ones. In this tutorial you will add the Xtreme
QA Data Connection to the Dynamic Data Connection that you created in
To create a Dynamic Data Connection on page 51.
To add a Data Connection
1. In the main window of the Dynamic Data Connection, click the Add button
located at the bottom-left corner of the window.
Tip:
You can also click the Add Data Connection button on the toolbar;
alternatively, you can click Add Data Connection on the Edit menu.
The "Choose a Data Connection" dialog box appears.
2. Expand the Tutorial folder, and select Xtreme QA.
3. Click Add, and then click Close.
52 Using Business Views
Page 53

Sorting Data Connections
If you have a Dynamic Data Connection with numerous Data Connections,
you can sort the listing of your Data Connections. To sort your Data
Connections, you can choose from three options in the sort list located in
the top right-hand corner of the Dynamic Data Connection window:
• Alphabetical ascending
• Alphabetical descending
• No Sort
You can also move a Data Connection object up or down the list by first
selecting the object, and then clicking the up or down arrows next to the
sorting list.
Use the arrows to sort the Data Connections so that they appear in this order:
• Xtreme Development
• Xtreme QA
Quick Start: Creating a Business View
Creating and configuring Dynamic Data Connections
3
• Xtreme Production
Saving and naming a Dynamic Data Connection
1. On the File menu, click Save.
Tip:
You can also click the Save button on the toolbar or press CTRL+S.
The "Save As" dialog box appears.
2. In the Object Name field, type Xtreme Dynamic.
3. Click the Tutorial folder to select it, and then click Save.
Using Business Views 53
Page 54

Quick Start: Creating a Business View
3
Creating and configuring a Data Foundation
Creating and configuring a Data
Foundation
After you have created the Data Connection layer (using Data Connections
and a Dynamic Data Connection), the next step is to create a Data
Foundation. A Data Foundation is a component used for data access
management, where you collect a list of data fields that are available for use
as Business Fields in Business Elements. A Data Foundation is an abstraction
layer into which you can insert and join several types of objects (from different
Data Connections):
• Table objects
• Data tables
• Views
• Stored procedures
• SQL command objects
• Formulas
• SQL expressions
• Parameters
• Filters
• Custom Functions
Note:
Views, stored procedures, and SQL command objects, all appear as tables
once you add them to the Data Foundation.
The items you choose to include in the Data Foundation determine what
fields are later available for report designers to use when creating reports.
In the tutorials in this section, you will complete these tasks:
• Create a Data Foundation.
• Link tables.
• Insert a formula.
• Insert an SQL expression.
54 Using Business Views
Page 55
• Insert two parameters.
• Insert a filter.
Creating a Data Foundation
In this tutorial, you will create a Data Foundation called Xtreme Data
Foundation, and you will add several tables to the Data Foundation.
To create a Data Foundation
1. On the File menu, select New, and then click Data Foundation.
The "Choose a Data Connection" dialog box appears.
2. Expand the Tutorial folder, and select Xtreme Dynamic.
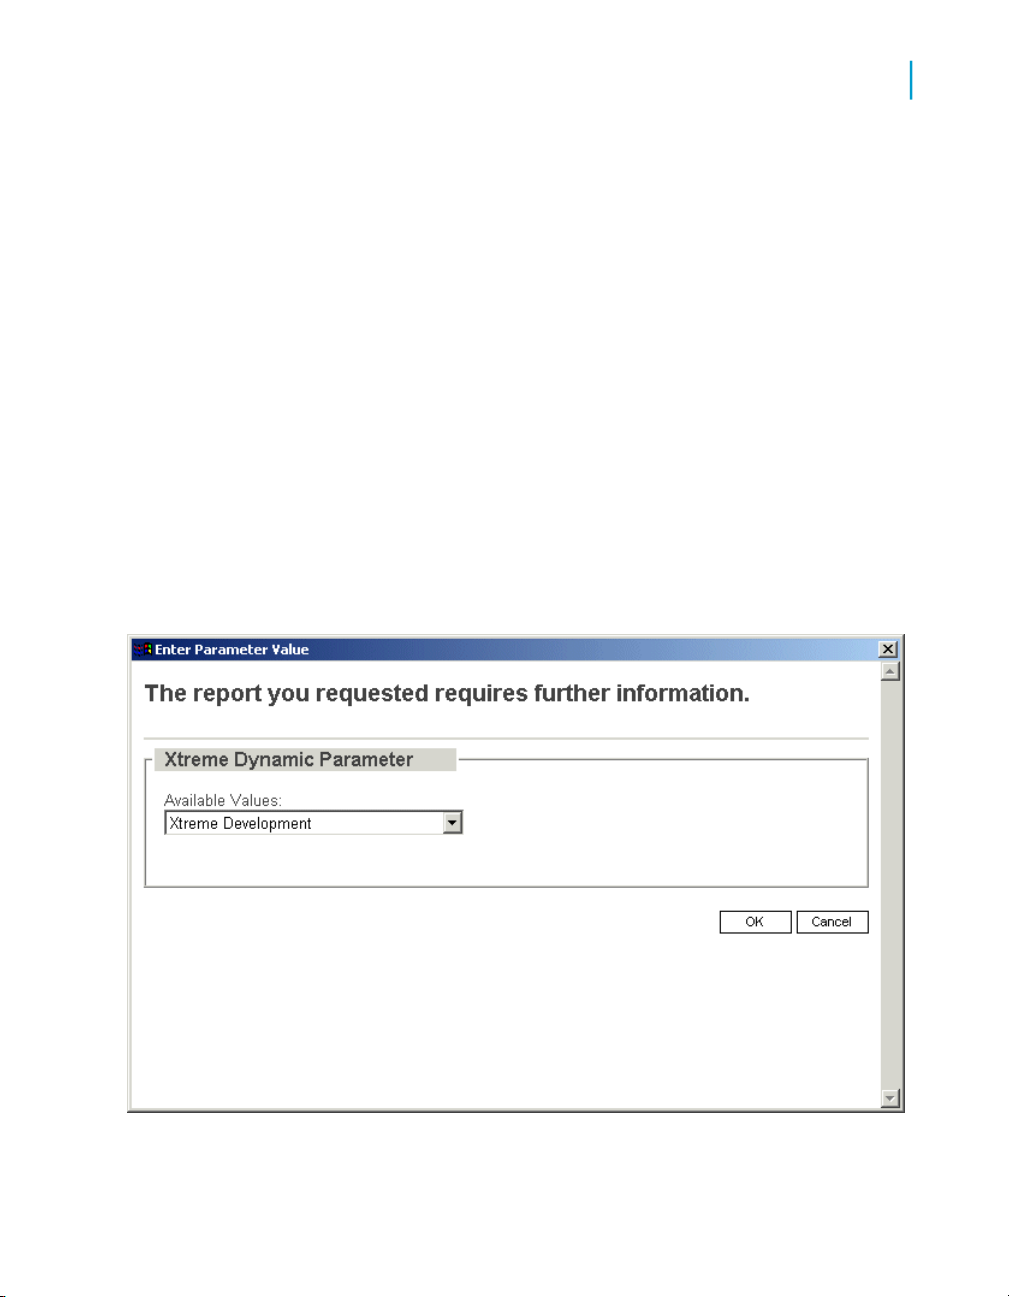
3. Click OK.
The "Enter Parameter Value" window appears.
Quick Start: Creating a Business View
Creating and configuring a Data Foundation
3
4. In the Available Values list, select Xtreme Development.
Using Business Views 55
Page 56

Quick Start: Creating a Business View
3
Creating and configuring a Data Foundation
5. Click OK.
The "Insert Data Tables" dialog box appears.
6. Expand the Tables node.
7. Select these tables:
• Customer
• Employee
• Orders
• Orders Detail
• Product
• Product Type
• Supplier
Tip:
You can select multiple tables concurrently by holding down the CTRL
key and clicking the tables that you want to select.
8. Click Add.
9. Click Close.
56 Using Business Views
Page 57

Quick Start: Creating a Business View
Creating and configuring a Data Foundation
3
10.
Save the Data Foundation in the Tutorial folder as Xtreme Founda
tion.
Linking tables
In your Data Foundation, you link tables so that records from one table will
match related records from another. For example, if you add an Orders table
and a Customers table, you link the two tables, so that each order (from the
Orders table) can be matched up with the customer (from the Customer
table) who made the order.
When you link tables, you use a field that is common to both tables. Business
Views uses the link to match up records from one table with those from the
other. Note that in your Data Foundation, you can use different tables from
different data sources.
In this tutorial, you will use the Smart Linking feature of the Business View
Manager to link the tables in the Data Foundation that you created in To
create a Data Foundation on page 55. You will also manually delete one link
and add another.
To link tables in the Data Foundation
1. Right-click in the main Data Foundation window.
The shortcut menu appears.
2. Select Smart Linking By Name.
The tables are automatically linked by field name.
3. Right-click the link between the Customer table and the Supplier table,
and on the shortcut menu, select Delete Link.
4. From the Orders_Detail table, click and drag the Product ID field over to
the Product ID field in the Product table.
A link appears.
Using Business Views 57
Page 58

Quick Start: Creating a Business View
3
Creating and configuring a Data Foundation
For more information on linking tables, see Linking tables on page 139.
Inserting a formula
In many cases, the data needed for a Data Foundation object already exists
in database fields. Sometimes, however, you need to put data in a Business
Element (a Business Element is a collection of fields that are based on a
Data Foundation) that does not exist in any of the data fields. In this situation,
you need to create a formula. You must create and define your formulas at
the Data Foundation level before you can add these formulas to your
Business Elements.
To create a formula, use the Formula Editor. The Formula Editor contains
four windows—three of which are situated under the Formula Editor
toolbar—and the text window directly below.
58 Using Business Views
Page 59
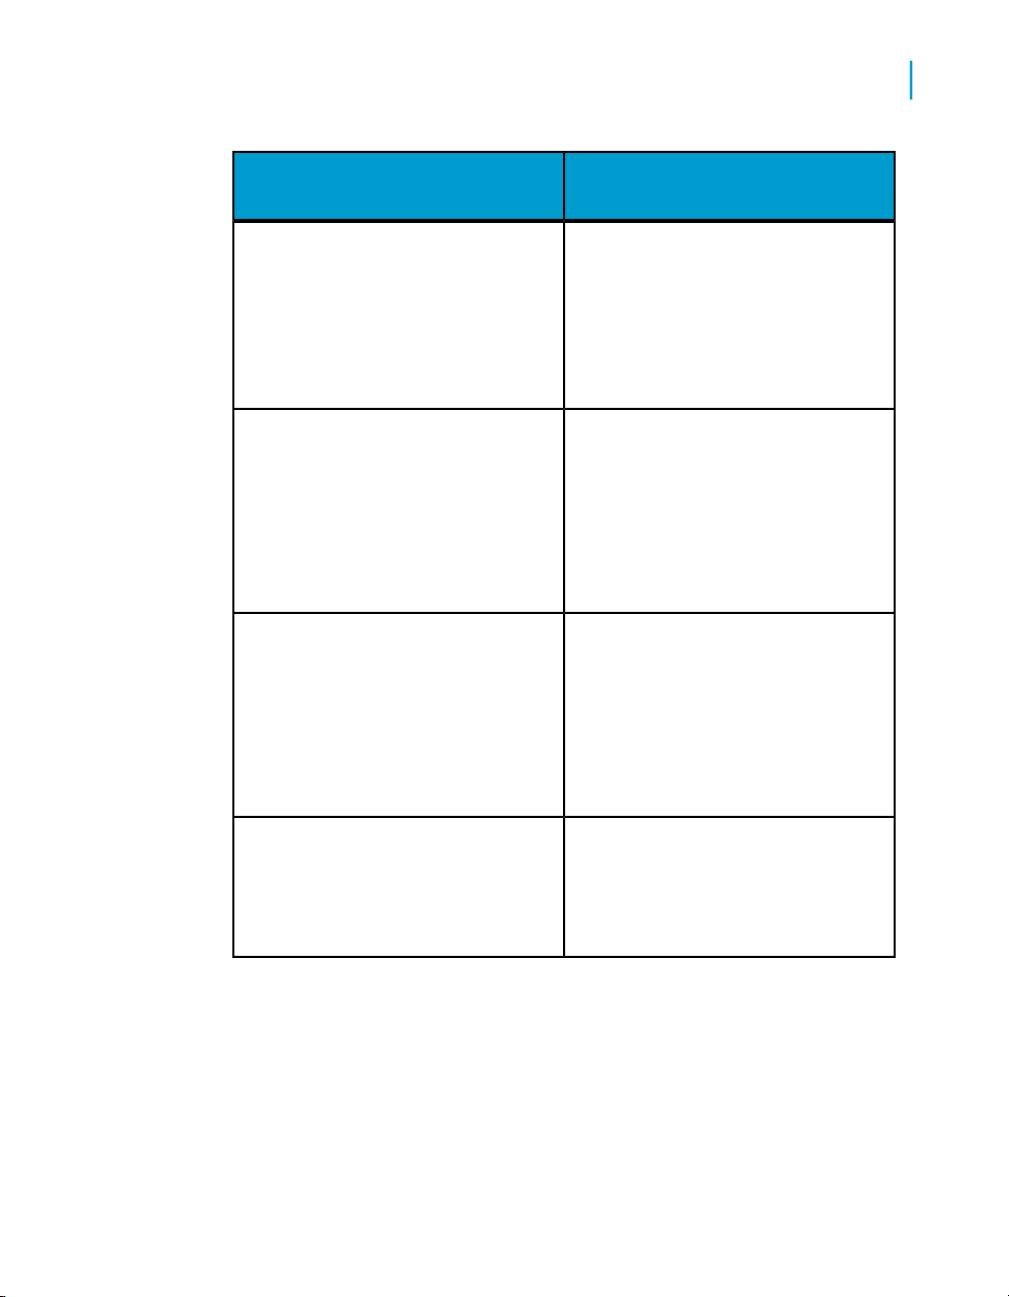
Report Fields
Functions
Operators
Quick Start: Creating a Business View
Creating and configuring a Data Foundation
Description of contentsWindow
Report fields contains all the
database fields that are accessible
for your Business Element. They also
contain any formulas or groups already created for the Business Element.
Functions are prebuilt procedures
that return values. They perform calculations such as average, sum,
count, sin, trim, and uppercase.
Custom functions are also listed in
this window.
Operators are the "action verbs" you
use in formulas. They describe an
operation or an action to take place
between two or more values.
3
Formula text window
In this tutorial, you will use the Formula Editor to create a formula that
calculates an employee's number of years of service.
To create a formula
1. On the Insert menu, click Insert Formula.
Examples of operators include: add,
subtract, less than, and greater than.
This is the area where you create a
formula. You can also view your formula in the Property Browser window.
Using Business Views 59
Page 60

Quick Start: Creating a Business View
3
Creating and configuring a Data Foundation
Tip:
In the Object Explorer, you can right-click Formulas, and click Insert
Formula.
The Formula Editor appears.
2. From the first drop-down list on the Formula Editor toolbar, choose Crystal
Syntax.
For more information on which syntax to use, see Choosing the syntax
on page 163.
3. In the second drop-down list, specify one of the following values:
• Choose Exception for Nulls to configure the formula to ignore null
values.
• Choose Zeroes for Nulls to configure the formula to treat null values
as zero values.
4. In the Functions window, expand Functions > Date and Time >
DateDiff,and double-click DateDiff (intervalType, startDateTime,
endDateTime).
DateDiff (, , ) appears in the Formula text window.
5. In the Formula text window, type the necessary strings to fill in the formula
so that it appears as DateDiff ("yyyy", {Employee.Hire Date},
CurrentDate)
60 Using Business Views
Page 61

Quick Start: Creating a Business View
Creating and configuring a Data Foundation
Note:
You can also select Employee.Hire Date and CurrentDate by expanding
the Report Fields and Functions trees respectively and double-clicking
the desired fields.
3
6.
7. Fix any syntax errors the Formula Checker identifies.
8. Click Apply to save the formula.
9. In the Object Explorer, expand the Formulas node, and click New
10. In the Property Browser, rename the formula to Years of Service.
On the Formula Editor toolbar, click Check to test if there are any
errors in the formula.
Note:
For more information on formulas, see the Crystal Reports Online Help.
Formula 1. This is the new formula that you created.
Tip:
You change the name of the formula by clicking the cell next to the Name
field, and then typing the desired name.
Inserting an SQL expression
SQL expressions are similar to formulas, but they are written in Structured
Query Language (SQL). They are useful in optimizing report performance
because the tasks they execute are always performed on the database server
(as opposed to a regular formula, which is typically executed on the local
machine). Like formulas, you must create and define your SQL expressions
at the Data Foundation level before you can add these expressions to your
Business Elements.
Much like the Formula Editor, the SQL expression Editor contains four
windows.
Using Business Views 61
Page 62
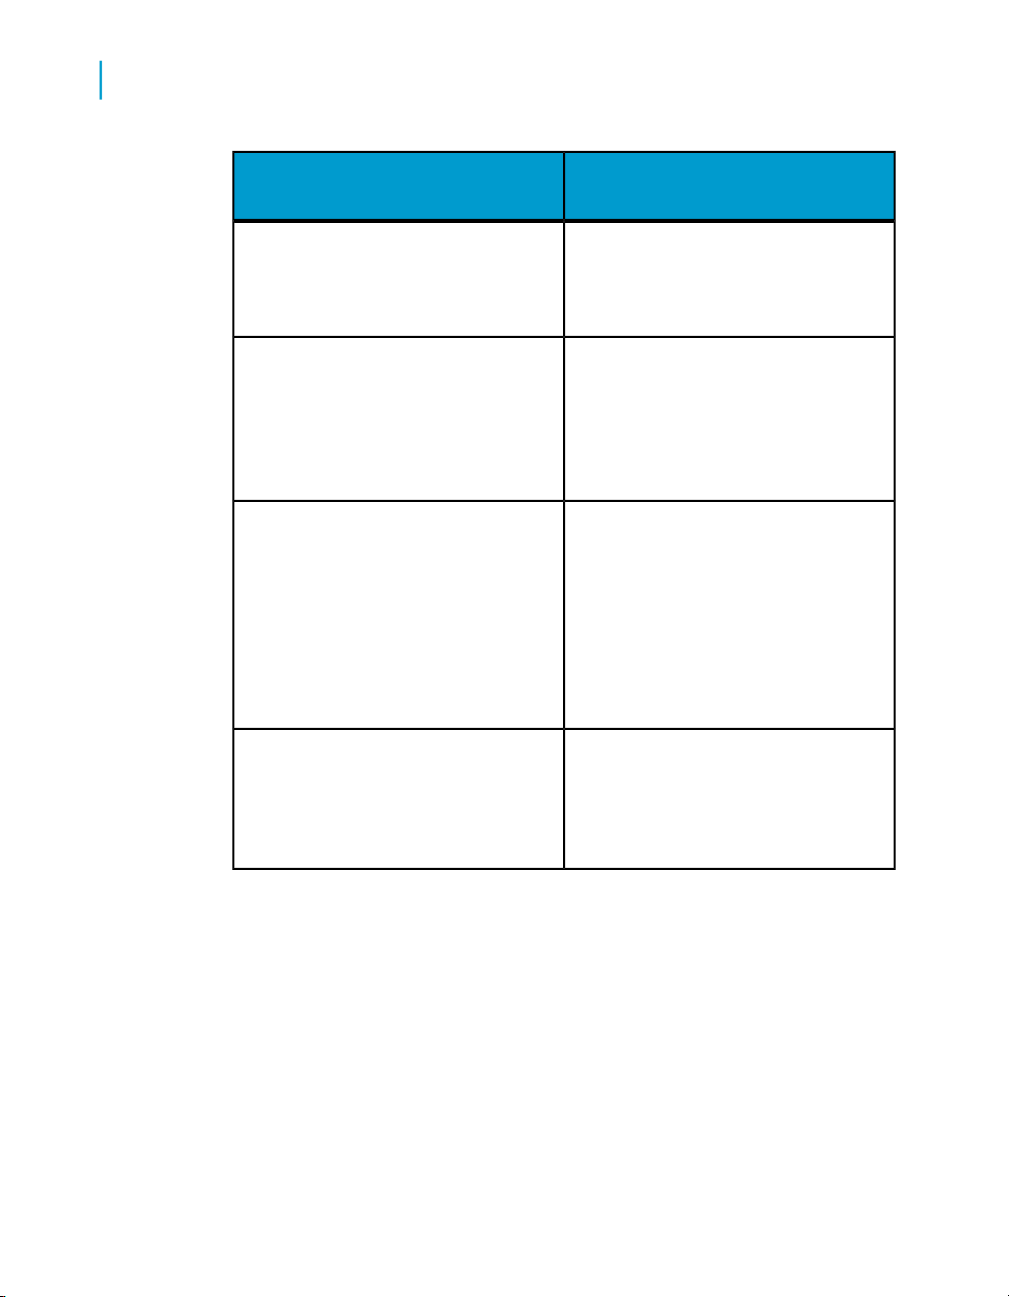
Quick Start: Creating a Business View
3
Creating and configuring a Data Foundation
Report Fields
Functions
Operators
Description of contentsWindow
Report fields contains all the
database fields that are accessible
to your Business Element.
Functions are prebuilt procedures
that return values. They perform calculations, including conversion calculations, numeric calculations, and so
on.
Operators are the "action verbs" you
use in SQL expressions. They describe an operation or an action to
take place between two or more values.
SQL expression text window
In this tutorial, you will use the SQL expression Editor to create an SQL
expression that returns an employee's full name.
To create an SQL expression
1. On the Insert menu, click Insert SQL Expression.
Tip:
In the Object Explorer, you can right-click SQL Expressions, and click
Insert SQL Expression.
62 Using Business Views
Examples of operators include: add,
subtract, less than, and greater than.
This is the area where you create an
SQL expression. You can also view
your SQL expression in the Property
Browser window.
Page 63

Quick Start: Creating a Business View
Creating and configuring a Data Foundation
The SQL expression Editor appears.
2. In the Report Fields window, expand Data Foundation, and then
Employee.
3. Double-clickthe Last Name field.
4. In the SQL expression text window, type + ', ' + next to 'Employ
ee'.'Last Name',
3
Note:
That is, [space]+[space]',[space]'[space]+
5. In the Report Fields window, double-click the First Name field.
The SQL expression should now read:
'Employee'.'Last Name' + ', ' +' Employee'.'First Name'
6.
7. Fix any syntax errors the SQL expression Checker identifies.
8. Click Apply to save the SQL expression.
On the SQL expression Editor toolbar, click Check to test if there
are any errors in the SQL expression.
Note:
For more information on SQL expressions, see the Crystal Reports Online
Help.
Using Business Views 63
Page 64

Quick Start: Creating a Business View
3
Creating and configuring a Data Foundation
9. In the Object Explorer, expand the SQL Expressions node, and click
New SQL Expression 1. This is the new SQL expression that you created.
10. In the Property Browser, rename the SQL expression to Employee Full
Name.
Tip:
You can change the name of the SQL expression by clicking the cell next
to the Name field, and then typing the desired name.
Inserting a parameter
Parameters prompt the user of a report to enter information. Think of a
parameter as a question that the user needs to answer before the report is
generated from the Business View information. The information that users
enter—or the way they respond—determines what appears in the report.
For example, in a report used by salespeople, there might be a parameter
that asks the user to choose a region. The report would return the results
for the specific region chosen by the user, instead of returning the results
for all of the regions.
For detailed information on parameter fields and on advanced parameter
features, see the "Parameter Fields" section of the Crystal Reports Online
Help.
Creating a new parameter field
You must create and define your parameter field in your Data Foundation
before you can use it in formulas of fields. In this tutorial, you will create two
new parameters—Order Start Date and Order End Date—that will prompt
users to enter a date range for the order(s) that they want to view in a report.
You will use these parameters to create a filter in the next exercise, Inserting
a Business Filter on page 66.
To create a parameter field
1. On the Insert menu, click Insert Parameter.
Note:
In the Object Explorer, you can right-click Parameters, and click Insert
Parameter.
64 Using Business Views
Page 65

Quick Start: Creating a Business View
Creating and configuring a Data Foundation
The "Create Parameter" dialog box appears.
3
2. In the Name field, type Order Start Date.
Note:
By default, the name that you provide is automatically used in the
parameter's Text field. (The text in this field appears when users are
prompted to provide a value for the parameter.) You can use the given
text or provide your own text for the prompt.
3. From the Type list, select Date.
4. From the List of Values, select Static. For more information on dynamic
prompts and cascading lists, see Dynamic Prompts and Cascading Lists
of Values on page 215
5. From the Value Field, select Order Date.
6. Click the down arrow under the Value list. Navigate through the list to
01/01/2002 and click on it.
7. From the Value Options, select True to Allow discrete values.
Using Business Views 65
Page 66
Quick Start: Creating a Business View
3
Creating and configuring a Data Foundation
8. Click OK.
Now that you have created one parameter, use the same steps to create
another parameter with these properties:
New Parameter 2
Order End DateName
Enter end date of order history.Prompt text
DateParameter type
Discrete valuesOptions
12/31/2002Default End Date
Inserting a Business Filter
By default, a Full Data Access filter and a No Data Access filter are available
for your Data Foundation. You can also create your own filters to apply to
your Data Foundation. These filters allow you to reference fields, formulas,
SQL expressions, parameters, and other filters. You can use Boolean
operators to create Business Filters that restrict access to certain information
for specific users or groups.
In this tutorial, you will create a Business Filter that uses the two order date
parameters that you created in Inserting a parameter on page 64. The filter
ensures that the records returned are those that fall within specific order start
and end dates.
66 Using Business Views
Page 67

To create a Business Filter
1. In the Object Explorer, right-click Filters, and click Insert Filter.
The Filter Editor appears.
Quick Start: Creating a Business View
Creating and configuring a Data Foundation
3
2. In the "Add fields, filters and operators below to create a Business Filter"
area, navigate to Tables > Orders and double-click Order Date.
Order Date is any value appears in the filters field.
3. Click Order Date is any value.
The Order Date area appears with a drop-down list.
4. From the drop-down list, select is between.
Two more drop-down lists appear.
5. From the two lists, select {?Order Start Date} AND {?Order End Date}.
Note:
{?Order Start Date} and {?Order End Date} are the order date parameters
you created in Inserting a parameter on page 64.
Using Business Views 67
Page 68

Quick Start: Creating a Business View
3
Creating and configuring Business Elements
6.
7. Click Apply to save your filter.
8. Use the Property Browser to change the name of the filter to Order Date
9. On the File menu, click Save.
In the Filter Editor toolbar, click Check Filter Validity to verify that
there are no errors in the filter.
Filter.
Tip:
You can also click the Save button on the toolbar or press CTRL+S.
Creating and configuring Business
Elements
A Business Element is an abstraction object that allows you to shape your
data fields from a Data Foundation into components that make sense from
a business perspective. It is important to understand that the organization
of Business Fields in Elements does not need to reflect the shape of the
underlying tables in the Data Foundation.
In the tutorial and exercise in this section, you will complete these tasks:
• Create and configure six different Business Elements.
• Create an alias for a Business Field within a Business Element.
Creating a Business Element
You can create Business Elements in two ways. You can create each
Business Element individually by choosing File > New > Business Element.
However, using the Business Element Wizard is more efficient because it
allows you to create several Business Elements at once.
In this tutorial, you will use the Business Element Wizard to create a Business
Element called Customer.
68 Using Business Views
Page 69

Quick Start: Creating a Business View
Creating and configuring Business Elements
To create a Business Element using the Business Element Wizard
1. On the File menu, click New, and then click Business Element Wizard.
2. Select Xtreme Foundation (located in the Tutorial folder) as your Data
Foundation, and then click Next.
3. In the "Create Business Elements" dialog box, expand Tables, and select
Customer.
3
4. Click the > arrow to move the entire Customer table to the Business
Elements area.
5. In the Business Elements area, expand the Customer table, and select
Customer Credit ID.
6. Click the < arrow to remove Customer Credit ID from the Business
Elements area, and then click Next.
Note:
This field will not be visible to report designers who create reports based
on Business Views that use this Business Element.
The "Save to Repository" dialog box appears.
7. Select the Tutorial folder, and click Next.
The "What to do next" dialog box appears.
8. Select Create more Business Elements, and then click Finish.
Using Business Views 69
Page 70
Quick Start: Creating a Business View
3
Creating and configuring Business Elements
The Business Element Wizard returns you to the first dialog box ("Choose
a Data Foundation"), so that you can create another Business Element.
Exercise: Creating additional Business Elements
Now that you have created one Business Element, called Customer, use the
Business Element Wizard to create five additional Business Elements as
outlined in the tables below:
Business Element 2
EmployeeTable to add
•
Home Phone
•
Extension
•
Photo
Fields to remove
Fields to add
70 Using Business Views
•
Notes
•
Emergency Contact First Name
•
Emergency Contact Last Name
•
Emergency Contact Relationship
•
Emergency Contact Phone
•
Years of Service
•
Employee Full Name
Note:
These two fields are located under
Formulas and SQL Expressions respectively.
Page 71

Business Element 3
Fields to remove
Business Element 4
Business Element 5
Quick Start: Creating a Business View
Creating and configuring Business Elements
OrdersTable to add
•
Courier Website
Orders DetailTable to add
3
Fields to add
Business Element 6
Exit the Wizard once you have finished.
ProductTable to add
•
Product Type Name
Note:
This field is located in the Product Type
table.
SupplierTable to add
Using Business Views 71
Page 72

Quick Start: Creating a Business View
3
Creating and configuring a Business View
Creating an alias for a Business Field
As a part of the abstraction that Business Elements facilitate, you can create
an alias for a Business Field. This can make report design much easier
because it allows you to make field names more accurate and descriptive.
In this tutorial, you will create an alias for a Business Field that is part of one
of the Business Elements that you created in Creating a Business Element
on page 68.
To create an alias for a Business Field
1. On the File menu, click Open, and then navigate to the Employee
Business Element. Select it and click Open.
2. In the Object Explorer, expand the Fields node, and select Salary.
3. In the Property Browser, change the name to Annual Salary.
4.
Click Save.
Creating and configuring a Business
View
Once you have created one or more Business Elements, you can create a
Business View. A Business View is a logical collection of Business Elements.
Users see Business Views as an abstract database connection, and the
contained Business Elements as virtual tables that, in turn, contain Business
Fields.
In this tutorial, you will create a Business View based on the Business
Elements that you created in Creating and configuring Business Elements
on page 68.
To create a Business View
1. On the File menu, click New, and then click Business View.
2. In the Object Explorer, right-click the Business Elements node, and click
Insert Business Elements.
The "Insert Business Elements" dialog box appears.
72 Using Business Views
Page 73

Quick Start: Creating a Business View
Creating and configuring a Business View
3. Expand the Tutorial folder and select the Customer Business Element.
4. Click Add.
5. Individually select and add each of the remaining Business Elements in
the Tutorial folder: Employee, Orders, Orders Detail, Product, and
Supplier.
6. Click Close.
7.
8. In the Object Name field, type Xtreme Business View.
9. Select the Tutorial folder, and then click Save.
You have now created a Business View from which users can create reports.
For information on setting security for each of the objects, see Business
Views Security Concepts on page 255.
Click Save.
3
Using Business Views 73
Page 74

Quick Start: Creating a Business View
Creating and configuring a Business View
3
74 Using Business Views
Page 75
Using the Business View Manager
4
Page 76

Using the Business View Manager
4
Business View Manager overview
This section serves as an introduction to using the Business View Manager
and details how to create and manage different Business Views objects. It
also provides information on using the Repository Explorer through the
Business View Manager.
Business View Manager overview
The Business View Manager is a designer for Business Views administrators
that provides a wide range of capabilities for creating and modifying Data
Connections, Dynamic Data Connections, Data Foundations, Business
Elements, and Business Views. The Business View Manager enables you
to design relational views of information. This designer also enables you to
set detailed column and row-level security for various objects in your report.
You can also use this designer to specify different Data Connections, to set
security, and to control access to the data found within various data sources.
In addition, you can use the Business View Manager to apply detailed security
settings to the BusinessObjects Enterprise Repository. You can set security
rights for users and groups for folders and objects found within the repository.
As long as a user has the Business View Manager installed on his or her
machine, he or she can use this designer; however, the user must have
access rights to folders in the BusinessObjects Enterprise Repository before
he or she can save objects to these specific folders. All Business Views
objects are saved to the BusinessObjects Enterprise Repository. For more
information on the security settings for the BusinessObjects Enterprise
Repository, see BusinessObjects Enterprise Repository security model on
page 92.
This section briefly introduces to new Business Views administrators some
of the features found within the Business View Manager. It also provides
information on using the Repository Explorer, which allows you to navigate
the BusinessObjects Enterprise Repository.
Working with the Business View Manager
You will use the Business View Manager (BVM) extensively to manage your
Business Views system. This designer enables you to create and modify
Data Connections, Dynamic Data Connections, Data Foundations, Business
76 Using Business Views
Page 77

Using the Business View Manager
Working with the Business View Manager
Elements, and Business Views. The BVM allows you to set in detail all of
the properties and settings for these various objects, including the necessary
security settings for each object.
Any user with valid credentials to BusinessObjects Enterprise can log on to
the BVM and create and modify objects to which he or she has access.
Because all of the objects found in Business Views are saved to the
BusinessObjects Enterprise Repository, the Business Views user must have
access to the BusinessObjects Enterprise Repository before he or she can
open, modify, and save different objects.
Logging on to the Business View Manager
Every time you use the Business View Manager, you need to log on with the
proper credentials. When you log on, you are logging on to the Central
Management Server (CMS), which is a part of BusinessObjects Enterprise.
To log on to the BVM
4
1. In Windows, click Start > Programs > BusinessObjects XI >
BusinessObjects Enterprise XI > Business View Manager.
2. When the Log On to BusinessObjects Enterprise dialog box appears,
select the type of authentication in the Authentication list.
3. In the System list, select the appropriate CMS.
Using Business Views 77
Page 78

Using the Business View Manager
4
Working with the Business View Manager
4. Type your User name and Password.
5. Click OK.
The Welcome to Business View Manager dialog box appears.
Navigating the Welcome to Business View Manager dialog box
The Welcome to Business View Manager dialog box is your starting point
for creating a new Business Views object or opening a saved or recently
saved object. This dialog box allows you to navigate to any object and also
to create and delete new folders and objects within the BusinessObjects
Enterprise Repository.
Tip:
• While in this dialog box, you can clear the "Show this dialog after
BusinessObjects Enterprise logon" check box if you do not want this
dialog box to appear after you log on to the Business View Manager.
78 Using Business Views
Page 79

Using the Business View Manager
Working with the Business View Manager
• This Welcome to Business View Manager dialog box also appears when
you select the Open command on the File menu—you can select the
"Show this dialog after BusinessObjects Enterprise logon" check box if
you want to have the dialog box appear again every time you start the
BVM.
This dialog box consists of three tabs:
• New
On the New tab, you can select any new object you want you create,
including the following:
• Data Connection
A Data Connection enables you to specify and define a data source.
For more information on Data Connections, see Data Connections
overview on page 106.
• Dynamic Data Connection
A Dynamic Data Connection is a collection of pointers to different Data
Connections. For more information on this object, see Dynamic Data
Connections overview on page 120.
4
• Data Foundation
This object is a collection of tables and fields—a Data Foundation
enables tables from different data sources to be used together. For
more information on Data Foundations, see Data Foundations overview
on page 134.
• Business Element
A Business Element consists of a logically related collection of data
fields that are based on a Data Foundation. For more information on
Business Elements, see Business Elements overview on page 194.
• Business View
A Business View is a logical collection of Business Elements. Users
see Business Views as abstract database connections, and the
contained Business Elements as virtual tables that, in turn, contain
Business Fields. Thus, end users can access Business Views through
a client application such as Crystal Reports. For more information on
this object, see Business Views overview on page 238.
• Business Element Wizard
Using Business Views 79
Page 80

Using the Business View Manager
4
Working with the Business View Manager
The Business Element Wizard guides you step-by-step through the
process of creating multiple Business Elements directly from a Data
Foundation. For more information on using this wizard, see Using the
Business Element Wizard on page 211.
• Open
The Open tab displays the Repository Explorer. Use the Repository
Explorer to find and open a previously saved object, to filter or change
repository view settings, to delete an object or folder, and to create a new
folder. For more information on using the Repository Explorer, see Using
the Repository Explorer on page 85.
• Recent
In the Object Name column, select from one of the recently modified
objects, and click Open to view and update this object.
Navigating within the Business View Manager
Each window within the Business View Manager can be set to be docked or
to be in floating mode. You can manually dock each window anywhere in
the designer. Logically related windows are typically grouped together: for
example, the Property Browser is often grouped with the Object Explorer.
You can switch between the different grouped windows by clicking the
windows' appropriate tabs. Double-click the tab to remove the window from
its associated group. You can also resize each window by dragging any of
its edges with the Resizing cursor.
Within certain windows, you can click Auto Hide (the pin-shaped button
located on the top-right corner of a window) to hide the window. The Business
View Manager displays hidden windows as tabs. When you click a tab, the
window reappears. You can dock windows on top of each other, which results
in grouped windows that can be selected by their exposed tabs. You can
also close a window by clicking the small "X" button, typically located in the
top-right corner of the window. You can select which windows to open through
the View menu.
The Business View Manager maintains all of your settings for each dockable
window; thus, depending on how these windows appeared when you last
used the Business View Manager, each window may be in docked or in
80 Using Business Views
Page 81

Using the Business View Manager
Working with the Business View Manager
floating mode. In the screen shots that follow in this administrator's guide,
some of your windows may be placed in different locations.
When you have multiple Business Views objects open, you can navigate
between the different objects by clicking their respective tabs. These tabs
are located on the top portion of the main window. You can also click the
"Scroll Left" and "Scroll Right" buttons, located at the top-right corner of the
main window to scroll between the various tabs.
Saving an object within the Business View Manager
All of the objects found within Business Views are saved to the
BusinessObjects Enterprise Repository. The BusinessObjects Enterprise
Repository is contained in the Central Management Server (CMS) of
BusinessObjects Enterprise. For more information on the BusinessObjects
Enterprise Repository, see Using the Repository Explorer on page 85.
When you first save a Business Views object, you need to specify a name
for the object and the location you want to save the object to.
4
To save an object
1. On the File menu, select Save.
Tip:
The Save As dialog box appears.
2. In the Object Name field, specify the name of your object.
You can also click the Save (Ctrl+S) button or press CTRL+S.
Using Business Views 81
Page 82

Using the Business View Manager
4
Exporting and importing Business Views
3. Select the folder you want to save your object to.
Tip:
You can create new folders in the repository by clicking the "Insert
a new folder" button.
4. Click Save.
Exporting and importing Business Views
The import and export tools enable you to export and import Business Views
and their associated objects (that is, the Data Connections, Dynamic Data
Connections, Data Foundation, Business Elements, and any other objects
that the Business Views reference).
When you export Business Views and their associated objects, all of this
information is exported as an XML file. Depending on whether you choose
to include security information or not, user and group rights are or aren't
included in the XML file. Regardless, for security reasons, passwords for
Data Connections are not exported.
The ability to export a complete set of Business Views objects allows you to
develop different migration strategies. For example, you can migrate Business
Views between CMS cluster installations. That is, you might have reporting
systems with separate clusters for development, test, and production systems.
In addition, you are able to extract your Business Views data from within the
BusinessObjects Enterprise Repository. Because the information is saved
as an XML file, this format is suitable for storage in a Code Asset
Management tool (for example, Microsoft SourceSafe).
Note:
When you import an XML file to a repository, even if the file contains security
settings, the security settings for the destination folder may override whatever
settings you have in the XML file. Because Business Views uses a
denial-based inheritance model, if rights are denied at the folder level, these
rights will also be denied at the imported object level.
To export Business Views
1. On the Tools menu, select Export.
82 Using Business Views
Page 83
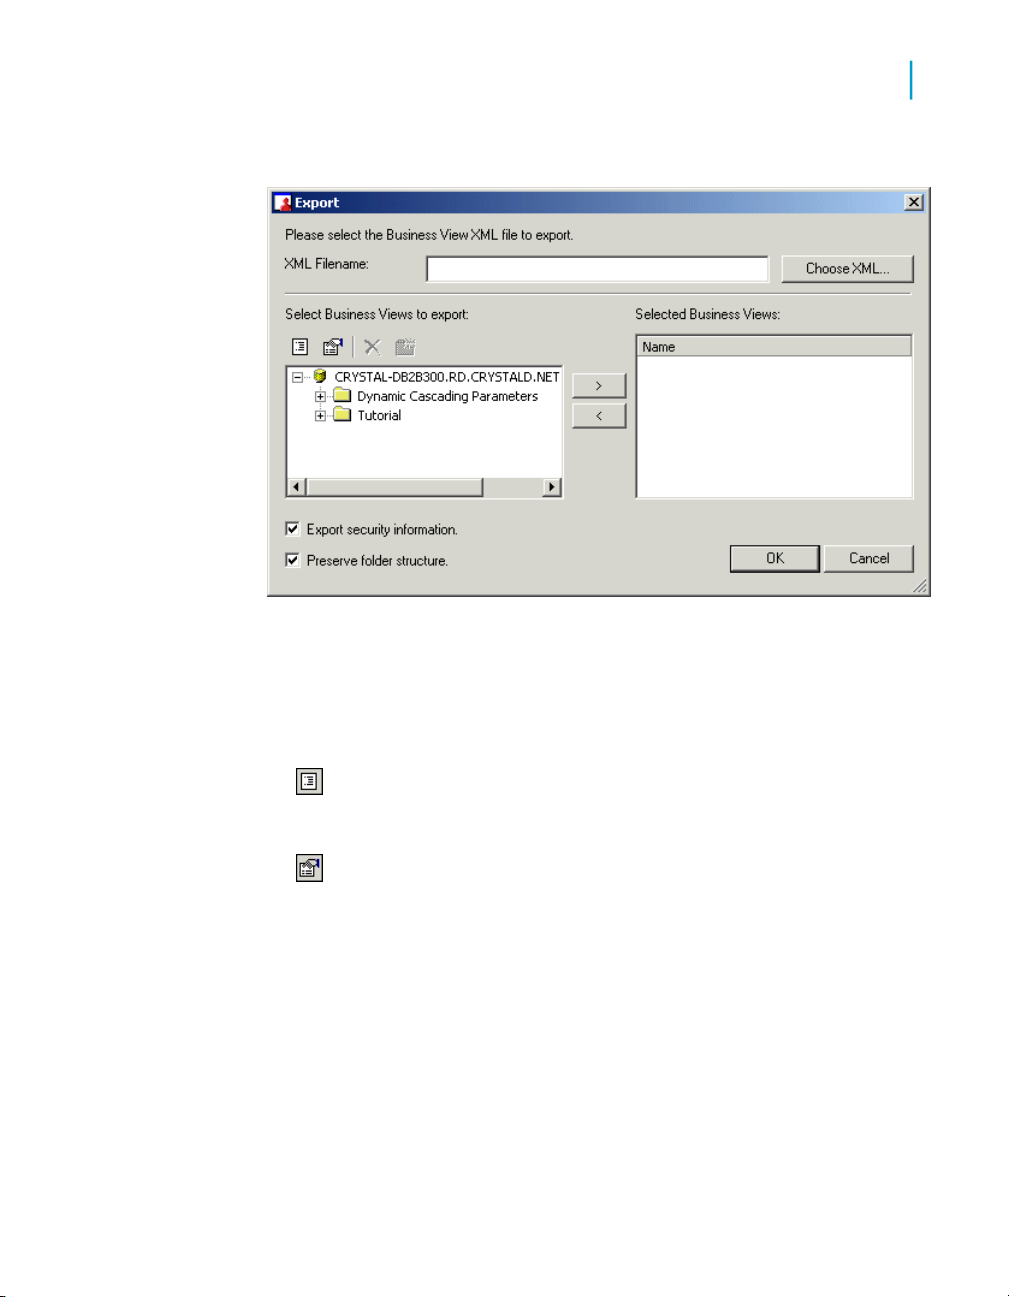
Using the Business View Manager
Exporting and importing Business Views
The Export dialog box appears.
2. In the XML Filename field, type the location and the name of the XML
file you are exporting to, or click Choose XML to specify a location.
3. In the "Select Business Views to export" area, choose a Business View
to export.
4
Note:
•
•
4. Click the > button to move the Business View to the "Selected Business
Views" area.
Tip:
• You can export more than one Business View by selecting different
• Click to < button to remove a Business View from the list of Business
Click the Change view settings button to bring up the View
Settings dialog box. In this dialog box, you can select the item types
you'd like to see, and also sort items by Name or by Type.
Click the Advanced filtering button to filter items by text or by
author. Click the button again to disable advanced filtering.
Business Views using the CTRL key and clicking the > button to create
a list of Business Views to export.
Views you want to export.
Using Business Views 83
Page 84
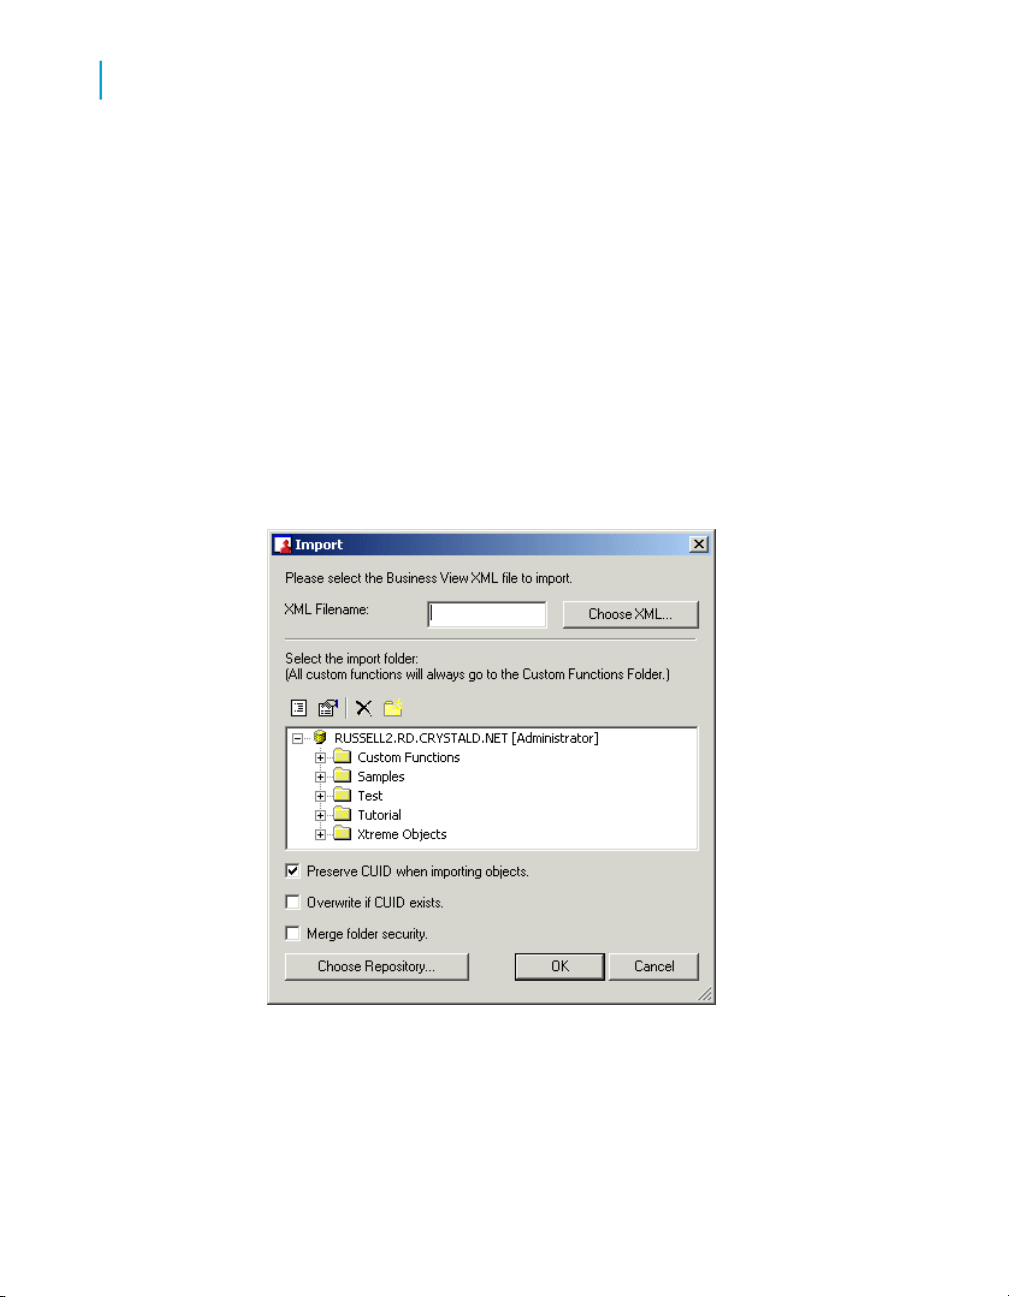
Using the Business View Manager
4
Exporting and importing Business Views
5. Select the Export security information check box to export the security
rights that are associated with the Business View.
Note:
Passwords for Data Connections are not exported to the XML file.
6. Select the Preserve folder structure check box to include the folder
hierarchy information of the Business View when it is exported.
7. Click OK to export the selected Business Views.
To import Business Views
1. On the Tools menu, select Import.
The Import dialog box appears.
2. In the XML Filename field, type the name of the XML file you are
importing, or click Choose XML to find the XML file.
3. In the "Select the import folder" area, choose a folder to import the XML
to.
84 Using Business Views
Page 85

Using the Business View Manager
Using the Repository Explorer
4
•
•
•
•
4. Select the Preserve CUID when importing objects check box to ensure
that each object's unique identifier is preserved during import.
Note:
• If this option is not selected, new CUIDs (an object's unique identifier)
• Reports that are based on Business Views reference the specific
Tip:
You can select the Overwrite if CUID exists check box to replace any
object in the folder that has same CUID as the object being imported.
Click the Change view settings button to bring up the View
Settings dialog box. In this dialog box, you can select the item types
you'd like to see, and also sort items by Name or by Type.
Click the Advanced filtering button to filter items by text or by
author. Click the button again to disable advanced filtering.
Click the Delete button to delete items or folders in the list.
Click the Insert a new folder button to insert a new folder.
will be assigned to the imported objects.
Business View's unique identifier; thus, if the unique identifier is not
preserved, upon refresh, the report will fail.
5. Select the Merge folder security check box to combine the security
settings of object's origin folder with the security settings of its destination
folder. If there is a conflict, the security settings of the destination folder
is used.
6. Click the Choose Repository button if you want to import the XML file
to a different BusinessObjects Enterprise Repository.
Specify the BusinessObjects Enterprise name, the User name, Password,
and Authentication type and click OK.
7. Click OK to import the selected XML file.
Using the Repository Explorer
The BusinessObjects Enterprise Repository is the central location for you to
store and manage your objects. Business Views users store objects such
as Data Connections, Dynamic Data Connections, Data Foundations,
Using Business Views 85
Page 86

Using the Business View Manager
4
Using the Repository Explorer
Business Elements, and Business Views. All of the objects that are found
within Business Views are stored in the BusinessObjects Enterprise
Repository.
The BusinessObjects Enterprise Repository that ships with Business Views
is contained in the Central Management Server (CMS) of BusinessObjects
Enterprise. The CMS is installed when you install BusinessObjects Enterprise
and Business Views. Before publishing reports that reference repository
objects, move your existing BusinessObjects Enterprise Repository to the
Central Management Server database. For more information on migrating
the BusinessObjects Enterprise Repository, see the BusinessObjects
Enterprise Adminitrator's Guide.
While using the Repository Explorer, you can double-click a Business Views
object to open and edit the object. You can also right-click the object to
change its settings or view its properties. In addition, the Repository Explorer
also displays the name of the current user and which Central Management
Server (CMS) the user is connected to.
Note:
The repository is also used by Crystal Reports to store supported Crystal
Reports object types, including text objects, bitmaps, custom functions, and
commands (queries). For more information on the repository as it pertains
to Crystal Reports, see the "BusinessObjects Enterprise Repository" section
found in the Crystal Reports Online Help.
Accessing the BusinessObjects Enterprise Repository
The BusinessObjects Enterprise Repository is set up when you install
Business Views. You do not have to do anything additional before you use
the repository.
To open the BusinessObjects Enterprise Repository
1. In Business Views, under the View menu, select the Repository Explorer.
The Repository Explorer appears.
2. Expand the top node to access the various folders and objects in the
repository.
86 Using Business Views
Page 87

Toolbar
Using the Business View Manager
Using the Repository Explorer
Note:
The Repository Explorer might appear in a docked position in the Business
View Manager depending on where it was when you last used Business
Views. You can drag it where you like, or dock it elsewhere.
The Repository Explorer's toolbar consists of various buttons that allow you
to add new folders, search for items, and so on:
•
Change view settings
Use this option to open the View Setting dialog box. Use this dialog box
to limit the type of repository items displayed in the Repository Explorer.
You can also select options to sort multiple items by name or by type.
4
•
•
•
•
Advanced filtering
Use this option to display filtering options at the bottom of the Repository
Explorer. Use these filters to find specific items by words from the "Show
items with this text in the name:" or the "Show items by this author:" fields.
Delete the item/folder
Use this option to remove the selected item or folder from the repository.
When you delete a folder, you delete all the items it contains. For more
information about deleting items from the repository, see Deleting items
from the repository on page 89.
Insert a new folder
Use this option to add a new folder to the repository. For information on
adding a new folder, see Adding folders to the repository on page 88.
Check Dependent Integrity
Use this option to test the Business Views objects that are dependent on
the object that you have selected in the Repository Explorer.
Using Business Views 87
Page 88

Using the Business View Manager
4
Using the Repository Explorer
•
•
Show Dependent Objects
Use this option to view a list of Business Views objects that depend on
the object that you have selected in the Repository Explorer.
Show Referenced Objects
Use this option to view a list of Business Views objects that are referenced
by the object that you have selected in the Repository Explorer.
Adding folders to the repository
You can organize the contents of the repository by creating folders and
subfolders in the tree view.
Folders provide you with the ability to organize and facilitate content
administration. They are useful when there are a number of Business Views
objects that a department or area requires frequent access to, because you
can set object rights and limits once, at the folder level, rather than setting
them for each object within the folder.
By default, new objects that you add to a folder inherit the object rights that
are specified for the folder. For more information, see Applying security
settings to folders in the BusinessObjects Enterprise Repository on page 93.
To add folders to the repository
1. In the Repository Explorer, right-click a node and click New Folder on
the shortcut menu.
Tip:
Alternatively, click the "Insert a new folder" button on the Repository
Explorer's toolbar.
A new folder is added to the bottom of the repository tree. (If your
repository items are sorted by type, the new folder is added alphabetically
with the default name New Folder.)
2. Name your new folder and press the Enter key.
88 Using Business Views
Page 89

3. To add a subfolder, right-click your new folder and click New Folder on
the shortcut menu.
4. Name your new subfolder and press the Enter key.
Renaming folders in the repository
You can rename any folder in the repository, as long as you have View and
Edit rights for the folder.
To rename a folder
1. In the Repository Explorer, right-click a folder and select Rename.
2. Rename the selected folder and press the Enter key.
Deleting items from the repository
Using the Business View Manager
Using the Repository Explorer
4
Any object you store in the repository can be deleted from that repository.
Once you remove an object from the repository, it is removed for all users.
Note:
The ability to delete repository objects is controlled by the permissions that
are set in BusinessObjects Enterprise. Once you confirm in Business Views
that you want to delete the selected object and its dependent objects, you
will receive an error message if you do not have adequate permission to
delete the object from the repository.
To delete an object from the repository
1. In the Repository Explorer, navigate to the appropriate folder, select the
object you want to remove, and press the Delete key.
Tip:
You can also delete a repository object by right-clicking it and
selecting Delete from the shortcut menu. You can also click the "Delete
the item/folder" button on the Repository Explorer's toolbar.
The "Delete Repository Objects?" dialog box appears.
Using Business Views 89
Page 90
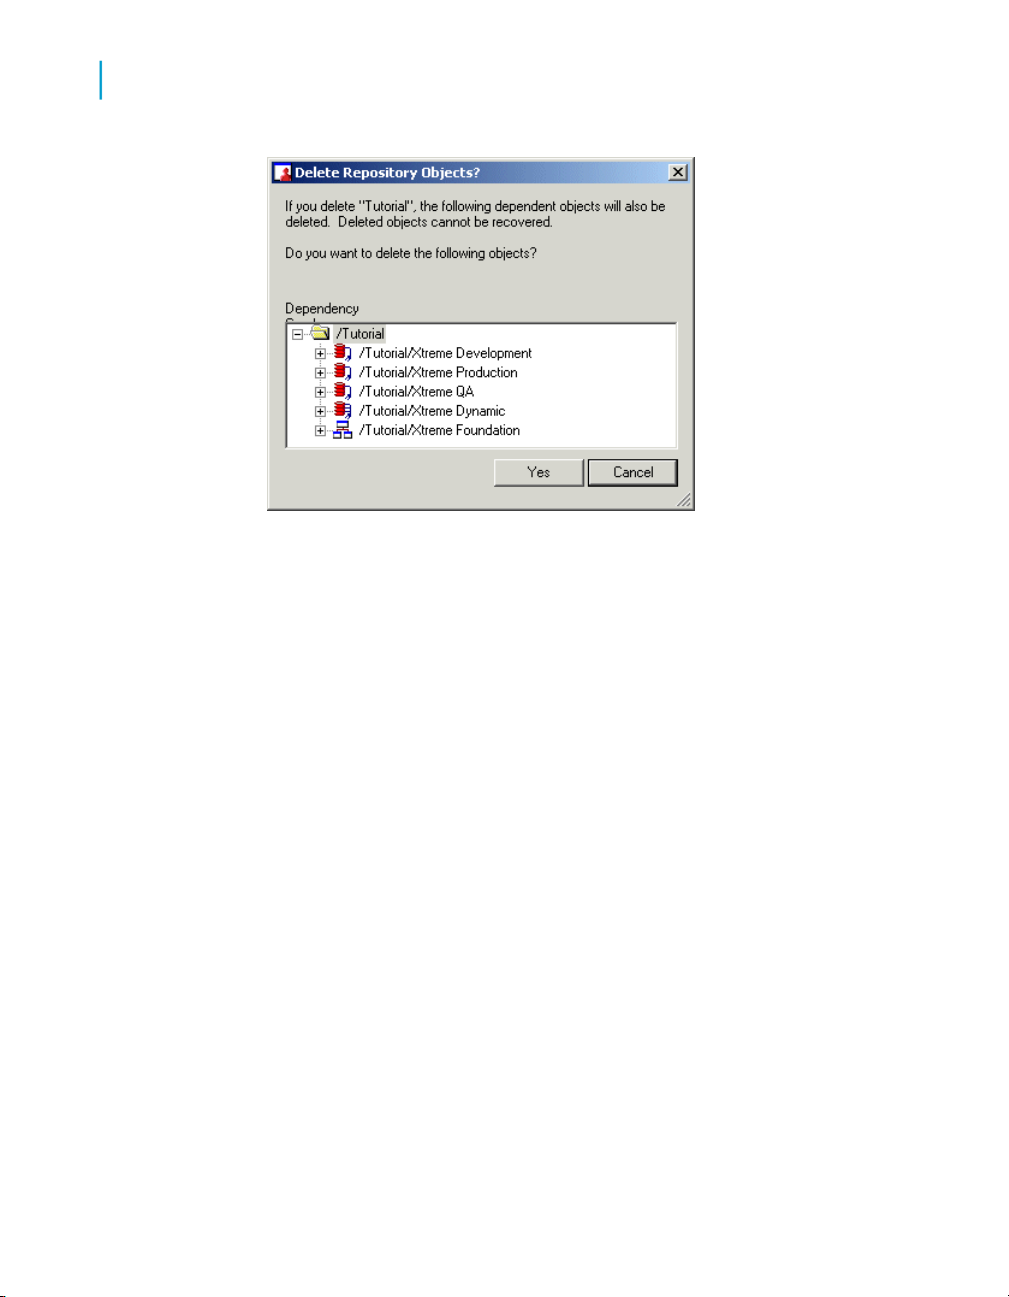
Using the Business View Manager
4
Using the Repository Explorer
2. Click Yes to confirm deletion of the selected object and its dependent
objects.
The "Delete Repository Objects?" dialog box displays a Dependency
Graph, which displays all of the dependent objects (child objects) that
also need to be deleted as well. This dialog box also notes that once the
selected object and its dependent objects are deleted, these objects are
deleted permanently.
Installing sample repository objects
By default, the BusinessObjects Enterprise Repository does not include any
sample repository objects. You need to install the sample repository objects
to the BusinessObjects Enterprise Repository on your Central Management
Server (CMS).
When you install the sample repository objects, the following folders and
objects are added to the BusinessObjects Enterprise Repository:
• Commands
This folder includes sample custom commands.
• Custom Functions
This folder includes a number of custom functions.
90 Using Business Views
Page 91

Using the Business View Manager
Using the Repository Explorer
• Images
This folder contains sample logos.
• Samples > Business Views > Xtreme
This folder contains one Data Connection, one Data Foundation, five
Business Elements, and one Business View.
• Text Objects
This folder contains sample text objects.
Note:
• Regardless of whether or not your product licensing includes the use of
Business Views, you can install the sample repository objects through
the Business View Manager.
• When you install the sample repository objects, you choose the language
you want for the samples. For example, you can install Korean samples
on an English BusinessObjects Enterprise system.
• Using the Business View Manager, you can install samples to any
BusinessObjects Enterprise Repository, regardless of whether the Central
Management Server is located on a Windows or a UNIX machine.
• For more information on custom functions, commands, images, and text
objects, see the Crystal Reports User's Guide.
4
To install the sample repository objects
1. On the Tools menu, select Install Repository Samples.
The "Install Repository Samples" dialog box appears.
2. Select the language for your sample repository objects from the Choose
Language list.
3. Click OK.
Note:
Any existing sample repository objects will be deleted before the new
objects are installed.
Using Business Views 91
Page 92

Using the Business View Manager
4
BusinessObjects Enterprise Repository security model
BusinessObjects Enterprise Repository
security model
The security model for Business Views is based directly on the
BusinessObjects Enterprise security model; as such, this flexible security
model allows you to be as general or as specific as you want in setting rights
for users and groups. You can set these rights through the Repository
Explorer, which determines whether users and groups can access and edit
specific Business Views objects through the Business View Manager.
Note:
This section of the documentation details the BusinessObjects Enterprise
security as it applies to the folders stored in the BusinessObjects Enterprise
Repository; it does not include detailed information on specific security
information for the various Business Views objects—for this information on
object security, refer to the specific section for each object, and also refer to
Security overview on page 256.
Object rights are the base units for controlling users' access to folders and
other objects within the BusinessObjects Enterprise Repository. When
granted, each right provides a user or group with permission to perform a
particular action on an object. For any object, you can set security levels that
affect individual users or entire groups.
To set object rights within the BusinessObjects Enterprise Repository, you
first locate the object in the Repository Explorer, and then you specify the
rights for different users and groups. Each object right can be explicitly
granted or denied. The BusinessObjects Enterprise object security model is
designed such that, if a right is left "not specified," the right is denied by
default. Additionally, if contradictory settings result in a right being both
granted and denied to a user or group, the right is denied by default. This
"denial based" design assists in ensuring that users and groups do not
automatically acquire rights that are not explicitly granted.
By setting rights through group membership, you can deny or grant users of
a certain group specific object rights. You can take advantage of the
inheritance patterns recognized by BusinessObjects Enterprise: users can
inherit rights as the result of group membership; subgroups can inherit rights
from parent groups; and both users and groups can inherit rights from parent
folders. When you need to disable inheritance or to customize security levels
for particular objects, users, or groups, you can disable these rights through
the Business View Manager.
92 Using Business Views
Page 93

Using the Business View Manager
BusinessObjects Enterprise Repository security model
Note:
• For more information on security as it applies to Business Views objects,
see Security overview on page 256.
• For more information on the inheritance model of security as it applies to
folders and Business Views objects, see Using inheritance to your
advantage on page 263.
• For more information on security as it applies to BusinessObjects
Enterprise, see the "BusinessObjects Enterprise Security Concepts"
section and the "Controlling Users' Access to Objects" section of the
BusinessObjects Enterprise Administrator's Guide.
Applying security settings to folders in the BusinessObjects Enterprise Repository
Using the Repository Explorer, you can specify which user and/or group has
access to specific folders in the repository. Folders provide you with the
ability to organize and facilitate content administration. They are useful when
there are a number of Business Views objects that a department or area
requires frequent access to, because you can set object rights and limits
once, at the folder level, rather than setting them for each object within the
folder.
4
Note that folder rights follow the same inheritance model as object rights.
Thus, if you set a right on a parent folder, all of its children folders inherit the
same security rights. For more information on the inheritance model as it
pertains to security, see Using inheritance to your advantage on page 263.
Before you can apply security rights to a folder, you must have Set Security
rights to the folder. By default, members of the BusinessObjects Enterprise
Administrators group have full access to all of the folders in the
BusinessObjects Enterprise Repository.
Note:
For detailed information on the Edit Rights dialog box, see Using the Edit
Rights dialog box on page 257.
To apply security settings to a folder
1. In the Repository Explorer, right-click a folder and select Edit Rights.
Using Business Views 93
Page 94
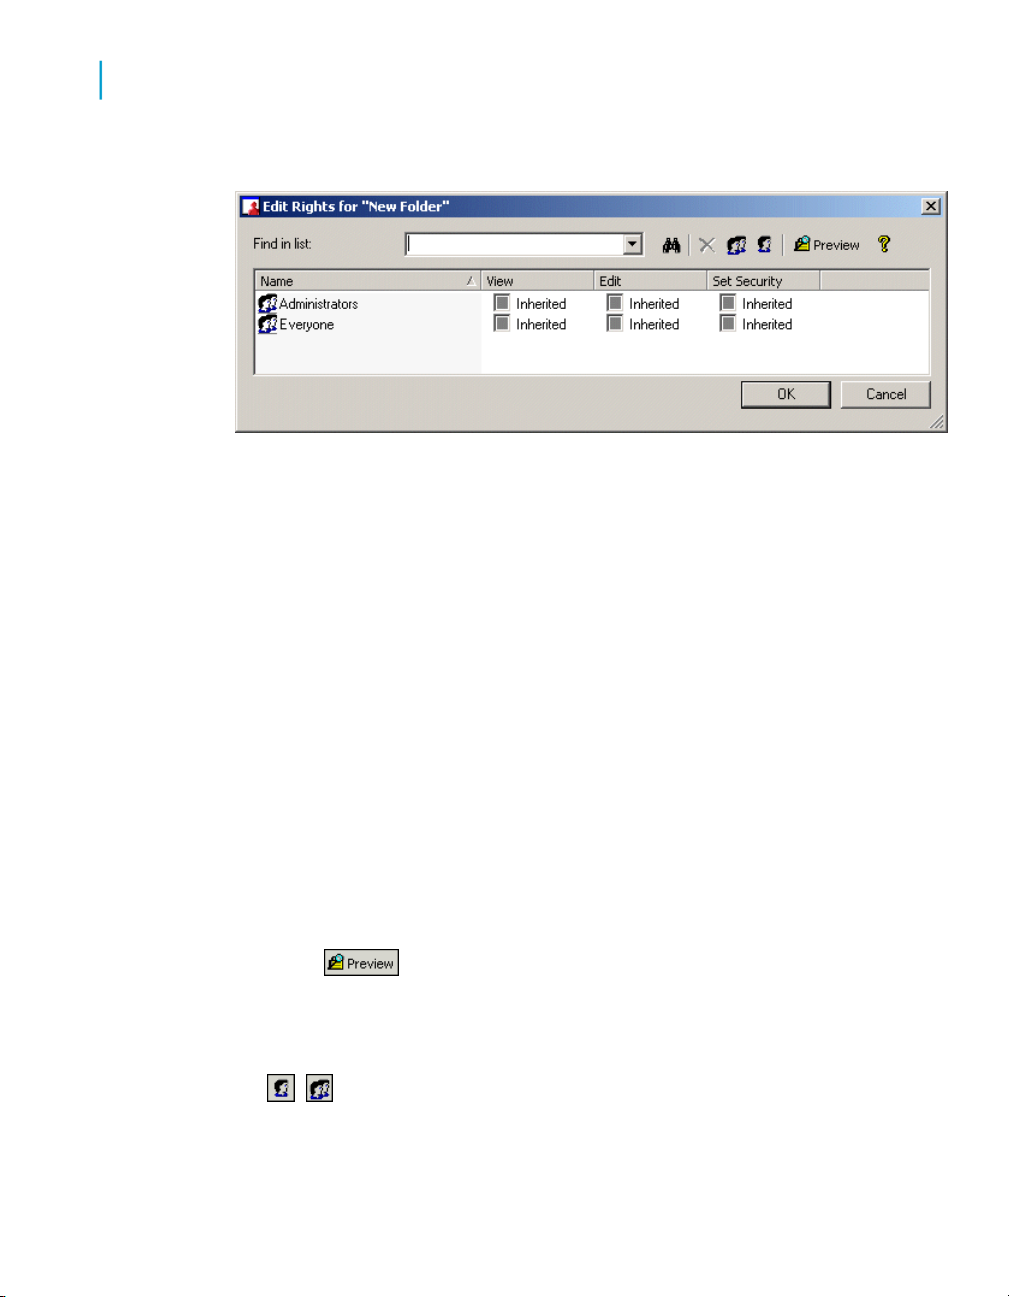
Using the Business View Manager
4
BusinessObjects Enterprise Repository security model
The Edit Rights dialog box appears.
2. Set the following rights for either a user or a group by clicking the
appropriate check box under each rights column.
• View
This right specifies whether a user or group can or cannot view a
folder.
• Edit
This right specifies whether a user or group can or cannot edit the
properties of a folder.
• Set Security
This right specifies whether a user or group can or cannot modify the
rights that are associated with a folder.
Note:
• A cleared check box indicates that the user or group is denied the
•
3.
click the Add Groups button.
4. Assign rights to the new user or group as needed.
94 Using Business Views
right; a check mark in the check box indicates that the user or group
is granted the right; a shaded check box indicates that the right is
inherited.
Click the Preview button to view the final security settings
for the object with inheritance in effect. The Business View Manager
resolves the net result of the current security settings and displays
the net rights.
To add another user or group, click the Add Users button or
Page 95

5. Click OK.
Viewing folder rights
If a user or group does not have View rights to a folder, the user or users in
that group will not be able to view the folder in the Business View Manager,
nor will they be able to view the folder's security settings.
To view a folder's rights settings, in the Repository Explorer, right-click the
folder and select Edit Rights.
Creating a list of values
A list of values is a BusinessObjects Enterprise object that contains the
values of specific fields in a Business View. Using the Business View
Manager, you can create a list of values and use the values of the fields as
values for dynamic and/or dynamic cascading parameters. (For more
information about parameters, see Inserting a parameter on page 172 for
parameters in Data Foundations and Inserting a parameter on page 203 for
parameters in Business Elements.)
Using the Business View Manager
Creating a list of values
4
List of values are stored inside the BusinessObjects Enterprise Repository.
Like a Crystal report, you can use BusinessObjects Enterprise to schedule
a list of values to obtain/update the values of the fields that it references from
a Business View.
To create a list of values
1. From the File menu, select Newand then select Create List of Values
Info.
The Select Business View dialog box appears.
Using Business Views 95
Page 96
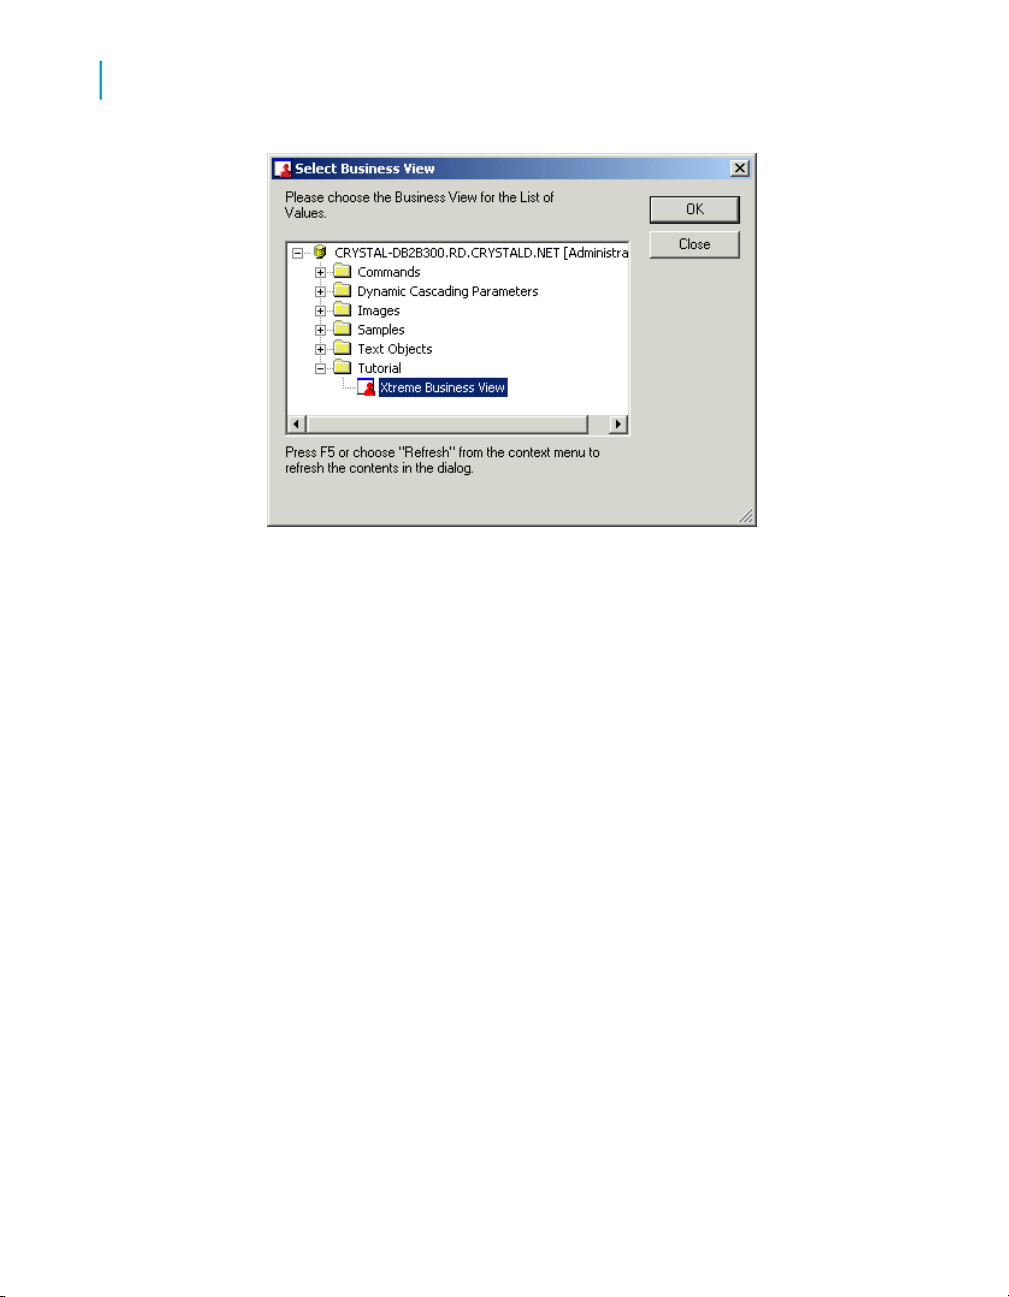
Using the Business View Manager
4
Creating a list of values
2. Expand the folders and select the Business View that contains the fields
that you want for your list of values.
3. Click OK.
The Create List of Values dialog box appears.
96 Using Business Views
Page 97
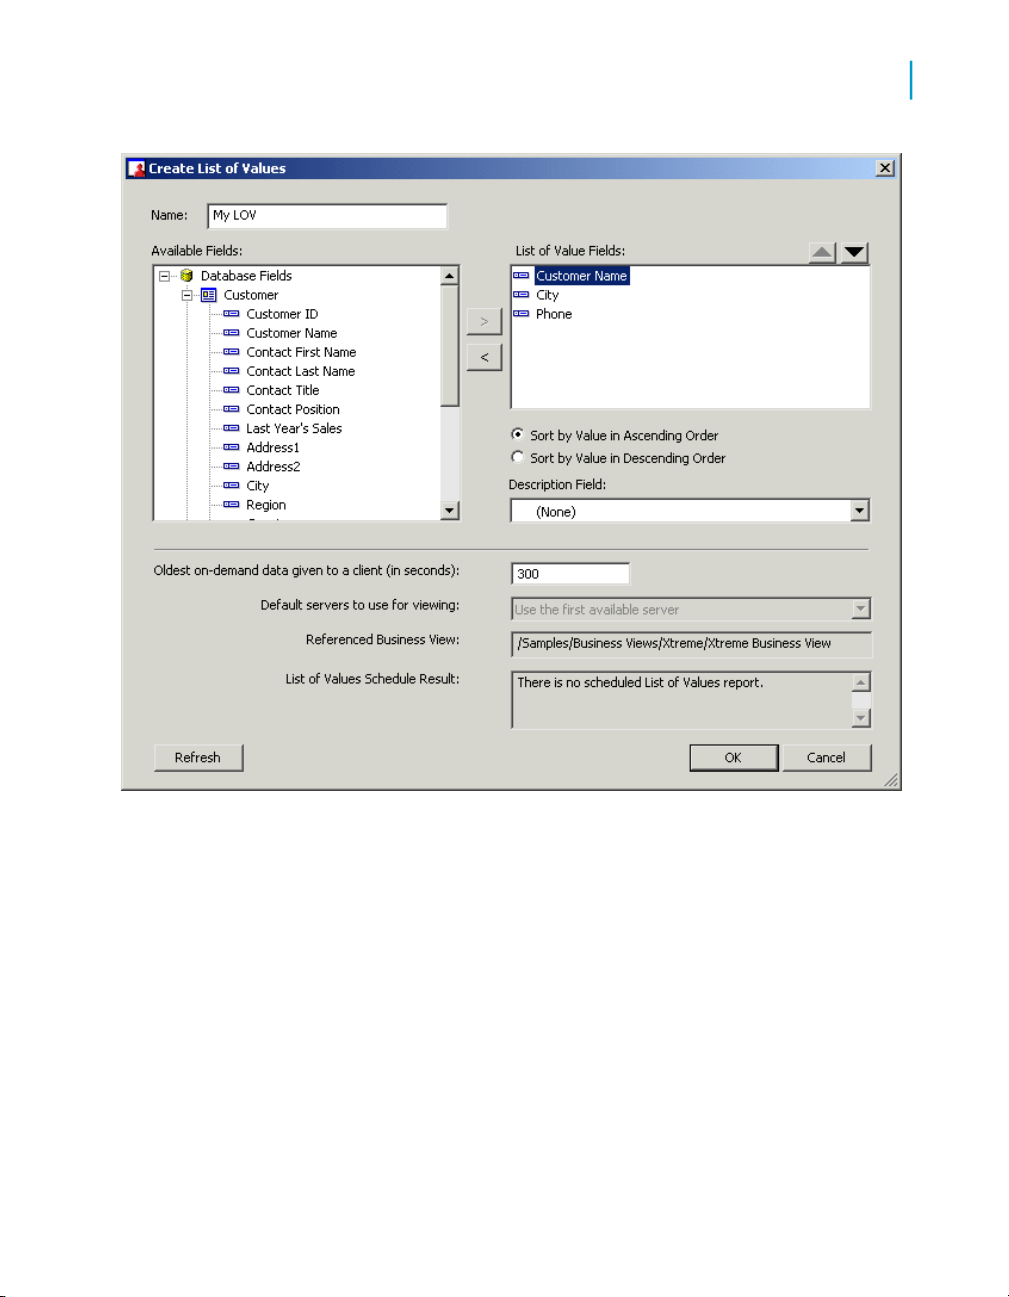
Using the Business View Manager
Creating a list of values
4
4. In the Name field, specify a name for the list of values.
5. In the Available Fields area, expand the tables and select a field that you
want to include in the list.
6. Click the right arrow to add the field to the list.
7. Continue to select and add all of the fields that you want to include in the
list of values.
8. In the List of Value Fields area, select a field.
• To change the order of the fields in your list, click the Up or Down
arrow.
The order of the fields in the list establishes the order in which
information is prompted for the fields in a parameter. For example,
suppose that the fields are listed in the following order:
Using Business Views 97
Page 98

Using the Business View Manager
4
Creating a list of values
• To specify a description for the field, click the … button beside
• Country
• Region
• City
A parameter that is based on the list of values will first prompt users
for a country, then for a region within the country, and finally, for a city
within the region.
Note:
The order of the fields in a list of values is especially important if you
plan to use the list of values for dynamic cascading parameters. If the
parameter is not cascading, then it will always prompt for the first field
in the list of values (which, in this case, is "Country").
the Description Field.
When you click the button, a list that contains the tables and fields in
the Business View appears. From the list, you can select a field. The
values of the field that you choose become the descriptions for the
values of the field that is selected in the List of Value Fields area.
For example, suppose that, in the List of Value Fields area, you select
the field "Customer ID." When you click the … button, you choose the
field "Customer Name." When you create a parameter that uses the
list of values (and configure the prompt to use Value and Description),
the values that are entered for the parameter are the values of the
"Customer ID" field; however, you specify these values by selecting
a customer name. The description allows you to provide a value for
that parameter without having to remember specific customer IDs.
You only have to provide a name.
• To sort the order of the values of the field, select Ascending by
Value or Descending by Value in the Sort Order area.
You can specify the order in which the values of the selected field
appear in the list of values. When you create a parameter that uses
the list of values, the order that you specified for the field is the order
in which the field's values appear in the prompt.
9. Click OK.
The Business View Manager creates the list of values and saves it in the
top-level folder of the BusinessObjects Enterprise Repository. To modify the
98 Using Business Views
Page 99

list of values, right-click the object in the Repository Explorer and select Edit
list of values.
For instructions on how to use the list of values for your parameters, see
Inserting a parameter on page 172 for parameters in Data Foundations and
Inserting a parameter on page 203 for parameters in Business Elements.
To schedule a list of values
1. In the Repository Explorer, right-click a list of values, and click Schedule
LOV.
The Schedule dialog box appears.
Using the Business View Manager
Creating a list of values
4
2. From the drop-down list, select a field.
Note:
The field that you specify is the level up to which data is obtained/saved
for dynamic cascading parameters. For example, if the list of values
consists of "Country", "Region", and "City" levels, and you choose
"Region", BusinessObjects Enterprise obtains data only for the "Country"
and "Region" fields; data is not obtained for the "City" field.
3. Click OK.
The second Schedule dialog box appears.
Using Business Views 99
Page 100
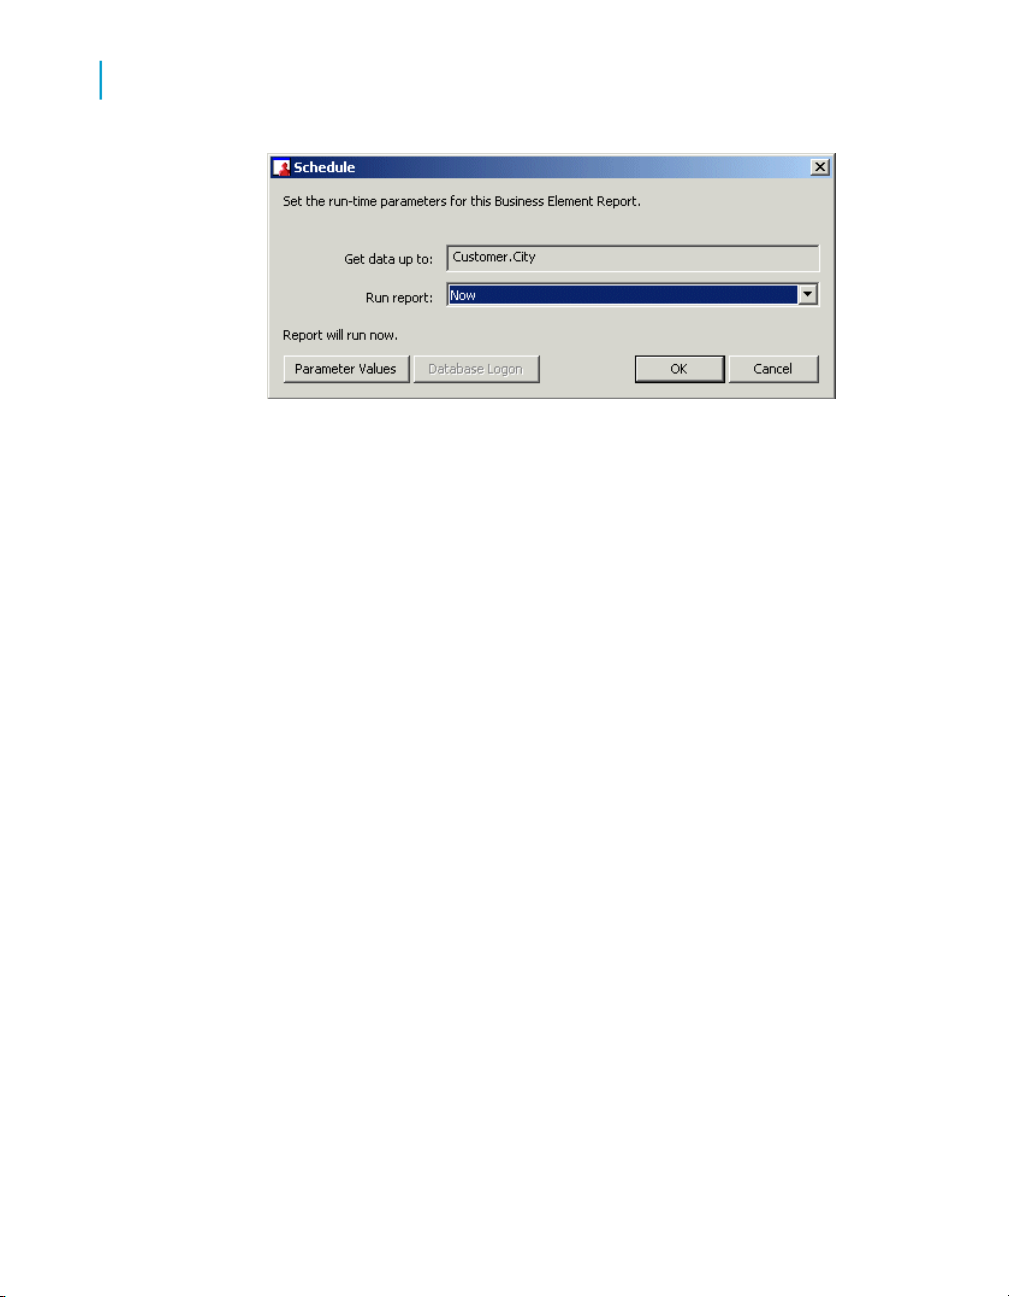
Using the Business View Manager
4
Changing the Business Views Used by a List of Values
4. In the Run report list, choose the schedule in which the list of values will
be run. (For more information about the different ways that you can
schedule an object, see the BusinessObjects Enterprise Administrator's
Guide.)
Note:
• If your list of values is based on a Business View that contains
parameters, click the Parameter Values button (at the bottom-left
corner of the dialog box) to specify values for the parameters. The
button is disabled if the Business View does not contain parameters.
• If your list of values is based on a Business View that requires
database logon, you must also click on the Database Logon button to
connect to the Business View's data source. The button is disabled if
the Business View does not require database logon.
5. Click OK.
The list of values is scheduled in BusinessObjects Enterprise.
Changing the Business Views Used by a
List of Values
Modifying a List of Values object is useful in the following situations:
• Data sources can change over time, and you want to update the list of
values objects to reflect the latest changes in a Business View. For
example, additional fields might be added to a database table that you
want to show in an existing list of values object.
• To reduce the number of Business Views you need to maintain, you can
consolidate multiple Business Views into a single Business View used
100 Using Business Views
 Loading...