

Page 1

Data Integrator Reference Guide
Data Integrator Reference Guide
Data Integrator 11.0.1
Windows and UNIX operating systems
Page 2

Copyright
If you find any problems with this documentation, please report them to Business Objects
S.A. in writing at documentation@businessobjects.com.
Copyright © Business Objects S.A. 2004. All rights reserved.
Trademarks
Patents
Business Objects, the Business Objects logo, Crystal Reports, and Crystal Enterprise are
trademarks or registered trademarks of Business Objects SA or its affiliated companies in the
United States and other countries. All other names mentioned herein may be trademarks of
their respective owners.
Business Objects owns the following U.S. patents, which may cover products that are offered
and sold by Business Objects: 5,555,403, 6,247,008 B1, 6,578,027 B2, 6,490,593 and
6,289,352.
2 Data Integrator Reference Guide
Page 3

Contents
Chapter 1 Introduction 15
Who should read this guide . . . . . . . . . . . . . . . . . . . . . . . . . . . . . . . . . 16
Business Objects information resources . . . . . . . . . . . . . . . . . . . . . . . 17
Chapter 2 Data Integrator Objects 21
Object classes . . . . . . . . . . . . . . . . . . . . . . . . . . . . . . . . . . . . . . . . . . . 23
Reusable objects . . . . . . . . . . . . . . . . . . . . . . . . . . . . . . . . . . . . . . 23
Single-use objects . . . . . . . . . . . . . . . . . . . . . . . . . . . . . . . . . . . . . 24
Object options, properties, and attributes . . . . . . . . . . . . . . . . . . . . . . 25
Descriptions of objects . . . . . . . . . . . . . . . . . . . . . . . . . . . . . . . . . . . . . . . 25
Annotation . . . . . . . . . . . . . . . . . . . . . . . . . . . . . . . . . . . . . . . . . . . 28
Batch Job . . . . . . . . . . . . . . . . . . . . . . . . . . . . . . . . . . . . . . . . . . . 29
Catch . . . . . . . . . . . . . . . . . . . . . . . . . . . . . . . . . . . . . . . . . . . . . . 37
Conditional . . . . . . . . . . . . . . . . . . . . . . . . . . . . . . . . . . . . . . . . . . 43
COBOL copybook file format . . . . . . . . . . . . . . . . . . . . . . . . . . . . 44
Data flow . . . . . . . . . . . . . . . . . . . . . . . . . . . . . . . . . . . . . . . . . . . 52
Datastore . . . . . . . . . . . . . . . . . . . . . . . . . . . . . . . . . . . . . . . . . . . 54
Document . . . . . . . . . . . . . . . . . . . . . . . . . . . . . . . . . . . . . . . . . . . 97
DTD . . . . . . . . . . . . . . . . . . . . . . . . . . . . . . . . . . . . . . . . . . . . . . . . 98
File format . . . . . . . . . . . . . . . . . . . . . . . . . . . . . . . . . . . . . . . . . . 109
Function . . . . . . . . . . . . . . . . . . . . . . . . . . . . . . . . . . . . . . . . . . . 119
Log . . . . . . . . . . . . . . . . . . . . . . . . . . . . . . . . . . . . . . . . . . . . . . . 120
Message function . . . . . . . . . . . . . . . . . . . . . . . . . . . . . . . . . . . . 125
Outbound message . . . . . . . . . . . . . . . . . . . . . . . . . . . . . . . . . . . 126
Project . . . . . . . . . . . . . . . . . . . . . . . . . . . . . . . . . . . . . . . . . . . . . 127
Query transform . . . . . . . . . . . . . . . . . . . . . . . . . . . . . . . . . . . . . 128
Real-time job . . . . . . . . . . . . . . . . . . . . . . . . . . . . . . . . . . . . . . . . 129
Script . . . . . . . . . . . . . . . . . . . . . . . . . . . . . . . . . . . . . . . . . . . . . . 133
Data Integrator Reference Guide 3
Page 4

Contents
Source . . . . . . . . . . . . . . . . . . . . . . . . . . . . . . . . . . . . . . . . . . . . .134
Table . . . . . . . . . . . . . . . . . . . . . . . . . . . . . . . . . . . . . . . . . . . . . .138
Target . . . . . . . . . . . . . . . . . . . . . . . . . . . . . . . . . . . . . . . . . . . . . .142
Template table . . . . . . . . . . . . . . . . . . . . . . . . . . . . . . . . . . . . . . .179
Transform . . . . . . . . . . . . . . . . . . . . . . . . . . . . . . . . . . . . . . . . . . .181
Try . . . . . . . . . . . . . . . . . . . . . . . . . . . . . . . . . . . . . . . . . . . . . . . . 182
While loop . . . . . . . . . . . . . . . . . . . . . . . . . . . . . . . . . . . . . . . . . . .183
Work flow . . . . . . . . . . . . . . . . . . . . . . . . . . . . . . . . . . . . . . . . . . .184
XML file . . . . . . . . . . . . . . . . . . . . . . . . . . . . . . . . . . . . . . . . . . . .187
XML message . . . . . . . . . . . . . . . . . . . . . . . . . . . . . . . . . . . . . . .190
XML Schema . . . . . . . . . . . . . . . . . . . . . . . . . . . . . . . . . . . . . . . .192
XML template . . . . . . . . . . . . . . . . . . . . . . . . . . . . . . . . . . . . . . . . 208
Chapter 3 Smart Editor 209
Smart editor toolbar . . . . . . . . . . . . . . . . . . . . . . . . . . . . . . . . . . . . . . .213
Editor Library pane . . . . . . . . . . . . . . . . . . . . . . . . . . . . . . . . . . . . . . .214
Tabs . . . . . . . . . . . . . . . . . . . . . . . . . . . . . . . . . . . . . . . . . . . . . . .214
Find option . . . . . . . . . . . . . . . . . . . . . . . . . . . . . . . . . . . . . . . . . .215
Editor pane . . . . . . . . . . . . . . . . . . . . . . . . . . . . . . . . . . . . . . . . . . . . .216
Syntax coloring . . . . . . . . . . . . . . . . . . . . . . . . . . . . . . . . . . . . . . .216
Selection list and tool tips . . . . . . . . . . . . . . . . . . . . . . . . . . . . . . . 216
Right-click menu and toolbar . . . . . . . . . . . . . . . . . . . . . . . . . . . .218
Validation . . . . . . . . . . . . . . . . . . . . . . . . . . . . . . . . . . . . . . . . . . .218
Chapter 4 Data Types 221
date . . . . . . . . . . . . . . . . . . . . . . . . . . . . . . . . . . . . . . . . . . . . . . .224
datetime . . . . . . . . . . . . . . . . . . . . . . . . . . . . . . . . . . . . . . . . . . . .226
decimal . . . . . . . . . . . . . . . . . . . . . . . . . . . . . . . . . . . . . . . . . . . . .227
double . . . . . . . . . . . . . . . . . . . . . . . . . . . . . . . . . . . . . . . . . . . . .228
int . . . . . . . . . . . . . . . . . . . . . . . . . . . . . . . . . . . . . . . . . . . . . . . . .229
interval . . . . . . . . . . . . . . . . . . . . . . . . . . . . . . . . . . . . . . . . . . . . . 230
long . . . . . . . . . . . . . . . . . . . . . . . . . . . . . . . . . . . . . . . . . . . . . . . .231
numeric . . . . . . . . . . . . . . . . . . . . . . . . . . . . . . . . . . . . . . . . . . . . .235
4 Data Integrator Reference Guide
Page 5

Contents
real . . . . . . . . . . . . . . . . . . . . . . . . . . . . . . . . . . . . . . . . . . . . . . . 236
time . . . . . . . . . . . . . . . . . . . . . . . . . . . . . . . . . . . . . . . . . . . . . . . 237
timestamp . . . . . . . . . . . . . . . . . . . . . . . . . . . . . . . . . . . . . . . . . . 238
varchar . . . . . . . . . . . . . . . . . . . . . . . . . . . . . . . . . . . . . . . . . . . . 239
Data type processing . . . . . . . . . . . . . . . . . . . . . . . . . . . . . . . . . . . . . . . . 240
Date arithmetic . . . . . . . . . . . . . . . . . . . . . . . . . . . . . . . . . . . . . . . . . . 240
Type conversion . . . . . . . . . . . . . . . . . . . . . . . . . . . . . . . . . . . . . . . . . 241
Conversion to/from Data Integrator internal data types . . . . . . . 241
Conversion of data types within expressions . . . . . . . . . . . . . . . 252
Conversion among number data types . . . . . . . . . . . . . . . . . . . . 253
Conversion between explicit data types . . . . . . . . . . . . . . . . . . . 255
Chapter 5 Transforms 257
Operation codes . . . . . . . . . . . . . . . . . . . . . . . . . . . . . . . . . . . . . . . . . . . . 258
Descriptions of transforms . . . . . . . . . . . . . . . . . . . . . . . . . . . . . . . . . . . . 259
Address_Enhancement . . . . . . . . . . . . . . . . . . . . . . . . . . . . . . . . 261
Case . . . . . . . . . . . . . . . . . . . . . . . . . . . . . . . . . . . . . . . . . . . . . . 268
Date_Generation . . . . . . . . . . . . . . . . . . . . . . . . . . . . . . . . . . . . . 271
Effective_Date . . . . . . . . . . . . . . . . . . . . . . . . . . . . . . . . . . . . . . . 273
Hierarchy_Flattening . . . . . . . . . . . . . . . . . . . . . . . . . . . . . . . . . . 277
History_Preserving . . . . . . . . . . . . . . . . . . . . . . . . . . . . . . . . . . . 286
Key_Generation . . . . . . . . . . . . . . . . . . . . . . . . . . . . . . . . . . . . . 292
Map_CDC_Operation . . . . . . . . . . . . . . . . . . . . . . . . . . . . . . . . . 294
Map_Operation . . . . . . . . . . . . . . . . . . . . . . . . . . . . . . . . . . . . . . 302
Match_Merge . . . . . . . . . . . . . . . . . . . . . . . . . . . . . . . . . . . . . . . 305
Merge . . . . . . . . . . . . . . . . . . . . . . . . . . . . . . . . . . . . . . . . . . . . . 313
Name_Parsing . . . . . . . . . . . . . . . . . . . . . . . . . . . . . . . . . . . . . . 315
Pivot (Columns to Rows) . . . . . . . . . . . . . . . . . . . . . . . . . . . . . . . 322
Reverse Pivot (Rows to Columns) . . . . . . . . . . . . . . . . . . . . . . . 327
Query . . . . . . . . . . . . . . . . . . . . . . . . . . . . . . . . . . . . . . . . . . . . . 330
Row_Generation . . . . . . . . . . . . . . . . . . . . . . . . . . . . . . . . . . . . . 352
SQL . . . . . . . . . . . . . . . . . . . . . . . . . . . . . . . . . . . . . . . . . . . . . . . 353
Table_Comparison . . . . . . . . . . . . . . . . . . . . . . . . . . . . . . . . . . . 359
Data Integrator Reference Guide 5
Page 6

Contents
Validation . . . . . . . . . . . . . . . . . . . . . . . . . . . . . . . . . . . . . . . . . . .366
Chapter 6 Functions and Procedures 375
Functions compared with transforms . . . . . . . . . . . . . . . . . . . . . . . . . 377
Operation of a function . . . . . . . . . . . . . . . . . . . . . . . . . . . . . . . . . . . .377
Arithmetic in date functions . . . . . . . . . . . . . . . . . . . . . . . . . . . . . . . . .378
Including functions in expressions . . . . . . . . . . . . . . . . . . . . . . . . . . .378
Kinds of functions you can use in Data Integrator . . . . . . . . . . . . . . . .381
Custom functions . . . . . . . . . . . . . . . . . . . . . . . . . . . . . . . . . . . . .382
Database and application functions . . . . . . . . . . . . . . . . . . . . . . .388
Descriptions of built-in functions . . . . . . . . . . . . . . . . . . . . . . . . . . . . . . . . 388
abs . . . . . . . . . . . . . . . . . . . . . . . . . . . . . . . . . . . . . . . . . . . . . . . .395
add_months . . . . . . . . . . . . . . . . . . . . . . . . . . . . . . . . . . . . . . . . .396
avg . . . . . . . . . . . . . . . . . . . . . . . . . . . . . . . . . . . . . . . . . . . . . . . .397
ceil . . . . . . . . . . . . . . . . . . . . . . . . . . . . . . . . . . . . . . . . . . . . . . . .398
concat_date_time . . . . . . . . . . . . . . . . . . . . . . . . . . . . . . . . . . . .399
count . . . . . . . . . . . . . . . . . . . . . . . . . . . . . . . . . . . . . . . . . . . . . .400
current_configuration . . . . . . . . . . . . . . . . . . . . . . . . . . . . . . . . . .401
current_system_configuration . . . . . . . . . . . . . . . . . . . . . . . . . . . 402
dataflow_name . . . . . . . . . . . . . . . . . . . . . . . . . . . . . . . . . . . . . .403
datastore_field_value . . . . . . . . . . . . . . . . . . . . . . . . . . . . . . . . . . 404
date_diff . . . . . . . . . . . . . . . . . . . . . . . . . . . . . . . . . . . . . . . . . . . .405
date_part . . . . . . . . . . . . . . . . . . . . . . . . . . . . . . . . . . . . . . . . . . . 406
day_in_month . . . . . . . . . . . . . . . . . . . . . . . . . . . . . . . . . . . . . . . . 407
day_in_week . . . . . . . . . . . . . . . . . . . . . . . . . . . . . . . . . . . . . . . .408
day_in_year . . . . . . . . . . . . . . . . . . . . . . . . . . . . . . . . . . . . . . . . . 409
db_type . . . . . . . . . . . . . . . . . . . . . . . . . . . . . . . . . . . . . . . . . . . . .410
db_version . . . . . . . . . . . . . . . . . . . . . . . . . . . . . . . . . . . . . . . . . . 412
db_database_name . . . . . . . . . . . . . . . . . . . . . . . . . . . . . . . . . . .414
db_owner . . . . . . . . . . . . . . . . . . . . . . . . . . . . . . . . . . . . . . . . . . .415
decode . . . . . . . . . . . . . . . . . . . . . . . . . . . . . . . . . . . . . . . . . . . . .416
exec . . . . . . . . . . . . . . . . . . . . . . . . . . . . . . . . . . . . . . . . . . . . . . . 418
extract_from_xml . . . . . . . . . . . . . . . . . . . . . . . . . . . . . . . . . . . . .423
6 Data Integrator Reference Guide
Page 7

Contents
file_exists . . . . . . . . . . . . . . . . . . . . . . . . . . . . . . . . . . . . . . . . . . 425
fiscal_day . . . . . . . . . . . . . . . . . . . . . . . . . . . . . . . . . . . . . . . . . . 426
floor . . . . . . . . . . . . . . . . . . . . . . . . . . . . . . . . . . . . . . . . . . . . . . . 427
gen_row_num . . . . . . . . . . . . . . . . . . . . . . . . . . . . . . . . . . . . . . 428
get_domain_description . . . . . . . . . . . . . . . . . . . . . . . . . . . . . . . 429
get_env . . . . . . . . . . . . . . . . . . . . . . . . . . . . . . . . . . . . . . . . . . . . 430
get_error_filename . . . . . . . . . . . . . . . . . . . . . . . . . . . . . . . . . . . 431
get_file_attribute . . . . . . . . . . . . . . . . . . . . . . . . . . . . . . . . . . . . . 432
get_monitor_filename . . . . . . . . . . . . . . . . . . . . . . . . . . . . . . . . . 433
get_trace_filename . . . . . . . . . . . . . . . . . . . . . . . . . . . . . . . . . . . 434
host_name . . . . . . . . . . . . . . . . . . . . . . . . . . . . . . . . . . . . . . . . . 435
ifthenelse . . . . . . . . . . . . . . . . . . . . . . . . . . . . . . . . . . . . . . . . . . . 436
index . . . . . . . . . . . . . . . . . . . . . . . . . . . . . . . . . . . . . . . . . . . . . . 437
init_cap . . . . . . . . . . . . . . . . . . . . . . . . . . . . . . . . . . . . . . . . . . . . 438
interval_to_char . . . . . . . . . . . . . . . . . . . . . . . . . . . . . . . . . . . . . . 439
is_set_env . . . . . . . . . . . . . . . . . . . . . . . . . . . . . . . . . . . . . . . . . . 440
is_valid_date . . . . . . . . . . . . . . . . . . . . . . . . . . . . . . . . . . . . . . . . 441
is_valid_datetime . . . . . . . . . . . . . . . . . . . . . . . . . . . . . . . . . . . . 442
is_valid_decimal . . . . . . . . . . . . . . . . . . . . . . . . . . . . . . . . . . . . . 443
is_valid_double . . . . . . . . . . . . . . . . . . . . . . . . . . . . . . . . . . . . . . 444
is_valid_int . . . . . . . . . . . . . . . . . . . . . . . . . . . . . . . . . . . . . . . . . 445
is_valid_real . . . . . . . . . . . . . . . . . . . . . . . . . . . . . . . . . . . . . . . . 446
is_valid_time . . . . . . . . . . . . . . . . . . . . . . . . . . . . . . . . . . . . . . . . 447
isempty . . . . . . . . . . . . . . . . . . . . . . . . . . . . . . . . . . . . . . . . . . . . 448
isweekend . . . . . . . . . . . . . . . . . . . . . . . . . . . . . . . . . . . . . . . . . 449
job_name . . . . . . . . . . . . . . . . . . . . . . . . . . . . . . . . . . . . . . . . . . 450
julian . . . . . . . . . . . . . . . . . . . . . . . . . . . . . . . . . . . . . . . . . . . . . . 451
julian_to_date . . . . . . . . . . . . . . . . . . . . . . . . . . . . . . . . . . . . . . . 452
key_generation . . . . . . . . . . . . . . . . . . . . . . . . . . . . . . . . . . . . . . 453
last_date . . . . . . . . . . . . . . . . . . . . . . . . . . . . . . . . . . . . . . . . . . 454
length . . . . . . . . . . . . . . . . . . . . . . . . . . . . . . . . . . . . . . . . . . . . . 455
literal . . . . . . . . . . . . . . . . . . . . . . . . . . . . . . . . . . . . . . . . . . . . . . 456
load_to_xml . . . . . . . . . . . . . . . . . . . . . . . . . . . . . . . . . . . . . . . . . 458
Data Integrator Reference Guide 7
Page 8

Contents
long_to_varchar . . . . . . . . . . . . . . . . . . . . . . . . . . . . . . . . . . . . . .461
lookup . . . . . . . . . . . . . . . . . . . . . . . . . . . . . . . . . . . . . . . . . . . . . 462
lookup_ext . . . . . . . . . . . . . . . . . . . . . . . . . . . . . . . . . . . . . . . . . .468
lookup_seq . . . . . . . . . . . . . . . . . . . . . . . . . . . . . . . . . . . . . . . . . .477
lower . . . . . . . . . . . . . . . . . . . . . . . . . . . . . . . . . . . . . . . . . . . . . . 482
lpad . . . . . . . . . . . . . . . . . . . . . . . . . . . . . . . . . . . . . . . . . . . . . . .483
lpad_ext . . . . . . . . . . . . . . . . . . . . . . . . . . . . . . . . . . . . . . . . . . . . 484
ltrim . . . . . . . . . . . . . . . . . . . . . . . . . . . . . . . . . . . . . . . . . . . . . . .486
ltrim_blanks . . . . . . . . . . . . . . . . . . . . . . . . . . . . . . . . . . . . . . . . . 487
ltrim_blanks_ext . . . . . . . . . . . . . . . . . . . . . . . . . . . . . . . . . . . . .488
mail_to . . . . . . . . . . . . . . . . . . . . . . . . . . . . . . . . . . . . . . . . . . . . . 489
match_pattern . . . . . . . . . . . . . . . . . . . . . . . . . . . . . . . . . . . . . . .491
match_regex . . . . . . . . . . . . . . . . . . . . . . . . . . . . . . . . . . . . . . . .493
max . . . . . . . . . . . . . . . . . . . . . . . . . . . . . . . . . . . . . . . . . . . . . . . .499
min . . . . . . . . . . . . . . . . . . . . . . . . . . . . . . . . . . . . . . . . . . . . . . . .500
month . . . . . . . . . . . . . . . . . . . . . . . . . . . . . . . . . . . . . . . . . . . . . .501
num_to_interval . . . . . . . . . . . . . . . . . . . . . . . . . . . . . . . . . . . . . .502
nvl . . . . . . . . . . . . . . . . . . . . . . . . . . . . . . . . . . . . . . . . . . . . . . . . . 503
print . . . . . . . . . . . . . . . . . . . . . . . . . . . . . . . . . . . . . . . . . . . . . . .504
pushdown_sql . . . . . . . . . . . . . . . . . . . . . . . . . . . . . . . . . . . . . . .505
quarter . . . . . . . . . . . . . . . . . . . . . . . . . . . . . . . . . . . . . . . . . . . . .507
raise_exception . . . . . . . . . . . . . . . . . . . . . . . . . . . . . . . . . . . . . . 508
raise_exception_ext . . . . . . . . . . . . . . . . . . . . . . . . . . . . . . . . . .509
rand . . . . . . . . . . . . . . . . . . . . . . . . . . . . . . . . . . . . . . . . . . . . . . . 510
replace_substr . . . . . . . . . . . . . . . . . . . . . . . . . . . . . . . . . . . . . . .511
replace_substr_ext . . . . . . . . . . . . . . . . . . . . . . . . . . . . . . . . . . . .512
repository_name . . . . . . . . . . . . . . . . . . . . . . . . . . . . . . . . . . . . .515
round . . . . . . . . . . . . . . . . . . . . . . . . . . . . . . . . . . . . . . . . . . . . . . 516
rpad . . . . . . . . . . . . . . . . . . . . . . . . . . . . . . . . . . . . . . . . . . . . . . . 517
rpad_ext . . . . . . . . . . . . . . . . . . . . . . . . . . . . . . . . . . . . . . . . . . . .518
rtrim . . . . . . . . . . . . . . . . . . . . . . . . . . . . . . . . . . . . . . . . . . . . . . . 520
rtrim_blanks . . . . . . . . . . . . . . . . . . . . . . . . . . . . . . . . . . . . . . . . .521
rtrim_blanks_ext . . . . . . . . . . . . . . . . . . . . . . . . . . . . . . . . . . . . .522
8 Data Integrator Reference Guide
Page 9

Contents
set_env . . . . . . . . . . . . . . . . . . . . . . . . . . . . . . . . . . . . . . . . . . . 523
sleep . . . . . . . . . . . . . . . . . . . . . . . . . . . . . . . . . . . . . . . . . . . . . 524
sql . . . . . . . . . . . . . . . . . . . . . . . . . . . . . . . . . . . . . . . . . . . . . . . 525
smtp_to . . . . . . . . . . . . . . . . . . . . . . . . . . . . . . . . . . . . . . . . . . . . 527
substr . . . . . . . . . . . . . . . . . . . . . . . . . . . . . . . . . . . . . . . . . . . . . 530
sum . . . . . . . . . . . . . . . . . . . . . . . . . . . . . . . . . . . . . . . . . . . . . . . 531
sysdate . . . . . . . . . . . . . . . . . . . . . . . . . . . . . . . . . . . . . . . . . . . . 532
system_user_name . . . . . . . . . . . . . . . . . . . . . . . . . . . . . . . . . . 533
systime . . . . . . . . . . . . . . . . . . . . . . . . . . . . . . . . . . . . . . . . . . . . 534
table_attribute . . . . . . . . . . . . . . . . . . . . . . . . . . . . . . . . . . . . . . 535
to_char . . . . . . . . . . . . . . . . . . . . . . . . . . . . . . . . . . . . . . . . . . . . 536
to_date . . . . . . . . . . . . . . . . . . . . . . . . . . . . . . . . . . . . . . . . . . . . 537
to_decimal . . . . . . . . . . . . . . . . . . . . . . . . . . . . . . . . . . . . . . . . . 538
total_rows . . . . . . . . . . . . . . . . . . . . . . . . . . . . . . . . . . . . . . . . . . 539
trunc . . . . . . . . . . . . . . . . . . . . . . . . . . . . . . . . . . . . . . . . . . . . . . 540
truncate_table . . . . . . . . . . . . . . . . . . . . . . . . . . . . . . . . . . . . . . . 541
upper . . . . . . . . . . . . . . . . . . . . . . . . . . . . . . . . . . . . . . . . . . . . . . 542
varchar_to_long . . . . . . . . . . . . . . . . . . . . . . . . . . . . . . . . . . . . . 543
week_in_month . . . . . . . . . . . . . . . . . . . . . . . . . . . . . . . . . . . . . . 544
week_in_year . . . . . . . . . . . . . . . . . . . . . . . . . . . . . . . . . . . . . . . 545
WL_GetKeyValue . . . . . . . . . . . . . . . . . . . . . . . . . . . . . . . . . . . . 546
word . . . . . . . . . . . . . . . . . . . . . . . . . . . . . . . . . . . . . . . . . . . . . . 547
word_ext . . . . . . . . . . . . . . . . . . . . . . . . . . . . . . . . . . . . . . . . . . 548
workflow_name . . . . . . . . . . . . . . . . . . . . . . . . . . . . . . . . . . . . . 550
year . . . . . . . . . . . . . . . . . . . . . . . . . . . . . . . . . . . . . . . . . . . . . . . 551
About procedures . . . . . . . . . . . . . . . . . . . . . . . . . . . . . . . . . . . . . . . . . . . 552
Overview . . . . . . . . . . . . . . . . . . . . . . . . . . . . . . . . . . . . . . . . . . . . . . 552
Requirements . . . . . . . . . . . . . . . . . . . . . . . . . . . . . . . . . . . . . . . . . . . 553
Creating stored procedures in a database . . . . . . . . . . . . . . . . . . . . . 554
Creating stored procedures in Oracle . . . . . . . . . . . . . . . . . . . . . 554
Creating stored procedures in MS SQL Server or Sybase ASE . 555
Creating stored procedure in DB2 . . . . . . . . . . . . . . . . . . . . . . . . 556
Importing metadata for stored procedures . . . . . . . . . . . . . . . . . . . . 557
Data Integrator Reference Guide 9
Page 10

Contents
Structure of a stored procedure . . . . . . . . . . . . . . . . . . . . . . . . . . . . .558
Calling stored procedures . . . . . . . . . . . . . . . . . . . . . . . . . . . . . . . . . . 559
In general . . . . . . . . . . . . . . . . . . . . . . . . . . . . . . . . . . . . . . . . . . .559
From queries . . . . . . . . . . . . . . . . . . . . . . . . . . . . . . . . . . . . . . . . 561
Without the function wizard . . . . . . . . . . . . . . . . . . . . . . . . . . . . . 564
Checking execution status . . . . . . . . . . . . . . . . . . . . . . . . . . . . . . . . . 565
Chapter 7 Data Integrator Scripting Language 567
Language syntax . . . . . . . . . . . . . . . . . . . . . . . . . . . . . . . . . . . . . . . . . . . .568
Syntax for statements in scripts . . . . . . . . . . . . . . . . . . . . . . . . . . . . . 568
Syntax for column and table references in expressions . . . . . . . . . . .569
Strings . . . . . . . . . . . . . . . . . . . . . . . . . . . . . . . . . . . . . . . . . . . . . . . . .569
Quotation marks . . . . . . . . . . . . . . . . . . . . . . . . . . . . . . . . . . . . . .570
Escape characters . . . . . . . . . . . . . . . . . . . . . . . . . . . . . . . . . . . .570
Trailing blanks . . . . . . . . . . . . . . . . . . . . . . . . . . . . . . . . . . . . . . . 570
Variables . . . . . . . . . . . . . . . . . . . . . . . . . . . . . . . . . . . . . . . . . . . . . . . 571
Variable interpolation . . . . . . . . . . . . . . . . . . . . . . . . . . . . . . . . . . . . .571
Functions and stored procedures . . . . . . . . . . . . . . . . . . . . . . . . . . . .572
Operators . . . . . . . . . . . . . . . . . . . . . . . . . . . . . . . . . . . . . . . . . . . . . . 572
NULL values . . . . . . . . . . . . . . . . . . . . . . . . . . . . . . . . . . . . . . . . . . . .573
NULL values and empty strings . . . . . . . . . . . . . . . . . . . . . . . . . .573
Debugging and Validation . . . . . . . . . . . . . . . . . . . . . . . . . . . . . . . . . .574
Keywords . . . . . . . . . . . . . . . . . . . . . . . . . . . . . . . . . . . . . . . . . . . . . .576
BEGIN . . . . . . . . . . . . . . . . . . . . . . . . . . . . . . . . . . . . . . . . . . . . . 576
CATCH . . . . . . . . . . . . . . . . . . . . . . . . . . . . . . . . . . . . . . . . . . . . .576
ELSE . . . . . . . . . . . . . . . . . . . . . . . . . . . . . . . . . . . . . . . . . . . . . . 577
END . . . . . . . . . . . . . . . . . . . . . . . . . . . . . . . . . . . . . . . . . . . . . . . 577
IF . . . . . . . . . . . . . . . . . . . . . . . . . . . . . . . . . . . . . . . . . . . . . . . . . 577
RETURN . . . . . . . . . . . . . . . . . . . . . . . . . . . . . . . . . . . . . . . . . . .577
TRY . . . . . . . . . . . . . . . . . . . . . . . . . . . . . . . . . . . . . . . . . . . . . . . 577
WHILE . . . . . . . . . . . . . . . . . . . . . . . . . . . . . . . . . . . . . . . . . . . . .577
Sample scripts . . . . . . . . . . . . . . . . . . . . . . . . . . . . . . . . . . . . . . . . . . . . . .578
Square function . . . . . . . . . . . . . . . . . . . . . . . . . . . . . . . . . . . . . . . . . .578
10 Data Integrator Reference Guide
Page 11

Contents
RepeatString function . . . . . . . . . . . . . . . . . . . . . . . . . . . . . . . . . . . . 578
Chapter 8 Metadata in repository tables and views 581
AL_AUDIT . . . . . . . . . . . . . . . . . . . . . . . . . . . . . . . . . . . . . . . . . . . . . 583
AL_AUDIT_INFO . . . . . . . . . . . . . . . . . . . . . . . . . . . . . . . . . . . . . . . . 584
Imported metadata . . . . . . . . . . . . . . . . . . . . . . . . . . . . . . . . . . . . . . . . . . 584
AL_INDEX . . . . . . . . . . . . . . . . . . . . . . . . . . . . . . . . . . . . . . . . . . . . . 585
AL_PCOLUMN . . . . . . . . . . . . . . . . . . . . . . . . . . . . . . . . . . . . . . . . . . 585
AL_PKEY . . . . . . . . . . . . . . . . . . . . . . . . . . . . . . . . . . . . . . . . . . . . . . 586
ALVW_COLUMNATTR . . . . . . . . . . . . . . . . . . . . . . . . . . . . . . . . . . . 586
ALVW_COLUMNINFO . . . . . . . . . . . . . . . . . . . . . . . . . . . . . . . . . . . . 587
ALVW_FKREL . . . . . . . . . . . . . . . . . . . . . . . . . . . . . . . . . . . . . . . . . . 588
ALVW_MAPPING . . . . . . . . . . . . . . . . . . . . . . . . . . . . . . . . . . . . . . . 588
Example use case . . . . . . . . . . . . . . . . . . . . . . . . . . . . . . . . . . . . 589
Mapping types . . . . . . . . . . . . . . . . . . . . . . . . . . . . . . . . . . . . . . . 590
How mappings are computed . . . . . . . . . . . . . . . . . . . . . . . . . . . 590
Mapping complexities . . . . . . . . . . . . . . . . . . . . . . . . . . . . . . . . . 592
Storing nested column-mapping data . . . . . . . . . . . . . . . . . . . . . 593
ALVW_TABLEATTR . . . . . . . . . . . . . . . . . . . . . . . . . . . . . . . . . . . . . 596
ALVW_TABLEINFO . . . . . . . . . . . . . . . . . . . . . . . . . . . . . . . . . . . . . . 596
Internal metadata . . . . . . . . . . . . . . . . . . . . . . . . . . . . . . . . . . . . . . . . . . . 596
AL_LANG . . . . . . . . . . . . . . . . . . . . . . . . . . . . . . . . . . . . . . . . . . . . . . 597
AL_ATTR . . . . . . . . . . . . . . . . . . . . . . . . . . . . . . . . . . . . . . . . . . . . . . 598
AL_USAGE . . . . . . . . . . . . . . . . . . . . . . . . . . . . . . . . . . . . . . . . . . . . 598
Example use cases . . . . . . . . . . . . . . . . . . . . . . . . . . . . . . . . . . . 599
ALVW_FUNCINFO . . . . . . . . . . . . . . . . . . . . . . . . . . . . . . . . . . . . . . 601
ALVW_PARENT_CHILD . . . . . . . . . . . . . . . . . . . . . . . . . . . . . . . . . . 601
Metadata Integrator tables . . . . . . . . . . . . . . . . . . . . . . . . . . . . . . . . . . . . 602
AL_CMS_BV . . . . . . . . . . . . . . . . . . . . . . . . . . . . . . . . . . . . . . . . . . . 603
AL_CMS_BV_FIELDS . . . . . . . . . . . . . . . . . . . . . . . . . . . . . . . . . . . . 603
AL_CMS_REPORTS . . . . . . . . . . . . . . . . . . . . . . . . . . . . . . . . . . . . . 604
AL_CMS_REPORTUSAGE . . . . . . . . . . . . . . . . . . . . . . . . . . . . . . . . 605
AL_CMS_FOLDER . . . . . . . . . . . . . . . . . . . . . . . . . . . . . . . . . . . . . . 606
Data Integrator Reference Guide 11
Page 12

Contents
AL_CMS_UNV . . . . . . . . . . . . . . . . . . . . . . . . . . . . . . . . . . . . . . . . . . 606
AL_CMS_UNV_OBJ . . . . . . . . . . . . . . . . . . . . . . . . . . . . . . . . . . . . . . 607
Operational metadata . . . . . . . . . . . . . . . . . . . . . . . . . . . . . . . . . . . . . . . .607
AL_HISTORY . . . . . . . . . . . . . . . . . . . . . . . . . . . . . . . . . . . . . . . . . . .607
ALVW_FLOW_STAT . . . . . . . . . . . . . . . . . . . . . . . . . . . . . . . . . . . . .608
Chapter 9 Locales and Multi-Byte Functionality 609
Locale support . . . . . . . . . . . . . . . . . . . . . . . . . . . . . . . . . . . . . . . . . . . . . .612
Code page support . . . . . . . . . . . . . . . . . . . . . . . . . . . . . . . . . . . . . . .614
Processing with and without UTF-16 Unicode . . . . . . . . . . . . . . .614
Minimizing transcoding in Data Integrator . . . . . . . . . . . . . . . . . .616
Guidelines for setting locales . . . . . . . . . . . . . . . . . . . . . . . . . . . . . . . 617
Job Server locale . . . . . . . . . . . . . . . . . . . . . . . . . . . . . . . . . . . . .617
Database, database client, and datastore locales . . . . . . . . . . . .618
File format locales . . . . . . . . . . . . . . . . . . . . . . . . . . . . . . . . . . . . 619
XML encodings . . . . . . . . . . . . . . . . . . . . . . . . . . . . . . . . . . . . . . .619
Locales Data Integrator automatically sets . . . . . . . . . . . . . . . . .620
Exporting and importing ATLs . . . . . . . . . . . . . . . . . . . . . . . . . . . . . . . 620
Exporting to other repositories . . . . . . . . . . . . . . . . . . . . . . . . . . . . . . 621
Multi-byte support . . . . . . . . . . . . . . . . . . . . . . . . . . . . . . . . . . . . . . . . . . .621
Multi-byte string functions supported in Data Integrator . . . . . . . . . . .621
Numeric data types: assigning constant values . . . . . . . . . . . . . . . . .622
Assigning a value as a numeric directly . . . . . . . . . . . . . . . . . . . . 622
Assigning a value in string format . . . . . . . . . . . . . . . . . . . . . . . .622
BOM Characters . . . . . . . . . . . . . . . . . . . . . . . . . . . . . . . . . . . . . . . . .623
Round-trip conversion . . . . . . . . . . . . . . . . . . . . . . . . . . . . . . . . . . . . .624
Column Sizing . . . . . . . . . . . . . . . . . . . . . . . . . . . . . . . . . . . . . . . . . . .624
Sorting . . . . . . . . . . . . . . . . . . . . . . . . . . . . . . . . . . . . . . . . . . . . . . . . .624
List of supported locales and encodings . . . . . . . . . . . . . . . . . . . . . . . . . . 625
Languages . . . . . . . . . . . . . . . . . . . . . . . . . . . . . . . . . . . . . . . . . . . . .626
Territories . . . . . . . . . . . . . . . . . . . . . . . . . . . . . . . . . . . . . . . . . . . . . .626
Code pages . . . . . . . . . . . . . . . . . . . . . . . . . . . . . . . . . . . . . . . . . . . . .627
XML encodings . . . . . . . . . . . . . . . . . . . . . . . . . . . . . . . . . . . . . . . . . .629
12 Data Integrator Reference Guide
Page 13

Contents
Supported sorting . . . . . . . . . . . . . . . . . . . . . . . . . . . . . . . . . . . . . . . . 630
Limitations . . . . . . . . . . . . . . . . . . . . . . . . . . . . . . . . . . . . . . . . . . . . . . . . 630
Chapter 10 Reserved Words 633
Data Integrator Reference Guide 13
Page 14

Contents
14 Data Integrator Reference Guide
Page 15

Data Integrator Reference Guide
Introduction
chapter
Page 16

Introduction
1
About this guide
About this guide
Welcome to the The Data Integrator Reference Guide . This guide provides
detailed information about the objects, data types, transforms, and functions
in the Data Integrator Designer.
This book contains the following chapters:
• Chapter 2: Data Integrator Objects — Describes options, properties, and
• Chapter 3: Smart Editor — Describes the editor that can be used to
• Chapter 4: Data Types — Describes the data types used in Data
• Chapter 5: Transforms — Describes the transforms included with Data
• Chapter 6: Functions and Procedures — Describes the functions
• Chapter 7: Data Integrator Scripting Language — Describes the Data
• Chapter 8: Metadata in repository tables and views — Describes the
• Chapter 9: Locales and Multi-Byte Functionality — Describes how Data
• Chapter 10: Reserved Words — Lists words that have special mean ing in
For source-specific information, such as information pertaining to a particular
back-office application, consult the supplement for that application.
attributes for objects, such as data flows and work flows.
create scripts, expressions, custom functions.
Integrator, and how Data Integrator handles data type conversions.
Integrator and how to use these transforms.
included with Data Integrator and how to use these functions.
Integrator scripting language and how you can use this language to
create scripts, expressions, and custom functions.
repository’s reporting tables and views that you can use to analyze an
Data Integrator application.
Integrator supports the setting of locales and multi-byte code pages for
the Designer, Job Server, and Access Server.
Data Integrator. You cannot use these words in names that you create,
such as names of data flows.
Who should read this guide
This and other Data Integrator product documentation assumes the following:
• You are an application developer, consultant or database administrator
working on data extraction, data warehousing, or data integration.
• You understand your source and target data systems, DBMS, legacy
systems, business intelligence, and messaging concepts.
16 Data Integrator Reference Guide
Page 17

• You understand your organization’s data needs.
• You are familiar with SQL (Structured Query Language).
• If you are interested in using this product to design real-time processing
you are familiar with:
• DTD and XML Schema formats for XML files
• Publishing Web Services (WSDL, HTTP/S and SOAP p rotocols, etc.)
• You are familiar with Data Integrator installation environments: Microsoft
Windows or UNIX.
Business Objects information resources
Consult the Data Integrator Getting Started Guide for:
• An overview of Data Integrator products and architecture
• Data Integrator installation and configuration information
• A list of product documentation and a suggested reading path
After you install Data Integrator, you can view technical documentation from
many locations. To view documentation in PDF format, you can:
• Select Start > Programs > Data Integrator version > Data Integrator
Documentation
• Release Notes
• Release Summary
• Technical Manuals
• Select one of the following from the Designer’s Help menu:
• Release Notes
• Release Summary
• Technical Manuals
• Select Help from the Data Integrator Administrator
You can also view and download PDF documentation by visiting Business
Objects Customer Support online. To access this Web site, you must have a
valid user name and password. To obtain your user name and password, go
to http://www.techsupport.businessobjects.com and click Register.
and choose:
Introduction
About this guide
1
Data Integrator Reference Guide 17
Page 18

Introduction
1
About this guide
18 Data Integrator Reference Guide
Page 19

Introduction
About this guide
1
Data Integrator Reference Guide 19
Page 20

Introduction
1
About this guide
20 Data Integrator Reference Guide
Page 21

Data Integrator Reference Guide
Data Integrator Objects
chapter
Page 22

Data Integrator Objects
2
This chapter contains reference information about general Data Integrator
objects, such as data flows, jobs, and work flows. Topics include:
• Characteristics of objects
• Descriptions of objects
Note: For information about source-specific objects, consult the reference
chapter of the Data Integrator supplement document for that source.
22 Data Integrator Reference Guide
Page 23

Characteristics of objects
This section discusses common characteristics of all Data Integrator objects.
Specifically, this section discusses:
• Object classes
• Object options, properties, and attributes
Object classes
An object’s class determines how you create and retrieve the object. There
are two classes of objects:
• Reusable objects
• Single-use objects
Reusable objects
After you define and save a reusable object, Data Integrator stores the
definition in the repository. You can then reuse the definition as often as
necessary by creating calls to the definition.
Most objects created in Data Integrator are available for reuse. You access
reusable objects through the object library.
A reusable object has a single definition; all calls to the object refer to that
definition. If you change the definition of the object in one place, and then
save the object, the change is reflected to all other calls to the object.
A data flow, for example, is a reusable object. Multiple jobs, such as a weekly
load job and a daily load job, can call the same data flow. If the data flow is
changed, both jobs call the new version of the data flow.
When you drag and drop an object from the object library, you are creating a
new reference (or call) to the existing object definition.
You can edit reusable objects at any time independent of the current open
project. For example, if you open a new project, you can go to the object
library , open a dat a flow, and edit it. The object will remain “dirty” (that is, your
edited changes will not be saved) until you explicitly save it.
Functions are reusable objects that are not available in the object library . Data
Integrator provides access to these objects through the function wizard
wherever they can be used.
Some objects in the object library are not reusable in all instances:
• Datastores are in the object library because they are a method for
categorizing and accessing external metadata.
Data Integrator Objects
Characteristics of objects
2
Data Integrator Reference Guide 23
Page 24

Data Integrator Objects
2
Characteristics of objects
• Built-in transforms are “reusable” in that every time you drop a transform,
a new instance of the transform is created.
Saving reusable objects
“Saving” a reusable object in Data Integrator means storing the language that
describes the object to the repository. The description of a reusable object
includes these components:
• Properties of the object
• Options for the object
• Calls this object makes to other objects
• Definition of single-use objects called by this object
If an object contains a call to another reusable object, only the call to the
second object is saved, not changes to that object’s definition.
Data Integrator stores the description even if the object does not validate.
Data Integrator saves objects without prompting you:
• When you import an object into the repository.
• When you finish editing:
• Datastores
• Flat file formats
• XML Schema or DTD formats
Y ou can explicitly save the reusable object currently open in the wo rkspace by
choosing
workspace, the
To save all objects in the repository that have changes, choose
the
Data Integrator also prompts you to save all objects that have changes when
you execute a job and when you exit the Designer.
Save from the Project menu. If a single-use object is open in the
Save command is not available.
Save All from
Project menu.
Single-use objects
Single-use objects appear only as components of other objects. They ope rate
only in the context in which they were created.
Saving single-use objects
“Saving” a single-use object in Data Integrator means storing the language
that describes the object to the repository. The description of a single-use
object can only be saved as part of the reusable object that calls the singleuse object.
Data Integrator stores the description even if the object does not validate.
24 Data Integrator Reference Guide
Page 25

Object options, properties, and attributes
Each object is associated with a set of options, properties, and attributes:
• Options control the operation of an object. For example, in a datastore,
an option is the name of the database to which the datastore connects.
• Properties document an object. For example, properties include the
name, description of an object, and the date on which it was created.
Properties merely describe an object; they do not affect an object’s
operation.
To view properties, right-click an object and select
• Attributes provide additional information about an object. Attribute values
may also affect an object’s behavior.
To view attributes, double-click an object from an editor and click the
Attributes tab.
Descriptions of objects
This section describes each Data Integrator object and tells you how to
access that object.
The following table lists the names and descriptions of objects available in
Data Integrator:
Data Integrator Objects
Descriptions of objects
Properties.
2
Object Class Description
Annotation Single-use Describes a flow, part of a flow, or a diagram in the workspace.
Catch Single-use Specifies the steps to execute if a given error occurs while a job
is running.
COBOL
copybook file
format
Conditional Single-use Specifies the steps to execute based on the result of a
Batch Job Reusable Defines activities that Data Integrator executes at a given time
Data flow Reusable Specifies the requirements for extracting, transforming, and
Reusable Describes the structure defined in a COBOL copybook file.
condition.
including error, monitor and trace messages.
Jobs can be dropped only in the project tree. The object
created is a direct reference to the object in the object library.
Only one reference to a job can exist in the project tree at one
time.
loading data from sources to targets.
Data Integrator Reference Guide 25
Page 26

Data Integrator Objects
2
Descriptions of objects
Object Class Description
Datastore Single-use Specifies the connection information Data Integrator needs to
access a database or other data source. Cannot be dropped.
Document Reusable Available in certain adapter datastores, documents are data
structures that can support complicated nested schemas.
DTD Reusable A description of an XML file or message. Indicates the format
an XML document reads or writes. See also: XML Schema
File format Reusable Indicates how flat file data is arranged in a source or target file.
Function Reusable Returns a value.
Log Single-use Records information about a particular execution of a single
job.
Message
function
Outbound
message
Project Single-use Groups jobs for convenient access.
Query transform Single-use Retrieves a data set that satisfies conditions that you specify.
Real-time job Reusable Defines activities that Data Integrator executes on-demand.
Script Single-use Evaluates expressions, calls functions, and assigns values to
Source Single-use An object from which Data Integrator reads data in a data flow.
Table Reusable Indicates an external DBMS table for which metadata has been
Target Single-use An object in which Data Integrator loads extracted and
Reusable Available in certain adapter datastores, message functions can
accommodate XML messages when properly configured.
Reusable Available in certain adapter datastores, outbound messages
are XML-based, hierarchical communications that real-time
jobs can publish to adapters.
Real-time jobs are created in the Designer, then configured and
run as services associated with an Access Server in the
Administrator. Real-time jobs are designed according to data
flow model rules and run as a request-response system.
variables.
imported into Data Integrator, or the target table into which data
is or has been placed.
A table is associated with its datastore; it does not exist
independently of a datastore connection. A table retrieves or
stores data based on the schema of the table definition from
which it was created.
transformed data in a data flow.
26 Data Integrator Reference Guide
Page 27

Data Integrator Objects
Descriptions of objects
Object Class Description
Template table Reusable A new table you want added to a database.
All datastores except SAP R/3 datastores have a default
template that you can use to create any number of tables in the
datastore.
Data Integrator creates the schema for each instance of a
template table at runtime. The created schema is based on the
data loaded into the template table.
Transform Reusable Performs operations on data sets.
Requires zero or more data sets; produces zero or one data set
(which may be split).
Try Single-use Introduces a try/catch block.
While loop Single-use Repeats a sequence of steps as long as a condition is true.
Work flow Reusable Orders data flows and operations supporting data flows.
XML file Single-use A batch or real-time source or target. As a source, an XML file
translates incoming XML-formatted data into data that D
NTEGRATOR can process. As a target, an XML file translates the
I
data produced by a data flow, including nested data, into an
XML-formatted file.
XML message Single-use A real-time source or target. As sources, XML messages
translate incoming XML-formatted requests into data that a
real-time job can process. As targets, XML messages translate
the result of the real-time job, including hierarchical data, into
an XML-formatted response and sends the messages to the
Access Server.
XML Schema Reusable A description of an XML file or message. Indicates the format
an XML document reads or writes. See also: DTD
XML template Single-use A target that creates an XML file that matches a particular input
schema. No DTD or XML Schema is required.
ATA
2
Data Integrator Reference Guide 27
Page 28

Data Integrator Objects
2
Descriptions of objects
Annotation
Class
Single-use
Access
Click the annotation icon in the tool palette, then click in the workspace.
Description
Annotations describe a flow, part of a flow, or a diagram in a workspace. An
annotation is associated with the job., work flow, or data flow where it
appears. When you import or export that job, work flow, or data flow, you
import or export associated annotations.
For more information, see “Creating annotations” on page 59 of the Data
Integrator Designer Guide.
Note: An annotation has no options or properties.
28 Data Integrator Reference Guide
Page 29

Data Integrator Objects
Descriptions of objects
Batch Job
Class
Reusable
Access
• In the object library, click the Jobs tab.
• In the project area, select a project and right-click Batch Job.
Description
Note: For information specific to SAP R/3, see Data Integrator Supplement
for SAP.
A batch job is a set of objects that you can schedule and execute together.
For Data Integrator to execute the steps of any object, the object must be part
of a job.
A batch job can contain the following objects:
• Data flows
• Sources
• Transforms
• Targets
• Work flows
• Scripts
• Conditionals
• Try/catch blocks
• While Loops
Y ou can run b atch jobs such that you can automatically recover from jobs that
do not execute successfully. During automatic recovery, Data Integrator
retrieves the results from steps that were successfully completed in the
previous run and executes all other steps. Specifically, Data Integrator
retrieves results from the following types of steps:
• Work flows
• Data flows
• Script statements
• Custom functions (stateless type only)
• SQL function
• EXEC function
2
Data Integrator Reference Guide 29
Page 30

Data Integrator Objects
2
Descriptions of objects
• get_env function
• rand function
• sysdate function
• systime function
Batch jobs have the following built-in attributes:
Attribute Description
Name The name of the object. This name appears on the
object in the object library and in the calls to the
object.
Description Your description of the job.
Date created The date when the object was created.
Batch and real-time jobs have properties that determine what information
Data Integrator collects and logs when running the job. You can set the
default properties that apply each time you run the job or you can set
execution (run-time) properties that apply for a particular run. Execution
properties override default properties.
To set default properties, select the job in the project area or the object library,
right-click, and choose
Execution properties are set as you run a job. To set execution properties,
right-click the job in the project area and choose
validates the job and opens the Execution Properties window.
You can set three types of execution properties:
Properties to open the Properties window.
Execute. The Designer
• Parameters
• Trace properties
• Global variables
For an introduction to using global variables as job properties and
selecting them at runtime, see “Setting global variable values” on
page 286 of the Data Integrator Designer Guide.
Parameters
Use parameter options to help capture and diagnose errors using log, View
Data, or recovery options.
Data Integrator writes log information to one of three files (in the
$LINK_DIR\log\Job Server name\repository name directory):
• Monitor log file
• Trace log file
30 Data Integrator Reference Guide
Page 31

Data Integrator Objects
Descriptions of objects
• Error log file
You can also select a system configuration and a Job Server or server group
from the
Select the
Options Description
Monitor sample
rate
(# of rows)
Print all trace
messages
Enable recovery (Batch jobs only) Select this check box to enable the
Recover from last
failed execution
Parameters tab of the Execution Properties window.
Parameters tab to set the following options.
Enter the number of rows processed before Data
Integrator writes information to the monitor log file and
updates job events. Data Integrator writes information
about the status of each source, target, or transform.
For example, if you enter 1000, Data Integrator updates
the logs after processing 1,000 rows.
The default is 1000. When setting the value, you must
evaluate performance improvement s gain ed by maki ng
fewer calls to the operating system against your ability to
find errors quickly. With a higher monitor sample rate,
Data Integrator collects more data before calling the
operating system to open the file: performance impro ves.
However, with a higher monitor rate, more time passes
before you are able to see any errors.
Select this check box to print all trace messages to the
trace log file for the current Job Server. (For more
information on log files, see “Log” on page 120)
Selecting this option overrides the trace properties set
on the Trace t ab.
automatic recovery feature. When enabled, Data
Integrator saves the results from completed steps and
allows you to resume failed jobs. You cannot enable the
automatic recovery feature when executing a job in data
scan mode.
See “Automatically recovering jobs” on page 437 of the
Data Integrator Designer Guide for information about
the recovery options.
This property is only available as a run-time property. It
is not available as a default property.
(Batch Job only) Select this check box to resume a
failed job. Data Integrator retrieves the results from any
steps that were previously executed successfully and
re-executes any other steps.
This option is a run-time property. This option is not
available when a job has not yet been executed or when
recovery mode was disabled during the previous run.
2
Data Integrator Reference Guide 31
Page 32

Data Integrator Objects
2
Descriptions of objects
Options Description
System
configuration
Job Server or
server group
Select the system configuration to use when executing
this job. A system configuration defines a set of
datastore configurations, which define the datastore
connections. For more information, see “Creating and
managing multiple datastore configurations” on
page 112 of the Data Integrator Designer Guide.
If a system configuration is not specified, Data Integrator
uses the default datastore configuration for each
datastore.
This option is a run-time property. This option is only
available if there are system configurations defined in
the repository.
Select the Job Server or server group to execute this
job. A Job Server is defined by a host name and port
while a server group is defined by its name. The list
contains Job Servers and server groups linked to the
job’s repository.
For an introduction to server groups, see “Using Server
Groups” on page 41 of the Data Integrator Administrator
Guide.
When selecting a Job Server or server group, remember
that many objects in the Designer have options set
relative to the Job Server’s location. For example:
• Directory and file names for source and target files
• Bulk load directories
Trace properties
Use trace properties to select the information that Data Integrator monitors
and writes to the trace log file during a job. Data Integrator writes trace
messages to the trace log associated with the current Job Server and writes
error messages to the error log associated with the current Job Server.
To set trace properties, click the
click Yes in the Value list, and click OK. To turn a trace off, select the trace,
No in the Value list, and click OK.
click
32 Data Integrator Reference Guide
Trace tab. To turn a trace on, select the trace,
Page 33

Data Integrator Objects
Descriptions of objects
You can turn several traces on and off.
Trace Description
Row Writes a message when a transform imports or exports a
row.
Session Writes a message when the job description is read from
the repository, when the job is optimized, and when the
job runs.
Work Flow Writes a message when the work flow description is read
from the repository, when the work flow is optimized,
when the work flow runs, and when the work flow ends.
Data Flow Writes a message when the data flow starts, when the
data flow successfully finishes, or when the data flow
terminates due to error.
This trace also reports when the bulk loader starts, any
bulk loader warnings occur, and when the bulk loader
successfully completes.
Transform Writes a message when a transform starts, completes, or
terminates.
Custom
Transform
Writes a message when a custom transform starts and
completes successfully.
2
Data Integrator Reference Guide 33
Page 34

Data Integrator Objects
2
Descriptions of objects
Trace Description
Custom Function Writes a message of all user invocations of the
AE_LogMessage function from custom C code.
SQL Functions Writes data retrieved before SQL functions:
• Every row retrieved by the named query before the
SQL is submitted in the key_generation function
• Every row retrieved by the named query before the
SQL is submitted in the lookup function (but only if
PRE_LOAD_CACHE is not specified).
• When mail is sent using the mail_to function.
SQL Transforms Writes a message (using the Table_Comparison
transform) about whether a row exists in the target table
that corresponds to an input row from the source table.
The trace message occurs before submitting the query
against the target and for every row retrieved when the
named query is submitted (but only if caching is not
turned on).
SQL Readers Writes the SQL query block that a script, query transform,
or SQL function submits to the system. Also writes the
SQL results.
34 Data Integrator Reference Guide
Page 35

Data Integrator Objects
Descriptions of objects
Trace Description
SQL Loaders Writes a message when the bulk loader:
• Starts
• Submits a warning message
• Completes successfully
• Completes unsuccessfully , if the Clean up bulk loader
directory after load
Additionally, for Microsoft SQL Server and Sybase ASE,
writes when the SQL Server bulk loader:
option is selected
• Completes a successful row submission
• Encounters an error
This instance reports all SQL that Data Integrator submit s
to the target database, including:
• When a truncate stm command executes if the
Delete data from table be fore loa di ng option is
selected.
• Any parameters included in PRE-LOAD SQL
commands
• Before a batch of SQL statements is submitted
• When a template table is created (and also dropped,
Drop/Create option is turned on)
if the
• When a delete stm command executes if auto
correct is turned on (Informix environment only).
Optimized
Dataflow
Tables Writes a message when a table is created or dropped.
Scripts and
Script Functions
For Business Objects consulting and technical support
use.
The message indicates the datastore to which the
created table belongs and the SQL statement used to
create the table.
Writes a message when Data Integrator runs a script or
invokes a script function. Specifically, this trace links a
message when:
• The script is called. Scripts can be started any level
from the job level down to the data flow level.
Additional (and separate) notation is made when a
script is called from within another script.
• A function is called by the script.
• The script successfully completes.
2
Data Integrator Reference Guide 35
Page 36

Data Integrator Objects
2
Descriptions of objects
Trace Description
Access Server
Communication
Writes messages exchanged between the Access Server
and a service provider, including:
• The registration message, which tells the Access
Server that the service provider is ready
• The request the Access Server sends to the service
to execute
• The response from the service to the Access Server
• Any request from the Access Server to shut down
Trace Parallel
Execution
Writes messages describing how data in a data flow is
parallel processed.
36 Data Integrator Reference Guide
Page 37

Data Integrator Objects
Descriptions of objects
Catch
Class
Single-use
Access
With a work flow diagram in the workspace, click the catch icon in the tool
palette.
Description
A catch is part of a serial sequence called a try/catch block. The try/catch
block allows you to specify alternative work flows if errors occur while Data
Integrator is executing a job. Try/catch blocks “catch” groups of errors, apply
solutions that you provide, and continue execution.
For each catch in the try/catch block, specify the following:
• One exception or group of exceptions that the catch handles.
To handle more than one exception or group of exceptions, add more
catches to the try/catch block.
• The work flow to execute if the indicated exception occurs.
Use an existing work flow or define a work flow in the catch editor.
If an exception is thrown during the execution of a try/catch block, and if no
catch is looking for that exception, then the exception is handled by normal
error logic.
Do not reference output variables from a try/catch block in any subsequent
steps if you are using (for batch jobs only) the automatic recovery feature.
Referencing such variables could alter the results during automatic recovery.
Also, try/catch blocks can be used within any real-time job component.
However, try/catch blocks cannot straddle a real-time processing loop and the
initialization or clean up component of a real-time job.
Catches have the following attribute:
2
Attribute Description
Name The name of the object. This name appears on the
object in the diagram.
Data Integrator Reference Guide 37
Page 38

Data Integrator Objects
2
Descriptions of objects
The following table describes exception groups and errors passed as
exceptions.
Exception Number Description
Catch All Exceptions All Catch All Exceptions
Parser Errors 1 Parser errors
Resolver Errors 2 Resolver errors
Execution Errors 5 Internal errors that occur during the
execution of a data movement
specification
Job initialization 50101 Initialization for a job failed
Job cleanup 50102 Job cleanup failed
Job unknown 50103 Unknown job error
Job failure 50104 Session failure
Work flow initialization 50201 Initialization for a work flow failed
Work flow cleanup 50202 Work flow cleanup failed
Work flow unknown 50203 Unknown work flow error
Work flow failure 50204 Work flow failure
Function initialization 50301 Initialization of the function failed
Function cleanup 50302 Function cleanup failed
Function unknown 50303 Unknown function error
Function failure 50304 Function failure
Step failure 50305 Step failure
System function failure 50306 System function execution failure
(function returned an error status)
System function initialization 50307 System function startup or launch failure
Data flow initialization 50401 Initialization for a data flow failed
Dataflow open 50402 Cannot open data flow
Dataflow close 50403 Data flow close failed
Dataflow cleanup 50404 Data flow cleanup failed
Data flow unknown 50405 Data flow unknown
Dataflow failure 50406 Data flow failure
Message bad 50407 Bad message error
Transform initialization 50501 Initialization for transform failed
38 Data Integrator Reference Guide
Page 39

Data Integrator Objects
Descriptions of objects
Exception Number Description
Transform open 50502 Cannot open transform
Transform close 50503 Cannot close transform
Transform cleanup 50504 Cannot clean up transform
Transform unknown 50505 Unknown transform error
Transform failure 50506 Transform failure
OS unknown 50601 Unknown OS error
OS GetPipe 50602 OS GetPipe error
OS ReadPipe 50603 OS ReadPipe error
OS WritePipe 50604 OS WritePipe error
OS ClosePipe 50605 OS ClosePipe error
OS CreatePipe 50606 OS CreatePipe error
OS RedirectPipe 50607 OS RedirectPipe error
OS DuplicatePipe 50608 OS DuplicatePipe error
OS Stdin/stdout restore 50609 OS stdin/stdout restore error
OS CloseProcess 50611 OS CloseProcess error
OS CreateProcess 50612 OS CreateProcess error
OS ResumeProcess 50613 OS ResumeProcess error
OS SuspendProcess 50614 OS Suspend process error
OS TerminateProcess 50615 OS TerminateProcess error
Internal thread initialization 50701 Internal error: thread initialization
Internal thread join 50702 Internal error: thread join
Internal thread start 50703 Internal error: thread start
Internal thread resume 50704 Internal error: thread resume
Internal thread suspend 50705 Internal error: thread suspend
Internal mutex acquire 50711 Internal error: acquire mutex
Internal mutex release 50712 Internal error: release mutex
Internal mutex recursive acquire 50713 Internal error: acquire recursive mutex
Internal mutex recursive release 50714 Internal error: mutex recursive release
Internal trap get error 50721 Internal error: trap get
Internal trap set 50722 Internal error: trap set
Internal trap make 50723 Internal error: trap make
2
Data Integrator Reference Guide 39
Page 40

Data Integrator Objects
2
Descriptions of objects
Exception Number Description
Internal condition wait 50731 Errors encountered while processing
files
Internal condition signal 50732 Cannot open file
Internal queue read 50741 Mismatch of the position of column
Internal queue write 50742 Premature end of row
Internal queue create 50743 Cannot move file pointer to the
beginning of the file
Internal queue delete 50744 Null row is encountered during read
String conversion overflow 50800 String conversion overflow
Validation not done 50801 Validation not complete
Conversion error 50802 Conversion error
Invalid data values 51001 Invalid data values
Database Access Errors 7 Generic Database Access Errors
Unsupported expression 70101 Unsupported expression
Connection broken 70102 Connection broken
Column mismatch 70103 Column mismatch
Microsoft SQL Server 70201 Microsoft SQL Server error
Oracle server 70301 Oracle server error
ODBC 70401 ODBC error
Sybase ASE server 70601 Sybase ASE SQL error
Sybase ASE server operation 70602 Sybase ASE operation error
File Access Errors 8 Errors accessing files through file
formats
Open 80101 Cannot open file
Read NULL row 80102 Null row is encountered during read
Premature end of row 80103 Premature end of row
Position column mismatch 80104 Mismatch the position of column
LSEEK BEGIN 80105 Cannot move file pointer to the
beginning of the file
Repository Access Errors 10 Errors accessing the D
repository
Repository internal error 100101 Repository internal error
Repository ODBC error 100102 Repository ODBC error
ATA INTEGRATOR
40 Data Integrator Reference Guide
Page 41

Data Integrator Objects
Descriptions of objects
Exception Number Description
Microsoft Connection Errors 12 Errors connecting to the Microsoft SQL
Server
MSSQL Server Initialization 120201 Initialization for a Microsoft SQL Server
failed
MSSQL Login Allocation 120202 Initialization for a Microsoft SQL Server
failed
MSSQL Login Connection 120203 Connection to Microsoft SQL Server
failed
MSSQL Database Context 120204 Failed to switch context to a Microsoft
SQL Server database
ODBC Allocate environment 120301 ODBC Allocate environment error
Oracle connection 120302 Oracle connection failed
ODBC connection 120401 ODBC connection failed
Sybase ASE server context allocation 120501 Sybase ASE server failed to allocate
global context
Sybase ASE server initialization 120502 Sybase ASE server failed to initialize
CTLIB
Sybase ASE user data configuration 120503 Sybase ASE server failed to configure
user data
Sybase ASE connection allocation 120504 Sybase ASE server failed to allocate
connection structure
Sybase ASE login connection 120505 Sybase ASE connection failed
Predefined Transforms Errors 13 Predefined Transforms Errors
Column list is not bound 130101 Primary column information list is not
bound
Key generation 130102 Transform Key_Generation error
Options not defined 130103 Transform options are not defined
ABAP Generation Errors 14 ABAP generation errors
ABAP syntax error 140101 ABAP syntax error
R/3 Execution Errors 15 R/3 execution errors
R/3 RFC open failure 150101 R/3 RFC connection failure
R/3 file open failure 150201 R/3 file open failure
R/3 file read failure 150202 R/3 file read failure
R/3 file close failure 150203 R/3 file close failure
2
Data Integrator Reference Guide 41
Page 42

Data Integrator Objects
2
Descriptions of objects
Exception Number Description
R/3 file open failure 150301 R/3 file open failure
R/3 file read failure 150302 R/3 file read failure
R/3 file close failure 150303 R/3 file close failure
R/3 connection open failure 150401 R/3 connection open failure
R/3 system exception 150402 R/3 system exception
R/3 connection broken 150403 R/3 connection broken
R/3 connection retry 150404 R/3 connection retry
R/3 connection tranid missing 150405 R/3 connection transaction ID missing
R/3 connection has been executed 150406 R/3 connection has been executed
R/3 connection memory low 150407 R/3 connection memory low
R/3 connection version mismatch 150408 R/3 connection version mismatch
R/3 connection call not supported 150409 R/3 connection call not supported
Email Errors 16 Email errors
System Exception Errors 17 System exception errors
Engine Abort Errors 20 Engine abort errors
42 Data Integrator Reference Guide
Page 43

Data Integrator Objects
Descriptions of objects
Conditional
Class
Single-use
Access
With a work flow diagram in the workspace, click the conditional icon in the
tool palette.
Description
A conditional implements if/then/else logic in a work flow.
For each conditional, specify the following:
• If: A Boolean expression defining the condition to evaluate.
The expression evaluates to TRUE or FALSE. You can use constants,
functions, variables, parameters, and standard operators to construct the
expression. For information about expressions, see Chapter 3: Smart
Editor.
Note: Do not put a semicolon (;) at the end of your expression in the
box.
• Then: A work flow to execute if the condition is TRUE.
• Else: A work flow to execute if the condition is FALSE.
This branch is optional.
The
Then and Else branches of the conditional can be any steps valid in a
work flow, including a call to an existing work flow.
Conditionals have the following attribute:
2
If
Attribute Description
Name The name of the object. This name appears on the
object in the diagram.
Data Integrator Reference Guide 43
Page 44

Data Integrator Objects
2
Descriptions of objects
COBOL copybook file format
Class
Reusable
Access
In the object library, click the Formats tab.
Description
A COBOL copybook file format describes the structure defined in a COBOL
copybook file (usually denoted with a .cpy extension). Y ou store templates for
file formats in the object library. You use the templates to define the file format
of a particular source in a data flow.
The following tables describe the Import (or Edit) COBOL copybook dialog
box options and the Source COBOL copybook Editor options.
Import or Edit COBOL copybook format options
The Import (or Edit) COBOL copybook format dialog boxes include options on
the following tabs:
• Format
• Data File
• Data Access
44 Data Integrator Reference Guide
Page 45

Data Integrator Objects
Descriptions of objects
Format
The Format tab defines the parameters of the COBOL copybook format.
Table 2-1 :Format tab
2
Data file
option
File name Type or browse to the COBOL copybook file name (usually
Expand
occurs
Description
has a .cpy extension). This file contains the schema definition.
Specifies the way to handle OCCURS groups. These groups
can be imported either:
• with each field within an OCCURS group getting a
sequential suffix for each repetition: fieldname_1,
fieldname _2, etc. (unrolled view), or
• with each field within an OCCURS group appearing only
once in the copybook’s schema (collapsed view). For a
collapsed view, the output schema matches the OCCURS
group definition, and for each input record there will be
several output records.
If a copybook contains more than one OCCURS group, you
must check this box.
Ignore
redefines
Source
format
Determines whether or not to ignore REDEFINES clauses.
The format of the copybook source code. Options include:
• Free — All characters on the line can contain COBOL
source code.
• Smart mode — Data Integrator will try to determine
whether the source code is in Standard or Free format; if
this does not produce the desired result, choose the
appropriate source format (standard or free) manually for
reimport.
• Standard — The traditional (IBM mainframe) COBOL
source format, where each line of code is divided into the
following five areas: sequence number (1-6), indicator
area (7), area A (8-11), area B (12-72) and comments (73-
80).
Source
codes [start]
Source
codes [end]
Defines the start column of the copybook source file to use
during the import. Typical value is 7 for IBM mainframe
copybooks (standard source format) and 0 for free format.
Defines the end column of the copybook source file to use
during the import. Typical value is 72 for IBM mainframe
copybooks (standard source format) and 9999 for free format.
Data Integrator Reference Guide 45
Page 46

Data Integrator Objects
2
Descriptions of objects
Data File
The Data File tab defines the parameters of the data file.
Table 2-2 :Data File tab
Data file
option
Directory Type or browse to the directory that contains the COBOL
File name Type or browse to the COBOL copybook data file Name. You
Type Specifies the record format—fixed, variable, or undefined:
Description
copybook data file to import.
If you include a directory path here, then enter only the file
name in the Name field.
can use variables or wild cards (* or ?).
If you leave Directory blank, then type a full path and file
name here.
• Fixed(F)
• Fixed-Blocked(FB)
• Variable(V)
• Variable-Blocked(VB)
• Variable-Spanned(VS)
• Variable-Blocked-Spanned(VBS)
• Undefined(U) (specific to the program that created the
file)
Use record length
Include or
exclude
Type Specifies whether variable-length records of the data file
Specifies whether the length information in the beginning of a
record is a part of total record length.
contain information about the length of each record. The
possible values are:
• 2-byte integer
• 2-byte followed by 0x0000 (integer followed by two zero
bytes)
• 4-byte integer
• None — No length information in the beginning of each
record)
Other
Record size Defines fixed record length in bytes. All records in the file have
this length (padded, if necessary).
46 Data Integrator Reference Guide
Page 47

Data Integrator Objects
Descriptions of objects
2
Data file
option
Record
trailer length
Has record
mark
Integer
format
Description
Specifies the length of extra character padding in bytes at the
end of each record.
Defines whether there is an extra byte in the beginning of each
record's data.
Describes how the existing data file stores binary data:
• Big endian — the most significant byte comes first
• Little endian — the least significant byte comes first
Encoding Specifies the character encoding of character data in the data
file.
Skip first Defines the number of data records to skip before starting to
process the file.
Read total Defines the number of records to read and process.
Data Integrator Reference Guide 47
Page 48

Data Integrator Objects
2
Descriptions of objects
Data Access
The Data Access tab specifies how Data Integrator accesses the data file. If
both check boxes are cleared, Data Integrator assumes the data file is on the
same computer as the Job Server.
Table 2-3 :Data Access tab
Data access
option
FTP Select to use FTP to access the data file.
Host Type the computer (host) name, fully qualified domain name,
User Type the FTP user name.
Password Type the FTP user password.
Directory Type or browse to the directory that contains the COBOL
File name Type or browse to the COBOL copybook data file Name. You
Custom Select to use a custom executable to access the data file.
Executable Type the name of the program to read data file.
User Type the user name.
Password Type the password.
Arguments Include any custom program arguments.
Description
or IP address of the computer where the data file resides.
copybook data file to import.
If you include a directory path here, then enter only the file
name in the Name field.
can use variables or wild cards (* or ?).
If you leave Directory blank, then type a full path and file
name here.
COBOL copybook source
The source editor includes the following COBOL copybook options on the
following tabs:
• Source
• Field clauses
• Data File
• Data Access
48 Data Integrator Reference Guide
Page 49

Source
Table 2-4 :Source tab
Data Integrator Objects
Descriptions of objects
2
Source
option
Make port Makes the source table an embedded data flow port. For more
Performance
Join rank Indicates the rank of the source relative to other tables and files
Cache Indicates whether Data Integrator should read the required
Description
information, see Chapter 11, “Embedded Data Flows,” in the
Data Integrator Designer Guide.
in the data flow when creating a join. Data In tegrator joins
sources with higher join ranks before joining sources with lower
join ranks. For more information, see “Join ordering” on page 27
of the Data Integrator Performance Optimization Guide.
NOTE: Must be a non-negative integer. When set to its
default value (zero), Data Integrator determines join order.
data from the source and load it into memory. Because an
inner source of a join must be read for each row of an outer
source, you might want to cache a source when it is used as
an inner source in a join and when the data retrieved will fit
into available memory.
There are two options:
• Yes: The source is always cached unless it is the outer-
most source in a join.
• No: The source is never cached.
Error handling
Log
data
conversion
warnings
Maximum
warnings to
log
Determines whether to include data-type conversion warnings
in the Data Integrator error log. Defaults to Yes.
If Log data conversion warnings is enabled, you can limit how
many warnings Data Integrator logs. Defaults to {no limit}.
Field clauses
The Field clauses tab displays the attributes for a selected column.
Data Integrator Reference Guide 49
Page 50

Data Integrator Objects
2
Descriptions of objects
Table 2-5 :Field clauses tab
Field clauses option Description
Possible values Enter values here to force Data Integrator
to only process rows that contain the
specified value(s). Separate multiple values
with the pipe character (|). Y ou can click the
ellipses button to open the smart editor; for
details on how to use the smart editor, see
Chapter 3, “Smart Editor,” in the Data
Integrator Reference Guide.
Level The level number (01-50) assigned to the
field in the source record definition.
Original name The name of the field in the copybook.
Original picture The PICTURE clause of the field in the
copybook.
Original usage The USAGE clause of the field in the
copybook.
Min occurs Minimum number of occurrences for this
field (if this field is a part of an OCCURS
group).
Max occurs Maximum number of occurrences for this
field (if this field is a part of an OCCURS
group).
Occurs depending on Specifies the repetition counter field name
for the ODO (OCCURS DEPENDING ON).
Redefines Specifies the name of another field that this
one REDEFINES.
Sign separate Specifies whether the sign is stored
separately from the field’s value.
Sign position Specifies whether the sign is LEADING or
TRAILING.
Multiply by Specifies whether the field needs to be
scaled (multiplied or divided by a certain
number). For example, if the field's
PICTURE clause is 9(5)P(3), the value of
the field from the data file will be multiplied
by 1000.
Data File
See “Data File” on page 46.
50 Data Integrator Reference Guide
Page 51

Data Access
See “Data Access” on page 48.
Data Integrator Objects
Descriptions of objects
2
Data Integrator Reference Guide 51
Page 52

Data Integrator Objects
2
Descriptions of objects
Data flow
Class
Reusable
Access
• In the object library, click the Data Flows tab.
• With a work flow diagram in the workspace, click the data flow icon in the
tool palette.
Description
A data flow extracts, transforms, and loads data.
You can define parameters to pass values into the data flow. You can also
define variables for use inside the data flow.
When Data Integrator executes data flows, it optimizes the extract, transform,
and load requirements into commands to the DBMS and commands executed
internally. Where it can, Data Integrator runs these operations in parallel.
By definition, a data flow can contain the following objects:
SourcesFiles, tables, XMl files, XML messages (real-time jobs only),
documents, or pre-defined template tables
Targets Files, tables, XML files, XML messages (real-time jobs only),
outbound messages, documents, XML template, or template tables
TransformsQuery is the most commonly used transform
You can view the SQL code Data Integrator generates for table sources in
data flows and improve your data flow design accordingly . See “Viewing SQL”
on page 34 of the Data Integrator Performance Optimization Guide.
Data flows have several built-in properties.
Attribute Description
Name The name of the object. This name appears on the
Description Your description of the data flow.
If you delete a data flow from the object library, calls to the object are replaced
with an icon indicating that the calls are no longer valid in the workspace.
52 Data Integrator Reference Guide
object in the object library and in the calls to the
object.
Page 53

Data Integrator Objects
Descriptions of objects
Executing jobs only once
You can ensure that a job executes a data flow only one time by selecting the
Execute only once check box on the data flow Properties window. When you
select this check box, Data Integrator executes only the first occurrence of the
data flow and skips subsequent occurrences of it in the job. You might use
this feature when developing complex jobs with multiple paths, such as those
containing try/catch blocks or conditionals, and you want to ensure that Data
Integrator executes a particular data flow only once. Before selecting the
Execute only once option, note that:
• If you design a job to execute the same Execute only once data flow in
parallel flows, Data Integrator only executes the first occurrence of that
data flow and you cannot control which one Data Integrator executes first.
Subsequent flows wait until Data Integrator processes the first one. The
engine provides a wait message for each subsequent data flow. Since
only one
engine skips subsequent data flows and generates a second trace
message for each, “Data flow n did not run more than one time. It is an
execute only once flow.”
Execute only once data flow can execute in a single job, the
• The Execute only onc e data flow option overrides the Recover as a unit
work flow option and the
For example, if you design a job to execute more than one instance of the
same
Execute only once data flow and execute the job in recovery mode,
if the job fails Data Integrator checks to see if the data flow ran
successfully. If any instance ran successfully, Data Integrator displays the
following trace message, “Data flow n recovered successfully from
previous run.” If no instance ran successfully, Data Integrator executes
the data flow in the next run and skips subsequent instances of that data
flow.
Enable recovery job option.
2
Parallel processing
You can run certain transforms and functions in parallel by entering a number
Degree of parallelism box on your data flow Properties window. When
in the
you drop a transform into the data flow and a function into each transform, the
number you enter in the
instances that can be generated for each transform or function in the data
flow. For more information, see “Degree of parallelism” on page 66 of the
Data Integrator Performance Optimization Guide.
Degree of parallelism box is the maximum number of
Data Integrator Reference Guide 53
Page 54

Data Integrator Objects
2
Descriptions of objects
Datastore
Class
Reusable
Access
In the object library, click the Datastores tab.
Description
A datastore provides a connection to a data source such as a database.
Through the datastore connec tio n, Da ta Integrator can import descript io ns of
the data source such as its metadata. When you specify tables as source s o r
targets in a data flow, Data Integrator uses the datastore to determine ho w to
read data from or load data to those tables. In addition, some transforms and
functions require a datastore name to qualify the t ables they access.
Datastores have the following properties:
Property Description
Name The name of the object. This name appears on the object in
the object library and in the calls to the object. You cannot
change the name of a datastore after creation.
Description Text that you enter to describe and document the datastore.
Date_created The date that you created the datastore. You cannot change
this value.
Note: If you delete a datastore from the object library, you must remove
references to the datastore from the following locations:
• Source or target tables using this datastore in your diagrams
• The lookup and key_generation functions and Key_Generation,
History_Preserving, Table_Comparison, and SQL transform references
Datastore Editor
The Datastore Editor consists of several dialog boxes.
Open the Datastore Editor by right-clicking the white space on the object
library’s Datastore tab and selecting New or right-clicking on the datastore
name and selecting Edit.
• Edit invokes the Edit Datastore DatastoreName dialog box
• New invokes the Create New Datastore dialog box
54 Data Integrator Reference Guide
Page 55

Data Integrator Objects
Descriptions of objects
The top part of the dialog box displays the options that are minimally required
to create the datastore.
Initially only two options appear on this realizable dialog box: Datastore
Name and Datastore type. When you select a datastore type, the dialog box
displays other options relevant to that type. The combination of Datastore
type and Database type determine all available options.
There are three categories of datastore types:
• Database datastores allow you to connect to supported databases.
• Adapter datastores allow you to connect to adapters.
• Application datastores, such as PeopleSoft and JDE One World allow
you to connect to applications that run on databases. You can select
these applications by name from the Datastore type list.
For example, if you select database as the Datastore type and Oracle as the
Database type, the following options appear:
2
Data Integrator Reference Guide 55
Page 56

Data Integrator Objects
2
Descriptions of objects
Data Integrator supports changed-data capture (CDC) with Oracle databases,
so in this case, the Designer displays the Enable CDC check box.
The Enable CDC option is available only when you create a new datastore.
After you save a datastore, or when editing a datastore, the dialog box
disables the Enable CDC check box. Also, although a database datastore
may have multiple configurations of different database types, if you enable
CDC for a datastore all configurations must use the same database type.
Click Advanced >> to expand the dialog box. The dialog box displays a grid
of additional datastore options.
56 Data Integrator Reference Guide
Page 57

Data Integrator Objects
Descriptions of objects
2
When you click the Advanced button, the dialog box expands and the button
text changes to Advanced <<. Y ou can click Advanced << to hide the grid. If
the Database type supports multiple configurations, the dialog box also
enables the Edit… button.
The option list is organized into groups that you can expand or collapse to
improve readability. Each cell represents the value for the configuration
option. If the values are from a closed set, the cell becomes a combo box
when you click it. If the option values must be entered, the cell becomes an
edit box when you click it.
Click the Edit… button to add, edit, or remove configurations. The
Configurations for Datastore DatastoreName dialog box opens.
Data Integrator Reference Guide 57
Page 58

Data Integrator Objects
2
Descriptions of objects
The Configurations for Datastore DatastoreName dialog box provides a tool
bar which includes commands to add, edit, and remove configurations. To
save a configuration, click Apply.
This dialog box displays datastore configurations as column headings with
datastore options in the left column. Each row represents a configuration
option. Every datastore has at least one configuration. Different options
appear depending upon the selected datastore type and (if applicable)
database type and version. The options appear under group headings (for
example, Connection, General, Locale).
With database datastores, you can use multiple configurations to minimize
your effort in porting existing jobs from one database type and version to
another. The Datastore Editor supports this by allowing you to choose a
configuration from which to copy options from when you create another.
When you add subsequent configurations, Data Integrator modifies the
language of data flows that contain table targets and SQL transforms in the
datastore. It adds the target options and SQL transform text to additional
datastore configurations based on the target options and SQL transform text
that you defined for an existing configuration.
58 Data Integrator Reference Guide
Page 59

Data Integrator Objects
Descriptions of objects
This functionality performs in the following ways:
• If the new configuration has the same or newer database type and
version as the old configuration, then Data Integrator automatically uses
the existing SQL transform and target table editor values.
• If the database type and version does not already exist (or if the version
is older than any existing configuration), you can use the values from an
existing database type and version by selecting them from the Use
values from box.
• If you select the Restore values if they already exist check box, then
when the new configuration is created, Data Integrator looks to see if
SQL transform and target table editor values already exist for the new
database.
For example, suppose you are working in a multi-user situation and have a
local datastore with configurations for Oracle 9i and SQL Server 2000. You
also have existing data flows that use target tables or SQL transforms from
this datastore. Y ou then delete Oracle 9i (perhaps because you checked out a
different version of the datastore from the central repository). Later, you want
to add an Oracle 9i configuration to this datastore.
When a version is deleted in this case, Data Integrator removes the
configuration, but not the target table and SQL transform values. If you select
Restore values if they already exist, then when you create the new
configuration, Data Integrator looks to see if the values already exist for the
database. If these values are not found, then the Designer uses the values
specified in the Use values from box.
When there are multiple configurations of different database types, the rows
show the options for all configurations.
2
Data Integrator Reference Guide 59
Page 60

Data Integrator Objects
2
Descriptions of objects
If a property does not apply to a configuration, the cell displays N/A in gray
and does not accept input. Cells that correspond to a group header also do
not accept input, and are marked with hashed gray lines.
The functionality of this dialog box is a super set of the Datastore Editor.
When you open this dialog box, there will always be at least one configuration
that reflects the values from the Datastore Editor. This configuration is the
default configuration. In addition, the grid shows other configurations as
additional columns.
60 Data Integrator Reference Guide
Page 61
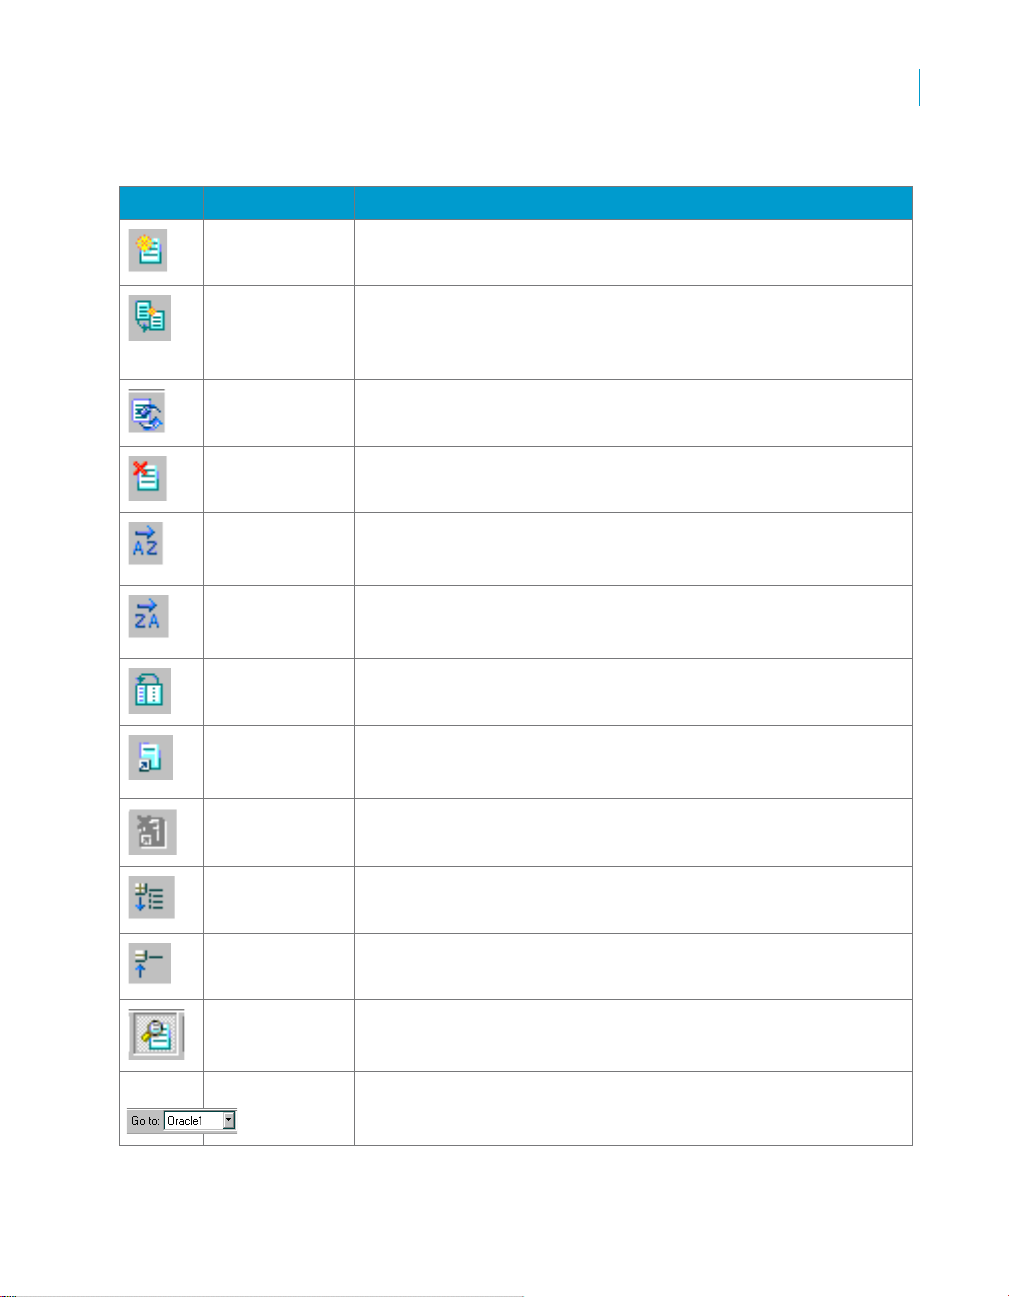
From left to right, the toolbar buttons are:
Button Button name Description
Create New
Configuration
Adds a new configuration with no values.
Data Integrator Objects
Descriptions of objects
2
Duplicate
Configuration
Rename
Configuration
Delete
Configuration
Sort
Configurations:
Ascending
Sort
Configurations:
Descending
Move Default to
First
Create New
Alias
Delete Alias Removes the selected alias name for the datastore.
Creates a new configuration with identical settings as the
selected configuration. The new configuration name is
“<old_name>_Copy_X”, where X is a number starting from 1 that
will create a unique name.
Puts the input focus on the column header where you can edit the
name of the selected configuration.
Removes the configuration from the datastore and its column
from the grid.
Arranges the configurations by their names in ascending order.
The arrangement is sensitive to the computer's system locale.
Arranges the configurations by their names in descending order.
The arrangement is sensitive to the computer's system locale.
Moves the default configuration to the first column in the list.
Does not change the order of other columns.
Adds a new alias name for the datastore. To map individual
configurations to an alias, enter the real owner name of the
configuration in the grid.
Expand All
Categories
Collapse All
Categories
Show Additional
Details
Navigation box This list contains the names of all configurations. Selecting a
Opens all the nodes so that every configuration property is
visible.
Closes all the nodes so that every configuration property is
hidden.
This is a toggle to show additional datastore options on the dialog
box: Database type, Number of Configurations, and CDC status.
name from this list will (if necessary) scroll the configuration into
view and highlight the configuration name in the grid.
Data Integrator Reference Guide 61
Page 62

Data Integrator Objects
2
Descriptions of objects
These commands (except for the Navigation box) also appear on a shortcut
menu when you right-click the grid.
You can also manage configurations by directly manipulating the grid.
Double-click the column header to edit the configuration name. Click the
header and press Delete to delete the selected configuration. When there is
more than one configuration, click and drag the header left or right to
rearrange the order.
Data Integrator saves the configurations in the same sequence as shown in
the Configuration dialog box.
All configurations have an Alias category. After you create an alias (such as
alias1, alias2), navigate horizontally to each configuration and define the
owner name that the alias name maps to.
Note that Owner names are not labeled in the configuration dialog box.
owner name
When you delete an alias name, the operation applies to the datastore (all
configurations). Data Integrator removes the selected row.
Because there can only be one default configuration (used to browse, search,
and import metadata), if you select Yes for one configuration, the dialog box
sets the others to No. Also, you cannot set a Yes value to a No. Designer will
ignore the change and display a message box instructing you to set Yes on
another configuration instead.
After you click Apply to save your new configuration, Data Integrator copies
the existing SQL transform and target table editor values, and displays a
report of the modified objects in a popup dialog box and in the Output window .
The report contains the following information:
62 Data Integrator Reference Guide
Page 63

Data Integrator Objects
Descriptions of objects
• Names of the data flows where language was modified
• Objects in the data flows that were affected
• Types of the objects affected (table target or SQL transform)
• Usage of the objects (source or target)
• Whether the objects have a bulk loader
• Whether the bulk loader option was copied
• Whether there were previous values
• Whether the previous values were restored
You can use this report as a guide to manually change the values for options
of targets and SQL transforms, as needed. Using the pop-up dialog box, you
can sort the results by clicking on the header and save the output to a file.
The popup appears after each newly added configuration.
Data Integrator also clears and displays the results in the Output window af ter
each newly added configuration. Because the Datastore Editor dialog boxes
are modal, you cannot see the entire Output window or manipulate it.
However, you can double-click one of the objects on this report and to view
the data flow.
Importing database links
This section provides the steps you need to follow to import and configure a
database link in the Designer. For an introduction to Data Integrator support
for database links, see “Database link support for push-down operations
across datastores” on page 77 of the Data Integrator Performance
Optimization Guide.
2
To link a target datastore to a source datastore using a database link
1. From the Datastores tab in the object library , right-click a target datastore
and select Edit.
Data Integrator Reference Guide 63
Page 64

Data Integrator Objects
2
Descriptions of objects
If the database type supports database links, the list of configuration
options includes the Linked Datastores option:
Note: The Datastore Editor allows you to edit database links on target
datastores using the default configuration only. If a target datastore has
multiple configurations (for example: Config1, Config2, and Config3),
make Config2 the default configuration before you attempt to import or
edit links that apply to Config2.
2. Click the Linked Datastores label.
The Add Linked Datastore dialog opens.
3. From the Add Linked Datastore dialog, select the datastore that your
target datastore will be linked to based upon the settings in the database
link you want to import.
64 Data Integrator Reference Guide
Page 65

Data Integrator Objects
Descriptions of objects
For example if your target datastore is DS_Emp and the database link
you will import associates the database emp with sales, select DS_Sales.
The datastores in the list box have database types that Data Integrator
supports for linked datastores.
Note: The Datastore Editor allows only one database link between a
target datastore and a source datastore pair. So if target datastore B
already has a link to source datastore A, you cannot import another
database link that associates datastore B with datastore A.
4. Click OK.
5. Notice the Datastore Editor dialog displays the datastore that you
selected.
2
6. Select the list button to the right of
The Database Link dialog opens.
7. To link to a datastore or to change the existing link, select Use the
database link.
Note: To remove an existing link, select Do not link.
8. Select a database link from the list that Data Integrator reads from the
default configuration connection of the target datastore you are editing.
This list box contains links that you previously defined on the DBMS.
9. Select the source datastore configuration that you want to use with this
database link.
Not Linked or double-click the cell.
Data Integrator Reference Guide 65
Page 66

Data Integrator Objects
2
Descriptions of objects
10. (Optional) Select Details to view additional information about the links or
to test them.
The check mark indicates the link to use. If you use the Details dialog,
click OK when you are finished.
11. From the Database Link dialog, click OK.
Database datastores
You can define datastores so that Data Integrator can read from and write to
the following types of databases:
• Attunity Connector (use for mainframe systems)
• DB2
• IBM Connector (use for mainframe systems)
• Informix
• Memory
• Microsoft SQL Server
• ODBC
• Oracle
• Sybase ASE
• Teradata
Each database requires its own connection information in the datastore
definition. For more information on configuring datastores, see
“Datastores,” in the Data Integrator Designer Guide.
The following tables describe the datastore connection information and
options specific to each database.
Chapter 5,
66 Data Integrator Reference Guide
Page 67

Data Integrator Objects
Descriptions of objects
Note: The Enable CDC option is available with a subset of the databases.
When the Enable CDC option is checked, the options in the following group
headings do not display because a CDC datastore is read-only and you can
only use it as a source: General, Bulk Loader, and FTP.
Table 2-6 Attunity Connector
Attunity option Possible values Description
Main window
Data source Refer to the
requirements of
your database
Host location Computer name,
fully qualified
domain name, or
IP address
Port Positive integer Type the port number for the Attunity server.
Attunity
workspace
User name Alphanumeric
Password Alphanumeric
Enable CDC Select to enable changed data capture for this datastore.
General (these options do not appear for CDC datastores)
Rows per
commit
Overflow file
directory
Locale
Language See Chapter 9: Locales and Multi-Byte Functionality.
Code page See Chapter 9: Locales and Multi-Byte Functionality.
Refer to the
requirements of
your database
characters and
underscores
characters,
underscores,
and punctuation
Positive integer Enter the maximum number of rows loaded to a target
Directory path or
click Browse
Type the Attunity data source name(s) as defined in
Attunity Studio. Separate multiple data source names
with semicolons.
Type the name of the Attunity server computer (host).
Type the worksp ace name under which the data sources
are defined in Attunity Studio.
Type the user name of the account through which Data
Integrator accesses the database.
Type the user’s password.
table before saving the data. This value is the default
commit size for target tables in this datastore. You can
overwrite this value for individual target tables.
Enter the location of overflow files written by target tables
in this datastore.
2
Data Integrator Reference Guide 67
Page 68

Data Integrator Objects
2
Descriptions of objects
Table 2-7 DB2
DB2 option Possible
values
Main window
Database version DB2 UDB 6.1
DB2 UDB 7.1
DB2 UDB 7.2
DB2 UDB 8.x
Data source Refer to the
requirements of
your database
User name Alphanumeric
characters and
underscores
Password Alphanumeric
characters,
underscores,
and punctuation
Enable CDC Select to enable changed data capture for this
General
Rows per commit Positive integer Enter the maximum number of rows loaded to a
Bulk loader directory Directory path
or click Browse
Overflow file
directory
Directory path
or click Browse
Description
Select the version of your DB2 client. This is the
version of DB2 that this datastore accesses.
Type the data source name defined in DB2 for
connecting to your database.
If you are going to use the Auto correct load feature
for DB2 targets, be sure that your data source allows
your user name to create or replace stored
procedures.
Enter the user name of the account through which
Data Integrator accesses the database.
Enter the user’s password.
datastore.
target table before saving the data. This value is the
default commit size for target tables in this datastore.
You can overwrite this value for individual target
tables.
Enter the location where command and data files are
written for bulk loading. For Solaris systems, the path
name must be less than 80 characters.
Enter the location of overflow files written by target
tables in this datastore.
68 Data Integrator Reference Guide
Page 69

Data Integrator Objects
Descriptions of objects
2
DB2 option Possible
values
Locale
Language See Chapter 9: Locales and Multi-Byte Functionality.
Code page See Chapter 9: Locales and Multi-Byte Functionality.
Linked Datastores (Click here to create)
Datastore Name Alphanumeric
characters and
underscores or
blank
Bulk loader
Bulk loader user
name
Bulk loader
password
DB2 server working
directory
Alphanumeric
characters and
underscores or
blank
Alphanumeric
characters,
underscores,
and
punctuation, or
blank
Directory path
or click Browse
Description
The name of a datastore to which you linked the
current datastore configuration in preparation to
import a database link. See “Importing database
links” on page 63.
The user name Data Integrator uses when loading
data with the bulk loader option. For bulk loading, you
might specify a different user name. For example,
specify a user who has import and load permissions.
The password Data Integrator uses when loading
with the bulk loader option.
The working directory for the load utility on the
computer that runs the DB2 server. You must
complete this field whenever the DB2 server and the
Data Integrator Job Server run on separate
machines.
Data Integrator Reference Guide 69
Page 70

Data Integrator Objects
2
Descriptions of objects
DB2 option Possible
values
FTP
FTP host name Computer
name, fully
qualified
domain name,
or IP address
FTP login user name Alphanumeric
characters and
underscores, or
blank
FTP login password Alphanumeric
characters,
underscores,
and
punctuation, or
blank
Table 2-8 IBM Connector
Description
If this field is left blank or contains the name of the
computer (host) where the Data Integrator Job
Server resides, Data Integrator assumes that DB2
and Data Integrator share the same computer and
that FTP is unnecessary. When FTP is unnecessary,
all other FTP-related fields can remain blank. See
“Using the DB2 bulk load utility” on page 49 of the
Data Integrator Performance Optimization Guide for
a discussion about when FTP is necessary.
Must be defined to use FTP.
Must be defined to use FTP.
IBM option Possible values Description
Main window
Data source Refer to the
requirements of
your database
User name Alphanumeric
characters and
underscores
Password Alphanumeric
characters,
underscores,
and punctuation
70 Data Integrator Reference Guide
Type the Data Source Name defined in the ODBC
Administrator for connecting to your database.
Enter the user name of the account through which Data
Integrator accesses the database.
Enter the user’s password.
Page 71

Data Integrator Objects
Descriptions of objects
IBM option Possible values Description
General
Rows per
commit
Overflow file
directory
Bulk loader
directory
Locale
Language See Chapter 9: Locales and Multi-Byte Functionality.
Code page See Chapter 9: Locales and Multi-Byte Functionality.
Positive integer Enter the maximum number of rows loaded to a target
table before saving the data. This value is the default
commit size for target tables in this datastore. You can
overwrite this value for individual target tables.
Directory path or
click Browse
Directory path or
click Browse
Table 2-9 Informix
Enter the location of overflow files written by target tables
in this datastore.
Enter the location where command and data files are
written for bulk loading. For Solaris systems, the path
name must be less than 80 characters.
2
Informix
option
Main window
Database
version
Data source Refer to the
User name Alphanumeric
Password Alphanumeric
Possible values Description
Informix IDS 7.3
Informix IDS 9.2
requirements of
your database
characters and
underscores
characters,
underscores,
and punctuation
Select the version of your Informix client. This is the
version of Informix that this datastore accesses.
Type the Data Source Name defined in the ODBC
Administrator for connecting to your database.
Enter the user name of the account through which Data
Integrator accesses the database.
Enter the user’s password.
Data Integrator Reference Guide 71
Page 72

Data Integrator Objects
2
Descriptions of objects
Informix
option
General
Rows per
commit
Overflow file
directory
Locale
Language See Chapter 9: Locales and Multi-Byte Functionality.
Code page See Chapter 9: Locales and Multi-Byte Functionality.
Memory option Possible values Description
Locale
Language See Chapter 9: Locales and Multi-Byte Functionality.
Code page See Chapter 9: Locales and Multi-Byte Functionality.
Possible values Description
Positive integer Enter the maximum number of rows loaded to a target
table before saving the data. This value is the default
commit size for target tables in this datastore. You can
overwrite this value for individual target tables.
Directory path or
click Browse
Table 2-10 Memory
Table 2-11 Microsoft SQL Server
Enter the location of overflow files written by target tables
in this datastore.
Microsoft SQL
Server option
Main window
Database
version
Database
server name
Database name Refer to the
72 Data Integrator Reference Guide
Possible values Description
Microsoft SQL
Server 7.0
Microsoft SQL
Server 2000
Computer name,
fully qualified
domain name, or
IP address
requirements of
your database
Select the version of your SQL Server client. This is the
version of SQL Server that this datastore accesses.
Enter the name of machine where the SQL Server
instance is located.
Enter the name of the database to which the datastore
connects.
Page 73

Data Integrator Objects
Descriptions of objects
2
Microsoft SQL
Server option
User name Alphanumeric
Password Alphanumeric
Connection
Use Windows
Authentication
General
Rows per
commit
Overflow file
directory
Locale
Language See Chapter 9: Locales and Multi-Byte Functionality.
Code page See Chapter 9: Locales and Multi-Byte Functionality.
Linked Datastores (Click here to create)
Datastore Name Alphanumeric
Possible values Description
Enter the user name of the account through which Data
characters and
underscores
characters,
underscores,
and punctuation
No, Yes Select whether to use Windows authentication or SQL
Positive integer Enter the maximum number of rows loaded to a target
Directory path or
click Browse
characters and
underscores or
blank
Integrator accesses the database.
Enter the user’s password.
Server authentication to connect to this datastore.
Defaults to No.
table before saving the data. This value is the default
commit size for target tables in this datastore. You can
overwrite this value for individual target tables.
Enter the location of overflow files written by target tables
in this datastore.
The name of a datastore to which you linked the current
datastore configuration in preparation to import a
database link. See “Importing database links” on
page 63.
ODBC
To define an ODBC datastore connection, you need to define a data source, a
user name, a password if applicable, and optionally a set of advanced
options.
Selecting an ODBC data source
Y ou can select a data source in one o f three ways. In the
the ODBC datastore editor:
Data source field of
• From the drop-down list, click an existing data source, or
• Type the name of a data source, or
Data Integrator Reference Guide 73
Page 74

Data Integrator Objects
2
Descriptions of objects
• Click ODBC Admin to launch the Windows ODBC Data Source
Administrator where you create or configure data sources. After closing
the ODBC Data Source Administrator, you can select a newly created
data source from the datastore editor’s drop-down list.
To configure data sources in UNIX, see “ODBC driver manager for UNIX”
on page 79.
Defining ODBC datastore options
T o define options for an ODBC datastore, click
configure, you can select a value from its drop-down list, or many options
allow you to type a custom value.
Most ODBC datastore options include the following values.
Automatic
When you create a new ODBC datastore, most options default to
With this setting, if you do not know if the ODBC driver supports an option,
Data Integrator queries the driver to determine its capabilities. If the driver
supports that option, Data Integrator pushes down the operation to the ODBC
database. If the ODBC driver does not support that option, Data Integrator
executes the operation internally.
In some cases, you might need to specify an option other than
circumvent possible inconsistencies with the ODBC driver. If you select
anything other than
that particular capability. Most options in the ODBC datastore editor provide
some or all of the following choices.
ODBC syntax
Data Integrator assumes the ODBC driver supports the function/capability
and uses ODBC syntax.
For example, for the ABSOLUTE function, the syntax would be:
{fn abs (TAB1.COL1)}
SQL-92
Data Integrator assumes the ODBC driver supports the function/capability
and uses SQL-92 syntax.
For example, when Data Integrator generates an explicit CONVERT function,
the syntax would be:
CAST (TAB1.VC_COL AS SQL_INTEGER)
No
Data Integrator assumes the ODBC driver does not support the function/
capability and executes it internally.
Automatic, Data Integrator does not query the driver for
Advanced. For each option to
Automatic.
Automatic to
74 Data Integrator Reference Guide
Page 75

Custom
Many functions allow you to type in the specific function call to use for that
option. Data Integrator assumes the ODBC driver supports the function/
capability.
Note: You cannot specify the signature of the function; it will be the same as
in the ODBC signature.
For example, for the string function
ucase(...)}
Integrator will generate:
upper(TAB1.VC_COL)
The following table describes all of the fields and options in the ODBC
datastore editor.
Table 2-12 ODBC
ODBC option Possible values Description
Main window
Data source Refer to the
requirements of
your database
User name Alphanumeric
characters and
underscores
Password Alphanumeric
characters,
underscores, and
punctuation
ODBC Admin
button
Connection
Additional
connection
information
Alphanumeric
characters and
underscores, or
blank
, you can type in the Upper case option field upper. Data
Select or type the Data Source Name defined in the
ODBC Administrator for connecting to your database.
Enter the user name of the account through which Data
Integrator accesses the database.
Enter the user’s password.
Click to launch the Windows ODBC Data Source
Administrator where you create or configure data
sources. After closing the ODBC Data Source
Administrator, you can select a newly created data
source from the datastore editor’s drop-down list.
Enter information for any additional parameters that the
data source supports (parameters that the data
source’s ODBC driver and database support). Use the
format:
<parameter1=value1; parameter2=value2>
Data Integrator Objects
Descriptions of objects
Upper case, instead of using {fn
2
Data Integrator Reference Guide 75
Page 76

Data Integrator Objects
2
Descriptions of objects
ODBC option Possible values Description
General
Rows per
commit
Overflow file
directory
Locale
Language See Chapter 9: Locales and Multi-Byte Functionality.
Code page See Chapter 9: Locales and Multi-Byte Functionality.
Capability
Support
Array fetch Automatic, No If you encounter errors when reading from an ODBC
Positive integer Enter the maximum number of rows loaded to a target
table before saving the data. This value is the default
commit size for target tables in this datastore. You can
overwrite this value for individual target tables.
Directory path or
click Browse
Enter the location of overflow files written by target
tables in this datastore.
datastore, especially if the error message involves the
ODBC call SQLFetchScroll, it is safe to assume that
your ODBC driver does not support array fetch. In this
case, select the No value to turn off Data Integrator’s
array fetch capability . Data Integrator fetches one row at
a time from the
ODBC data source. The No value
causes all Source Table Editors and SQL Transform
Editors that use this ODBC datastore to not display
the Array fetch size performance option
Parameterized
SQL
Outer join Automatic,
Auto commit Automatic, Yes, NoDetermines whether the ODBC driver supports auto
Automatic, No By using parameterized SQL, Data Integrator
generates SQL statements with parameters instead of
literal values, which can significantly improve
performance.
Determines whether the ODBC driver supports outer
ODBC syntax,
SQL-92 syntax,
No
join syntax.
commit.
.
76 Data Integrator Reference Guide
Page 77

ODBC option Possible values Description
Math Function Support
Absolute Automatic, ODBC
syntax, No,
custom
Ceiling Automatic, ODBC
syntax, No,
custom
Floor Automatic, ODBC
syntax, No,
custom
Round Automatic, ODBC
syntax, No,
custom
Truncate Automatic, ODBC
syntax, No,
custom
String Function Support
Lower case Automatic, ODBC
syntax, No,
custom
Upper case Automatic, ODBC
syntax, No,
custom
Rtrim blanks Automatic, ODBC
syntax, No,
custom
Ltrim blanks Automatic, ODBC
syntax, No,
custom
Length Automatic, ODBC
syntax, No,
custom
Substring Automatic, ODBC
syntax, No,
custom
Returns the absolute value of an input number.
Returns the smallest integer value greater than or equal
to an input number.
Returns the largest integer value less than or equal to
an input number.
Rounds a given number to the specified precision.
Truncates a given number to the specified precision.
Changes the characters in a string to lowercase.
Changes the characters in a string to uppercase.
Removes blank characters from the end of a string.
Removes blank characters from the start of a string.
Returns the number of characters in a given string.
Returns a specific portion of a string starting at a given
point in the string.
Data Integrator Objects
Descriptions of objects
2
Data Integrator Reference Guide 77
Page 78

Data Integrator Objects
2
Descriptions of objects
ODBC option Possible values Description
Date Function Support
System date Automatic, ODBC
syntax, No,
custom
System time Automatic, ODBC
syntax, No,
custom
Week Automatic, ODBC
syntax, No,
custom
Month Automatic, ODBC
syntax, No,
custom
Quarter Automatic, ODBC
syntax, No,
custom
Year Automatic, ODBC
syntax, No,
custom
Day of month Automatic, ODBC
syntax, No,
custom
Day of year Automatic, ODBC
syntax, No,
custom
Aggregate Function Support
Average Automatic,
SQL-92 syntax,
No
Count Automatic,
SQL-92 syntax,
No
Max Automatic,
SQL-92 syntax,
No
Min Automatic,
SQL-92 syntax,
No
Returns the current date as listed by the Job Server’s
operating system.
Returns the current time as listed by the operating
system.
Determines the week in the year in which the given date
falls.
Determines the month in which the given date falls.
Determines the quarter in which the given date falls.
Determines the year in which the given date falls.
Determines the day in the month on which the given
date falls.
Determines the day in the year on which the given date
falls.
Calculates the average of a given set of values.
Counts the number of values in a table column.
Returns the maximum value from a list.
Returns the minimum value from a list.
78 Data Integrator Reference Guide
Page 79

ODBC option Possible values Description
Sum Automatic,
SQL-92 syntax,
No
Miscellaneous
Date format
Time format
Date-time
format
Decimal
separator
Data type
conversion
support
NVL support Automatic, ODBC
Ifthenelse
support
yyyy.mm.dd
or other
combinations
hh24:mi:ss
or other
combinations
yyyy.mm.dd
hh24:mi:ss
or other
combinations
. , Enter the character that the data source uses to
Automatic, ODBC
syntax, No,
SQL-92 syntax
syntax, No,
custom
Yes, No Allows conditional logic in mapping and selection
Calculates the sum of a given set of values.
Enter a date format supported by the data source (a
date format that the data source’s ODBC driver and
database supports).
Enter a time format supported by the data source (a
time format that the data source’s ODBC driver and
database supports).
Enter a date-time format supported by the data source
(a date-time format that the data source’s ODBC driver
and database supports).
separate the decimal portion of a number.
When there’s a data type mismatch in an expression,
Data Integrator automatically generates an explicit
convert function call.
If the input values is NULL, replace with the specified
value.
operations.
Data Integrator Objects
Descriptions of objects
2
ODBC driver manager for UNIX
To take advantage of Data Integrator’s built-in driver manager for UNIX, you
add data source entries in Data Integrator’s odbc.ini file. The Data Integrator
installation also provides a sample file called odbc.ini.sample that provides a
template that you can save as odbc.ini.
The UNIX ODBC driver manager provides the option to load any ODBC driver
library other than DataDirect’s library when the ODBC driver satisfies
following conditions:
• The ODBC driver is at least ODBC 2.0 compliant
• The ODBC driver library is thread-safe
Data Integrator Reference Guide 79
Page 80

Data Integrator Objects
2
Descriptions of objects
UNIX ODBC driver manager configuration file
Similar to the way other driver managers on UNIX define an ODBC data
source, Data Integrator provides an odbc.ini file. Add each ODBC data source
in the Data Integrator datastore(s) to the configuration file in $LINK_DIR/bin/
odbc.ini. The following table lists the data source configuration parameters
odbc.ini (and odbc.ini.sample):
Key Required? Valid value Example
Driver Yes A full path including the ODBC driver
library name. The directory containing
the dependent libraries must be in the
shared library path (for AIX, LIBPATH;
for Solaris or Linux,
LD_LIBRARY_PATH; for HP-UX,
SHLIB_PATH). Check vendor
documentation for what you need to add
to the shared library path.
OdbcCon
formance
Level
Lazy
Loading
No A decimal value specifying the ODBC
conformance level of driver. Default
value is 0, in which case the driver
detects by loading 2.x followed by 3.x
functions from the driver. When any
value greater than or equal to 4.0 is
specified, the driver manager prints a
run time error.
No You can specify a Boolean TRUE/YES
or FALSE/NO. Default value is
FALSE.The UNIX ODBC Driver
Manager loads the ODBC driver and
instructs the operating system to load all
of its dependent libraries. This flag is
useful when certain dependent libraries
of the ODBC driver are not required and
the ODBC vendor recommends to load
the library in lazy mode.
Driver=/home/mysql/
myodbc/lib/libmyodbc3_r.so
OdbcConformanceLevel=0
OdbcConformanceLevel=3.0
LazyLoading=TRUE
In addition to editing the data source in $LINK_DIR/bin/odbc.ini, follow the
instructions provided by your ODBC driver vendor for UNIX, which usually
include:
• Adding certain directory locations to the shared library path
• Exporting the ODBCINI environment variable to point to the vendor's
odbc.ini file
• Adding the data source to the vendor’s odbc.ini file
A sample entry in the $LINK_DIR/bin/odbc.ini file might be:
80 Data Integrator Reference Guide
Page 81

Data Integrator Objects
Descriptions of objects
[test_mysql]
Driver = /home/mysql/myodbc/lib/libmyodbc3_r.so
OdbcConformanceLevel= 0.0
LazyLoading = FALSE
Note that the data source name test_mysql (specified in the Data Integrator
datastore) must be the same in the following other locations:
• Windows ODBC Administrator
• UNIX ODBC Driver Manager Configuration File ($LINK_DIR/bin/odbc.ini)
• ODBC vendor’s configuration file
Syntax of the odbc.ini file
All *.ini files have the same syntax requirements. Enclose data source names
in square brackets. Properties follow on subsequent lines and use
PropertyName = PropertyValue. For example:
[test_mysql]
Driver = /home/mysql/myodbc/lib/libmyodbc3_r.so
OdbcConformanceLevel=
LazyLoading =
In this example, test_mysql is the name of data source that can be loaded
using libmyodbc3_r.so library file. Default values apply when optional
properties are left blank.
Follow these guidelines when editing the $LINK_DIR/bin/odbc.ini file:
• Each data source name must at least have a driver property defined,
which allows the driver manager to load the driver when connecting to the
database.
• The pound sign (#) as the first character in any line denotes a comment.
• All leading blanks and trailing blanks in data source names and
properties are ignored.
ODBC driver compliance level detection
An ODBC driver can be compliant to either 2.x or 3.x or both. The UNIX
ODBC driver manager detects if the driver is 2.x or 3.x and loads the
respective compatible ODBC API functions. In the case when the driver is
both 2.x and 3.x compliant, then the driver manager only loads the 2.x ODBC
API. However, you can override this behavior by specifying for 3.0 for the
OdbcConformanceLevel parameter in theodbc.ini file. AS a result, the ODBC
driver manager only loads 3.x ODBC API functions.
Upgrading and migration
Customers migrating from earlier versions of Data Integrator (prior to 11.x)
can do one of the following methods to retain the original behavior:
When using DataDirect ODBC:
2
Data Integrator Reference Guide 81
Page 82

Data Integrator Objects
2
Descriptions of objects
1. Overwrite the existing installation so that the UNIX installer takes care of
setting UseDIUNIXODBCDriverManager to FALSE in DSConfig.txt so
that DataDirect’s driver manager loads by default for every data source
configured.
OR
2. If you are doing a fresh installation, then manually set
UseDIUNIXODBCDriverManager to FALSE in DSConfig.txt in the
[AL_Engine] section.
OR
3. There is no need to use DataDirect ODBC Driver Manager . Simply add all
the data sources used in existing DI datastores to $LINK_DIR/bin/
odbc.ini file.
When using the UNIX_DRIVER_MANAGER_LIB property:
1. Overwrite the existing installation to retain
UNIX_DRIVER_MANAGER_LIB property in DSConfig.txt.
OR
2. If you are doing a fresh installation, then copy the
UNIX_DRIVER_MANAGER_LIB property from DSConfig.txt in old
installation. This setting lets Data Integrator load the library property for
every ODBC data source.
OR
3. Add all the data sources used in existing DI datastores to the $LINK_DIR/
bin/odbc.ini file.
Working with data sources used in a datastore
When UNIX_ODBC_DRIVER_MANAGER_LIB is specified in DSConfig.txt
Data Integrator assumes the user wants to use a third-party ODBC driver
manager and automatically disables its ODBC driver manager. Then for every
data source name mentioned in an ODBC datastore, Data Integrator loads
the library named for the UNIX_ODBC_DRIVER_MANAGER_LIB property.
If the option UseDIUNIXODBCDriverManager is FALSE, then Data Integrator
assumes the user wants to use DataDirect as ODBC driver manager. Then
for every data source name mentioned in ODBC datastore, Data Integrator
loads the DataDirect driver manager library.
If UseDIUNIXODBCDriverManager is TRUE, then Data Integrator searches
$LINK_DIR/bin/odbc.ini file and loads the library mentioned in driver property.
Examples for configuring the ODBC driver
The following examples apply to Linux.
,
82 Data Integrator Reference Guide
Page 83

Data Integrator Objects
Descriptions of objects
You can often combine the configuration files (odbc.ini) of different ODBC
drivers into one single file and point to this file in ODBCINI environment
variable. Verify this functionality by referring to your ODBC vendor’s
documentation.
To configure MYSQL ODBC on Linux
1. Add the data source to the Data Integrator UNIX ODBC driver manager
configuration file ($LINK_DIR/bin/odbc.ini). For example:
[test_mysql]
Driver = /home/mysql/myodbc/lib/libmyodbc3_r.so
1. Add the data source to the MyODBC driver configuration file as:
[test_mysql]
Driver = /home/mysql/myodbc/lib/libmyodbc3_r.so
SERVER = mysql_host
PORT = 3306
USER = test
Password = test
Database = test
OPTION = 3
SOCKET =
2. Add the following environment settings to .profile
ODBCINI=MyODBC Install Dir/lib/odbc.ini;export ODBCINI
LD_LIBRARY_PATH=MyODBC Install Dir/lib:$LD_LIBRARY_PATH
2
To configure DataDirect Informix ODBC driver on Linux
1. Add the data source to the Data Integrator UNIX ODBC driver manager
configuration file ($LINK_DIR/bin/odbc.ini). For example:
[test_ifmx_odbc]
Driver = Driver=/3pt/merant50/lib/ivifcl20.so
2. Add the data source to DataDirect configuration file as:
[test_ifmx_odbc]
Driver=/3pt/merant50/lib/ivifcl20.so
Description=DataDirect 5.0 Informix Wire Protocol
ApplicationUsingThreads=1
CancelDetectInterval=0
Database=test_db3
HostName=ifmxsrvr_host
LogonID=informix
Password=
Protocol=olsoctcp
ServerName=ol_ifmxservr
Service=1526
TrimBlankFromIndexName=1
3. Add following environment settings to .profile:
Data Integrator Reference Guide 83
Page 84

Data Integrator Objects
2
Descriptions of objects
ODBCINI=DataDirect Install Dir/lib/odbc.ini;export ODBCINI
LD_LIBRARY_PATH=DataDirect Install Dir/lib:$LD_LIBRARY_PATH
Table 2-13 Oracle
Oracle option Possible values Description
Main window
Database
version
Connection
name
User name Alphanumeric
Password Alphanumeric
Enable CDC Select to enable changed data capture for this datastore.
General
Rows per
commit
Bulk loader
directory
Oracle 8.0
Oracle 8.1
Oracle 9i
Oracle 10g
Refer to the
requirements of
your database
characters and
underscores
characters,
underscores,
and punctuation
Positive integer Enter the maximum number of rows loaded to a target
Directory path or
click Browse
Select the version of your Oracle client. This is the
version of Oracle that this datastore accesses.
Enter an existing Oracle connection through which Data
Integrator accesses sources and targets defined in this
datastore.
Enter the user name of the account through which Data
Integrator accesses the database.
Enter the user’s password.
table before saving the data. This value is the default
commit size for target tables in this datastore. You can
overwrite this value for individual target tables.
Enter the location where command and data files are
written for bulk loading. For Solaris systems, the path
name must be less than 80 characters.
84 Data Integrator Reference Guide
Page 85

Data Integrator Objects
Descriptions of objects
Oracle option Possible values Description
Overflow file
directory
Locale
Language See Chapter 9: Locales and Multi-Byte Functionality.
Code page See Chapter 9: Locales and Multi-Byte Functionality.
Linked Datastores (Click here to create)
Datastore Name Alphanumeric
Directory path or
click Browse
characters and
underscores or
blank
Table 2-14 Sybase ASE
Enter the location of overflow files written by target tables
in this datastore.
The name of a datastore to which you linked the current
datastore configuration in preparation to import a
database link. See “Importing database links” on
page 63.
2
Sybase ASE
option
Main window
Database
version
Database
server name
Database name Refer to the
User name Alphanumeric
Password Alphanumeric
Possible values Description
Sybase ASE
11.x
Sybase ASE
12.x
Computer name Enter the name of the computer where the Sybase ASE
requirements of
your database
characters and
underscores
characters,
underscores,
and punctuation
Select the version of your Sybase ASE client. This is the
version of Sybase that this datastore accesses.
instance is located.
Enter the name of the database to which the datastore
connects.
Enter the user name of the account through which Data
Integrator accesses the database.
Enter the user’s password.
Data Integrator Reference Guide 85
Page 86
Data Integrator Objects
2
Descriptions of objects
Sybase ASE
option
General
Rows per
commit
Overflow file
directory
Locale
Language See Chapter 9: Locales and Multi-Byte Functionality.
Code page See Chapter 9: Locales and Multi-Byte Functionality.
Sybase IQ option Possible
Main window
Database version Sybase IQ 12.5
Data source Refer to the
User name Alphanumeric
Password Alphanumeric
General
Rows per commit Positive integer Enter the maximum number of rows loaded to a
Bulk loader directory Directory path
Possible values Description
Positive integer Enter the maximum number of rows loaded to a target
table before saving the data. This value is the default
commit size for target tables in this datastore. You can
overwrite this value for individual target tables.
Directory path or
click Browse
Table 2-15 Sybase IQ
values
Sybase IQ 12.6
requirements of
your database
characters and
underscores
characters,
underscores,
and punctuation
or click Browse
Enter the location of overflow files written by target tables
in this datastore.
Description
Select the version of your Sybase IQ client. This is
the version of Sybase IQ that this datastore
accesses.
Select or type the Data Source Name defined in the
ODBC Administrator for connecting to your database.
Enter the user name of the account through which
Data Integrator accesses the database.
Enter the user’s password.
target table before saving the data. This value is the
default commit size for target tables in this datastore.
You can overwrite this value for individual target
tables.
Enter the location where command and data files are
written for bulk loading. For Solaris systems, the path
name must be less than 80 characters.
86 Data Integrator Reference Guide
Page 87

Data Integrator Objects
Descriptions of objects
2
Sybase IQ option Possible
values
Overflow file
directory
Locale
Language See Chapter 9: Locales and Multi-Byte Functionality.
Code page See Chapter 9: Locales and Multi-Byte Functionality.
Bulk loader
JS and DB on same
machine
Use named pipe
Directory path
or click Browse
Yes, No If the Job Server and database server are not on the
Yes, No
Description
Enter the location of overflow files written by target
tables in this datastore.
same computer, you must configure Data Integrator
to transfer via FTP the data file generated on the Job
Server to the database server. Therefore, the
performance of bulk loader is significantly better if the
Job Server and the database are on the same
machine.
Applies to Sybase IQ database version 12.6 only.
If the Job Server and database server are on same
computer, select Yes to eliminate the need to write a
data file to disk, which can improve performance.
If a data file is required for Sybase IQ database
recovery, select No.
Defaults to No.
Data Integrator Reference Guide 87
Page 88

Data Integrator Objects
2
Descriptions of objects
Sybase IQ option Possible
values
FTP
FTP host name Computer
name, fully
qualified
domain name,
or IP address
FTP login user name Alphanumeric
characters and
underscores, or
blank
FTP login password Alphanumeric
characters,
underscores,
and
punctuation, or
blank
FTP host working
directory
Absolute file
path
Description
If the Job Server and Sybase IQ database server are
not on the same machine, Data Integrator generates
a data file and transfers it via FTP to the database
machine for loading. You set FTP parameters in the
Sybase IQ datastore editor.
Type the name of the Sybase IQ server computer
(host). If left blank and Data Integrator needs this
FTP information for bulk loading, it generates a
validation error.
Must be defined to use FTP.
Must be defined to use FTP.
The location on the database server to where Data
Integrator transfers the data file.
Note: Configure the FTP server to accept an
absolute path
Table 2-16 Teradata
Teradata
option
Main window
Database
version
Data source Refer to the
User name Alphanumeric
88 Data Integrator Reference Guide
Possible values Description
Teradata 2.5 Select the version of your Teradata client. This is the
requirements of
your database
characters and
underscores
version of Teradata that this datastore accesses.
Type the Data Source Name defined in the ODBC
Administrator for connecting to your database.
Enter the user name of the account through which Data
Integrator accesses the database.
Page 89

Data Integrator Objects
Descriptions of objects
2
Teradata
option
Password Alphanumeric
General
Bulk loader
directory
Overflow file
directory
Locale
Language See Chapter 9: Locales and Multi-Byte Functionality.
Code page See Chapter 9: Locales and Multi-Byte Functionality.
Teradata
Log directory Directory path or
Tdpld Alphanumeric
Possible values Description
Enter the user’s password.
characters,
underscores,
and punctuation
Directory path or
click Browse
Directory path or
click Browse
click Browse
characters,
underscores,
and punctuation
Enter the location where command and data files are
written for bulk loading. For Solaris systems, the path
name must be less than 80 characters.
Enter the location of overflow files written by target tables
in this datastore.
The directory in which to write log files.
The password Data Integrator uses when loading with
the bulk loader option.
Application datastores
The information you must enter for a datastore depends on the type of
datastore to which you are connecting. Application datastore types include:
• JDE OneWorld
• JDE World
• Oracle Applications
• PeopleSoft
• R/3
• SAP BW Source
• SAP BW Target
• Siebel
After you create a datastore, you can import metadat a about the objects, such
as tables and functions, into that datastore. See Chapter 5, “Datastores,” in
the Data Integrator Designer Guide.
Data Integrator Reference Guide 89
Page 90

Data Integrator Objects
2
Descriptions of objects
JDE OneWorld
Datastore configuration options for this datastore type vary depending on
which database type you select.
The following table lists the options specific to JDE OneWorld (some might
not be available with every database).
Table 2-17 JD Edwards
JD Edwards
option
Environment Refer to the
System data
source
System data
source owner
Object librarian
data source
Local data
source
Data dictionary
data source
Possible values Description
requirements of
the application
Refer to the
requirements of
the application
Refer to the
requirements of
the application
Refer to the
requirements of
the application
Refer to the
requirements of
the application
Refer to the
requirements of
the application
Type the J.D. Edwards application environment name.
Type the name of the database where the tables
F986101, F98611, and F00941 are located.
This option is available for DB2 and Microsoft SQL
Server databases.
Type the owner ID for the system data source.
Type the name of the database where the tables F9860
and F9861 are located.
This option is available for DB2 and Microsoft SQL
Server databases.
Type the name of the dat abase where the table F0005 is
located.
This option is available for DB2 and Microsoft SQL
Server databases.
Type the name of the dat abase where the table F9203 is
located.
This option is available for DB2 and Microsoft SQL
Server databases.
The JDE OneWorld datastore type works with the following database types.
Refer to the specific option tables for each database.
• “DB2” on page 68
• “Microsoft SQL Server” on page 72
• “ODBC” on page 75
• “Oracle” on page 84
For more information, see “Datastores” on page 8 of the Data Integrator
Supplement for J.D. Edwards.
90 Data Integrator Reference Guide
Page 91

Data Integrator Objects
Descriptions of objects
JDE World
Datastore configuration options for this datastore type vary depending on
which database type you select; however, currently only the ODBC database
type is available.
For the options specific to JD Edwards, see “JD Edwards” on page 90.
For the options specific to ODBC, see “ODBC” on page 75.
For more information, see “Datastores” on page 8 of the Data Integrator
Supplement for J.D. Edwards.
Oracle Applications
The following table lists the options specific to Oracle Applications.
Table 2-18 Oracle Applications
2
Oracle
Applications
option
Process
flexfield names
Schema owner Refer to the
Possible values Description
Yes, No Determines whether Data Integrator should use
requirements for
your application
For the remaining options, see “Oracle” on page 84.
For more information, see “Datastores” on page 7 of the Data Integrator
Supplement for Oracle Applications.
PeopleSoft
Datastore configuration options for this datastore type vary depending on
which database type you select.
For the options specific to Microsoft SQL Server, see “Microsoft SQL Server”
on page 72.
For the options specific to Oracle, see “Oracle” on page 84.
For more information, see “Datastore” on page 35 of the Data Integrator
Supplement for PeopleSoft.
R/3
The following table lists the options for R/3.
descriptive names for flexfield columns based on the
flexfield information. If set to No, Data Integrator uses
database column names for all columns including those
that belong to flexfields.
Type the schema owner name for foundation tables (the
name is usually
apps).
Data Integrator Reference Guide 91
Page 92

Data Integrator Objects
2
Descriptions of objects
Table 2-19 R/3
R/3 option Possible values Description
Main window
R/3 application
server
User name Alphanumeric
Password Alphanumeric
Locale
R/3 language E - English
Code page See Chapter 9: Locales and Multi-Byte Functionality.
SAP
ABAP execution
option
R/3 client 000-999 The three-digit R/3 client number.
R/3 system
number
Computer name,
fully qualified
domain name, or
IP address
characters and
underscores
characters and
underscores, or
blank
G - German
F - French
J - Japanese
Generate and
Execute
Execute
Preloaded
00-99 The two-digit R/3 system number.
Name of the remote SAP R/3 application computer (host)
to which Data Integrator connects (if using as an R/3
datastore).
Enter the name of the account through which Data
Integrator accesses the SAP R/3 application server.
Enter the user’s password.
Select the login language from the drop-down list.
See Chapter 9: Locales and Multi-Byte Functionality.
Select the job execution strategy:
• Generate and Execute — ABAP resides on the Data
Integrator server and is submitted to R/3 using the SAP
R/3 RFC_ABAP_INSTALL_AND_RUN function.
• Execute Preloaded — ABAP resides on the SAP R/3
application server and is submitted to R/3 using Data
Integrator RFC function modules.
If the Data Integrator job changes between scheduled
executions, choose Generate and Execute. If the job
does not change, choose Execute Preloaded. Your
choice affects the required authorizations. See
“Authorizations for Data Integrator” on page 40 of the
Data Integrator Supplement for SAP.
Defaults to 800.
Defaults to 00.
92 Data Integrator Reference Guide
Page 93

Data Integrator Objects
Descriptions of objects
R/3 option Possible values Description
Execute in
background
(batch)
Target host Computer name,
Job class A, B, C Specify the job class if you choose to execute ABAP
Data transfer
method
Yes, No Specify that the generated ABAP programs created by
R/3 data flows defined with this datastore will execute in
batch mode on the SAP R/3 application server. Batch
mode operation is slower than the normal console mode;
however, choose batch mode if the application is too long
to run during the console mode time window.
Defaults to No.
Specify the target computer (host) if you choose to
fully qualified
domain name, or
IP address
Direct download
Shared directory
FTP
Custom transfer
execute ABAP programs in background.
programs in background.
Define how to get data from the SAP R/3 server to the
Data Integrator server:
• Direct download — Use SAP R/3 WS_DOWNLOAD
function
• Shared directory — Use NFS (shares one network
drive or directory)
• FTP — Use FTP
• Custom transfer — Use a third-party program
These methods are described in Chapter 8, “Executing
Batch Jobs that Contain R/3 Data Flows,” in the Data
Integrator Supplement for SAP.
When you select a data transfer method, the appropriate
options for that method appear below the option.
Working
directory on
SAP server
Data Integrator
path to the
shared directory
Local directory Directory path or
Generated
ABAP directory
Directory path or
click Browse
Directory path or
click Browse
click Browse
Directory path or
click Browse
Indicate where ABAP intermediate file, R/3 source, and
R/3 target are written. All the files used by the R/3 data
flow should be placed in this directory . This directory also
stores the transport file used by the FTP, shared-
directory, and custom transfer data transfer methods.
If you selected the Shared directory data transfer
method, Indicate the path from the Data Integrator server
to the SAP R/3 server’s working directory.
If you selected the Direct download or FTP data transfer
method, select a client-side directory to which data from
the R/3 server downloads.
Indicate the directory into which generated ABAP files
are written. Can be the same directory as the local/direct
download directory.
2
Data Integrator Reference Guide 93
Page 94

Data Integrator Objects
2
Descriptions of objects
R/3 option Possible values Description
R/3 security
profile
Number of
connection
retries
Interval
between retries
(sec)
Custom
transfer
Custom transfer
local directory
Custom transfer
program
Custom transfer
user name
Custom transfer
password
Custom transfer
arguments
FTP These options are visible if you selected the FTP data transfer method.
FTP relative
path to the SAP
working
directory
FTP host name Computer (host)
Refer to the
requirements of
the application
Positive integer The number of times Data Integrator tries to establish a
Positive integer The time delay in seconds between connection retries.
These options are visible if you selected the Custom transfer data transfer
method.
Directory path The client-side directory to which data from the R/3
Refer to the
requirements of
the application
Refer to the
requirements of
the application
Refer to the
requirements of
the application
Refer to the
requirements of
the application
Directory path or
click Browse
name, fully
qualified domain
name, or IP
address
Specify the security profile you want to use in the
generated ABAP program. The user of the Data
Integrator R/3 datastore must have the required profile.
connection with the R/3 application server.
Defaults to 3.
Defaults to 10.
server downloads.
The name of the third-party file transfer program you
want to use to transfer files from the SAP working
directory to the local directory.
(optional) Login ID for the SAP R/3 server to which the
custom transfer program connects.
(optional) Password for the SAP R/3 server to which the
custom transfer program connects. Passwords entered
into this option are encrypted by Data Integrator.
(optional) Specify arguments for your custom transfer
program. Arguments can add security or compression
mechanisms to your program or include Data Integrator
system variables. See “Data Integrator system variables
for transferring a file from SAP R/3” on page 172 for more
information.
Indicate the path from the FTP root directory to the SAP
R/3 server’s working directory. When you select FTP, this
directory is required.
Must be defined to use FTP.
94 Data Integrator Reference Guide
Page 95

R/3 option Possible values Description
FTP user name Alphanumeric
characters and
underscores
FTP password Alphanumeric
characters and
underscores, or
blank
For more information, see “Datastore” on page 204 of the Data Integrator
Supplement for SAP.
SAP BW Source
The SAP BW Source datastore type has he same options as the R/3
datastore type. See “R/3” on page 92.
For more information, see “Datastore” on page 204 of the Data Integrator
Supplement for SAP.
SAP BW Target
The following table lists the options for SAP BW Target.
Table 2-20 SAP BW Target
Must be defined to use FTP.
Enter the FTP password.
Data Integrator Objects
Descriptions of objects
2
SAP BW
Target option
Main window
R/3 application
server
User name Alphanumeric
Password Alphanumeric
Possible values Description
Computer name,
fully qualified
domain name, or
IP address
characters and
underscores
characters and
underscores, or
blank
Type the name of the remote SAP R/3 application
computer (host) to which Data Integrator connects (if
using as an R/3 datastore).
Enter the user name of the account through which Data
Integrator accesses the database.
Enter the user’s password.
Data Integrator Reference Guide 95
Page 96

Data Integrator Objects
2
Descriptions of objects
SAP BW
Target option
Locale
R/3 language E - English
Code page See Chapter 9: Locales and Multi-Byte Functionality.
SAP
R/3 client 000-999 The three-digit R/3 client number.
R/3 system
number
Routing string Refer to the
Possible values Description
Select the login language from the drop-down list.
G - German
F - French
J - Japanese
00-99 The two-digit R/3 system number.
requirements of
the application
Siebel
The Siebel datastore type works with the following database types:
See Chapter 9: Locales and Multi-Byte Functionality.
Defaults to 800.
Defaults to 00.
The SAP routing string.
• “DB2” on page 68
• “Microsoft SQL Server” on page 72
• “Oracle” on page 84
For more information, see “Datastores” on page 9 of the Data Integrator
Supplement for Siebel.
96 Data Integrator Reference Guide
Page 97

Data Integrator Objects
Descriptions of objects
Document
Class
Reusable
Access
In the object library, click the Datastores tab.
Description
Available in some adapter datastores, documents describe a data schema.
Documents can support complicated nested schemas. You can use
documents as sources or targets.
See your adapter’s documentation for more specific information about the
options available for documents.
2
Data Integrator Reference Guide 97
Page 98

Data Integrator Objects
2
Descriptions of objects
DTD
Class
Reusable
Access
In the object library, click the Formats tab, then open the DTD category.
Description
A DTD (document type definition) describes the data schema of an XML
message or file.
Note: XML Schemas can be used for the same purpose. See “XML Schema”
on page 192.
Data flows can read and write data to messages or files based on a specified
DTD format.You can use the same DTD to describe multiple XML sources or
targets.
To use DTDs, import metadata into Data Integrator. You can import a DTD
directly, or you can import an XML document that contains or references a
DTD. During import, Data Integrator converts the structure defined in the DTD
into the Data Integrator nested-relational data model (NRDM). See “Rules for
importing DTDs” on page 104.
Editor
Open the DTD editor by double-clicking a DTD name in the object library.
98 Data Integrator Reference Guide
Page 99

Document Type Definition
<?xml encoding="UTF-8"?>
<!ELEMENT Order (OrderNo, CustID, ShipTo1, ShipTo2, LineItems+)>
<!ELEMENT OrderNo (#PCDATA)>
<!ELEMENT CustID (#PCDATA)>
<!ELEMENT ShipTo1 (#PCDATA)>
<!ELEMENT ShipTo2 (#PCDATA)>
<!ELEMENT LineItems (Item, ItemQty, ItemPrice)>
<!ELEMENT Item (#PCDATA)>
<!ELEMENT ItemQty (#PCDATA)>
<!ELEMENT ItemPrice (#PCDATA)>
DTD opened from the object library
Object name
Columns at the top level
Nested table
Columns nested one level
Data Integrator Objects
Descriptions of objects
2
Full path to DTD
format file
Root element in DTD
format file
For import procedures, see “Using Document Type Definitions (DTDs)” on
page 221 of the Data Integrator Designer Guide.
Properties
DTDs have the following properties.
Property Description
Name The name of the format. This name appears in the
object library under the Formats tab and is used for
sources and targets (XML files or messages) that
reference this format in data flows.
Description Text that you enter to describe and document the DTD.
Data Integrator Reference Guide 99
Page 100

Data Integrator Objects
2
Descriptions of objects
Property Description
Imported from The full path to the format. For example,
C:\data\test.dtd
DTD file (Read-only) If the check box is selected, the DTD format
was originally imported from a DTD file. Otherwise, it
with an associated DTD.
Root element
name
was imported from an XML file
The name of the primary node of the XML that the DTD
is defining. Data Integrator only imports elements of the
format that belong to this node or any sub nodes.
Attributes
Data Integrator supports the following column attributes for DTDs.
Table 2-21 Column attributes supported for DTDs
Attribute Description
Enumeration Contains a list of all possible values separated by
vertical bars. For example: “Red | White | Blue Green |
Magenta”. A string display is cut off at 256 characters.
Fixed Value The only value the column can have.
Native Type String. The original data type of the of the element or
attribute in the DTD.
Required Indicates whether this column always has to be mapped
(YES/NO).
If a column is optional (required =no), then validation
will allow mapping expressions to be missing for these
columns and at runtime the engine will substitute
NULLs for the missing values.
XML Type Allows you to track whether the column was an element
or attributes in the original DTD.
100 Data Integrator Reference Guide
 Loading...