

Page 1
Dual Camera
VPC-CG100EX
VPC-CG100GX
VPC-CG100PX
VPC-CG100TA
VPC-CG102
QUICK GUIDE
1AG6P1P5623-- SG413EX, U, GX, PX, TA (0110AB-SD)
STEP 2
CAPTURE A STILL IMAGE
Printed in Vietnam
STEP 1
RECORD A VIDEO CLIP
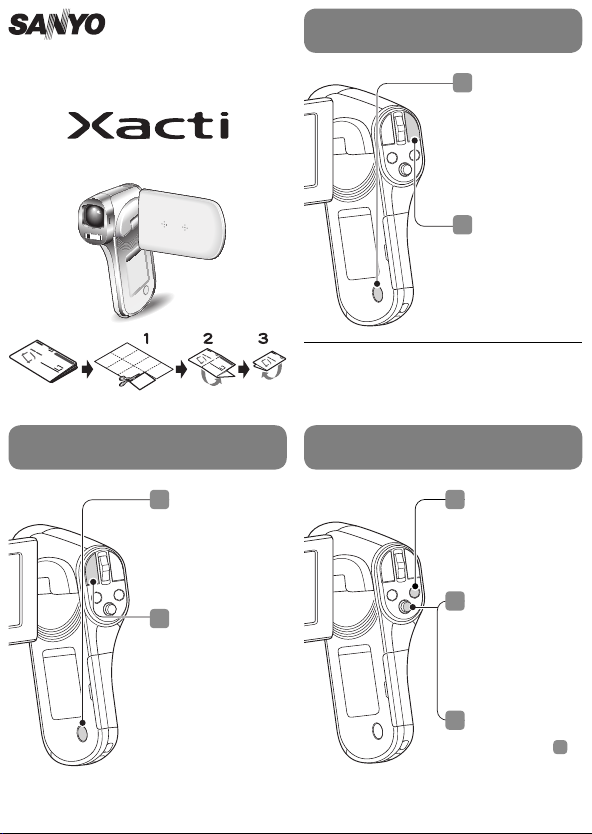
Turn on the camera.
1
Press the ON/OFF
button for at least
1 second.
If the screen to set
the date and time
appears, press the
MENU button 2
times to cancel it.
Press the [R]
2
button to begin
recording a video
clip.
To stop recording,
press the [R]
button again.
If the image is not captured...
Is there enough power left in the battery? Recharge
the battery pack.
(See “Insert the battery pack” on the reverse side.)
STEP 3
VIEWING IMAGES
1
Turn on the camera.
Press the [O]
2
button.
You can capture a still
image while recording
a video clip.
During video clip
recording, press the
[O] button to capture
a still image of the
scene at that instant.
Press the REC/PLAY
1
button.
The last recorded
image is displayed.
2
Select the image to
play back.
Toggle the SET button
left, right, up or down
to move the orange
frame to the fi le you
wish to play back.
3
Press the SET button.
The image you
selected in step
displayed fullscreen.
If a video clip was
selected, playback
begins.
2
is
Page 2
STEP 4
DELETING IMAGES
COPYING FILES TO A COMPUTER
(WINDOWS XP)
Display the fi le that
1
you want to delete.
2
Toggle the SET
button up.
The Confi rm
Delete Screen
appears.
Select “DELETE”,
3
and press the SET
button.
The current image
is deleted.
To return to the
Playback Screen,
select “EXIT”, and
press the SET
button.
Did your photos turn out the way you hoped?
Even if you make a mistake, it’s easy to delete the pictures you aren’t
satisfi ed with. Unlike fi lm cameras, with a dual camera you can take
all the photos you want, keep the ones you like and delete the rest.
Start your computer, and use the supplied USB
1
interface cable to connect your camera to the
computer.
Connect the camera’s USB/AV terminal to the
computer’s USB connector.
The USB Connection Screen appears on the
camera’s monitor.
Select “COMPUTER”, and press the SET button.
2
The screen to select the connection mode
appears.
Select “CARD READER”, and press the SET
3
button.
Select an action.
4
Select the desired procedure.
Copy the desired camera fi le(s) to the computer.
5
CAUTION
To access the data in the camera’s internal memory...
Remove the card from the camera.
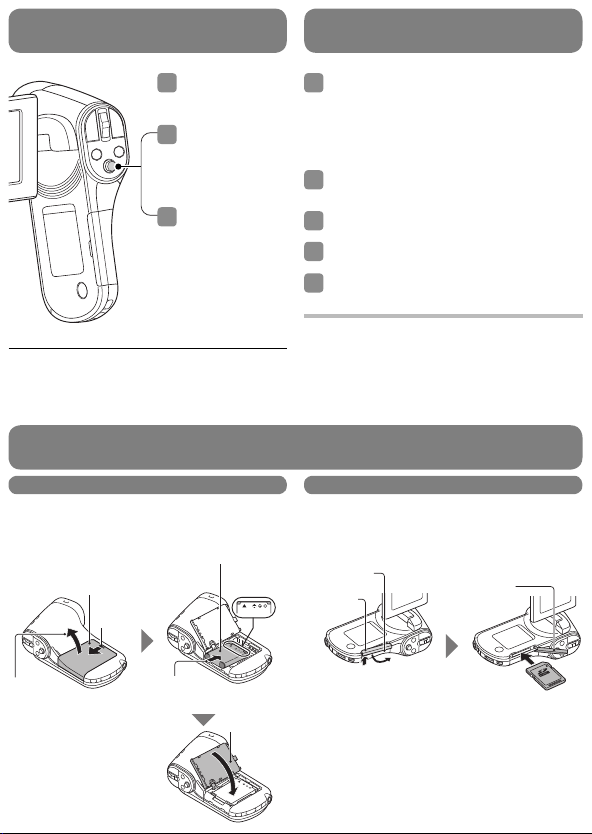
INSTALL THE BATTERY PACK AND CARD
Insert the battery pack Insert the card
Please charge the supplied battery pack before
using it.
Battery pack
Connector
Battery cover
1Push out
markings
A card is not included with your camera. Please
purchase a commercially sold card.
Card slot cover
1Raise up
4Close
2Open
3Insert by matching
the connector markings
4Close
2Swivel
3Insert the card
 Loading...