

Page 1
INSTRUCTION MANUAL
Manual de Instrucciones
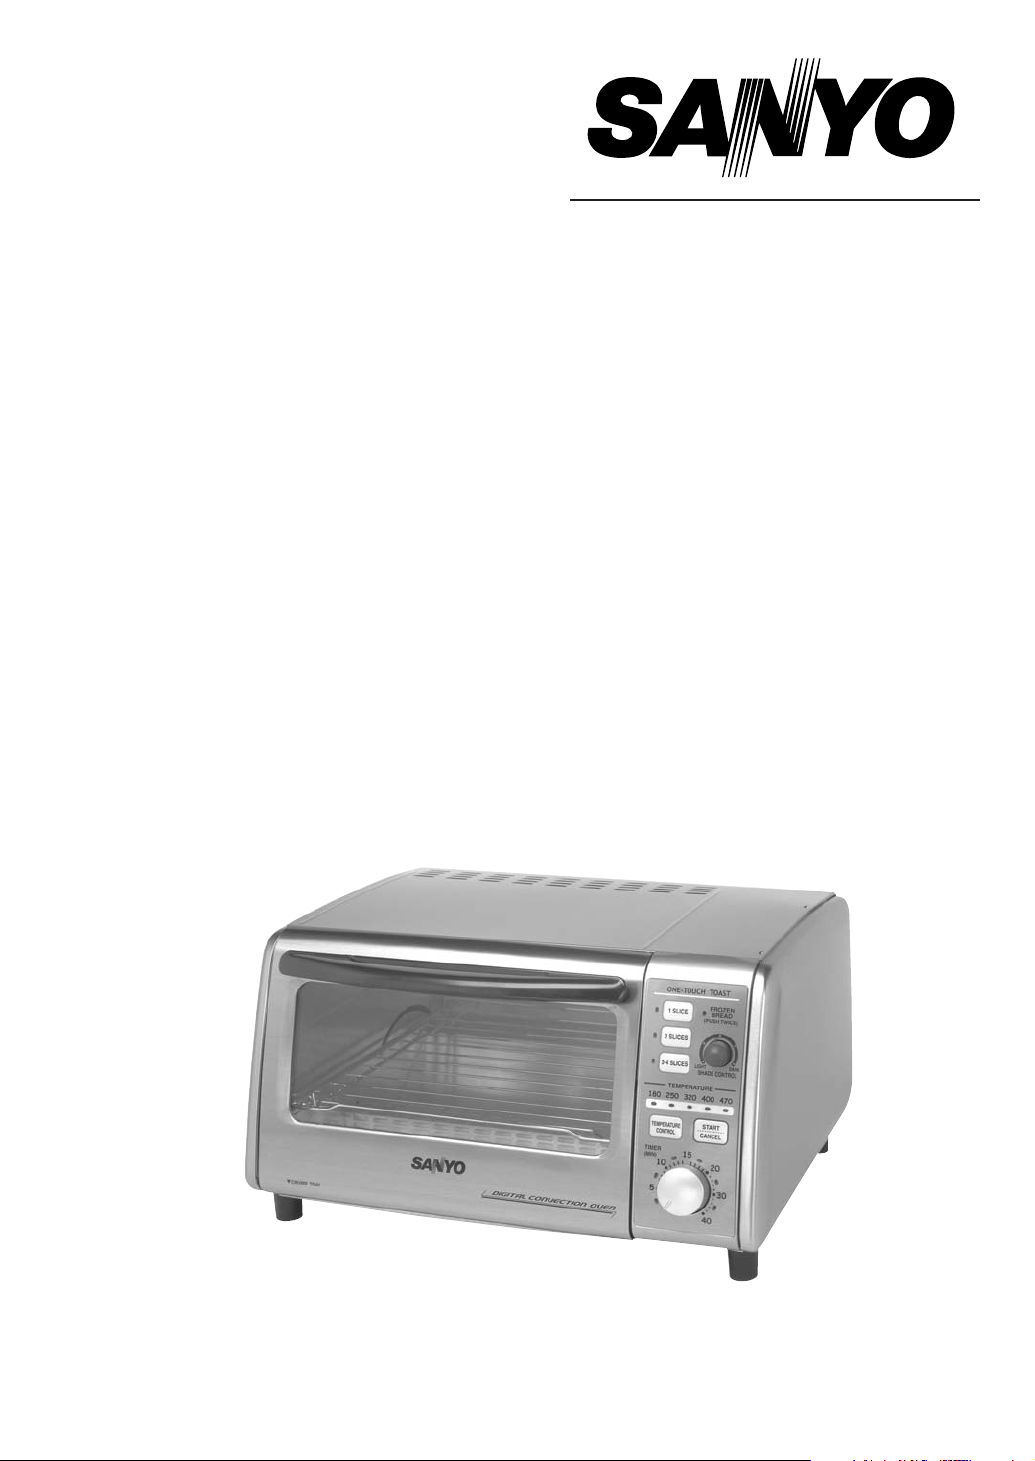
DIGITAL CONVECTION TOASTER OVEN
HORNO TOSTADOR DE CONVECCIÓN DIGITAL
SK-VF7S
Page 2

Thank you for your purchase of a SANYO DIGITAL CONVECTION TOASTER OVEN. Please read
these instructions carefully before use and be sure to keep the manual in a safe place for
future reference.
Table of Contents
■ Important Safeguards ...................................................................................................3
■ Precautions ..............................................................................................................4-5
■ Names and Function of Parts.........................................................................................6
■ Heater and Convection Fan ...........................................................................................7
■ How to Use.............................................................................................................8-11
Toasting with One-Touch Toast Buttons ....................................................................8-9
Cooking with Timer ..................................................................................................10
Tips for Convection Cooking......................................................................................11
■ Specifications ............................................................................................................11
■ Cooking Time Guidelines .............................................................................................12
■ Cleaning and Maintenance/Troubleshooting..................................................................13
■ Recipes................................................................................................................14-16
■ Warranty ...................................................................................................................17
■ Spanish................................................................................................................18-31
WARNING: Handling the cord on this product or cords associated with accessories sold
with this product, will expose you to lead, a chemical known to the State of California to
cause cancer, and birth defects or other reproductive harm.
2
Wash hands after handling.
Page 3

IMPORTANT SAFEGUARDS
When using electrical appliances, follow basic safety precautions to reduce the risk of
fire, electrical shock, and/or injury:
1. Read all instructions.
2. Do not touch hot surfaces. Use handles or
knobs.
3. To protect against fire, electrical shock, and
personal injury, do not immerse cord, plugs,
or appliance in water or other liquid.
4. Close supervision is necessary when any
appliance is used by or near children.
5. Unplug unit from outlet when not in use and
before cleaning. Allow to cool before
attaching or removing parts, and before
cleaning the appliance.
6. Do not operate any appliance with a damaged
cord or plug after the appliance malfunctions
or has been damaged in any manner. Return
appliance to an authorized service facility for
examination, repair or adjustment.
7. To protect against risk of electrical shock, do
not force any foreign objects, such as pins
and wires, into any openings.
8. The use of accessory attachments not
recommended by the appliance manufacturer
may result in fire, electric shock or personal
injury.
9. Do not use outdoors.
10. Do not let cord hang over edge of table or
counter, or touch hot surfaces.
11. Do not place the appliance on or near a hot
gas or electric burner, or in a heated oven.
12. To disconnect, turn all controls to its “Off”
position then remove the plug from wall outlet.
13. Use extreme caution when removing the
oven tray, the oven rack or disposing of hot
grease and oils.
14. Do not clean with metal scouring pads.
Pieces can break off the pad and touch electrical
parts, creating a risk of electric shock.
15. To assure safe operation, oversize foods,
metal foil packages, or utensils must not be
inserted into the appliance.
16. A fire may occur if the appliance is covered,
or touching flammable materials, including
curtains, draperies, walls, etc. when in
operation. Do not store any item on top of
the appliance when in operation.
17. CAUTION: Never leave the appliance
unattended when it is in use.
18. Before using this appliance, move it four to
six inches away from the wall or any object
on the counter top. Remove any object that
may have been placed on top of the appliance.
Do not use on surfaces where heat may
cause a problem.
19. Extreme caution should be exercised when
using containers constructed of other than
metal or glass.
20. Always turn unit off before opening the oven
door.
21. Do not store any materials, other than
manufacturer’s recommended accessories,
in the oven when not in use.
22. Do not place any of the following materials
in the oven: paper, cardboard, plastic, etc.
23. Do not use appliance for other than intended
use. This product is designed for household
use only.
SAVE THESE INSTRUCTIONS
Note:
A. A short power-supply cord is provided to reduce risks of becoming entangled in or tripping
over a longer cord.
B. Extension cords are available and may be used if care is exercised in their use.
C. If extension cord is used:
(1) The marked electrical rating of the extension cord should be at least as great as the
electrical rating of the appliance.
(2) The longer cord should be arranged so that it will not drape over the countertop or tabletop
where it can be pulled on by children or tripped over.
The appliance has a polarized plug (one blade is wider than the other is). As a safety feature, this plug
will fit in a polarized outlet only one way. If the plug does not fit fully in the outlet, reverse the plug. If it
still does not fit, contact a qualified electrician. Do not attempt to over
3
ride this safety featur
e.
Page 4
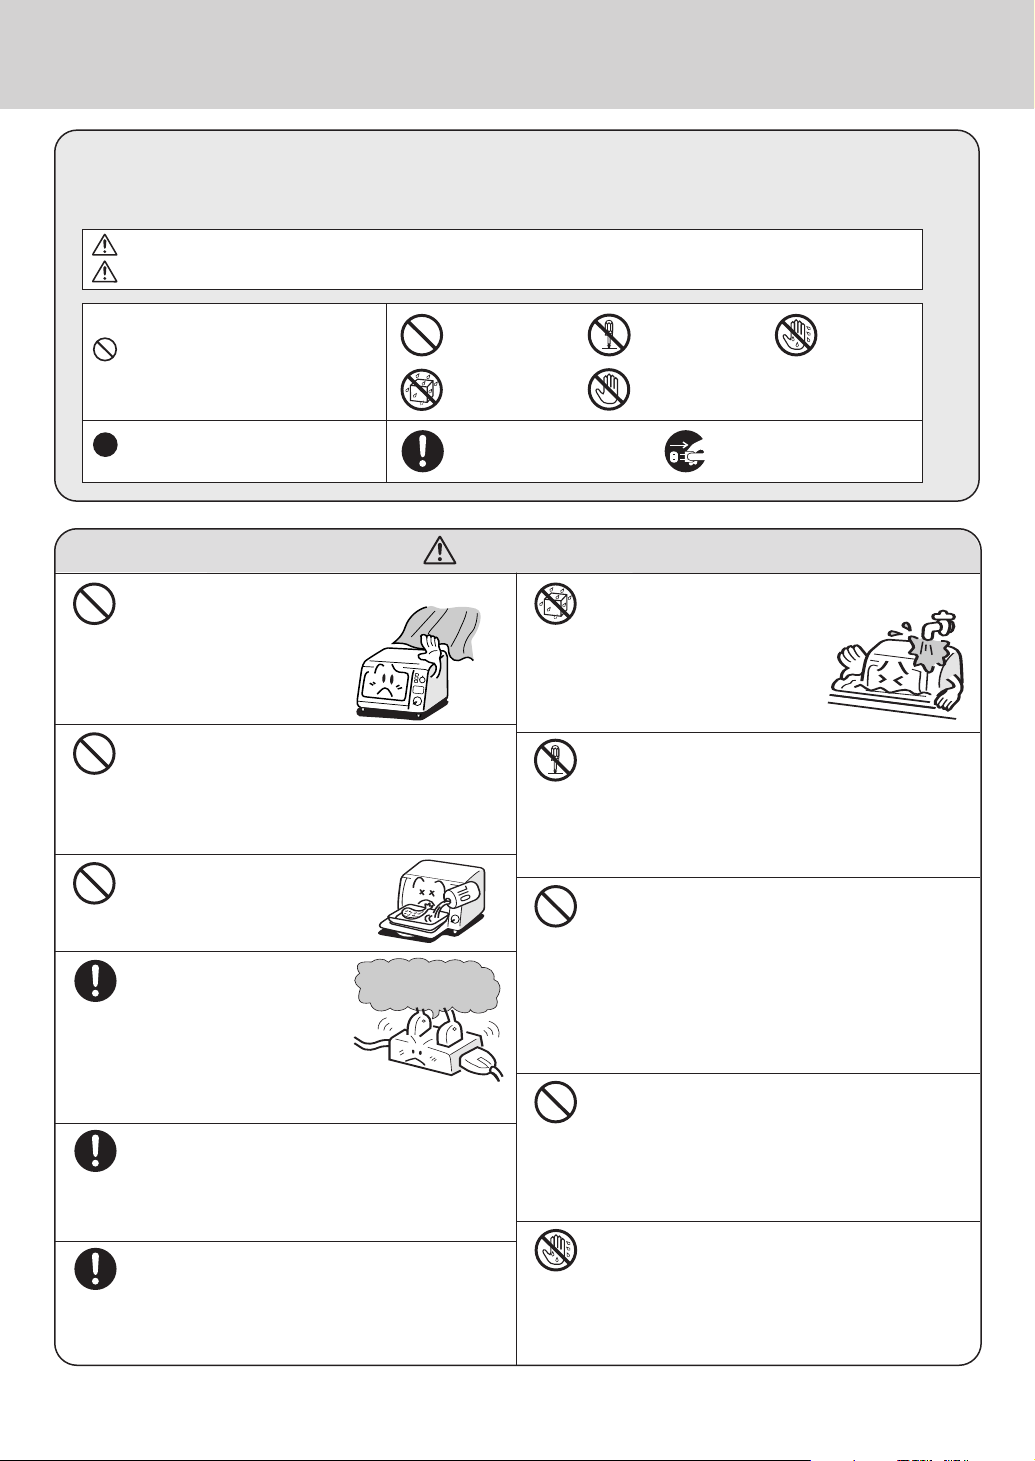
PRECAUTIONS
The important precautions described within this section must be followed carefully to
prevent the possibility of personal injuries and/or property damage. The significance of the
following cautionary symbols is explained below:
WARNING: Circumstances that may result in serious injury or death.
CAUTION: Circumstances that may result in personal injury or property damage.
Generally
Indicates prohibited
prohibited.
actions (Don’t do this).
Do not allow.
Indicates actions that must
be performed (Do this).
This action must be
performed.
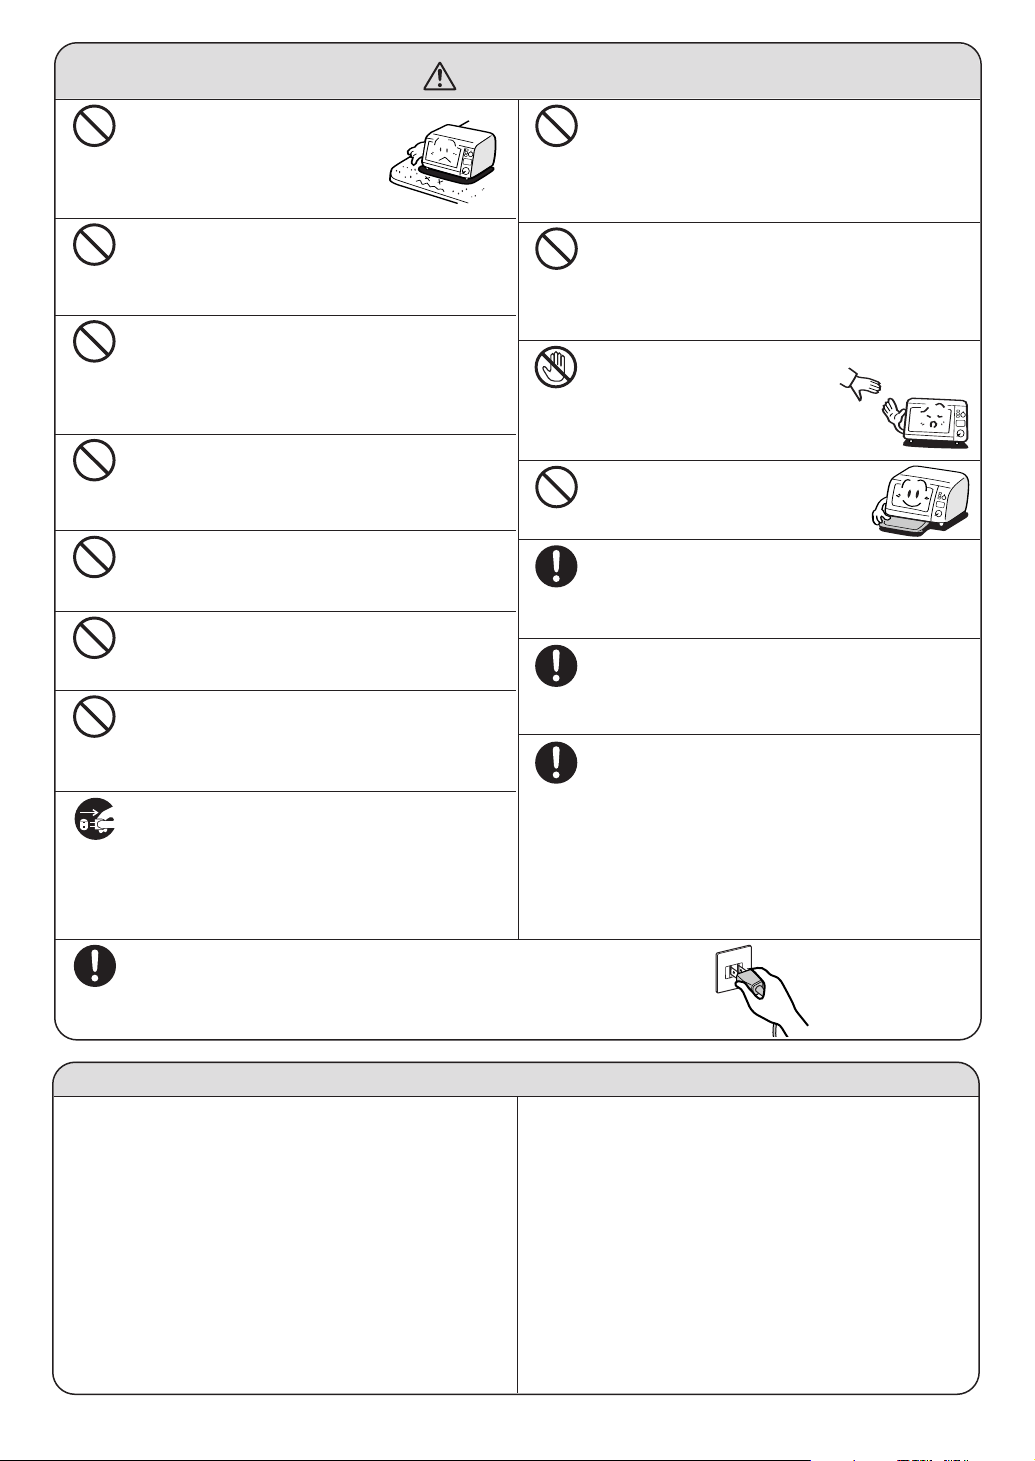
WARNING
Do not operate the appliance near any
flammable materials, such
as walls, furniture,
curtains, draperies, etc.
Doing so may cause a fire.
Do not allow children to use this
appliance without adult super
not operate the appliance within the
reach of an infant.
This may lead to electric shock, burns or other injuries.
Do not put oil on the oven
tray.
This may cause a fire.
Plug the appliance into
a single electrical
outlet only.
Use only an electrical outlet rated
at 15 amperes or more. If electrical
outlets ar
circuit may become hot, potentially causing a fire.
e shared with other appliances, the
Always keep the power supply plug clean.
If the power supply plug blades or plug
surfaces become dirty, be sure that they are cleaned
thoroughly. A dirty power supply plug can potentially
cause a fire.
Make sure that the power supply plug is
firmly inserted all the way into the electrical
outlet.
A fire, electric shock or short circuit may result if the
plug is not fully inserted into the outlet.
vision. Do
Do not share outlet
with other appliances.
Do not
disassemble.
Do not
touch
with wet
Do not touch.
hands.
Disconnect the
power supply plug.
Do not immerse the appliance in water
and do not pour water onto it.
This action may cause a short
circuit or electric shock.
Do not attempt to modify the appliance.
Improper repair may cause fire, electric shock and
injury. All repairs must be performed by qualified
technicians. If repair is necessary, take it to an
authorized repair center.
Do not handle the power supply cord in a
rough manner.
Do not cause damage to the power supply cord by
bending, pulling, twisting, or placing the cord near
hot appliances. Also, do not place heavy objects on
the cord. These actions may result in damage to the
power supply cord, possibly leading to electric
shock and fire.
Do not operate the appliance if the
power supply cor
d or plug has been
damaged.
A loose or damaged plug may r
shock, short circuit or fire.
esult in electric
Do not attempt to plug in or unplug with
wet hands.
cuit or electric
This action may cause a shor
shock.
t cir
4
Page 5
CAUTIONS
Do not operate the appliance on
an unstable surface or on any
surface that is not resistant
to heat.
This operation may cause fire.
Do not place the appliance near walls or
furniture.
Doing so may cause damage, possibly resulting in
discoloration or disfiguration of the wall or furniture.
Do not attempt to heat up oven more than
necessary.
• Overheating may cause the oven to catch fire.
• Set the timer at the shorter time. Adjust cooking time
properly observing the food.
Do not place any object on the unit or
under the unit.
This action may cause disfiguration of the unit or can
potentially cause a fire.
Do not use the unit for anything other
than cooking.
This action may cause fire or burn injuries.
Do not toast bread topped with butter or
jam.
The bread may catch fire.
Do not heat up canned or bottled food
directly.
This action may cause food to explore resulting in
fire or burn injuries.
Unplug the power supply plug from the
outlet when the appliance is not being
used.
Any existing electrical insulation problems may
cause electric shock or sparking, leading to burns or
other injuries.
Do not cook meat, fish or oily food
without the oven tray and the oven rack
in place.
Oil from meat or fish may drip onto the heating element
and may cause a fire.
Do not leave the appliance unattended
while broiling and toasting.
Overheating may cause the food to burn and to catch
fire. Watch the food carefully from time to time to
prevent over cooking.
Do not touch the metal parts or the glass
window during or
immediately after operation.
This action may cause burn injuries as they
get extremely hot during cooking.
Do not operate the appliance
without the crumb tray in place.
This action may cause a fire.
Allow the appliance to cool off prior to
cleaning.
Performing maintenance while the appliance is still
hot, may lead to burn injuries.
Always clean the appliance after each use.
The accumulation of the food or grease inside the oven
may cause smoking or can potentially cause a fire.
If the food begins to smoke or catches
fire, press CANCEL button and unplug the
power supply cord.
• Not doing so may cause a fire.
• Do not open the door until the smoking stops or no
flame can be seen. If the door is opened, the flame
may get bigger as the air comes inside the oven.
• Do not splash water on the oven. Doing so may
cause the window to crack.
Grasp only the plug when unplugging the power supply cord.
Do not pull the power supply cor
Doing so may cause electric shock or short circuit, potentially causing a fire.
d itself when unplugging the electrical plug.
PRECAUTIONS
• Do not operate the appliance without putting
any food inside.
This action may cause a malfunction.
• Do not place food on the door when opened.
The unit may tilt causing the food to spill over.
• Do not place containers made of
non-heat-resistance materials (plastic or
cardboard) inside the oven.
These may catch fir
e.
• Do not place foil on the crumb tray.
This action may cause a malfunction.
• Do not place oven tray or heated container on
the oven while operation.
This action may cause the top of the oven or containers
to become deformed or discolored.
Do not use oven tray when toasting with
•
Touch Toast function or without food on it.
This action may cause the oven tray to become
discolored or emit smoke.
• Do not use oven tray with other appliance or
gas cooker
This action may cause the oven tray to become
defor
5
.
med or discolor
One-
ed.
Page 6
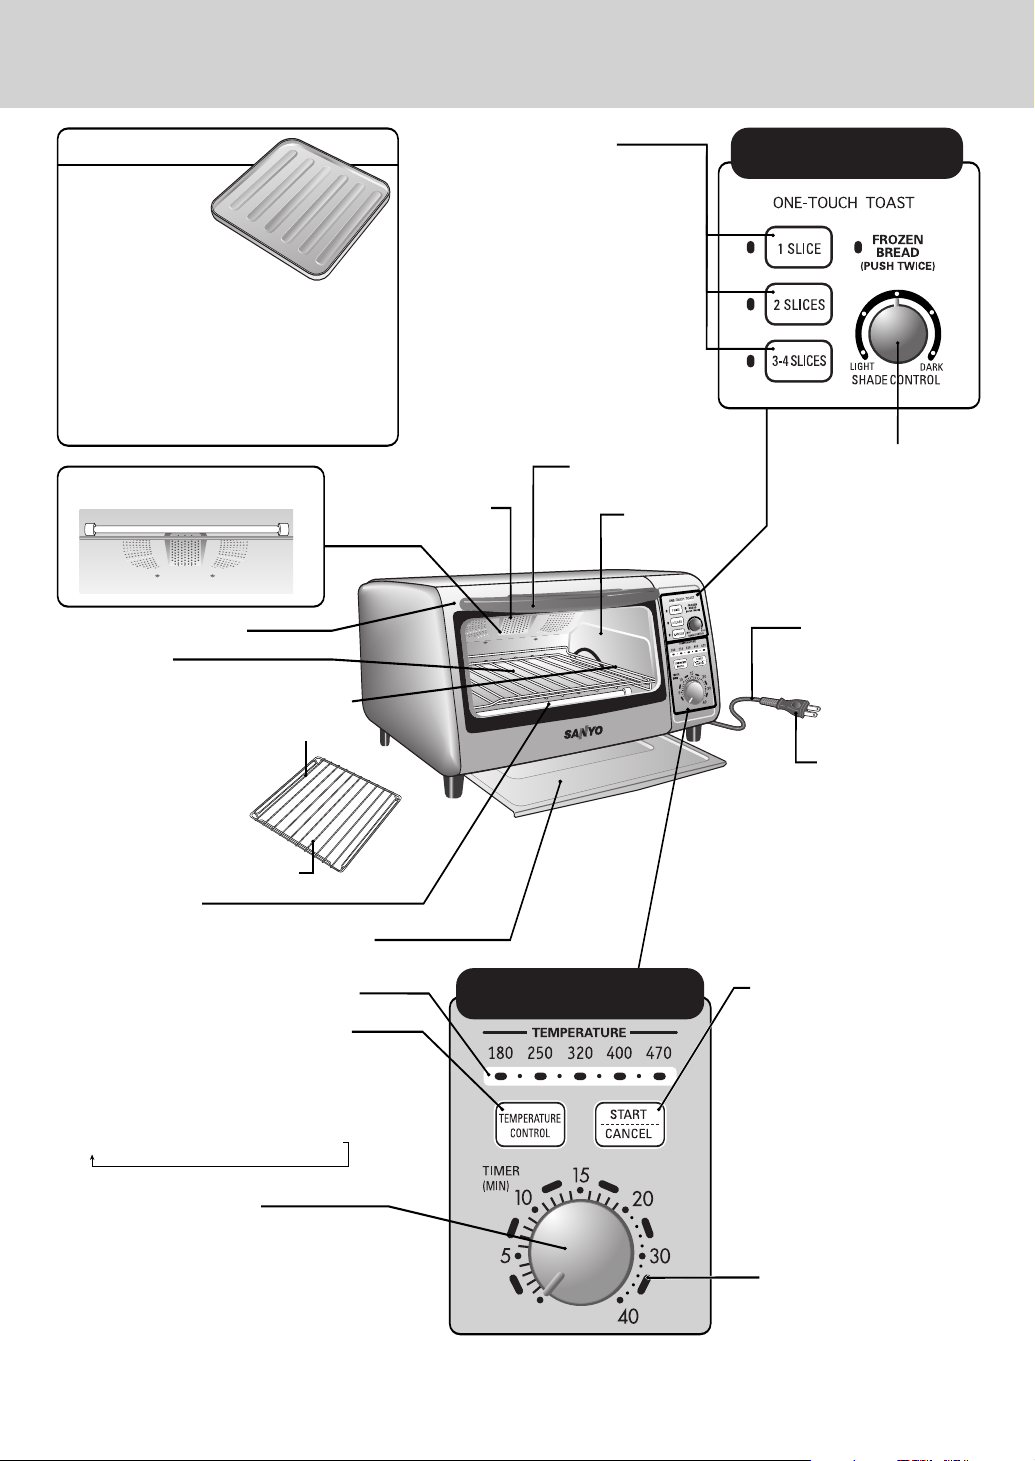
NAMES AND FUNCTION OF PARTS
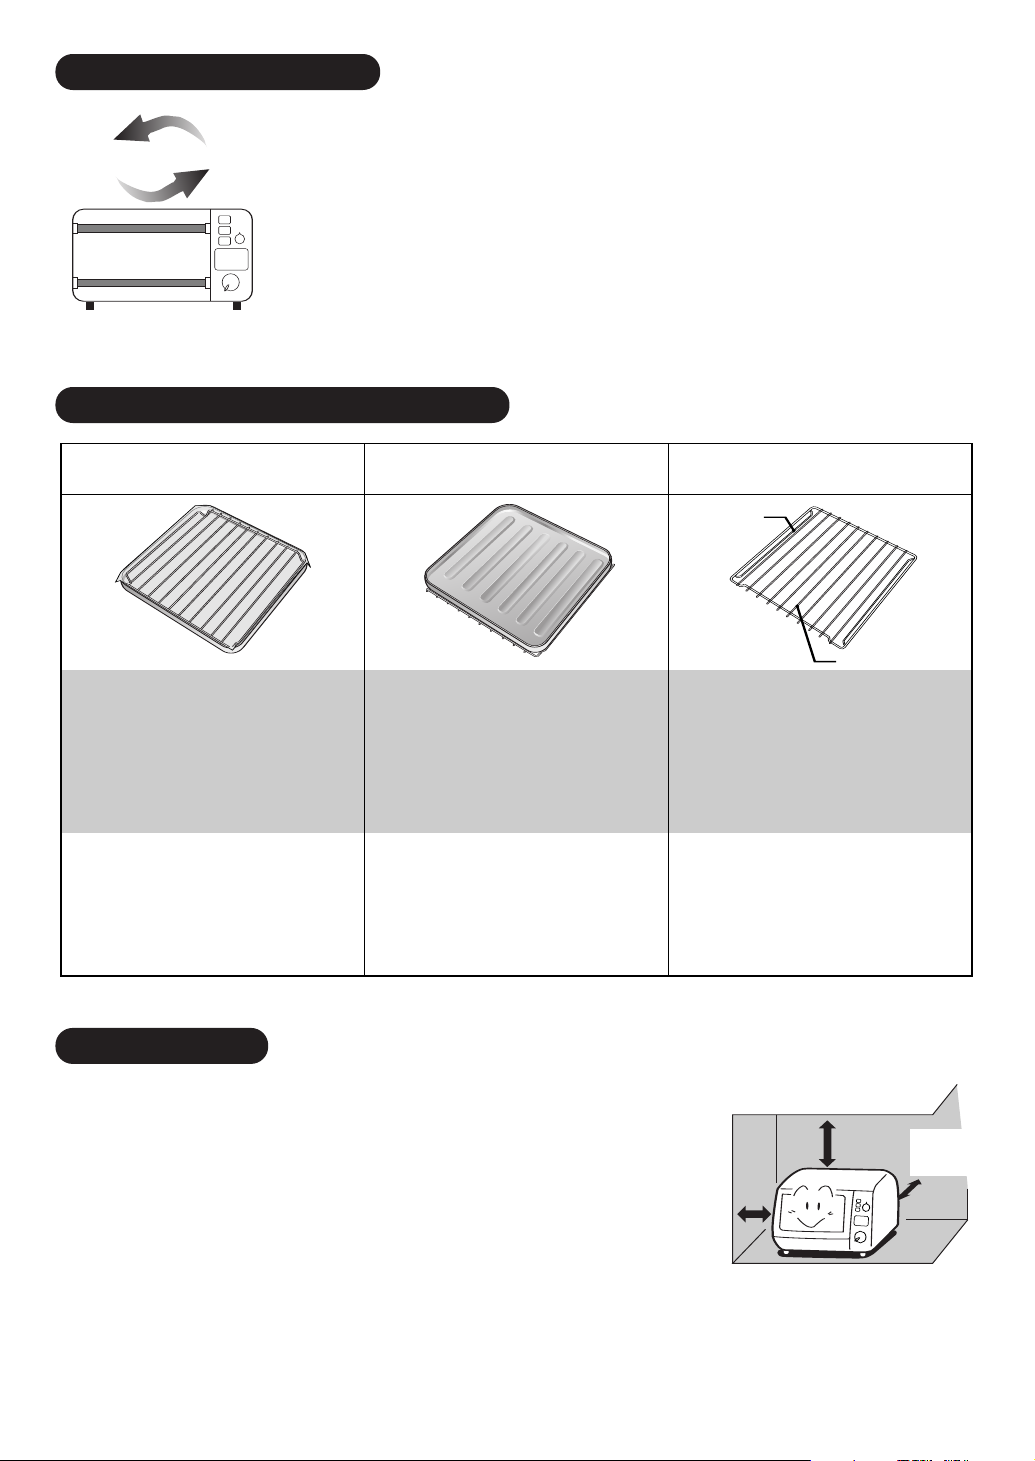
Accessory
1 Oven Tray
• Use Oven Tray whenever cooking pizza,
small foods or foods that are oily.
• Do not use Oven Tray when toasting
with One-Touch Toast function or
without food on it.
• Do not use Oven Tray with other
appliances or gas cooker.
Convection Fan Exhaust
Upper Heater
Door
Oven Rack
Place the Oven Rack
firmly onto Oven Rack
Guide with the four
bent corners facing
down. Do not reverse
the side or place the
Oven Rack with rack
running sideways.
Oven Rack
Guide
One-Touch Toast
Button
• Toasting begins when
a button is pressed
according to the number
of bread slices.
• Press the button twice for
frozen slices.
• Press Start/Cancel button
to cancel. You may also
press the button twice for
regular bread. Press the
button once for frozen
bread.
Door Handle
Glass
Window
One-Touch Toast
Control Panel
Shade Control Dial
To adjust the
color of browning
Power Supply
Cord
Power Supply
Plug
Oven Rack
Lower Heater
Crumb Tray (Slide out type)
Temperatur
Temperatur
ess button to select desir
Pr
temperature. Each time Temperature
ol button is pr
Contr
emperatur
T
➔250➔320➔400➔470➔180
180
e Indicator Lamp
e Control Button
ed cooking
essed, the
e Indicator lamp changes fr
om
Timer Control Dial
Turn dial to desired cooking time and press
Start/Cancel button. The T
will light and the timer will star
Indicator lamp will change as cooking
progresses and to show the r
time.
Note: The Timer Control Dial does not change
position. It stays at the initial setting position.
ime Indicator lamp
t. The T
emaining cooking
ime
Temperature Control and
Timer Operation Panel
6
Start/Cancel Button
• Press Start/Cancel button
after temperature and
cooking time ar
Heating will begin
immediately.
•
Press the Start/Cancel
button once more to cancel
heating.
•
This button can also be
used to cancel
One-Touch Toast function.
e selected.
Time Indicator Lamp
Page 7
Heater and Convection Fan
ot Air Movement
H
Heaters turn
on and off.
• A rotating sound will be heard during operation. This is not a
malfunction.
• The Upper and Lower Heaters turn on and off while the
Convection fan circulates hot air throughout the oven cavity.
This allows food to cook more quickly and evenly.
Oven Rack and Oven Tray Combination
Oven Rack + Oven Tray
(for healthier cooking)
• Place aluminum foil on Oven Tray
and place Oven Rack on the foil.
• Place the foods on the Oven Rack.
• Foods that are warmed up on
Oven Rack become crispier and
healthier because excess fat will
drain onto foil.
Example:
• Warm up breaded or deep fried food.
• Frozen breaded or deep fried food.
• Place the Oven Tray on Oven Rack
Guide or Oven Rack.
Example:
• Gratin/Casserole
• Cookies
• Frozen Pizza
• Rice Cake(mochi)
Oven Tray Oven Rack
Oven Rack
Guide
Oven Rack
• Place the Oven Rack firmly onto
Oven Rack Guide with the four
bent corners facing down. Do not
reverse the side or place the Oven
Rack with rack running sideways.
Example:
• Toast
• Sponge Cake
• Warm up Butter Rolls
Location to use
The front and one side of the unit should be free from any obstacles.
•
e to prevent heat damage.
• Place the unit away fr
Use even more space between the unit and any object made of material
susceptible to heat.
Not doing so may cause damage, possibly resulting in discoloration or
disfiguration of the wall or furniture.
• Do not place the unit higher than your shoulder.
Doing so may cause a bur
of oven.
om any wall or fur
y when you attempt to take foods out
n injur
nitur
7
Side 4”
or more
op 4” or mor
T
e
Back 4”
or mor
e
Page 8

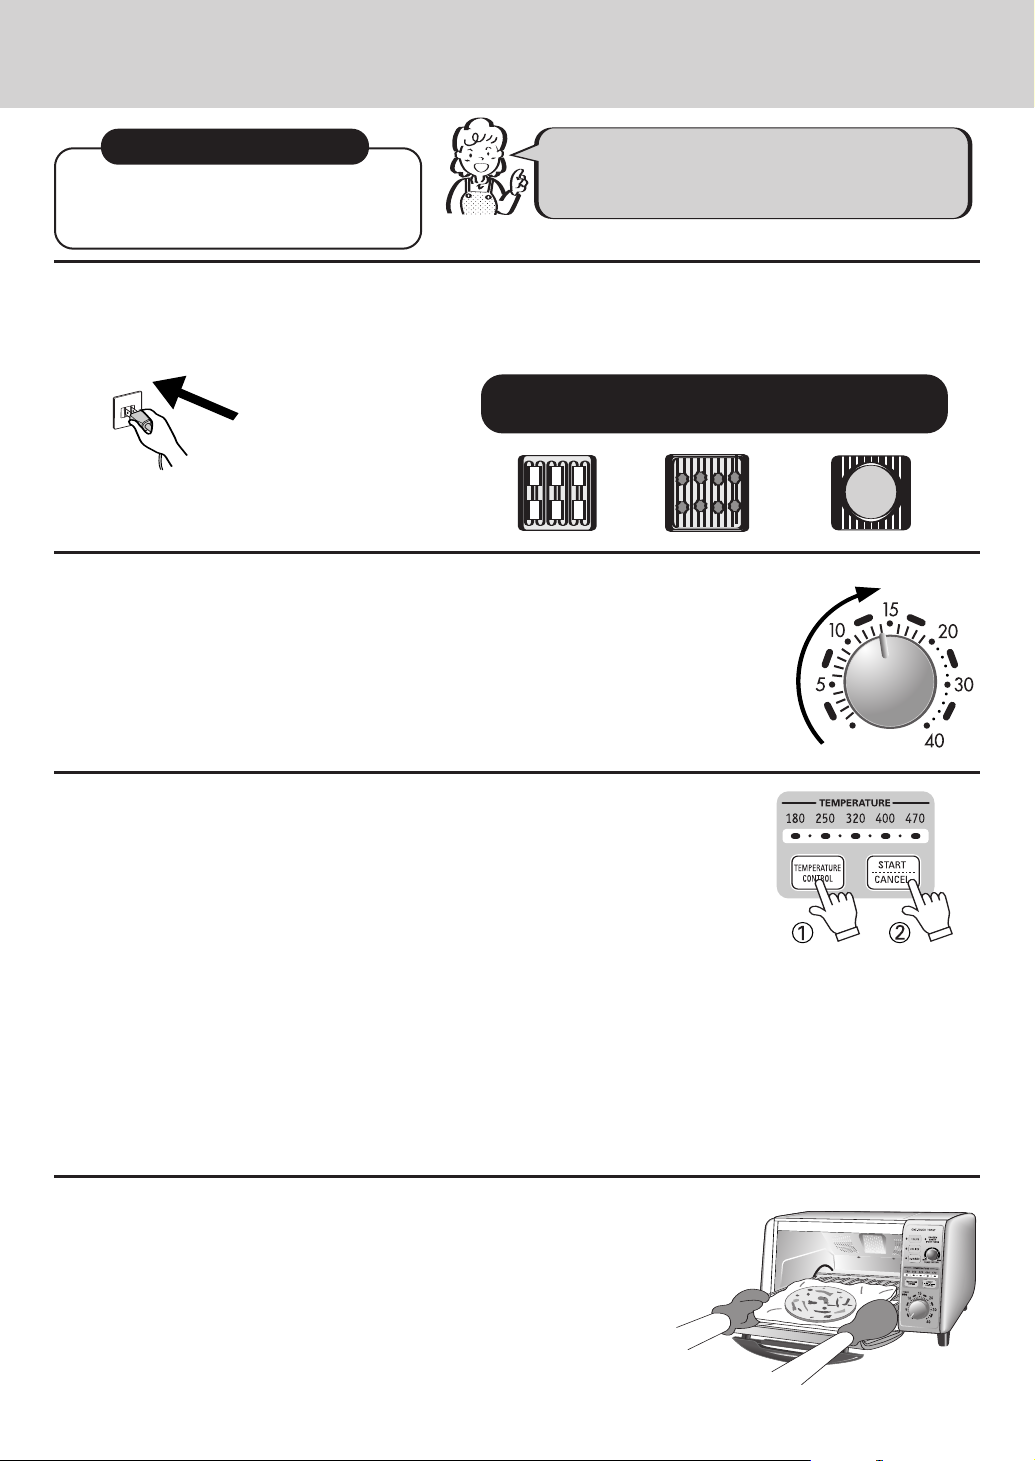
HOW TO USE
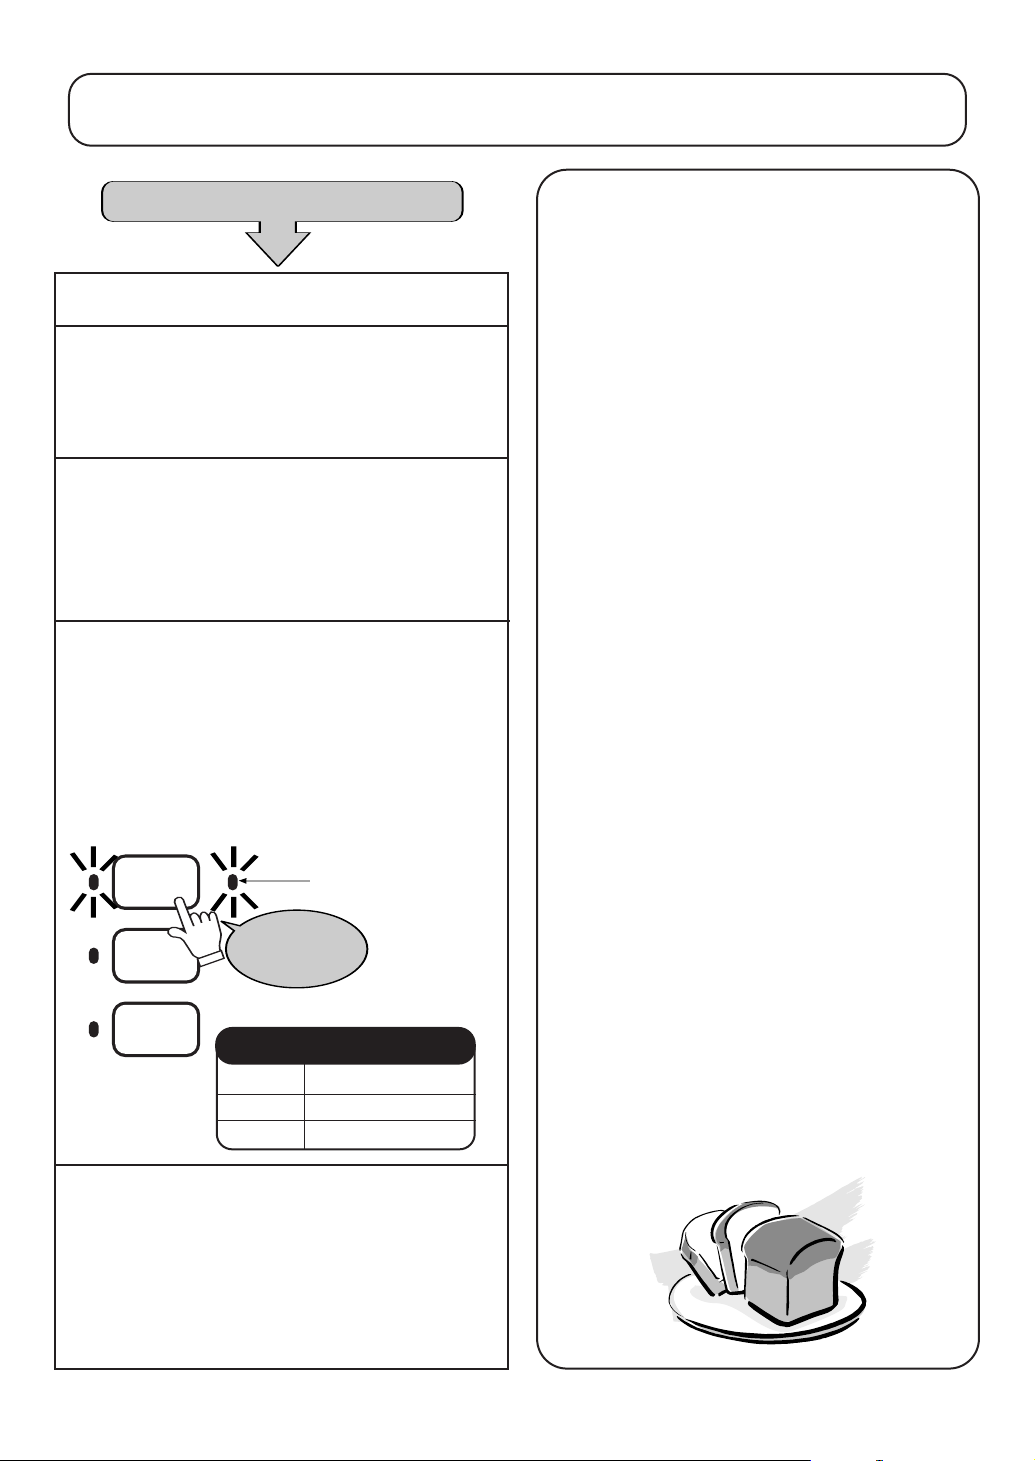
One-Touch Toast
Set the Shade Control Dial to the desired
toast color and press Number of Slice
button. The microcomputer automatically
controls cooking time and power based
on the slice and shade selected.
Toasting with One-Touch Toast Buttons
①
During the first use, the unit may emit odor or
smoke. The odor or smoke will lessen as the
unit is used. This is not a malfunction.
Plug in power supply
plug into the outlet.
1
A beep will sound.
Place bread slice(s) on the Oven Rack.
2
How to Place Bread Slice(s) Evenly
1 Slice 2 Slices 3 Slices 4 Slices
• Place bread slices as illustrated above for even heat distribution.
• When toasting three bread slices, they may be browned more
than desired. Adjust the Shade Control Dial to the desired toast color.
• The standard size of the bread slice for toasting four slices is
1
/2" x 41/4". If the slices are larger than this, toast one or two
4
slices at a time.
Set the Shade Control Dial.
3
• The Shade Control Dial can be set two levels lighter or darker than the
standar
• During the first use, set to the standard position.
Note: The shade may vary depending on type, size and thickness of bread
d position.
or room temperature.
Standard
Setting
Press One -Touch Toast Button.
4
• Press One-Touch Toast button according to the
number of slices being toasted. Number-of-Slice
lamp lights and toasting begins.
• Do not open door during the operation. Doing so
will change the doneness.
om
The unit may emit steam when moistur
•
foods evaporate.
• Refer page 9 for changing settings or stopping
operation.
e fr
1 Slice
2 Slices
•
4 Slices
3
Remove bread slice(s).
5
When toasting is done, the unit beeps thr
• Care must be taken to avoid burns when you remove bread from oven. Be extra careful when you
remove bread from the back side of oven. Do not touch door or inside of oven as they remain very hot.
• Unplug the Power Supply Cord from the outlet after use.
• Do not move the unit until it has completely cooled.
ee times and heaters ar
8
e turned off automatically.
Standard Toasting Time
(when bread slices are placed
1 Slice
2 Slices
3-4 Slices Approx. 3 min. 15 sec.
ecommended)
as r
Appr
Appr
ox. 1 min. 58 sec.
ox. 2 min. 30 sec.
Page 9
❇ The Temperature Control or Timer can not be used while One-Touch Toast function is
in operation.
When toasting frozen bread slice(s)
Plug in power supply cord.
1
Place bread slice(s) on the Oven Rack.
2
• Follow the steps shown on previous page.
• Remove frost from the surface of frozen
bread and place them on the Oven Rack.
Set the Shade Control Dial to the
3
desired toast color
• Follow the steps shown on previous page.
• Set the Shade Control Dial to the same
desired toast color as non-frozen bread.
Press One-Touch Toast Button twice.
4
Press the One-Touch Toast button twice
according to the number of slices you are
toasting. Both Number of Slice lamp and
Frozen Br
Heating will begin immediately
ead Indicator lamp will light.
.
.
To change the setting after One-Touch
Toast Button is pressed.
• You must make a change in Number of
Slice and Shade Control within 20 seconds.
• You cannot make a change after 20
seconds. Observe the toast color through
Glass Window and press Cancel Button.
Remove bread slices when they become
desired color.
To cancel One-Touch Toast.
• Press Star
• You can also press One-Touch Toast button
to stop. Press the button that has the Slice
Indicator lamp on.
<For regular bread slices>
Press the button twice if it is within 20
seconds after heating started. Press the
button once after 20 seconds of operation.
<For frozen bread slices>
Press the button once, even after 20 seconds
of operation.
t/Cancel button to cancel.
1 Slice
2 Slices
3•4Slices
Frozen Br
Press button
twice
Standard Toasting Time
1 Slice Approx. 3 min. 7 sec.
2 Slices Approx. 3 min. 35 sec.
3-4 Slices Approx. 4 min. 15 sec.
ead Lamp
Remove bread slice(s).
5
Follow the steps shown on pr
• When toasting is done, the unit will beep
three times and heaters ar
automatically
the beeps stop so that the bread can
retain more heat.
. Do not r
evious page.
e tur
emove br
ned off
ead until
Toast is browning unevenly.
Uneven browning may be caused when inside
of oven is dirty.
• Set Shade Control Dial to darker shade.
• Keep the inside of the oven clean.
To store breads properly.
Freezing bread is recommended to keep it
eeze in
esh and avoid losing flavor
fr
air-tight bag to prevent them it from drying
and absorbing odor.
9
. Fr
Page 10
HOW TO USE
Cooking with Timer
②
Temperature Control
Depending on the food items that you
are cooking, you can select oven
temperatures from 180˚F to 470˚F in 5 levels.
Plug in power supply
plug into the outlet.
1
A beep will sound.
Note: One Touch Toast can not be used while using Timer Cooking.
2
During the first use, the unit may emit odor or
smoke. The odor or smoke will lessen as the
unit is used. This is not a malfunction.
Place food on Oven Tray and/or Oven Rack.
• Place food on the Oven Tray and/or Oven Rack evenly.
• Oven Tray may warp when heated.
Refer to page 7, “Oven Rack and Oven
Tray Combination”
Oven Tray Oven RackOven Rack + Oven Tray
Place aluminum foil on Tray
Set the Timer.
3
• The maximum time you can set is 40 minutes. The timer is graduated in one minute
increments up to 20 minutes. It is graduated in two minute increments from
20 –40 minutes.
• To cook longer than 40 minutes, set the timer again after the first 40 minutes is up.
• If the Timer Dial is turned all the way to the left and the Start button is
pressed, heaters will turn on for 30 seconds and then turn off automatically.
Select desired cooking temperature and press Start button.
4
• Refer to page 12, Cooking Time Guidelines.
• Each time the Temperature Control button is pressed, the Temperature Indicator
lamp changes from 180
Temperature can be changed even after Start/Cancel button is pressed.
• Press the Start/Cancel button. The Temperature Indicator lamp lights and
cooking begins. The Time Indicator lamp will change as cooking progresses
and to show the remaining cooking time.
Note: The Timer Control Dial does not change position. It stays at the initial setting position.
• To cancel cooking, press Start/Cancel button again. The lamps turn off.
• Timer setting can be changed within 20 seconds after Start/Cancel button is pressed. Timer setting
cannot be changed if 20 seconds have elapsed.
Do not open the door during the cooking as it may af
•
The unit may emit steam when moistur
•
Remove food out of oven.
5
When timer is done, three beeps will sound and heaters are turned off
automatically.
• Take care not to get bur
Oven Tray, Oven Rack and food remain very hot.
• Make sure all the indicator lamps are off after use and unplug
the power supply cord.
• Do not move the unit until it has completely cooled.
➔250➔320➔400➔470➔180.
fect doneness.
e from foods evaporate.
ned when taking out foods out of oven.
10
Page 11

Tips for Convection Cooking
When baking or reheating packaged convenience foods
• Use packaged or frozen food that is labeled safe for use in a toaster oven. If necessary, remove food from
plastic or cardboard containers and place in heat resistant containers.
• Follow the recommended cooking time and temperature on the package directions.
• You may need to adjust the time and temperature to achieve your personal preferences.
Use Aluminum Foil
• Set the timer for a shorter time when cooking food that can burn easily. Observe food that can burn easily
through Glass Window during operation and cover with aluminum foil to prevent burning.
• Wrap foods that emit odor in the foil and place it on the Oven Tray to prevent the odor from traveling to
other foods.
• Placing aluminum foil on Oven Tray makes cleaning easy.
• Make sure that aluminum foil does not touch the upper heating element. Foil may melt and adhere to the
heating element, which may cause a malfunction.
When baking cakes and cookies
★ Preheat the oven.
Prior to placing food inside the oven, preheat for 5 minutes for best results.
★ Do not open door during the operation.
Cake may sink when oven temperature drops drastically by opening door. Open and close the door
quickly when checking the doneness of cake to prevent heat loss.
★ When using commercial cake mix.
Cooking time varies depending on ingredients and manufacturer. Adjust cooking time while observing
the doneness. Do not use paper baking molds for cake mix. Doing so may cause a fire.
★ Use aluminum foil to cover food when cooking for more than 40 minutes.
Cover food with aluminum foil whenever cooking longer than anticipated. Food may burn due to high
power heating.
SPECIFICATIONS
Model No.
Power Source 120V 1350W 60 Hz
Timer 40 minutes Digital Timer
Outer Unit Dimensions (WxHxD) 15
Inner Unit Dimensions (WxHxD) 10
Weight (Approx.) 9.5 lbs./4.3 kg
Accessory
SK-VF7S
3
/4" x 9" x 12 1/2" /400mm x 228mm x 318mm
3
/4" x 41/8" x 10 5/8"/273mm x 104mm x 270mm
1 Oven T
11
ray
Page 12

Cooking Time Guidelines
The cooking times and temperatures given in chart below are approximate and should be
used as a guideline. It varies depending on food temperature, type of food, amount of
ingredients or room temperature. Adjust the cooking time by observing desired doneness.
Temperature
470
400
320
250
180
Food Amount
Macaroni Cheese
Alum. Foil Wrapped
Meat & Vegetables
Baked Potato
Baked Eggplant
Hot Dog
Rice Cake (Mochi)
Pizza
Pizza Toast
Lasagna
Apple Pie
Oven Fried Shrimp
Oven Fried Chicken
Wings
Macaroni Cheese
Chicken Nugget
Deep Fried Chicken
Breaded Deep Fried
Frozen Food
Warm up Fried Foods
Warm up Butter Rolls
Warm up Croissant
Food
French Fries
Pizza
Cookies
Bread Pudding
Scone
Sponge Cake
Melt Butter
Melt Chocolate
2 servings
3 servings
4 small potatoes
4 Japanese Eggplant
6 pcs.
6 pcs.
1 piece
2 pcs.
4-6 servings
1 piece
8 pcs.
10 pcs.
2 servings
8 pcs.
8 pcs.
8 pcs.
0.5 lb.
1
/2"
dia. 9
4 pcs.
20 pcs.
9 pcs.
9 pcs.
dia. 9"
6 pcs.
4 pcs.
4 oz.
4 oz.
Cooking
Time (min.)
8-12
16-20
45-50
25-30
10-12
5-6
8-10
7-9
35-40
50-60
8-10
20-25
17-19
8-10
10-12
10-12
13-18
9-12
8-11
9-10
18-20
11-13
40-45
3-5
2-4
10-12
10-12
Oven Rack /Oven Tray Note
Oven Tray
Oven Tray
Oven Rack
Oven Tray
Oven Tray
Oven Tray
Oven Tray
Oven Tray
Oven Tray
Oven Rack
Oven Tray
Oven Tray
Oven Tray
Oven Rack &
Oven Tray
Oven Rack &
Oven Tray
Oven Rack &
Oven Tray
Oven Tray
Oven Tray
Oven Rack &
Oven Tray
Oven Tray
Oven Tray
ray
Oven T
Oven Rack
Oven Rack
Oven Rack
Oven Tray
Oven Tray
Recipe page 14
Seam side up
Potato diameter up to 2"
Poke skin with folk
Place alum. foil on tray
Try 470˚F if not browned
Place alum. foil on tray
Recipe page 15
Recipe page 16
Recipe page 14
Place alum. foil on tray
Cover with alum. foil to
prevent from burning
Preheat for 5 min.
Do not over cook
Cut into
1
/2" cubes
❇ If cooking longer than 40 minutes, set the time again after first 40 minutes is up.
12
Page 13

CLEANING AND MAINTENANCE
Always unplug the power supply cord from the electric outlet and let the entire unit cool off prior to cleaning.
Exterior and interior of the unit/Crumb Tray
Wipe it with a damp cloth moistened with a kitchen detergent. Rinse off with a damp cloth.
• It is easy to clean inside the oven when the Oven Rack Guide is lifted up.
• If the inside of the unit is dirty, the unit does not heat up properly and the food
may not be cooked properly.
How to Remove Oven Rack Guide
• Open the door halfway.
• While holding the door, pull the Oven Rack Guide
towards you to disengage
it from Door Hook.
• Assemble the Oven Rack
Guide in reverse order of
removing it.
Door Hook (2 places)
How to Remove Crumb Tray
• Pull the Crumb Tray in the direction of arrow.
• Securely insert the Crumb
Tray up to the far end.
Make sure the tray is
properly facing upwards.
Oven Rack and Oven Tray
• Wash in lukewarm warm water with a gentle
kitchen detergent. Rinse off with a damp cloth and
dry thoroughly.
• Do not use cleaning powder or scrub brush.
Notes
• Unplug the power supply cord and let the unit cool
off completely before cleaning.
• Do not use a hard or nylon scrub brush, cleaning
powder, benzene or thinner.
• Do not open or close the door forcefully. Doing so
may cause the Oven Rack Guide to disengage from
Door Hook resulting in damage to the door or Crumb
Tray.
• Do not touch the heaters when you attach or
remove the Oven Rack to avoid damaging heaters.
• Do not damage the Glass Door. Doing so may
cause the window to crack.
TROUBLESHOOTING
Symptom
The unit does not heat up.
•
The heaters tur
•
n on and of
f during
cooking.
• The heaters do not turn on.
• Toast does not brown using One Touch
Toast.
• The control buttons won’t work properly.
Is power supply cor
•
• The heaters automatically turn on and off by the
microcomputer to adjust the cooking temperature. It is
not a malfunction.
• When toasting frozen bread, the heaters may turn off
after browning toast. This is due to inside of the toast
being heated after browning. This is not a malfunction.
• Is the inside of the oven dirty? If the inside of the oven is
not clean, the unit does not heat up pr
inside of the oven.
• Unplug the power supply cord and then plug it again.
13
Check the following before requesting service.
Possible Cause/Remedy
d plugged in properly?
operly. Clean the
Page 14

RECIPES
Note
Use a heat-resistant dish that measures less than 10 X 10 X 3 inches. Observe all food items through
glass window and cover with foil if the top is browning too quickly.
Bruschetta
1. Heat olive oil in skillet over medium heat.
Sauté garlic 2 minutes.
8-12 servings 400˚F 6-10 minutes
Ingredients:
11/2 tomatoes, seeded and cut into 1/4 inch pieces
3 cloves garlic, minced
1 tablespoon olive oil
1
/4 marinated artichoke heats, drained and
chopped
1
1
/2 teaspoon shredded Parmesan cheese
1
/4 teaspoon dried basil
1 small loaf French bread
2. In a small bowl, combine chopped tomatoes,
garlic, olive oil, artichoke heats, and dried
basil.
3. Refrigerate for a few hours.
4. Cut French bread in half lengthwise and place
on Oven Tray in oven. Allow bread to brown
slightly.
Remove bread from oven and top with tomato
5.
mixture.
6. Sprinkle with Parmesan Cheese and place on
Oven Tray
.
7. Bake in a preheated oven for 6-10 minutes.
Baked Macaroni and Cheese
2 servings 470˚F 8-12 minutes
Ingredients:
1
/2 cup dried elbow macaroni
1
/2 small onion, thinly sliced
salt & pepper
1
/3 cup shredded cheese
White Sauce:
1 tablespoon butter or margarine
1 tablespoon all-purpose flour
1
/8 teaspoon salt
3
/4 cup milk
Oven Fried Shrimp
16 Shrimp (Make 8 at a time) 400˚F 8-10 min.
edients:
Ingr
16 small-medium size shrimp
salt & pepper
Coating Mixture:
3 tablespoon vegetable oil
2
/3 cup breadcrumbs
1 egg, beaten
1 tablespoon flour
1. Cook macaroni according to package
instructions and drain.
2. Sauté onion in skillet.
3. In a saucepan, melt butter and stir in flour.
Add milk. Cook and stir until slightly thickened
and bubbly. Add a dash salt and pepper
.
4. In a heat-resistant dish, mix cooked macaroni,
onion, and white sauce.
5. Sprinkle with cheese.
6. Place on Oven Tray and bake in preheated
oven for 8-12 minutes.
1. Heat oil in skillet. Add breadcrumbs and sauté
until slightly brown. Remove from heat.
2. Shell shrimps, but leave the tail unshelled.
Score shrimp in several places on bottom side.
Sprinkle with salt and pepper.
3. Pat shrimp with paper towel to remove
moisture. Coat shrimp with flour, dip in egg,
and then roll in breadcrumbs.
4. Line Oven Tray with aluminum foil. Place
shrimp on Oven Tray and bake in preheated
oven for 8-10 minutes.
14
Page 15

Teriyaki Chicken Kabobs
6-8 Servings 400˚F 10 minutes
Ingredients for marinade:
11/2 cups soy sauce
1 cup + 1 tablespoon brown sugar
4 tablespoons vegetable oil
3 cloves garlic, pressed
1
/2 teaspoon green onions, chopped
1
Ingredients for kabobs:
Boneless, skinless chicken breasts, cut into pieces
Red onion, cut into squares
Red and green bell peppers, cut into squares
Pineapple wedges, if desired
Ground Turkey and Vegetable Lasagna
4-6 Servings 400˚F 35-40 minutes
edients:
Ingr
6 oz. dried lasagna noodles, approx 9 strips
1
/2 lb. ground turkey
1
/2 cup broccoli florets
1
3
/4 cup tomato sauce
1
5 oz. frozen spinach, well drained
3
/4 cup shredded carrots
4 oz. mozarella cheese, shredded
1
4
/2 teaspoon Parmesan cheese, shredded
1
/4 teaspoon dried basil
salt and pepper
1. Prepare marinade and place chicken pieces in
marinade for several hours.
2. Alternately thread chicken, red onion, bell
peppers, and pineapple onto metal or
presoaked wooden skewers.
3. Place on Oven Rack with Oven Tray underneath.
4. Cook in preheated oven for approximately
10 minutes. Rotate skewers as necessary.
1. Cook lasagna noodles according to package
instructions and drain.
2. Cook ground turkey in saucepan and season
to taste with salt and pepper. Then drain.
3. Steam broccoli until bright green.
4. Spread a thick coating of tomato sauce on
bottom of the pan.
5. Place a layer of lasagna noodles over sauce.
6. Spread cooked spinach, broccoli and shredded
carrots evenly over noodles.
7. Mix mozarella and Parmesan cheese together.
Sprinkle some cheese on top.
8. Cover with a layer of noodles and pour
3
/4 cup
tomato sauce on top.
9. Place cooked turkey over sauce and top with
a layer of noodles.
10. Spread remaining sauce over noodles.
Cover with remaining cheese.
11.
12. Sprinkle with basil.
Place dish on Oven T
13.
ray and bake in pr
eheated
oven for approximately 35-40 minutes.
14. Watch carefully and cover with foil if top
becomes too dark.
Cinnamon Toast
6 servings 470˚F 1-2 minutes
Ingredients:
6 slices white bread (crust may be cut off)
2 tablespoons + 2 teaspoons unsalted butter
softened
1
/4 teaspoon cinnamon
1
1
/4 teaspoon sugar
1
2
/3 cup brown sugar
1. Toast bread until slightly brown. Spread with
butter.
Combine r
2.
,
spread mixture over buttered toast.
emaining ingr
edients in bowl and
3. Place buttered toast on Oven Tray.
4. Bake in preheated oven for 1-2 minutes or until
glazed.
15
Page 16

Apple Pie
6-8 servings 400˚F 50-60 minutes
Ingredients:
2 9" Frozen Pie Crust
5 cups thinly sliced, peeled apples (5-8 apples)
1 tablespoon lemon juice
3
/4 cup sugar
2 tablespoons flour
1
/2 teaspoon ground cinnamon
1
/8 ground nutmeg
Raspberry-Chocolate Pastry Puffs
ox. 30 twists 400˚F 6-8 minutes
Appr
Ingredients:
1 frozen pastry sheet
1 egg + 1 tablespoon water
1
/4 cup semi-sweet chocolate pieces
2 tablespoons seedless raspberry jam
1. Defrost pie crusts. Remove one crust from
pan and roll out to form top crust.
2. Sprinkle apple with lemon juice if tarter flavor
is desired.
3. In a bowl, stir together sugar, flour, cinnamon,
and nutmeg. Add apple slices and mix gently.
4. Place one crust in a heat-resistant pie pan.
5. Transfer apple mixture to pie crust. Place top
crust on the pie and crimp edges. Cut 3-4 slits
in top crust.
6. Cover pie with aluminum foil to prevent
over-browning. Remove foil towards end of
cooking time to achieve desired browning.
7. Place on Oven Rack and bake in preheated
oven for 50-60 minutes or till done.
1. Thaw pastry sheet according to package.
2. Roll pastry sheet into a 14 x 10 inch sheet.
3. Cut in half lengthwise. (You should have a
7x10 inch sheet)
4. Top one pasty sheet with jam, then sprinkle
with chocolate pieces.
5. Place other pastry sheet half over filling.
6. Roll gently with rolling pin.
7. Cut into
1
/2 inch strips.
8. Twist and place on foil covered Oven Tray,
pressing ends down.
9. Mix egg and water together in a small dish.
Brush lightly with egg mixture.
10. Cook in preheated oven for 6-8 minutes or until
color is golden br
own.
11. Cool and sprinkle lightly with powdered sugar
ed.
if desir
16
Page 17

SANYO DIGITAL CONVECTION TOASTER OVEN SK-VF7S LIMITED WARRANTY
OBLIGATIONS
n order to obtain factory warranty service, call the toll-free number below. The unit must be packed in the original
I
carton or a well padded sturdy carton in order to avoid shipping damage.
Note: Do not return this unit to the retail store for service.
To obtain factory warranty service, product operation information or for problem resolution, call
1-800-421-5013
Weekdays 8:00 AM – 5:00 PM Pacific Time
Or visit our web site at www.sanyoservice.com
THIS WARRANTY IS VALID ONLY ON SANYO PRODUCTS PURCHASED AND USED IN THE UNITED STATES OF AMERICA.
THIS WARRANTY APPLIES ONLY TO THE ORIGINAL RETAIL USER AND DOES NOT APPLY TO PRODUCTS USED FOR
ANY INDUSTRIAL, PROFESSIONAL OR COMMERCIAL PURPOSE. THE ORIGINAL DATED BILL OF SALE OR SALES
SLIP MUST BE SUBMITTED TO THE AUTHORIZED SANYO SERVICE CENTER AT THE TIME WARRANTY SERVICE IS
REQUESTED.
Subject to the OBLIGATIONS above and EXCLUSIONS below, SANYO FISHER COMPANY (SFC) warrants this SANYO
product against defects in materials and workmanship for the periods of LABOR and PARTS specified below. SFC
will repair or replace (at its option) the product and any of its parts which fail to conform to this warranty. The
warranty period commences on the date the product was first purchased at retail.
LABOR PARTS
1 YEAR 1 YEAR
EXCLUSIONS
This warranty does not cover (A) the adjustment of customer-operated controls as explained in the appropriate
model’s instruction manual, or (B) the repair of any product whose serial number has been altered, defaced or
removed.
This warranty shall not apply to setup, installation, removal or the product for repair or reinstallation of the product
after repair.
This warranty does not apply to repairs or replacements necessitated by any cause beyond the control of SFC
including, but not limited to, any malfunction, defect or failure caused by or resulting from unauthorized service or
parts, improper maintenance, operation contrary to furnished instructions, shipping or transit accidents, modification
or repair by the user, abuse, misuse, neglect, accident, incorrect power line voltage, fire, flood or other Acts of God,
or normal wear and tear.
The foregoing is in lieu of all other expressed warranties and SFC does not assume or authorize any party to assume
for it any other obligation or liability.
THE DURATION OF ANY WARRANTIES WHICH MAY BE IMPLIED BY LAW (INCLUDING THE WARRANTIES OF
MERCHANTABILITY AND FITNESS) IS LIMITED TO THE TERM OF THIS WARRANTY. IN NO EVENT SHALL SFC BE
LIABLE FOR SPECIAL, INCIDENT
PRODUCT, OR FOR ANY DELAY IN THE PERFORMANCE OF ITS OBLIGATIONS UNDER THIS WARRANTY DUE TO
CAUSES BEYOND ITS CONTROL. SOME STATES DO NOT ALLOW LIMITATIONS ON HOW LONG AN IMPLIED
ARRANTY LASTS AND/OR DO NOT ALLOW THE EXCLUSION OR LIMITA
W
THE ABOVE LIMITATIONS AND EXCLUSIONS MAY NOT APPLY TO YOU.
THIS WARRANTY GIVES YOU SPECIFIC LEGAL RIGHTS. YOU MAY HAVE OTHER RIGHTS, WHICH VARY FROM STATE
TO STATE.
For your protection in the event of theft or loss of this pr
personal records.
Model No. Serial No.
Date of Purchase Purchase Price
Where Purchased
AL OR CONSEQUENTIAL DAMAGES ARISING FROM OWNERSHIP OR USE OF THIS
TION OF CONSEQUENTIAL DAMAGES, SO
oduct, please fill in the infor
(Located on back or bottom side of unit)
mation below for your own
17
Page 18

Gracias por su compra de el HORNO TOSTADOR DE CONVECCIÓN DIGITAL SANYO. Por favor
lea todas las instrucciones antes de usar y conserve este manual en un lugar seguro para
referencia futura.
Tabla de Contenidos
■ Instrucciones de Seguridad.........................................................................................19
■ Precauciones ...........................................................................................................4-5
■ Nombres y Función de Partes......................................................................................20
■ Calentador y Sistema de Convección ...........................................................................21
■ Como Usar ...........................................................................................................22-25
Tostado con los Botones de Tostar de One-Touch (Un Toque) .................................22-23
La Cocción con el Contador de Tiempo......................................................................24
Aviso para la Cocción por Convección ......................................................................25
■ Especificaciones ........................................................................................................25
■ Guía para el Tiempo de Cocción...................................................................................26
■ Limpieza y Mantenimiento / Localización de Fallas ........................................................27
■ Recetas................................................................................................................28-30
■ Garantía ....................................................................................................................31
ADVERTENCIA: El manejo del cable de este producto o cables asociados con accesorios
vendidos con este producto, le podría exponer a plomo, un químico conocido por el estado
de California que causa cáncer, y anormalidades relacionadas de nacimiento humano u
otro daño reproductivo.
Lávese las manos después del manejo.
18
Page 19

INSTRUCCIONES DE SEGURIDAD
Cuando se usan aparatos electrónicos, siempre deben tomarse algunas precauciones
básicas de seguridad para reducir el riesgo de incendio, choque eléctrico y/o lesión:
1. Lea todas las instrucciones.
2. No toque las superficies calientes. Use las
manijas o perillas.
3. Para proteger contra incendio, choque eléctrico,
y lesión personal, no sumerge la cuerda, los
enchufes, o la unidad en agua o otro líquido.
4. Una supervisión rigurosa es necesaria cuando
cualquier aparato es usado por o cerca de niños.
5. Desenchufe la unidad de la salida cuando no
se está usando. Permita que se enfrie antes
de juntar o retirar piezas, y antes de limparla.
6. No haga funcionar ningún aparato con una
cuerda o enchufe dañado, después de que el
aparato funciona defectuosamente, o ha sido
dañado de cualquier manera. Devuelva el
aparato a una instalación de servicio autorizada
para examinación, r
7. Para proteger contra el riesgo de choque
eléctrico, no haga entrar por la fuerza ningún
objeto extraño, tal como clavijas y alambres,
en ninguna de las aperturas.
8. El uso de fijaciones accesorios no recomendados
por el fabricante del aparato puede producir
como resultado un incendio, choque eléctrico
o lesión personal.
No use aparato a la intemperie.
9.
10. No permita que la cuerda cuelgue sobre el
borde de una mesa o mostrador, o toque
superficiescalientes.
11. No coloque sobre o cerca de un quemador de
gas o eléctrico caliente, o dentro de un horno
calentado.
12. Para desconectar, gire el interruptor a su posición
(“apagado”) (“OFF”) y entonces retire el
enchufe de la salida en la pared.
eparación, o ajuste.
13. Use caución extrema cuando quita la Bandeja
para Hornear, la Parrilla para Hornear o
dispone de grasa caliente y engrasa.
14. No limpie la unidad con almohadillas de fibras
metálicas, o cualquier otro abrasivo que
puedan separar y tocar las partes eléctricas,
causando un riesgo de un choque eléctrico.
15. Alimentos o utensilios de gran tamaño no
deben ponerse dentro del aparato para asegurar
funcionamiento seguro .
16. Un incendio puede ocurrir si el aparato esta
cubierto o si toca materiales inflamables como
cortinas y paredes cuando está en operación
No coloque nada sobre el aparato cuando
esté en uso.
17. CAUCIÓN: Controle el funcionamento del
equipo cuando está usando.
18. Antes de usar este aparato, muevelo cuatro a
seis pulgadas lejos de la pared o cualquier
objeto encima del contador
objeto que se hubiera puesto encima del
aparato. No use en superficies donde calor
causaría un problema.
Se debe ejercer caución extrema cuando usa
19.
recipientes constr
o vidrio.
Siempre desconecte el hor
20.
puerta del mismo.
21. No guarde ningunos materiales, además dos
accesorios que el fabricante recomendó, en el
horno cuando no esté en uso.
No coloque los siguientes materiales en el
22.
aparato como: papel, cartulina, plástico, etc.
23.
No use el aparato para otra cosa que su uso
uyó de otra cosa que metal
. Quite cualquier
no antes de abrir la
intencionado.
CONSERVE ESTAS INSTRUCCIONES
Nota:
A. Un cable eléctrico corto se ha seleccionado para reducir el peligro que puede ocasionar un cable más
largo.
B. Cables de extensión están disponibles y pueden ser utilizados si el cuidado se ejercite en su uso.
C. Si se use un cable de extensión:
(1) La extensión deberá estar calificada para no menos del grado eléctrico marcado del aparato.
(2) Cuando se use un cable más largo asegúrese que no interfiera con la área de trabajo ni que
cuelgue de modo que alguien pueda tirar de él o tr
Se emplean enchufes polarizados con un contacto más ancho que el otro para reducir los riesgos de choque
eléctrico. Cuando el cable tiene este tipo de enchufe, se ajusta únicamente a un contacto polarizado. Si el
enchufe no se ajusta en su contacto, inviér
calificado para que instale un contacto polarizado apropiado. Por ningún punto trate de modificar o hacerle
cambios a la enchufe.
talo. Si aún así no se ajusta, busque la ayuda de un electricista
19
opezarse
.
Page 20

NOMBRES Y FUNCIÓN DE PARTES
Accesorio
1 Bandeja para
Hornear
• Siempre utilice la .
bandeja para hornear
al cocinar la pizza, los
alimentos pequeños o los alimentos que
son aceitosos.
• No utilice la bandeja del horno al tostar
con la función de la tostada de One-Touch
(Un- Toque) o sin el alimento sobre él.
• No utilice la bandeja del horno con los
otros electrodomésticos o cocina del gas.
Extractor Del Ventilador de la Convección
Calentador
Superior
Puerta
Parrilla para Hornear
Coloque la Parrilla para
Hornear firmemente sobre
la Guía de la Parrilla para
Hornear con las cuatro
esquinas dobladas que están
haciendo frente abajo. No
invierta el lado ni coloque la
Parrilla para Hornear con la
parrilla en la posición de lado.
Guía de la
Parrilla Para
Hornear
Botón de Tostar de
One-Touch (Un-Toque)
• El tostado se comienza cuando
un botón se presiona según el
número de la rebanada del pan.
• Oprima el botón dos veces para
las rebanadas congeladas.
• Oprima el botón Start/Cancel
button para cancelar. Usted
también puede oprimir el botón
dos veces para el pan normal
Oprima el botón una vez para el
pan congelado.
Asa de la Puerta
Ventana
de Vidrio
Panel del Control de
Tostar de One-Touch
Control de Grado
de Tostado
Para ajustar el color
del tostado y dorado.
Cable de Corriente
Cable de
Voltaje de
Alimentación
Parrilla para Hornear
Calentador Inferior
Bandeja para Residuos (Tipo Corredizo)
Luz Indicadora de la Temperatura
ol de Temperatura
Contr
Oprima el botón para seleccionar la
temperatura de cocción deseada. Cada vez que
el contr
Indicadora de la Temperatura cambia de
180➔250➔320➔400➔470➔180
emperatura se oprima, la Luz
ol de T
Marcador de Tiempo
Gire el control al tiempo de cocción deseado y
oprima el botón Start/Cancel. La Luz Indicadora
del Tiempo se iluminará y el contador de tiempo
comenzará. La Luz Indicadora del
Tiempocambiará como el cocinar se progresa
para demostrar el tiempo de cocción r
estante.
Panel del Control de la Temperatura
y de la Función de Tiempo
20
Botón INICIO/CANCELAR
Oprima el Botón Star
•
después de seleccionar el tiempo
de cocción y temperatura. El
calentamiento comenzará
inmediatamente.
• Oprima el Botón Start/Cancel una
vez mas para cancelar el
calentamiento.
• Usted también puede usar este
botón para cancelar la función
ostar de One-Touch.
de T
t/Cancel
Luz Indicadora del
Tiempo
Page 21

Calentador y Sistema de Convección
El Movimiento del Aire Caliente
Los
Calentadores
se encienden
y se apagan.
• Durante la operación, se puede oír un sonido giratorio. Esto no
es un malfuncionamiento.
• Los Calentadores Superiores y Inferiores se encienden y se
apagan mientras que el ventilador de la convección circula el
aire caliente a través de la cavidad del horno. Esto permite
que el alimento cocine mas rápido y parejo.
Combinación de la Parrilla para Hornear y Bandeja para Hornear
Parrilla para Hornear + Bandeja para Hornear
(para una cocción saludable)
• Cubra la Bandeja para Hornear con papel de
aluminio y coloque la Parrilla para Hornear sobre el
papel de aluminio.
• Coloque los alimentos sobre la Parrilla para Hornear.
• Los alimentos que se calientan sobre de la Parrilla
para Hornear se hacen más crujientes y más
sanos porque el exceso de la grasa goteará sobre
del papel.
Ejemplo:
• Para calentar el alimento empanizado
o frito.
• El alimento congelado empanizado o
frito.
Bandeja para Hornear Parrilla para Hornear
Guía de la
Parrilla Para
Hornear
• Coloque la Parrilla para Hornear
• Coloque la Bandeja para Hornear
sobre la Guía de la Parrilla para
Hornear o Parrilla para Hornear.
Ejemplo:
• Gratén/Cacerola
• Galletas
• Pizza Congelada
• Torta del Arroz (Mochi)
firmemente sobre la Guía de la
Parrilla para Hornear con las cuatro
esquinas dobladas que están haciendo
frente abajo. No invierta el lado ni
coloque la Parrilla para Hornear con
la parrilla en la posición de lado.
Ejemplo:
• Pan Tostado
• Pasteles
• Para calentar los panecillos con
mantequilla
Parrilla Para Hornear
Ubicación del Horno
• El frente y un lado de la unidad deben estar libres de cualquier
obstáculo.
• Coloque la unidad lejos de cualquier pared o muebles para evitar daño
por calor. Utilice aún más espacio entre la unidad y cualquier objeto
hecho de material susceptible al calor.
El no hacer eso puede causar daño, posiblemente resultando en la
decoloración o el desfiguración de la pared o de los muebles.
• No coloque la unidad más alto que su hombro.
Al hacer eso puede causar lesión de la quemadura cuando usted
intenta agarrar los alimentos del hor
no.
21
Lado 4”
o más
riba 4” o más
Ar
Trasero
4” o más
Page 22

COMO USAR
①
Tostar de One-Touch
Fije el Control de Grado de Tostado al color
del tostado deseado y oprima el Botón del
Número de Rebanada. La microcomputadora
está diseñada para controlar automáticamente
el tiempo y la potencia de cocción por la
rebanada y el grado seleccionados.
Tostado con los Botones de Tostar de One-Touch (Un-Toque)
Durante el primer uso, la unidad puede emitir olor o
humo. El olor o el humo disminuirá como se utiliza la
unidad. Esto no es un malfuncionamiento.
Enchufe el cable de
voltaje de alimentación
1
al tomacorriente.
Un beep sonará.
Coloque las rebanadas del pan sobre de la Parrilla
para Hornear.
2
Como Colocar las Rebanadas del Pan Parejamente
1 Rebanada
• Coloque las rebanadas del pan según lo ilustrado arriba para la distribución
pareja del calor.
• Al tostar tres rebanadas del pan, se puede ser dorados más que deseado.
Ajuste el Control de Grado al color deseado de la tostada.
• El tamaño estándar de la rebanada del pan para tostar cuatro rebanadas
es
41/2" x 41/4" . Si las rebanadas son más grandes que esto, tueste una o
dos rebanadas a la vez.
2 Rebanadas
Fije el Control de Grado de Tostado.
3
• El Control de Grado de Tostado puede ser fijado a dos niveles más pálido o más oscuro
que la posición estándar.
• Durante el primer uso, Fíjelo a la posición estándar.
Nota: El grado puede variar dependiendo de tipo, tamaño y grueso del pan, o temperatura
ambiente.
3 Rebanadas 4 Rebanadas
La
Posición
Estándar
Oprima el botón de tostar de One-Touch (Un-Toque).
4
• Oprima el Botón de Tostar de One-Touch según el número
de las rebanadas que son tostadas. La Luz Indicadora de
o-de-Rebanada enciende y el tostar comienza.
Númer
• No abra la puerta durante la operación. Al hacer eso
cambiará la terminación de la cocción.
La unidad puede emitir el vapor cuando la humedad de
•
los alimentos se evapora.
Refiera a la página 23 para cambiar los ajustes o para
•
terminar la operación.
1 Slice
2 Slices
•
4 Slices
3
Retire las rebanadas de pan.
5
Cuando el tostar termina, la unidad sonará un beep tres veces y los calentadores se apagarán automáticamente.
• Para evitar el riesgo de quemadura, tenga mucho cuidado al r
cuidado cuando usted retira el pan del lado trasero del horno. No toque la puerta o el interior del horno como siguen
siendo muy calientes.
• Desenchufe el cable de corriente después de usar.
• No mueva la unidad hasta que se haya enfriado completamente.
etirar el pan del hor
22
Tiempo Estándar de Tostar
(Cuando las rebanadas estan
colocadas como r
1
Rebanada
2
Rebanadas
3-4
Rebanadas
no. Tenga extraordinariamente
ecomendo)
ox. 1 min. 58 sec.
Apr
ox. 2 min. 30 sec.
Apr
Aprox. 3 min. 15 sec.
Page 23

❇ El Control de Temperatura o Marcador de Tiempo no puede ser utilizado mientras que
la función de Tostar de One-Touch está en la operación.
Al tostar rebanada(s) congelada(s) del pan
Enchufe el cable de corriente.
1
Coloque las rebanadas del pan sobre
2
la Parrilla para Hornear.
• Siga los pasos demostrados en la página anterior.
• Quite lo helado de la superficie del pan congelado
y colóquelos sobre la Parrilla para Hornear.
Fije el Control de Grado de Tostado
3
al color del tostado deseado.
• Siga los pasos demostrados en la página anterior.
• Fije el Control de Grado de Tostado al mismo color .
del tostado deseado como el pan no congelado.
Oprima el Botón One-Touch Toast
4
dos veces.
Oprima el Botón de Tostar de One-Touch dos veces
según el número de las rebanadas que está tostando.
La Luz Indicadora de Número-de-Rebanada y la Luz
Indicadora de Pan Congelado encenderán.
El calentamiento comenzará inmediatamente.
Para cambiar el ajuste después del
Botón de Tostar de One-Touch se oprime.
• Usted debe hacer un cambio para el Número-de-
Rebanada y el Control de Grado de Tostado entre 20
segundos.
• No puede hacer un cambio después de 20 segundos.
Observe el color de la tostada a través de la ventana
de vidrio y oprima el Botón CANCELAR. Retire las
rebanadas del pan cuando se hacen en el color
deseado.
Para cancelar One-Touch Toast.
• Oprima el botón Start/Cancel para cancelar.
• Usted también puede oprimir el Botón de Tostar de
One-Touch para parar. Oprima el botón que tiene la
Luz Indicadora de Rebanada encendida.
<Para las rebanadas del pan normales>
Oprima el botón dos veces si es entre 20 segundos
después de se comienza el calentamiento.Oprima el
botón una vez después de 20 segundos de la operación.
<Para las rebanadas del pan congeladas>
Oprima el botón una vez después de 20 segundos de la
operación.
1 Slice
2 Slices
•
4Slices
3
Luz Indicadora de
Pan Congelado
Oprima el
botón dos
veces
Tiempo Estándar de Tostar
1
Rebanada
2
Rebanadas
Rebanadas
3-4
Retire las r
5
Siga los pasos demostrados en la página anterior.
•
Cuando el tostar ter
tres veces y los calentadores se apagarán
automáticamente
beeps paren para que el pan pueda conservar más
calor.
ebanadas de pan.
. No quite el pan hasta que los
Aprox. 1 min. 58 sec.
Aprox. 2 min. 30 sec.
Aprox. 3 min. 15 sec.
mina, la unidad sonará un beep
La tostada está dorando desparejadamente.
El dorar desparejo puede ser causado cuando el interior
del horno es sucio.
• Fije el Control de Grado de Tostado a un grado más
oscuro.
• Mantenga el interior del horno limpio.
Para almacenar los panes correctamente.
Se recomienda congelar el pan para mantenerlo fr
y para evitar de perder el sabor. Congele en un bolso
mético para pr
her
absorbente.
evenirlo de la sequedad y del olor
esco
23
Page 24

COMO USAR
La Cocción con el Contador de Tiempo
②
Control de la Temperatura
Dependiendo de los artículos del alimento
que usted está cocinando, puede seleccionar
temperaturas del horno de 180˚F a 470˚F en
5 niveles.
Enchufe el cable de
voltaje de alimentación
1
al tomacorriente.
Un beep sonará.
ota: La función de Tostar de One-Touch no puede ser utilizada mientras
N
que usa la cocción del contador del tiempo.
Coloque el alimento sobre la Bandeja para
Hornear y/o la Parrilla para Hornear.
2
• Coloque el alimento sobre la Bandeja para Hornear y/o la Parrilla para .
Hornear parejamente.
• La bandeja del horno puede combarse cuando está calentada.
Durante el primer uso, la unidad puede emitir olor o
humo. El olor o el humo disminuirá como se utiliza
la unidad. Esto no es un malfuncionamiento.
Refiera a la pagina 21, “Combinación de la Parrilla
para Hornear y Bandeja para Hornear”
andeja para Hornear Parrilla para Hornear
B
arrilla para Hornear + Bandeja para Hornear
P
Coloque el papel de aluminio sobre la Parrilla
Fije el Contador de Tiempo.
3
• El tiempo máximo que usted puede fijar es 40 minutos. El contador de tiempo se gradúa en
los incrementos de un minuto hasta 20 minutos. Se gradúa en los incrementos de dos
minutos de 20-40 minutos.
• Para cocinar más de 40 minutos, fije el contador de tiempo después de los primeros 40
minutos que terminen.
• Si el Contador de Tiempo se da vuelta toda la manera a la izquierda y se oprime el Botón
Start, los calentadores se encenderán por 30 segundos y se apagarán automáticamente.
Seleccione la temperatura de cocción deseada y oprima el
Botón Start.
4
• Refiera a la página 26, Guía de Cocina y Tiempo de Cocción.
• Cada vez que se oprima el Control de Temperatura, la Luz Indicadora de la Temperatura
cambia de 180
La temperatura se puede cambiar aunque después de oprimir el botón Start/Cancel.
• Oprima el botón Start/Cancel. La Luz Indicadora de la Temperatura encenderán y se
comienza la cocción. La Luz Indicadora del tiempo cambiará como progresa la cocción y
mostrará el tiempo de cocción restante.
Nota: El Contador de Tiempo no cambia la posición. Permanece en la posición que fija inicial.
Para cancelar la cocción, oprima el Botón de Start/Cancel otra vez. Las luces apagarán.
•
El ajuste del Contador de Tiempo puede ser cambiado dentr
•
se oprime. El ajuste del Contador de Tiempo no puede ser cambiado si han transcurrido 20 segundos.
• No abra la puerta durante la operación. Al hacer eso cambiará la terminación de la cocción.
• La unidad puede emitir el vapor cuando la humedad de los alimentos se evapora.
➔250➔320➔400➔470➔180.
o 20 segundos después de que el Botón de IStart/Cancel
Retire el alimento del horno.
5
Cuando se termina el contador de tiempo, la unidad sonará un beep tres veces y los
calentadores se apagarán automáticamente.
• Para evitar el riesgo de quemadura, tenga mucho cuidado al retirar el alimento
del horno. La Bandeja para Hornear, la Parrilla para Hornear, y el alimento
siguen siendo muy calientes.
• Asegúrese de que todas las luces indicadoras estén apagadas después de
usar y desenchufe el cable de corriente.
• No mueva la unidad hasta que se haya enfriado completamente.
24
Page 25

Aviso para la cocción por
convección
Para hornear o recalentar los alimentos de conveniencia empaquetados
• Use el alimento empaquetado o congelado que es marcado seguro para el uso en un horno tostador. Si es necesario,
retire el alimento de envases del plástico o de recipientes de cartón y colóquelo en recipientes resistentes al calor.
• Siga las indicaciones del tiempo y de la temperatura recomendados de cocción del paquete.
• Para mejores resultados en alcanzar sus preferencias personales, podrá ser necesario ajustar el tiempo y temperatura.
Utilice el Papel de Aluminio
• Fije el contador por un tiempo más corta al cocinar el alimento que puede quemarse fácilmente. Observe el alimento
que puede quemarse fácilmente a través de la ventana de vidrio durante la operación, y cubra con el papel de
aluminio para evitar de quemarse.
• Envuelva los alimentos que emiten olores en el papel de aluminio y colóquelos sobre la Bandeja para Hornear para
evitar que el olor afecte a otros alimentos.
• El colocar papel de aluminio sobre la Bandeja para Hornear hace la limpieza fácil.
• Asegúrese de que el papel de aluminio no toque la resistencia de calor de arriba. El papel puede derretir y adherir a
la resistencia de calor, que puede causar un malfuncionamiento.
Al Hornear Pasteles y Galletas
★ Precaliente el horno.
Para los mejores resultados precaliente el horno por 5 minutos antes de colocar el alimento dentro del horno.
★ No abra la puerta durante la operación.
El paste puede hundirse cuando la temperatura del horno cae drástico abriendo la puerta. Abra y cierre la puerta
rápidamente al verificar si el pastel está listo para evitar de la pérdida de calor.
★ Al usar una mezcla para pastel comercial.
Los tiempos de cocción pueden variar dependiendo de los ingredientes y de fabricante. Ajuste el tiempo de cocción
mientras que supervisa para ver si ya está listo. No utilice los moldes de papel para hornear para la mezcla para
pastel. Al hacer eso puede causar un fuego.
★ Use el papel de aluminio para cubrir el alimento al cocinar por más de 40 minutos.
Siempre cubra el alimento con el papel de aluminio al cocinar por más tiempo que anticipado. El alimento puede
quemarse debido al calentamiento de la alta potencia.
ESPECIFICACIONES
Número de Modelo SK-VF7S
Fuente de Potencia
Contador de Tiempo Contador Digital de 40 minutos
3
Dimensiones de la Unidad Exterior (WxHxD)
Dimensiones de la Unidad Interior (WxHxD) 10
15
/4" x 9" x 12 1/2" /400mm x 228mm x 318mm
3
/4" x 41/8" x 10 5/8"/273mm x 104mm x 270mm
Peso (Aprox.) 9.5 lbs./4.3 kg
Accesorio 1 Bandeja para Hornear
25
120V 1350W 60 Hz
Page 26

GUÍA PARA EL TIEMPO DE COCCIÓN
Los tiempos y las temperaturas de cocción deberán tomarse solo como una guía. Se
pueden variar debido a la temperatura del alimento, tipo de alimento, cantidad de ingredientes,
o temperatura de ambiente. Ajuste el tiempo de cocción por verificar si ya está listo.
Temperatura
470
400
320
250
180
Comida Cantidad
Macarrones con queso
Carne y Vegetales Envueltos
de Papel de Aluminio
Papas al Horno
Berenjena al Horno
Hot Dog
Torta del Arroz (Mochi)
Pizza
Pizza en Tostada
Lasaña
Pastel de Manzana
Camarones Fritos al Horno
Alas de Pollo Frito al Horno
Macarrones con queso
Trocitos de Pollo
Pollo Frito
Pollo Empanizado y
Comida Congelada
Para Calentar Panecillos
Para Calentar Cr
Para Derretir la Mantequilla
Para Derretir el Chocolate
Frito
Papas Fritas
Pizza
Para Calentar los
Alimentos Fritos
Galletas
Pudín del Pan
Torta Escocesa
Pasteles
con Mantequilla
oissant
4 berenjenas japonesas
2 porciones
3 porciones
4 papas pequeñas
6 pcs.
6 pcs.
1 pieza
2 pcs.
4-6 porciones
1 pieza
8 pcs.
10 pcs.
2 porciones
8 pcs.
8 pcs.
8 pcs.
0.5 libra
1
dia. 9
/2"
4 pcs.
20 pcs.
9 pcs.
9 pcs.
dia. 9"
6 pcs.
4 pcs.
4 onzas
4 onzas
Tiempo de
Cocción (min.)
8-12
16-20
45-50
25-30
10-12
5-6
8-10
7-9
35-40
50-60
8-10
20-25
17-19
8-10
10-12
10-12
13-18
9-12
8-11
9-10
18-20
11-13
40-45
3-5
2-4
10-12
10-12
Parrilla para Hornear /
Bandeja para Hornear
Bandeja para Hornear
Bandeja para Hornear
Parrilla para Hornear
Bandeja para Hornear
Bandeja para Hornear
Bandeja para Hornear
Bandeja para Hornear
Bandeja para Hornear
Bandeja para Hornear
Parrilla para Hornear
Bandeja para Hornear
Bandeja para Hornear
Bandeja para Hornear
Parrilla para Hornear y
Bandeja para Hornear
Parrilla para Hornear y
Bandeja para Hornear
Parrilla para Hornear y
Bandeja para Hornear
Bandeja para Hornear
Bandeja para Hornear
Parrilla para Hornear y
Bandeja para Hornear
Bandeja para Hornear
Bandeja para Hor
Bandeja para Hor
Parrilla para Hornear
Parrilla para Hornear
rilla para Hornear
Par
Bandeja para Hornear
Bandeja para Hornear
Diámetro de la papa hasta 2"
Envuelva con papel de
Envuelva con papel de
aluminio para evitar de quemarse
near
near
Corte en los cubos del 1/2"
Nota
página 28 de la receta
Lado de la costura
para arriba
Pinche con tenedor
Envuelva con papel de aluminio
Hornee a 470˚ F y
supervise el dorado
aluminio
página 29 de la receta
página 30 de la receta
página 28 de la receta
aluminio
Cubra la bandeja con papel de
Precaliente por 5 min.
vise que no se
Super
cocine demasiado
❇ Al cocinar por más de 40 minutos, fije el tiempo otra vez después de los primeros 40 minutos ya acabados.
26
Page 27

LIMPIEZA Y MANTENIMIENTO
Siempre desconecte la unidad y permita que se enfrié antes de limpiarla.
La Parte Exterior e Interior de la Unidad/ Bandeja para Residuos
Use jabón suave con un paño húmedo para limpiarlas. Enjuáguelas con un paño húmedo.
• Es fácil limpiar dentro del horno cuando la Guía de la Parrilla para Hornear se
levanta para arriba.
• Si el interior de la unidad es sucio, la unidad no calienta adecuadamente y puede causar
que los alimentos no se cocinen apropriadamente.
Como Retirar el Guía de la Parrilla para Hornear
• Abra la puerta intermedia.
• Mientras que sostiene la puerta, tire la Guía de la
Parrilla para Hornear hacia
usted para desunirla del
Gancho de la Puerta.
• Ensamble la Guía de la
Parrilla para Hornear en la
orden reversa de
quitarla.
Gancho de la Puerta (2 lugares)
Como Retirar la Bandeja para Residuos
• Tire la Bandeja para Residuos en la dirección de la
flecha.
• Inserte con seguridad la
Bandeja para Residuos
hasta el extremo lejano.
Asegúrese de que la
bandeja esté haciendo
frente correctamente hacia arriba.
Parrilla para Hornear y Bandeja para Residuos
• Lave en agua tibia con jabón suave. Enjuáguelas
con un paño húmedo y séquelas a fondo.
• No use polvos o escobillas rayantes.
• Desconecte la unidad y permita que se enfrié
completamente antes de limpiarla.
• No use una escobilla rayante, polvos, bencina, o
diluyente.
• No abra o cierre la puerta poderosamente. Al
hacer eso puede causar la Guía de la Parrilla para
Hornear desunir del Gancho de la puerta resultando
en daño a la puerta o a la Bandeja para Residuos.
• No toque los calentadores cuando Usted ensambla
o quita la Parrilla para Hornear para evitar el daño a
los calentadores.
• No dañe la Puerta de Vidrio. Al hacer eso puede
causar la ventana agrietarse.
Notas
LOCALIZACIÓN DE FALLAS
Problema
La unidad no se calienta.
•
Los calentador
•
es se encienden y se
apagan durante la cocción.
• Los calentadores no se encienden.
• El pan tostado no dora usando el Botón
de Tostar de One-T
Los botones no funcionan correctamente
•
ouch.
¿Esta conectado cor
•
• Los calentadores se encienden y se apagan automáticamente
por la microcomputadora para controlar la temperatura
de cocción. Esto no es un malfuncionamiento.
• Al tostar el pan congelado, los calentadores se pueden
apagar después de dorar el pan tostado. Esto es debido
al calentar del pan tostado por dentr
Esto no es un malfuncionamiento.
¿Es el interior del hor
•
está limpio, la unidad no se calienta correctamente.
Limpie el interior del horno.
• Desenchufe el horno del tomacorriente de pared y luego
.
vuélvalo a enchufar.
27
Revise los seguintes antes de pedir servicio.
Prevención / Cura
ectamente el Cable de Cor
r
riente?
o después de dorar.
no sucio? Si el interior del hor
no no
Page 28

RECETAS
Nota
Utilice un recipiente resistente al calor que es menos de 10 x 10 x 3 pulgadas en tamaño. Observe todos
los artículos del alimento a través de la ventana y cubra con papel de aluminio si se dora muy rápido.
Bruschetta de Tomate
1. Caliente el aceite de oliva en un sartén a
fuego mediano. Saltee el ajo por 2 minutos.
8-12 porciones 400˚F 6-10 minutos
Ingredientes:
11/2 Tomates, sin semillas y picados en piezas de
1
servir de
/4 pulgadas
3 dientes de ajo (desmenuzado)
1 cda de aceite de oliva
1
/4 corazones de alcachofa marinados,
desaguados y picados
1
1
/2 cdta de queso de Parmesano desmenuzado
1
/4 cdta albahaca seca
1 pan francés pequeño
2. Mezcle los tomates picados, ajo, aceite de
oliva, corazones de alcachofa, y albahaca
seca en un tazón pequeño.
3. Deje reposar en la refrigeradora por los
menos de dos horas.
4. Corte el pan francés en dos mitades a lo largo
y colóquelos sobre la Bandeja para Hornear
en el horno. Deje dorar un poco.
5. Saquélo del horno y agregue con la mezcla de
tomate.
6. Rocíe con queso de parmesano y colóquelos
sobre la Bandeja para Hornear.
7. Hornee en un horno precalentado por 6-10 minutos.
Macarrones con Queso al Horno
2 porciones 470˚F 8-12 minutos
Ingredientes:
1
/2 taza de macar
1
/2 cebolla pequeña, cortada en trozas delgadas
rones coditos
sal y pimienta
1
/3 taza de queso desmenuzado
Para la Salsa Blanca:
1 cda de mantequilla
1 cda harina para todo pr
1
/8 cdta de sal
3
/4 taza de leche
opósito
Camarones Fritos al Horno
16 Camarones (8 por vez) 400˚F 8-10 min.
Ingredientes:
16 camar
sal y pimienta
Para la Mezcla de:
31/2 cda de aceite vegetal
2
/3 taza migajas de pan
1 huevo, bateado
1 cda de harina
ones medianos
1. Cocine el macarrone conforme a las indicaciones
del paquete. Escurra la pasta cuando esté lista.
2. Saltee la cebolla en un sartén.
3. En una olla, derrita la mantequilla y agregue la
harina. Añada la leche. Cocine y revuelva
hasta que la mezcla esté cremosa y burbujeada.
Agregue una rociada de sal y pimienta.
4. En un recipiente resistente al calor, mezcle la
pasta cocida, cebolla, y salsa blanca.
5. Rocíe con queso.
6. Colóquelo sobre la Bandeja para Hornear y
ecalentado por 8-12
nee en un hor
hor
no pr
minutos.
Caliente el aceite en un sartén. Agregue migajas
1.
de pan y saltee hasta que se dore ligeramente.
2. Pele los camarones pero deje la cola con su
caparacho.
Séquelos bien con una toalla de papel para quitar
3.
la humedad. Sazone con sal y pimienta a su
gusto. Cubra los camarones con harina, metálos
en la mezcla de huevo, y empanícelos.
Cubra la Bandeja para Hornear con papel de
4.
aluminio. Coloque los camarones sobre la
Bandeja para Hor
near y hor
nee en un horno pre
calentado por 8-10 minutos.
28
Page 29

Kabobs de Pollo de Teriyaki
6-8 porciones 400˚F 10 minutos
Ingredientes para marinada:
11/2 tazas salsa de soya
1 cup + 1 cda azúcar moreno
4 cucharas aceite vegetal
3 diente de ajo exprimido
1
/2 cdta cebolla verde picada
1
Ingredientes para kabobs:
Pechugas de pollo sin hueso y piel
Cebolla roja, cortada en pedazos cuadrados
Pimientos rojo y verde, cortados en pedazos cuadrados
Rodajas de Piña (opcional)
1. Prepare la marinada y deje los pedazos del pollo de
2. En cada uno de los palillos, alterne los trozos de
3. Coloque sobre la Parrilla con la Bandeja para
4. Cocine en un horno precalentado por aproximadamente
marinar por varias horas.
pollo, la cebolla roja, la pimienta verde, y la piña.
Antes de usar los palillos para las brochetas,
póngalos en agua fría durante 10 minutos para
evitar que se quemen.
Hornear abajo.
10 minutos. Voltee los palillos a lo necesario
Lasaña de Pavo Molino y Verdura
4-6 por
ciones 400˚F 35-40 minutos
Ingredientes:
6 onzas de pasta para lasaña
1
/2 libra de pavo molido
1
/2 tazas floretes del brócoli
1
3
/4 tazas salsa de tomate
1
5 onzas paquete de espinaca congelada, bien
escurrida
3
/4 taza zanahorias desmenuzadas
4 oz. queso de Fontina desmenuzado
1
4
/2 cdta queso rallado
1
/4 cdta albahaca seca
sal y pimienta
1. Cocine la pasta para lasaña conforme a las
indicaciones del paquete. Escurra la pasta
cuando esté lista.
2. Cocine el pavo molido en una cacerola y sazone
con sal y pimienta a su gusto. Escúrralo bien.
3. Hierva el brócoli hasta que se ponga el color verde claro.
4. Distribuya una capa fina de salsa de tomate en el
fondo de la bandeja.
5. Coloque una capa de pasta para lasaña sobre la salsa.
6. Distribuya la espinaca y las zanahorias des
menuzadas parejamente sobre la pasta.
7. Rocíe un poco de queso por encima.
3
8. Cubra con una capa de pasta y vierta
/4 de salsa
por encima.
9. Distribuya el brócoli sobre la salsa y coloque con
una capa de pasta.
10. Distribuya la última salsa sobre la pasta.
11. Rocíe el resto del queso.
12. Adorne con albahaca.
13. Coloque el recipiente en la Bandeja para Hornear y
hornee en un horno precalentado por aproximadamente
35-40 minutos.
14. Super
vise cuidadosamente y cubra con papel de
aluminio por si se dora muy rápido.
Pan Tostado con Canela
6 porciones 470˚F 1-2 minutes
Ingredientes:
pan de trigo (las cortezas pueden ser cortadas)
2 cda + 2 cdta mantequilla sin sal, ablandada
1
/4 cdta canela
1
1
/4 cdta azúcar
1
2
/3 cup azúcar moreno
ueste el pan hasta que se dore un poco. Unte con
T
1.
la mantequilla.
Combine los ingr
2.
edientes r
estantes en un tazón y
distribuya la mezcla sobre el pan tostado con
mantequilla.
Coloque el pan tostado con mantequilla sobr
3.
.
Bandeja para Hor
near
e la
4. Hornee en un horno precalentado por 1-2 minutos.
29
Page 30

Pastel de Manzana
6-8 porciones 400˚F 50-60 minutos
Ingredientes:
2 paquetes de corteza para pastel congelada de
9 pulgadas
5 tazas rodajas finas de manzana, sin cáscara
(5-8 manzanas)
1 cda jugo de limón
3
/4 taza azúcar
2 cdas harina
1
/2 cdta canela en polvo
1
/8 cdta nuez moscada en polvo
1. Descongele la corteza para pastel según las
instrucciones del fabricante. Quite una corteza del
molde y extiéndala para formar la corteza superior.
. Rocíe las manzanas con jugo de limón si se desea
2
un sabor mas ácido.
3. En un tazón, combine el azúcar, la harina, la canela
y la nuez moscada. Agregue las rodajas de
manzanas y mezcla suavemente.
4. Coloque una de las cortezas en un molde de pastel
resistente al calor.
5. Pase la mezcla de manzana al molde. Coloque la
corteza superior sobre del pastel y doble los
bordes hacia arriba, como tratando de cubrir las
manzanas. Corte 3-4 rajas en la corteza superior
para dejar pasar el calor cuando se está horneando.
6. Cubra el borde del paste con papel de aluminio
para que no se dore demasiado. Remove el papel
de aluminio hacia terminar de cocinar para
alcanzar el dorado que deseas.
7. Coloque sobre la Parrilla para Hornear y hornee en
un horno precalentado por 50-60 minutos o hasta
que esté listo.
Puff Pastry (Masa de Hojaldre) con Frambuesa y Chocolate
1. Deshele hoja del pan dulce según paquete.
2. Extienda la masa en forma de un rectángulo fino
sobre una bandeja de 14 x 10 pulgadas.
3. Córtela en dos mitades a lo largo. (Debe tener una
hoja de 7 x 10 pulgadas)
ox. 30 tor
Apr
Ingredientes:
1 1 paquete de puff pastry (masa de hojaldre)
1 huevo + 1 cda agua
1
/4 taza chocolate semi-sweet en pedazos
2 cdas jalea de la frambuesa sin semillas
ceduras 400˚F 6-8 minutos
4. Unte uno de los pliegues de masa con la mitad de
la jalea, y rocíe las piezas de chocolate.
5. Cierre el relleno con el pliegue de masa de hojaldre.
6. Con un rodillo extienda la masa suavemente.
7. Corte en rectángulos del tamaño de
8. Tuerza y coloque sobre la Bandeja para Hornear
ta en papel de aluminio.
cubier
9. En un tazón pequeño, bata el huevo y el agua.
Brush lightly with egg mixtur
10. Hornee en un horno precalentado por 6-8 minutos
o hasta que esté dorada.
11. Permita que se enfrié y rocíe ligeramente el azúcar
en polvo como opción.
1
/2 pulgada.
e.
30
Page 31

GARANTÍA LIMITADA DEL HORNO TOSTADOR DE CONVECCIÓN DIGITAL SANYO SK-VF7S
OBLIGACIONES
Para obtener servicios garantizados por fábrica, llame el número de teléfono de llamada gratis abajo. La unidad debe
ser embalada en el cartón original o en un cartón firme y bien acolchonado para evitar daños durante el envío.
NNootta
a
: No devuelva esta unidad a la tienda de venta al por menor para servicio.
Para obtener servicios garantizado por fábrica, información sobre funcionamiento de un producto o para la
resolución de problemas, llame
Días Hábiles de 8:00 AM hasta 5:00 PM hora del Pacífico de los Estados Unidos
o visite nuestra página de Internet en www.sanyoservice.com
ESTA GARANTÍA ES VÁLIDA ÚNICAMENTE PARA PRODUCTOS SANYO COMPRADOS Y USADOS EN LOS ESTADOS
UNIDOS DE AMÉRICA.
ESTA GARANTÍA APLICA ÚNICAMENTE AL USUARIO AL POR MENOR ORIGINAL Y NO APLICA A PRODUCTOS USADOS PARA CUALQUIER OBJETO INDUSTRIAL, PROFESIONAL O COMERCIAL. EL CONTRATO DE COMPA Y VENTA O
RECIBO DE VENTA CON FECHA ORIGINAL DEBE SER PRESENTADO AL CENTRO DE SERVICIO DE SANYO AUTORIZADO
EN EL MOMENTO EN QUE SE SOLICITA SERVICIO DE GARANTÍA.
Sujeto a las OBLIGACIONES arriba y las EXCLUSIONES abajo, SANYO FISHER COMPANY (SFC) garantiza este producto SANYO contra defectos en materiales y mano de obra para los períodos de MANO DE OBRA y PIEZAS especificadas abajo. SFC reparará o reemplazará (a la opción de SFC) el producto y cualquiera de sus piezas que no conforman con esta garantía. El periodo de garantía comienza en la fecha en que el producto fue comprado por primera vez
al nivel de venta al por menor.
MANO DE OBRA PIEZAS
UN AÑO UN AÑO
1-800-421-5013
EXCLUSIONES
Esta garantía no cubre (A) el ajuste de controles operados por el cliente tal como explicados en el manual de
instrucción del modelo apropiado, o (B) la reparación de cualquier producto cuyo número de serie ha sido alterado, desfigurado o retirado.
Esta garantía no aplicará a la configuración, instalación, retiro del producto para reparación o reinstalación del producto después de reparación.
Esta garantía no aplica a reparación o reemplazos necesitados por cualquier causa más allá del control de SFC
incluyendo, pero no limitándose, a cualquier función defectuosa, defecto o fallo causado por o como resultado de servicio o piezas no autorizados, mantenimiento inapropiado, funcionamiento contrario a las instrucciones proporcionadas, accidentes de envío o de tránsito, modificación o reparación por el usuario, abuso, uso indebido, negligencia, accidentes, voltaje de línea de potencia incorr
mayor), o desgaste debido a uso normal.
Lo antedicho remplaza todas las otras garantías expresas y SFC no asume ni autoriza ninguna parte a asumir por la compañía cualquier otra obligación o responsabilidad.
LA DURACIÓN DE CUALQUIER GARANTÍA QUE PUEDE SER IMPLÍCITA POR LA LEY (INCLUYENDO LAS GARANTÍAS DE COMERCIABILIDAD E IDONEIDAD) SE LIMITA AL PERÍODO DE ESTA GARANTÍA. EN NINGÚN CASO SFC TENDRÁ RESPONS
ABILIDAD POR DAÑOS ESPECIALES, INCIDENTALES O CONSECUENTES QUE SURGEN DE LA POSESIÓN O USO DE ESTE
PRODUCTO, O POR CUALQUIER DEMORA EN EL DESEMPEÑO DE SUS OBLIGACIONES BAJO ESTA GARANTÍA DEBI DO A CA USAS
MÁS ALLÁ DE SU CONTROL. ALGUNOS ESTADOS NO PERMITEN LIMITACIONES SOBRE CUÁNTO TIEMPO DURA UNA
GARANTÍA IMPLÍCITA Y/O NO PERMITEN LA EXCLUSIÓN O LIMITACIÓN DE DAÑOS CONSECUENTES, ASÍ QUE LAS LIMITACIONES Y EXCLUSIONES ARRIBA POSIBLEMENTE NO APLICAN A USTED.
ESTA GARANTÍA LE DA A USTED DERECHOS LEGALES ESPECÍFICOS. ES POSIBLE QUE USTED TENGA OTROS DERECHOS, QUE VARÍAN DE EST
P
ara su protección en el caso de robo o pérdida de este producto, por favor llene la información abajo para sus propios registros.
Número de Modelo _______________________Número de Serie _________________________________________
Fecha de Compra ________________________
Donde fue Comprado _____________________________________________________________________________
ADO A EST
ADO.
ecta, incendio, inundación o otras Acciones de Dios, (fuerza
(Ubicado en el lado atrás o de abajo de la unidad)
ecio de Compra
Pr
________________________________________
-
31
Page 32

0204
21605 Plummer Street
Chatswor
th, CA 91311
www.sanyo.com
Printed in China
 Loading...