

Sanyo LNSS02K User Manual

PARTS LIST
Following parts are contained in the packing.
· LENS 1 piece
· LENS MOUNTING SCREWS 6 screws (2 for spare)
· DRIVER 1 piece
· LIGHT-BLOCK SHEET 1 sheet
· LENS COVER 1 set
NOTES ON LENS REPLACEMENT
LENS REPLACEMENT PROCEDURE
LCD PROJECTOR LENS
MODEL NO. LNS-S02K Series
Lens replacement should be performed by the qualified service personnel.
It should be followed by this procedure precisely.
Before attempt to replace the lens, confirm the model number (both the LCD
projector and the lens) and use the proper lens.
If you have any questions, contact to the dealers.
Following checks and confirmations should be taken for safety.
Check the following things by the time of the cabinet cover installation after
the lens replacement.
1. Confirm the proper wiring and the wires are fixed properly.
2. Confirm the each connector is connected properly.
3.Wiring must not be tangled in the gear of the lens motor or the other
mechanical part.
4.There is no missing part, or no loosing mounting par t.
1AA6P1P1987-- (ICPF)
ICPF/ICPR/ICPS
LENS REPLACEMENT PROCEDURE
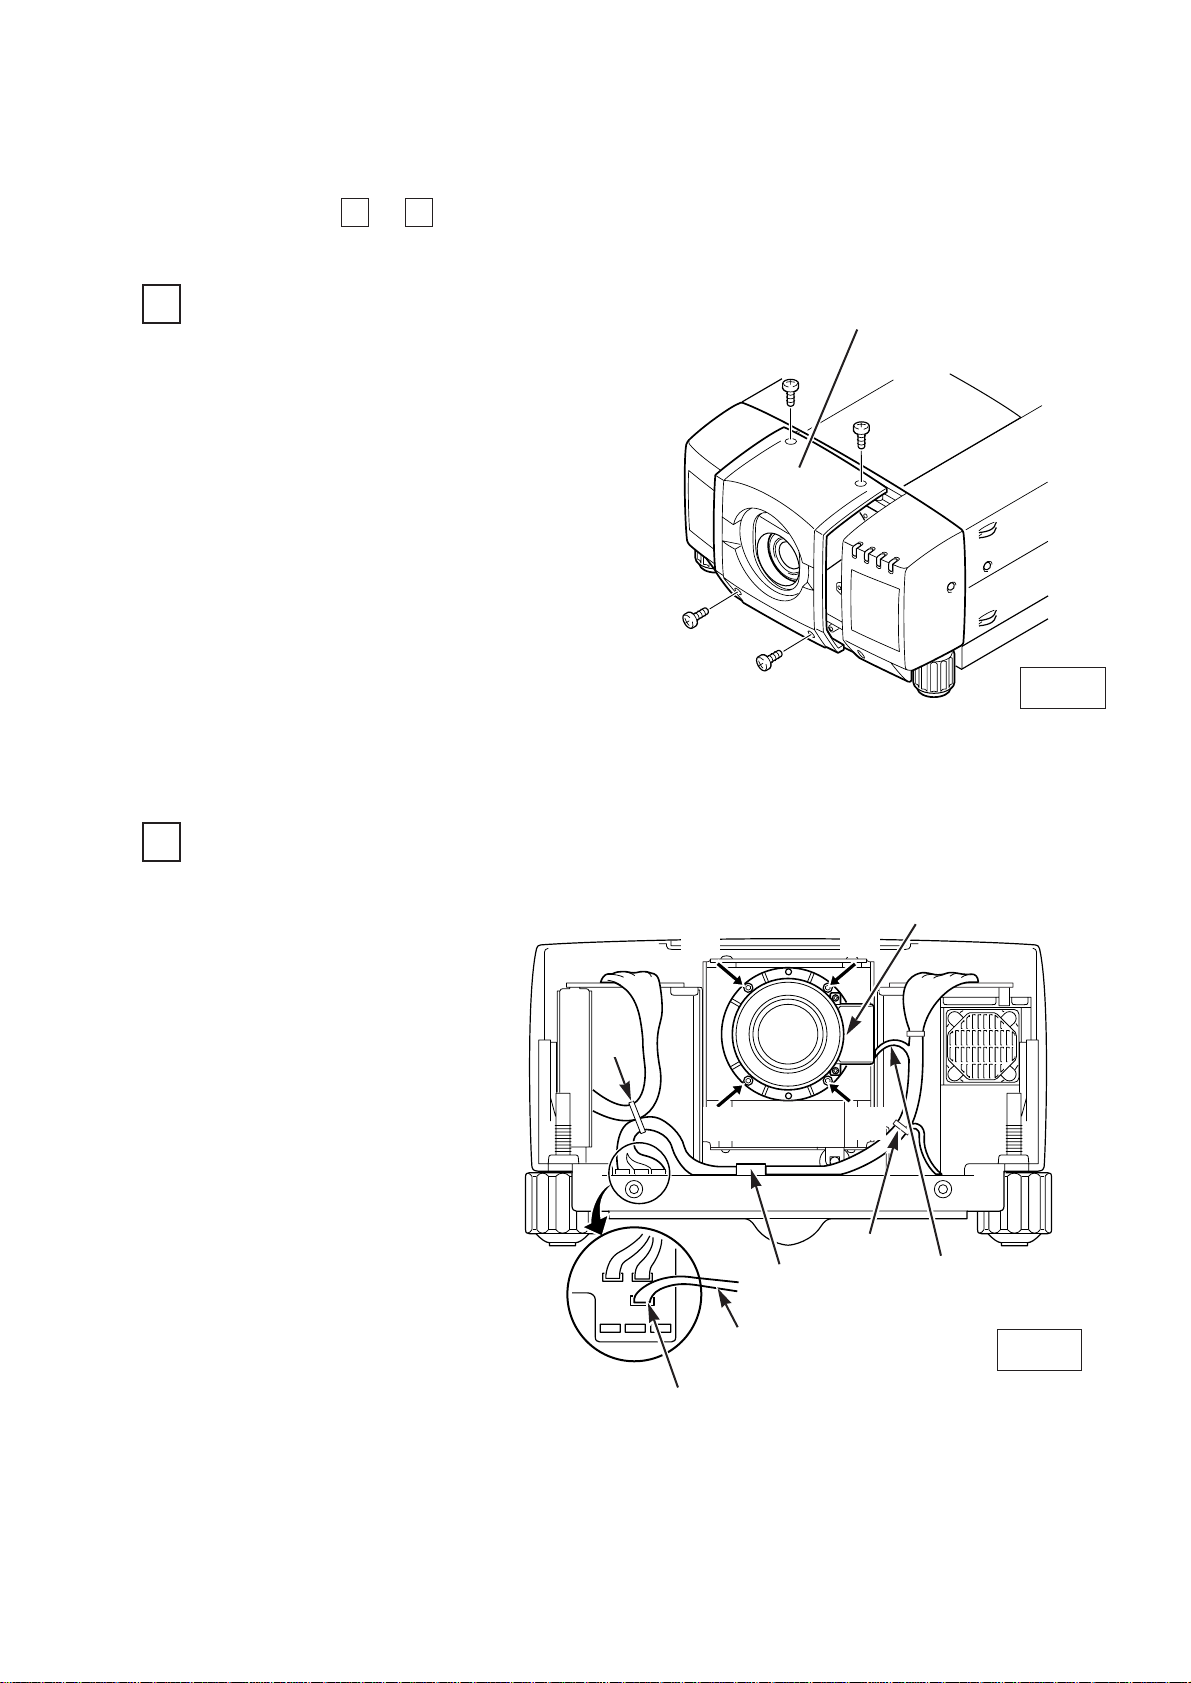
REMOVE THE LENS COVER. (See figure-1.)
1
1. Turn on the LCD projector.
2. Adjust the lens shift, so that lens is set in
the center.
3. Turn off the LCD projector and disconnect
the power cord from the AC outlet.
4. Remove 4 screws of the lens cover and
remove the lens cover.
REMOVE THE LENS. (See figure-2.)
2
1. Remove the connector
“K16B” of the circuit board.
2. Loosen the A, B wire bands,
wire holder and remove the
lens motor lead.
3. Remo ve screws D(4 scre ws)
which fastens the lens and
remove the lens.
LENS
MOT OR LEAD
CONNECTOR “ K16B “
(D)
(D)
(D)
(D)
B
A
LENS MOT OR
Fig-2
This part wiring should
not be tightened.
❋Figure shown inside of the cabinet.
Fig-1
LENS COVER
1 5
Perform the steps to for lens replacement.
WIRE HOLDER
 Loading...