

Page 1
ESPAÑOL
PORTUGUÊS 99
ENGLISH 1
25
49
74
DEUTSCH
FRANÇAIS
INSTRUCTION MANUAL
Digital Voice Recorder
ICR-FP500
PLAY/PAUSE
REC
STOP/OFF
MENU REPEAT ERASE
DIGITAL VOICE RECORDER
FP500.indd 1 2008.6.19 3:30:40 PM
Page 2
1
25
49
74
ENGLISH
Precautions
- The apparatus shall not be exposed to dripping or splashing.
- Do not drop the unit or subject it to strong shocks.
- Do not use where there are extremes of temperature (below 5°C
or exceeding 35°C).
- Excessive sound pressure from earphones and headphones
can cause hearing loss.
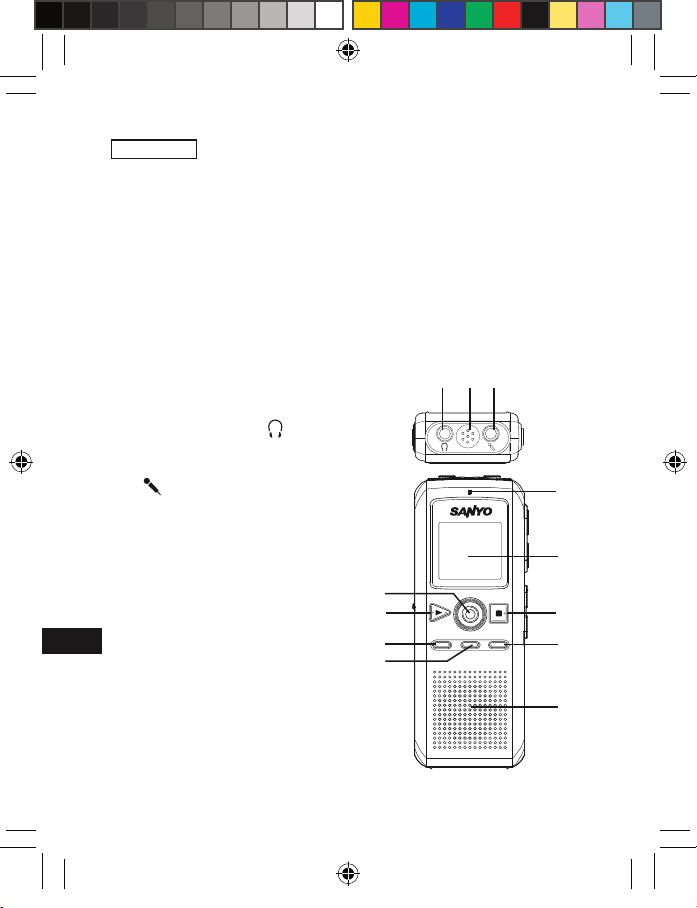
Controls
1. Earphone socket ( )
2. Built-in microphone
3. External microphone socket
( )
4. Recording LED
5. Display
6. Stop/Power off button (n)
(STOP/OFF)
7. Erase button (ERASE)
8. Built-in speaker
9. Repeat button (REPEAT)
10. Menu button (MENU)
11. Play/Pause/Power on button
(a) (PLAY/PAUSE)
12. Record button (m) (REC)
PLAY/PAUSE
REC
STOP/OFF
MENU REPEAT ERASE
DIGITAL VOICE RECORDER
1 2
3
4
5
6
7
8
9
10
11
12
FP500.indd 1 2008.6.19 3:30:42 PM
Page 3
2
25
49
74
25
49
74
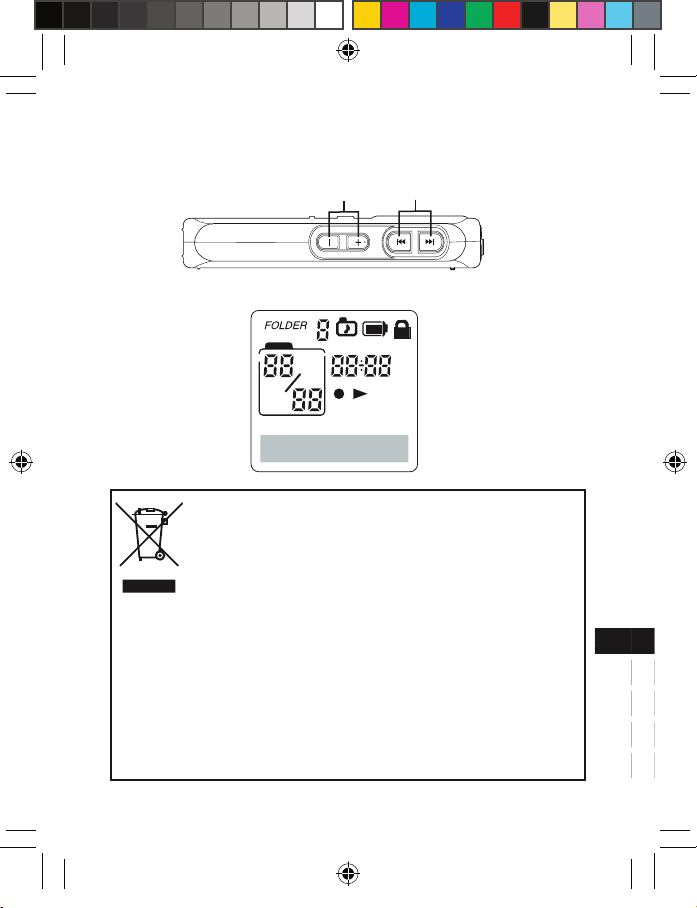
13. Volume buttons (VOLUME)
14. Skip/Search buttons (f, e) (SKIP/SEARCH)
Display
Your SANYO product is designed and manufactured
with high quality materials and components which can
be recycled and reused.
This symbol means that electrical and electronic equipment, at their end-of-life, should be disposed of separately from your household waste.
Please dispose of this equipment at your local community waste collection/recycling centre.
In the European Union there are separate collection
systems for used electrical and electronic products.
Please help us to conserve the environment we live in!
VOLUME
SKIP/SEARCH
14
MM DD
AM
PM
ON
E
AL
L
CONF
VA
S
DICT
HQSPLP
REMAIN
13
FP500.indd 2 2008.6.19 3:30:44 PM
Page 4
25
49
74
3
25
49
74
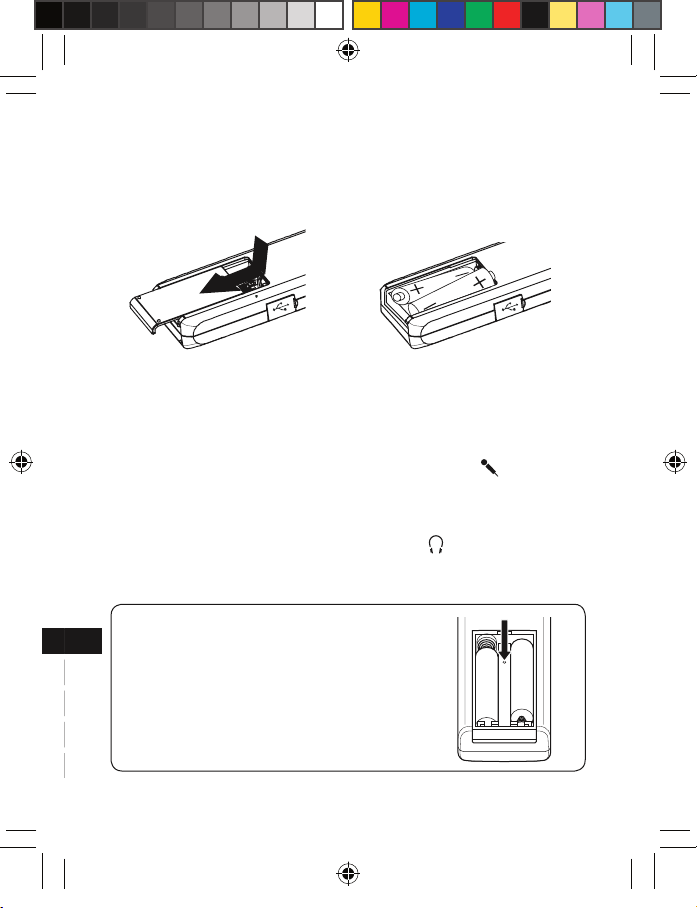
Inserting batteries
1. Remove the battery compartment lid.
2. Install two “R03/HP16/AAA” batteries (not supplied). Observe
proper polarity and replace the lid.
1 2
Connections
External microphone
Plug an external microphone (not supplied) into the socket. The
built-in microphone is automatically disconnected.
Earphone
Connect an earphone (not supplied) to the socket for monitoring the content being recorded or for private listening. The built-in
speaker is automatically disconnected.
WHAT TO DO IF...
If the operation of the unit or display is not
normal,
1. Open the battery compartment lid.
2. Press the RESET switch for at least 3
seconds using a small ball-point pen,
etc.
3. Resume operation.
FP500.indd 3 2008.6.19 3:30:47 PM
Page 5
4
25
49
74
25
49
74
Getting start
Turning the power on and off
Press the PLAY/PAUSE button to turn the power on. The “LOADING.” appears briefly then the
display lights and the unit is in the stop mode.
To turn the power off, press the STOP/OFF
button for at least 2 seconds in the stop mode.
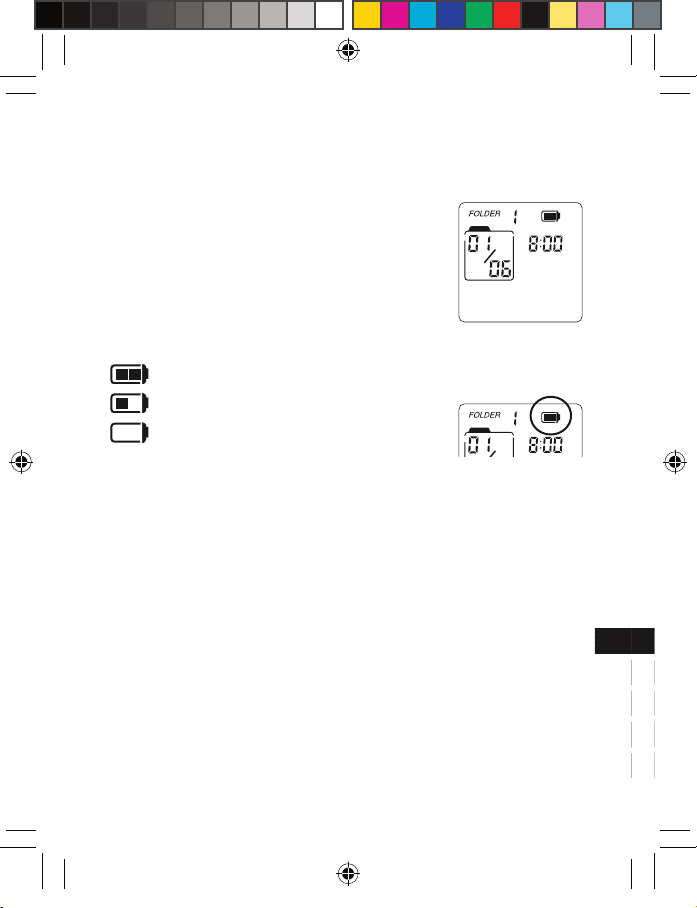
Battery indicator
Shows the battery condition while the unit is operating.
: Full
: Approximately half used
: Weak or exhausted batteries, must be
replaced
CAUTION:
- Do not replace the batteries while the power is on. It may cause
the unit malfunction.
- Remove the batteries if the unit will not be used for a month or
longer.
- Dispose of all used batteries safely and in accordance with all
applicable laws.
- Battery shall not be exposed to excessive heat such as sunshine, fire or the like.
Auto power off function
If you do not use the unit for 3 minutes, the power will be automatically turned off.
02:18:45
AM
ON
E
VA
S
DICT
LP
REMAIN
AM
Example:
(Stop mode)
FP500.indd 4 2008.6.19 3:30:50 PM
Page 6
25
49
74
5
25
49
74
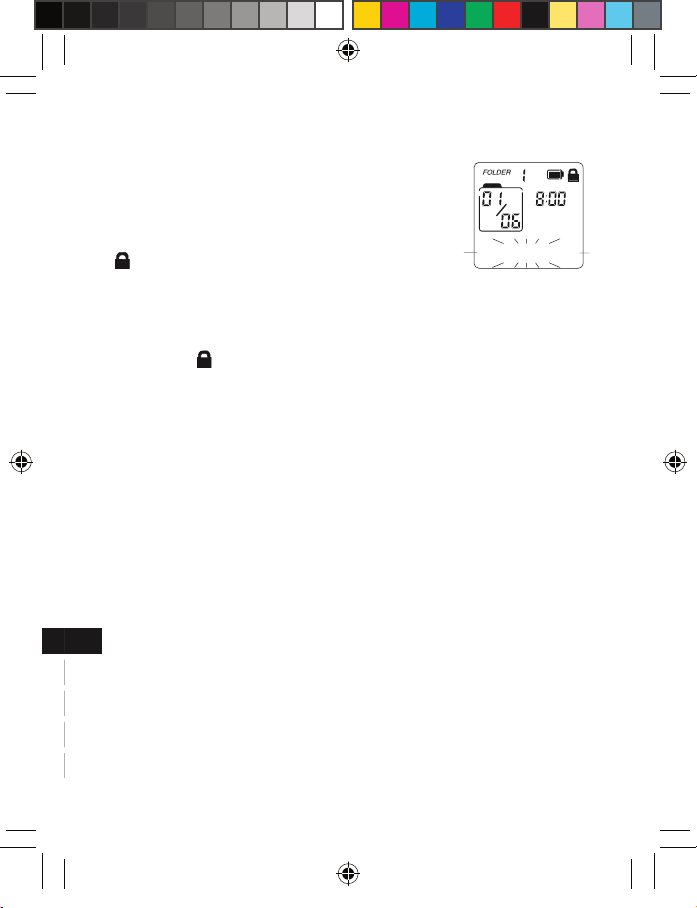
Lock function
This function avoids accidental button activation
during recording or playback.
Press the MENU button for at least 2 seconds to
set the lock mode. “LOCKED” flashes briefly and
“ ” remains lit.
- If you press any other button while the unit
is in the lock mode, “LOCKED” flashes and the button will not
function.
Press the MENU button for at least 2 seconds again to release the
lock mode. “ ”disappears.
Beep
Beep sound can be heard whenever you press any button except during playback and recording (See page 8).
Date and time setting
With this function, you can always read on the display the recording
date and time of your recorded messages (See page 9).
- You can still use this unit for normal recording without setting the
time. However, no correct recording date and time can be referred
for your recorded massages.
LOCKED
AM
ONE
VA
S
DICT
LP
REMAIN
FP500.indd 5 2008.6.19 3:30:51 PM
Page 7
6
25
49
74
25
49
74
Menu function
Common procedures of menu function
1. In the stop mode, press the MENU button briefly. The unit enters
the menu setting mode. Only the related indicator is lit and all
other indicators go off.
Each time the button is pressed, the display changes as fol-
lows:
“DICT” (or “CONF”) “LP” (or “HQ” or “SP) “VAS” (OFF
or ON) “SPEED” ( or “SLOW” or “FAST” ) “ONE”
(or “ALL”) “a” “TONE” (or “NO TONE”) Date and time
setting mode (YEAR, MM/DD, 12 or 24 HOUR, TIME)
Stop mode
2. To change the setting of the selected menu, press the e or
f SKIP/SEARCH button. (For more detail, refer to the following explanations.)
- If no button is pressed within 10 sec., the stop mode re-
turns.
3. Press the STOP/OFF button to quit the menu setting mode. The
stop mode returns.
DICT (or CONF) : Setting recording condition
DICT (dictation): In a more enclosed area
and recording source is close to the
unit.
CONF (conference): In a more open area
and recording source is far from the unit.
v v
v v
v
v
DICT
v
FP500.indd 6 2008.6.19 3:30:52 PM
Page 8
25
49
74
7
25
49
74
LP (or HQ or SP) : Setting recording quality
The recording time differs as shown below.
Recording mode Recording time (approx.)
LP: Long
SP: Standard
HQ: High-quality
140 hr
70 hr
35 hr
VAS (OFF or ON) : Setting VAS (Voice activated system)
OFF: To start and stop recording manually
ON: Recording begins when you are speak ing into the microphone. When dictation
stops for about 3 seconds, recording
stops. “VAS” remains lit.
Press the “+” or “-” VOLUME button to set the microphoneʼs
sensitivity when recording begins. The
VAS sensing mode appears (“SEN
LOW”, “SEN MID”, “SEN HIGH”).
SPEED (SLOW or FAST) : Setting playing speed
SPEED: Normal playback
SLOW: Slow forward playback
FAST: Fast forward playback
LP
VAS
OFF
VAS
DICT
LP
SEN HIGH
SPEED
FP500.indd 7 2008.6.19 3:30:55 PM
Page 9

8
25
49
74
25
49
74
ONE (or ALL) a : Setting play mode
a ONE: To play a specific file.
a ALL: To play all files in a folder.
TONE (or NO TONE) : Setting beep
TONE: Beep sound can be heard
whenever you press any button except
during playback and recording.
NO TONE: Beep off
ONE
TONE
FP500.indd 8 2008.6.19 3:30:56 PM
Page 10

25
49
74
9
25
49
74
Date and time setting mode: YEAR, MM/DD, 12 or 24 HOUR,
TIME
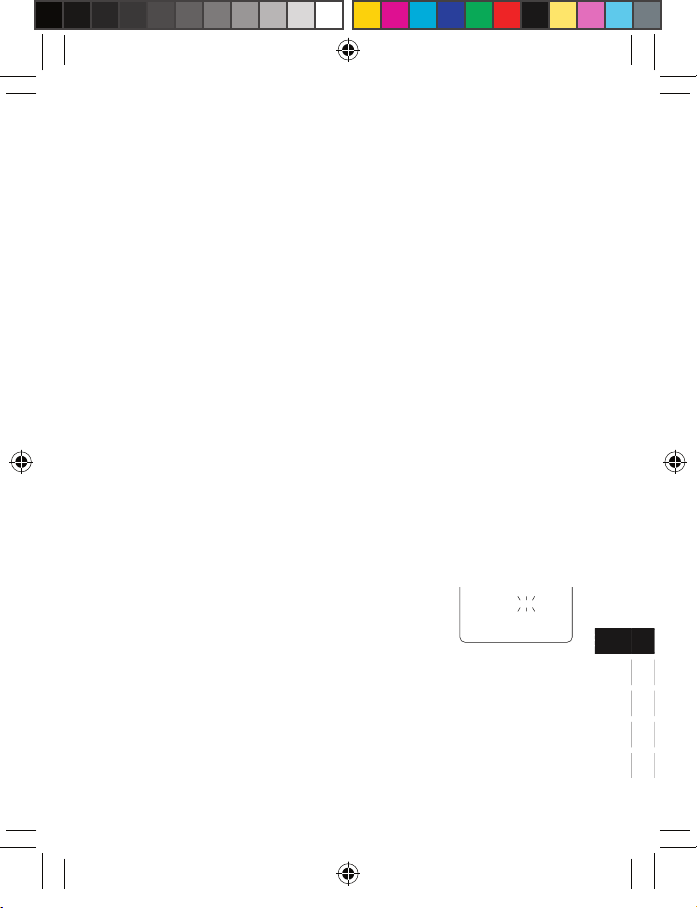
1. In the stop mode, press the MENU button seven
times. The unit enters the date and time setting mode. “YEAR” appears and the year
display flashes.
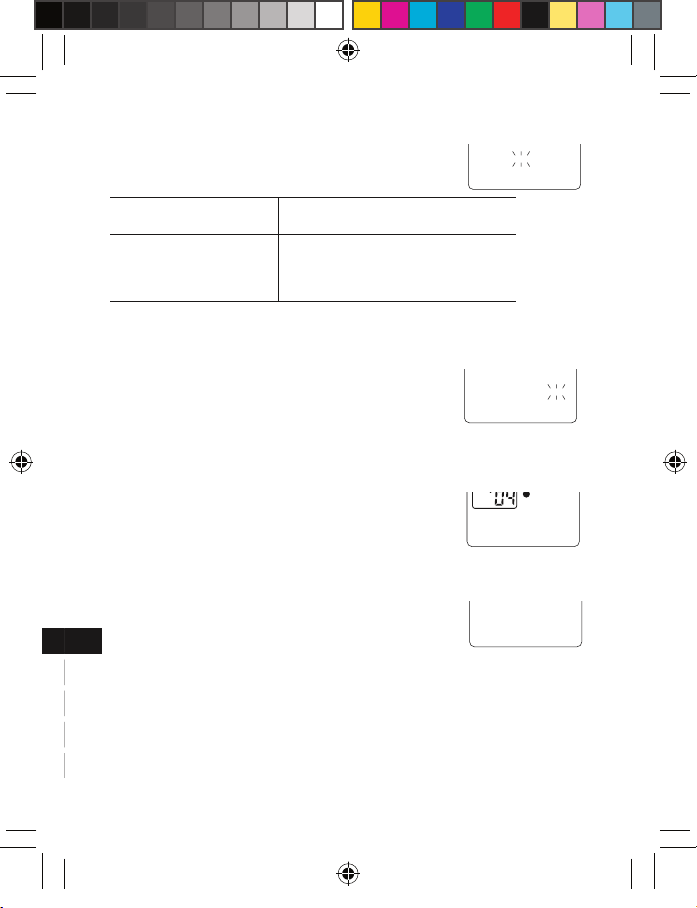
2. Press the e or f button repeatedly to select the year.
3. Press the MENU button. The month
display flashes.
4. Set the month, day, hour display (12-hour or 24-hour), hour and
minute by following steps 2 - 3 above.
(Year)
MM DD
MM/DD
(Month)
x
x x
MM DD
MM/DD
(Day)
AM
12 HOUR
(Hour display)
AM
TIME
(Hour)
AM
TIME
(Minute)
YEAR
FP500.indd 9 2008.6.19 3:31:00 PM
Page 11

10
25
49
74
25
49
74
Recording
Set the recording condition (DICT/CONF), recording quality (LP/HQ/
SP) and VAS function before you start recording (see pages 6-7).
1. In the stop mode, select the desired folder (see page 12).
2. Press the REC button. Recording starts with new file number.
The recording LED lights.
Example:
- For recording with VAS: See page 7.
3. To pause recording, press the REC button. “PAUSE” appears
and the recording LED flashes. Press it again to resume recording.
4. Press the STOP/OFF button to stop recording, “SAVE” appears
breifly.
Total remaining time for recording appears.
To view the remaining recording time, press and hold the PLAY/
PAUSE button during recording.
Note:
- You can record up to 99 files in one folder, not exceeding 594
files in total.
- When you are recording a power off occurs suddendly (Expamle:
Batteries fall down), the contents you recorded will not be
saved.
00:00:03
AM
DICT
HQ
Folder number
Current time
Record
Recording condition
Recording qualityRecording time
File number
Total file number
Current file number
FP500.indd 10 2008.6.19 3:31:01 PM
Page 12

25
49
74
11
25
49
74
Playback
Set the play mode (ONE/ALL) before you start playback (see page 8).
1. In the stop mode, select the desired folder (see page 12).
2. Press the e or f SKIP/SEARCH button to select the de-
sired file.
3. Press the PLAY/PAUSE button to start playback. The recorded
date appears briefly on the time display, then the recorded time
remains lit.
Example:
4. To pause playback, press the PLAY/PAUSE button. “PAUSE”
appears. Press it again to resume playback.
5. Press the “+” or “—” VOLUME button to ad-
just the volume (VOL 00 - VOL 28).
6. Press the MENU button. Playback point reverses for 5 seconds
within a file and playback continues.
7. Press and hold the e or f button to make a quick search
within a file.
8. Press the e button briefly to skip to the next file.
Press the f button briefly to skip back to the beginning of the
previous file.
9. Press the STOP/OFF button to stop playback.
00:00:05
AM
DICT
HQ VAS
ONE
Folder number
Recording time
Play mode
Playback
Playing time
Total file number
Current file number
VOL 13
AM
DICT
HQ VAS
ONE
FP500.indd 11 2008.6.19 3:31:03 PM
Page 13

12
25
49
74
25
49
74
Introscan
Play back the first 3 seconds of each file in a folder.
1. In the stop mode, select the folder.
2. Press the e or f button repeatedly until
“ALL” appears.
3. Press the PLAY/PAUSE button to start in-
troscan and “INTRO” appears.
4. Press the STOP/OFF button to stop introscan.
REPEAT button: Select desired folder
In the stop mode, press the REPEAT button repeatedly to select the
folder (1, 2, 3, 4, 5, 6 and music)
Note:
- In the FOLDER 1 ~ FOLDER 6 folder only the recorded file can
be played.
- In the music folder only MP3 and WMA file can be played.
Designated range repeat play (A-B Repeat)
1. Press the REPEAT button during play at the
beginning of the section you want to repeat
(Point A).
2. Press the REPEAT button again at the end of the section (Point
B). “AB REP” appears. The section between points A and B is
played repeatedly.
3. To return to normal play, press the REPEAT button again.
ALL
AM
DICT
HQ
ONE
REP-A
AM
DICT
HQ
ONE
FP500.indd 12 2008.6.19 3:31:04 PM
Page 14

25
49
74
13
25
49
74
Erasing
Erasing the selected file
1. In the stop mode, select the folder and file.
2. Press the ERASE button briefly. “DEL” and
selected file number “01” flash.
3. While “DEL 01” is flashing, press the ERASE
button for at least 2 seconds. The selected file in the folder is
erased. All the file numbers after the file that was erased are
reduced by one.
Erasing all files in one folder
1. In the stop mode, select the folder.
2. Press the e or f SKIP/SEARCH button until “ALL” ap-
pears.
3. Press the ERASE button briefly. “DEL ALL” flashes.
4. While “DEL ALL” is flashing, press the ERASE button for at least
2 seconds. All the files in the selected folder are erased.
Formatting (Erasing all files in all folders)
When the “DEL 01” or “ DEL ALL” is blinking press the REC button
for at least 3 seconds. “FORMAT” blinks and press the “ERASE”
button for at least 2 seconds, the formatting percentage changes
from 000% ~ 100% on the display. All files in all folders are erased.
- If you do not want to erase, press the STOP/OFF button.
- If you select the format function, the memory will be initialized
and all files will be erased. Use only when you need it. Save
a backup copy of your recorded messages on a PC, etc, if re-
quired.
DEL 01
AM
DICT
HQ
ONE
FP500.indd 13 2008.6.19 3:31:05 PM
Page 15

14
25
49
74
25
49
74
Connecting to PC
Recommended PC environment
Supported PCs Windows preinstalled PC
Supported OS Windows Vista
Windows XP Professional
Windows XP Home Edition
Windows Millennium Edition(Me)
Windows 2000 Professional (After SP3)
USB port One required for connection
Other Speakers or headphones required
Sound playback function required
Note:
- Operation is not guaranteed for Macintosh PCs.
- Operation is not guaranteed for the following environments.
Upgraded Windows environments
Windows 95, Windows NT,Windows 98,
Windows 98SE
Dual-boot Windows environments
- Standby, suspend, and other modes may not work properly with
your particular environment. If this is the case, do not use those
modes.
- This is not guaranteed to operate with all PCs in the recom-
mended setup.
- The file with copyright protection can not play on this unit.
- When using Windows XP or Windows 2000,
1. Log in as an administrator.
2. “Dynamic Disc” introduced in Window XP/2000 is not sup-
ported.
FP500.indd 14 2008.6.19 3:31:06 PM
Page 16

25
49
74
15
25
49
74
Connect the unit to your PC
Connect the unit to the USB terminal of the PC by using the original
USB connection cable supplied.
Note:
- Do not use an USB hub or USB extension cable (Operation is
not guaranteed). Use only the supplied USB connection cable.
- When you connect the unit to the PC for the first time, it sometimes
may not be recognized as a Removable Disk. In this case , dis-
connect the unit and reconnect it again.
Pay attention to the direction of the terminal.
FP500.indd 15 2008.6.19 3:31:07 PM
Page 17

16
25
49
74
25
49
74
1) select
2) check
3) click
Selecting the action Windows is to take
After connection, the following screen will appear (Windows XP
only).
- For Windows Me/2000, this operation is not needed.
Adjust your settings to match your PCʼs environment.
In this manual, “Take no action” is selected, “Always do the selected
action” is checked, and “OK” is clicked. This completes the connection to the PC.
When connected to the PC, the unit display will be as shown below
and none of the operating buttons will work.
PC LINK
FP500.indd 16 2008.6.19 3:31:09 PM
Page 18

25
49
74
17
25
49
74
Disconnecting the unit from your PC
Before disconnecting, make sure no data is being transferred.
For Windows XP
Follow the steps below to disconnect.
- The screen might be different for a different OS.
1. Right-click Task tray icon at the bottom right of the Windows
screen.
If the icon is not displayed, refer to the Windows help.
2. Click the “Safely Remove Hardware” displayed.
3. Select “USB Mass Storage Device” and click “STOP”.
FP500.indd 17 2008.6.19 3:31:11 PM
Page 19

18
25
49
74
25
49
74
4. Select the “USB Mass Storage Device” and click “OK”.
5. Disconnect the unit from your PC.
FP500.indd 18 2008.6.19 3:31:12 PM
Page 20

25
49
74
19
25
49
74
Displaying by Explorer
To start up Explorer
To use the same Explorer screen as the ones used in this manual,
start up the Windows XP Explorer as follows.
- The screens displayed on your PC may not exactly correspond
to those shown in this manual depending on the OS version and
manufacturer.
Click “start”, then right-click “My computer”, and select “Explorer”
from the menu that appears.
Explorer will start up.
FP500.indd 19 2008.6.19 3:31:14 PM
Page 21

20
25
49
74
25
49
74
Removable Disk display
An icon for a Removable Disk will appear in My Computer in Windows when the unit is connected to your PC.
[FOLDER 1] ~ [FOLDER 2]
Files recorded using the unit are stored here.
[MUSIC]
Files transfered from your PC are stored in this folder.
- There is no set format for file names for files, which are trans-
fered, but they must be MP3/WMA files.
- You can not create a folder in the MUSIC folder and move files
to the folder.
FOLDER_1 FOLDER_2
FOLDER_3 FOLDER_4
FOLDER_5
MUSIC
FOLDER_6
FOLDER 1
FOLDER 2
FOLDER 3
FOLDER 4
FOLDER 6
FOLDER 5
MUSIC
VOICE
FP500.indd 20 2008.6.19 3:31:15 PM
Page 22

25
49
74
21
25
49
74
Copying data by using Explorer
Start up Explorer (see page 19)
Copying files to the unit
Select the MP3/WMA (except for DRM contents) files to copy and
drag and drop them to the MUSIC folder in the Removable Disk
drive.
- Be sure to place the files in the MUSIC folder in the Removable
Disk.
FOLDER 2
FOLDER 1
FOLDER 3
FOLDER 4
FOLDER 5
FOLDER 6
MUSIC
VOICE
FOLDER 2
FOLDER 1
FOLDER 3
FOLDER 4
FOLDER 5
FOLDER 6
MUSIC
VOICE
1
2
FP500.indd 21 2008.6.19 3:31:17 PM
Page 23

22
25
49
74
25
49
74
Copying files to your PC
Select the MP3/WMA files you wish to copy inside the MUSIC folder
on the Removable Disk and drop them into a folder of your choice
on your PC.
FP500.indd 22 2008.6.19 3:31:18 PM
Page 24

25
49
74
23
25
49
74
Troubleshooting guide
Display is blank
- Check that the batteries are inserted proper polarity and not ex-
hausted.
Buttons do not respond
- Make sure the lock function is not activated.
Cannot record
- Make sure memory is not full.
- You have recorded 99 files in one folder. Try record in a new
folder.
- Check the total files are not exceeding 594.
No sound
- Make sure the volume is not set to 0.
- Make sure you have selected folder with recorded messages.
- Earphone should not be connected.
The Removable Disk is not displayed when the unit is connected to the PC
- Make sure the connect is corrected.
- Disconnect the unit from the PC and connect it again.
FP500.indd 23 2008.6.19 3:31:18 PM
Page 25

24
25
49
74
Cleaning the cabinet
Clean the outside of the unit with a clean soft cloth, moistened with
lukewarm water. Do not use benzene, thinner or alcohol since they
will mar the finish of the surfaces.
Sanyo cannot be held responsible for damage caused by improper use or modifications to the device, or data that is lost or
destroyed.
The normal function of the product may be disturbed by
strong Electro-Magnetic Interference. If so, simply reset
the product to resume normal operation by following the
instruction manual. In case the function could not resume,
please use the product in other location.
FP500.indd 24 2008.6.19 3:31:18 PM
Page 26

25
49
74
123
25
49
74
This set complies with the EMC Directive 2004/108 and with
the LVD Directive 2006/95.
Dieses Gerät entspricht der EMC-Direktive 2004/108 und der
LVD-Direktive 2006/95.
Cet appareil est en conformité avec la directive EMC 2004/108 et
avec la directive BT 2006/95.
Dit toestel is in overeenstemming met EMC-richtlijn 2004/108
en met LVD-richtlijn 2006/95.
Detta set uppfyller EMC-direktivet 2004/108 och Lågspänningsdirektivet 2006/95.
Questo set aderisce alle direttive EMC 2004/108 e alle direttive
LVD 2006/95.
Este aparato cumple con la Directiva EMC 2004/108 y con la
Directiva LVD 2006/95.
Este conjunto satisfaz a Directiva EMC 2004/108 e a Directiva
LVD 2006/95.
FP500Portuguese.indd 123 2008.6.19 3:36:24 PM
Page 27

SANYO Electric Co., Ltd.
5-5, Keihan-hondori, 2-chome, Moriguchi City, Osaka, Japan
(XE) AX809FP500002L
SPECIFICATIONS
Frequency respone
400 Hz - 2,500 Hz
Output power
120 mW
Power source
DC: DC 3V
(“R03/HP16/AAA” x 2)
Loudspeaker
28 mm dia.
Output terminal
: 32 ohms
Dimensions (W x H x D)
Approx. 43 x 111 x 20 mm
Weight
Approx. 40 g (without batter-
ies)
IMPORTANT INFORMATION
Because its products are subject to continuous improvement,
SANYO reserves the rights to
modify product designs and
specifications without notice and
without incurring any obligation.
SANYO FISHER Sales (Europe) GmbH
Stahlgruberring 4, D-81829
München, Germany
FP500Portuguese.indd 1 2008.6.23 2:02:25 PM
 Loading...