

Sanyo ICR-B160NX,ICR-B175NX,ICR-B170NX Instruction Manual

INSTRUCTION MANUAL
ISTRUZIONI PER L’USO
Digital Voice Recorder
Registratore vocale digitale
ICR-B160NX
ICR-B170NX
ICR-B175NX
GB English
D Deutsch
F Français
NL Nederlands
I Italiano

ENGLISH
Precautions
- The apparatus shall not be exposed to dripping or
splashing.
- Do not remove the batteries while operating the unit.
- Do not insert pins, etc., inside the unit.
- Do not drop the unit or subject it to strong shocks.
- Do not use where there are extremes of temperature
(below 5°C or exceeding 35°C).
- IBM and PC/AT are registered trademarks of
International Business Machines Corporation.
- Microsoft, Windows MediaTM, and the Windows® Logo
are trademarks or registered trademarks of Microsoft
Corporation in the United States and/or other
countries.
- Windows MediaTM Player is trademark or registered trademark of
Microsoft Corporation.
- Other system and product names generally are the
registered trademarks or trademarks of the respective
development manufacturers. The symbols TM and
are not shown in this manual.
Accessories
Original USB connection cable x 1
USB driver CD-ROM x 1
Headphones x 1 (ICR-B175NX only)
®
GB-1
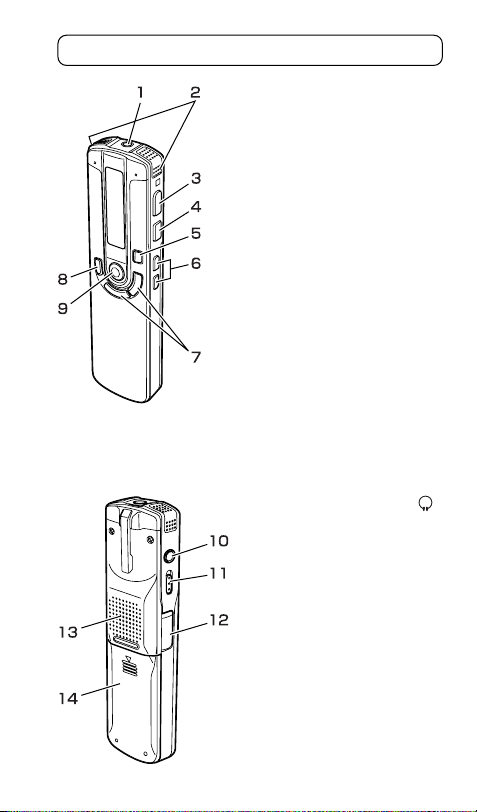
Controls
1. External microphone socket
(MIC(ST))
2. Built-in microphones (L/R)
3. Play/Pause button (i)
4. Stop/Menu button (n)
(MENU)
5. Erase button (ERASE)
6. Skip/Search buttons
(f, e)
7. Volume buttons (VOL.)
8. Folder/Repeat button
(FOLDER/REPEAT)
9. Record/Pause button
(m) (PAUSE/REC)
10. Headphones socket ( )
11. Hold switch (HOLD)
12. USB terminal (I/O)
13. Speaker
14. Battery compartment lid
GB-2

H
S
LCD display
1. Battery
2. Record
3. Recording mode
4. Timer
5. Alarm
6. VAS (Voice activated system)
7. Microphone sensitivity
8. Repeat/A-B Repeat
9. AM/PM
10. Time/Message/Mode display
VAS A-BHi
AM
PM
GB-3
Before use
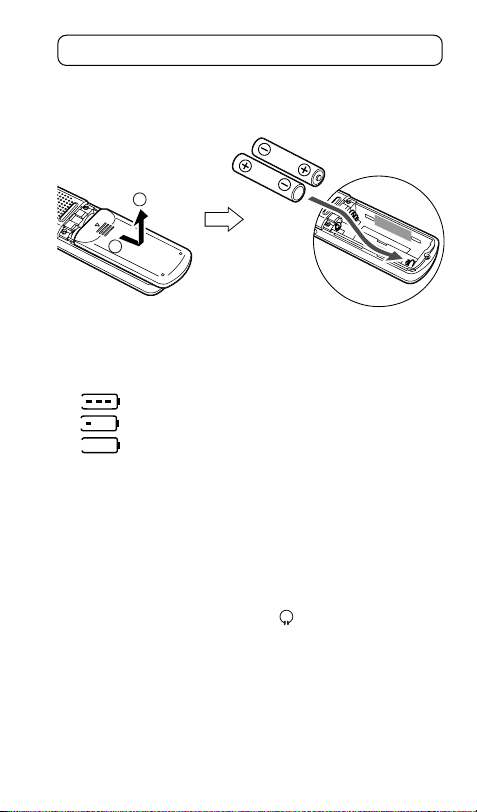
Inserting the batteries
Two AAA/LR03/HP16 alkaline batteries
(not supplied)
2
1
Battery indicator
Check the battery indicator on the LCD display for
remaining battery power.
Note:
Dispose of all used batteries safely in accordance with all
applicable laws.
Using headphones
Connect the headphones to the socket for monitoring
the content being recorded or for private listening. The
speaker is automatically disconnected.
For ICR-B160NX/ICR-B170NX: Headphones are not
supplied.
: Good condition
: Weak batteries
: Exhausted batteries, must be replaced with
new alkaline batteries. If not, after displaying “Lo
bAT”, the LCD display goes out.
GB-4
Using an external stereo microphone
Connect an external stereo microphone (not supplied) to
the MIC(ST) socket. The built-in microphones are
automatically disconnected.
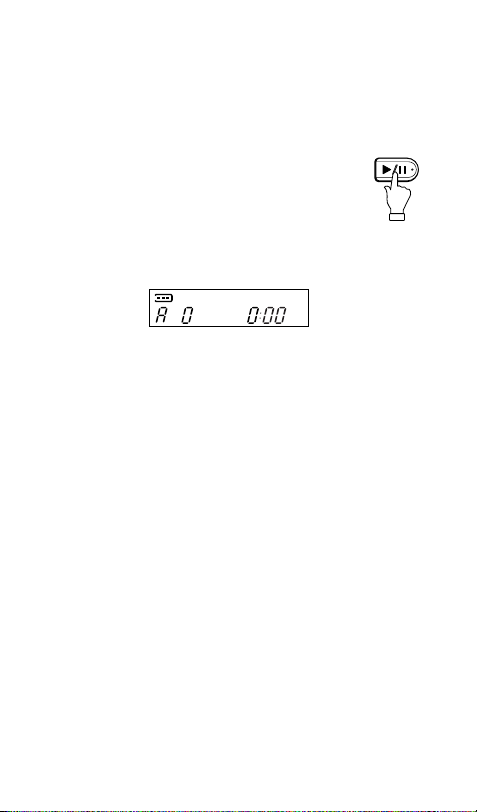
Turning the power on and off
Press the i button. “HELLO” appears briefly
on the display and the power turns on.
- The m PAUSE/REC or FOLDER/REPEAT
button can also be used.
Then the last selected file number and total playing time
appear (Resume function).
S
Hi
Press the i button for at least 2 seconds. “-byE-”
appears and the power turns off.
Auto power off function
- Leaving the unit on for 15 minutes without using it
automatically turns off the power.
- Leaving the unit on with recording pause for more
than 15 minutes turns off the power after creating the
recorded file.
Resume function
By storing the point where you stopped last, it becomes
possible to start playback of the file from that point even
after turning off the power.
- The resume function is cleared if the folder is changed,
if the unit is connected to your PC or if the batteries
are removed.
GB-5
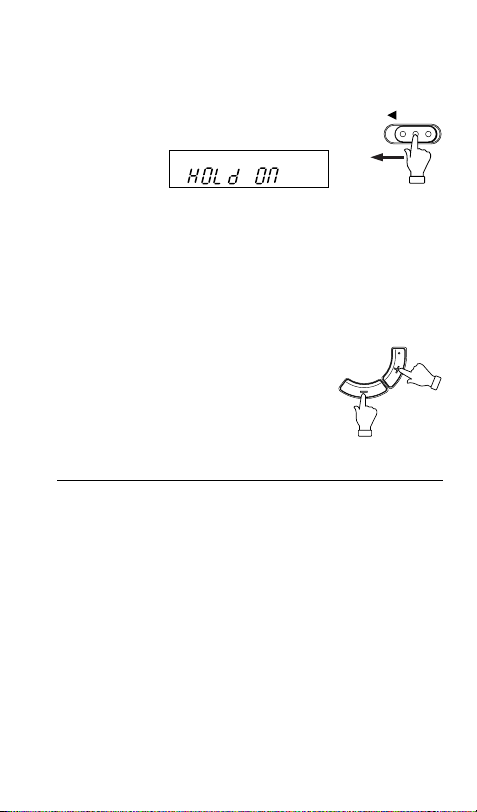
Hold function
This prevents operation from stopping by accidentally
pressing a button during recording or playback.
Set the HOLD switch to the left. The hold
function is engaged.
- If an operation button is pressed while the hold
function is engaged, “HOLd ON” will appear and
nothing else happens.
Set the HOLD switch to the right. “HOLd OFF” appears
and the hold function is disengaged.
HOLD
To adjust the volume
Press the VOL. + or – button.
The volume level appears (VOL 0 to
VOL 20).
Selecting the beep sound (See page 19)
VOL.
GB-6

Date and time setting
1. In the stop mode, press the n/MENU button
for at least 2 seconds.
S
Hi
2. Press the e or f button to select “dATE TIME”.
The unit enters the date and time setting mode.
S
Hi
3. Press the i button. The year display blinks.
4. Press the e or f button to select the year. Then
press the i button. The month display blinks.
5. Set the month, day, hour display (24H or AM/PM),
hour and minute by following step 4 above.
When the minute setting is completed, “dATE TIME”
returns.
6. Press the n/MENU button.
If you press the n/MENU button in the stop mode, the
current time appears.
GB-7

Recording
Recording time
The recording time differs as shown below.
ICR-B160NX
Recording mode Recording time (approx.)
HS: Super high-quality 30 min. (stereo)
HQ: High-quality 1 hr. (stereo)
SP: Standard 2 hr. 5 min. (stereo)
LP: Long 4 hr. 15 min. (monaural)
ICR-B170NX
Recording mode Recording time (approx.)
HS: Super high-quality 1 hr. (stereo)
HQ: High-quality 2 hr. 5 min. (stereo)
SP: Standard 4 hr. 15 min. (stereo)
LP: Long 8 hr. 35 min. (monaural)
ICR-B175NX
Recording mode Recording time (approx.)
HS: Super high-quality 2 hr. 10 min. (stereo)
HQ: High-quality 4 hr. 20 min. (stereo)
SP: Standard 8 hr. 40 min. (stereo)
LP: Long 17 hr. 25 min. (monaural)
GB-8

Selecting a recording mode
1. In the stop mode, press the n/MENU button for at
least 2 seconds.
2. Press the e or f button to select “REC ModE”.
S
Hi
3. Press the i button. The selected recording mode
blinks.
4. Press the e or f button to select the recording
mode.
Super high-quality High-quality
H
S
Hi
Standard Long
S
Hi
Then press the i button. “REC ModE” returns.
5. Press the n/MENU button.
HHi
Hi
GB-9
Selecting the folder
Press the FOLDER/REPEAT button to
S
select the folder (A, b, C, d or M).
Note:
- Since the M folder is the music folder, ordinary voice
data cannot be recorded to it, and is instead recorded
automatically to the A folder.
No recording is possible if the A folder is full.
- The unit can record up to 99 files in one folder. “FILE
FULL” appears when attempting to record the 100th
file.
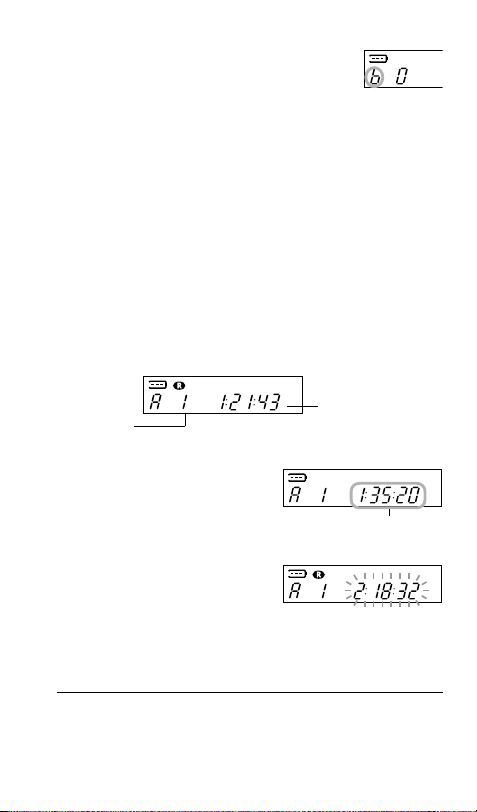
Starting recording
Press the m PAUSE/REC button. Recording starts
(standard recording mode is assumed for the following
description).
S
Hi
File
number
To stop recording
Press the n/MENU button.
To pause recording
Press the m PAUSE/REC
button. Press it again to resume
recording.
Remaining
recording time
S
Hi
Total playing time
S
Hi
Selecting the microphone sensitivity (See page 19)
GB-10
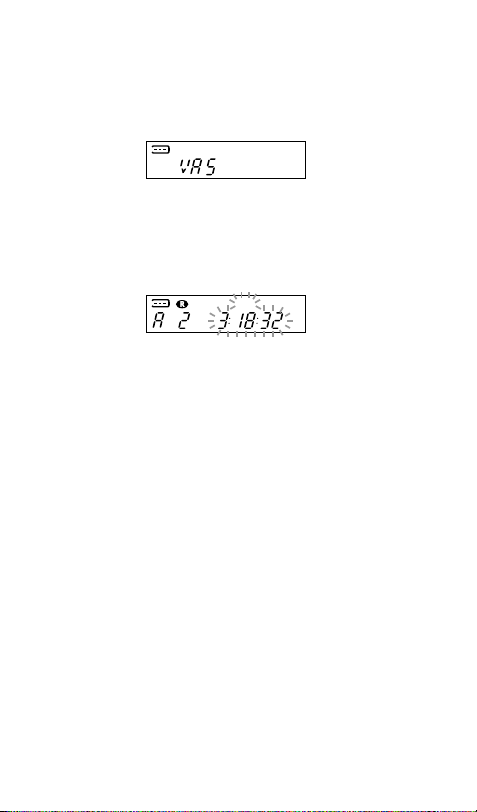
VAS recording
VAS: Voice activated system
1. In the stop mode, press the n/MENU button for at
least 2 seconds.
2. Press the e or f button to select “VAS”.
S
Hi
3. Press the i button. VAS “OFF” blinks.
4. Press the e or f button to select “ON”. “VAS”
appears. Then press the i button.
5. Press the n/MENU button.
6. Press the m PAUSE/REC button.
S
VAS H i
Recording begins when you are speaking into the
microphone. When dictation stops for about 3
seconds, recording stops.
Press the e or f button to set the microphone’s
sensitivity when recording begins. The VAS sensing
level appears (“VAS 1” - “VAS 5”).
GB-11
 Loading...