

Page 1

LC2A
Thank you for choosing the Sanus Systems VisionMount™ LC2A. The VisionMount™ LC2A is designed to mount two flat panel
televisions up to 1270 mm (50 in) and weighing up to 59 kg (130 lb) each to an existing NPT 1-1/2 threaded pipe drop. The LC2A
tilts the televisions from +5° to -15°, swivel up to ±90°, and roll ±6°.
CAUTION
The size and weight of each television must not exceed 1270 mm (50 in) diagonally and 59 kg (130 lb). Do not use
this product for any purpose not explicitly specified by Sanus Systems. Improper installation may cause property
damage and/or personal injury. If you do not understand these directions, or have doubts about the safety of the
installation, contact Sanus Systems Customer Service or qualified contractor. It is the responsibility of the installer
to verify the safety of the existing pipe drop. Sanus Systems is not liable for damage or injury caused by incorrect
mounting, assembly, or use.
Supplied Parts and Hardware
Make sure all parts are included and undamaged. Never use damaged parts. If hardware is damaged or missing, contact Sanus
Systems. Before returning products to the point of purchase, contact Sanus Systems. Replacement parts for products purchased
through authorized dealers are shipped directly to you.
[01] X 1 [02] X 1
[04] X 4
[05] X 8
[03] X 2
[06] X 4
Sanus Systems 2221 Hwy 36 West, St Paul, MN 55113 USA • 01.04.07 (6901-100129<00>)
USA Customer Service 800.359.5520 • www.sanus.com
Page 2
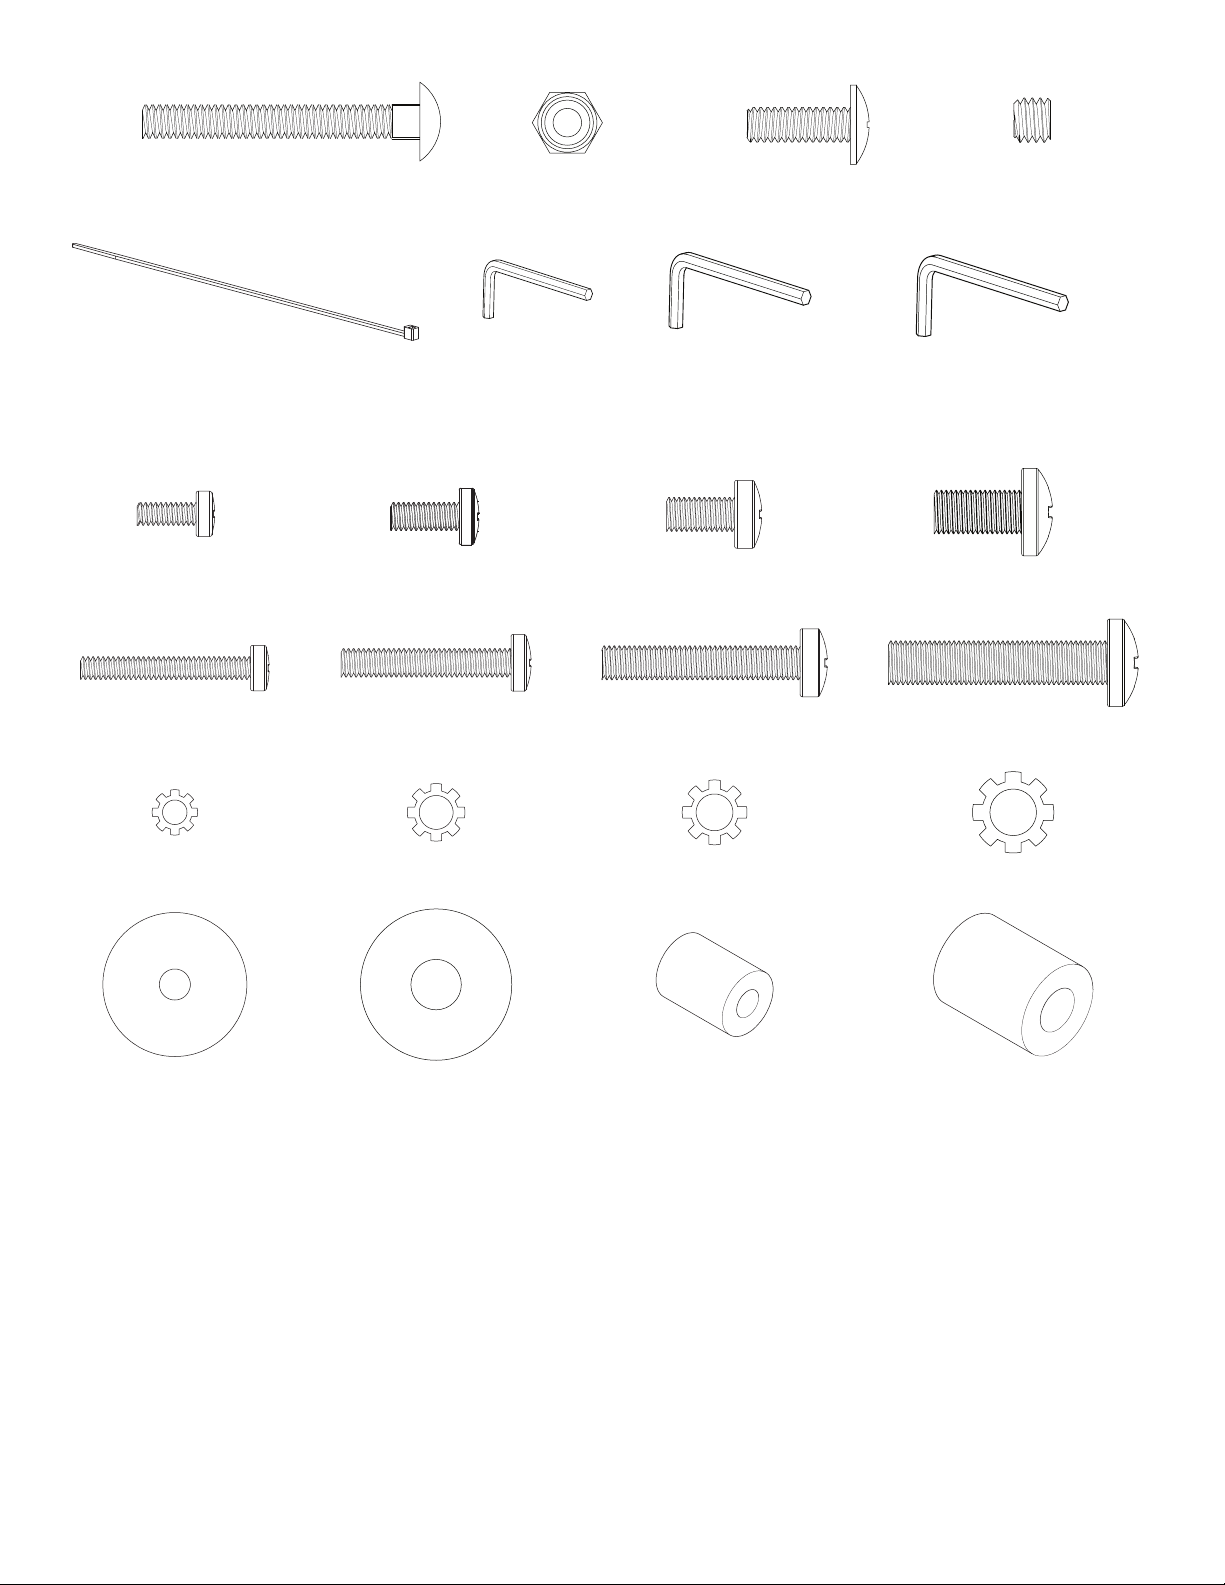
1/4-20 x 2.0 in.
M8 x 40mm
M6 x 35mm
M5 x 30mm
M4 x 30mm
[07] X 8 [08] X 8 [09] X 2 [10] X 2
[11] X 10 [13] X 1 [14] X 1
[12] X 1
[15] X 8 [16] X 8 [17] X 8 [18] X 8
[19] X 8 [20] X 8 [21] X 8 [22] X 8
[23] X 8 [24] X 8 [25] X 8 [26] X 8
2
[27] X 16 [28] X 8 [29] X 8 [30] X 8
6901-100129<00>
Page 3

1 -1: TV with flat back
M6 x 35mm
M8 x 40mm
M4 x 30mm
1 - 2: TV with curved back or obstruction
1-1 1-2
1
[27]
[27]
[28]
[28]
[23]
[24]
[25]
[26]
[15]
[16]
[17]
[18]
[29]
[29]
[30]
[30]
[27] [23] [19]
[27]
[27]
[27]
[28] [25]
[--]
[28] [26]
[--]
[24]
[20]
[21]
[22]
[06]
6901-100129<00>
[06]
8x
3
Page 4

2
1/4-20 x 2.0 in.
Do not overtighten the Nut [08]. The vise Assembly [05] must rotate freely around the Carriage Bolt [07].
[05]
[07]
8x
[08]
[06]
[06]
3
3 -1
[04]
[04]
[05]
4
6901-100129<00>
Page 5

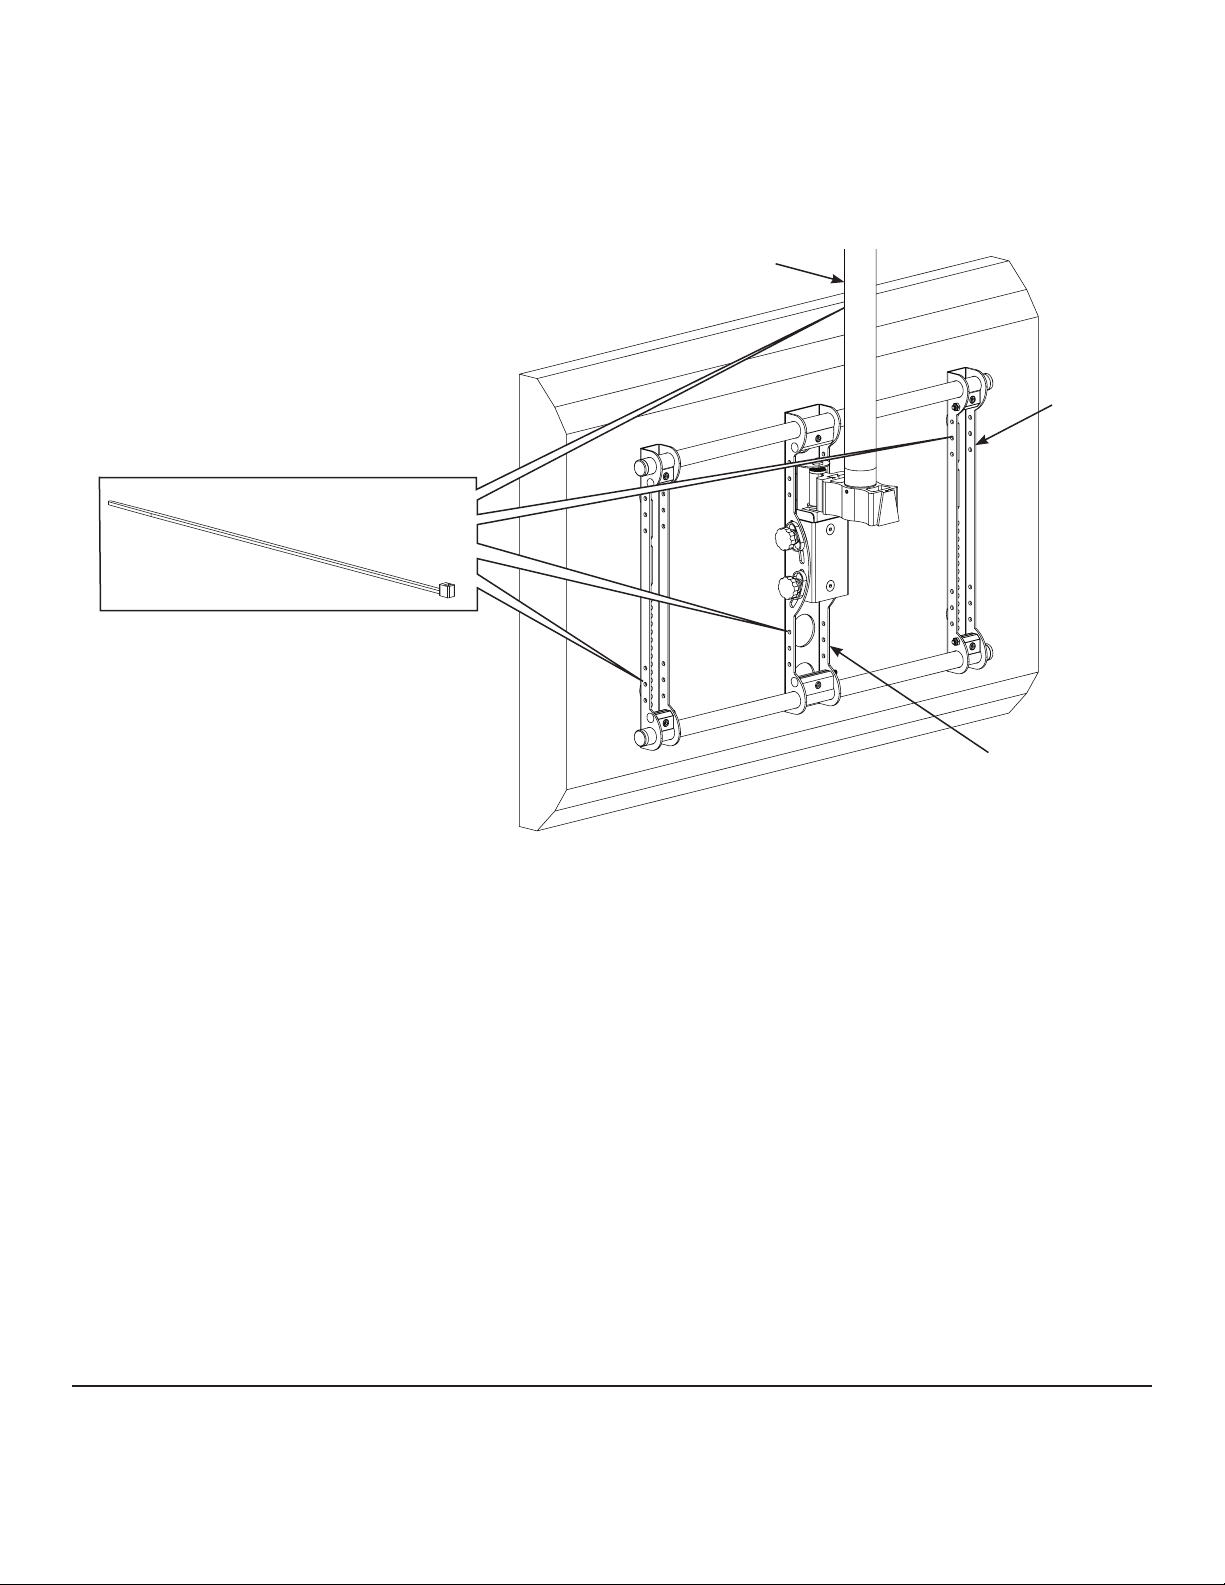
CAUTION:
To prevent property damage and/or personal injury, the CrossTubes [04] must extend beyond the outside edges of
both Monitor Brackets [06].
Orient the Vise Assemblies [05] and [A] on both the Axis Assembly [03] and the second Monitor Bracket [06] so that the Cross
Tubes [04] pass between the jaws.
Do not over-tighten the four Vise Assemblies [05] and the two Vise Assemblies [A] . Turn the Allen Bolt until resistance is felt;
then, tighten the Allen Bolt approximately 1 -1/2 turns or until the head of the Allen Bolt is slightly above the surface of the Vise
Assembly. The Cross Tubes [04] will not be able to move side-to-side when the Vise Assembly is properly tightened. Tighten all six
Allen Bolts on both TVs
3-2
[14]
[A]
[06]
[05]
[04]
[03]
[A]
4
6901-100129<00>
[01]
[02]
5
Page 6

5
Thread the Coupler [01] and Tube [02] onto an existing threaded pipe drop. Once the Tube [02] is properly aligned, tighten the
Set Screws [10] using Allen Wrench (12) and the two Set Screws [B] on the Tube using Allen Wrench (13).
[12]
[13]
[10]
[B]
6 -1
[02]
6
[01]
[02]
6 - 2
For clairity, TV is not shown.
[10]
[09]
[03]
[02]
[02]
[03]
2x
6
6901-100129<00>
Page 7

7
To adjust for level, loosen the two Allen Bolts [C] on the back of the Axis Assembly [03]. Adjust the television and retighten the
Allen Bolts.
Tilt is set by simply tilting the television. To adjust tilt tension, loosen the Tension Knobs [D].
7 -1
[14]
Never completely remove the Tension Nut [E]. The Safety Bracket [F] must be reinstalled after adjustment. Hex
hole in Safety Bracket must seat completely down onto Tension Nut [E]. Failure to heed this Caution may result in
property damage and/or personal injury.
To adjust swivel tension, tilt the television forward and remove the Safety Bracket [F] for use as a wrench to tighten or loosen the
Tension Nut [E].
2x
[C]
[D]
[03]
CAUTION
7 - 2
6901-100129<00>
2x
[F]
[E]
7 - 3
2x
[F]
[E]
7
Page 8
8
Leave some slack in the cables so that during motion there is no tension on the connectors. Secure cables by attaching Wire Ties
[11] as desired to the Monitor Brackets [06], Axis Assembly [03] , and the NPT Tube [02].
[02]
[06]
[11]
[03]
CSAV, Inc. and its affiliated corporations and subsidiaries (collectively, “CSAV”), intend to make this manual accurate and complete. However, CSAV makes no claim that the information contained herein covers all details,
conditions, or variations. Nor does it provide for every possible contingency in connection with the installation or use of this product. The information contained in this document is subject to change without notice
or obligation of any kind. CSAV makes no representation of warranty, expressed or implied, regarding the information contained herein. CSAV assumes no responsibility for accuracy, completeness or sufficiency of the
information contained in this document.
8
6901-100129<00>
 Loading...