

Santec SanStore-4LEMX, SanStore-16LMX, SanStore-8LEMX, SanStore-16LEMX, SanStore-4LMX User Manual
...
Version 2.1sfi/0813/engl/A5
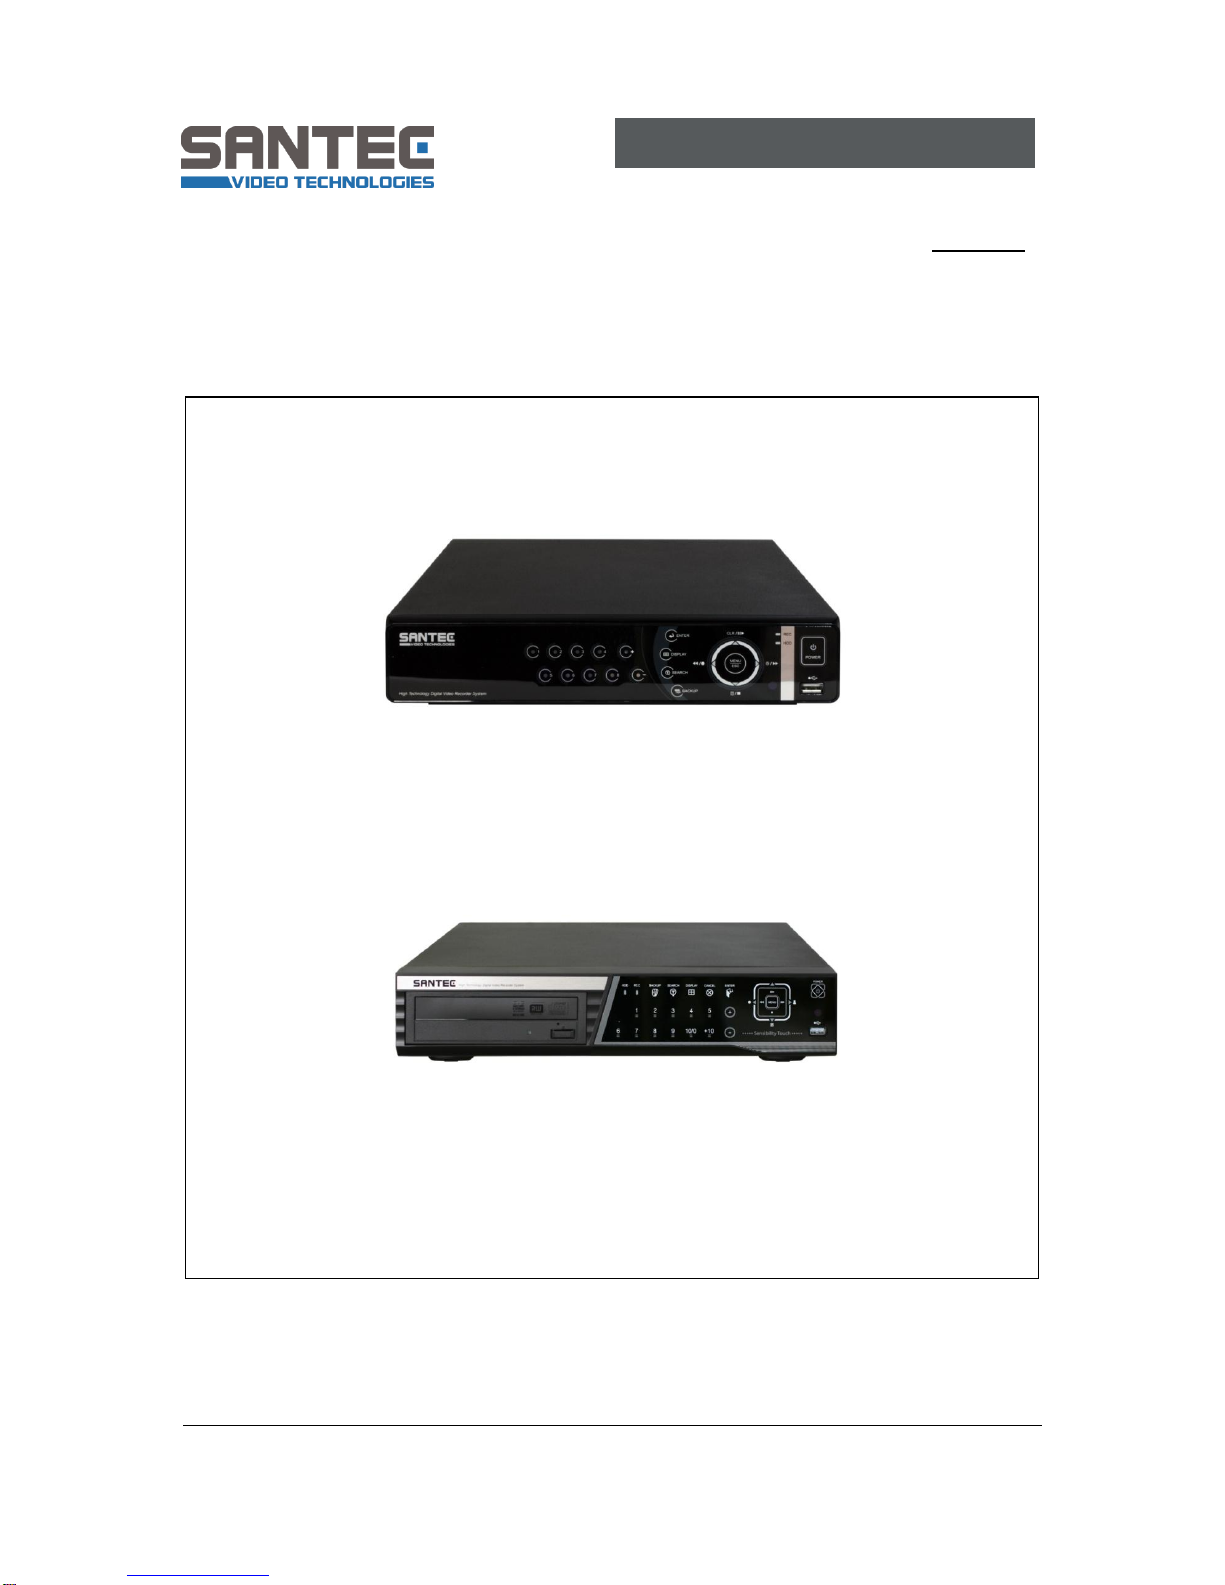
USER MANUAL
SanStore digital video recorder
Models:
SanStore 4/8/16-LEMX
SanStore 4/8/16-LMX
SanStore LEMX series
SanStore LMX series

Dear customer,
Thank you for purchasing a high quality SANTEC device.
We recommend that you read this manual thoroughly before operating your new system
for the first time. Please follow all instructions and observe the warnings contained in this
manual.
Please contact your local dealer or us if you have any questions or if you wish to claim
for a service or warranty.
You will find further information on our website:
www.santec-video.com
All rights reserved. This publication may not be reproduced, stored in a retrieval system
or transmitted, in any form or by any means (electronic, mechanical, photocopying,
recording or otherwise), without the written prior permission of SANTEC BW AG.
No reproduction of any part or excerpts thereof are permitted.
Errors excepted. Specifications are subject to change without notice for quality
improvement.
SANTEC is a registered trademark of SANTEC BW AG. All other companies or products
mentioned in this publication are trademarks, registered trademarks or brands of the
respective company.
© Copyright by SANTEC BW AG, Ahrensburg, Germany

User manual
SanStore-4LEMX / SanStore-8LEMX / SanStore-16LEMX
SanStore-4LMX / SanStore-8LMX / SanStore-16LMX
_____________________________________________________________________________
- 3 -
Table of contents
1. PREFACE 5
1.1 Description of symbols 5
1.2 Safety instructions and precautions 6
1.3 Important general note 7
1.3.1 Assembly and installation 7
1.3.2 Maintenance and repair 7
1.3.3 Spare parts and accessories 8
1.4 Items included in the delivery 8
1.5 Optionally available accessories 9
1.5.1 SANTEC accessories 9
1.5.2 Apps for Apple iPhone and Android smartphones 9
1.6 General note 9
2. CONTROLS 10
2.1 SanStore LEMX series 10
2.1.1 Front panel 10
2.1.2 Rear panel connectors 14
2.1.3 Power-off the LEMX recorder 15
2.2 SanStore LMX series 16
2.1.1 Front panel 16
2.1.2 Rear panel connectors 19
2.3 Remote control 21
2.4 Mouse control 22
2.5 Virtual keypad for mouse control 23
3. INSTALLATION AND CONNECTIONS 24
3.1 Complete system configuration 24
3.2 Camera connection 25
3.3 Audio connection 25
3.4 Monitor connection 25
3.5 PC requirements for network connection 26
4. QUICK START 27
5. LIVE VIEWING 29
5.1 Display overview 29
5.2 Multi-screen display and sequencing 31
5.2.1 Screen display 31
5.2.2 Multi-screen display and switch sequencing display 31
5.3 Quick buttons for multi-screen display 32
5.4 Zooming 33
5.5 Spot monitor 34
6. OPERATION 35
6.1 Login/logout 35
6.2 Menu navigation 36
7. SETUP 38
7.1 Display 38
7.1.1 General 38
7.1.2 Switch setup (monitor configuration) 40
7.1.3 Event 41
7.2 Camera 42
7.3 Record 46
7.3.1 General 46
7.3.2 Resolution and recording speed setting 48
7.3.3 Continuous recording 49
7.3.4 Event recording 50
7.3.5 Continuous and event (motion/alarm) recording 52

User manual
SanStore-4LEMX / SanStore-8LEMX / SanStore-16LEMX
SanStore-4LMX / SanStore-8LMX / SanStore-16LMX
_____________________________________________________________________________
- 4 -
7.4 Schedule 53
7.4.1 Chart setup 53
7.4.2 Holiday setup 55
7.5 Disk 56
7.5.1 Disk manager 56
7.5.2 Recording disk (HDD) 59
7.5.3 SMART status 60
7.6 Network 61
7.6.1 Ethernet 61
7.6.2 General 62
7.6.3 E-mail 64
7.6.4 SMTP 66
7.6.5 DDNS (dynamic DDNS) 67
7.6.6 Host List (only for LMX series) 68
7.6.7 Router and port forwarding 69
7.7 Device 71
7.7.1 General 71
7.7.2 Alarm 73
7.7.3 PTZ event 75
7.8 System 76
7.8.1 General 76
7.8.2 Time 77
7.8.3 Account 78
7.8.4 Update 79
7.8.5 Info 80
8. PAN / TILT / ZOOM (PTZ) CONTROL 81
8.1 PTZ menu 82
8.2 Preset and tour 83
8.3 Custom functions 85
8.4 Auto pan, auto tilt, power on/off 85
8.5 PTZ camera models 85
9. SEARCH / PLAYBACK 86
9.1 Playback 86
9.2 Time search 86
9.2.1 Multi channel playback 86
9.2.2 Preview search (single channel playback) 87
9.2.3 Recorded event search 88
9.2.4 Event area search (single channel playback) 89
9.3 Go to search 90
9.4 Log list search 91
10. BACKUP 93
10.1 Manual backup 93
10.1.1 Internal CD/DVD-R/W drive (only for LMX series) 93
10.1.2 USB memory stick 95
10.1.3 Backup range setup 95
10.2 Auto backup via FTP server 96
10.3 Log list backup 97
11. Remote acces via Internet Explorer 98
11.1 IP address 98
11.2 Login 98
11.3 Recorder playback 100
11.4 Live mode 103
11.5 Remote playback 104
11.6 Download 106
11.7 Recorder setup 106
12. TECHNICAL SEPCIFICATIONS 107
User manual
SanStore-4LEMX / SanStore-8LEMX / SanStore-16LEMX
SanStore-4LMX / SanStore-8LMX / SanStore-16LMX
_____________________________________________________________________________
- 5 -
1. PREFACE
Please read this user manual carefully before starting to operate this device. Please
retain this user manual for future reference.
1.1 Description of symbols
Caution: Danger to life!
In the text, this sign symbolises life-threatening voltages which may lead
to damages to humans and to material.
Attention: Important note!
In the text, this sign refers to operation and maintenance notes which
have to be adhered to. Please ensure to follow theses notes.
General note!
In the text, this sign symbolises general notes and recommendations
which
might not necessarily be in direct connection with the device’s operation.
User manual
SanStore-4LEMX / SanStore-8LEMX / SanStore-16LEMX
SanStore-4LMX / SanStore-8LMX / SanStore-16LMX
_____________________________________________________________________________
- 6 -
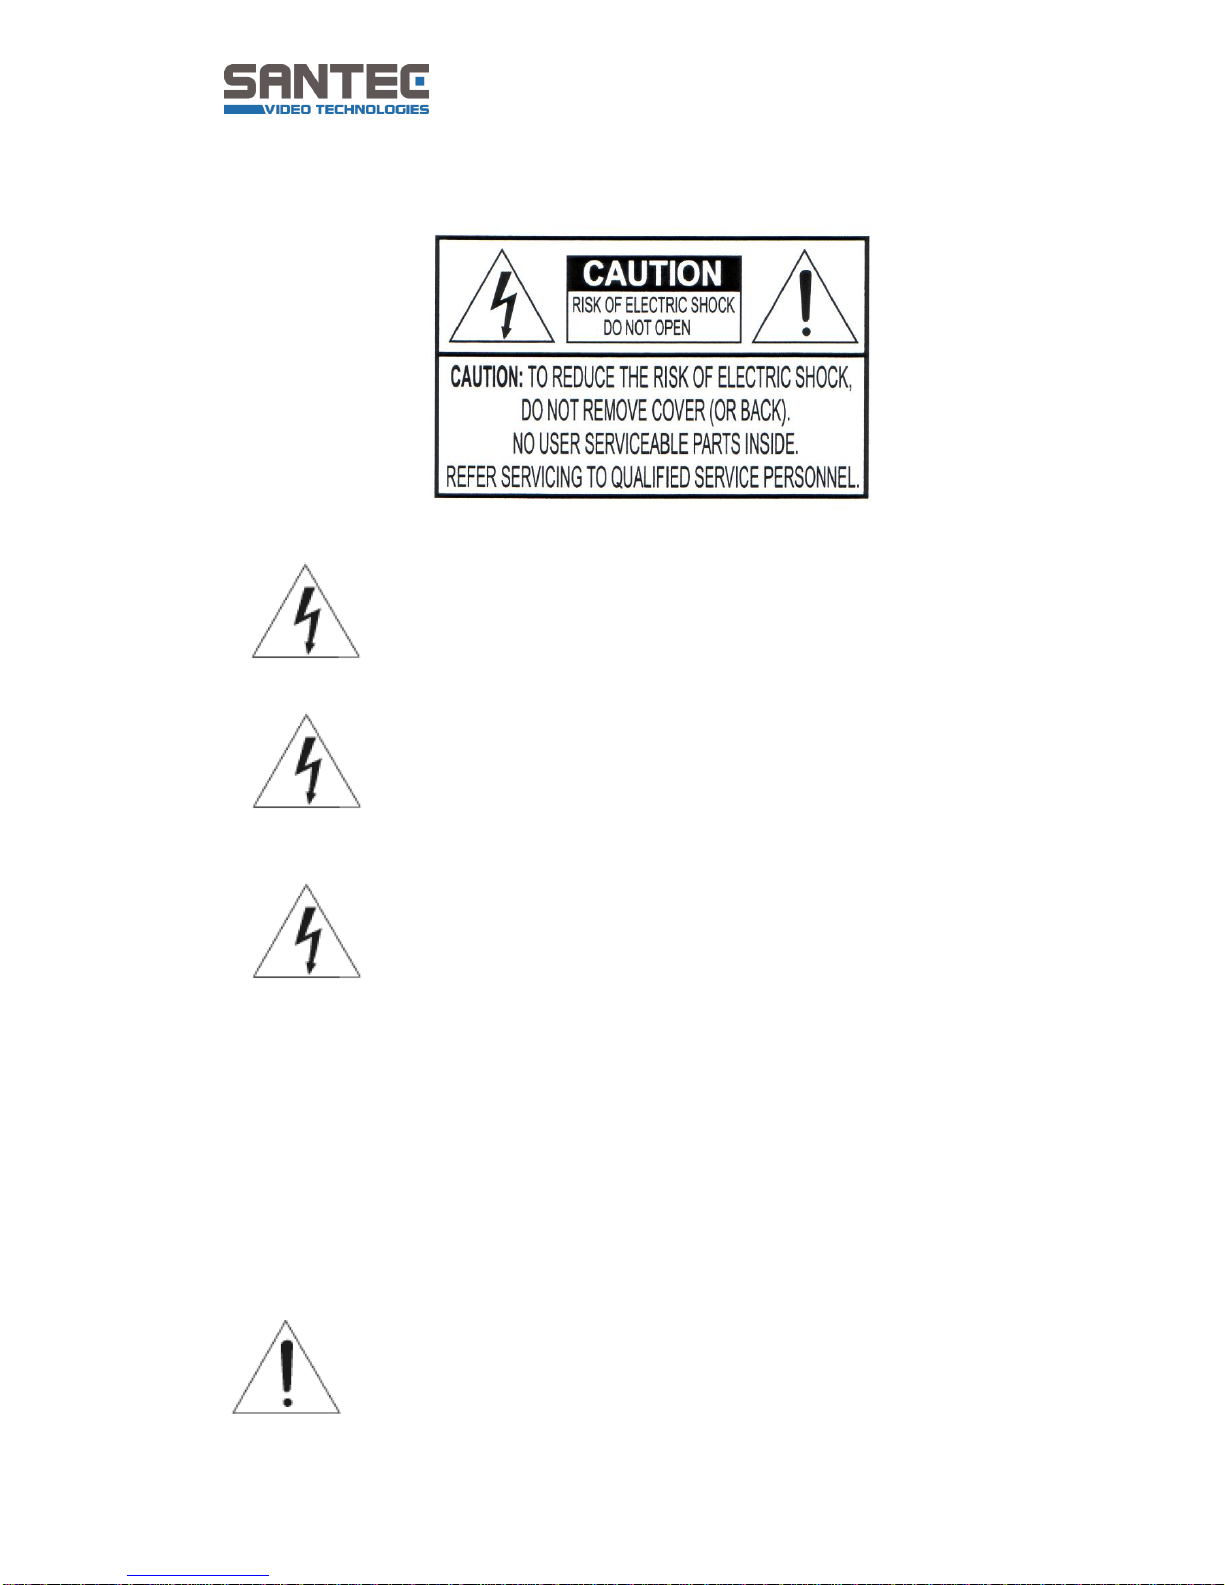
1.2 Safety instructions and precautions
Caution: Overcharge
Never expose the power socket or the power cord to electrical
overcharge. This may lead to fire and life-threatening shocks.
Caution: Thunderstorms
If there is a thunderstorm or if the device has not been in use for a
longer period of time, please always disconnect the device from the
power source. Disconnect the power cord. This protects the device
from lightning damages or overcharging.
Caution: Entry of liquids or items
Never poke with metalic items in the ventilation slots of the device. You
may touch dangerous live power items which may lead to an electronic
shock, a short circuit or fire.
Note:
This equipment has been tested and found to comply with the limits for a Class A digital
device, pursuant to part 15 of the FCC Rules. These limits are designed to provide
reasonable protection against harmful interference when the equipment is operated in a
commercial environment. This equipment generates, uses, and can radiate radio
frequency energy and, if no installed and used in accordance with the instruction
manual, may cause harmful interference to radio communications. Operation of this
equipment in a residential area is likely to cause harmful interference in which case the
user will be required to correct the interference at his own expense.
Caution:
Risk of explosion if the lithium battery is not installed correctly or if it is
replaced by an incorrect type. Only use batteries which are compatible to
the device and are recommended by the manufacturer. Dispose of used
batteries only in accordance with local regulations.

User manual
SanStore-4LEMX / SanStore-8LEMX / SanStore-16LEMX
SanStore-4LMX / SanStore-8LMX / SanStore-16LMX
_____________________________________________________________________________
- 7 -
1.3 Important general note
Please read the following instructions carefully.
1.3.1 Assembly and installation
On-site installation should only be performed by qualified maintenance personnel
and must meet local specifications and regulations.
Never operate the equipment without the respective protective cover near water, in
dusty rooms or extremely humid rooms. The equipment could be seriously
damaged.
The openings on the equipment are intended for ventilation purposes and protect
from overheating. Never cover or close off these openings. Rack mounting is only
permissible if sufficient ventilation can be ensured. Overheating may damage the
equipment or result in fire due to short-circuit.
Power cables and other cables should be run so as to avoid being stepped on or
potential damage from falling objects. Damaged cables may result in short-circuit
and equipment damage as well as potentially fatal electrical shock.
When connecting the supply voltage please note correct polarity. Faulty connections
may damage or destroy the equipment.
Only use the power source specified on the nameplate. Please consult your
electrician if you are unsure whether the power supply on site is appropriate. Only
use the supplied power cables or power adapters or the specified recommended
power supplies.
1.3.2 Maintenance and repair
Shut off and unplug the equipment from the power receptacle prior to every
cleaning. Only clean the equipment with a slightly dampened cloth. Do not use
harsh cleaners or spray cans. Using harsh solvents such as thinner or petrol may
damage the housing surface.
Immediately shut off the equipment and promptly disconnect it from the operating
voltage. The following damages must be handled by an authorized service centre:
o Damage to the power supply cable
o If a liquid spilled onto the equipment or an object penetrated the
equipment
o If the equipment was exposed to water or another liquid
o If the equipment is not functioning properly despite observing the
instructions in these operating instructions. Only the controls specified in
these operating instructions may be adjusted. Incorrect settings to the
other controls may damage the equipment.
o If the equipment fell to the floor or the housing was damaged
o If the equipment performance is substantially the required performance
Never attempt to maintain the equipment yourself, as this may expose you to
hazardous voltages. Maintenance work should always be performed by qualified
personnel only.
User manual
SanStore-4LEMX / SanStore-8LEMX / SanStore-16LEMX
SanStore-4LMX / SanStore-8LMX / SanStore-16LMX
_____________________________________________________________________________
- 8 -
Attention:
Opening the appliance will result in loss of warranty. Do not try to repair
the appliance yourself but contact your local distributor or specialist.
For digital recorders, it is mainly the HDD which subject to natural attrition. HDD
attrition may happen after approx. 8,000 to 10,000 hours of operating time which
may lead to malfunctions. We thus recommend to replace the HDD in specific
intervals in order to ensure a smooth operation of the appliance. Moreover, we
recommend to clean the built-in fan regularly from dust and dirt to avoid
interferences caused by overheating. Please do not hesitate to contact us in case of
further questions.
Attention: Attrition of mechanical parts
We explicitely point out that any type of recording device, no matter if it is
an analogue or digital device, is subject to natural attrition. Every
recording device contains mechanical parts which – like any other device
– need to be maintained and checked regularly. This is particularly
important for appliances which run non-stop.
1.3.3 Spare parts and accessories
Only use auxiliary devices which are recommended by the manufacturer. Non-
recommended devices may influence the functionality and may cause electric
shocks or fire caused by short circuits.
Only use spare parts which are recommended by the manufacturer or which have
identical characteristics. Non-approved spare parts may cause harm to people
(electric shock) and may damage the device (fire).
1.4 Items included in the delivery
1x Video recorder SanStore-LEMX, SanStore-8LEMX, SanStore-16LEMX or
SanStore-LMX, SanStore-8LMX, SanStore-16LMX
1x Remote control
1x Battery
1x Power cord
1x AC adapter (power supply)
1x USB mouse
1x USB-stick (user manual)
1x Octopus cable
1x User manual
User manual
SanStore-4LEMX / SanStore-8LEMX / SanStore-16LEMX
SanStore-4LMX / SanStore-8LMX / SanStore-16LMX
_____________________________________________________________________________
- 9 -
1.5 Optionally available accessories
1.5.1 SANTEC accessories
You can purchase the following accessories from SANTEC (optionally available):
Part number
Description
SanStore-Mouse
USB mouse
SanStore-Stick
USB-stick
SanStore-EMS
EMS software to administer SanStore recorders
KSC-3505
Control keypad via RS-485 connection
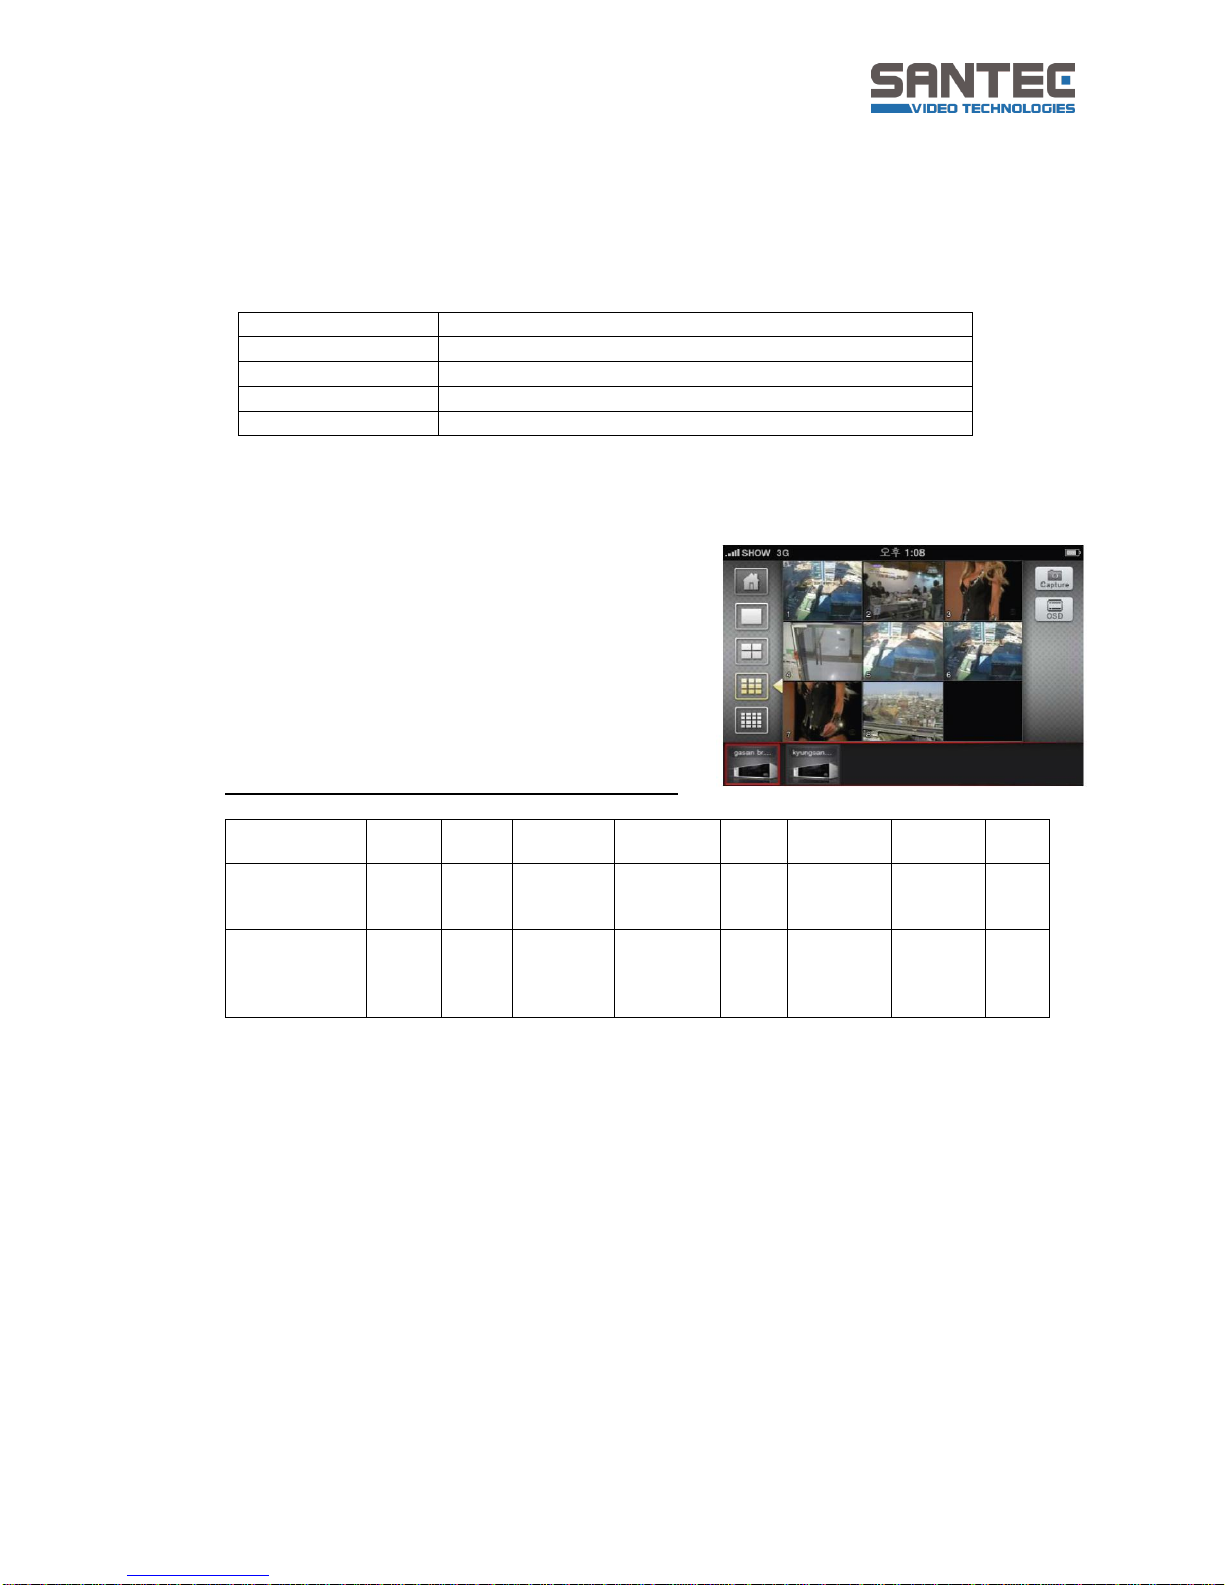
1.5.2 Apps for Apple iPhone and Android Smartphones
These SanStore recorders can also be accessed
via Apps which are available in the stores of the
respective providers.
Below you will find a brief overview about the two
Apps. More detailed information is available in the
stores of the respective providers.
Apps for Apple iPhone and Android Smartphones:
Max.
DVRs
Live-
View
Search/
Playback
Snapshot
OSD
DVR
control
Virtual
DVR
PTZ
MobileCMS
Lite (free of
charge)
2
Yes
No
Yes
Yes
No
No
Yes
MobileCMS
(with costs;
prices see
stores)
10
Yes
Yes
Yes
Yes
Yes
Yes
Yes
1.6 General note
Windows 98/SE/ME, Windows 2000, Windows XP, Windows Vista and Windows 7 are
trademarks or registered trademarks of Microsoft Corporation in the USA and in other
countries. All other companies or products mentioned in this publication are trademarks,
registered trademarks or brands of the respective company. They are not connected in
any way with SANTEC BW AG. Proprietary rights are with the respective manufacturers
or brand owners. Illustrations and pictures in this user manual are for better
understanding only and may differ from the actual product design. All technical
specifications are subject to change. Errors excepted.
User manual
SanStore-4LEMX / SanStore-8LEMX / SanStore-16LEMX
SanStore-4LMX / SanStore-8LMX / SanStore-16LMX
_____________________________________________________________________________
- 10 -
2. CONTROLS
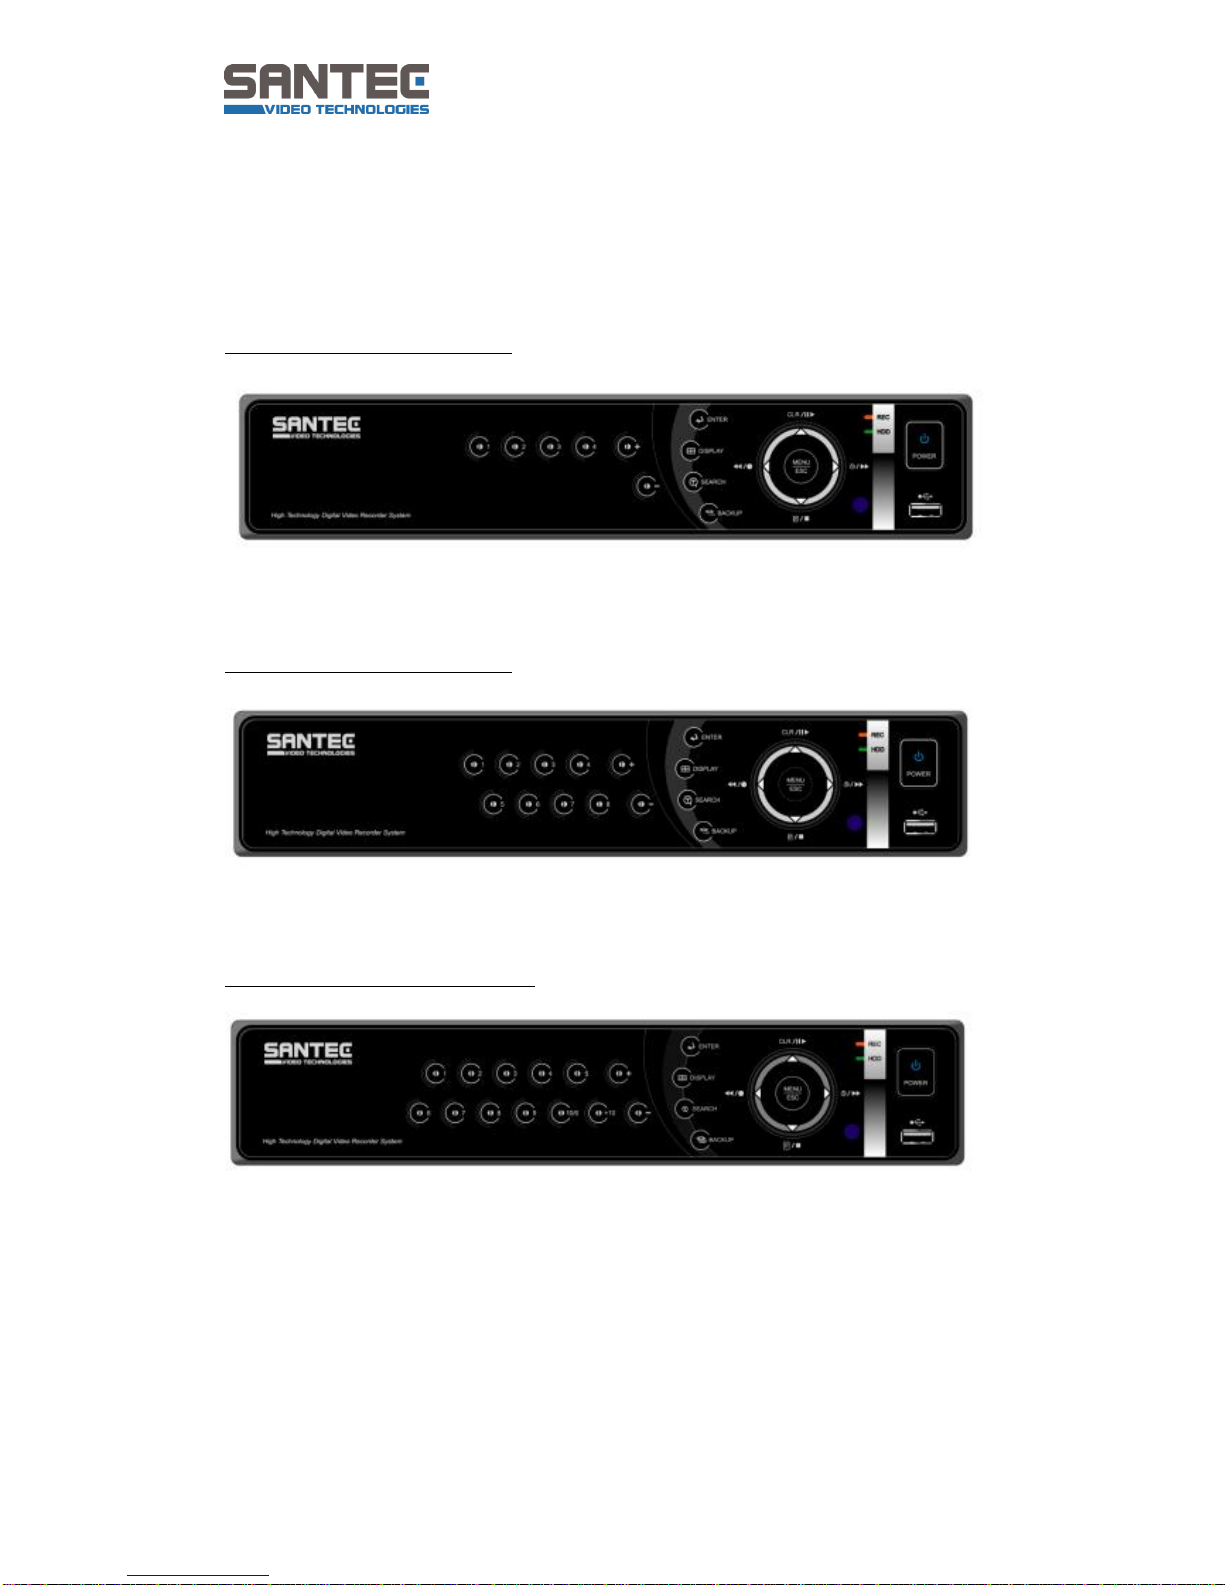
2.1 SanStore LEMX series
2.1.1 Front panel
SanStore-4LEMX (4 channels):
SanStore-8LEMX (8 channels):
SanStore-16LEMX (16 channels):
User manual
SanStore-4LEMX / SanStore-8LEMX / SanStore-16LEMX
SanStore-4LMX / SanStore-8LMX / SanStore-16LMX
_____________________________________________________________________________
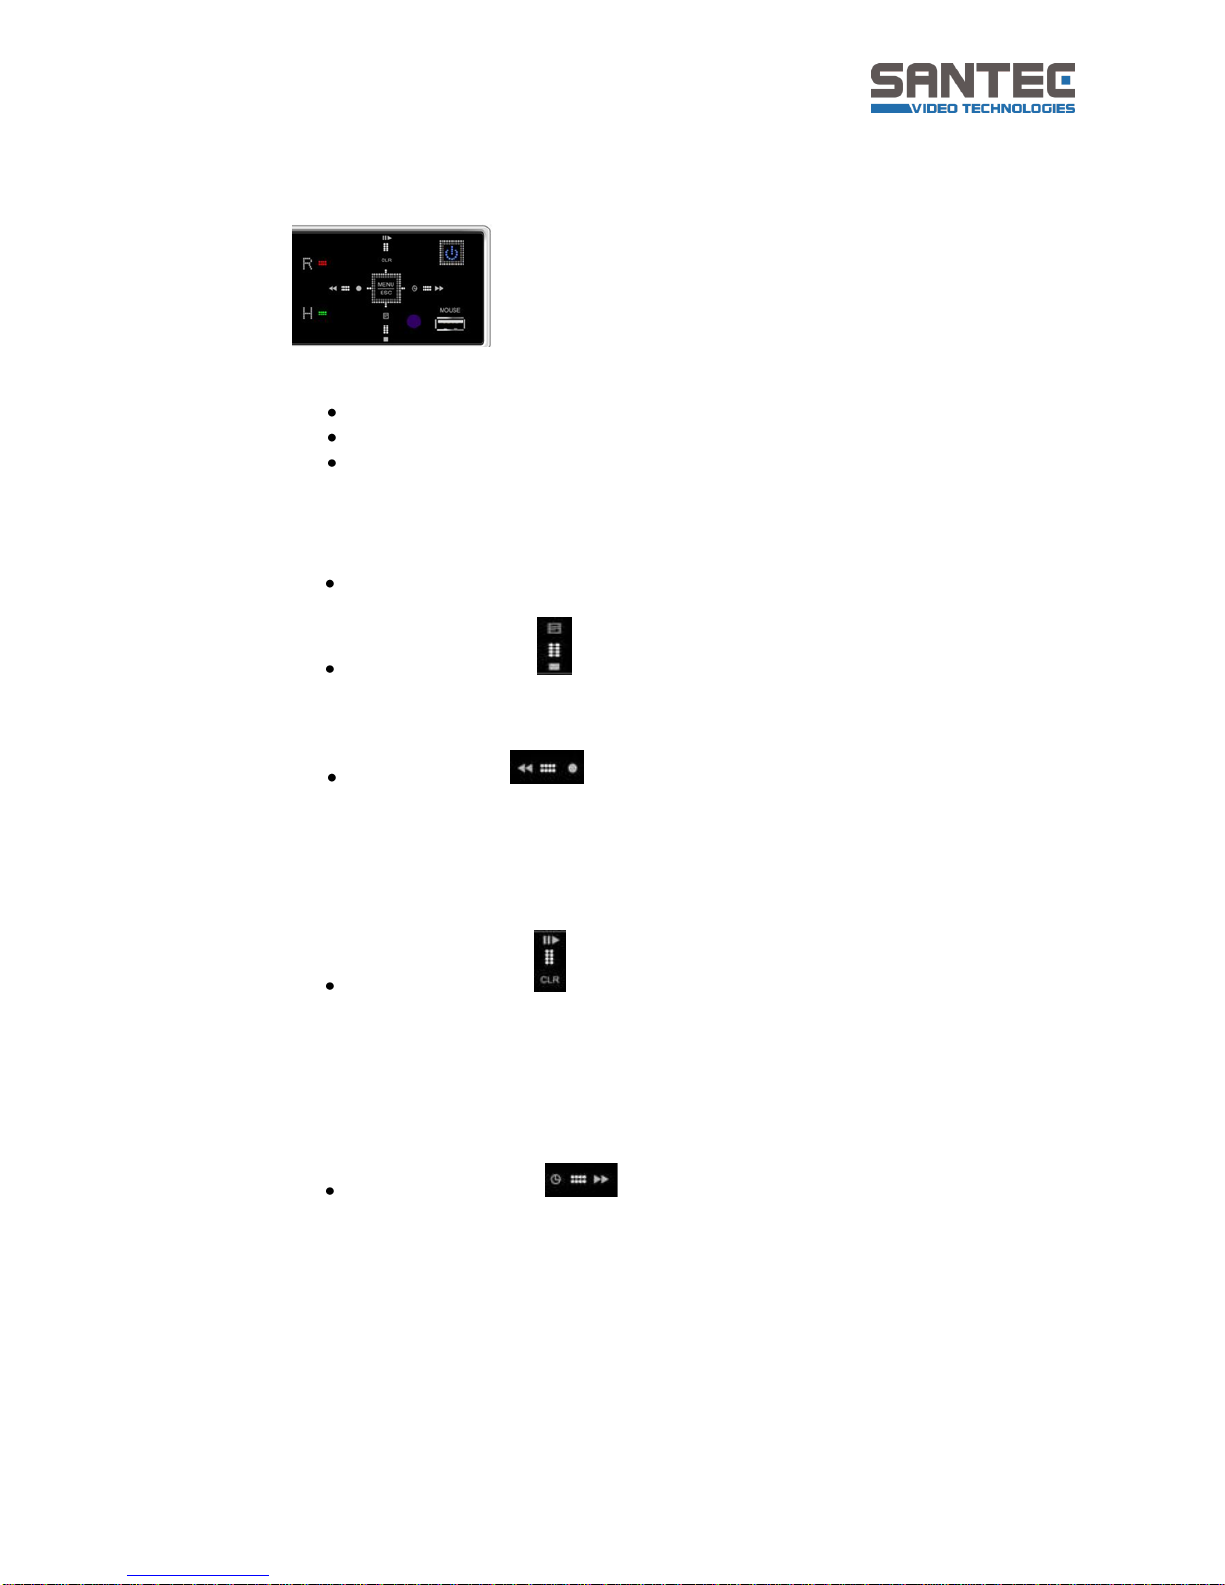
- 11 -
1. Mode indicator:
3 LEDs to display the status of the recorder:
Blue: Power is on.
Green: HDD is on.
Red: Recording is on.
2. Playback/Recording:
These functions are used in live mode or playback mode.
Direction buttons :
In the setup menu, these buttons are used to move the cursor.
Log/Playback Stop :
Log: Press this button to access the log lists.
Stop: Press this button to stop the playback.
R Step/FR/REC :
o Reverse Step: Use this button to move reversely field by field
during still mode.
o FR (Fast Rewind): Use this button to fast rewind during playback
mode.
o REC (Recording): Use this button to start the recording. Press it
again to stop the recording.
CLR/Still/Playback :
o CLR (Clear): Use this button to clear OSD information from the
screen, e.g. time, date and channel icons. Using this button, alarm
icons in the corner of the screen (AL, VL, PL) are cleared from the
screen, too. This button is also used to turn off the alarm buzzer.
o Still/Playback: Use this button to create a still image or a playback
at 1x speed.
Schedule/F step/FF :
o Schedule: Press this button to activate the schedule. Use this
button to start or stop the recording.
o F step (Forward step): Use this button to move forward field by
field during still mode.
o FF (Fast forward): Use this button to move fast forward during
playback mode.
User manual
SanStore-4LEMX / SanStore-8LEMX / SanStore-16LEMX
SanStore-4LMX / SanStore-8LMX / SanStore-16LMX
_____________________________________________________________________________
- 12 -
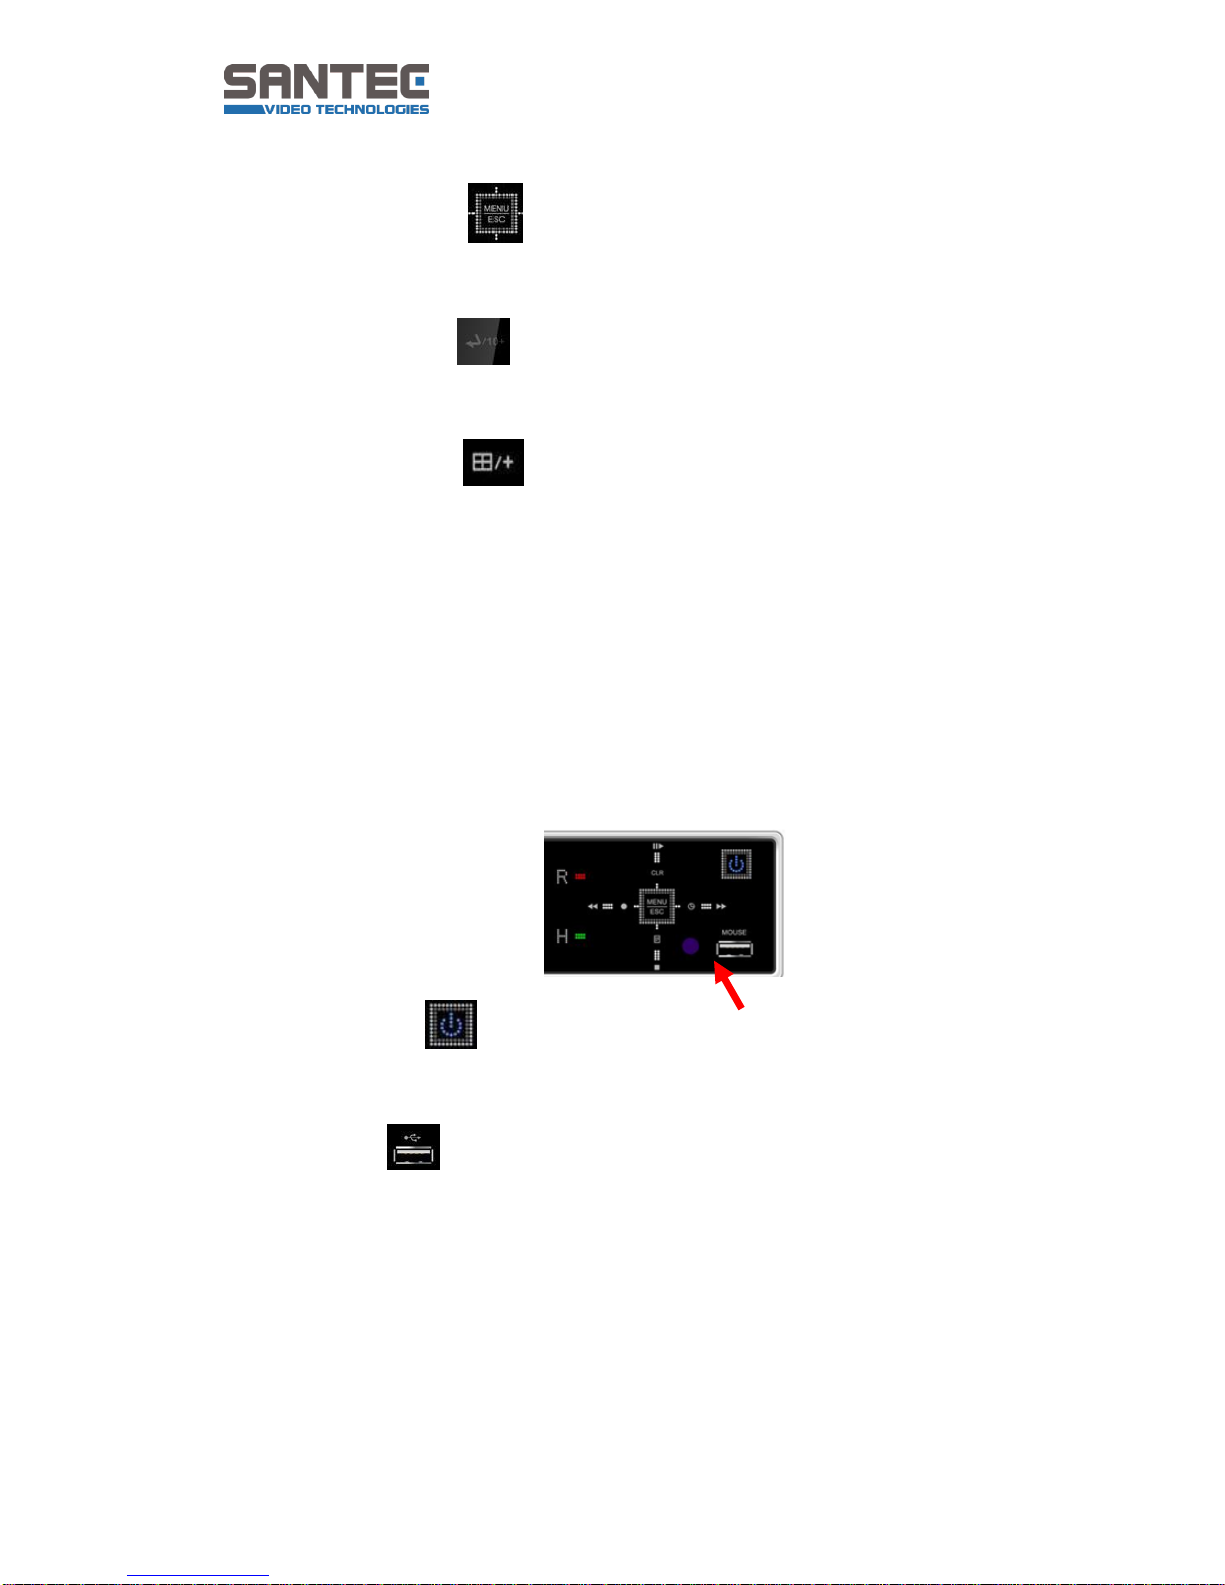
3. Menu/ESC-button :
Menu: Press this button to display the main menu screen.
ESC : Press this button to exit the menu without saving.
4. Enter/10+ button :
Enter : Press this button to save menu settings or to select channels over
10. Example: Press this button and then „6“ to see channel „16“.
5. Quad/Plus button :
Press this button to display the cameras in multi-screen mode.
This button is also used to switch channels or to increase values in the setup
menu.
6. Channel/numeric buttons:
Press these buttons to enter data and to make selections, e.g. enter the numeric
code when prompted for a password, channel selection or date selection in
schedule option mode.
Use the minus button [-] and the plus button [+] to decrease or increase the
settings or channels.
7. Remote control signal receiver:
Do not block the receiver port on the recorder. Doing so may cause the remote
control to function improperly.
8. Power button :
Press this button to turn on the recorder (the LED lights up). Press it again to turn
off the recorder (the LED goes off).
9. USB port :
This USB port allows you to connect memory sticks to backup video data.

User manual
SanStore-4LEMX / SanStore-8LEMX / SanStore-16LEMX
SanStore-4LMX / SanStore-8LMX / SanStore-16LMX
_____________________________________________________________________________
- 13 -
10. Time search and minus button :
Press this button to access the calendar and the time search menu. This button
is also used to change channels or to decrease values in the setup menu.
11. Backup button :
Press this button to access the backup menu. You can define the time and
channel for the backup.
User manual
SanStore-4LEMX / SanStore-8LEMX / SanStore-16LEMX
SanStore-4LMX / SanStore-8LMX / SanStore-16LMX
_____________________________________________________________________________
- 14 -
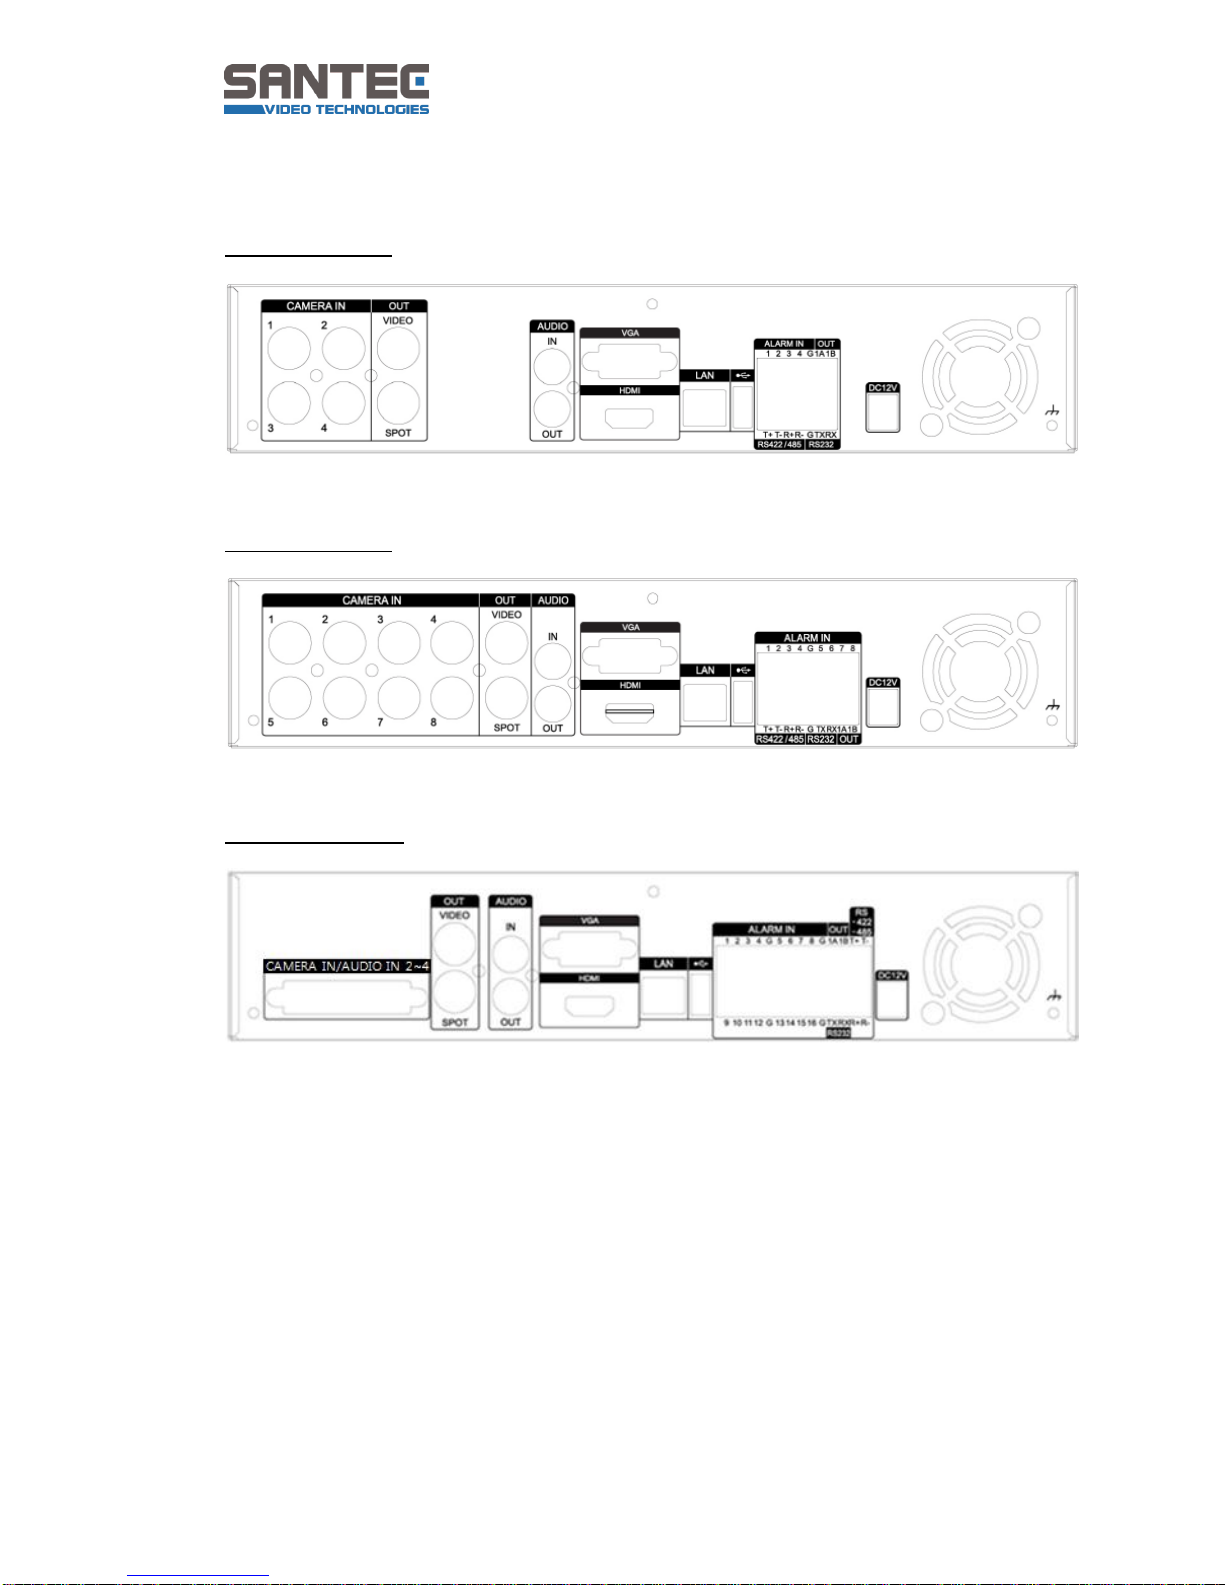
2.1.2 Rear panel connectors
SanStore-4LEMX:
SanStore-8LEMX:
SanStore-16LEMX:

User manual
SanStore-4LEMX / SanStore-8LEMX / SanStore-16LEMX
SanStore-4LMX / SanStore-8LMX / SanStore-16LMX
_____________________________________________________________________________
- 15 -
Connections:
1. 4, 8 or 16 camera inputs: BNC connectors
2. Video output: Composite video out (BNC)
3. Spot monitor (BNC)
4. Audio input / speaker output: RCA
5. VGA connector
6. HDMI connector
7. LAN (RJ-45 Ethernet port): To connect the recorder with the network
8. Mouse connector: To connect a PS2 USB
9. 4, 8 or 16 alarm inputs
10. Alarm output replay
11. RS-422/485: To connect a PTZ camera.
12. RS-232C: Only for development purposes.
13. 12 V DC power jack
2.1.3 Power-off the LEMX recorder
If you power-off the recorder by using the button on the recorder’s front panel or by using
the remote control, the following message appears:
This means that you need to disconnect the power cord (i.e. disconnect the recorder
from power) to definitely switch off the recorder. It is recommended to follow this
procedure if the recorder is not used for a longer period of time or if the recorder is
defective.
User manual
SanStore-4LEMX / SanStore-8LEMX / SanStore-16LEMX
SanStore-4LMX / SanStore-8LMX / SanStore-16LMX
_____________________________________________________________________________
- 16 -
2.2 SanStore LMX series
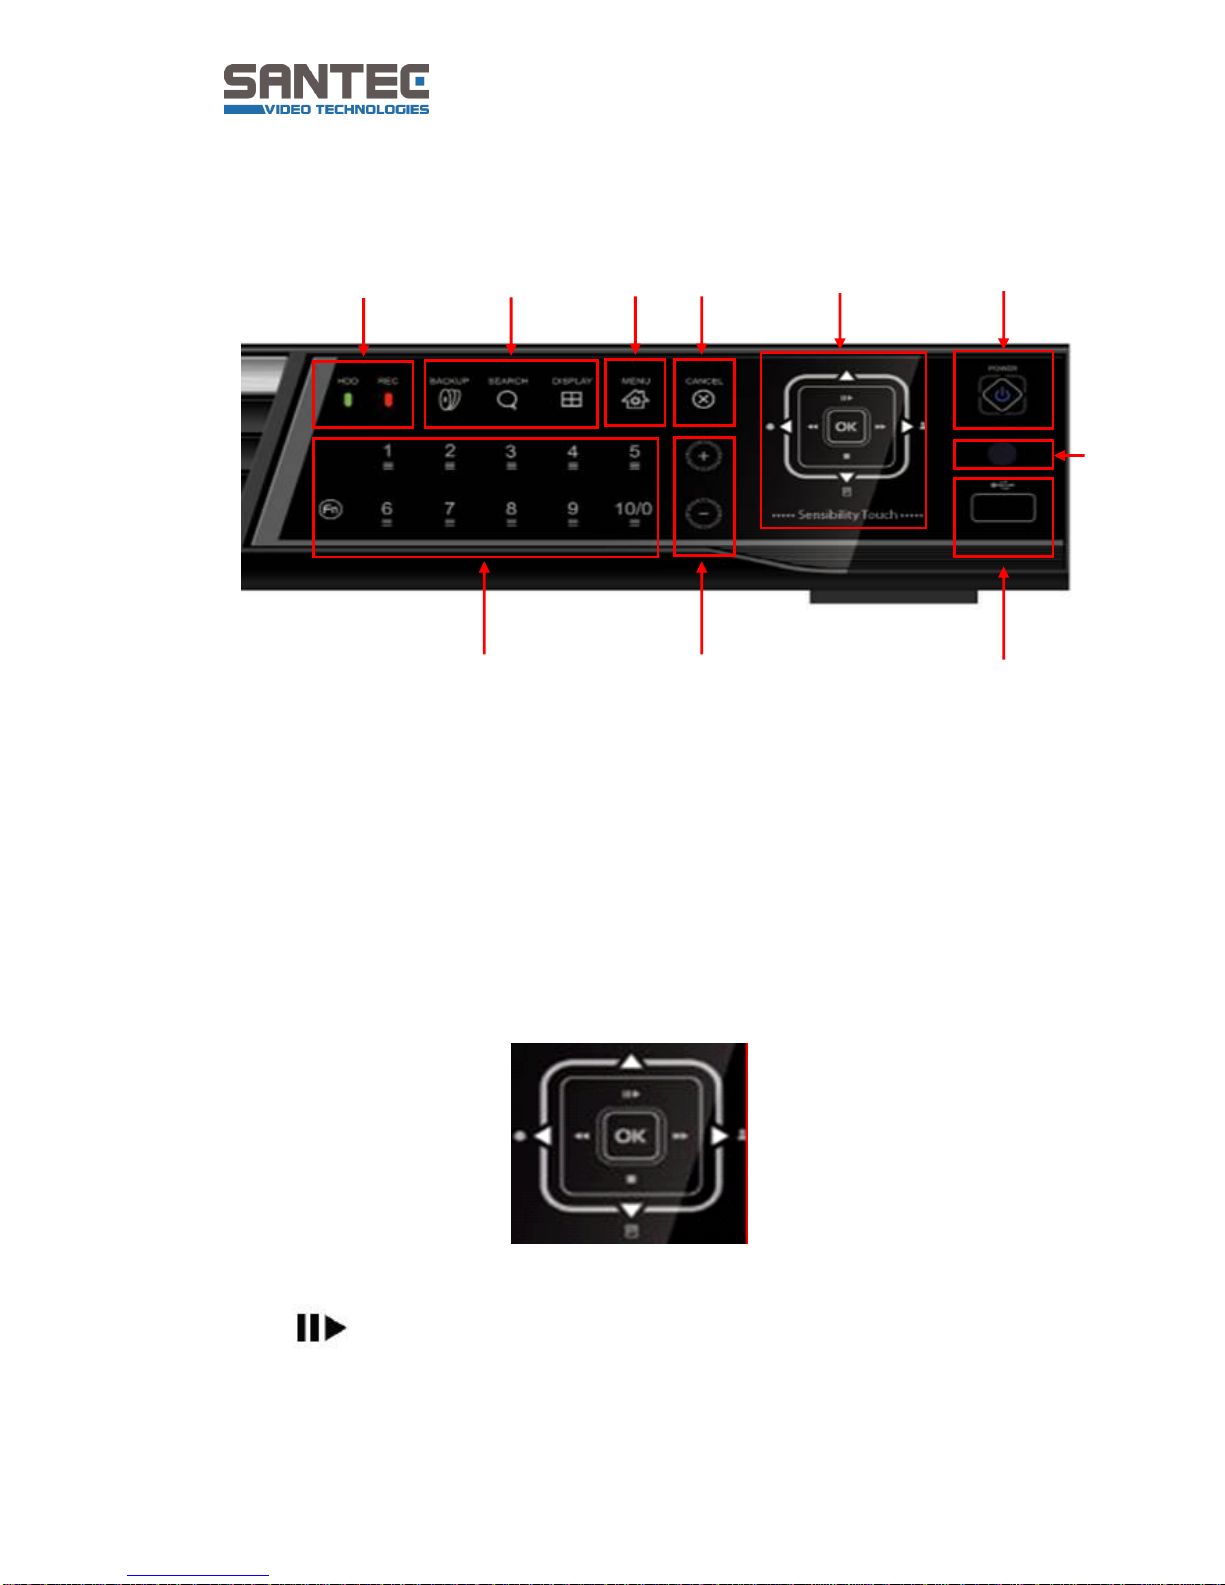
2.2.1 Front panel
1. Status LED
3 LEDs indicate the status of the video recorder:
Green: Recoder is operating
Red: Recording in process
Blue: Power on
2. Playback / Record:
These functions are used in live mode or playback mode.
Direction buttons:
In the menu setup mode, these buttons are used to move the cursor.
Still / Playback:
This button is used to still the picture or to start the playback mode (press 1x).
9
1 1 2 3 4
5
6 7 8

User manual
SanStore-4LEMX / SanStore-8LEMX / SanStore-16LEMX
SanStore-4LMX / SanStore-8LMX / SanStore-16LMX
_____________________________________________________________________________
- 17 -
Reverse / Fast Rewind:
In still mode, this button is used to move reverse picture by picture.
In playback mode, this button is used to fast rewind.
Forward / Fast Forward:
In still mode, this buttons is used to move forward picture by picture.
In playback mode, this button is used to fast forward.
Stop:
Press this button tos top the playback.
OK:
Press this button to confirm your selection.
REC :
Press this button to start or to stop the recording.
Login/Logout:
Press this button to toggle between login and logout.
Log:
Press this button to display the log list screen.
3. Menu_
Press this button to return to the main menu.
4. Cancel:
Press this button to cancel the settings and to not save them.
5. [+] and [-]:
Press these buttons to increase/decrease settings and values.
User manual
SanStore-4LEMX / SanStore-8LEMX / SanStore-16LEMX
SanStore-4LMX / SanStore-8LMX / SanStore-16LMX
_____________________________________________________________________________
- 18 -
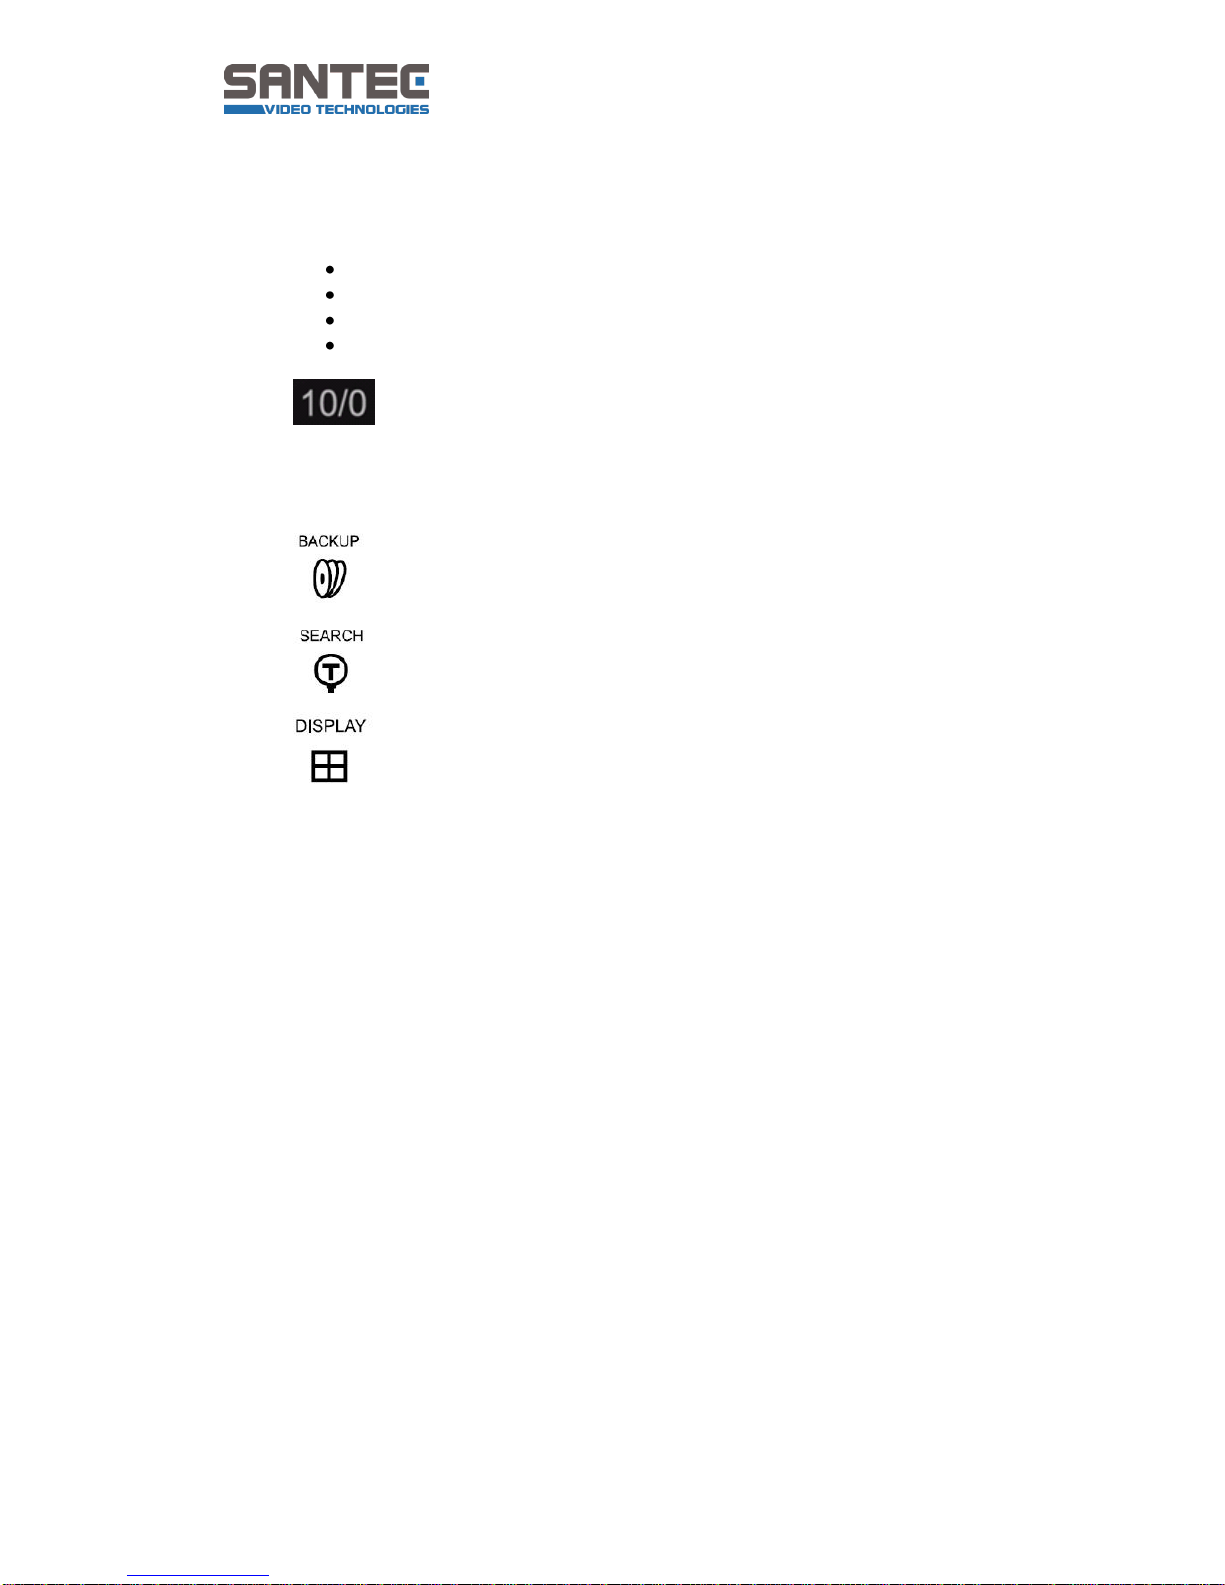
6. Nnumeric buttons 1-10
These buttons have several functions:
Enter numbers/numerical data (e.g. when prompted for a password)
Select channels/cameras
Choose the day in the schedule function
Enter letters to mark channels
Press this button to choose channels >10.
Example: Press this button once and then „6“ to see channel 16.
7. Function buttons:
Backup:
Press this button to go to the backup menu. You can set the time and
the channels to backup footage from the video recorder.
Search:
Press this button to display the „Time Search“ menu.
Display:
Press this button to display the cameras in multi-screen view.
8. USB port:
You can connect USB compatible devices or a USB mouse.
9. Remote control signal receiver:
IR sensor to receive the control signal from the remote control. Do not block the
receiver port on the recorder as this might be a reason for improper controlling.
User manual
SanStore-4LEMX / SanStore-8LEMX / SanStore-16LEMX
SanStore-4LMX / SanStore-8LMX / SanStore-16LMX
_____________________________________________________________________________
- 19 -
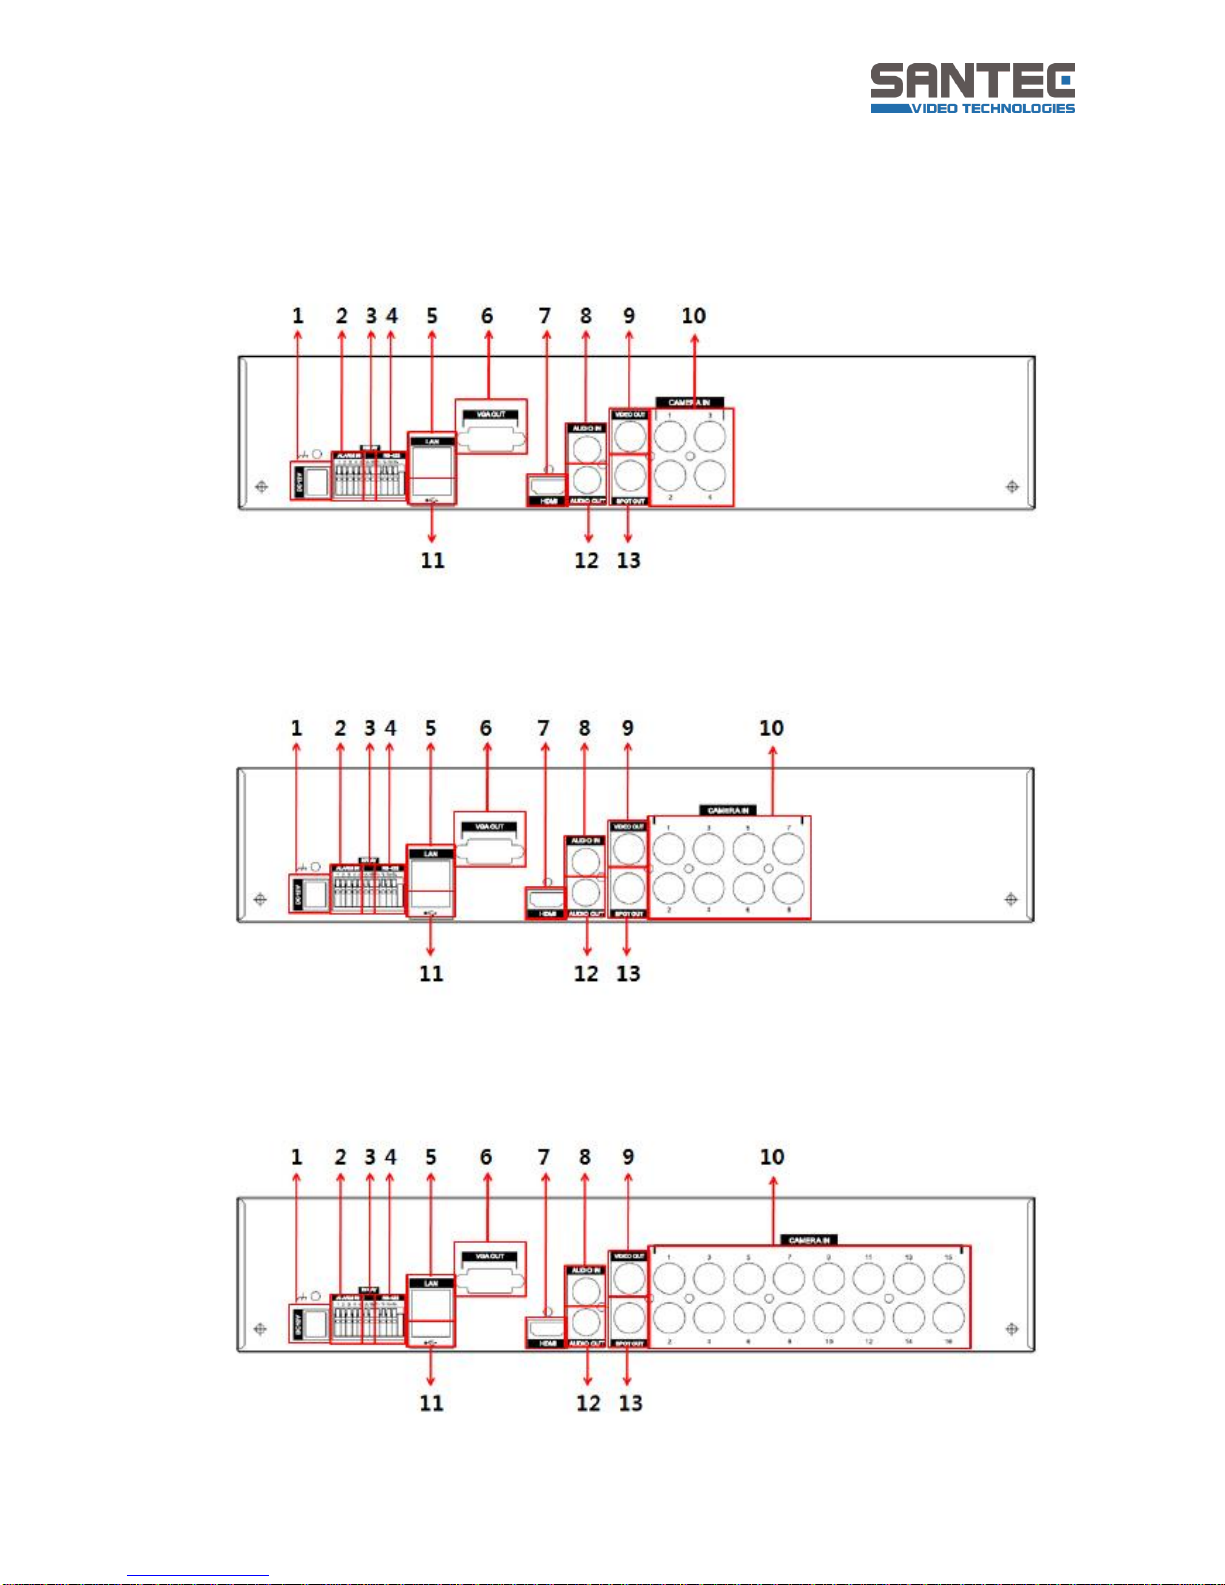
2.2.2 Rear panel connectors
SanStore-4LMX (4 channels):
SanStore-8LMX (8 channels):
SanStore-16LMX (16 channels):

User manual
SanStore-4LEMX / SanStore-8LEMX / SanStore-16LEMX
SanStore-4LMX / SanStore-8LMX / SanStore-16LMX
_____________________________________________________________________________
- 20 -
Connections:
1. Power:
DC power jack
2. Sensor (alarm in 1-4):
For connecting alarm inputs
3. Relay (alarm out 1):
For connecting alarm out relays.
4. RS-422/485:
For connecting a PTZ camera and/or a keyboard.
5. LAN (RJ-45 Ethernet port):
For connecting to a remote PC via Ethernet network
6. VGA:
VGA out connector
7. HDMI:
HDMI out connector
8. Audio input (input: 1)
9. Video out (composite out):
BNC standard composite video output connector.
10. Camera inputs:
BNC input (camera 1-4 / 1-8 / 1-16) connectors (depending on recorder model)
11. USB: For connecting USB compatible devices
12. Audio output (Output: 1)
13. Spot: Spot out connector

User manual
SanStore-4LEMX / SanStore-8LEMX / SanStore-16LEMX
SanStore-4LMX / SanStore-8LMX / SanStore-16LMX
_____________________________________________________________________________
- 21 -
2.3 Remote control
Note: DVR ID button:
Set the proper DVR system ID through which to operate. Press the ID button, and then
press the number button within two seconds to select the system ID of the DVR. If you
set the system ID to zero, you can control multiple DVRs at the same time.
User manual
SanStore-4LEMX / SanStore-8LEMX / SanStore-16LEMX
SanStore-4LMX / SanStore-8LMX / SanStore-16LMX
_____________________________________________________________________________
- 22 -
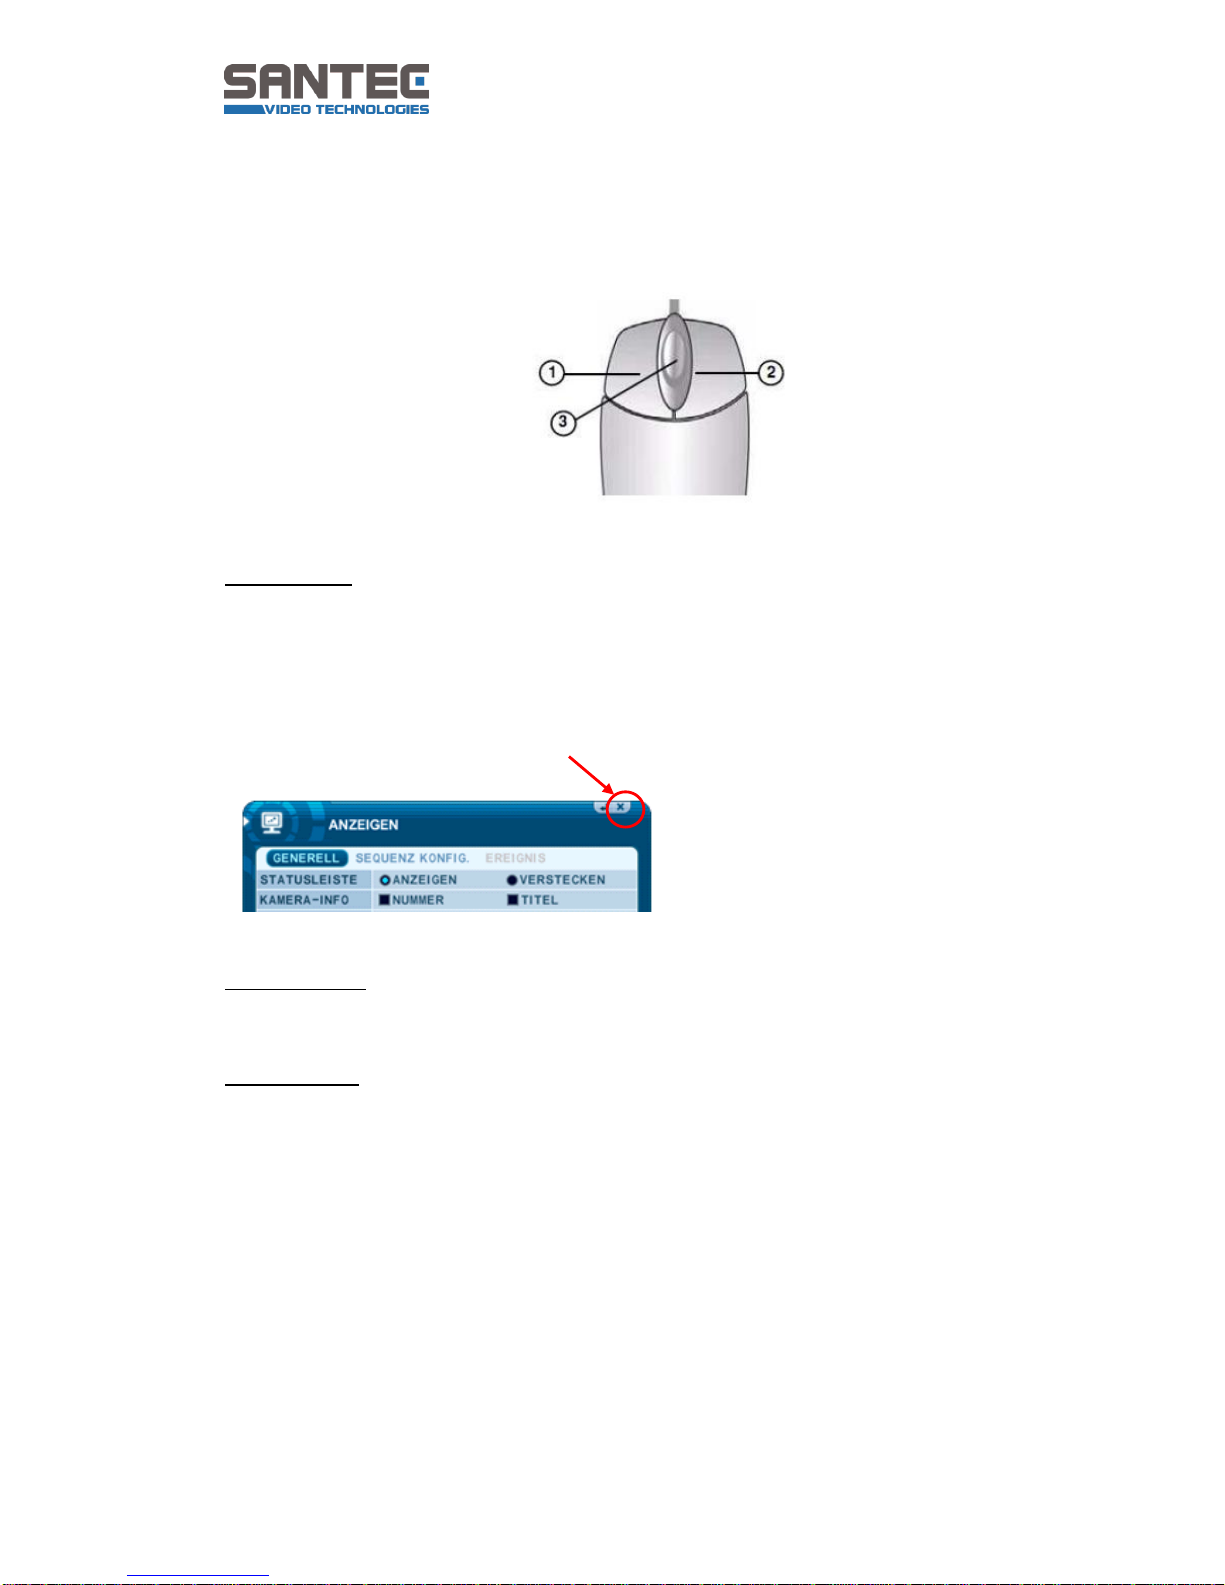
2.4 Mouse control
You can control the recorder using the mouse.
1. Left button:
Double-click on any channel to enlarge to full screen while in a split-screen display
mode. Double-click again to return to the split-screen mode.
When you are in the menu and you wish to close an opened menu window without
saving any changes, use the left mouse button to click on the cross in the upper right
corner.
2. Right button:
Right-click anywhere on the screen to open the main menu. Double-click again to return
to the previous view.
3. Scroll whell:
Move the scroll whell up or down to increase or decrease the value of the selected menu
item.
User manual
SanStore-4LEMX / SanStore-8LEMX / SanStore-16LEMX
SanStore-4LMX / SanStore-8LMX / SanStore-16LMX
_____________________________________________________________________________
- 23 -
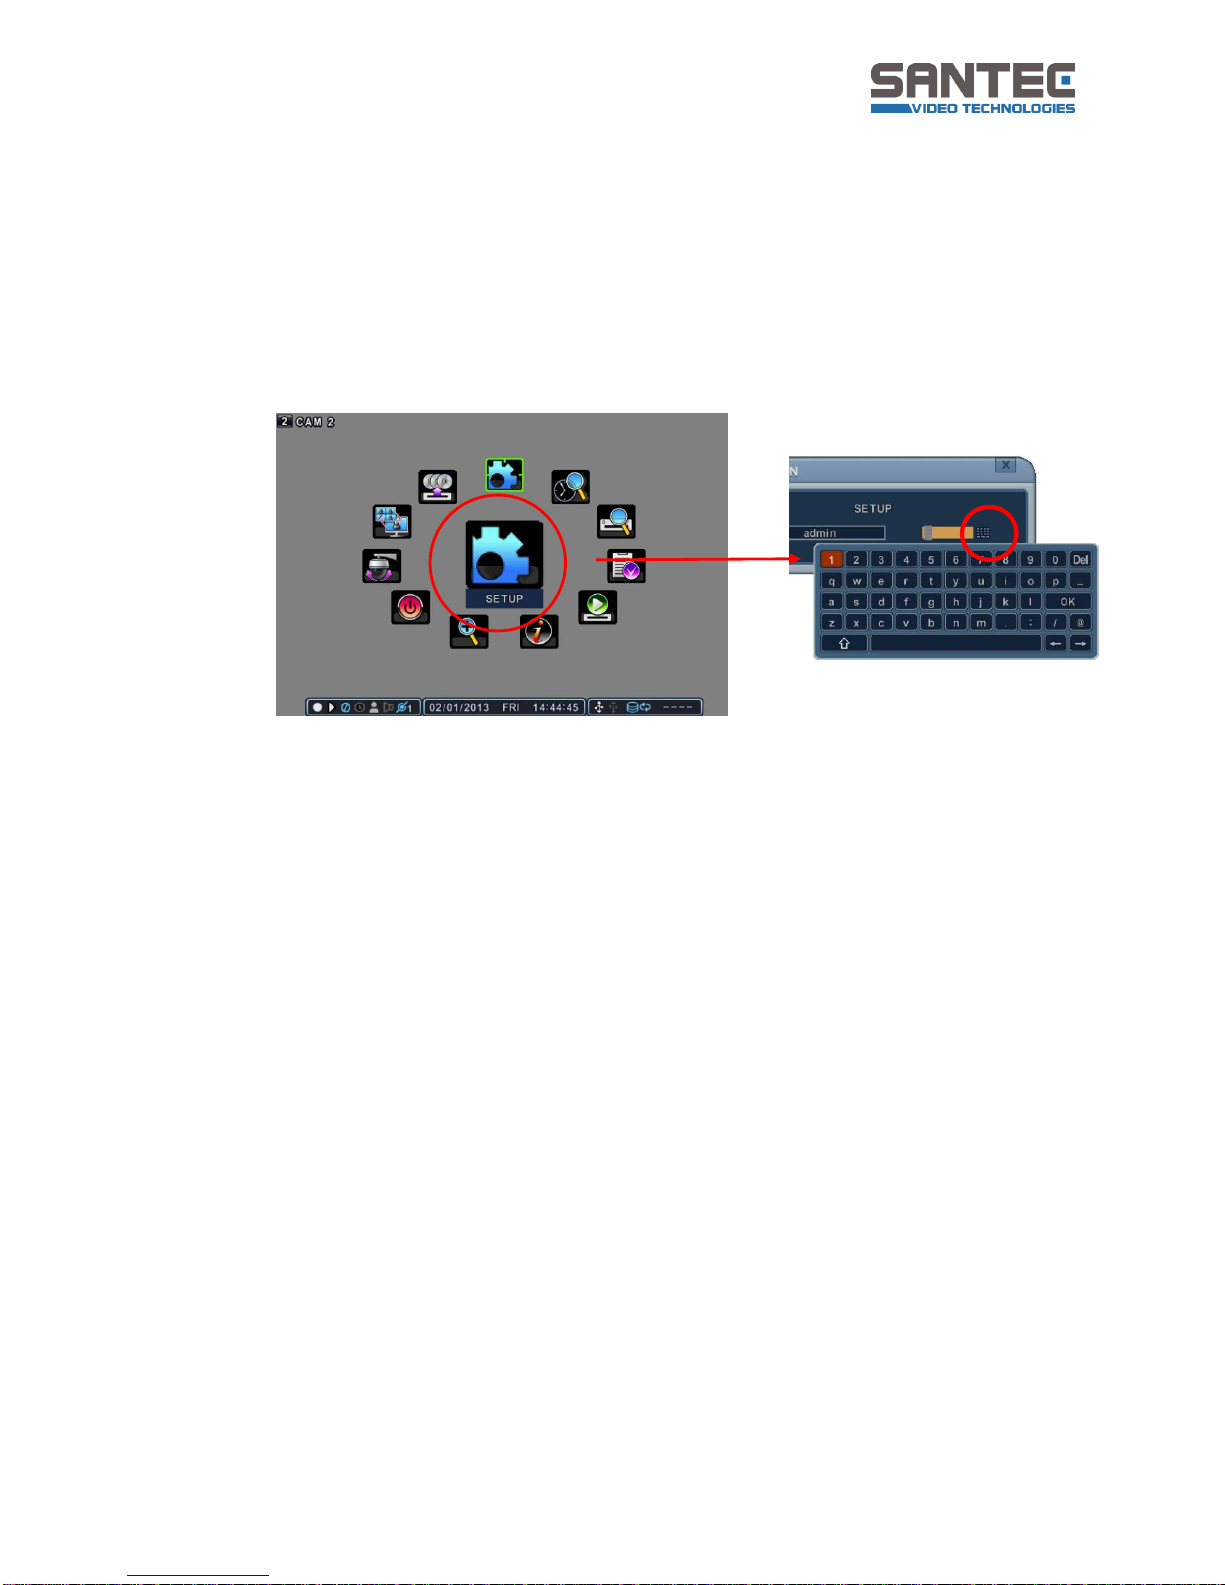
2.5 Virtual keypad for mouse control
This DVR provides a virtual on-screen keypad to perform the control by mouse. Connect
a mouse via the USB port before use.
1. While in live-view or playback mode, right-click to open the configuration window.
2. Click on „Setup“. The login window appears.
Here you will find a key symbol.
3. If you click on the key symbol, the virtual keypad opens. You can now use the
mouse to enter letters or numbers.
4. Right-click to close the virtual keypad again.
Login window
Virtual keypad
Configuration window
User manual
SanStore-4LEMX / SanStore-8LEMX / SanStore-16LEMX
SanStore-4LMX / SanStore-8LMX / SanStore-16LMX
_____________________________________________________________________________
- 24 -
3. INSTALLATION & CONNECTIONS
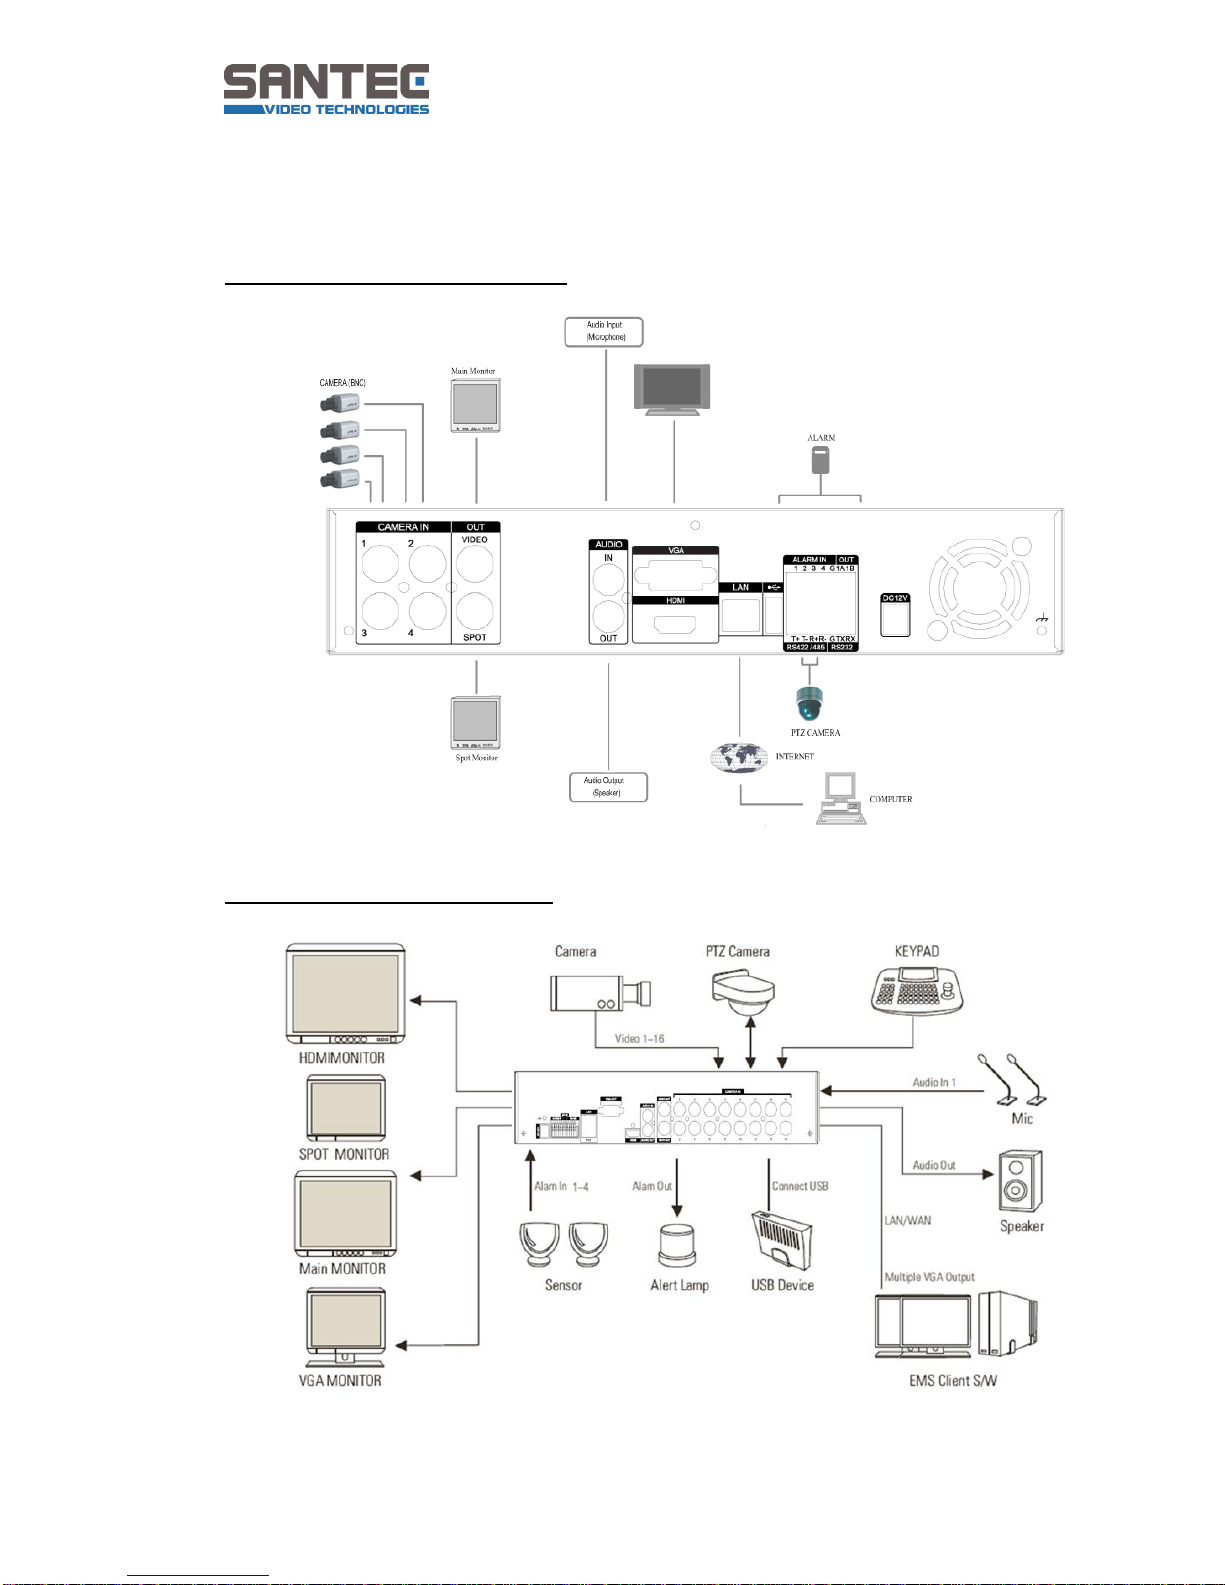
3.1 Complete system configuration
LEMX series: Configuration example:
LMX series: Configuration example:

User manual
SanStore-4LEMX / SanStore-8LEMX / SanStore-16LEMX
SanStore-4LMX / SanStore-8LMX / SanStore-16LMX
_____________________________________________________________________________
- 25 -
3.2 Camera connection
4 / 8 / 16 cameras can be connected tot he video inputs (BNC) on the recorder’s rear
panel. To connect a PTZ camera, please connect the control line of the PTZ camera to
the RS-422 TX+, RS-422 TX- terminal and connect the video output on the recorder’s
rear panel.
3.3 Audio connection
The recorder has an audio output and an audio input. If you want to record and playback
audio signals, please connect the respective audio device (microphone) to the audio
input
(1 Vpp, 600 Ohm) and connect the speaker to the audio output (see below).
3.4 Monitor connection
The recorder has 3 video outputs (2x BNC, 1x VGA), located on the rear panel. Here
you can plug-in monitors.
1x BNC for main composite video output
1x BNC for spot composite video output
1x VGA output
1x HDMI connection
User manual
SanStore-4LEMX / SanStore-8LEMX / SanStore-16LEMX
SanStore-4LMX / SanStore-8LMX / SanStore-16LMX
_____________________________________________________________________________
- 26 -
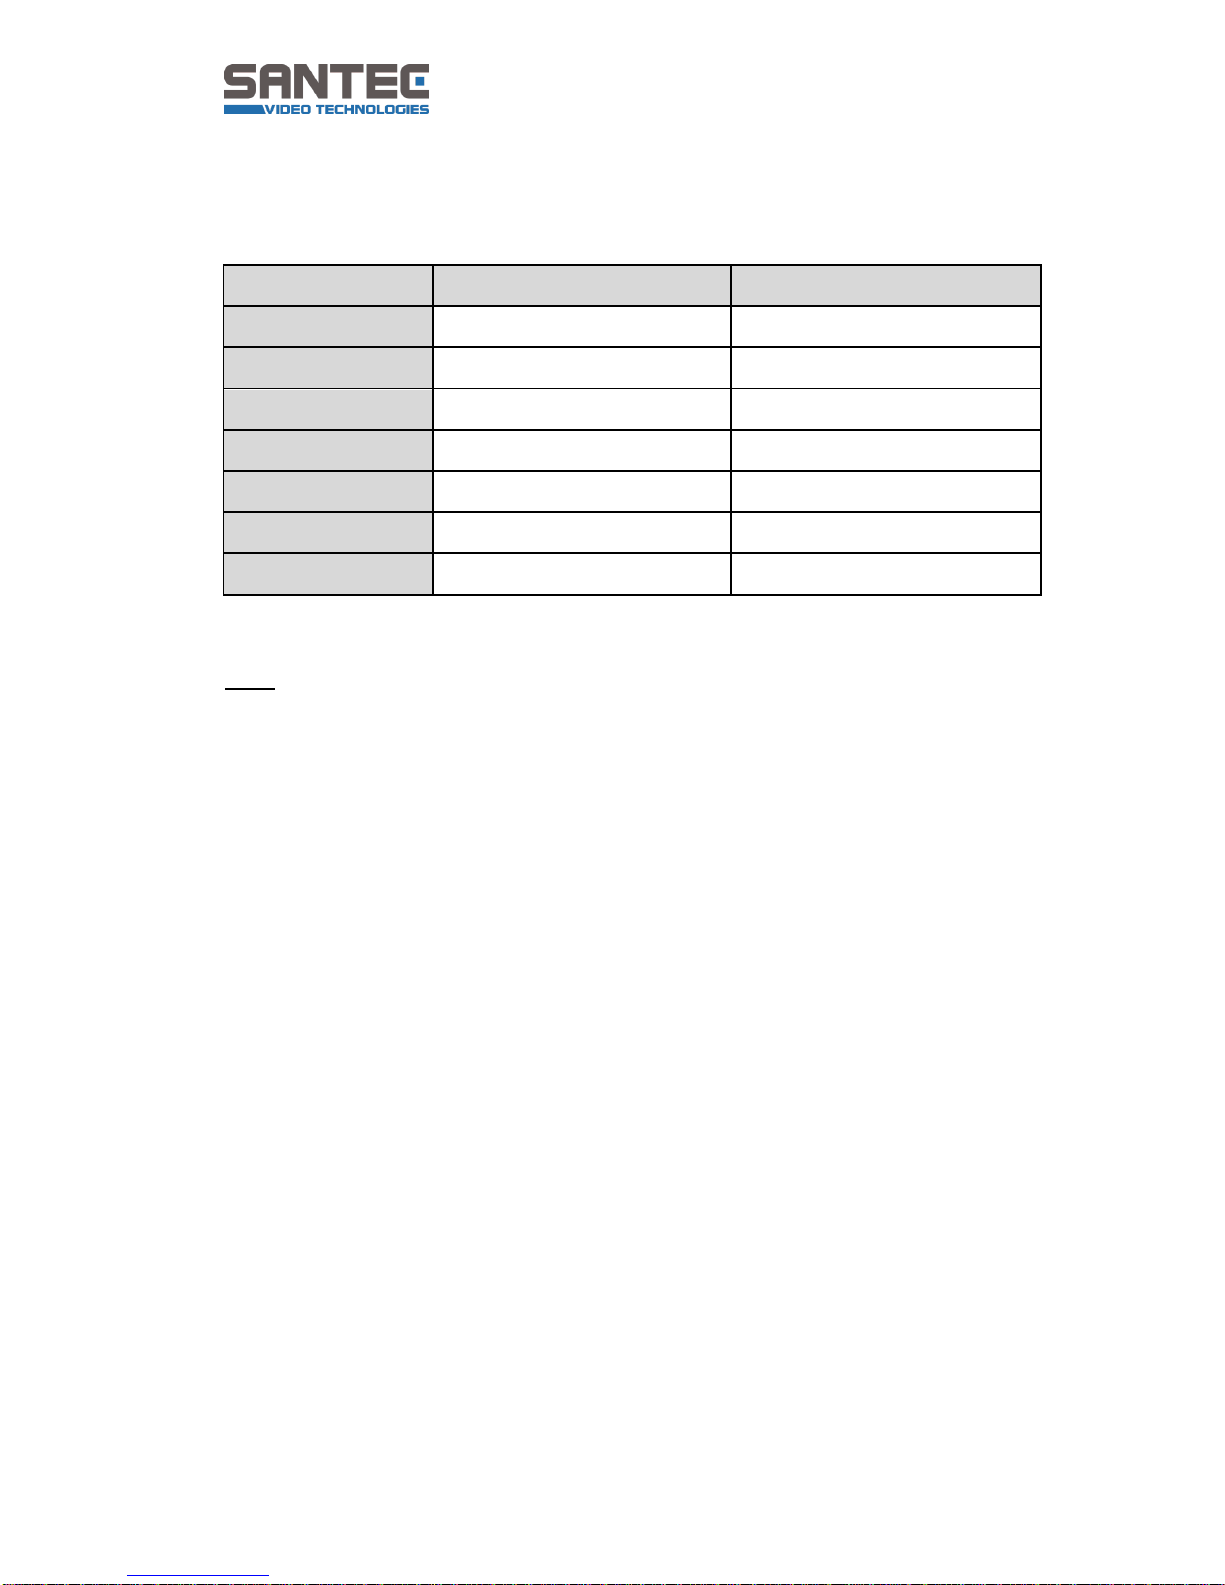
3.5 PC requirements for network connection
Note:
The connection and remote viewing of the DVR may not be successful on all PCs due to
the variety of PCs’ Internet connection settings.
Please contact the technical support for further assistance.
Minimum
Recommended
OS
Windows XP SP3 or higher
Windows 7
Processor (CPU)
Core2 Duo
I5
Memory (RAM)
2 G
4 G
VGA
PCI-E 256M
PCI-E 512M
DirectX
DX9.0 Support
DX9.0 Support
Network
100 M Ethernet LAN
100M Ethernet LAN
HDD
100 G
500 G
User manual
SanStore-4LEMX / SanStore-8LEMX / SanStore-16LEMX
SanStore-4LMX / SanStore-8LMX / SanStore-16LMX
_____________________________________________________________________________
- 27 -
4. QUICK START
Press the POWER button on the recorder’s front panel or on the remote control to switch
the recorder on. The live-view image appears after approx. 30 seconds.
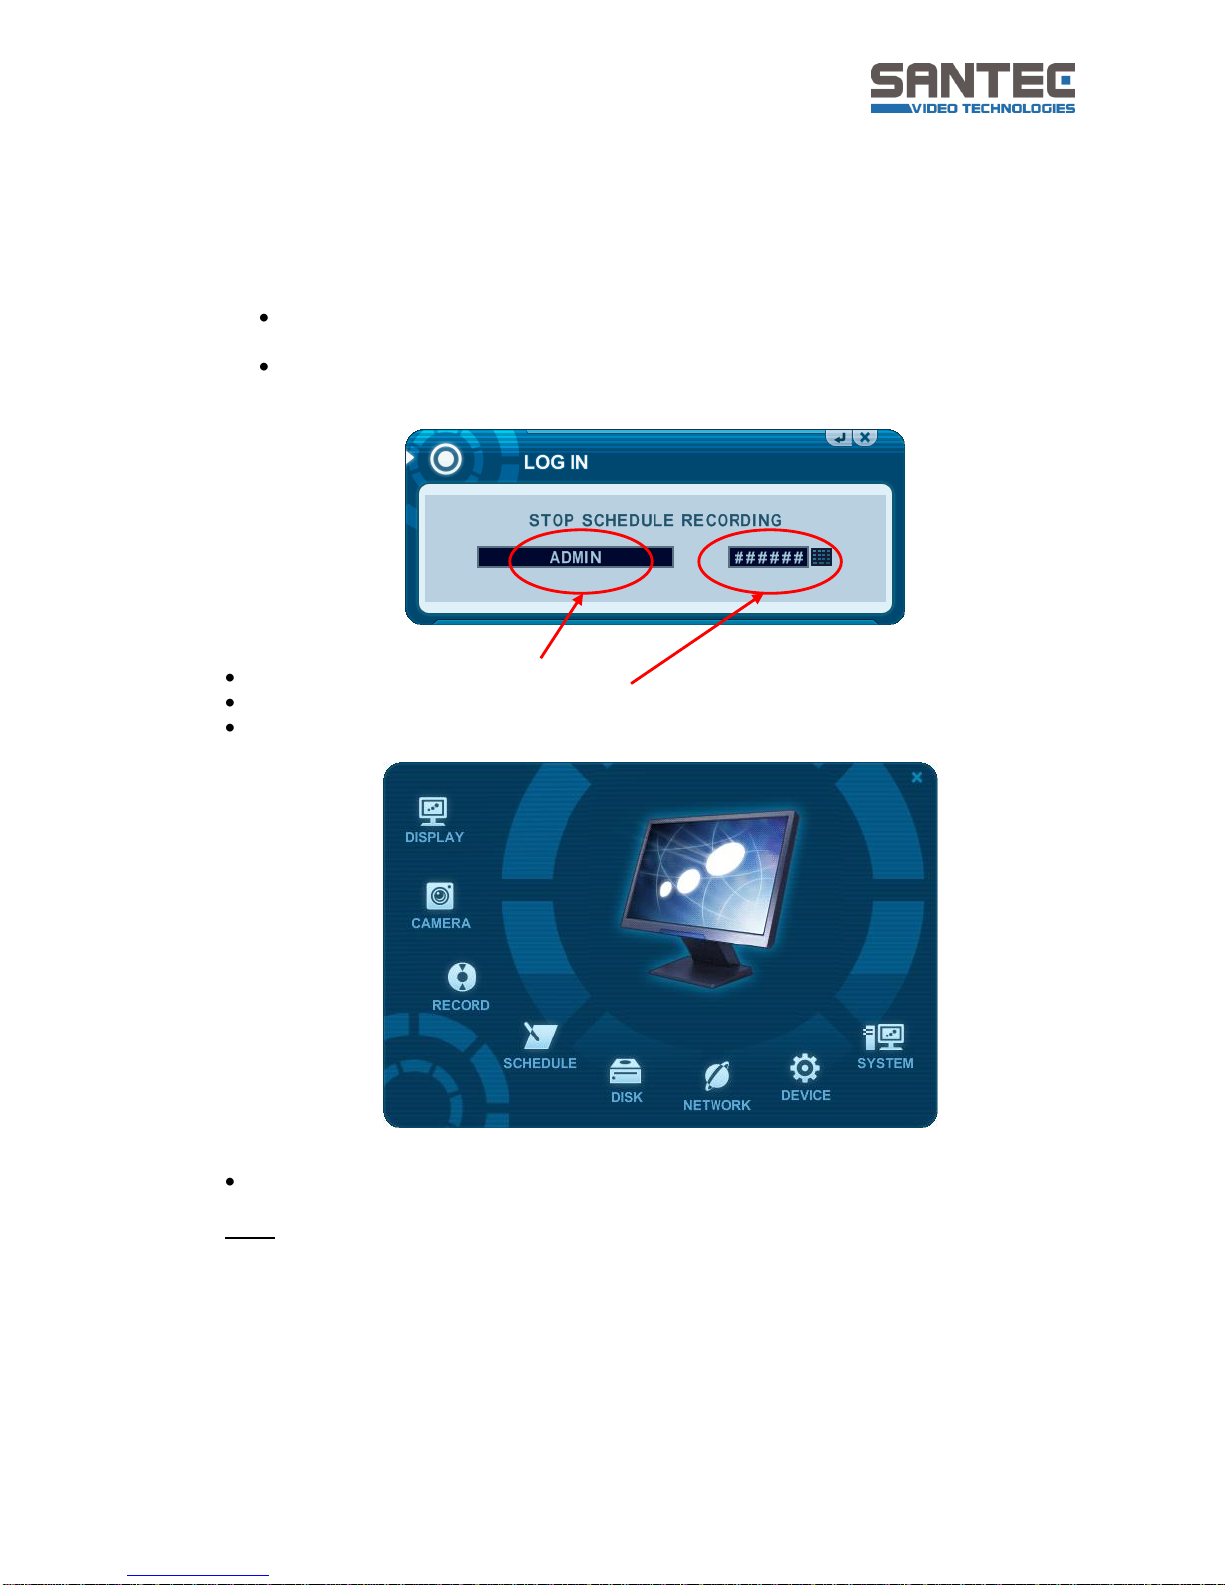
Prior to the quick start, please stop all recordings which might be running. During
a recording, the time and recording menus are not active.
Enter the password using the numeric keys (either use the remote control or the
virtual keypad).
The default user name is ADMIN.
The factory default password is “000000“.
The main menu appears once you have entered the password.
Use the mouse or the direction butoons to select a menu item.
Note:
If you are idle for approx. 1 minute, i.e. you have not made any entries or have not
navigated through the menu for 1 minute, the menu will close automatically.
User manual
SanStore-4LEMX / SanStore-8LEMX / SanStore-16LEMX
SanStore-4LMX / SanStore-8LMX / SanStore-16LMX
_____________________________________________________________________________
- 28 -
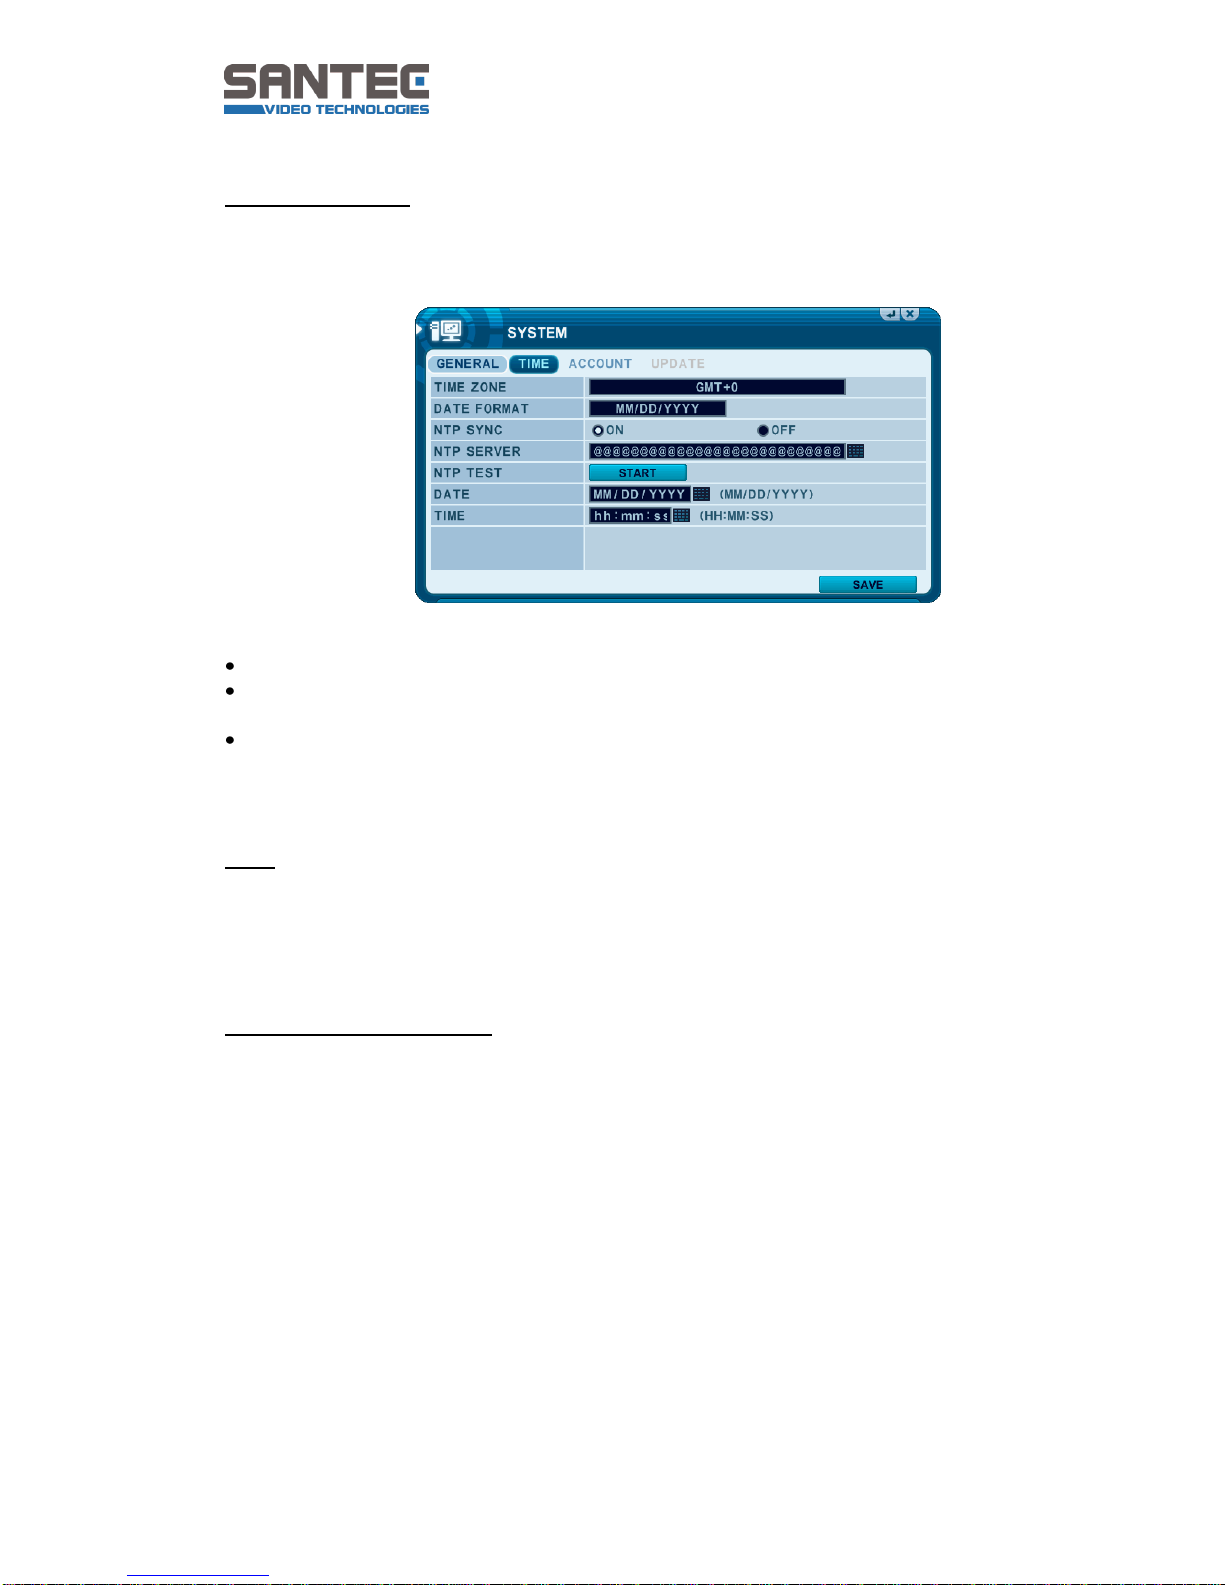
Time & date setting:
When the DVR is powered on for the very first time, please enter the correct date and
time.
Use the mouse or the direction buttons to selec the „Time“ tab in the system menu.
Enter the date and time using the numeric buttons on the remote control or the „-
/+“ buttons on the recorder’s front panel. Alternatively, use the mouse.
Press ENTER to save your entries and to exit the menu. Alternatively, click „SAVE“.
Press ESC to exit the menu without saving the entries. Alternatively, close the
window by clicking on the cross.
Note:
If the recorder is in recording mode, you cannot change the date and time. You first have
to stop the recording to be able to edit the date and time.
Once you have adjusted the date and time, press REC to continue with the recording.
Selecting the OSD language:
By default, German is selected as OSD language. You can change the language. Go to
System > General and select your langauge (also see chapter 7.8.1).
User manual
SanStore-4LEMX / SanStore-8LEMX / SanStore-16LEMX
SanStore-4LMX / SanStore-8LMX / SanStore-16LMX
_____________________________________________________________________________
- 29 -
5.LIVE VIEWING
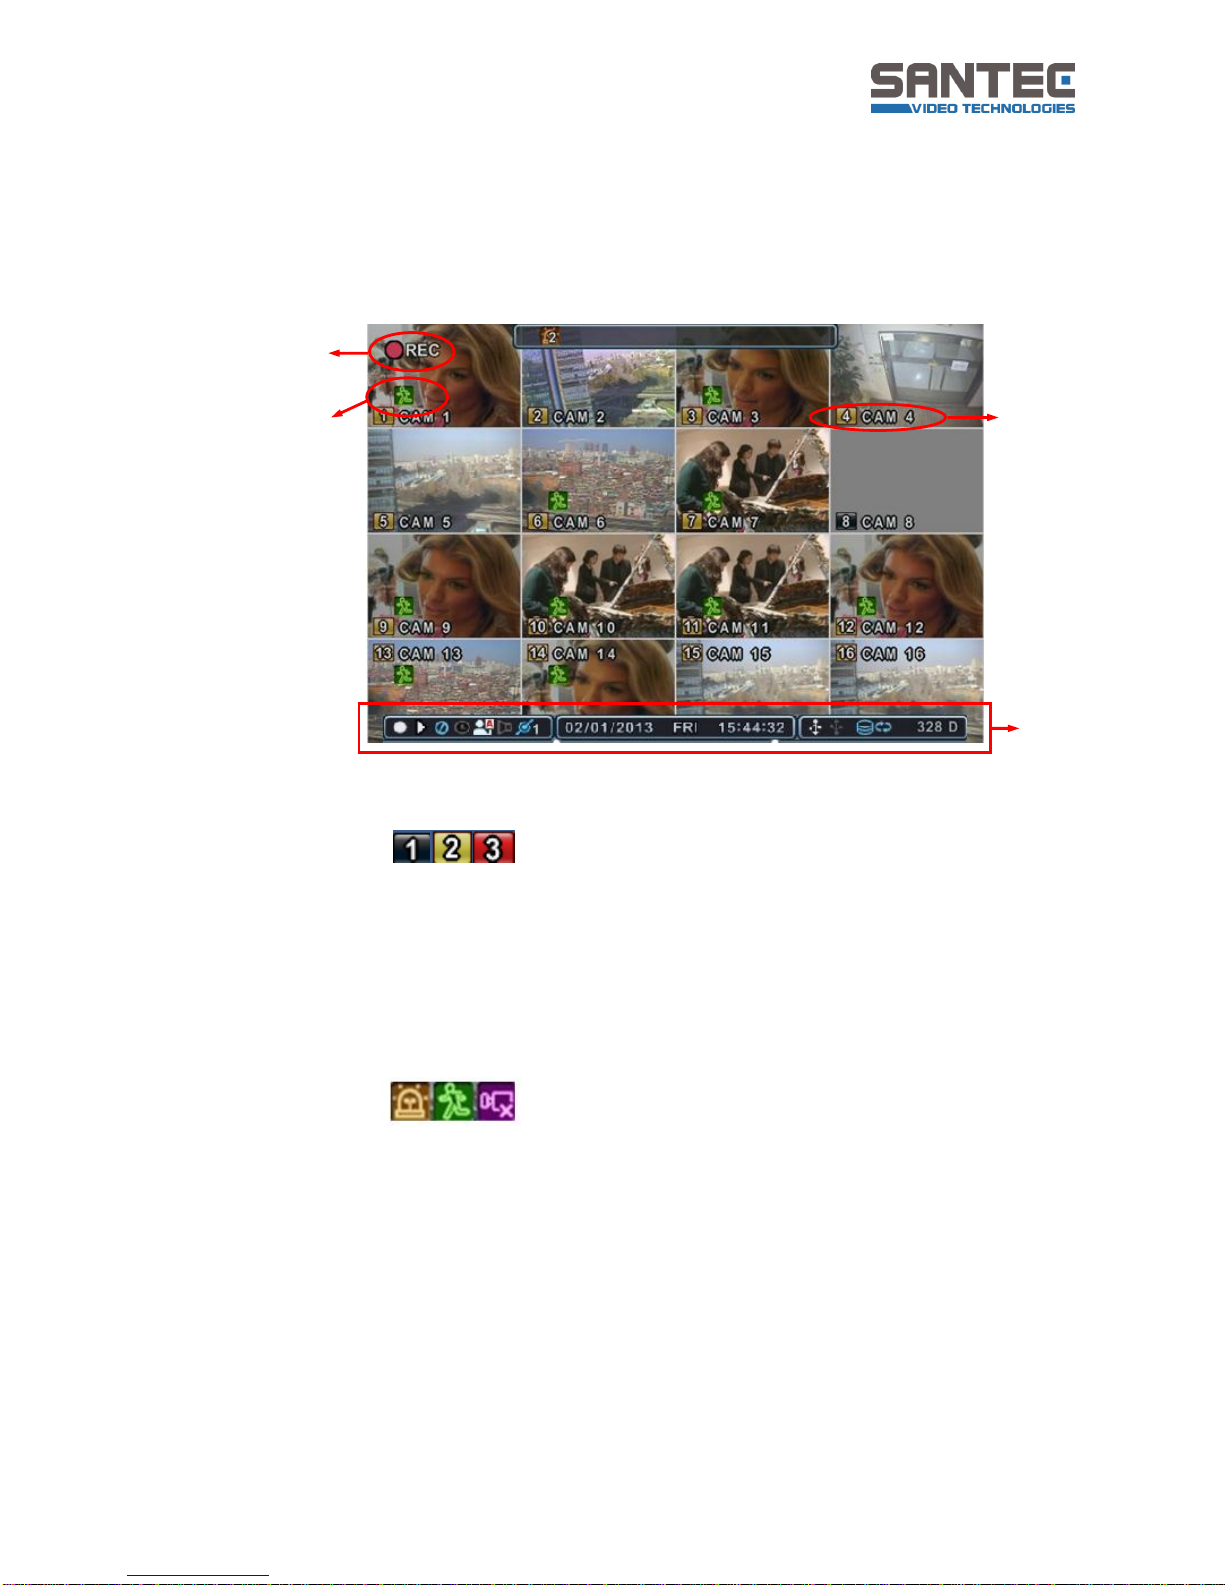
5.1 Display overview
1 Bildschirm-Übersicht
Recording Mode
The background colour of the number will be different based on the recording status.
Black: No recording
Yellow: Recording continues
Red: Event recording (motion, alarm)
1 2 3
Event indicator
(1) Alarm: Indicates that an alarm has been triggered.
To hide the symbol, press [CANCEL/ESC] on the remote control.
(2) Motion: Indicates that motion has been detected
To hide the symbol, press [CANCEL/ESC] on the remote control.
(3) Video loss: Indicates that the video image has been lost.
To hide the symbol, press [CANCEL/ESC] on the remote control.
Recording
mode
Event
Camera number
and camera title
Status bar
User manual
SanStore-4LEMX / SanStore-8LEMX / SanStore-16LEMX
SanStore-4LMX / SanStore-8LMX / SanStore-16LMX
_____________________________________________________________________________
- 30 -
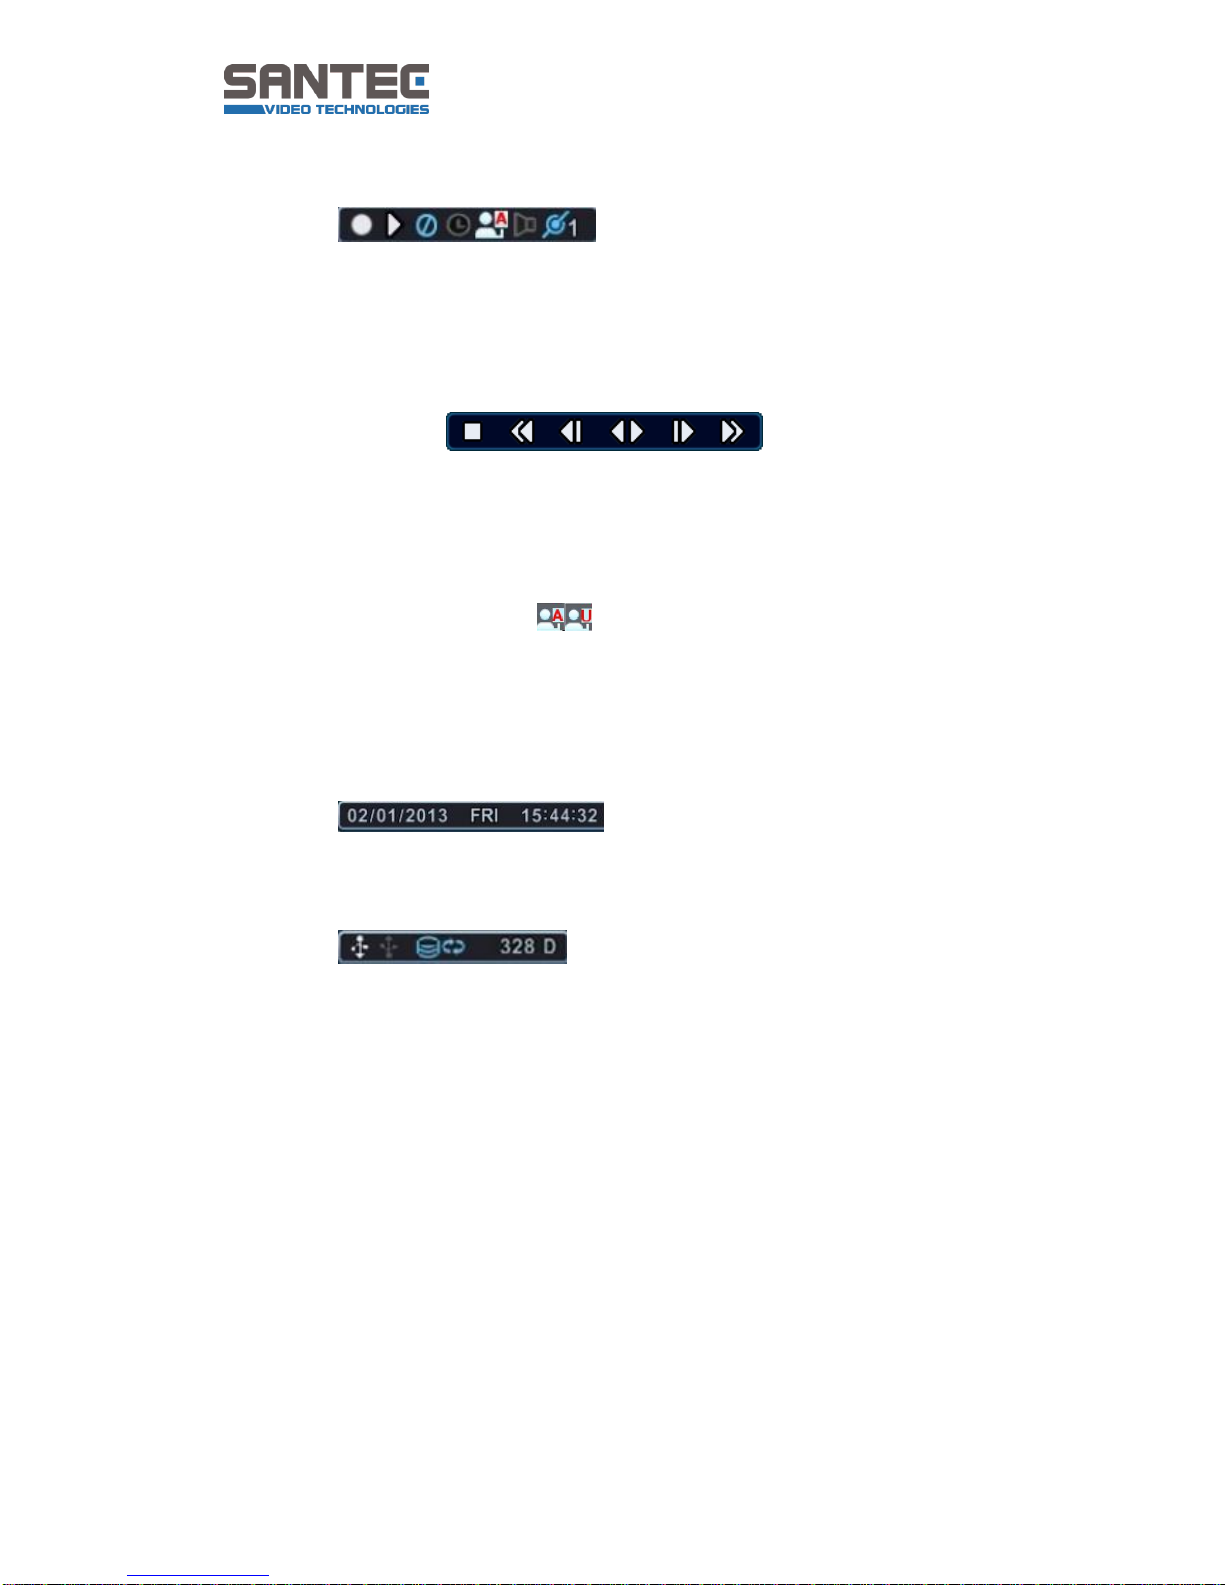
Status bar
(1) Indicates the recording status. Red means that the event is currently recorded.
Click on this symbol to toggle between recording start and stop.
(2) Indicates the playback status. Green means that the playback is currently
running. Click on this symbol to toggle between playback start and stop.
(3) Click on “M” (= Menu) to open the configuration window. Click on “M” again to
close the window.
(4) Indicates the log list. Close the log list again by clicking on the cross.
(5) Indicates the login status „A“ is for „Admin“ and „U“ is for „User“.
(6) Indicates that audio data are recorded.
(7) Indicats the number of users currently logged-in to the network.
Status bar
Indicates the date, the day of the week and the time.
Status bar
(8) Indicates that a USB device is connected. During the backup the symbol is blue.
Click on the symbol to toggle between backup start and stop.
(9) Indicates the remaining recording time. If the HDD capacity is below 5 GB, the
recycling symbol is blue.
(10) Indicates the remaining recording days for the currently activated recording.
(1) (2) (3) (4) (5) (6) (7)
(8) (9) (10)
 Loading...