

Santec JB-300G, JB-300W Quick Installation Manual
Kurzanleitung / Quick installation guide
JB-300G, JB-300W
KURZANLEITUNG
QUICK INSTALLATION GUIDE
Montagebox / Junction box
JB-300G
JB-300W
Beschreibung:
Diese Montagebox dient zur leichteren
Installation für Kabelanschlüsse usw.
Die Montagebox ist in grau (JB-300G) bzw. in
weiß (JB-300W) erhältlich.
Sie ist geeignet für die SANTEC Kameras
VTC-HDH359IRPU/G und VTC-369IRPG
(graue Modelle) sowie für
VTC-HDH359IRPU/W und VTC-369IRPW
(weiße Modelle).
Zur Decken- oder Wandmontage.
Installation:
Befestigen Sie die Kamera mit der Montagebox
auf einem festen Untergrund (Wand oder Decke),
der deren Gewicht tragen kann. Verwenden Sie
hierfür geeignete Schrauben für eine sichere
Installation.
Vorgehensweise
(siehe auch nachfolgende Bilder):
1. Lösen Sie die Sicherheitsschraube und öffnen
Sie das Gehäuse durch Drehen.
2. Entfernen Sie den Montagering der Kamera
(er wird nicht mehr benötigt) und ersetzen Sie
ihn durch die Montagebox JB-300G bzw.
JB-300W.
3. Schrauben Sie die Montagebox an der
gewünschten Stelle (Wand oder Decke) fest.
4. Schließen Sie die Video- und
Betriebsspannungskabel an.
5. Schrauben Sie die Kamerakugel nicht allzu
fest auf die Montagebox auf, so dass die
Kugel noch beweglich ist und Sie sie auf das
gewünschte Objekt ausrichten können.
6. Erst nach Ausrichtung der Kugel schrauben
Sie sie bitte fest auf der Montagebox auf.
7. Benutzen Sie den Brennweiten-/Fokusregler
(im Lieferumfang enthalten), um das Objektiv
wie gewünscht einzustellen.
8. Zum Schluss setzen Sie das Gehäuse über
die Kugel und drehen es fest.
Description:
This junction box has been designed for
easy installation of cables, etc.
The box is available in gray (JB-300G) and
in white (JB-300W).
It is suitable for SANTEC cameras
VTC-HDH359IRPU/G and VTC-369IRPG
(gray housing) as well as for
VTC-HDH359IRPU/W and VTC-359IRPW
(white housing).
The box can be wall or ceiling mounted.
Installation:
Only install the camera and the junction box on
a solid ground which is capable of carrying
their weight (wall or ceiling). Only use suitable
screws to ensure a safe installation.
Procedure
(also see pictures on next page):
1. Loosen the security screw and turn the
housing carefully to open it.
2. Remove the mounting ring/plate of the
camera (it is not needed anymore) and
replace it by the junction box JB-300G
resp. JB-300W.
3. Screw the junction box in the desired
location (ceiling or wall).
4. Connect the video and power cables.
5. Put the dome ball on the junction box but
tighten it only a bi so that the ball is still free
to move. Adjust the position of the ball to
the desired object.
6. If you are satisfied with the ball position, fix
it tightly onto the junction box.
7. Use the focus adjuster (included in the
delivery) to adjust the lens as required.
8. Finally, put the housing on the ball and
tighten it.
Version 1.1sfi/1114/dt-engl/A5
Kurzanleitung / Quick installation guide
JB-300G, JB-300W
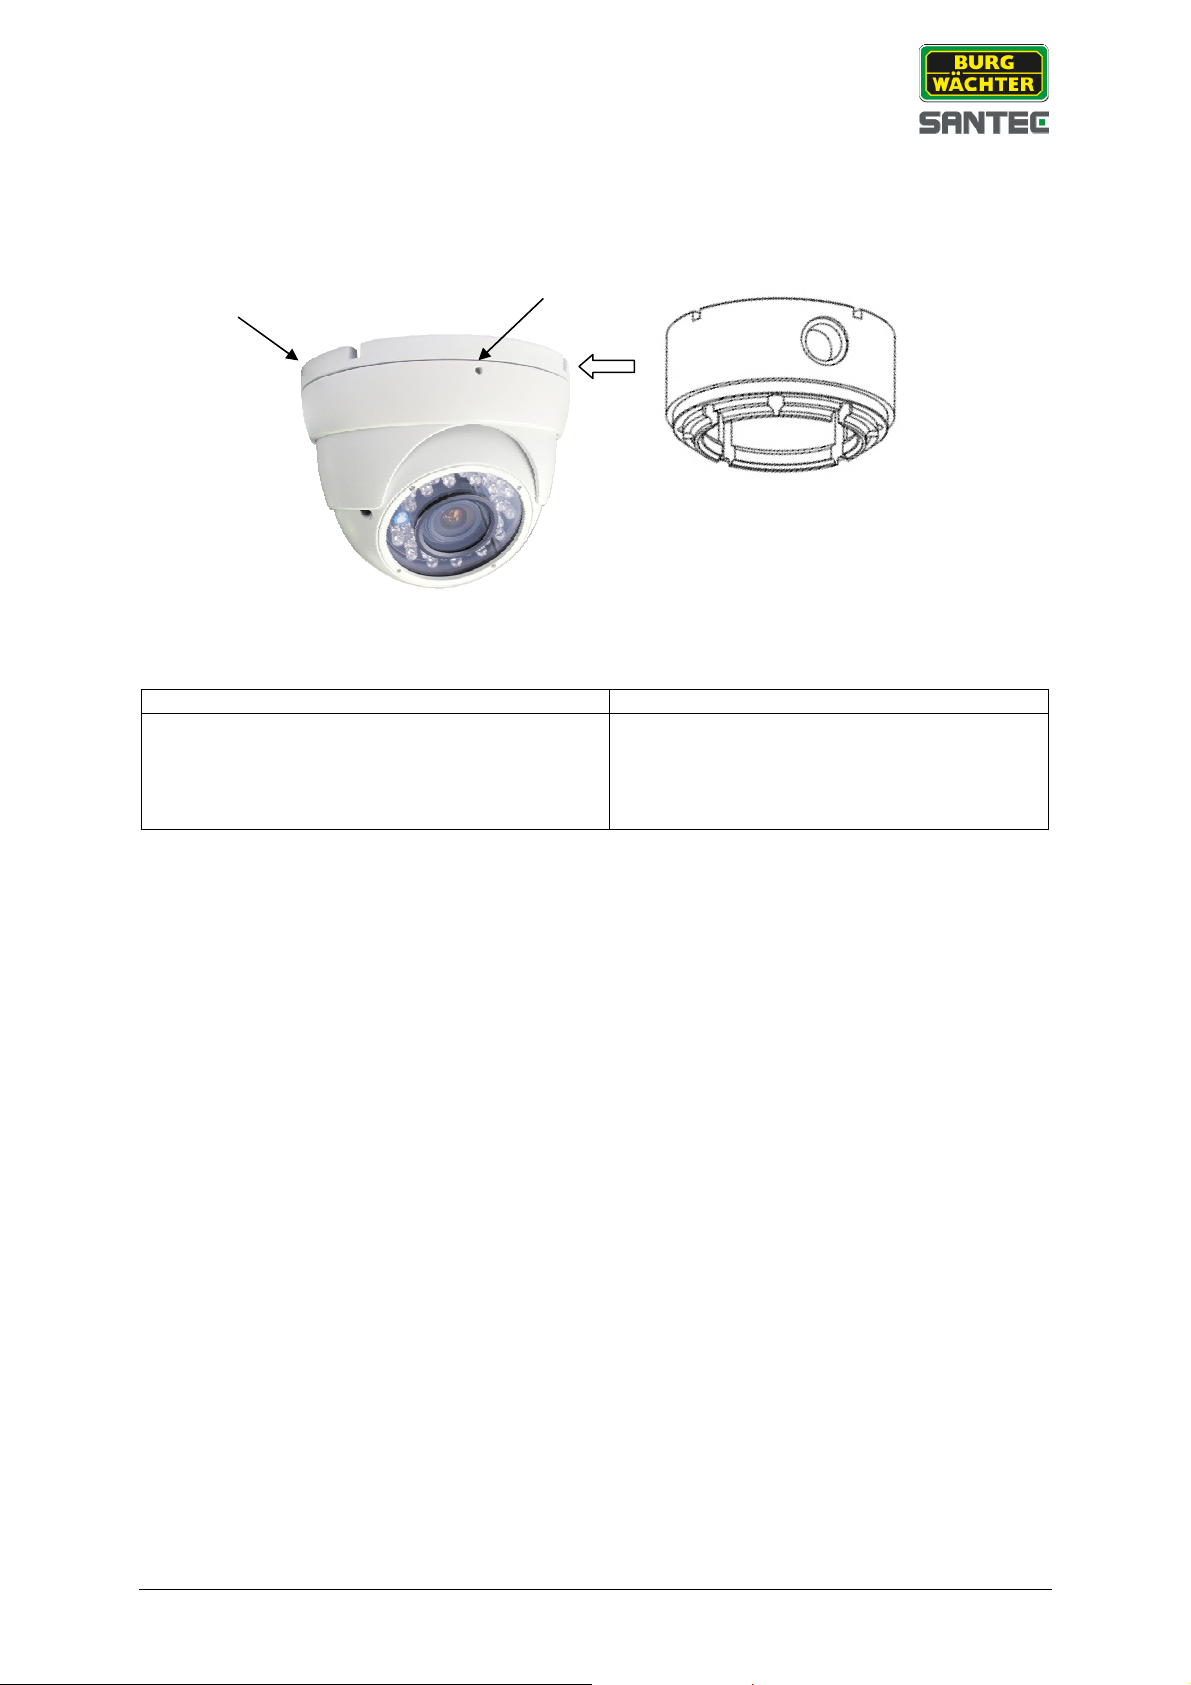
Montagering entfernen /
Remove mounting ring
Sicherheitsschraube lösen /
Loosen security screw
Montagebox aufschrauben /
Put on junction box
Hinweis:
Bitte beachten Sie, dass die Montagebox keine
komplett geschlossene Box ist.
Schützen Sie den Kabelanschluss bzw. die
Kabelverbindung gegen Feuchtigkeit und
Witterungseinflüsse.
Irrtum und technische Änderungen vorbehalten. Abbildungen nicht maßstabsgerecht.
Subject to technical changes. Errors excepted. Illustrations not true to scale.
Please note:
Please note that the junction box is not a fully
closed box.
Please protected the cable connector resp. the
cable connections against humidity and
influence of weather.
Version 1.1sfi/1114/dt-engl/A5
 Loading...