

Santec 9950CR User Manual
PLEASE READ THE INSTRUCTIONS COMPLETELY
BEFORE BEGINNING THE INSTALLATION.
ROMAN TUBS
This is a general installation instruction
for the following collections:
* AVA
*
AVA CRYSTAL
MINIMUM HOLE SIZE FOR THE SPOUT AND
HANDLE TRIM IS 1
¼” AND MAXIMUM OF 1 ½”
*** NOTE: SHUT OFF WATER SUPPLY BEFORE BEGINNING INSTALLATION***
INSPECTED BY
KEEP THIS INSTRUCTION BOOKLET FOR FUTURE REFERENCE
PAGE 01
COLLECTION
INSTALLATION INSTRUCTIONS
ROMAN TUBS
S POUT INSTALLATION
FLUSH BOTH SUPPLY LINES BEFORE INSTALLATION.
AFTER FLUSHING, SHUT OFF BOTH SUPPLY LINES.
MINIMUM HOLE SIZE FOR THE SPOUT AND HANDLE TRIM IS 1-1/4”
AND MAXIMUM IS 1 -1/2”
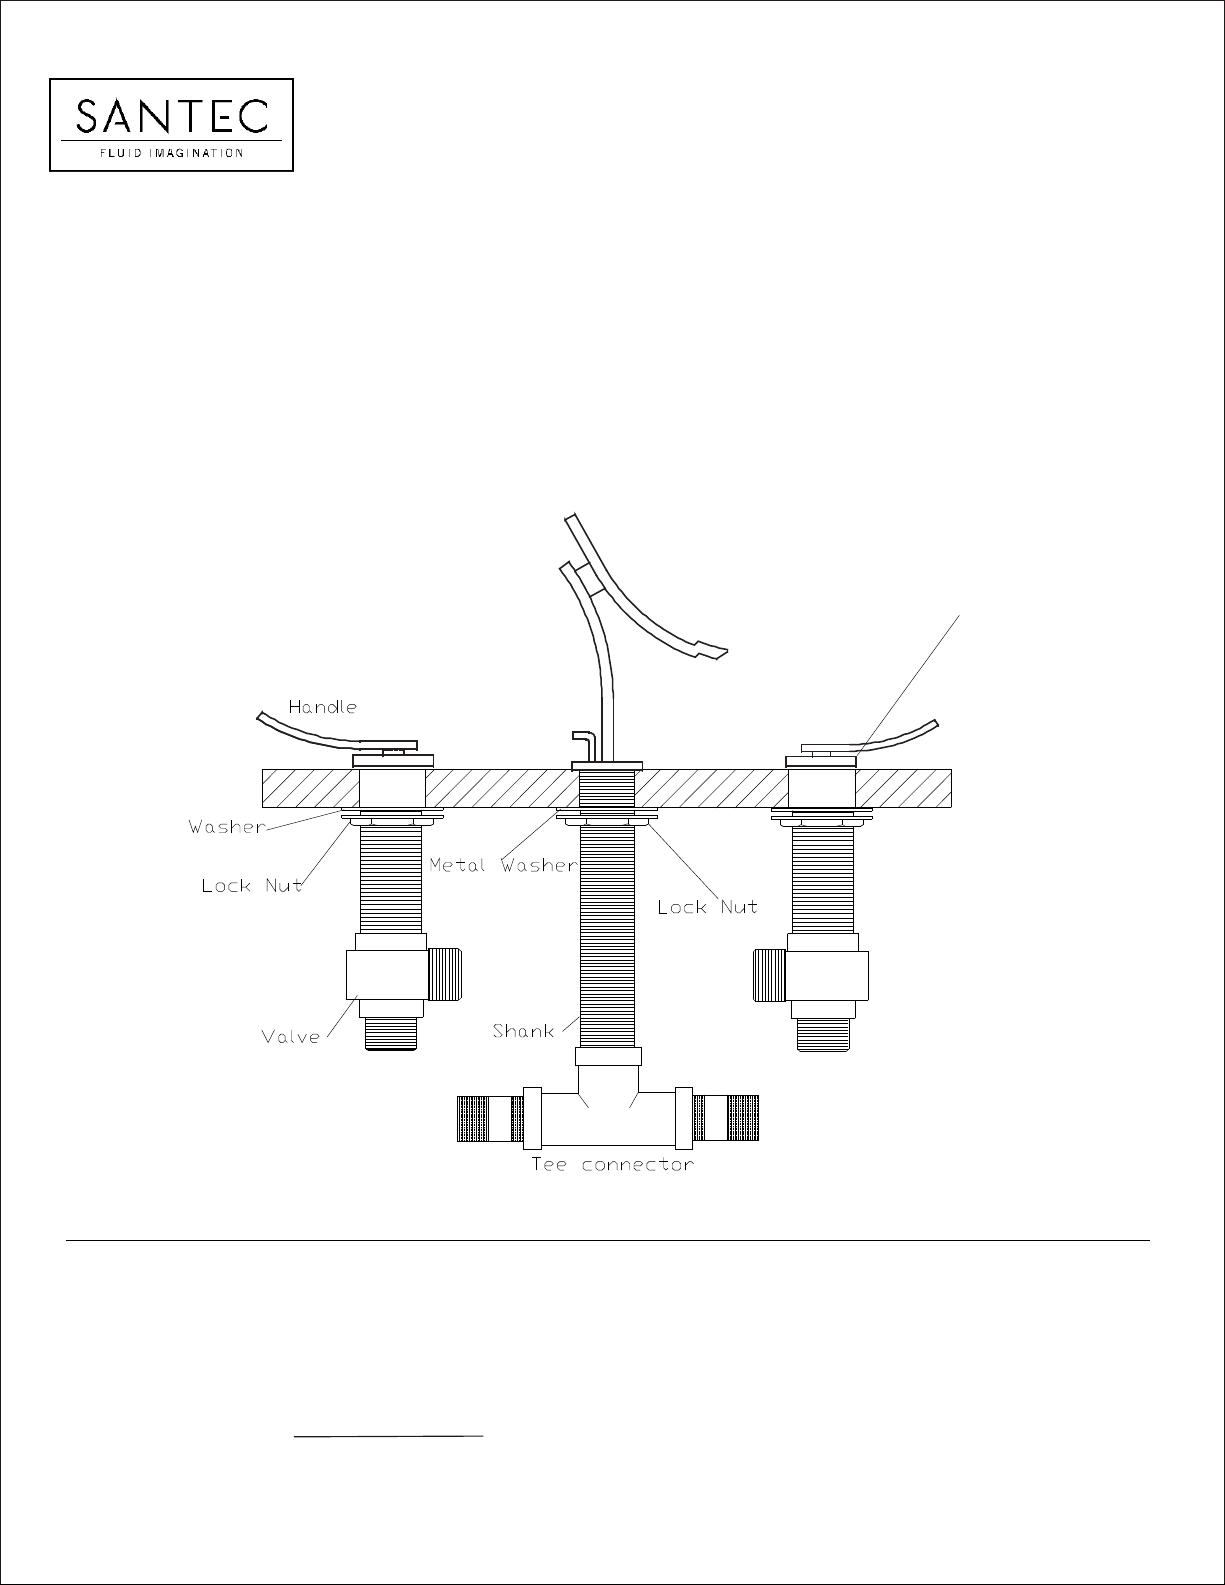
1. Remove the tee connector and spout mounting hardware from
quick connect shank being sure to leave on brass pl ate.
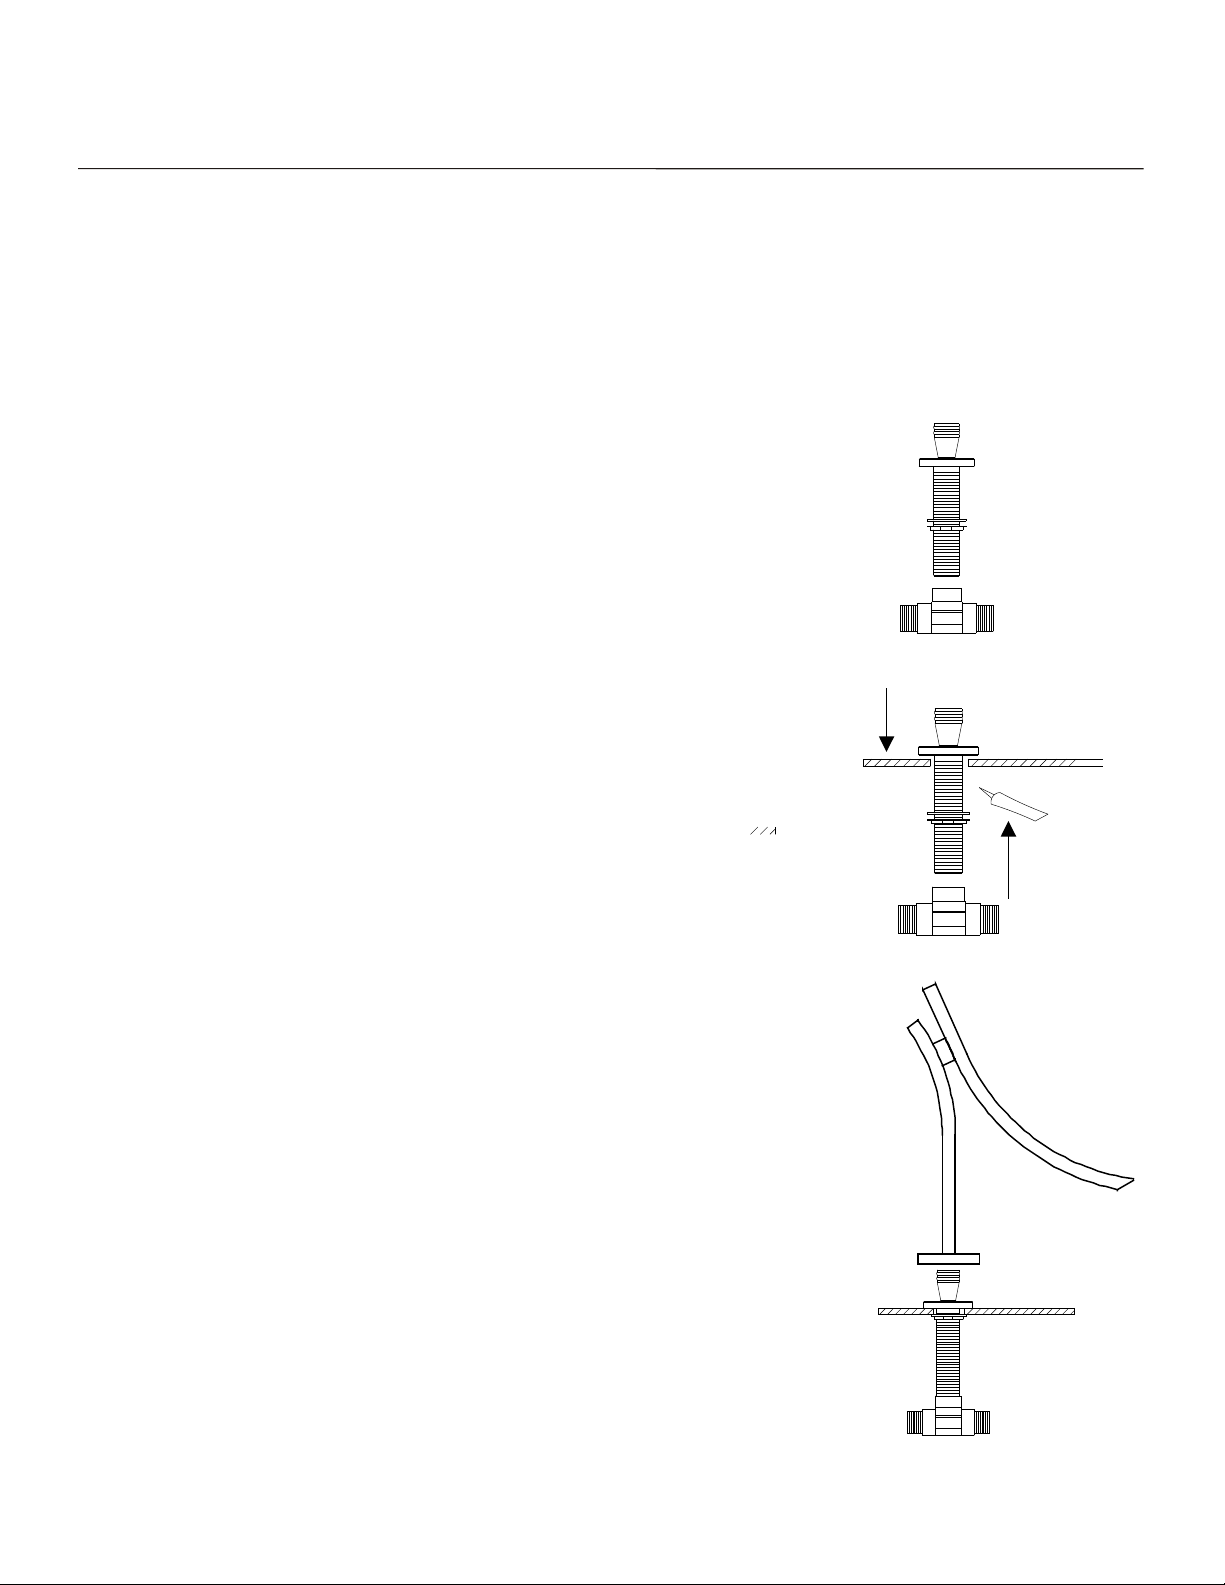
2. Apply a ring of silicone caulking around hole designated for spout.
DO NOT USE PLUMBERS’ PUTTY, WHICH CAN DAMAGE FINISH.
3. From the top of the deck, slip the quick connect shank through
the assig ned spout hole.
4. Secure the quick connect shank by putting
back on the shank. Tighten the lock nut rmly.
5. From the top of the deck, slip the spout with the ange and ange
washer onto the quick connect shank top. Align the spout and tighten
the set screw with the Allen key provided.
6. Connect the tee connector to the spout shank.
the washer and lock nut
S ILI CO NE
 Loading...