

Santec 9250DC User Manual
PLEASE READ THE INSTRUCTIONS COMPLETELY
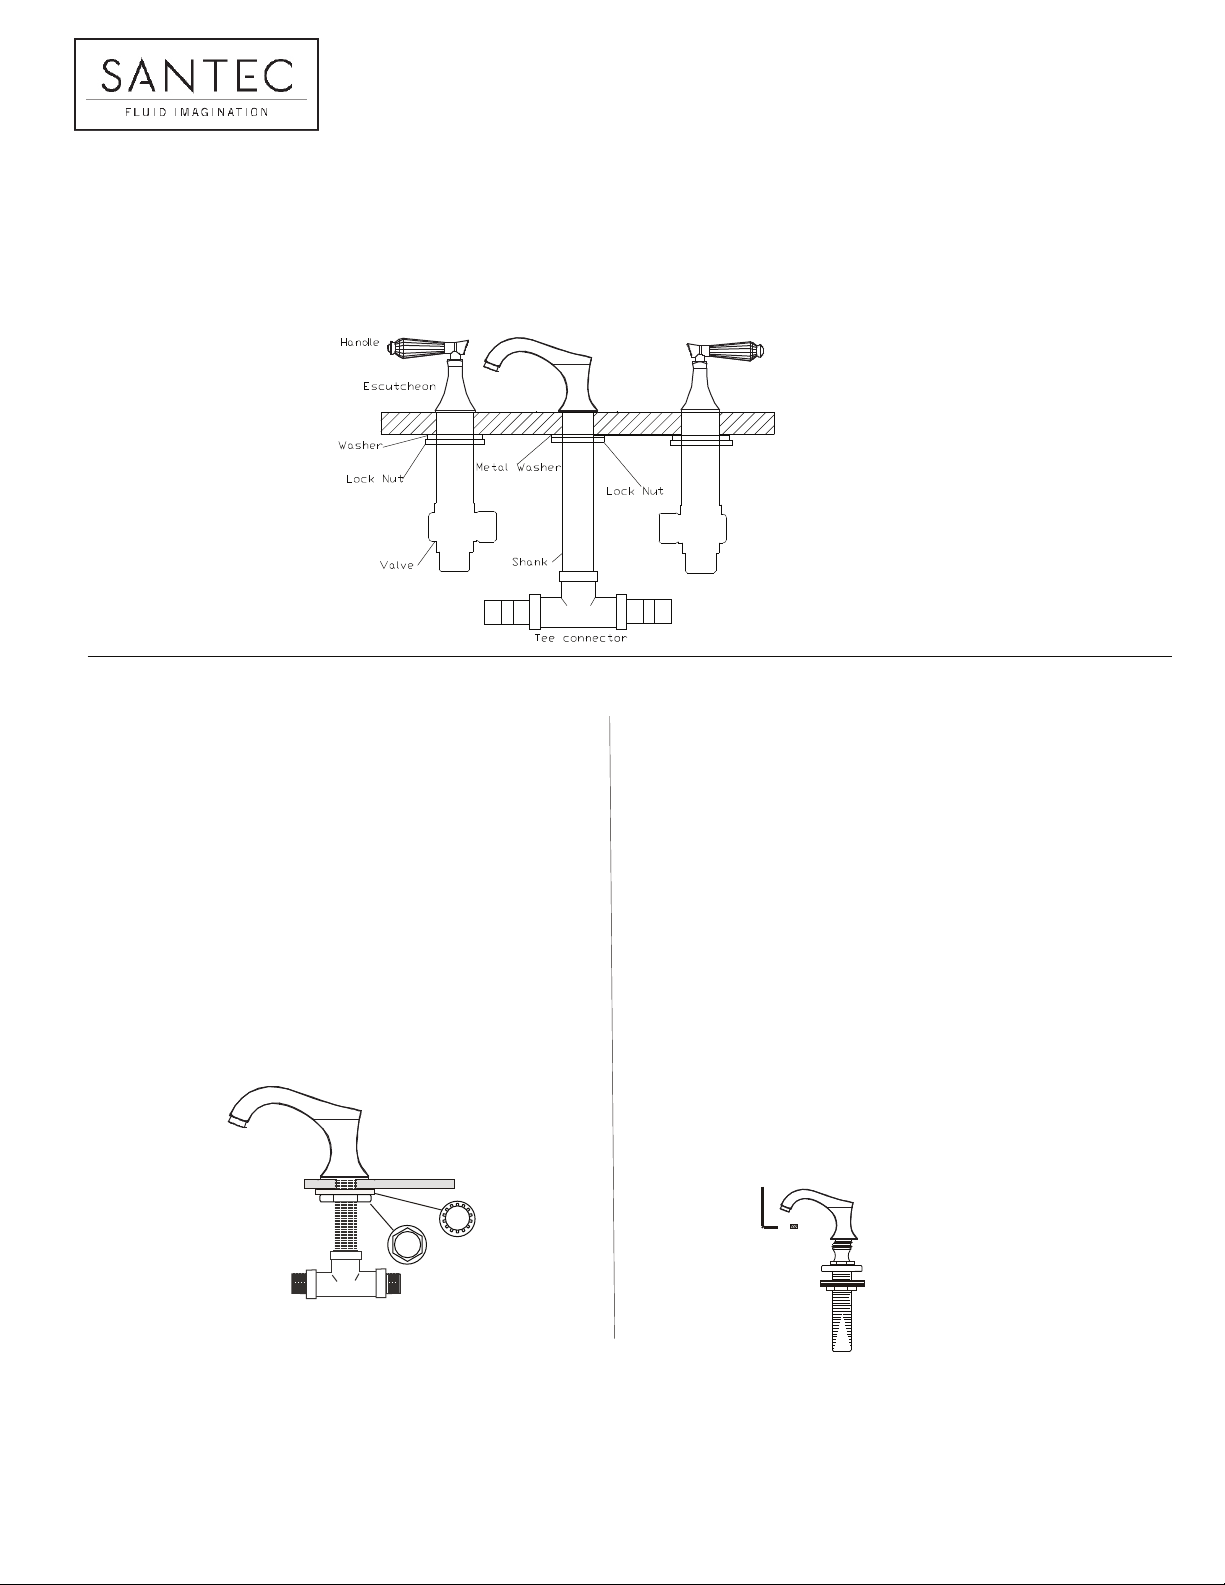
BAROQUE & ENZO APPLICATION EDO APPLICATION
¾” N.P.T. SPOUT SHANK QUICK CONNECT SHANK
-Remove tee connector and spout mounting -Remove tee connector and spout
hardware from spout nipple. mounting hardware from quick
-Apply a ring of silicone caulking around connect shank being sure to leave
hole designated for spout. on brass plate.
DO NOT USE PLUMBERS’ PUT TY, WHICH -Apply a ring of silicone caulking
CAN DAMAGE FINISH. around hole designated for spout.
-Slip spout and spout base through top of DO NOT USE PLUMBERS’ PU TTY,
deck. WHICH CAN DAMAGE FINISH.
-Reattach spout mounting hardware and -Slip quick connect shank through
secure spout. deck top.
-Thread tee connector onto spout shank. -Reattach spout mounting hardware
until secure.
-Place spout onto quick connect
shank and set in
place with allen key
and set screw provided.
BEFORE BEGINNING THE INSTALLATION.
ROMAN TUBS W & W.O. HANDSHOWER INSTALLATION
INSTRUCTIONS FOR DROP IN VALVES
MINIMUM HOLE SIZE FOR THE SPOUT AND
HANDLE TRIM IS 1
¼” AND MAXIMUM OF 1 ½”
*** NOTE: SHUT OFF WATER SUPPLY BEFORE BEGINNING INSTALLATION***
Large Allen Key
KEEP THIS INSTRUCTION BOOKLET FOR FUTURE REFERENCE
PAGE 01
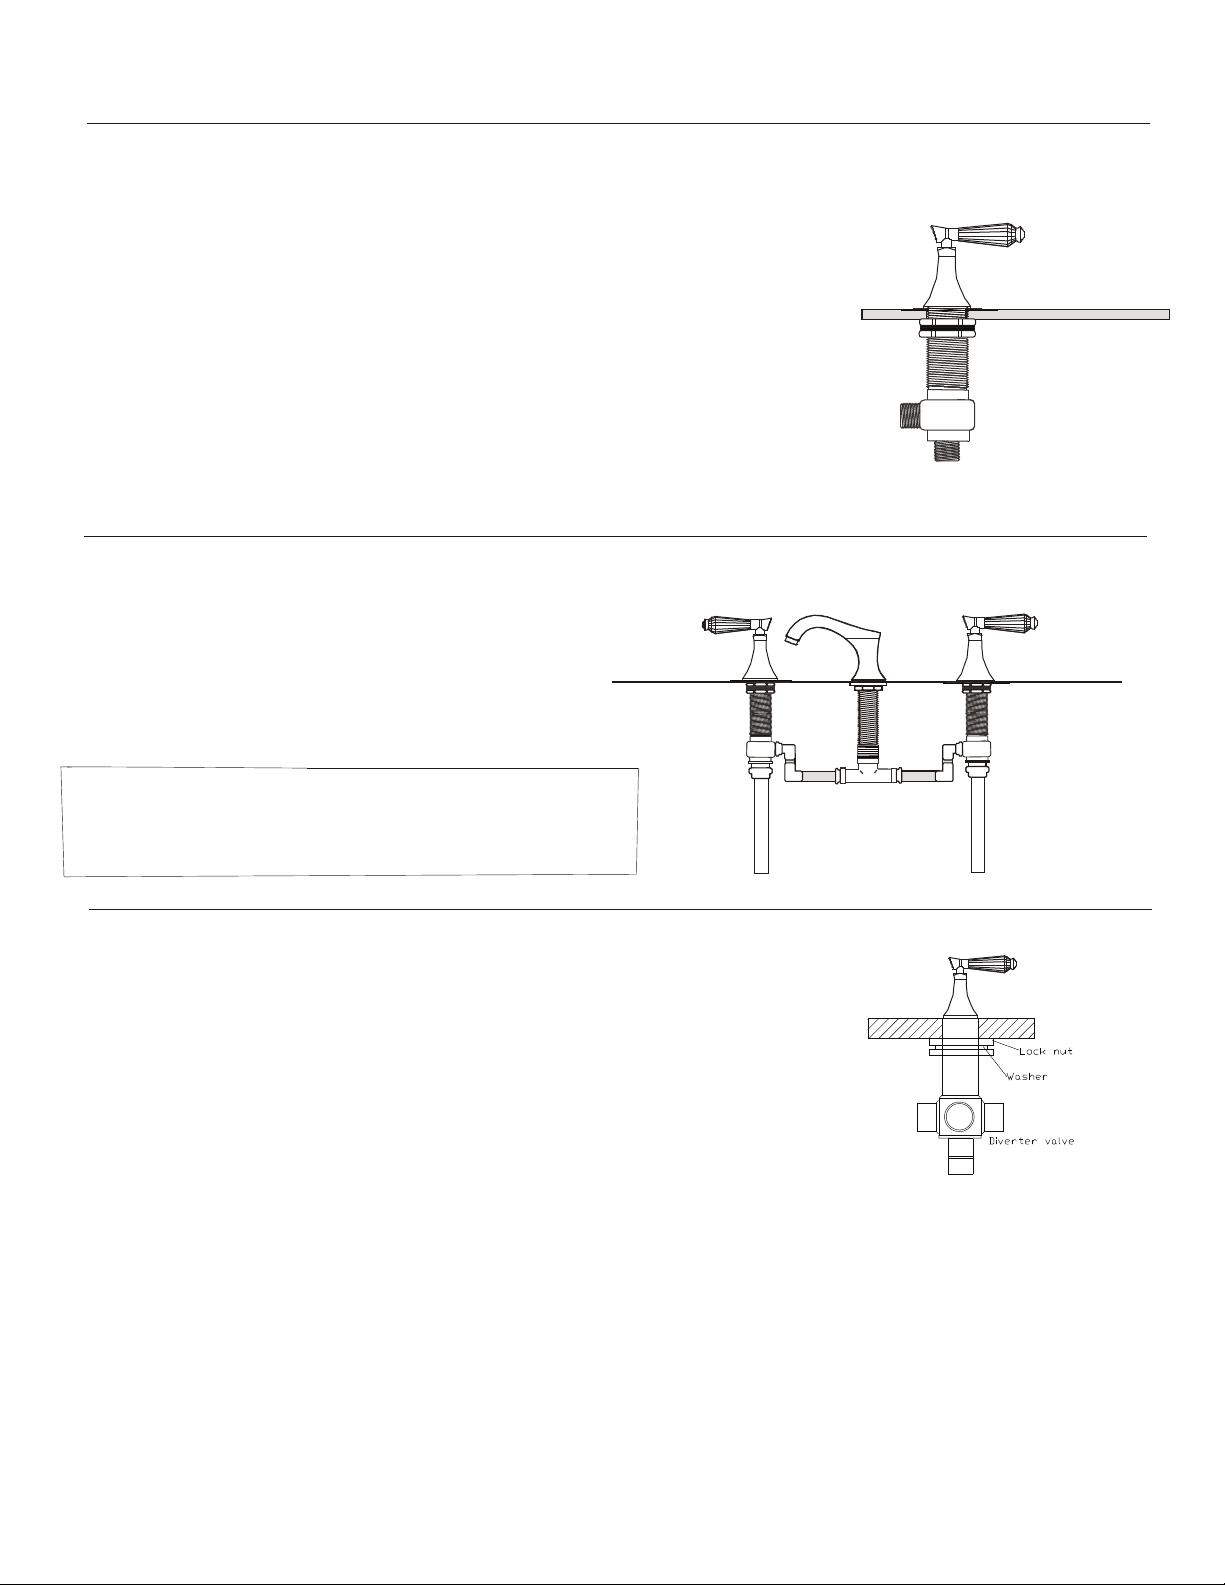
INSTALLATION INSTRUCTIONS
HANDLE INSTALLATION
- Unscrew pre-assembled handle trim from valve body. Hot valve assembly “Red” to be
mounted on left. Cold valve assembly “Blue” to be mounted on right. Apply a ring of silicon e
caulking around the handle hole on deck top.
DO NOT USE PLUMBERS’ PUTTY, WHICH CAN DAMAGE FINISH.
Slip valve body up from below tub deck. Reattach pre-assembled handle trim to valve body.
Align handless with respect to the spout and tighten valve body locknut until secure.
PLUMBING
Install plumbing “not provided” to make connections between hot valve, cold valve and spout tee
connector.
WATER TEST
- Turn on the cold water supply.
- Use the handle from the faucet set to turn the valve on and off.
- Check for leaks. If water leaks from any of the connections merely tighten the
connections until the leak stops.
- Repeat the same procedure for the hot water supply.
Hot Valve
C old Va lve
SANTEC RECOMMENDS:
- The use of teflon tape or equivalent on all threaded joints.
- The installation of hard plumbing, not flex connections for all connections.
- An access panel provided for all roman tub installations.
HOT WATER
SUPPLY
CO LD WATER
SUPPLY
DIVERTER INSTALLATION
1
- Unscrew the pre-assembled diverter handle trim from the diverter .
- Slip the diverter valve body up from the bottom of the tub through the appropriate hole. From tub
top, screw the handle trim with the flange washer back onto the diverter. The
washer must be gently pressed against the surface. Make sure that the handle turns
freely in both directions.
- Align the handle lever and tighten the lock nut firmly.
** The spout, handle valve bodies and diverter can be connected with flex hoses (not provide by Santec) or copper pipe soldering.
Please note that when soldering connections, do not use excessive heat. Excessive heat can damage the joints increasing
probability of leakage.
PAGE 02
 Loading...