


Santec 7093TX User Manual
ITEM NUMBER
7093TX _ _-_ _
MODENA COLLECTION
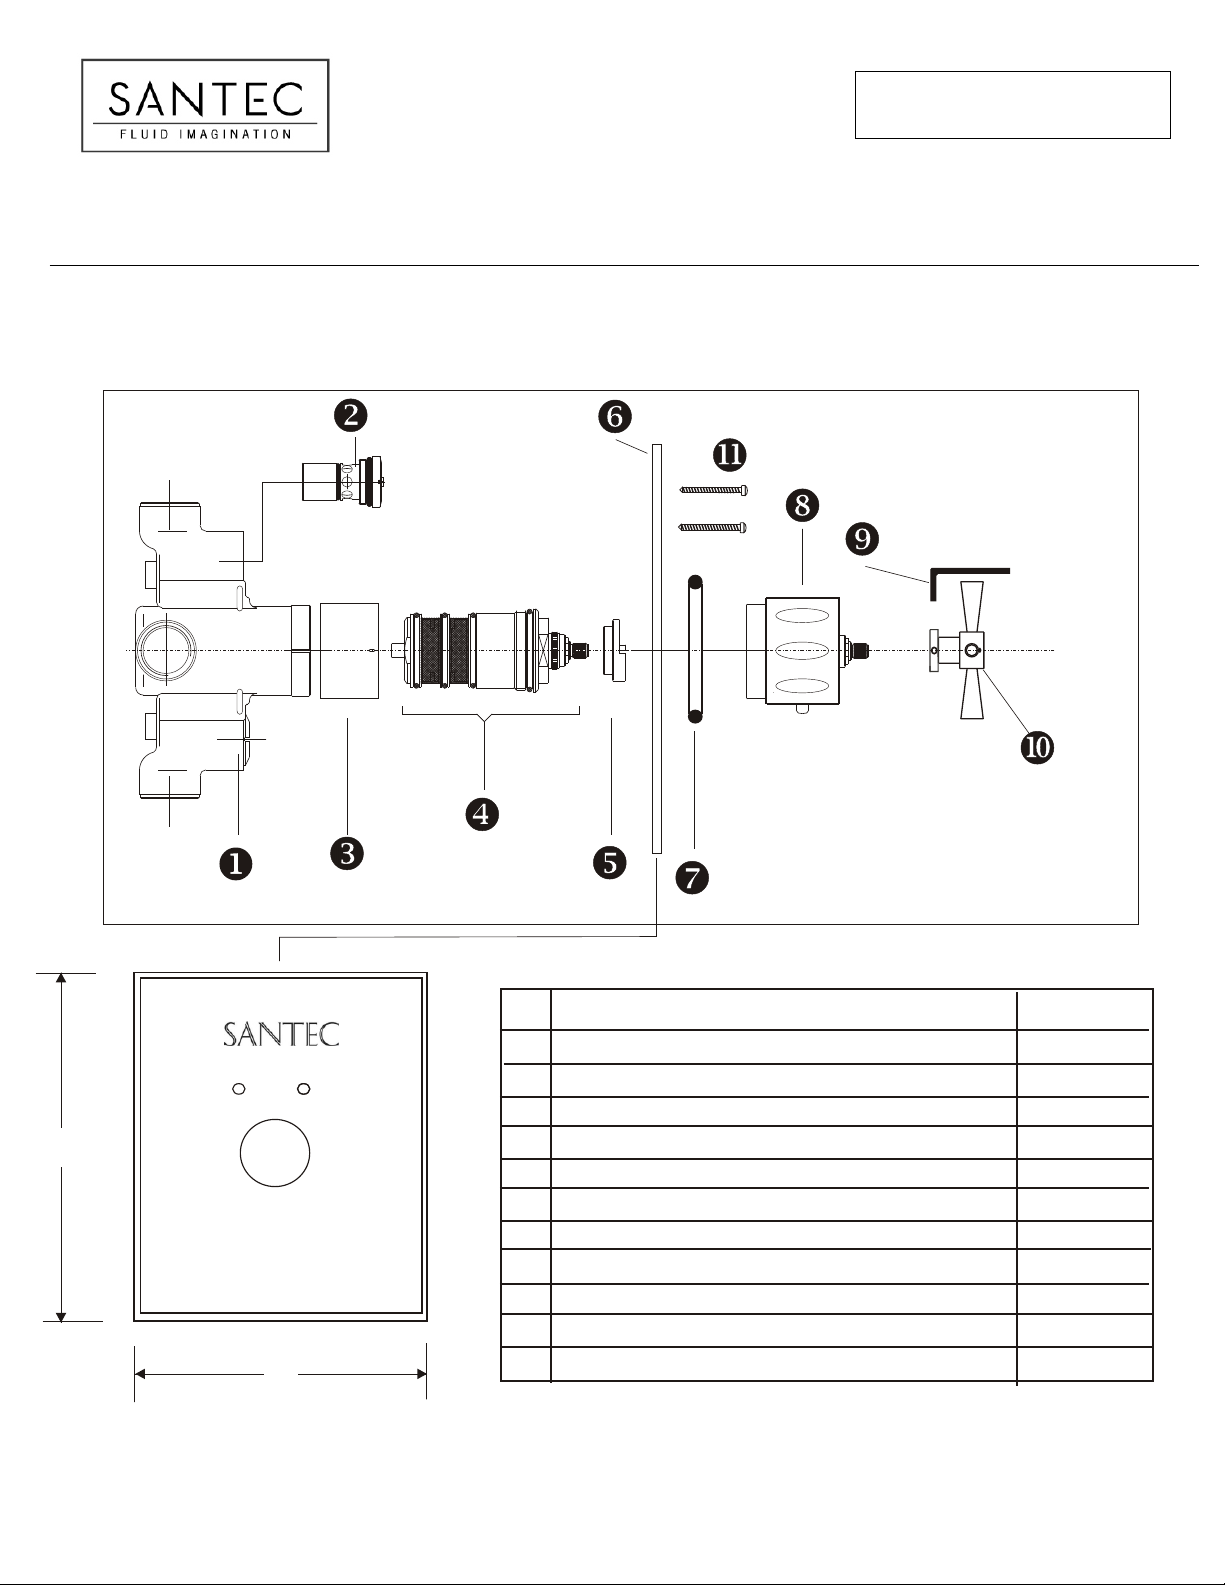
3/4” THERMAX THERMOSTATIC VALVE AND TRIM WITH “TX” CROSS HANDLE
105110055100110000959955
* Please specify the finish when ordering the part.
Part Description Part #
1
Complete Thermostatic valve
2
Service Valve*
3
Valve Cylinder*
9¼”
H
6½”
C
4
Cartridge Only
5
Temperature Limiter
6
Trim Plate*
7
O-Ring
8
Handle Trim Base*
9
Allen Wrench, Medium
10
Lever Sub Assembly, TX Cross Handlle*
11
Trim Plate Screw*
KEEP THIS INSTRUCTION BOOKLET FOR FUTURE REFERENCE
TH-5034
TH007
PH-2603
TH010
TH020
PH-29000
PM-475
PH-2601
PM-033
PH-2735
PM-255
PAGE 01
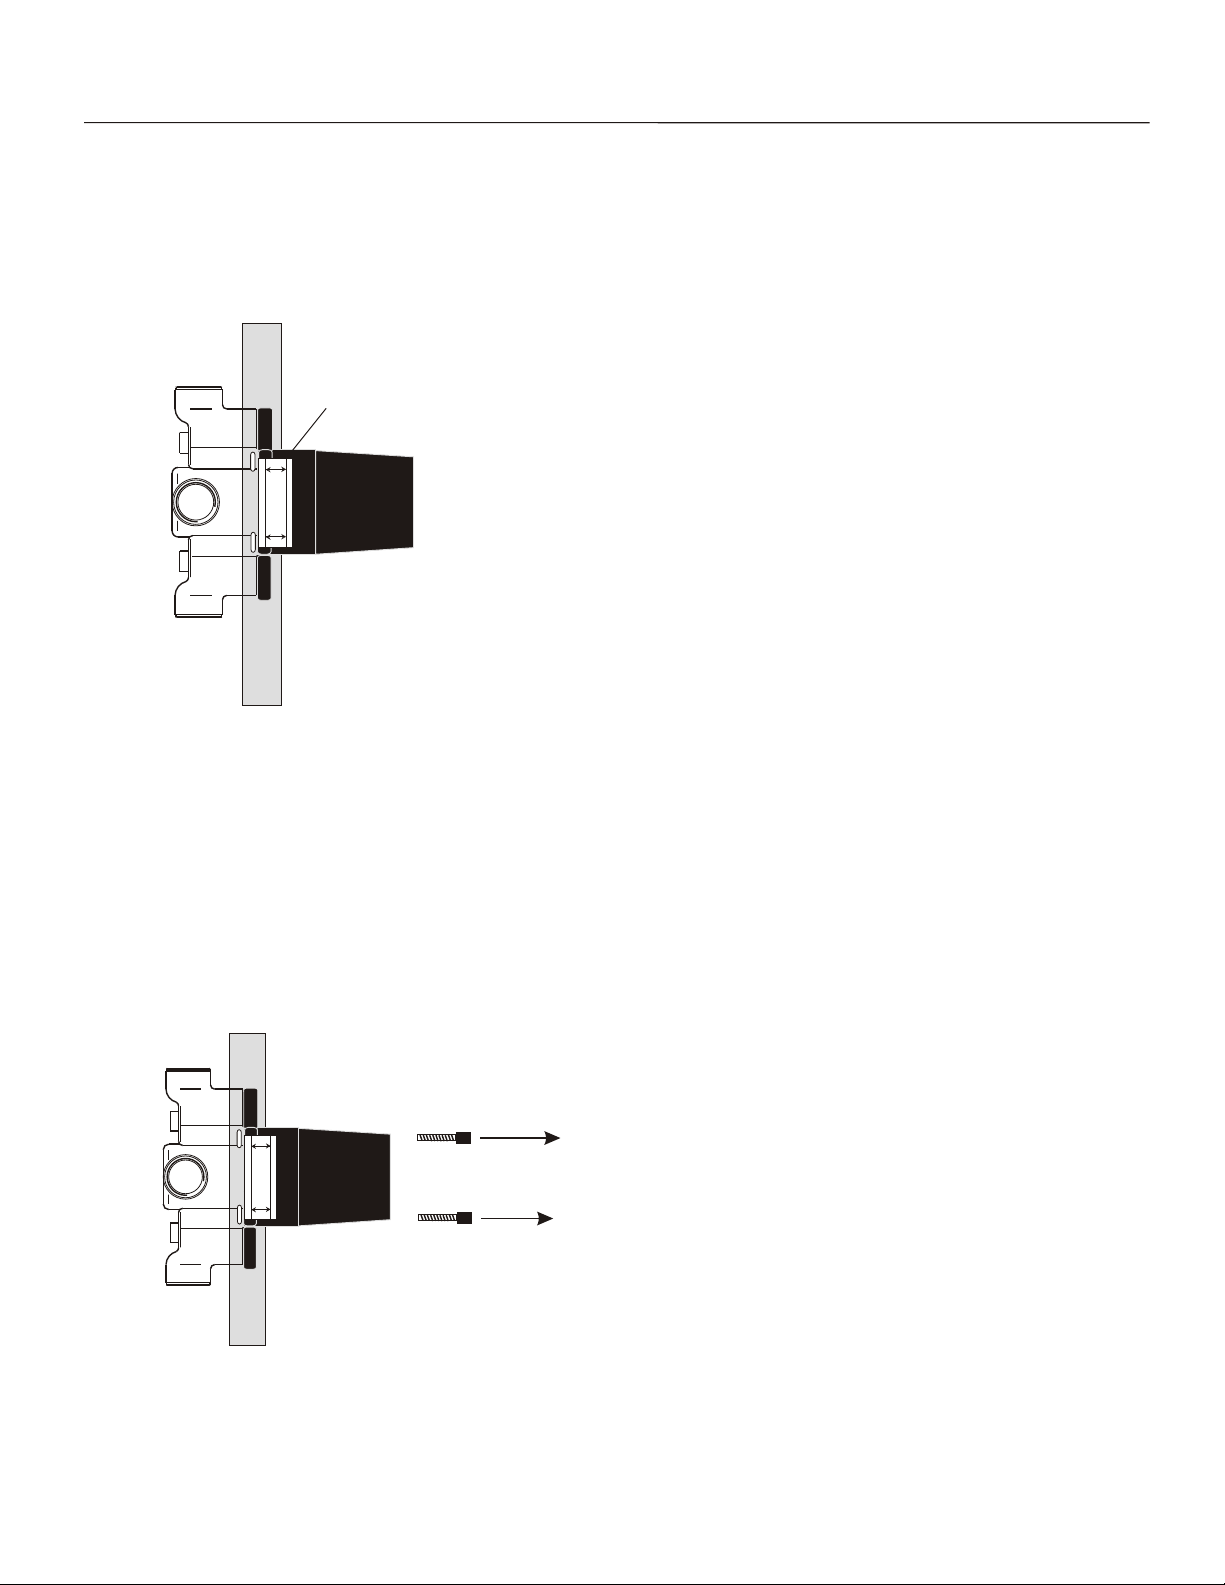
INSTALLATION INSTRUCTIONS
Rough installation
- Turn the water supplies off.
Finished wall
Minimum and
Maximum Lines
-
Max
Min
- Remove all the trim items (plate and handle) before
installation.
- Secure the valve firmly against the stub.
- Make sure that the shower out let is in the up position.
- Flush or raise grouting on the tiled wall surface.
- Connect the supply lines to the valve inlets.
- The rough depth must fall within the minimum/
maximum range lines marked on the plaster guard.
- For both functional and esthetic reasons, the valve must
be leveled horizontally.
- When soldering the inlet connection, make sure that all
internal parts are removed to avoid damages to the non metal parts.
7093TX _ _
- If only the shower portion of the valve will be used, keep
the tub outlet plugged at all time.
Trim installation
1.
Max
Min
- Remove the screws from the plaster
guard.
- Remove the plaster guard.
PAGE 02