

Santec 3555TX User Manual
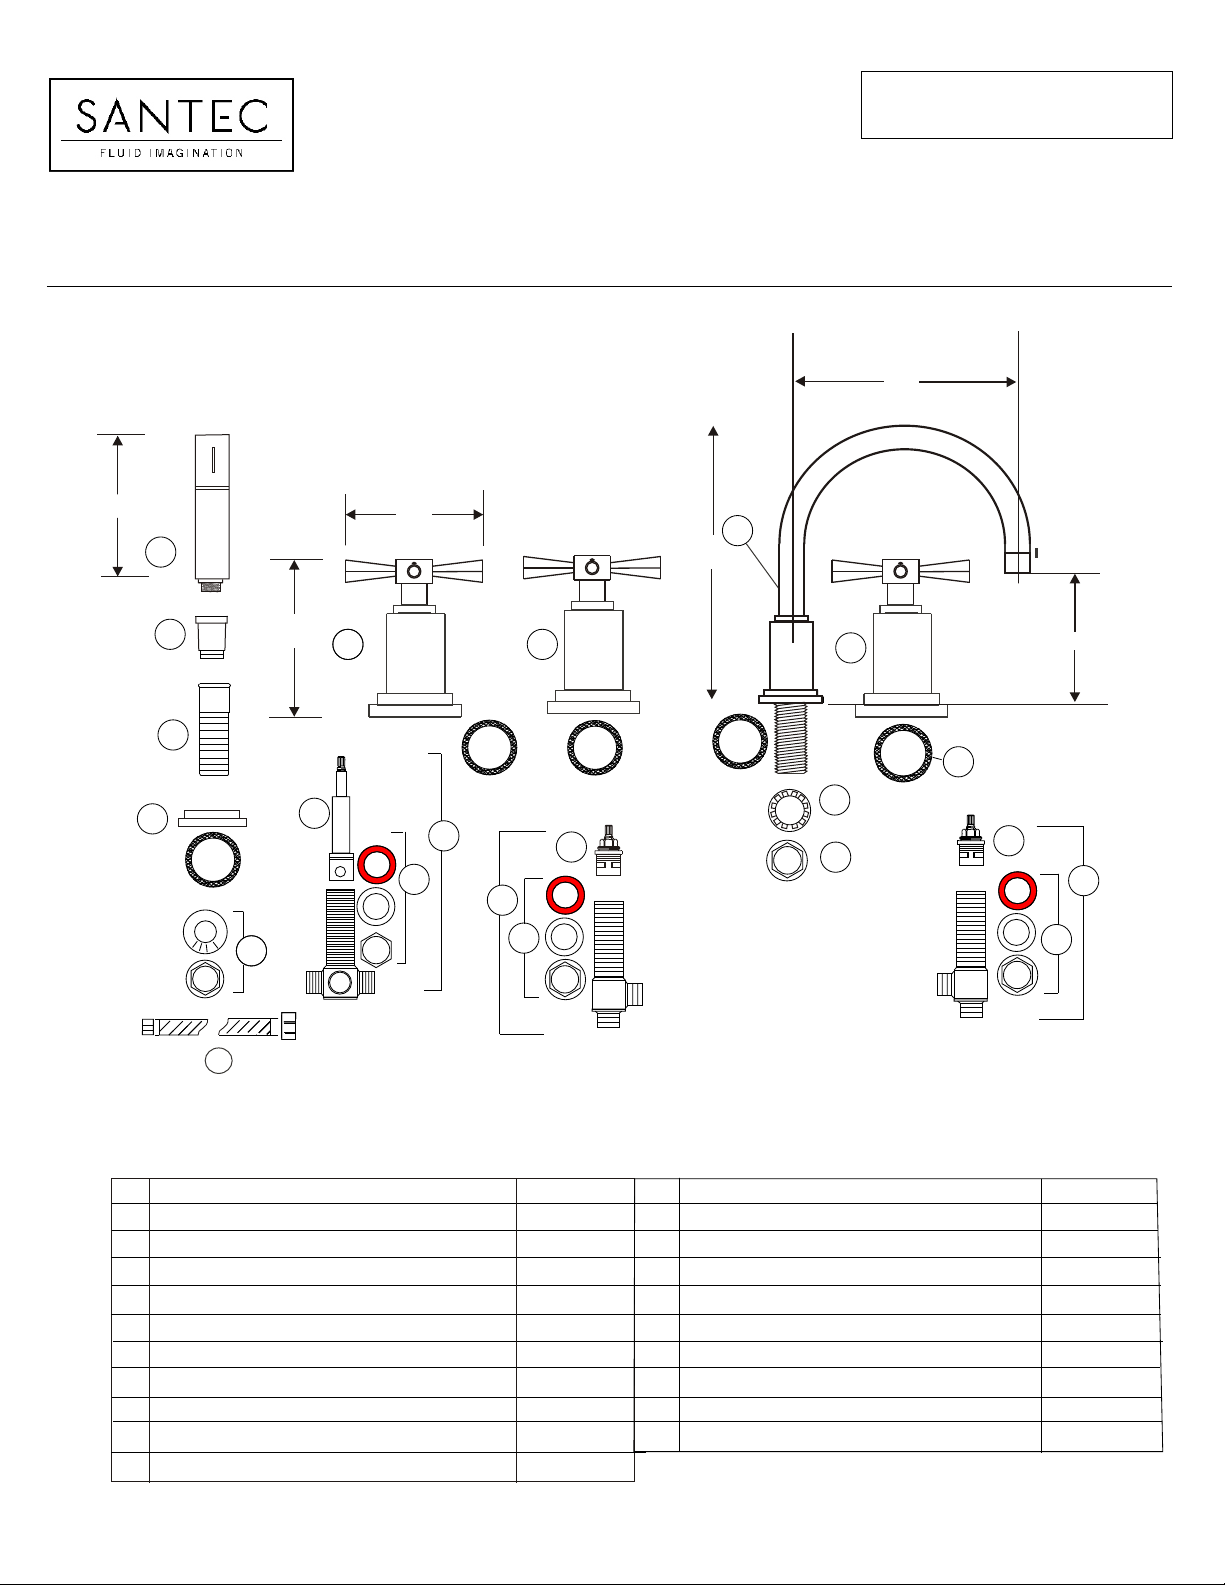
ITEM NUMBER
3555TX _ _-_ _
MODENA COLLECTION
ROMAN TUB FILLER WITH HAND HELD SHOWER - “TX” CROSS HANDLES
8.5”
6½”
1515
1818
1717
1616
1919
1414
1414
3.9”
1111
3.5”
22 2222
11.2”
11
22
6.5”
33
44
SANTECSANTEC
88
1010
1212
1313
77
55
99
66
66
##
1
Complete Spout Assembly*
2
Complete TX-Handle Assembly*
Flange WasheR
3
Crimped Metal Washer
4
Lock Nut Shank
5
Valve Body Mounting Hardware
6
Hot Cartridge
7
Cold Cartridge
8
Complete Hot Valve
9
Complete Cold Valve
10
PART
DESCRIPTION
PART #
PS-5D00U
00YY-TX
PM-400
PM-551
PM-550
PM-551
PO-420-SH
PO-420-SC
PO-495
PO-496
##
11
12
13
14
15
16
17
18
19
* Please specify the finish when ordering the part.
PART
DESCRIPTION
Diverter Cartridge
Diverter Mounting Hardware
Complete Diverter
Flange Hardware Pack Sub Assembly*
Flange Deluxe Shower Arm (Modena)*
Guide Tube, Handheld Shower*
Adapter, Modena Handheld Shower*
Modena Handheld Shower Assembly*
Shower Hose Sub Assembly
KEEP THIS INSTRUCTION BOOKLET FOR FUTURE REFERENCE
PART #
P0500R
P0500
PM-Z11
PO-300M
Z-200-2
PS-700-3
PS-700S
HS-600
PAGE 01
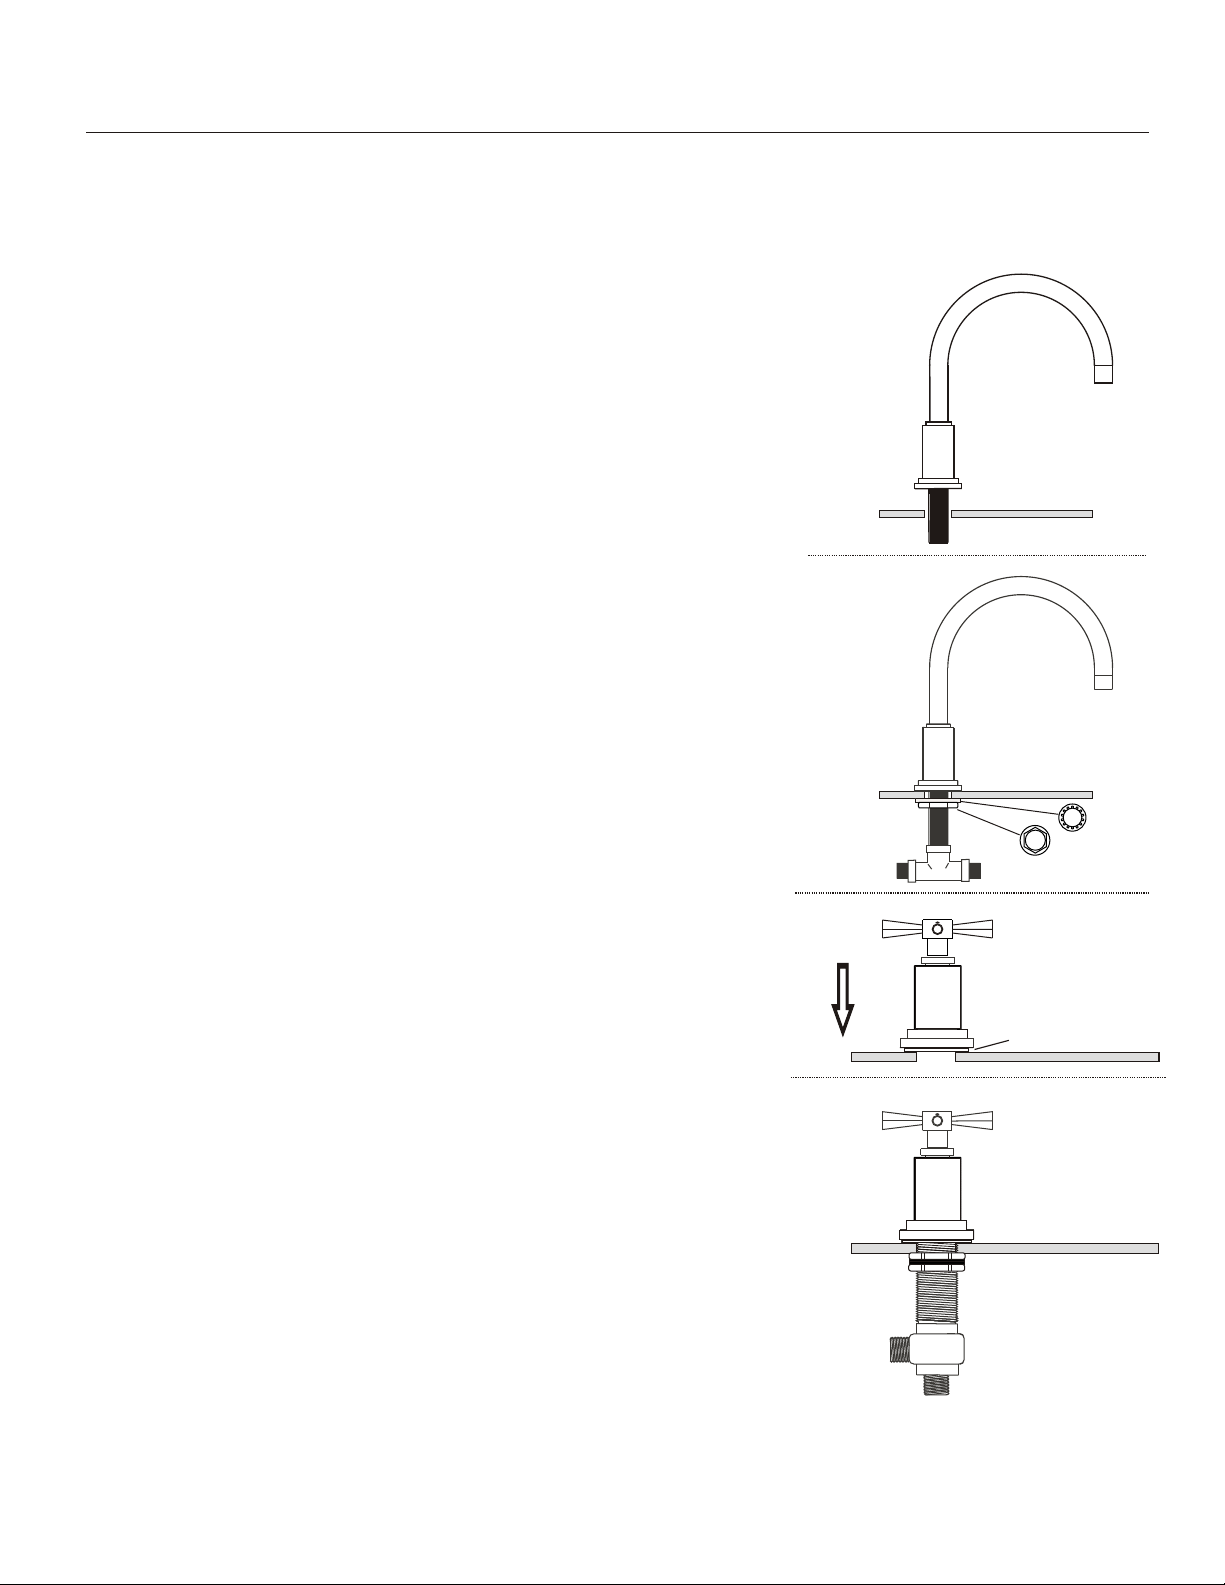
INSTALLATION INSTRUCTIONS
FLUSH BOTH SUPPLY LINES BEFORE INSTALLATION
AFTER FLUSHING, SHUT OFF BOTH SUPPLY LINES
MINIMUM HOLE SIZE FOR THE SPOUT AND HANDLE TRIM IS 1 1/4” AND MAXIMUM IS 1 1/2”
SPOUT INSTALLATION
1
- Remove the faucet from the box.
Remove the mounting lock nut, washer and tee connector from the
threaded spout shank.
- From the top of the deck, slip the spout with the flange and flange washer through
the assigned spout hole. Secure the spout by putting the washer and mounting nut
back onto the threaded spout shank. Align the spout and tighten the lock nut firmly.
2
- Put on Aerator rubber water seal, free flow aerator on spout mouth. Screw on aerator
housing on the spout mouth.
- Connect the tee connector to the spout shank.
3555TX _ _
Note: for better installation it is advisable to place silicone caulking around all holes on
the top of the deck
HANDLE TRIM INSTALLATION
1
- For proper handle turning direction, install the handle with the “cold” blue label
at the right side of the spout (looking from the front) and the handle with the “hot”
red label at the left side of the spout.
- Both hot and cold side handle trims are pre-assmbled for faster installation.
- Put on the rubber washer on the base. Put the flange on the rubber washer maintaining the
co axiality. Modena handle complete assembly is to be kept on the top of it.
Put on Teflon washer in the body base of the cross handle,
2
- From the beneath of the basin or counter, screw the valve body mounting
hardware back to the valve body. First the rubber washer, then the white
nylon washer and lastly the brass lock nut.
- Align the lever or cross handle properly against the spout.
Tighten the lock nut until it secures the valve body firmly.
Rubber washer
3
- Loop and connect the flexible hoses to the tee connector. Tighten to avoid
leakage.
- Connect and tighten the Inlet hoses to the supply lines.
PAGE 02
 Loading...