

Santec 3120VL User Manual
ESTATE SERIES VILLA COLLECTIONESTATE SERIES VILLA COLLECTION
WIDESPREAD FAUCET WITH “VL” HANDLESWIDESPREAD FAUCET WITH “VL” HANDLES
ITEM NUMBER
3120VL _ _-_ _
##
11
22
33
44
55
1515
1616
11
1717
66
77
88
99
1010
1111
22
22
1212
1313
1414
1212
1212
1515
1616
33
4 4
66
99
99
55
77
1717
* Please specify the finish when ordering the part.* Please specify the finish when ordering the part.
PARTPART
DESCRIPTIONDESCRIPTION
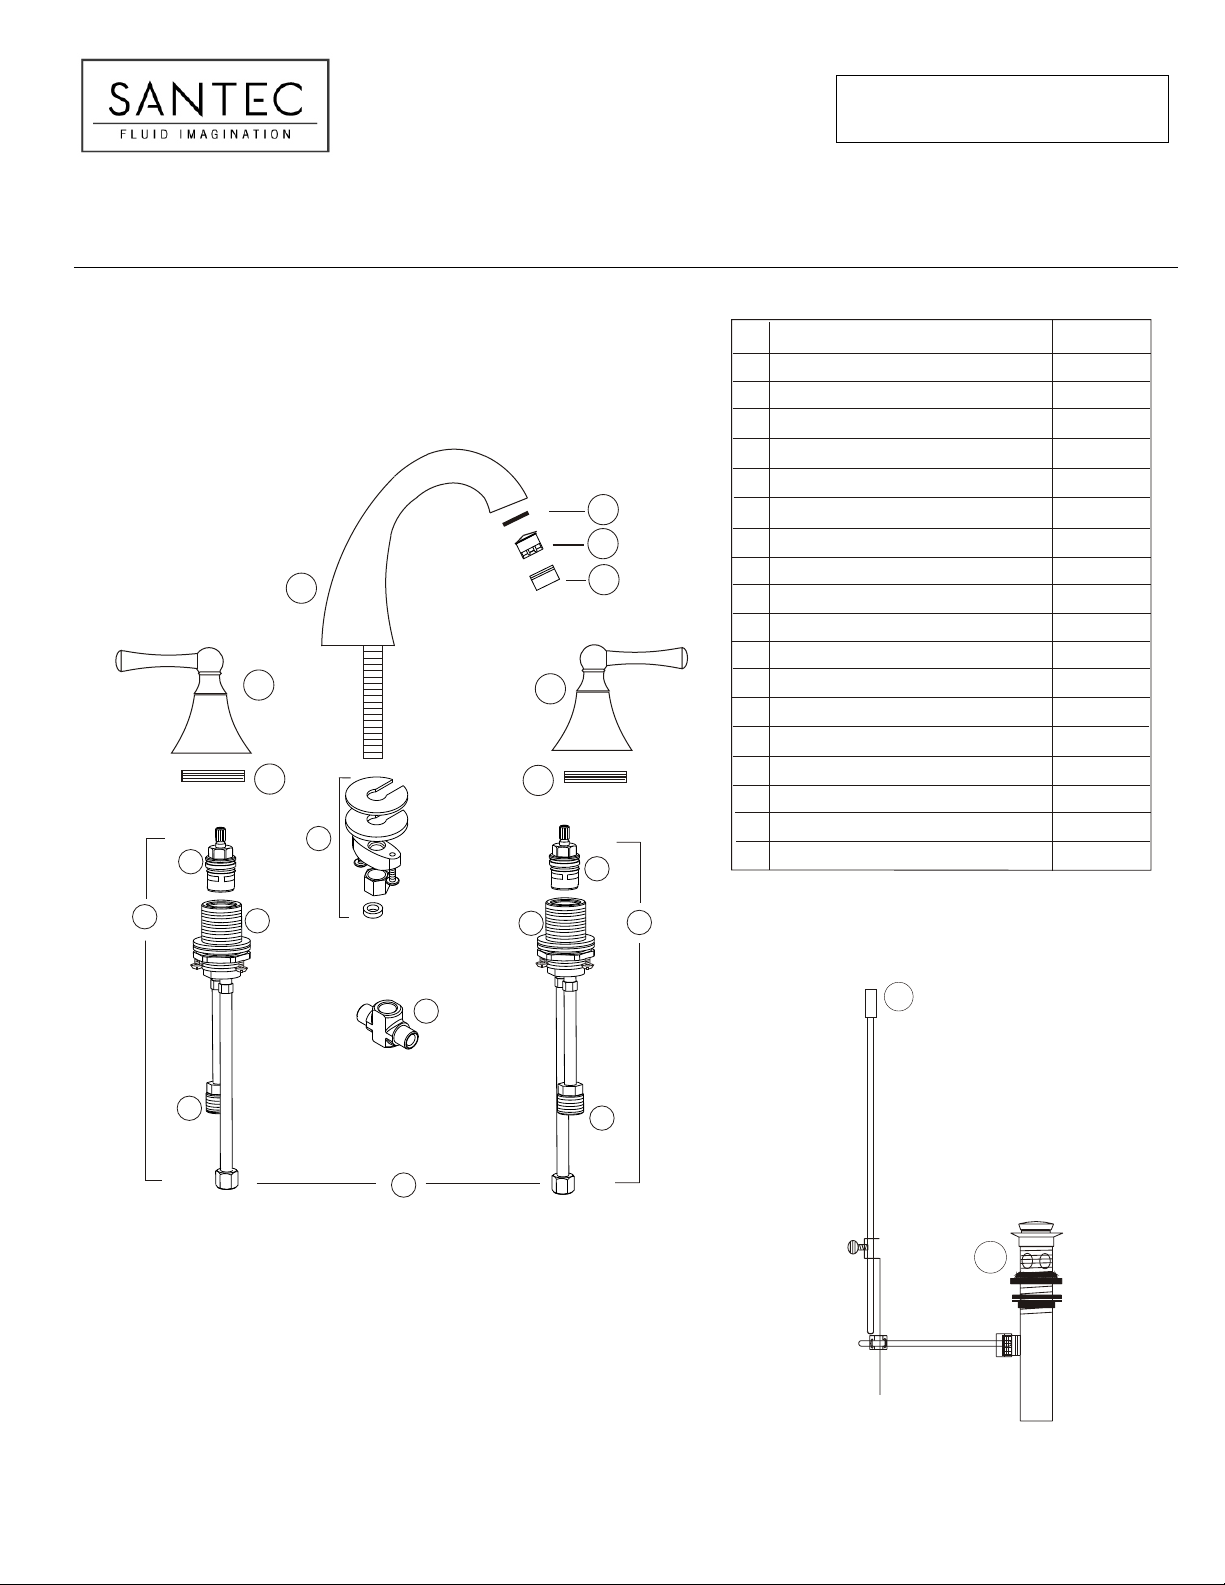
Complete Spout Assembly *Complete Spout Assembly *
Complete VL Lever HandleComplete VL Lever Handle
Spout Mounting HardwareSpout Mounting Hardware
Hot Cartridge OnlyHot Cartridge Only
Cold Cartridge OnlyCold Cartridge Only
Complete Hot ValveComplete Hot Valve
Complete Cold ValveComplete Cold Valve
Connecting Hose to the TeeConnecting Hose to the Tee
Valve Body Mounting HardwareValve Body Mounting Hardware
Tee ConnectorTee Connector
Connecting Hose to the Supply LineConnecting Hose to the Supply Line
Handle Top Lock NutHandle Top Lock Nut
Lift Knob and Lift Rod *Lift Knob and Lift Rod *
Complete Pop-Up *Complete Pop-Up *
Aerator WasherAerator Washer
Aerator Basket with RestrictorAerator Basket with Restrictor
Aerator Housing *Aerator Housing *
Assembly *Assembly *
PART #PART #
PS-2EV00SPS-2EV00S
00VL00VL
P0431P0431
P0418P0418
P0419P0419
P0466P0466
P0467P0467
P0441P0441
P0427P0427
P0440P0440
PM-108PM-108
P0202P0202
PM-306PM-306
PM-305PM-305
P0952-UP0952-U
1313
1111
1010
1111
88
KEEP THIS INSTRUCTION BOOKLET FOR FUTURE REFERENCE
1414
PAGE 01
INSTALLATION INSTRUCTIONS
FLUSH BOTH SUPPLY LINES BEFORE INSTALLATION
.
AFTER FLUSHING , SHUT OFF BOTH SUPPLY LINES.
MINIMUM HOLE SIZE FOR THE SPOUT AND HANDLE TRIM IS 1 1/4” AND MAXIMUM OF 1 1/2”
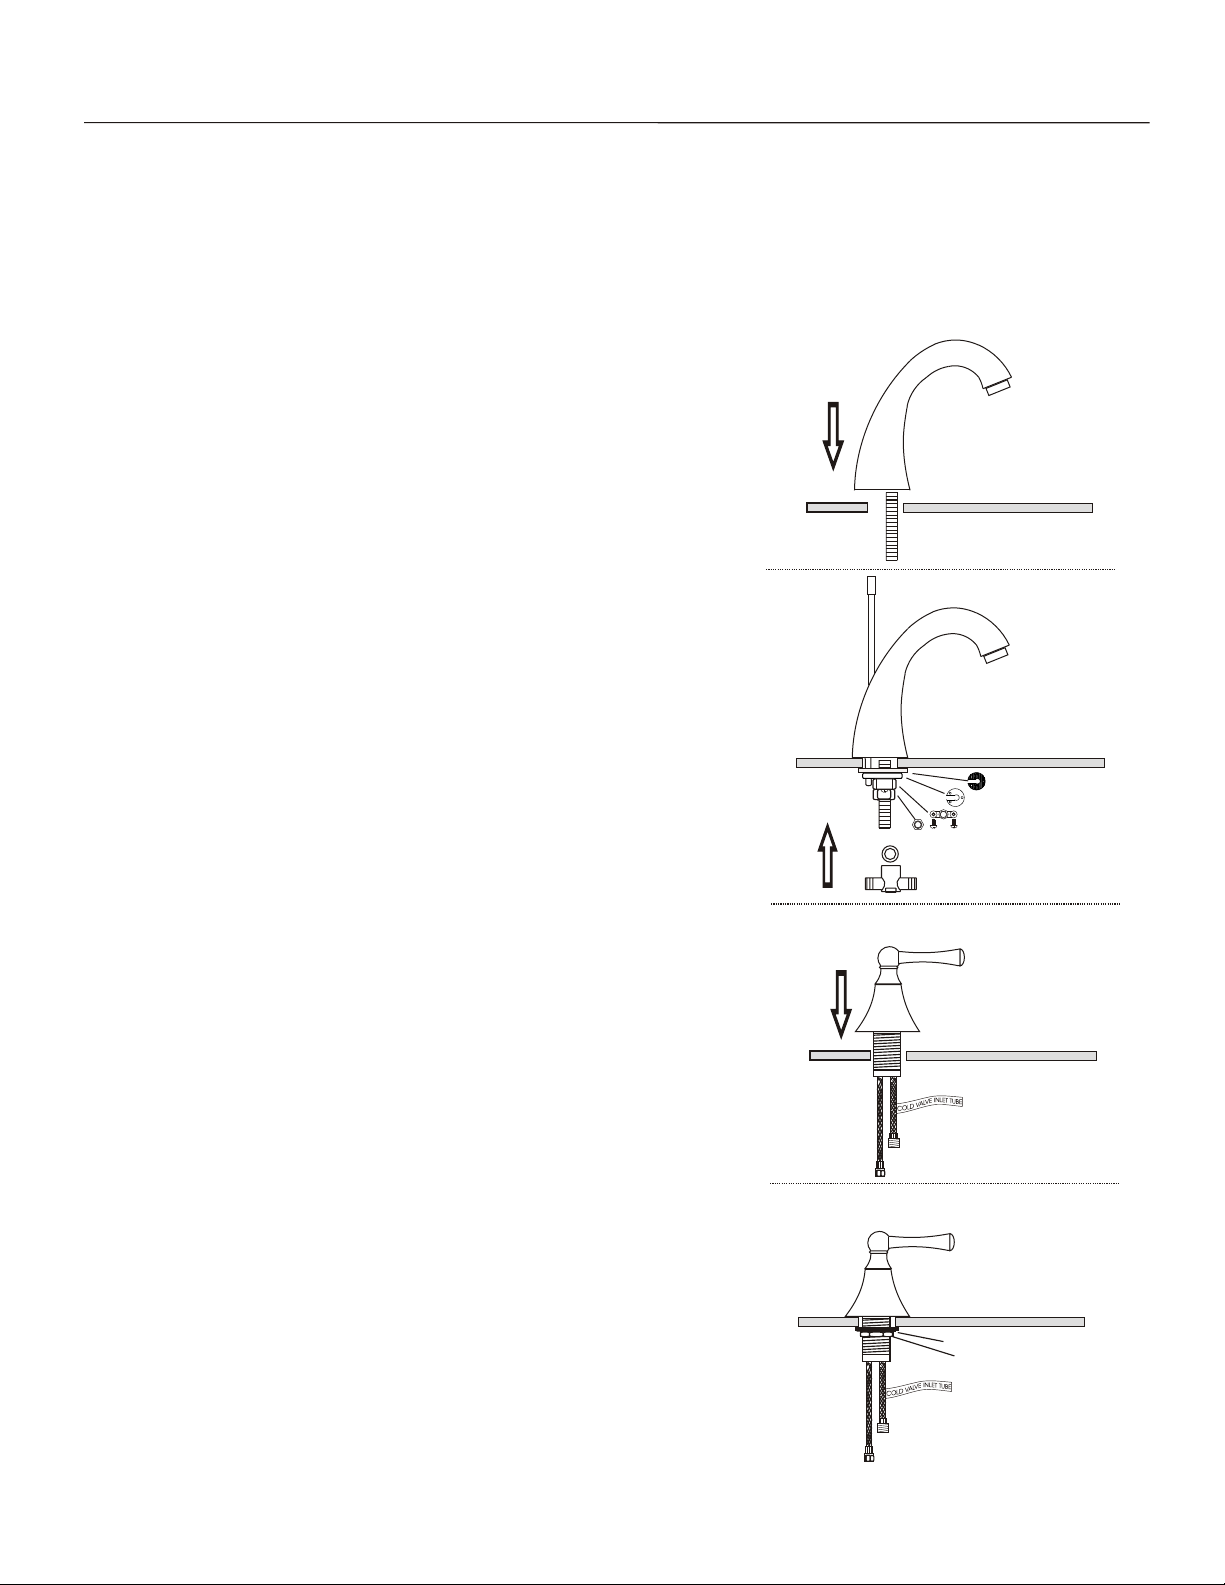
SPOUT INSTALLATION
1
- Remove the tee connector (10), spout mounting hardware (03) and tee connector
washer (11) from the bottom of the spout assembly. Apply a ring of silicon caulking
around the center hole on the top of the sink. Do not use plumbers' putty which
can damage the finish of the faucet.
- From the top of the deck, insert the spout's threaded shank through the center
hole of the sink.
2
- Slip the spout mounting hardware (03) back onto the spout. First the notched rubber
washer, then the notched metal washer and lastly the brass lock nut. Hand tighten the
lock nut
- Place the pop-up lift rod with the knob (13) through the back hole in the spout and
rotate the notched washers until the lift rod passes through the notch.
- Tighten the lock nut. Make sure the lift rod operates smoothly. Adjust it if necessary.
- Place the tee connector washer (11) into the tee connector (10) and thread the tee
connector onto the end of the spout shank. Tighten to seal.
- Align the spout and tighten the shank lock nut (03) firmly
HANDLE TRIM INSTALLATION
3120VL _ _
Notched rubber washer
Notched metal washer
Wing lock nut
Screw lock nut
Hex lock nut
Tee connector washer
Tee connector
1
- For proper handle turning direction, install the handle with the “cold” blue label (7)
at the right side of the spout (looking from the front) and the handle with the “hot”
red label at the left side of the spout.
- Both hot and cold side handle trims are pre-assmbled for faster installation.
- Remove the valve body mounting hardware (12) from the valve body. Slip the
valve body’s flexible hoses from the top of the sink or counter through the
appropriate hole next to the spout.
Aim the tee connecting hoses (8) toward the tee connector (10).
2
- From beneath of the basin or counter, screw the valve body mounting
hardware (12) back to the valve body. First the fiber washer, then the brass
lock nut.
- Align the handle lever handle properly against the spout.
Tighten the lock nut until it secures the valve body firmly.
SANTEC SANTEC
SANTEC SANTEC
Fiber washer
Brass lock nut
PAGE 02
 Loading...