

Santec 3050MF-TM User Manual

MODEL NUMBER
PLEASE READ THE INSTRUCTIONS COMPLETELY
BEFORE BEGINNING THE INSTALLATION.
33
44
55
3050MF10-TM
3050MF41-TM
3050MF23-TM
3050MF75-TM
ESTATE SERIES MANOR COLLECTIONESTATE SERIES MANOR COLLECTION
ROMAN TUB FILLER TRIM WITH “MF” HANDLESROMAN TUB FILLER TRIM WITH “MF” HANDLES
11
22
1010
77
88
1111
99
66
USE ROUGH P0385
(NOT INCLUDED)
66
##
Complete Spout Assembly *
1
Spout Knob *
2
Aerator Washer
3
Roman Tub Aerator without Restrictor
4
Aerator Housing *
5
Complete MF Lever Handle
6
Set Screw
7
Spout Plug
8
Allen Key for Roman Tub Spout *
9
O-ring for the spout plug
10
Spout Flange*
11
* Please specify the finish when ordering the part.
PART
DESCRIPTION
Assembly *
PART #
PS-5EE00-U
P02391
PM-356
PM-355
P0255L
00MF
PM-039
P0-257
PM-445
P02502
INSPECTED BY
KEEP THIS INSTRUCTION BOOKLET FOR FUTURE REFERENCE
PAGE 01
INSTALLATION INSTRUCTIONS
FLUSH BOTH SUPPLY LINES BEFORE INSTALLATION
AFTER FLUSHING, SHUT OFF BOTH SUPPLY LINES
MINIMUM HOLE SIZE FOR THE SPOUT AND HANDLE TRIM IS 1 1/4” AND MAXIMUM IS 1 1/2”
3050MF _ _-TM
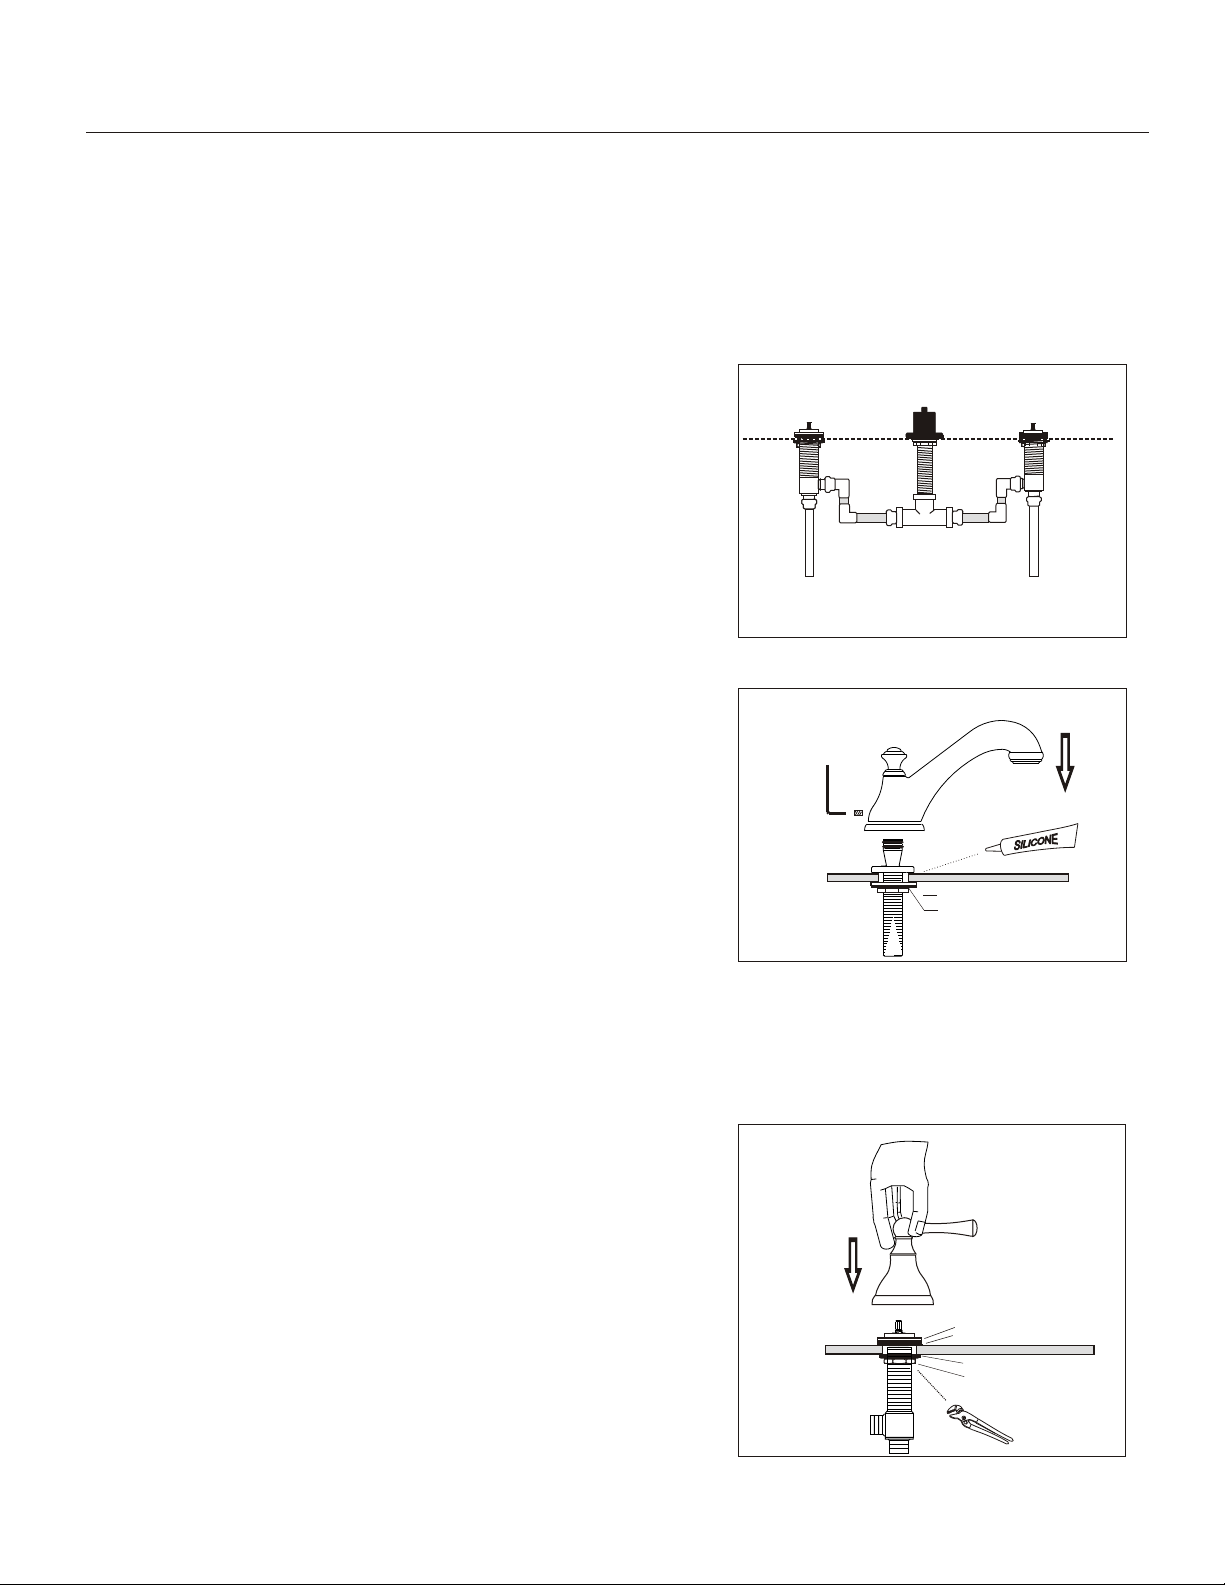
1. ROUGH INSTALLATION
DO NOT REMOVE THE SPOUT PROTECTANT HOOD PRIOR TO TRIM INSTALLATION
A - Install P0385 roman tub rough prior to installing the trims.
(Roughs are sold separately).
2. SPOUT INSTALLATION
A - Remove the faucet from the box.
- From the top of the deck, insert the spout (1) with the Flange (11) onto the top
of quick connect shank.
- Align the spout and tighten the set screw (7) with the Large Allen Key (9).
Insert the spout plug (8) into the spout back hole.
Note: for better installation it is advisable to place silicone caulking around all holes
on the top of the deck
A
Hot ValveHot Valve
A
HOT WATER
HOT WATER
SUPPLY
SUPPLY
Metal washer
Brass lock nut
COLD WATER
COLD WATER
SUPPLY
SUPPLY
Cold ValveCold Valve
3. HANDLE TRIM INSTALLATION
A - Screw the handle trim (6) onto the upper lock nut of installed valve.
- Adjust the handle alignment in respect to the spout.
- Make sure that the handle turns freely in both direction and tighten
the brass lock nut firmly. If the handle is scraping against the stem,
lower the valve body to reduce the friction.
- Repeat the same procedure for the oppose side handle.
A
Upper Lock Nut
rubber washer
Fiber Washer
Brass lock nut
PAGE 02
 Loading...